

What if you plug in your headphones to listen to your favorite music, watch a movie, or do something else and your computer fails to recognize the headphones? That's frustrating.
Your computer not recognizing your headphones is a fairly common issue in Windows 10 PCs.
It could be caused by a corrupt or outdated driver, faulty USB ports (if your headset uses USB), an error in the connection (in case of Bluetooth, for example), or an issue with the headphones themselves.
In this guide, I will walk you through 4 different ways you can fix this issue in Windows 10 PCs.
What to Try First if Your Computer Isn't Recognizing Headphones
If your headphones use Bluetooth, you should make sure Bluetooth is enabled on your computer.
Some computers have power on lights for Bluetooth, so make sure they are on.
If the headphones connect to your computer through USB and you get this error, try out another USB drive, or another computer.
If the headphones work on one computer and fail to work on another, the solutions discussed in the remaining parts of this article are for you.
How to Fix a Headphones Error by Updating Your Computer's Audio Driver
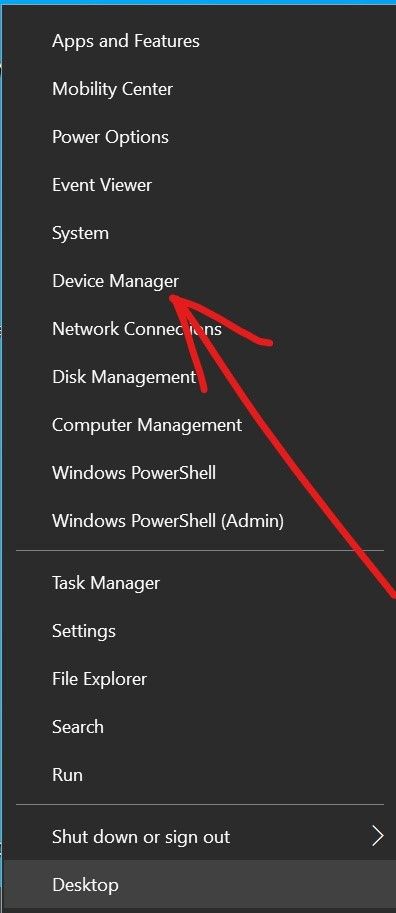
Step 1: Right-click on Start and select "Device Manager".
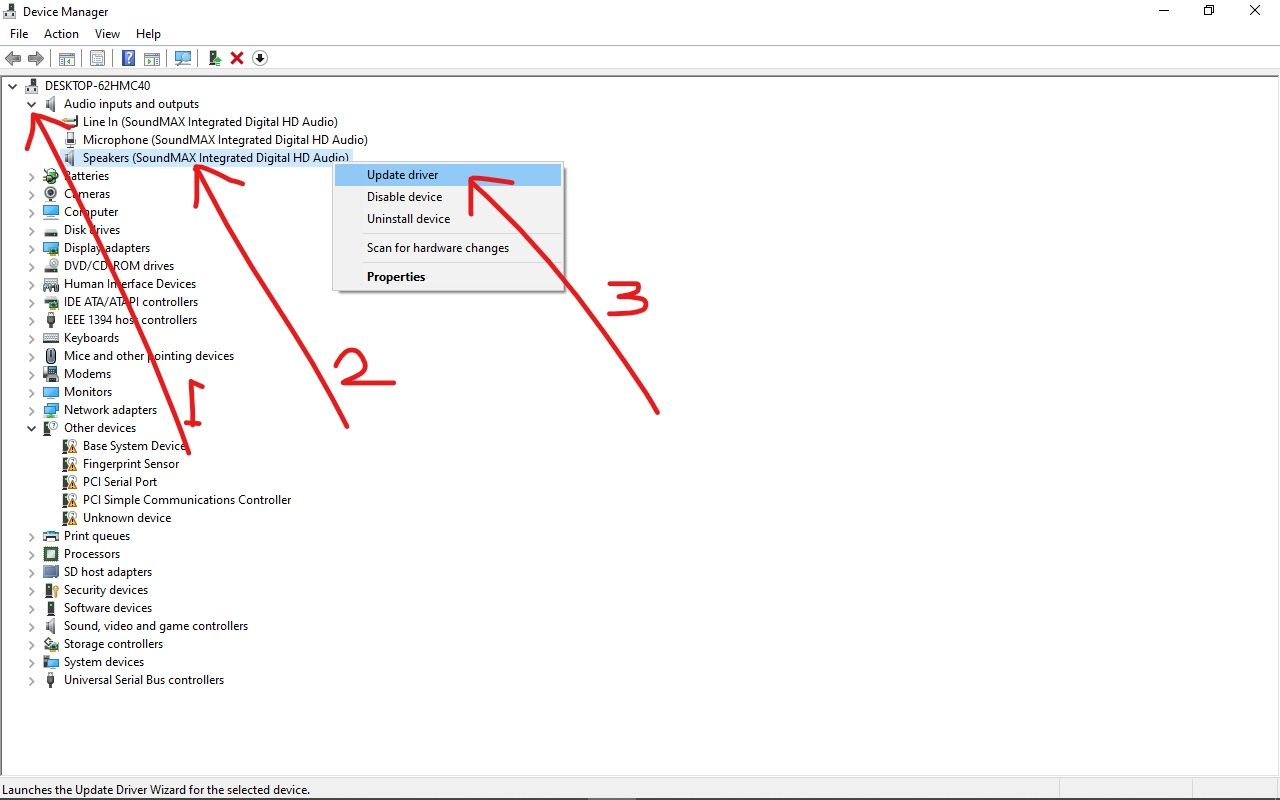
Step 2: Expand Audio Inputs and outputs, right-click on your audio device, and select "Update driver".
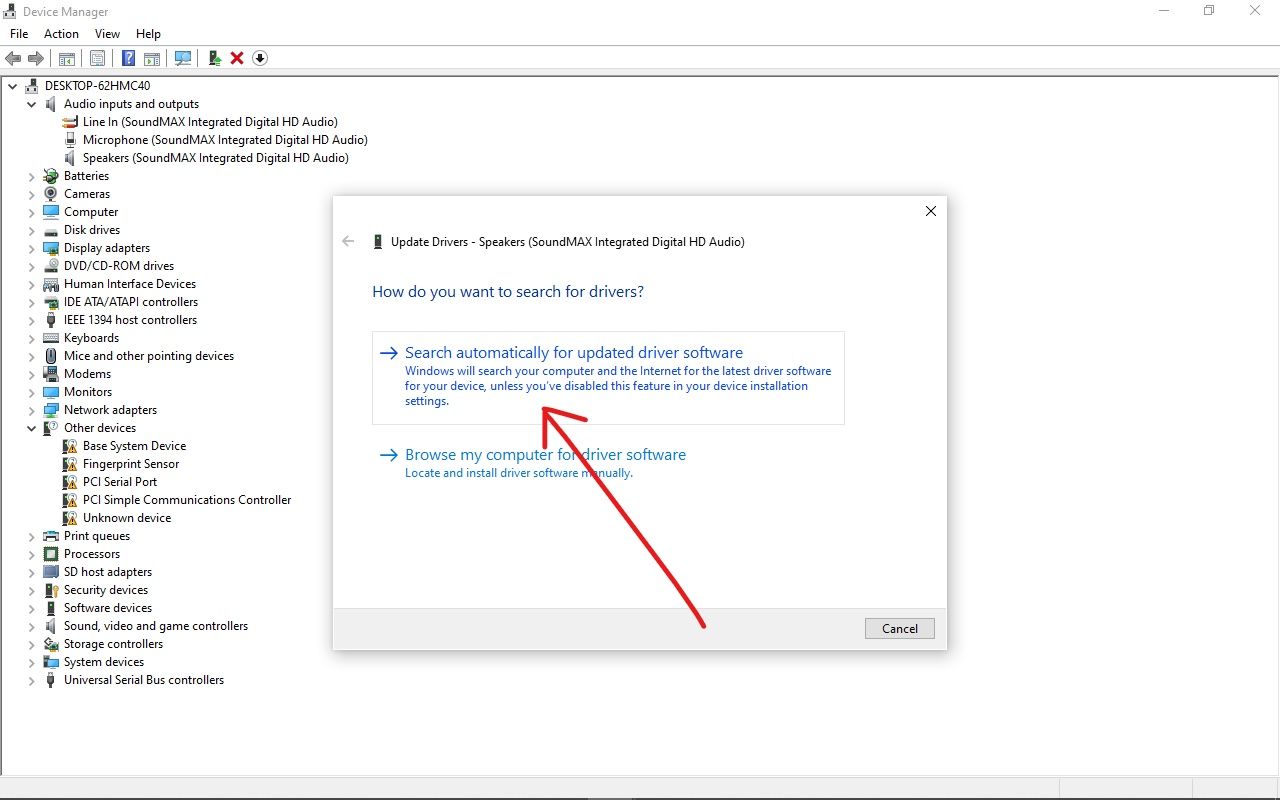
Step 3: Choose "Search automatically for updated driver software".
Step 4: Allow your computer to search the internet for driver updates. It will be automatically installed for you.
How to Fix a Headphones Error by Setting the Headphone as the Default Audio Output Device
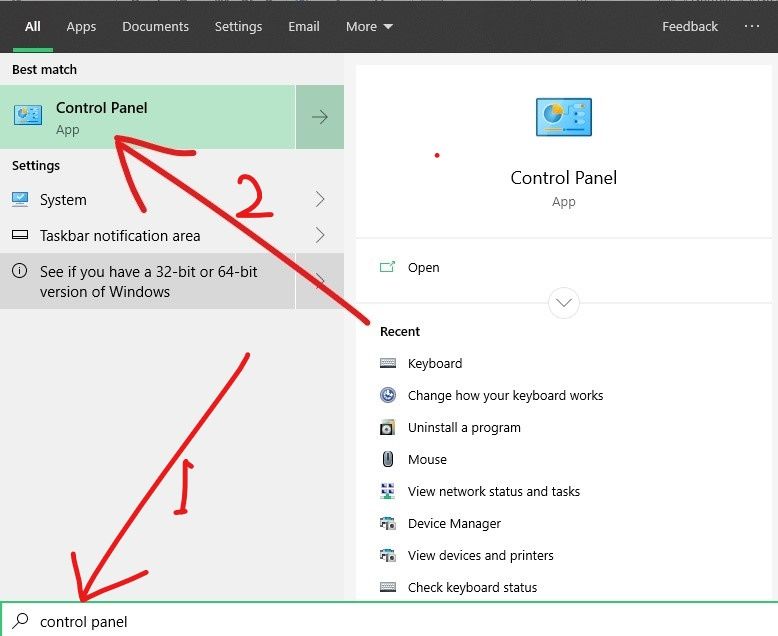
Step 1: Press the WIN (Windows logo key) on your keyboard and search for "control panel". Then hit ENTER to open the first search result – which is usually Control Panel.
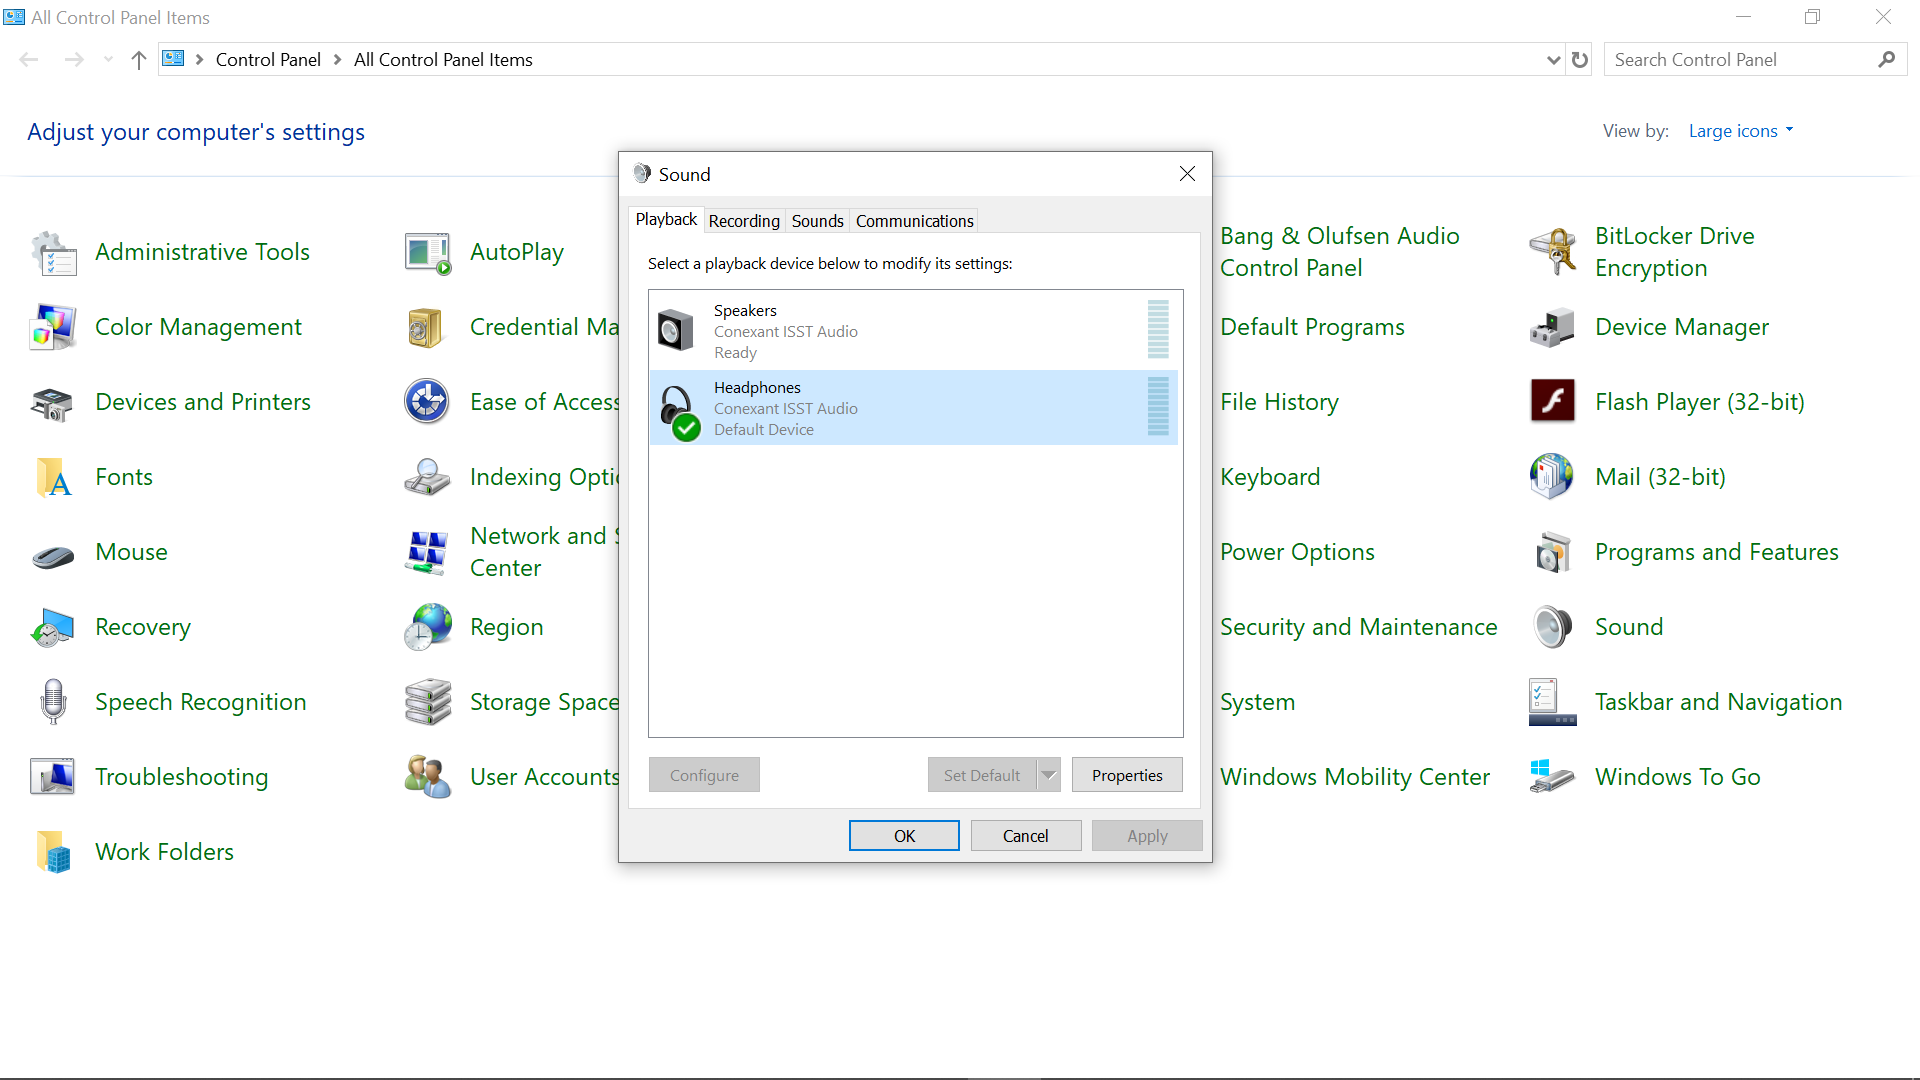
Step 2: Change the Control Panel view to large icons at the top right corner, and then click on “Sound”.

Step 3: If your headphones aren't showing up in the list under the Playback tab, right-click and choose "Show disabled devices". Then click on your headset name from the list of audio devices.
Step 4: Make sure your headphone is been used as the default device. If not, select click on it and select "Set Default".
How to Fix a Headphones Error by Turning off Audio Enhancements
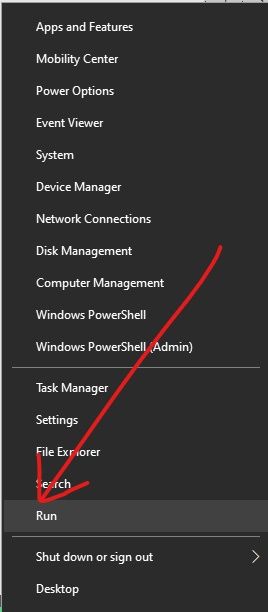
Step 1: Right-click on Start and select "Run".
Step 2: Type in "control" and hit ENTER.
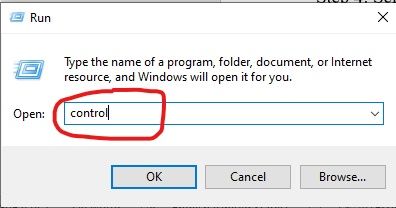
That’s another way to open the Control Panel.
Step 3: Make sure you change view mode to large icons in the top right corner.
Step 4: Select Sound.
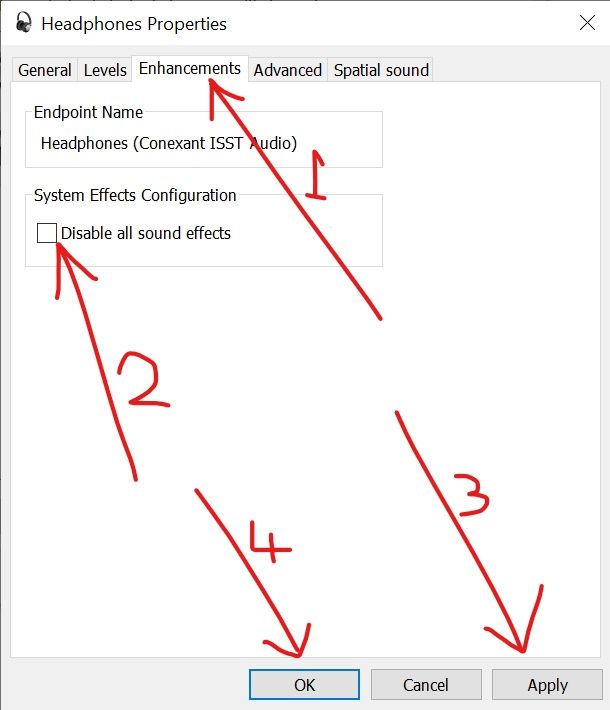
Step 5: Right-click on your headphones and select "Properties".
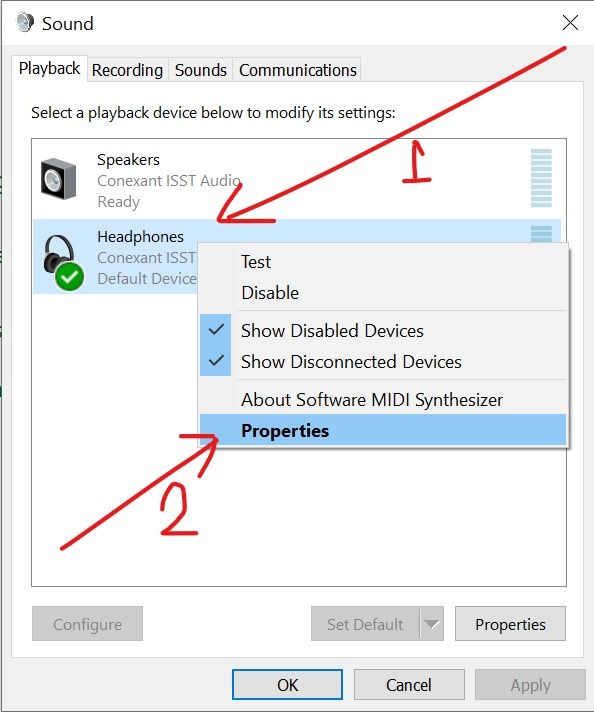
Step 6: Click on the Enhancements tab and uncheck "Disable all sound effects".
Step 7: Click "Apply", and then "Ok".
The reason why this solution works is that enabling audio enhancements on your computer interferes with headphones functionality – which might stop them from working properly in the long run.
I hope the fixes explained in this guide help make your headphones work again.
Thanks a lot for reading and have a nice time.