
In mid-2021, a new Twitter design trend emerged: dynamically updated headers. Developers decided that static headers were boring, and dynamic Twitter headers were the way to go.
Ever since then, many developers (including me) have been creating dynamic banners on Twitter. But what does this actually mean?
The idea is to use an image processing library to create and add multiple images together programmatically and then upload the final version on Twitter

This idea has opened many possibilities for Twitter folks, as you can now use Twitter headers to showcase or advertise anything you want.
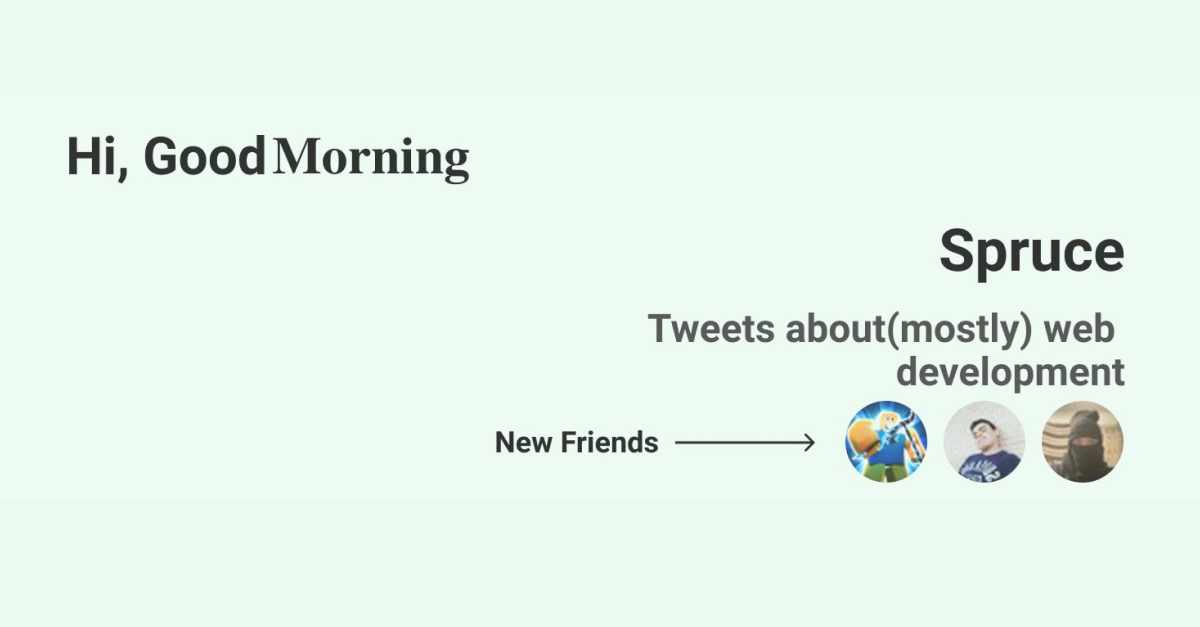
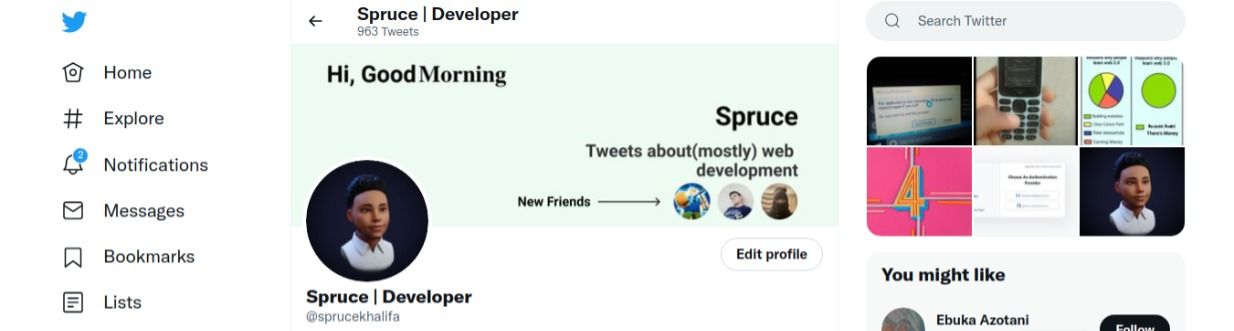
In fact some developers have turned this to a SaaS product. But in my case I just wanted to keep it minimal and only display my current followers and a custom greeting message. This is the final result of what we'll be building here:
In this tutorial you'll learn how to create a Twitter banner that's updated dynamically with your current followers' profile pictures every 60 seconds.
So what do you need to know to follow along with this tutorial? Some basic knowledge of Node.js and JavaScript will be extremely helpful so you can get the most out of what we learn here.
Getting Started
To create our dynamic twitter header we are going to use Nodejs and the sharp image processing library. We'll use sharp to create and merge pieces of our dynamic header together.
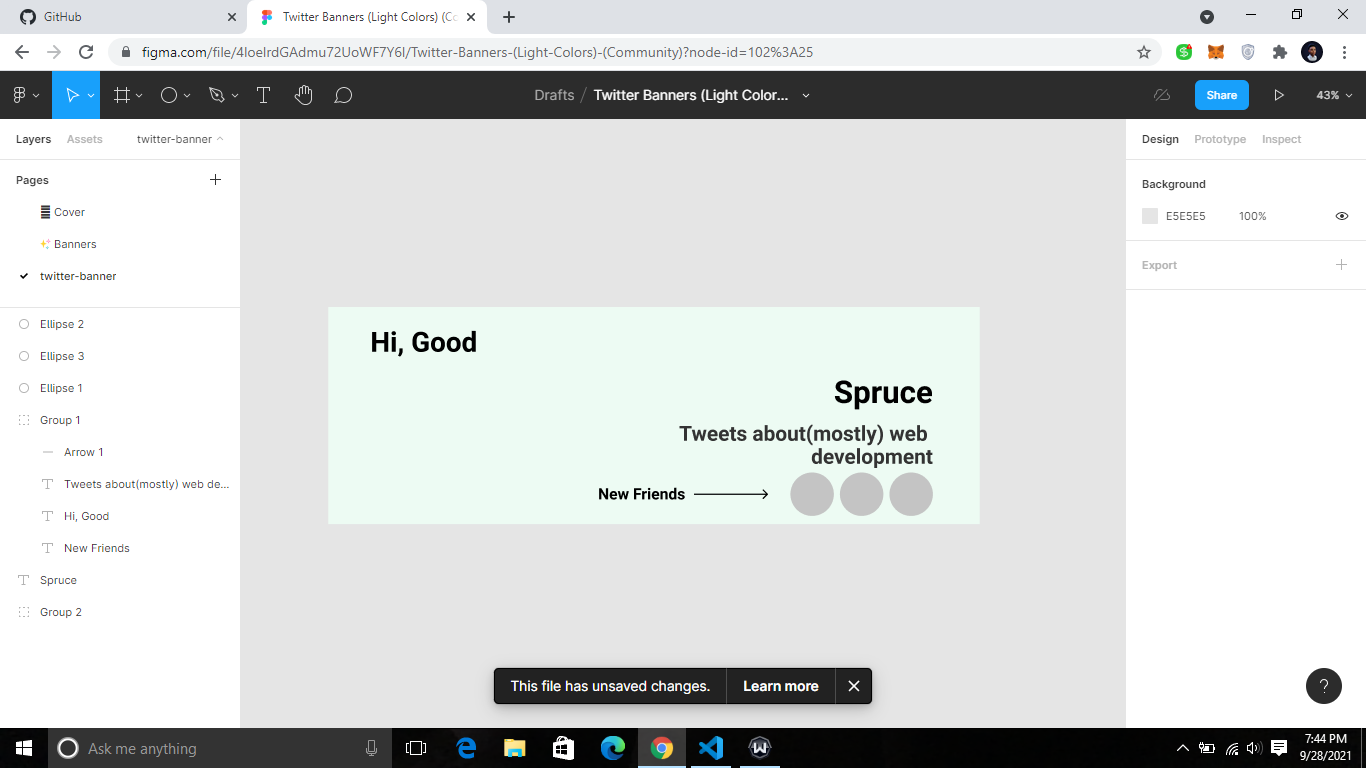
To start, you are going to need a new banner. For this you can use your favorite image editing software, but in my case I used Figma.
I opened Figma and created a new Twitter banner that's 1500px x 500px. Then I added dummy boxes and text to visualize where I was going to place things with sharp later on.
How to Create a Twitter app
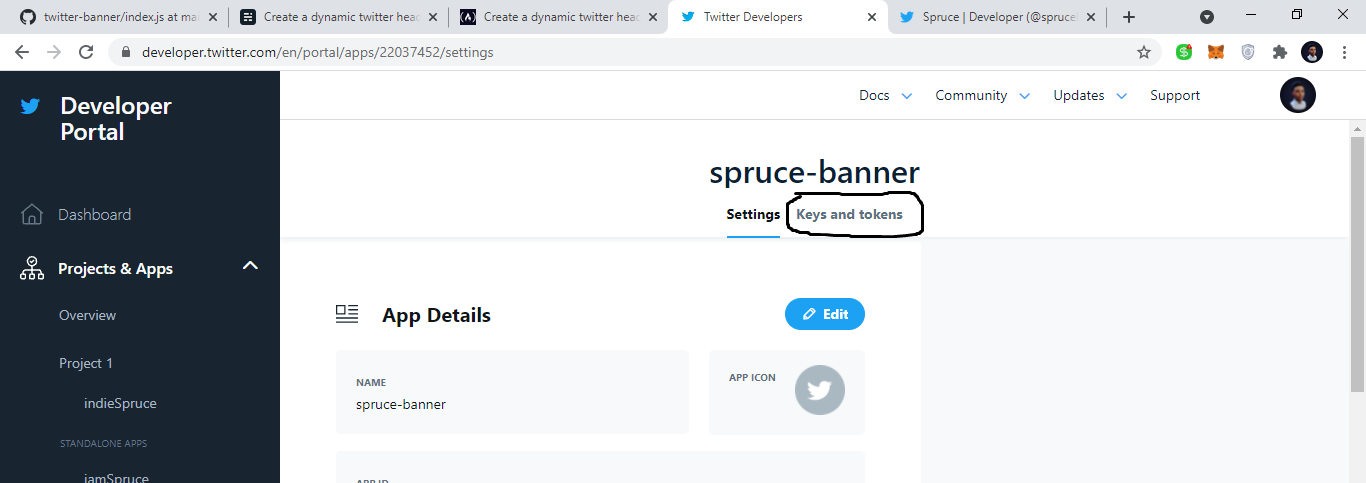
To continue you are going to need a Twitter Developer account. A developer account lets you interact with the Twitter API. If you don't have a developer account yet, head over to the Twitter Developer Portal and create one.
To fully interact with the Twitter API like pulling tweets or pulling followers you will need some ACCESS keys.
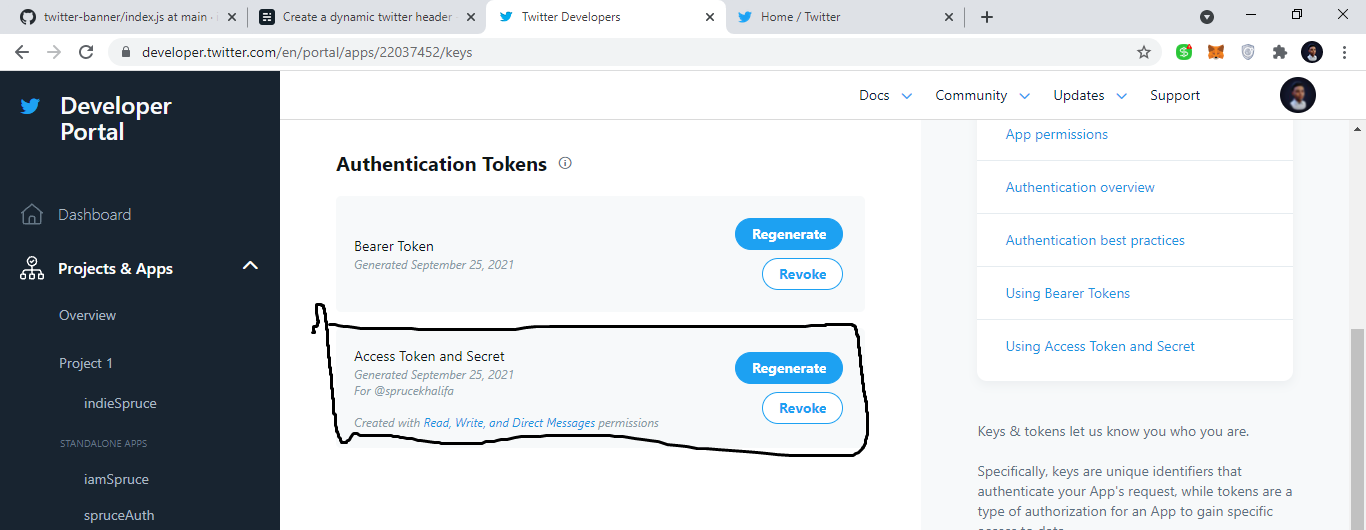
To get those access keys, you will need to create a Twitter app. So login to your dashboard and create a new Twitter app with a unique name. Once you are done click on the keys and tokens tab.
Copy your access tokens and save them to your clipboard or a text file for now. Then click on Generate secrets, and copy those as well.
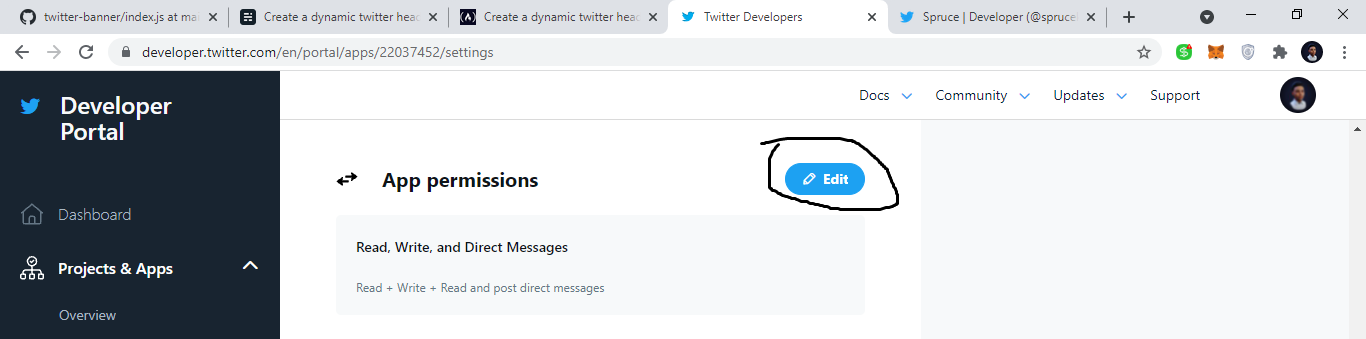
Also, it is important that you update your twitter app permissions by clicking on the "Edit" button:
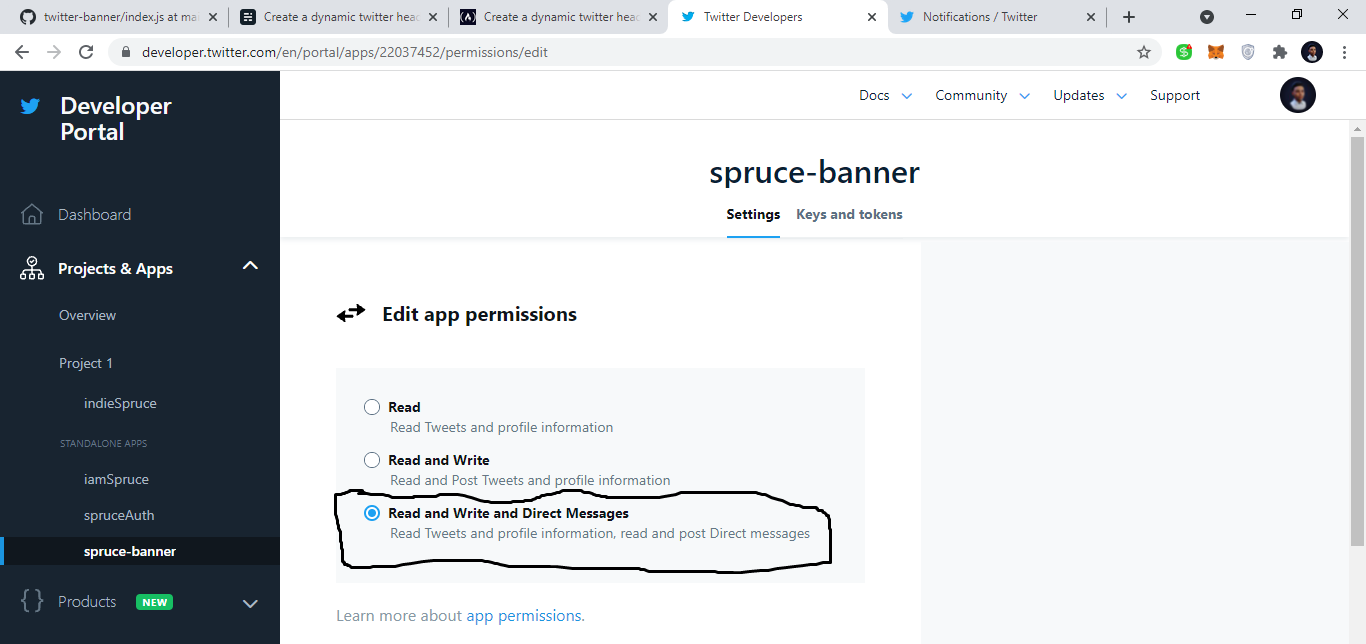
Once you have clicked the edit button, go ahead and select the Read and Write Direct Messages permission:
How to Set Up The Project
Open your code editor, and once you are in your directory of choice, open your terminal. I use the Visual Studio Code integrated terminal. Go ahead and create a new directory:
mkdir twitter-banner
Then you have to cd your way into that new directory, so go ahead and run:
cd twitter-banner
Once you are in that directory, let's create our Node.js project by running this command:
npm init -y
Right now you have an empty Nodejs project, so let's go ahead and install all the dependencies we'll need.
Still on the project directory and in your terminal run the following:
npm i dotenv axios sharp twitter-api-client
We'll use dotenv to read our environmental variables. axios lets us download remote images. The twitter-api-client is what we'll use to establish and communicate with Twitter. And finally sharp is an image processing library which we'll use in this tutorial to create our dynamic header.
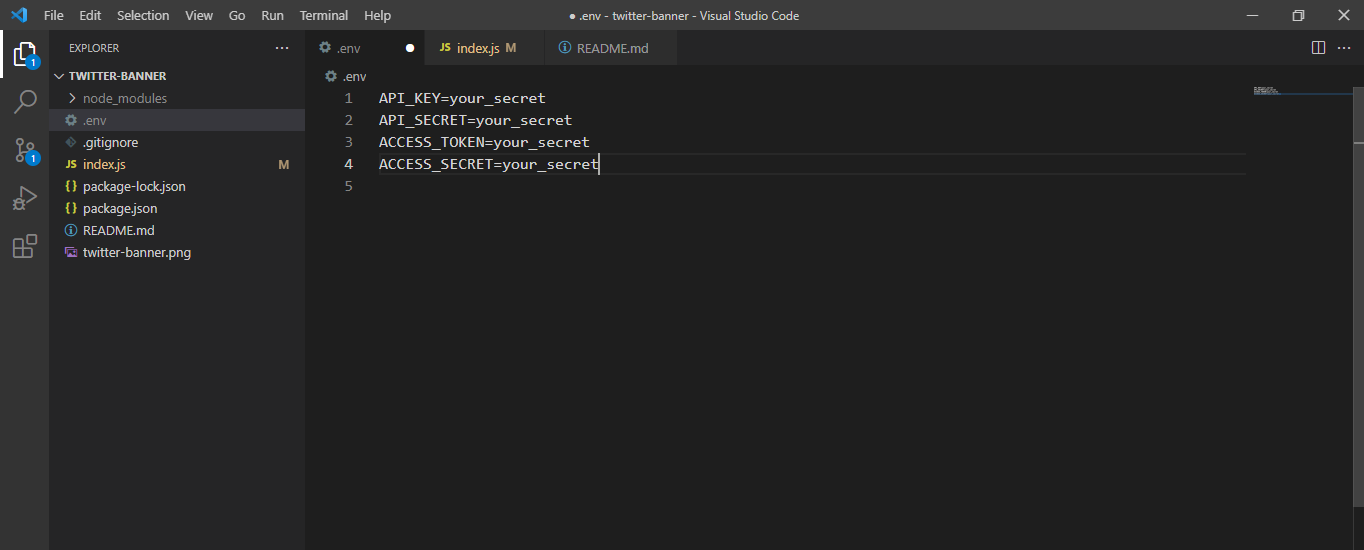
Before you can continue, you'll need to create a .env file and add your access keys and secrets that you copied from Twitter earlier on:
Create an index.js file with the following code:
// step 1
const dotenv = require("dotenv");
dotenv.config();
const { TwitterClient } = require("twitter-api-client");
const axios = require("axios");
const sharp = require("sharp");

// step 2
const twitterClient = new TwitterClient({
  apiKey: process.env.API_KEY,
  apiSecret: process.env.API_SECRET,
  accessToken: process.env.ACCESS_TOKEN,
  accessTokenSecret: process.env.ACCESS_SECRET,
});

// step 3
async function get_followers() {
  const followers = await twitterClient.accountsAndUsers.followersList({
    count: 3,
  });

  console.log(followers);
}

// call function
get_followers()
In this code, we import our installed dependencies and store them in variables, for example sharp = require("sharp").
In the second step we connected to Twitter.
And lastly we created a function get_followers(). Using our twitter-api-client we fetched our followers, and using the count parameter we restricted the fetch to only 3 followers.
💡 Here's a tip: If you live in a country where Twitter is not currently available (like I do) you may want to install a VPN on your system.
Now open your package.json file and add a start script "start": "node index.js" like so:
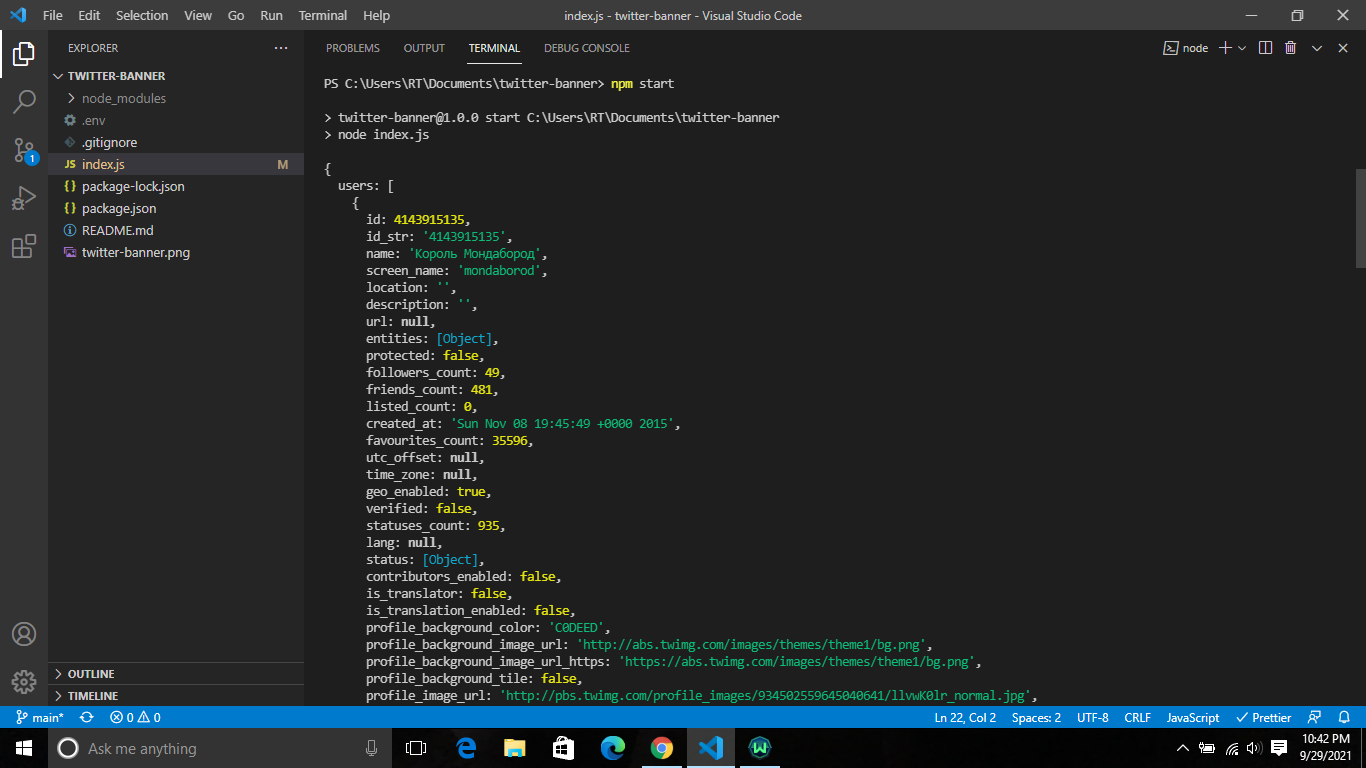
Now run npm start, and if everything works fine you should see your 3 followers printed on the console:
How to Fetch Followers from Twitter
To kick things off, we'll start by fetching our recent followers from Twitter which we already did in the last section. Just edit your index.js file with the following code:
...
async function get_followers() {
  const followers = await twitterClient.accountsAndUsers.followersList({
    screen_name: process.env.TWITTER_HANDLE,
    count: 3,
  });

  const image_data = [];
  let count = 0;

  const get_followers_img = new Promise((resolve, reject) => {
    followers.users.forEach((follower, index,arr) => {
      process_image(
        follower.profile_image_url_https,
        `${follower.screen_name}.png`
      ).then(() => {
        const follower_avatar = {
          input: `${follower.screen_name}.png`,
          top: 380,
          left: parseInt(`${1050 + 120 * index}`),
        };
        image_data.push(follower_avatar);
        count++;
        if (count === arr.length) resolve();
      });

    });
  });


Let's break down this code a bit: first we created a function `get_followers()`. Inside the function we fetched our recent followers and saved them in the variable `followers`. Next we created a new `Promise` called `get_followers_img` and for each of the followers we called a function `process_img()`:

```js
process_image(
        follower.profile_image_url_https,
        `${follower.screen_name}-${index}.png`
      )
The function takes in two parameters: the follower image URL and the name of the image (for which we used the follower's screen name ${follower.screen_name}.png).
Another thing I wanted to point out is the follower_img_data. Remember when I said we'd be creating and adding multiple images together? To do this in sharp you need three properties:
input: The path to the file
top: Vetical position of the image
left: Horizontal position
We push each of the follower_img_data to our image_data array:
image_data.push(follower_img_data);
Lastly we check if all processes are complete and then resolve:
...
count++;
if (count === arr.length) resolve();
How to Process the Images
In the previous step we called a function process_img() that we have not yet created. In this step we'll create that function.
In your index.js create the function with the following code:
...
async function process_image(url, image_path) {
  await axios({
    url,
    responseType: "arraybuffer",
  }).then(
    (response) =>
      new Promise((resolve, reject) => {
        const rounded_corners = new Buffer.from(
          '<svg><rect x="0" y="0" width="100" height="100" rx="50" ry="50"/></svg>'
        );
        resolve(
          sharp(response.data)
            .resize(100, 100)
            .composite([
              {
                input: rounded_corners,
                blend: "dest-in",
              },
            ])
            .png()
            .toFile(image_path)
        );
      })
  );
}
sharp doesn't support the use of remote images (images not stored on your filesystem), so we'll use axios to download the remote images from Twitter. Then finally when our promises are resolved will use sharp to resize and save the images in Buffer to our file system using toFile(image_path).
Note: Buffer here refers to memory storage used to temporarily store data (and in our case images). You can use this data as if it was in your filesystem.
You'll also notice we created a variable rounded_corners in which we drew a rectangle with svg:
const rounded_corners = new Buffer.from('
    <svg>
        <rect x="0" y="0" width="100" height="100" rx="50" ry="50"/>
    </svg>
');
To make our created rectangle mimic a rounded image, it has to:
have the same size as our resized image
100have its vertical and horizontal radius be half the size of our resized image
50
How to Create the Text
Everything has to be an image – even text. To create text with sharp we have to create it as SVG images and save it in Buffer storage. Now in your index.js file create a function called create_text():
...
async function create_text(width, height, text) {
  try {
    const svg_img = `
    <svg width="${width}" height="${height}">
    <style>
    .text {
      font-size: 64px;
      fill: #000;
      font-weight: 700;
    }
    </style>
    <text x="0%" y="0%" text-anchor="middle" class="text">${text}</text>
    </svg>
    `;
    const svg_img_buffer = Buffer.from(svg_img);
    return svg_img_buffer;
  } catch (error) {
    console.log(error);
  }
}
The function create_text() takes in three parameters:
width: width of the image
height: height of the image
text: actual text you want to write, e.g. Hello World
How to Draw the Twitter Banner
So far so good! We have been creating and processing multiple images, and now comes the fun part: adding those images together to create a new image.
To get started, go back to your get_followers() function and add this at the end:
  get_followers_img.then(() => {
     draw_image(image_data);
  });
Now let's create the draw_image function we just called. Create a new function draw_image in your index.js file like this:
...
async function draw_image(image_data) {
  try {
    const hour = new Date().getHours();
    const welcomeTypes = ["Morning", "Afternoon", "Evening"];
    let welcomeText = "";

    if (hour < 12) welcomeText = welcomeTypes[0];
    else if (hour < 18) welcomeText = welcomeTypes[1];
    else welcomeText = welcomeTypes[2];

    const svg_greeting = await create_text(500, 100, welcomeText);

    image_data.push({
      input: svg_greeting,
      top: 52,
      left: 220,
    });

    await sharp("twitter-banner.png")
      .composite(image_data)
      .toFile("new-twitter-banner.png");

    // upload banner to twitter
    upload_banner(image_data);
  } catch (error) {
    console.log(error);
  }
}
The first thing we did in this code was to create a welcome greeting text depending on the hour of the day. Then, using the create_text() function we made earlier, we created and saved the greeting as an SVG buffer image:
const svg_greeting = await create_text(500, 100, welcomeText);
The next step was to add our new buffer image to our image data array:
    image_data.push({
      input: svg_greeting,
      top: 52,
      left: 220,
    });
Note that I got the top and left values from the Figma design (don't make those up!).
Next we combined our multiple images into one by using .composite(image_data) and saved it to a new file called new-twitter-banner.png.
    await sharp("twitter-banner.png")
      .composite(image_data)
      .toFile("new-twitter-banner.png");
Lastly, once we have successfully created our new image, we call a function upload_banner(). As the name implies, it lets us upload our new Twitter banner to Twitter.
How to Upload the Banner to Twitter
To upload our new banner to Twitter, we need to first read the image from our filesystem. So we need to require a new module. Don't worry – we are not going to install it, it comes with NodeJs.
At the top of index.js where we required other modules, add the following:
// other modules
const fs = require("fs");
Then at the bottom of your index.js file, create an upload_banner() function with the following code:
async function upload_banner(files) {
  try {
    const base64 = await fs.readFileSync("new-twitter-banner.png", {
      encoding: "base64",
    });
    await twitterClient.accountsAndUsers
      .accountUpdateProfileBanner({
        banner: base64,
      })
      .then(() => {
        console.log("Upload to Twitter done");
        delete_files(files);
      });
  } catch (error) {
    console.log(error);
  }
}
Notice that we called another function delete_files() once the image was uploaded to Twitter. This is because we don't want our server to be filled with images of our new followers, so after every successful upload we delete the images:
...
async function delete_files(files) {
  try {
    files.forEach((file) => {
      if (file.input.includes('.png')) {
        fs.unlinkSync(file.input);
        console.log("File removed");
      }
    });
  } catch (err) {
    console.error(err);
  }
}
The function above checks our image_data (now called files) and for each input it checks if the input includes .png. It does this because some of our images (SVG text) are buffers and are not saved on our file system. So attempting to delete that would result in an error.
Finally we want to run the get_followers() function every 60s because that's where everything starts:
...
get_followers();
setInterval(() => {
  get_followers();
}, 60000);
And that's it! If you are interested, the entire code is on Github:
Conclusion
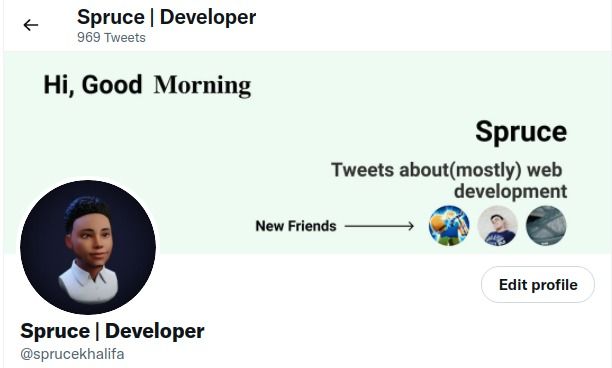
If you made it this far, congratulations! You should now see your dynamic Twitter header. And depending on the time of the day, you should see a greeting message – in my case it is morning here as I'm writing this:
The rest is now up to your creativity. If you created something wonderful with this please feel free to tweet about it and tag me @sprucekhalifa. And don't forget to hit the follow button.
So I say unto you "Go into the world and be creative". Oh and happy coding!