By Danny
I want to show you that creating a best practice token is a simple process. To be honest, we are going to be doing some coding, but it won’t be much.
We’ll be using Solidity to create our Ethereum token. But don’t worry, there are a lot of open source libraries and contracts to help us in the process.
What we want is an ERC-20 compliant token. What that means is that the Ethereum developers have decided a set of functionalities that is necessary for your most common token usages today. There are other types of ERC standards, but we wont dive into it.
Requirements:
- Github
- Terminal
- NodeJS
- NPM
- Metamask (For initial Account Creation)
Alright let’s start coding! The first thing we want to do is download truffleglobally. You can visit their repo at truffle and here’s the following snippet to install:
npm install -g truffle
*note: make sure you have the latest version of truffle if you installed this prior
Truffle will handle the smart contract compilation, linking, and deployment for us. It’s a library that will make our lives easier for this demonstration.
Now we need to create a directory where our project will live. In my case I called it ethereum_token_tutorial.
So we have two options here. Either you can clone the repo I have created by following this:
git clone -b initial_step https://git@github.com/danieljoonlee/ethereum_token_tutorial.git
Or you can do this in your terminal inside of your new directory:
truffle init
If you followed the second option of doing truffle init. The directory should look like this:
etherem_token_tutorial|___contracts| |_____ConvertLib.sol| |_____MetaCoin.sol| |_____Migrations.sol|___migrations| |_____1_initial_migrations.js| |_____2_deploy_contracts.js|___test| |_____TestMetacoin.sol| |_____metacoin.js|___truffle.js
Go ahead and delete ConvertLib.sol , MetaCoin.sol , TestMetacoin.sol , metacoin.js.
So your directory should look like this now:
etherem_token_tutorial|___contracts| |_____Migrations.sol|___migrations| |_____1_initial_migrations.js| |_____2_deploy_contracts.js|___test|___truffle.js
Great. Now we’re moving. Truffle helps us compile smart contracts and deploy them. But we deleted our smart contract files other than the migrating helper. Don’t worry, this is where Open-Zeppelin comes in.
Open-Zeppelin is an open source repo where you can find smart contracts with generally best practices, good test coverage, and most likely audited*.
- Audit is when you have professional developers review your smart contracts looking for any leaks, bugs, or possibilities of malicious attacks.
Here’s a link if you’re interested in smart contract attacks: Link
For us to use any Open-Zeppelin contracts we need to install it into our repository:
npm init -ynpm install -E zeppelin-solidity
We initialized a package.json with npm init -y. We also installed the package for using the Open-Zeppelin contracts.
Okay, we’re going to write some Solidity. I did mention in the article earlier that this will not be much code and I wasn’t joking!
Create a new file in the contracts folder. In my case I named it TestToken.sol
Now your directory should look like this:
etherem_token_tutorial|___contracts| |_____Migrations.sol| |_____TestToken.sol***(this one is new)|___migrations| |_____1_initial_migrations.js| |_____2_deploy_contracts.js|___test|___truffle.js
In TestToken.sol we need to have the following code:
// TestToken.solpragma solidity ^0.4.18;
import "zeppelin-solidity/contracts/token/ERC20/MintableToken.sol";
contract TestToken is MintableToken { string public constant name = "Test Token"; string public constant symbol = "TT"; uint8 public constant decimals = 18;}
Let’s break this down since it’s quite a bit , even though it’s only a few lines of code.
pragma solidity ^0.4.18;
It is required at the top of the file because it specifies the version of Solidity we’re using.
import "zeppelin-solidity/contracts/token/ERC20/MintableToken.sol";
The above code snippet is why Open-Zeppelin is so useful. If you know how inheritance works, our contract is inheriting from MintableToken. If you don’t know how inheritance works, MintableToken has a lot of functionalities saved in inMintableToken.sol. We can use these functionalities to create our token. If you visit this MintableToken you’ll notice a ton of functions and even more inheritance. It can be a bit of a rabbit hole, but for this demonstration purpose, I want us to release a token into the testnet.
For us, Mintable let’s us create as many tokens as we want, so we won’t be starting with an initial supply. In my next article, we’ll create a nodejs service that will create new tokens, and handle other ERC-20 standard functionalities.
The next bit of code:
contract TestToken is MintableToken { string public constant name = "Test Token"; string public constant symbol = "TT"; uint8 public constant decimals = 18;}
This is where we can customize the token. In my case, I named mine “Test Token”, with the symbol “TT”, and decimals of 18. But why 18 decimals?
Decimals of 18 is fairly standard in the community. So if we have one test token it can potentially look like this 1.111111111111111111.
Whelp. That’s all the Solidity coding we need to do for this token. We inherit all the main functionalities for a standardized ERC 20 token from Open-Zeppelin. After that we need to set our constants for the name, symbol, and decimals.
Before we forget, we should create a Metamask account and get it funded with testnet ethereum.
Go ahead and search MetaMask extension for Chrome, or follow this link
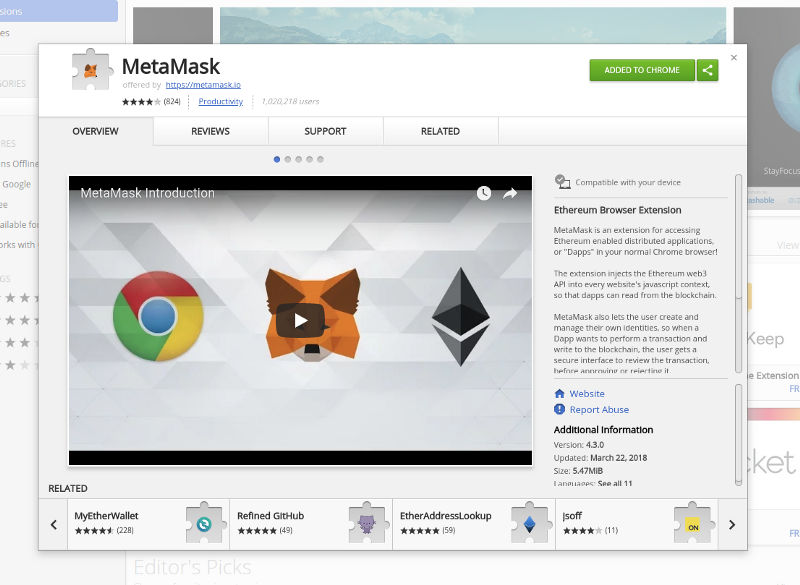
After you install MetaMask you should see a series of steps. You can read through like terms of service. Eventually you’ll reach:
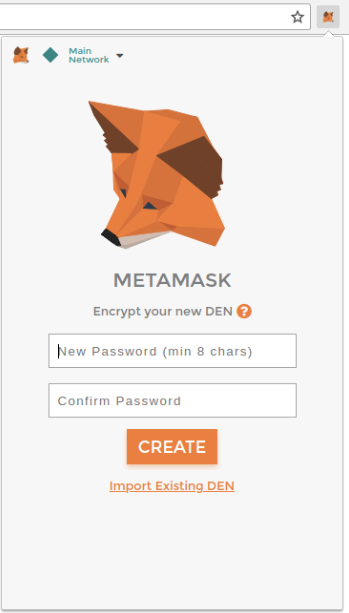
Input your password and confirm that password. On clicking create, you will see another screen.
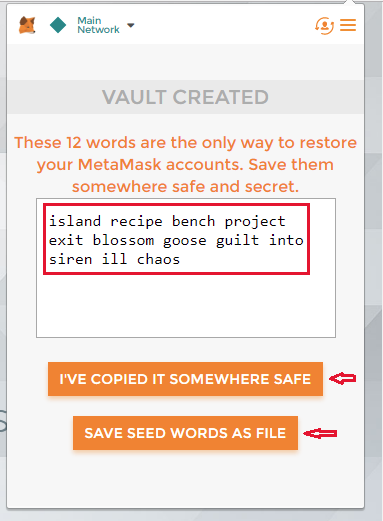
Make sure to save your seed words or copy them down into a text file. We will need those seed words to deploy the token onto the testnet.
Also more important is to change your test from Mainnet Test Net to Ropsten Test net. It’s on the top left of your MetaMask tab. Here is the drop down:
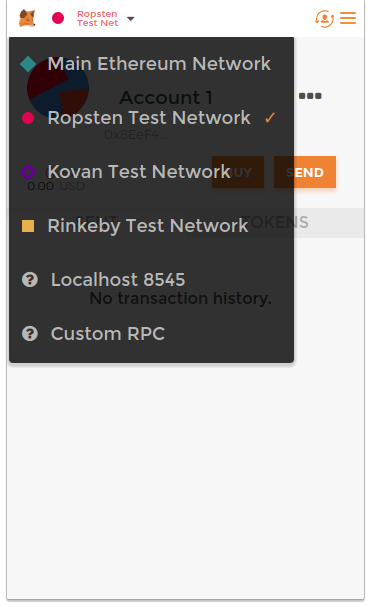
The reason we’re using Ropsten Test Network is because it’s the closest testnet/implementation of the Main Ethereum Network.
Next you will need to copy your address to clipboard from the ... menu like so:
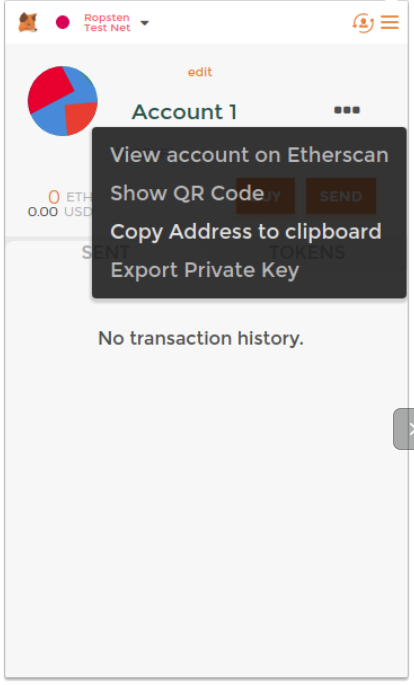
You should have an address similar to this one copied to your clipboard:
address: 0x8EeF4Fe428F8E56d2202170A0bEf62AAc93989dE
This is the address from which we’re going to deploy our token contract. Now one thing you need to know about deploying contracts is that they cost Ethereum, to be specific Gas. We’re going to need to get some testnet Ethereum into our accounts.
Now that you have your address go to this Ropsten faucet link:
Ethernet Faucet
_Edit description_faucet.ropsten.be
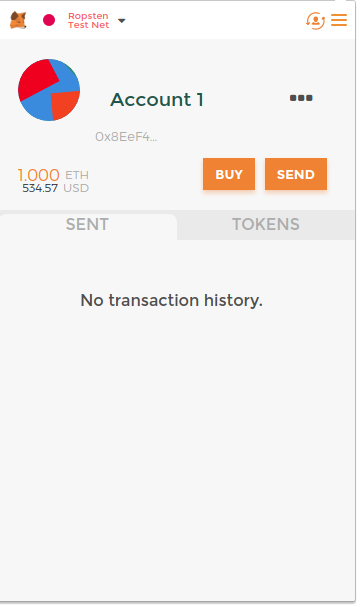
Copy and paste your address and soon you should have 1 Ethereum in your MetaMask wallet for your address.
Just one more thing before we start coding our deployment process! We’re going to use a free API called Infura.io:
Infura — Scalable Blockchain Infrastructure
_Secure, reliable, and scalable access to Ethereum APIs and IPFS gateways._infura.io
Sign up for their services. You should get an email from them or be redirected to a site with your API Key. The one we want specifically is from the Ropsten Network.
Test Ethereum Network (Ropsten)https://ropsten.infura.io/API_KEY
Copy your API_KEY.
Almost there! Now let’s start working on our deployment. Let’s head back in our code.
First things first, let’s talk about security. Create a new file in your root directory called .env. Your file structure should now look like this:
etherem_token_tutorial|___contracts| |_____Migrations.sol| |_____TestToken.sol|___migrations| |_____1_initial_migrations.js| |_____2_deploy_contracts.js|___test|___truffle.js|___.env**(new file)
Inside your .env file lets add some environmental variables (these are variables that you can access anywhere in your code directory)
//.env fileINFURA_API_KEY=API_KEYMNENOMIC=MNEOMIC_FROM_METAMASK
First add your API_KEY you copied into the file.
Remember the Mneomic(seed words) from initializing Metamask chrome extension? We’re going to need that now to deploy the contracts from. If you downloaded or wrote down your Mneomic, now write them down in your .env file MNENOMIC=SOME KEY PHRASE YOU DONT WANT THE PUBLIC TO KNOW.
IMPORTANT*
We added a .env file!!! We need to add a .gitignore file now to avoid adding the .env to a public repository if you ever decide to make the code public!
Create a .gitignore file in the same directory as your .env. Now it should look like this:
etherem_token_tutorial|___contracts| |_____Migrations.sol| |_____TestToken.sol|___migrations| |_____1_initial_migrations.js| |_____2_deploy_contracts.js|___test|___truffle.js|___.env|___.gitignore**(newfile)
Inside your .gitignore file:
// .gitignorenode_modules/build/.env
We want to ignore node_modules/ because when we do npm install it will download packages from our package.json. We want to ignore buildbecause later on when we run a script, it will create that directory for us automatically. We also want to ignore .env because it has private information we don’t want to release to the public.
Great! Over in our terminal we need to add two more modules.
npm install --save dotenv truffle-hdwallet-provider
Since we’re putting in private information, we need a way to access those variables from .env, and the dotenv package will help us.
The second package, truffle-hdwallet-provider is a wallet enabled provider. Without this, we would need to download all the blocks or use a light wallet to make new transactions in the Ethereum network. With the wallet provider and Infura API. We can deploy instantly, also bypassing painful processes.
Over in the truffle.js in our root directory, we need to modify some configurations.
// truffle.jsrequire('dotenv').config();const HDWalletProvider = require("truffle-hdwallet-provider");
module.exports = { networks: { development: { host: "localhost", port: 7545, gas: 6500000, network_id: "5777" }, ropsten: { provider: new HDWalletProvider(process.env.MNENOMIC, "https://ropsten.infura.io/" + process.env.INFURA_API_KEY), network_id: 3, gas: 4500000 }, }};
The first line indicates we want to use the .env variables in this repo. Generally in most apps, you only need to require this once in the starting config file.
Most of this is boilerplate. Main section we want to focus on is the ropsten network.
ropsten: { provider: new HDWalletProvider(process.env.MNENOMIC, "https://ropsten.infura.io/" + process.env.INFURA_API_KEY), network_id: 3, gas: 4500000 },
The provider is our network. In our case, we want to deploy our token into the Ropsten network. Using the HDWalletProvider we pass in two arguments, process.env.MNENOMIC, "https://ropsten.infura.io/" + process.env.INFURA_API_KEY. We access our .env variables by referencing process.env.VARIABLE_NAME_IN_ENV.
We set the network_id: 3 because that represents Ropsten. 1 is the main Ethereum net and 2 is an old testnet.
Lastly, we set gas: 4500000, which is why we needed the Ethereum originally. We use gas/ethereum any time we need to modify/add something in the Ethereum Network.
Alright, onto the last step before deployment!
Over in our migrations/2_deploy_contract.js, we need to make some modifications for our contract.
// 2_deploy_contract.js
const TestToken = artifacts.require("./TestToken.sol");
module.exports = function(deployer) { deployer.deploy(TestToken);};
If you named your token contract file something else. You need to replace the TestToken.sol to whatever file you named it.
truffle compile
This should create a new folder in your directory:
etherem_token_tutorial|___build| |_____contracts| |_____BasicToken.json| |_____ERC20.json| |_____ERC20Basic.json| |_____Migrations.json| |_____MintableToken.json| |_____Ownable.json| |_____SafeMath.json| |_____StandardToken.json| |_____TestToken.json|___contracts| |_____Migrations.sol| |_____TestToken.sol|___migrations| |_____1_initial_migrations.js| |_____2_deploy_contracts.js|___test|___truffle.js|___.env|___.gitignore**(newfile)
In our build folder, we have a bunch of contracts we inherited from the Open-Zeppelin library. If you’d like to know more about ERC-20 standards I’d check out the wiki. If there’s enough people asking for it I can make another blog post on it. For now here’s the link to the wiki.
Here comes the moment of truth. Now we need to deploy the contracts into the Ropsten network. Enter the following line in your terminal:
truffle migrate --network ropsten
You should get a series of lines in your terminal like:
Using network 'ropsten'.
Running migration: 1_initial_migration.js Deploying Migrations... ... 0x7494ee96ad7db4a560b6f3169e0666c3938f9f54208f7972ab902feb049a7f68 Migrations: 0x254466c5b09f141ce1f93689db6257b92133f51aSaving successful migration to network... ... 0xd6bc06b3bce3d15dee4b733e5d4b09f0adb8f93f75ad980bad078484641d36e5Saving artifacts...Running migration: 2_deploy_contracts.js Deploying TestToken... ... 0x7e5c1b37f1e509aea59cd297417efe93eb49fdab2c72fa5c37dd2c63a3ba67b7 TestToken: 0x02ec6cbd89d3a435f8805e60e2703ef6d3147f96Saving successful migration to network... ... 0x2fd6d699295d371ffd24aed815a13c5a44e01b62ca7dc6c9c24e2014b088a34eSaving artifacts...
This will take some time. Once it’s fully deployed copy the last txid. In my case:
0x2fd6d699295d371ffd24aed815a13c5a44e01b62ca7dc6c9c24e2014b088a34e
This will have an address to your token contract. Here is a link to my txid:
Ropsten Transaction 0x2fd6d699295d371ffd24aed815a13c5a44e01b62ca7dc6c9c24e2014b088a34e
_Ropsten (ETH) detailed transaction info for 0x2fd6d699295d371ffd24aed815a13c5a44e01b62ca7dc6c9c24e2014b088a34e_ropsten.etherscan.io
Which has an address to the contract itself:
Ropsten Accounts, Address and Contracts
_The Ethereum BlockChain Explorer, API and Analytics Platform_ropsten.etherscan.io
You can get the completed github repo here.
This part one of a series of creating a token and interacting with it. In the next blog we will create a simple node microservice. We will use this service to call various functions on your token smart contract, such as minting new tokens, transferring, etc.
If you find any mistakes or typos please let me know! Also I’m always looking for exciting projects in the blockchain space.
If you found this helpful and feel like buying me a beer:
BTC: 3Kxz6zPweuiaVG28W78pX9DoEZVkLhH4nT
BCH: qqwusc2peyvlh3wgl0tpt3ll4ug9zujfvy9586tgd4
ETH: 0x96Ee87e22D899BDc27EAD4fE3FCA8e9F39176B4C
LTC: MDhqUBtGgVZrDG7TYzzyK2a2b99sHyHaQQ