

Welcome to this tutorial on how to integrate ChatGPT with Google Spreadsheets using the GPT API and Google Apps Script.
We will create two custom formulas, GPT_SUMMARY and GPT_SIMPLIFY. You can use GPT_SUMMARY to summarize a large passage or text into a few bullet points for easy reading. And you can use GPT_SIMPLIFY to simplify English into easy-to-read English.
We will also create menus with access to functions that perform the same tasks as formulas. We will then discuss the pros and cons of using formulas versus menus.
By the end of this tutorial, you will understand how to use ChatGPT in Google Sheets with Google Apps Script. You will also be able to modify the formulas and menus to meet your own needs, such as creating CVs, social media posts, or cover letters.
You can find the source code for this project in this GitHub repo.
If you want to follow along with a video version of this article, here you go:
Pre-requisites
This tutorial is not meant for beginners in Apps Script or JavaScript. I will not be explaining every method or classes used in the code. This is also not a tutorial on how to use and optimize ChatGPT – instead we'll focus on how to integrate GPT in Google Sheets.
Who is this tutorial for?
This tutorial is for intermediate to advanced users who have a basic understanding of Apps Script and JavaScript. If you are new to either of these, I recommend that you start with a beginner tutorial before attempting this one.
Step 1 – Get the ChatGPT API Key
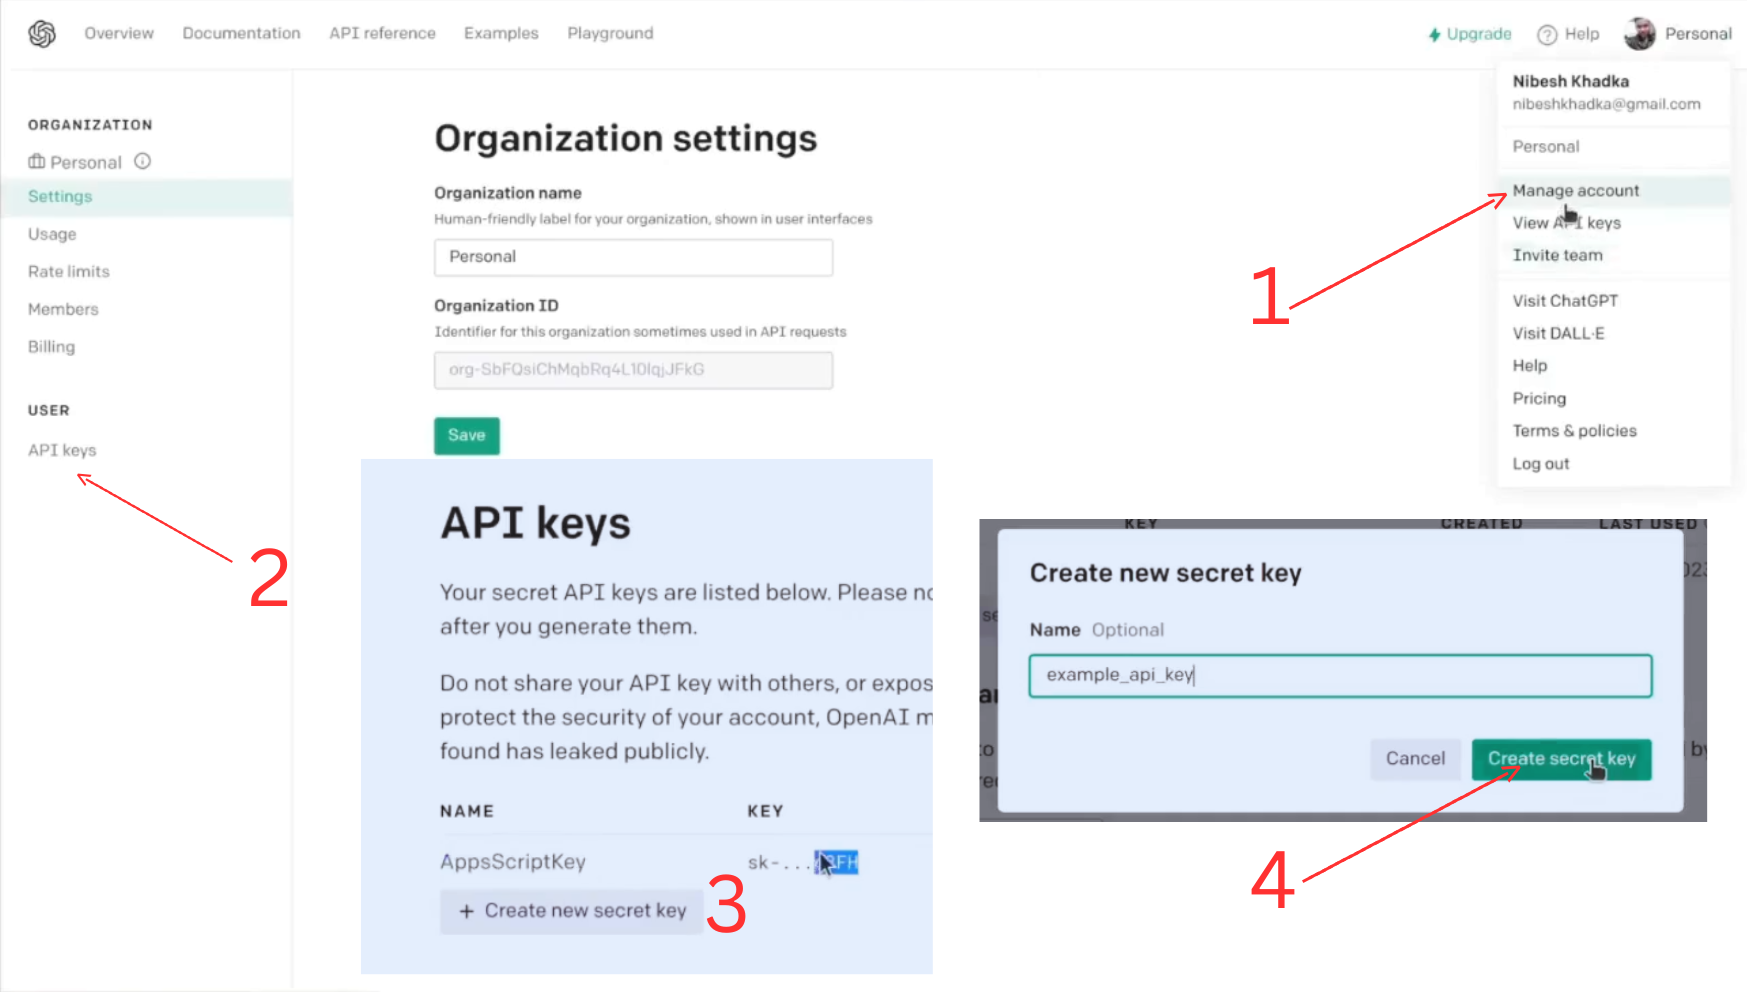 Get ChatGpt API Key
First, if you don't already have an account with OpenAI, you'll need to create one. Once you have an account, you can create a new API key by going to the API keys section under the User tab.
Click the Create new secret key button and copy the key after it has been created. You will not be able to see this API key again, so be sure to copy it somewhere safe.
Step 2 – Fetch the Data From the ChatGpt API with Apps Script
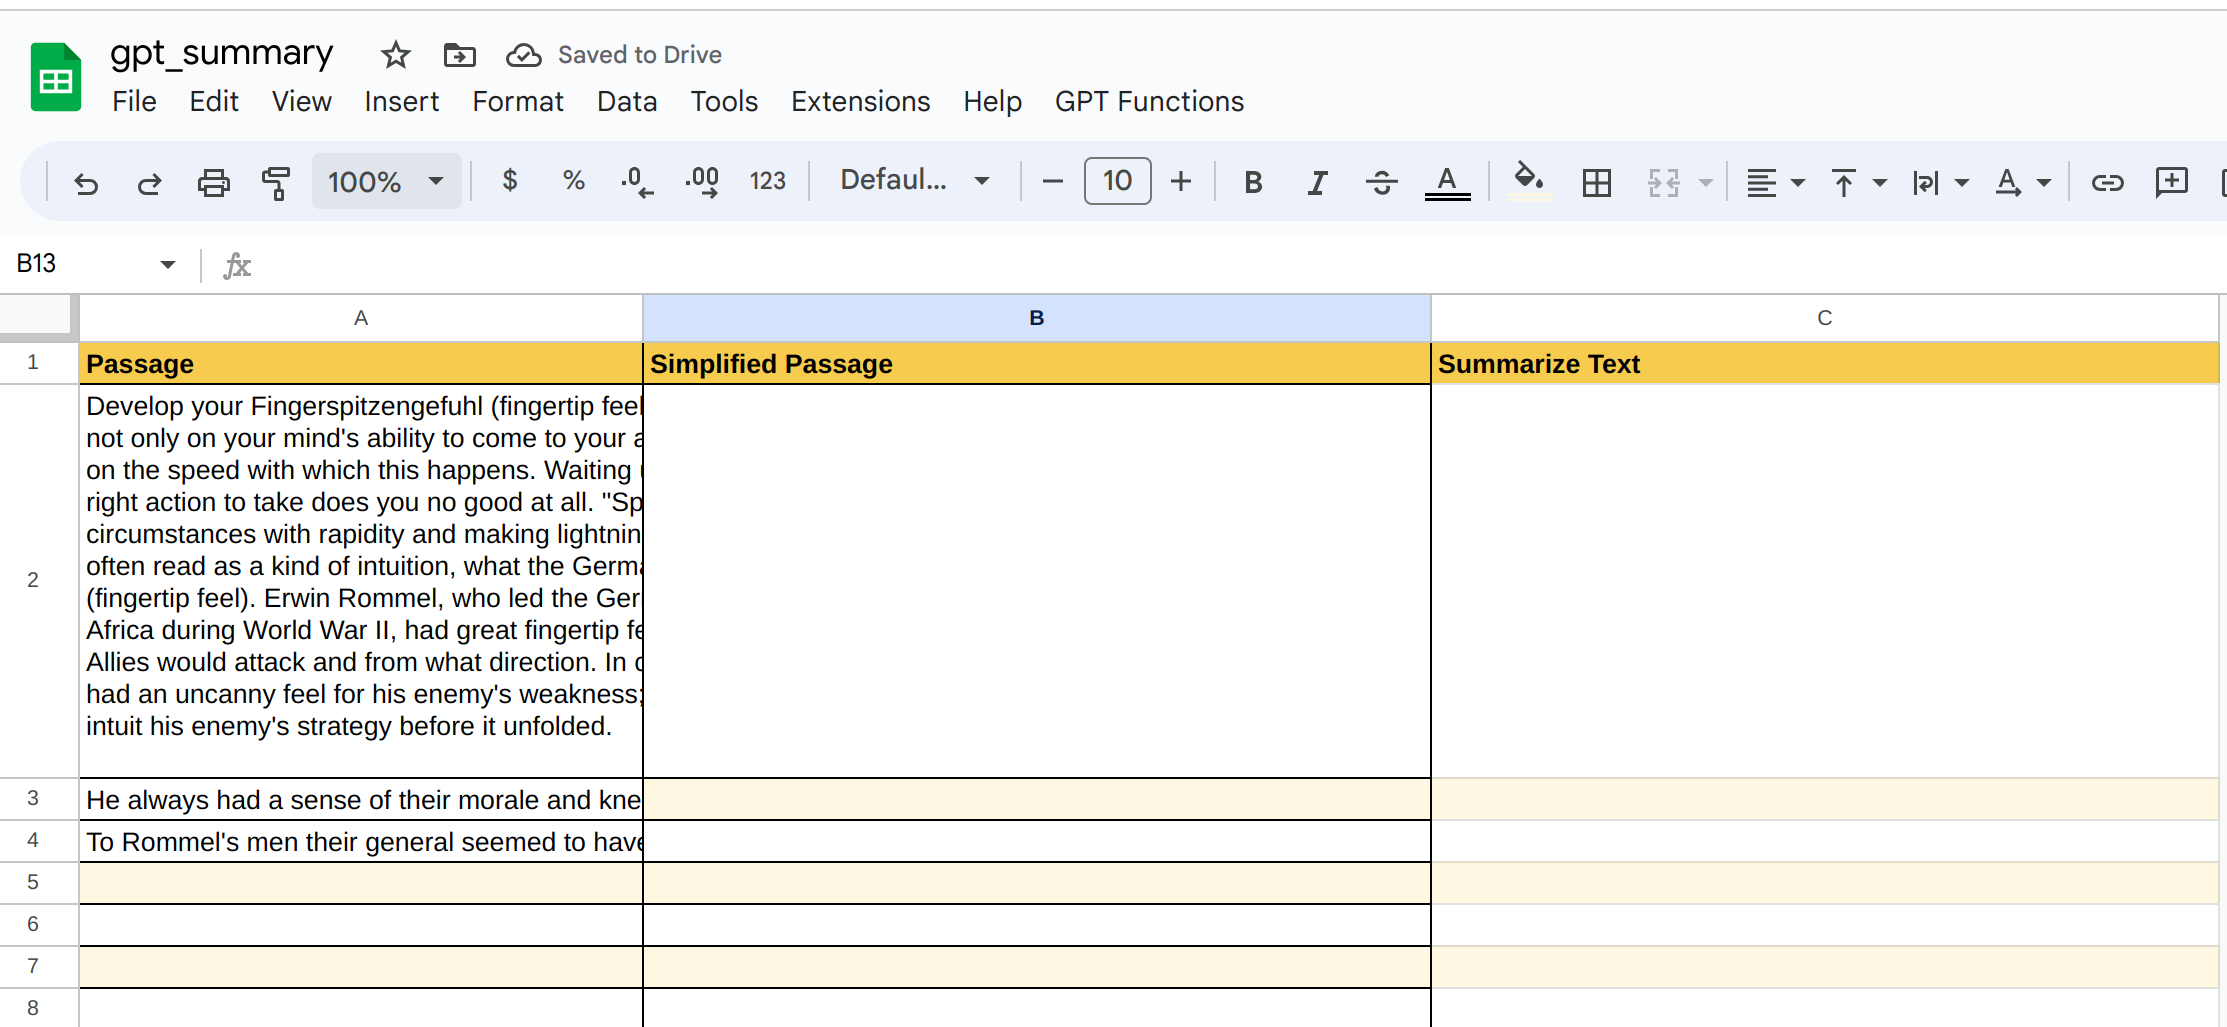 Spreadsheet Sample
I have named my spreadsheet GPT_Integration with three columns: Passage, Simplified Passage, and Summarized Text.
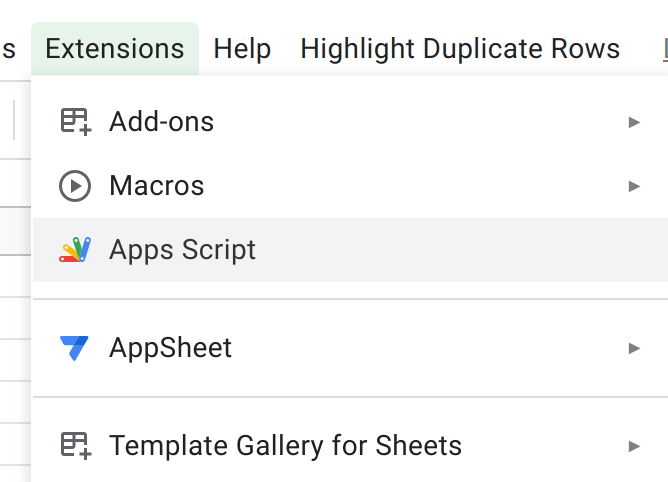
Let's open the app script for this spreadsheet, rename it to GPT_integration, and also rename the existing file to utils.gs. We'll create a function called fetchData here.
const CHAT_GPT_API_KEY = "paste your API key here";
const BASE_URL = "https://api.openai.com/v1/chat/completions";


function fetchData(systemContent, userContent) {
  try {
    const headers = {
      "Content-Type": "application/json",
      "Authorization": `Bearer ${CHAT_GPT_API_KEY}`
    };

    const options = {
      headers,
      method: "GET",
      muteHttpExceptions: true,
      payload: JSON.stringify({
        "model": "gpt-3.5-turbo",
        "messages": [{
          "role": "system",
          "content": systemContent,
        },
        {
          "role": "user",
          "content": userContent
        },
        ],
        "temperature": 0.7
      })
    };

    const response = JSON.parse(UrlFetchApp.fetch(BASE_URL, options));
    //console.log(response);
    //console.log(response.choices[0].message.content)
    return response.choices[0].message.content;
  } catch (e) {
    console.log(e)
    SpreadsheetApp.getActiveSpreadsheet().toast("Some Error Occured Please check your formula or try again later.");
    return "Some Error Occured Please check your formula or try again later.";
  }
}
Here are some key points to notice in the code above:
- Paste the API key that you created earlier inside the quotes.
- We will be using the Chat Completions API. You can find more details about it here.
- ChatGPT models have different roles, such as system, user, and assistant.
- The systemContent parameter is where you provide roleplay for the GPT system. For example, you could say "You're an expert algebra teacher" or "You're an expert CV writer".
- The userContent parameter is where you provide tasks to perform for the model. In our case, we will provide long passages from the spreadsheet to summarize and simplify.
- We will be using the GPT 3.5 turbo model.
- We are muting HTTPExceptions so that we can use our own error message in the catch block.
- The error string is useful when we face errors such as Rate Limit Exceed.
We're returning the content from the response object of GPT that'll be later on handled by our formulas.
The response object from ChatGPT has following structure:
{
  "id": "chatcmpl-123",
  "object": "chat.completion",
  "created": 1677652288,
  "choices": [{
    "index": 0,
    "message": {
      "role": "assistant",
      "content": "\n\nHello there, how may I assist you today?",
    },
    "finish_reason": "stop"
  }],
  "usage": {
    "prompt_tokens": 9,
    "completion_tokens": 12,
    "total_tokens": 21
  }
}
Read more on how to use URLFetchApp from here.
Step 3 – Integrate ChatGpt as a Sheets Formula
GPT SIMPLIFY Formula
Again, for the custom formula, we'll create a new file named formula and then we will create a function named GPT_SIMPLIFY.
/**
 * Simplifies the given paragraph in layman's term.
 * @param {String} input The value to simplify.
 * @return Simplified Text.
 * @customfunction
 */
function GPT_SIMPLIFY(input) {
  console.log(input)
  const systemContent = "Simplify the given text in layman's term. Remember reader is not an expert in english.";
  return Array.isArray(input) ?
    input.flat().map(text => fetchData(systemContent, text)) :
    fetchData(systemContent, input);

}
- The
GPT_SIMPLIFYformula simplifies whatever text is provided as input. The input to this function is data that is coming from the spreadsheet. When you select a range, a cell, or multiple cells, the data in the range will be automatically provided by the spreadsheet to this formula. - The
systemContentis defined to be passed as the first parameter to thefetchData(systemContent,userContent)function. - We are checking if the input is an Array because the data passed to this function can either be a nested array or just a string if we select multiple cells or single cell, respectively, in the spreadsheet.
You can read more on custom functions on this page.
Now go ahead and apply this formula in your spreadsheet. I copied some text from a book I'm reading in the first column and applied the formula in the second column named "Simplify Passage", like this =GPT_SIMPLIFY(A2) for the second cell.
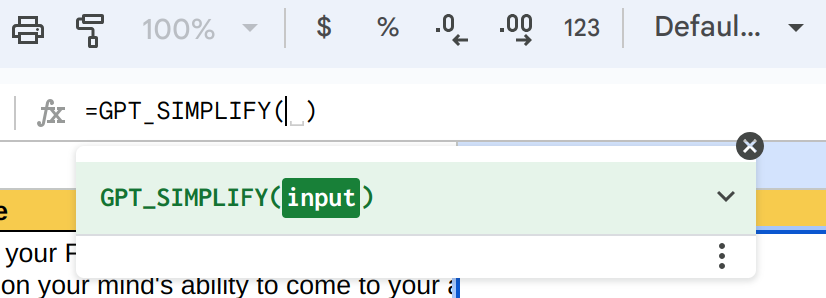 _Appilcation of GPTSIMPLIFY Formula
Note: Make sure to refresh the spreadsheet before you apply the formula to sync with the latest changes in the script.
GPT SUMMARIZE
To summarize the formula we'll just copy the simplify function and some other things, as you can see in the code below.
/**
 * Summarzies the given paragraph. It provides from 3-5 bullet points
 *
 * @param {String} input The value to summarize.
 * @return summarize Text.
 * @customfunction
 */
function GPT_SUMMARY(input) {
  console.log(input)
  const systemContent = "Summarize the given text. Provide atleast 3 and atmost 5 bullet points.";
  return Array.isArray(input) ?
    input.flat().map(text => fetchData(systemContent, text)) :
    fetchData(systemContent, input);

}
The main thing to notice here is the different system content.
Note: Since this is not a tutorial on how to use ChatGpt optimally, I provided instructions as the system content instead of role-play, and then just provided data in the user content. You can improvise this by providing roles in system content, and tasks as well as data as two different user roles in our FetchData() function.
GPT Rate Limit Error
For free users, the rate limit to use the API is 3/minute. As such, when you apply these formulas in more than three cells you'll encounter the error. Luckily the execution won't stop because we're returning an error string from fetch data which will be saved into those cells.
 API rate limit error
Auto Refresh and Error
Moreover, the auto-refresh feature of the formula can force the re-application of the formula on cells that already have satisfying values whenever source cells are updated, in our case cells in column "A".
When we add a rate limit on top of auto-refresh it can cause a conundrum. You can technically make changes in custom functions to accommodate such circumstances but, I like to keep formulas light and efficient. So, I recommend we instead create custom menus and apply these functions manually.
Step 4 – Integrate GPT Chat API in Spreadsheet Menu Functions
GPT Simplify Menu
First, let's create another file named menu. Then we'll create the gptSimplifyMenu function which will be an alternative to the GPT_SIMPLIFY formula.
/**
 * Simplifies the given paragraph in layman's term.
 * @customfunction
 */
function gptSimplifyMenu() {
  try {
    // get sheets and data
    const ss = SpreadsheetApp.getActiveSheet();
    const data = ss.getDataRange().getValues();
    const lastRow = data.length;
    const lastCol = data[0].length;

    // define gpt's role play
    const systemContent = "Simplify the given text in layman's term. Remember reader is not an expert in english.";


    for (let i = 1; i < data.length; i++) {
      // only simplify if not already simplified or error occured previously
      if (data[i][1] === "" || data[i][1] === "Some Error Occured Please check your formula or try again later.") {
        data[i][1] = fetchData(systemContent, data[i][0]);
        console.log(data[i][1]);

      }
    }

    ss.getRange(1, 1, lastRow, lastCol).setValues(data);
  } catch (e) {
    console.log(e)
    SpreadsheetApp.getActiveSpreadsheet().toast("Some Error Occured Please check your formula or try again later.");

  }
}
Key points that are different to understand in this code are:
- We're hardcoding the data sources, as such data[i][1], which refers to the second column (that is "Simplified Passage") as shown in the spreadsheet image above. This means that if you're using some other columns to save data from ChatGPT to, then you'll have to make changes according to it.
- We only fetch data when the target cell is empty or contains an error message. This helps to avoid unnecessary API calls.
Add a Custom Function as a Spreadsheet Menu
The function is ready to be tested, but it still will not appear in the spreadsheet. To do so, we'll need to provide the following instructions.
/**
 * Menu creates menu UI in spreadsheet.
 */
function createCustomMenu() {
   // define menu ui
  let menu = SpreadsheetApp.getUi().createMenu("GPT Functions");
   // add function to the menu
   menu.addItem("GPT SIMPLIFY", "gptSimplifyMenu");
   // add menu to the spreadsheet ui
  menu.addToUi();
}

/**
 * OnOpen trigger that creates menu
 * @param {Dictionary} e
 */
function onOpen(e) {
  createCustomMenu();
}
In createCustomMenu():
- We define menu with
SpreadsheetApp.getUi().createMenu("GPT Functions")as GPT Functions the title appearing in the spreadsheet tab. - We add a function to the menu with the
menu.addItem("GPT SIMPLIFY", "gptSimplifyMenu"), where the first parameter is the title for display and the second is the function to call when pressed. - Add the menu to the UI with
menu.addToUi().
The onOpen trigger runs automatically whenever the document the script is attached to reloads and as such will add a menu to the spreadsheet as shown in the image below.
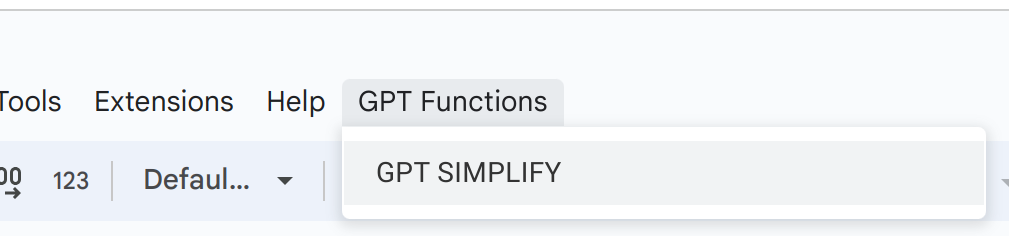
Go ahead and try the formula – it'll only be applied if the cell is either empty or prefilled with an error message.
GPT Summarize Menu
We'll make some minor changes after copying the simplify function as shown below:
/**
 * Summarzies the given paragraph. It provides from 3-5 bullet points
 * @customfunction
 */
function gptSummaryMenu() {
  try {
    // get sheets and data
    const ss = SpreadsheetApp.getActiveSheet();
    const data = ss.getDataRange().getValues();
    const lastRow = data.length;
    const lastCol = data[0].length;

    // define gpt's role play
    const systemContent = "Summarize the given text. Provide atleast 3 and atmost 5 bullet points.";


    for (let i = 0; i < data.length; i++) {
      console.log(`Inside gptSummaryMenu() for loop`)

      if (i == 0) continue;
      // only summarize if not already summarized or error occured previously
      if (data[i][2] === "" || data[i][2] === "Some Error Occured Please check your formula or try again later.") {
        data[i][2] = fetchData(systemContent, data[i][0]);
        console.log(data[i][2]);
      }
    }

    ss.getRange(1, 1, lastRow, lastCol).setValues(data);
  } catch (e) {
    console.log(e)
    SpreadsheetApp.getActiveSpreadsheet().toast("Some Error Occured Please check your formula or try again later.");
  }
}
- The system role has been changed to address summary instruction.
- The target column to save data is now the third column.
- The doc string has been adjusted as well.
As for adding this function to the menu I'll leave it to you.
Tips to Modify the Code
All you need to make your own formula like =GPT_COVER_LETTER_CREATOR() are the following modifications:
To FetchData
You can change System Content Description should to address your needs, like "You write an expert cover letter for software developers".
Add one more instruction in the messages array:
// from this
[{
          "role": "system",
          "content": systemContent,
        },
        {
          "role": "user",
          "content": userContent
        },
        ],

// to
[{
          "role": "system",
          "content": "You write an expert cover letter for software developers",
        },
        {
          "role": "user",
          "content": "Write me a cover letter for this given job advertisement"
        },
        {
          "role": "user",
          "content": userContent // this is job ad from spreadsheet
        },
        ],
You can also add another list item to include your skills and experiences.
Other Functions
Just make sure that your source cell/columns and target cell/columns are accurately indexed (for instance, if you're not using the first column as the source cell and the second to save the data).
Summary
In this tutorial, you learned how to use Google Apps Script to fetch ChatGPT responses from the API and save them into spreadsheets using custom formulas and custom menus.
We started by creating a new Google Apps Script project and adding the ChatGPT API. Then, we wrote a script that would fetch a ChatGPT response for a given prompt. We saved the response using a custom formula into a spreadsheet cell.
We also created a custom menu item that would allow us to fetch a ChatGPT response from any cell in the spreadsheet. This menu item would open a button to fetch the response.
The final step was to share the spreadsheet with others so that they could use the custom formulas and menus to fetch ChatGPT responses.
I hope you enjoyed this article and found it helpful. If you have any questions, just let me know.
I am Nibesh Khadka, Freelancer specializing in automating Google products with Apps Script. Contact me if you need my services at me@nibeshkhadka.com.