
By Faith Oyama
Data validation is a feature in Excel used in restricting data entry in specific cells. It can also prompt the user to enter valid data into the cells based on the rules and restrictions provided by the creator of the Excel worksheet.
When setting up a workbook, you might want to make sure users input a specific type of data. For example, you might want to allow only dates, numbers, or letters in a specific range to be imputed in a cell. This is crucial if you want to eliminate mistakes as much as possible in your data.
Types of Data Validation Rules in Excel
Here are a few data validation rules you can set up in Excel:
- Only allow text or numeric values in a cell.
- Only allow numbers within a specific range.
- Display a warning message when a user inputs the wrong data.
- Only allow dates and times outside a given range.
- Validation rule based on criteria from another cell.
Steps to Create Data Validation Rules in Excel.
To create a data validation rule in Excel, do the following:
First, select the row, column, or specific cell you want to apply a data validation rule to.
Then open the data pane and click on the data validation. Alternatively, you can go directly to the data validation dialogue box by pressing the following keys on your keyboard separately. ALT > D > L. Do not hold the keys together, press the keys separately and you will be taken to the dialogue box as well.

Create the data validation based on what data you want to be supplied in the cell or row.
You can supply the following validation criteria:
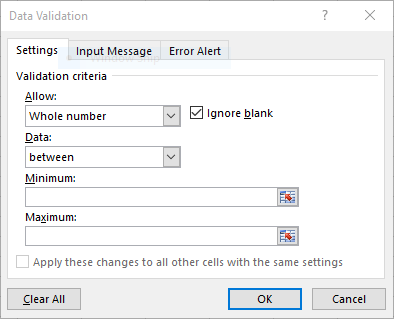
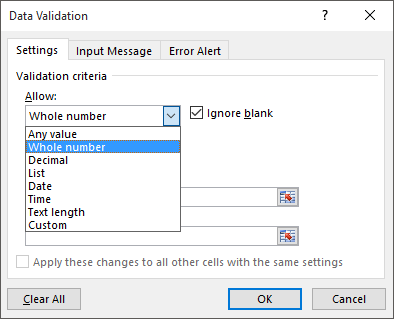
Allow: Make a rule based on the type of data you want to allow. You can choose one from the drop-down menu. You can uncheck the “Ignore blank” button if you do not want blank spaces.
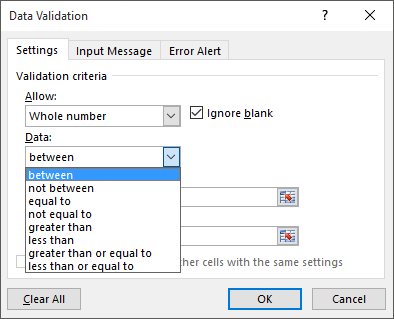
Data: From the drop-down menu you can choose the criteria and also input the minimum and maximum values you want the user to input.
With the validation criteria set, click OK to close the window or click on the Input Message or Error Alert tab to give the user more information on the data validation rule.
Input message: While this is optional, you can input a message to be displayed when a user clicks on a cell that has a data validation rule defined on it.

Next, give your input message a title, and under the input message, make sure the message you provide is clear to the user. Click on OK to close the dialogue box or navigate to the Error Alert tab.
Then display an error message. This is optional, but it is good practice to display an error message to users when they enter data that is outside the validation rule you set.
There are three types of error alerts:
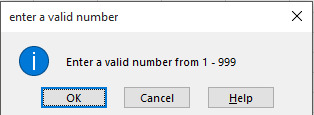
- Stop: This is the default and is very strict, as it stops users from entering invalid data. You can only click on “Retry” or “Cancel”

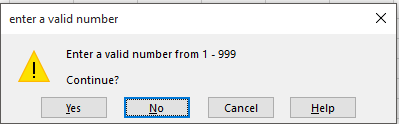
- Warning: This will only warn the user but is not as strict as the stop warning. A user can ignore the message by clicking “YES” the invalid data will be inputted.
Here’s an example of the warning message a user will get:
- Information: This is a permissive type of error alert as it only informs the user about invalid data inputted.
If the user clicks OK, the invalid gets inserted into the worksheet. If the user clicks on Cancel, the data gets deleted.
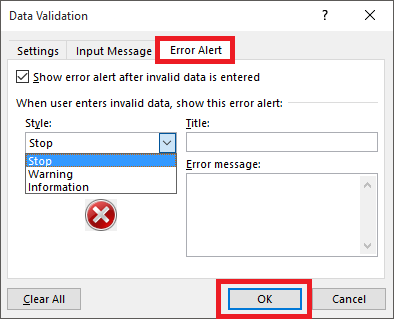
Give a title to the error alert and also provide a message for your users to see. When you’re done, click on OK, and your data validation rule has been set.
Conclusion
Data validation in Excel is one powerful feature you should utilize when creating an Excel spreadsheet.
You can use the data validation feature in Excel to make rules that will ensure the data inputted meets certain criteria or follows predefined rules. Setting a data validation rule helps to maintain data accuracy, consistency, and integrity within your Excel worksheet.