By Timonwa Akintokun
A code Snippet is a programming term that refers to a small portion of re-usable source code, machine code, or text.
Snippets help programmers reduce the time it takes to type in repetitive information while coding. Code Snippets are a feature on most text editors, code editors, and IDEs.
In this tutorial, we're going to learn how to write our own custom snippets.
Prerequisites
For this tutorial, I'll assume that you can write a decent amount of code in the language you want to create a code snippet for.
And with that confirmed...

Why Code Snippets are Useful
When I first started learning how to code, the first code snippet I ever used was Ctrl + ! and enter to get an HTML5 document template. (I doubt anyone knows how to write that by heart.) It was cool and I felt like a code ninja.
(PS: if you don't want to read the back story and just wanna dive right into the tutorial, then jump right into it.)
As I started exploring more into coding, I learned about VSCode extensions that made coding faster – code snippets in particular – and I then went on a downloading spree.
All was going fine and well until I started frequently using frameworks and libraries in my projects. This involved me trying to remember how to link my documents to their packages and also use personalized CSS resets and variables.
Plus I was always forgetting to link my stylesheets to my HTML pages, making me spend an unreasonable amount of time trying to figure out why my pages were not being styled correctly. (I still forget to do so now and then.)
That got me thinking about having my personalized HTML and CSS templates which would have all the base code I always used in my projects.
At first, I just created the templates and saved them on my system so I could copy the code any time I started a new project. But that also was getting stressful, and I wanted to just type in a few letters, press enter, and boom have my templates showing on my screen. And that was when I learned about VsCode Code Snippets.
I didn't know it was called code snippets at that time, so I spent over 2 weeks trying to find a tool that could help me do this and I almost gave up. Until I randomly stumbled on Brad Travesty's video on one of my daily evening wanderings on the streets of YouTube without actively searching for it.
It was a lifesaver, and every once in a while I add new custom snippets to my collection. You can check out my personalized HTML and CSS templates here.
You've likely often wished that you had a custom snippet of a particular piece of code you use all the time but didn't know how to create or find it. Well, wish no more for I'm about to show you how to easily create your own.
How to Create Custom Code Snippets
Creating your own custom snippet is quite easy. And with the help of another tool called Snippet Generator (which I will show you how to use shortly), it becomes even easier.
Step 1: Check if your editor lets you create custom snippets
You can check the docs on your code editor to find out if the feature is available and how to access it.
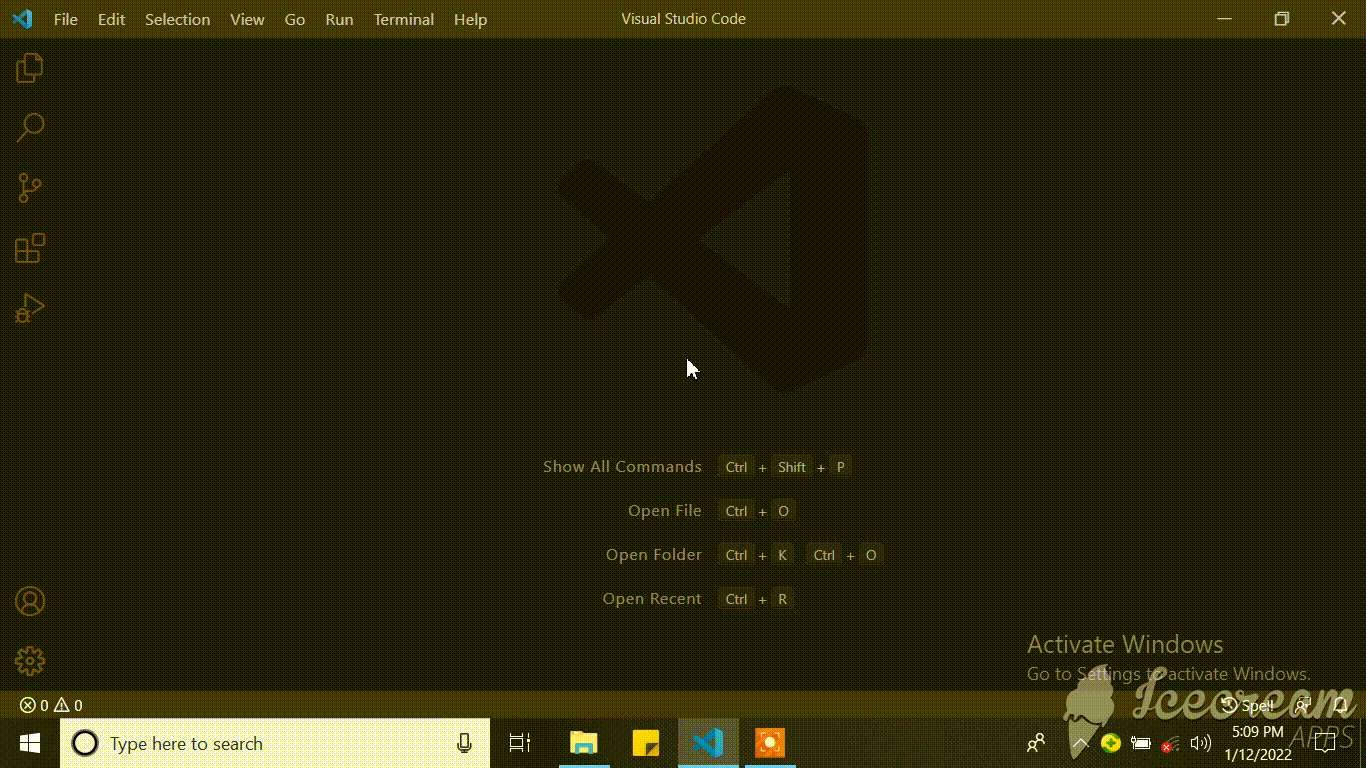
I am using VsCode for this tutorial. You can download it here.
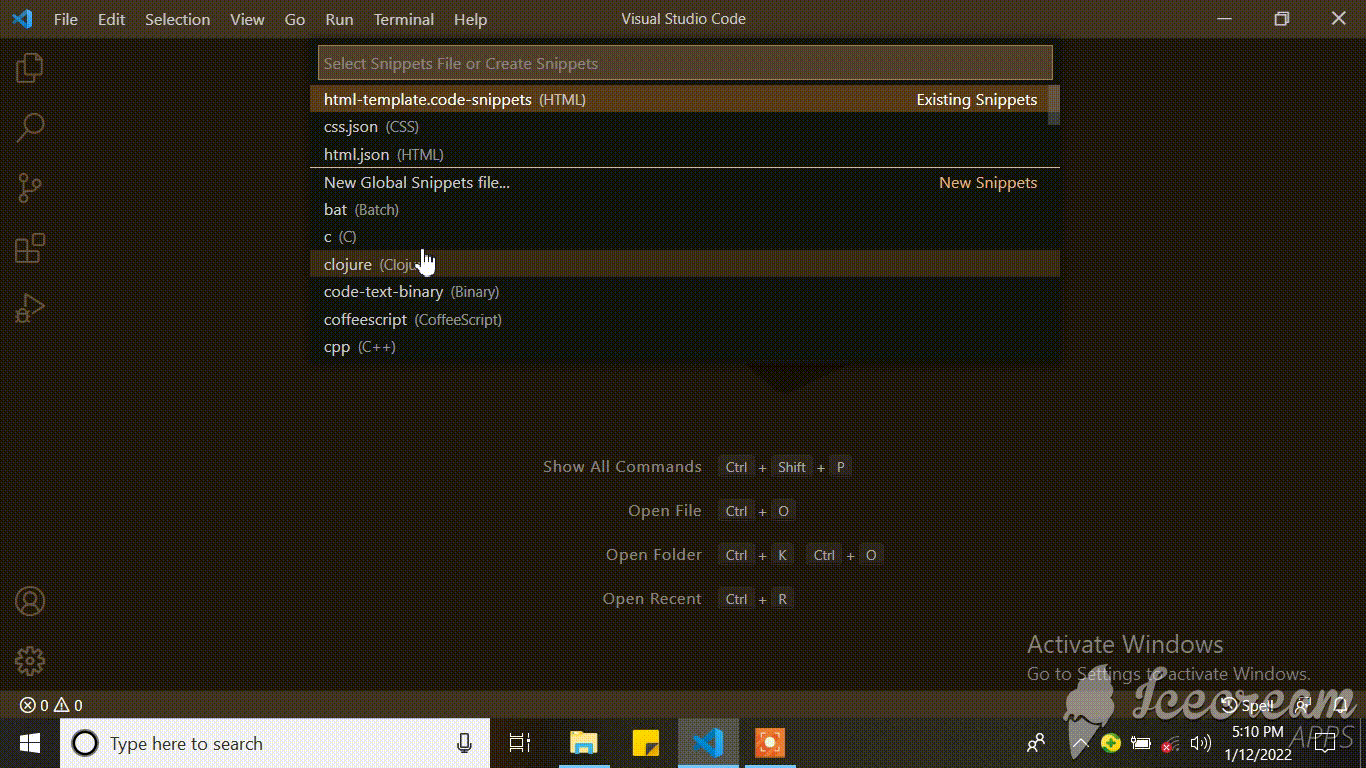
To access this setting, you can either click on the settings icon on the sidebar and then click on user snippets or open up the command palette using Cntr + shift + p on Windows or CMD + shift + p on Mac, typing in "snippet" and clicking on Preferences: Configure User Snippets.
This will give you a drop-down with different language selections to choose from.
Step 2: Decide your Snippet Scope
You can either create a global snippet that you can use across all languages or create a local snippet scoped to a particular language.
So from the drop-down, you can see New Global Snippet File and then a bunch of languages in alphabetical order.
Scroll to the language you want to write your snippet for and click on it (or select New Global Snippet File if you want to use your snippets in multiple languages).
If you selected a particular language, HTML for example, the file will automatically open. But if you chose Global snippet, you'll be prompted to type in the name of the snippet file before it opens.
For this one, I'll be using a Global Snippet.
Step 3: Understand the Syntax
The Syntax for code snippet is quite easy actually. It is written in JSON format and each file can contain an unlimited number of snippets.
{
// Code Snippet 1
  "Snippet name": {
    "scope": "language1, language2"
    "prefix": "trigger word 1",
    "body": ["your code snippet"],
    "description": "description of the code"
  },
// Code Snippet 2
  "Snippet name": {
    "scope": "language1, language2"
    "prefix": ["trigger word 1, trigger word 2"],
    "body": ["your code snippet"],
    "description": "description of the code"
  }
}
Let's see what's going on in this code:
Snippet Name
The Snippet Name is the name of the snippet. It is also what will be displayed via IntelliSense if no description is provided.
Scope
This determines what languages are allowed to use the snippet. Enter the name of the language(s) separated by a comma. If you leave it empty or omit it, the snippet can be accessed by any language. This part is included in Global Snippets only, as Local Snippets files are already locally scoped.
Prefix
This describes one or more trigger words that will prompt IntelliSense to display the snippet.
Body
This can be a string if it is one-line code or an array of strings if it is multi-line code.
Description
This describes the snippet and what it does. If this is omitted, the name of the snippet will be used instead.
Snippet example 1:
{
// log to console
  "Print to console": {
    "scope": "javascript, typescript",
    "prefix": "log",
    "body": "console.log();",
    "description": "Log output to console"
  }
}
From the above example, our snippet name is Print to console, and it can only be used in a JavaScript and TypeScript file. If you were to type log in a JavaScript or TypeScript file, IntelliSense would show it along with the description Log output to console. Once you select it and click enter, you'd see console.log() on the screen.

Step 4: Add Tab Stops
Tabstops allow you to move the editor cursor inside a snippet. $1, $2, ..., $n specify cursor locations it should move into sequentially when you hit the tab key. $0 represents the final position the cursor should stop.
Snippet example 2:
// named function
{
  "Named Function": {
    "scope": "javascript, typescript",
    "prefix": "nfn",
    "body": [
      "function $1($2){",
      "  $0",
      "}"
    ],
    "description": ""
  }
}
In this example, when you type nfn, our Named Function snippet shows up. Once you select it, you'll see your snippet on the screen. You'll also see that the cursor is now before the parenthesis as opposed to being at the end of the code.
Type in the name of the function, "GetUsers" for example, and then hit the tab button. You will notice that the cursor has now moved into the parenthesis.
You can type in the parameter if it has one or and hit the tab key again to move the cursor to the next tab stop which is between the curly brackets where our function body will go.

Note: When you are writing multi-line code, you cannot use a tab to indent your code in the JSON syntax. You can only use 2 spaces to indent your code, or whatever number of spacing indentation you use to write your code.
Step 5: Use Placeholders
These are Tab Stops with values. They help the user easily identify or understand what they are supposed to type at that particular tab stop.
The placeholder will be automatically highlighted so you can immediately type in what you want to replace it with.
Snippet example 3:
// named function
{
  "Named Function": {
    "scope": "javascript, typescript",
    "prefix": "nfn",
    "body": [
      "function ${1:functionName}(${2:parameter}){",
      "  ${0:functionBody}",
      "}"
    ],
    "description": ""
  }
}

Step 6: Create Choices
Placeholders can have choices as values. This means that instead of typing in your value, you can choose from a dropdown selection.
To create one, you write the values which are separated by a comma between two pipe-characters, for example, ${1|one, two, three|}.
Snippet example 4:
// array method
{
"Array Method": {
    "scope": "javascript, typescript",
    "prefix": "arrmth",
    "body": [
      "${1|forEach, map, filter, reduce|}((${2:item}) => {",
      "  $0",
      "})"
    ],
    "description": ""
  }
}

Here, once you type in arrmth, select it from IntelliSense and hit enter. The first tab stop will be a dropdown of array choices to select from. The next tab stop is the parameter and the last stop is the function code.
Snippet Generators
As your snippets begin to grow in lines and size, it becomes difficult to type and create them within your code editor. This is where a snippet generator comes in.
A snippet generator will take in your regular code and turn it into a code snippet.
I will be using Snippet Generator for this tutorial. With this particular snippet generator, you can write code snippets for VsCode, Sublime Text, and Atom.
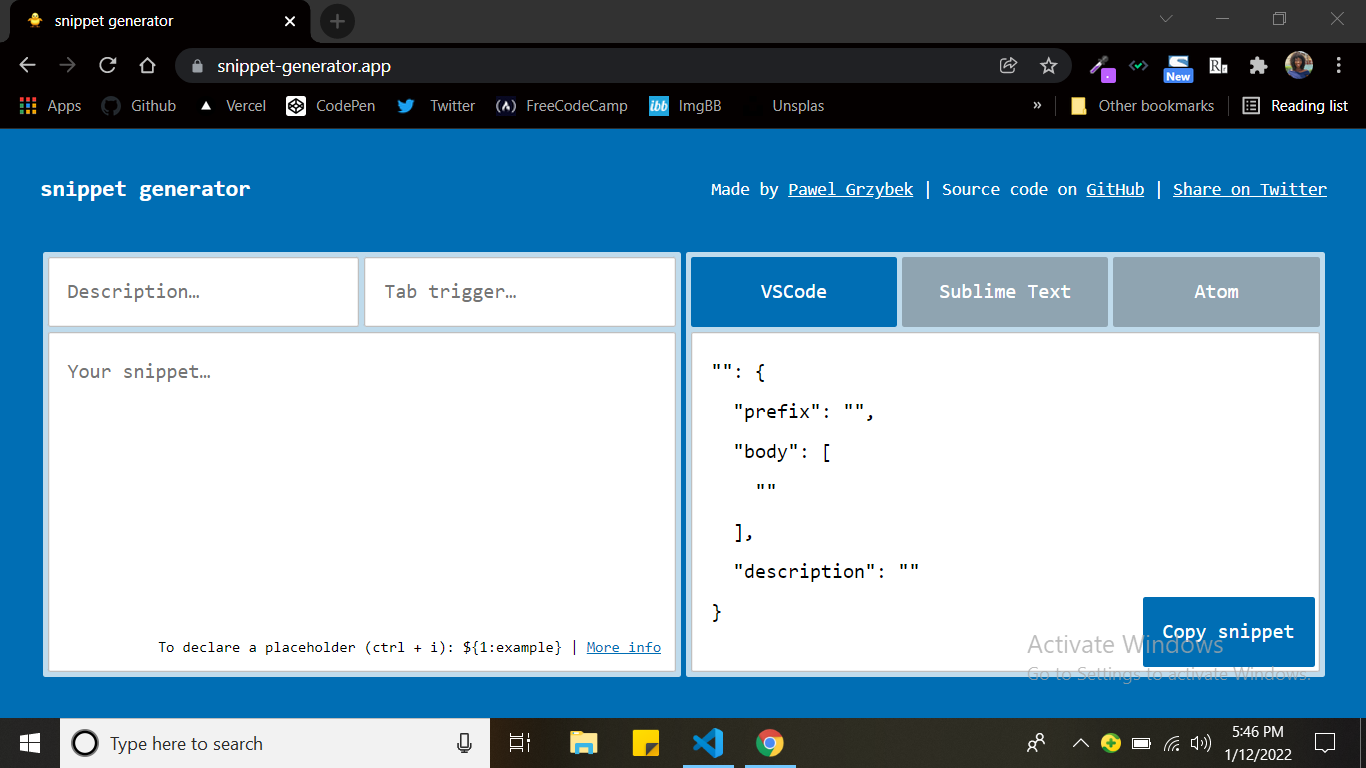
How to Use the Snippet Generator
In the description input, enter the name of the code snippet which will be used as the name and description of the snippet.
In the tab trigger input, enter the prefix of your code snippet.
In the your snippet.. input, enter your code in its natural form as you would without writing it as an array of strings.
After this, you can then add in Tabstops, Placeholders, and Choices as explained above.
Snippet example 5:
//named function
function ${1:functionName}(${2: parameter}) {
  ${0:functionBody}
}
![]()
Snippet example 6:
//array method
${1|forEach, map, filter, reduce,|}((${2:item}) => {
 $0
)}

Final Snippet Code
{
  // log to console
  "Print to console": {
    "scope": "javascript, typescript",
    "prefix": "log",
    "body": "console.log();",
    "description": "Log output to console"
  },
  // named function
  "Named Function": {
    "scope": "javascript, typescript",
    "prefix": "nfn",
    "body": [
      "function ${1:functionName}(${2:parameter}){",
      "  ${0:functionBody}",
      "}"
    ],
    "description": ""
  },
  // array method
  "Array Method": {
    "scope": "javascript, typescript",
    "prefix": "arrmth",
    "body": [
      "${1|forEach, map, filter, reduce|}((${2:item}) => {",
      "  $0",
      "})"
    ],
    "description": ""
  }
}
And that's it. Easy peasy lemon squeezy.
Recap
Let's do a recap. We have learned that:
- a code snippet is a small portion of re-usable source code, machine code, or text which helps programmers reduce the time it takes to type in repetitive codes while programming.
- a code snippet file can contain an unlimited number of snippets.
- you can have a locally scoped snippet used within only one language file or a globally scoped snippet used within two or more language files.
- code snippets are written in JSON syntax.
- you can add tabstops, placeholders, and choices to your code snippets.
- you can also use a snippet generator to generate your snippets.
Thank you for reading my article. You can connect with me on Twitter, LinkedIn or my Blog.
I would love to know if you'll be creating your own custom snippets and what they might be. And do feel free to share this article with others who might find this useful too. Byeee!