
The Christmas season is a magical time of year. We have Santa flying around spreading cheer and Elf roaming around New York during our yearly rewatch with family and friends.
 Buddy the Elf waving
To get in the spirit, we’re going to spin up a web app that includes a map that tracks Santa on it!
Edit 12/23: Updated the app to request directly to Santa's route, just in case the original API doesn't work as originally expected.
What are we going to build?
We’re going to work through building a mapping app that tracks Santa’s route and his current location.
To achieve this, we’re going to spin up a premade Gatsby starter that will give us a basic foundation for a map, utilize Google’s unofficial API to grab Santa’s route, and overlay his position and route on top of the map with Leaflet.
Woah, a mapping app?
 Ay Caramba
Yup. If you haven’t played with maps before, don’t be discouraged! It's not as bad as you probably think. If you’d rather start with mapping basics, you can read more about how mapping works first.
What do we need before we get started?
For this exercise, I’m going to assume you have node or yarn installed. For each example, I'll use yarn, but use the tool of your choice.
You’ll also want to install Gatsby’s CLI globally which will allow us to use their Starter tools.
To set up Gatsby’s CLI, run the following command:
yarn global add gatsby-cli
After, you should be able to run gatsby -h to see the available commands, which means it’s successfully installed.
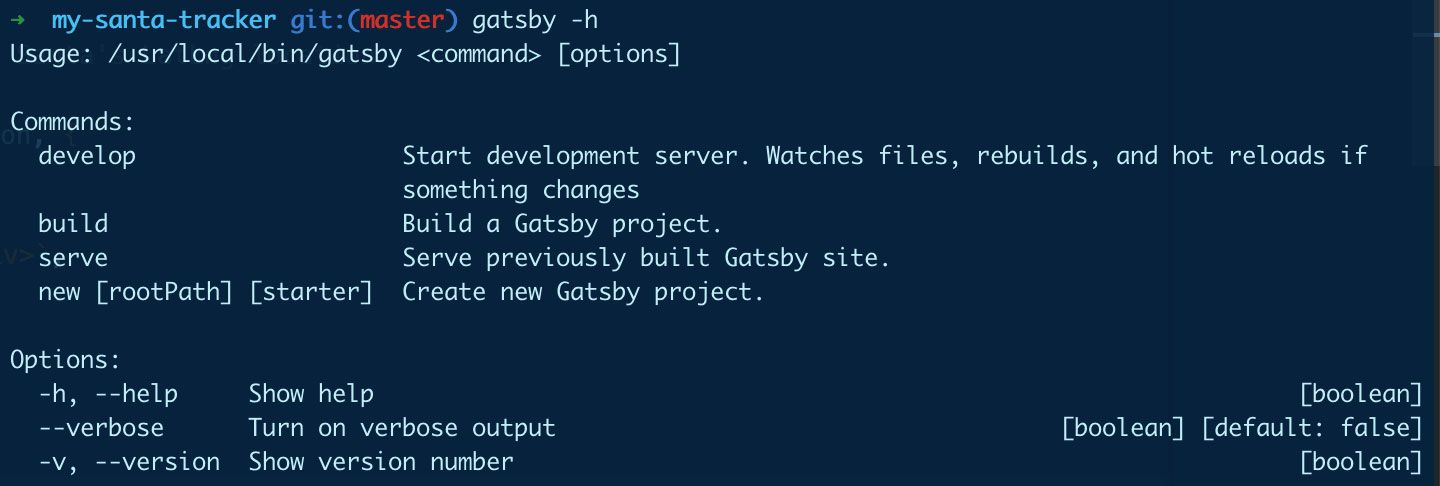 Running gatsby -h to verify install
For more info about the Gatsby CLI, you can check out their documentation.
Getting started with our map foundation
Once our command line tools are set up, the first thing we’ll want to do is create a new Gatsby project using a Leaflet starter I put together. It provides us with a basic setup with Leaflet and React Leaflet.
Starting in your project directory, let’s install the project:
gatsby new [directory] https://github.com/colbyfayock/gatsby-starter-leaflet
Make sure to replace [directory] with the location you want to set up your project.
Once you run that command, Gatsby will clone that project without any of the git references and install the packages required to start.
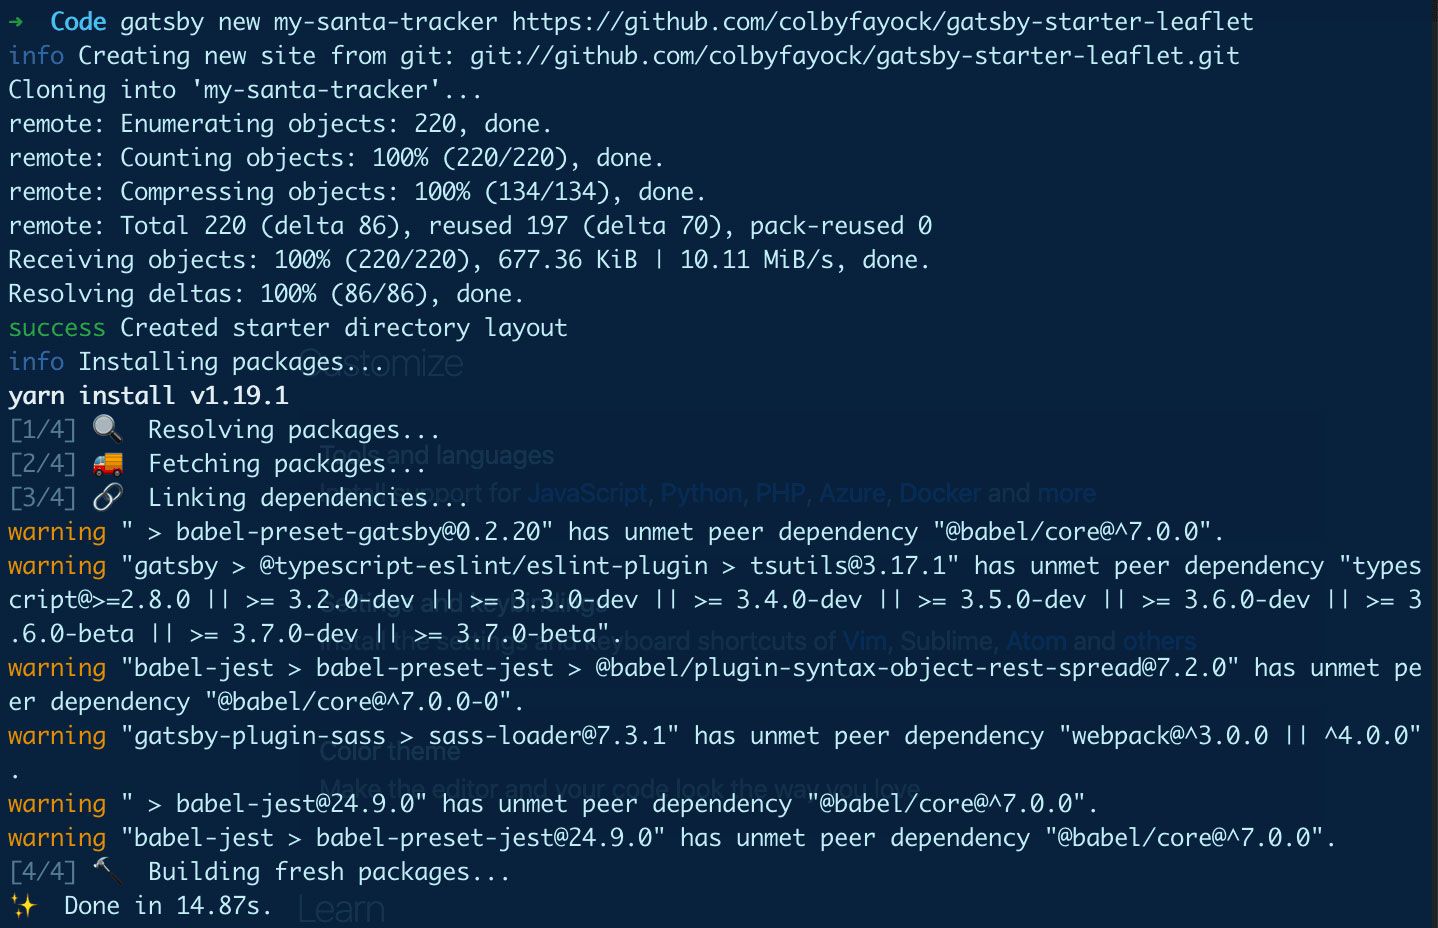 Installing Gatsby Starter Leaflet
To make sure it works, you can now navigate to that directory, spin up your server, and test it in the browser:
cd [directory]
yarn develop
Where you see [directory] above, make sure to use the same path as you did before when setting up the new Gatsby project.
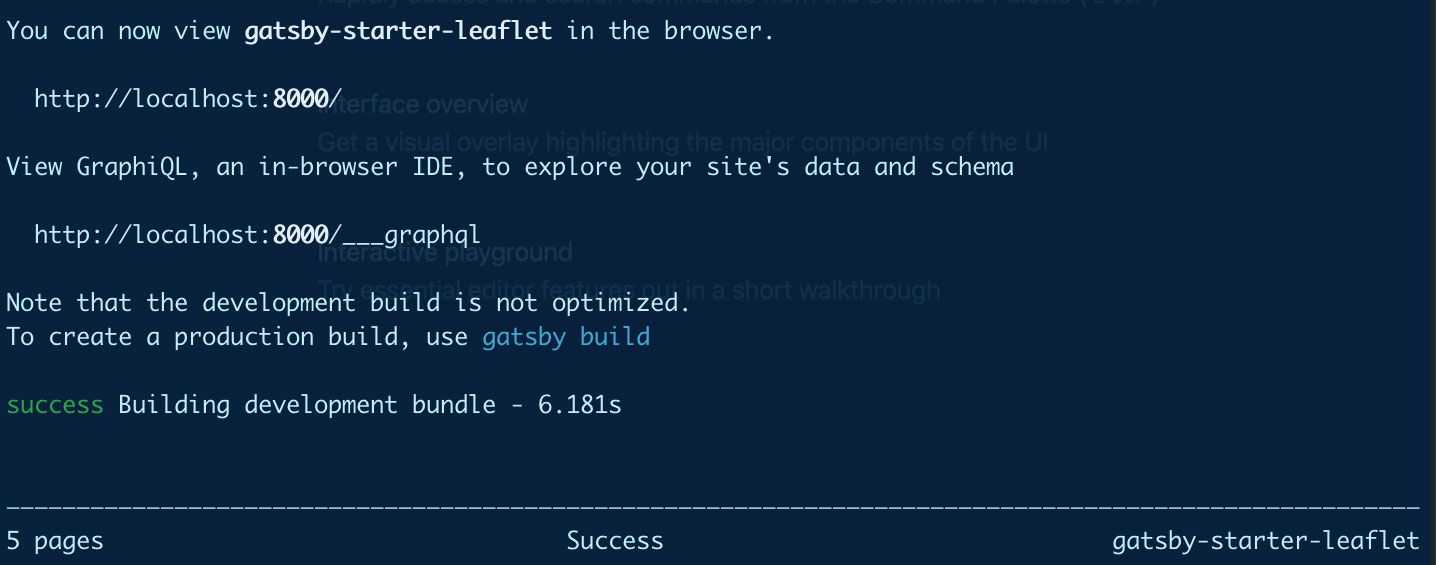 Running Gatsby Starter Leaflet
If all goes as planned, your server should start and you should now be able to see your basic mapping app in your browser!
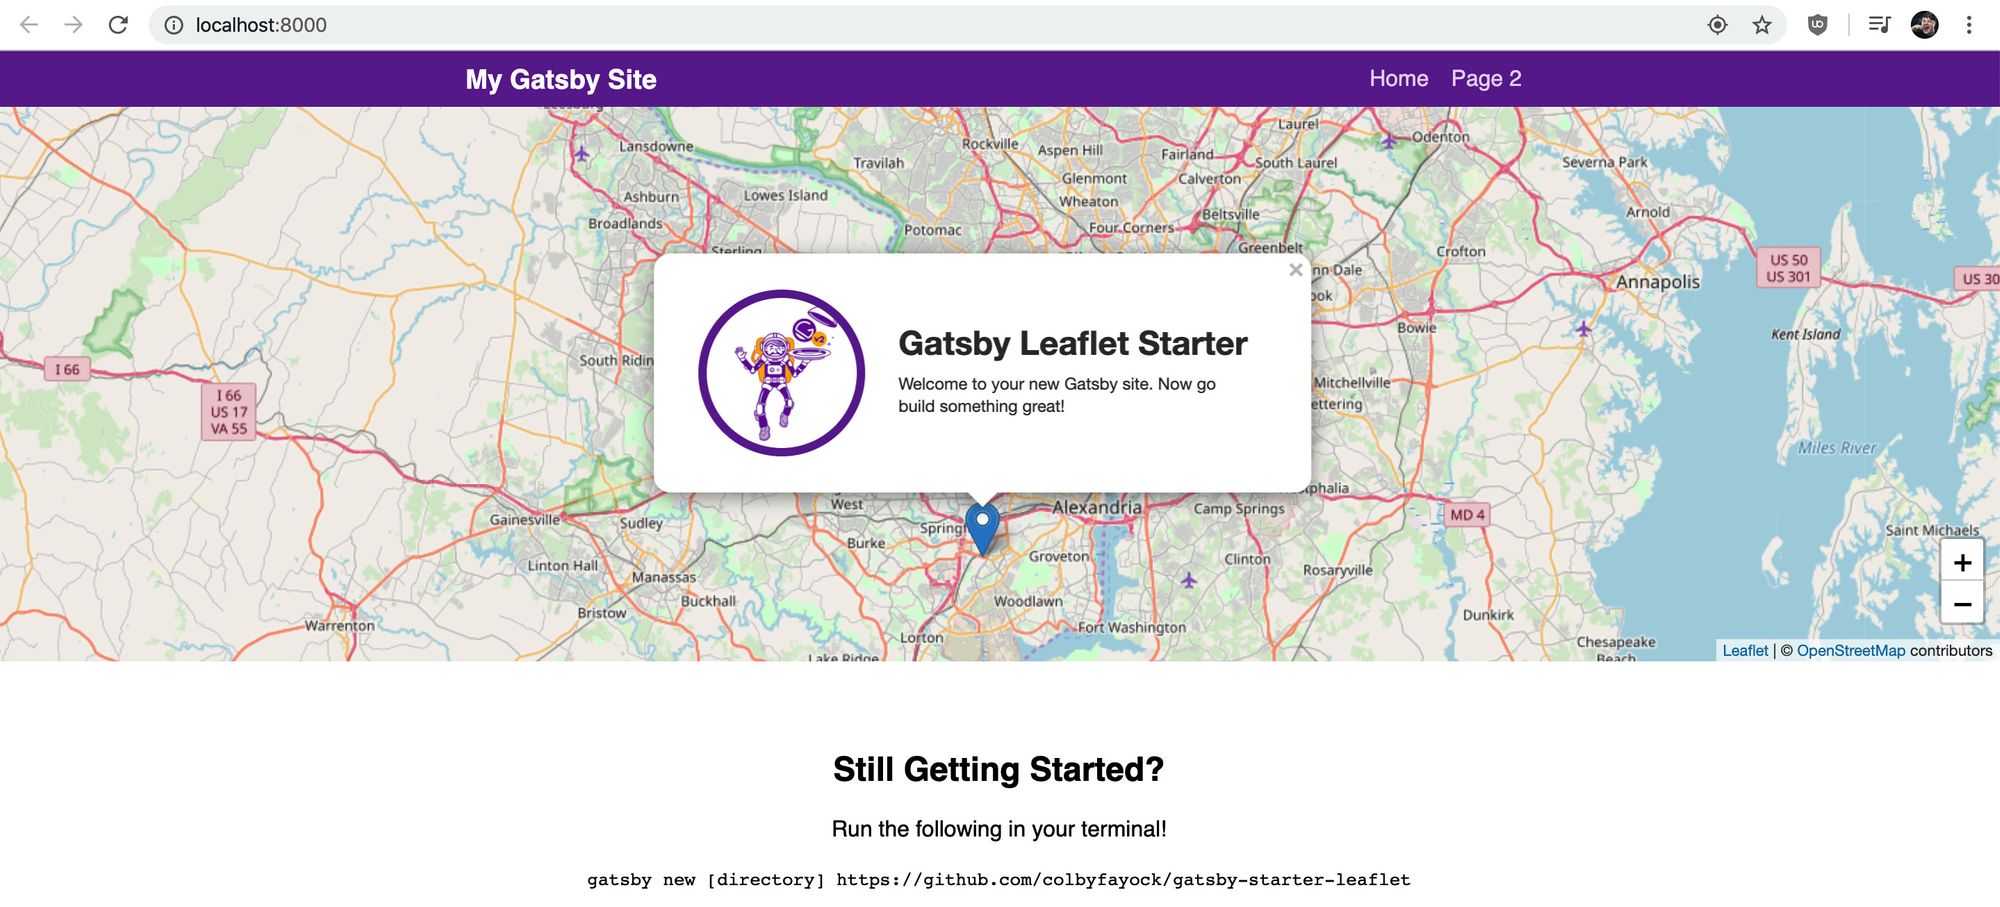 Gatsby Starter Leaflet in the browser
Cleaning things up
This starter comes with a quick example of how we can interact with the map. We're not going to need this at all for our purposes so we can go ahead and clean things up.
To start, we’re going to open up our index.js file, the homepage file, and get rid of everything inside of the mapEffect function, which leaves us with:
// In src/pages/index.js

async function mapEffect({ leafletElement } = {}) {
  // Get rid of everything in here
}
Now, let’s remove the Marker component nested inside of our Map, so we end up with:
<Map {…mapSettings} />
Now that we’re no longer using that functionality, we can get rid of the variables and references at the top of the file, so you can go ahead and remove:
- useRef
- promiseToFlyTo
- getCurrentLocation
- Marker
- gatsby_astronaut
- ZOOM
- timeToZoom
- timeToOpenPopupAfterZoom
- timeToUpdatePopupAfterZoom
- popupContentHello
- popupContentGatsby
- markerRef
Finding Santa
Now that we’re in a good place, let’s get our hands dirty and find Santa. To do this, we’re going to use Google’s unofficial, undocumented API. This means that it’s possible this API won’t be available the day after this get’s published, but let’s be optimistic.
Additionally, at the time of writing, it’s still showing last year’s destinations, so what we’re really going to be visualizing here is Santa’s previous year’s route, though the hope is this would reset on the 24th and we’ll all be merry!
Before we get Santa, let’s first add a line back to our mapEffect function:
async function mapEffect({ leafletElement } = {}) {
  if ( !leafletElement ) return;
}
What this will do is prevent the rest of our code from running in the event our map isn't ready yet. The mapEffect function itself, as you can see in the Map component, runs inside of an instance of useEffect passing an argument of a ref to the map, allowing us to run some code after our component renders.
So once we have that line, let’s now fetch Santa’s route inside of our mapEffect function:
async function mapEffect({ leafletElement } = {}) {
  if ( !leafletElement ) return;
  let route, routeJson;
  try {
    route = await fetch('https://firebasestorage.googleapis.com/v0/b/santa-tracker-firebase.appspot.com/o/route%2Fsanta_en.json?alt=media&2018b');
    routeJson = await route.json();
  } catch(e) {
    console.log(`Failed to find Santa!: ${e}`);
  }
  console.log(‘routeJson’, routeJson);
}
Let’s break this down:
- We grab Santa’s route via the API endpoint
- Once we have his route, we grab the response in a JSON format to make it easier to work with
- This is all wrapped in a try/catch so we can safely handle any response errors
- Finally, we just
logout our response for now
 Santa's route object in the web console
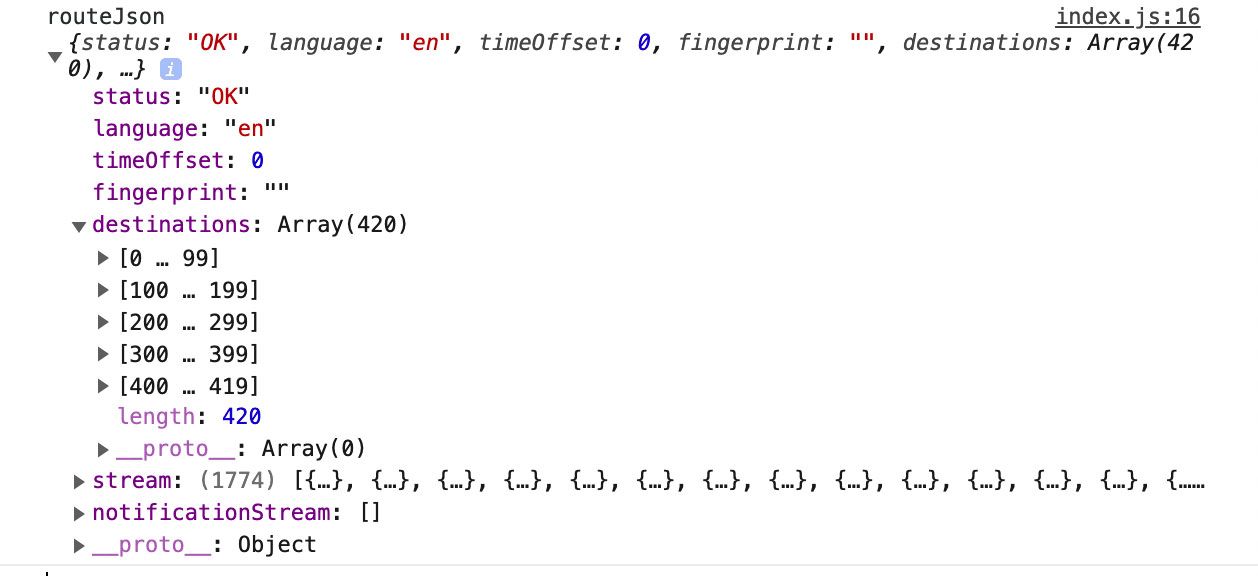
Now we have Santa and his route, which means we can see all the destinations in his route. If you dig in the response a little bit, you can see some fun things like how many presents were delivered to each location and the weather at the time!
Put a pin in his location
We found Santa! ? Now let’s put him on the map.
For our purposes, we’ll need to find the latitude and longitude of Santa. The problem is, we don’t get this exact value defined anywhere, we just get his destinations.
Since we don’t have his location specified anywhere, we can utilize his last known location where presents were delivered. Add the following after our last snippet inside the mapEffect function:
const { destinations = [] } = routeJson || {};
    const destinationsVisited = destinations.filter(({arrival}) => arrival < Date.now());
    const destinationsWithPresents = destinationsVisited.filter(({presentsDelivered}) => presentsDelivered > 0);
const lastKnownDestination = destinationsWithPresents[destinationsWithPresents.length - 1]
Below our request code, we:
- Destructure
routeJsonto grabdestinationsinto a constant, adding a fallback to an empty object - Filter the results to only find the destinations that he's visited, using the arrival time from the route object
- Filter the results to find only the locations with presents
- And finally grab the last item from the array, which shows his last known location
At this point in time, 12/23, we don't actually have any destinations, as Santa is still at the North Pole. At any time, we can test this out to simulate a future date by replaceing Date.now() in destinationsVisited with a future date, such as 1577188980000 which would be around 7pm Eastern on 12/24. With that change, we can see what Santa's route actually looks like!
Handle a missing Santa
Now that it's close to Christmas, Santa will still be at the North Pole, so let's handle the case where we don't have a location.
Above the line where we set lastKnownDestination, let's add:
if ( destinationsWithPresents.length === 0 ) {
  // Create a Leaflet Market instance using Santa's LatLng location
  const center = new L.LatLng( 0, 0 );
  const noSanta = L.marker( center, {
    icon: L.divIcon({
      className: 'icon',
      html: `<div class="icon-santa">?</div>`,
      iconSize: 50
    })
  });
  noSanta.addTo( leafletElement );
  noSanta.bindPopup( `Santa's still at the North Pole!` );
  noSanta.openPopup();
  return;
}
Okay so what are we doing here?
- First, we’re checking if we have any destinations with presents, which here we don't
- We first create a LatLng of the center of the map
- We create a Leaflet marker, using that center, with a custom Icon of Santa
- Next we add that Santa marker to the leafletElement, which is our map
- To show a message, we first bind a popup with a custom message and open it
- Finally we return so the rest of the code doesn’t run, as we don’t have Santa at this point
This was a section added after published to handle the API resetting, but you can still follow along with the code I added in context of the rest of the rest of the code.
Pinning Santa
Edit 12/23: This section was originally written with the previous year's API, but this is still a good example of what you'll expect on the response, so you can follow right along.
And as we can see, since we’re looking at last year’s data, Santa is back home at the North Pole.
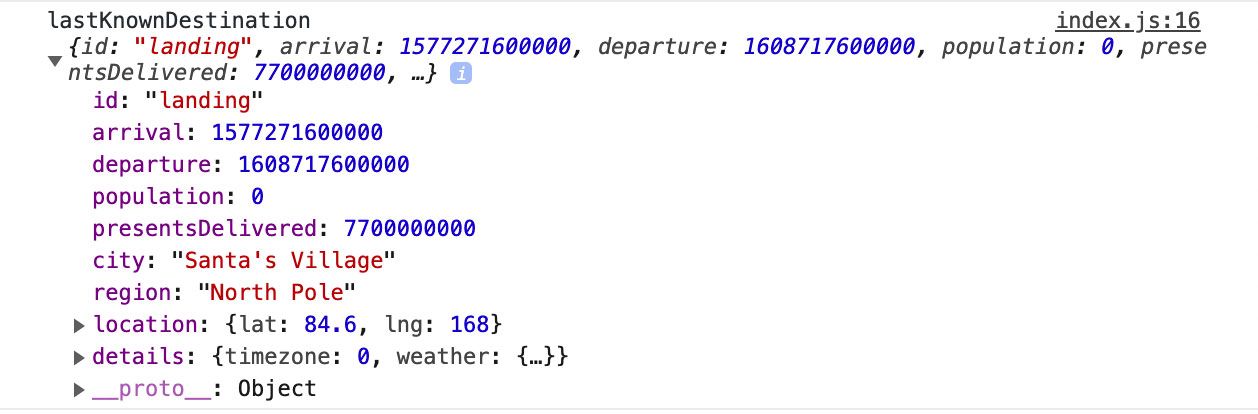 Santa's last known location in the web console
With his location, we can pull that apart, set up a Leaflet marker instance, and add our old friend to the map. Add the following after our last snippet inside the mapEffect function:
const santaLocation = new L.LatLng( lastKnownDestination.location.lat, lastKnownDestination.location.lng );

const santaMarker = L.marker( santaLocation, {
  icon: L.divIcon({
    className: ‘icon’,
    html: `<div class=“icon-santa”>?</div>`,
    iconSize: 50
  })
});

santaMarker.addTo(leafletElement);
Here we:
- Create a Leaflet LatLng instance with his location
- Create a Marker instance with our newly created LatLng instance
- Add our new Marker to the map
If we refresh our page, you’ll have to zoom out and pan up a little bit, but we'll see Santa on the map!
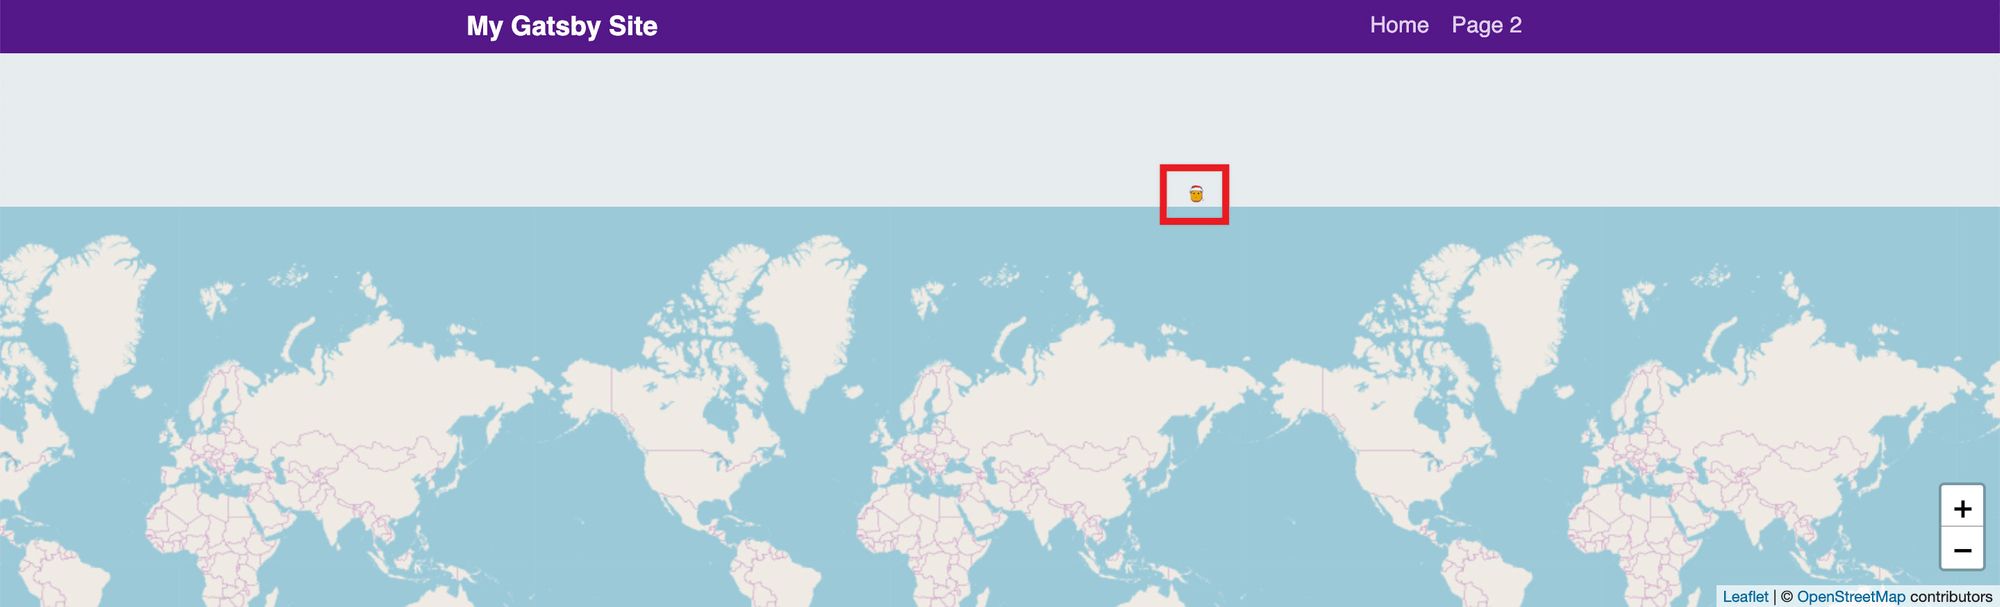 Santa on the map
Before we move on, let’s give Santa a little holiday cheer to make him easier to find. Find your application.scss file and toss these styles in:
// In src/assets/stylesheets/application.scss

.icon {

  & > div {

    display: flex;
    justify-content: center;
    align-items: center;
    overflow: hidden;
    border-radius: 100%;
    box-shadow: 0 3px 4px rgba(0,0,0,.4);
    border: none;
    transition: all .2s;

    &:hover {
      box-shadow: 0 4px 8px rgba(0,0,0,.6);
    }

  }

}

.icon-santa {
  width: 50px;
  height: 50px;
  font-size: 3em;
  background: white;
}
This just adds a white circle around him, a little drop shadow, and increases the size a bit to make him a little easier to find on the map.
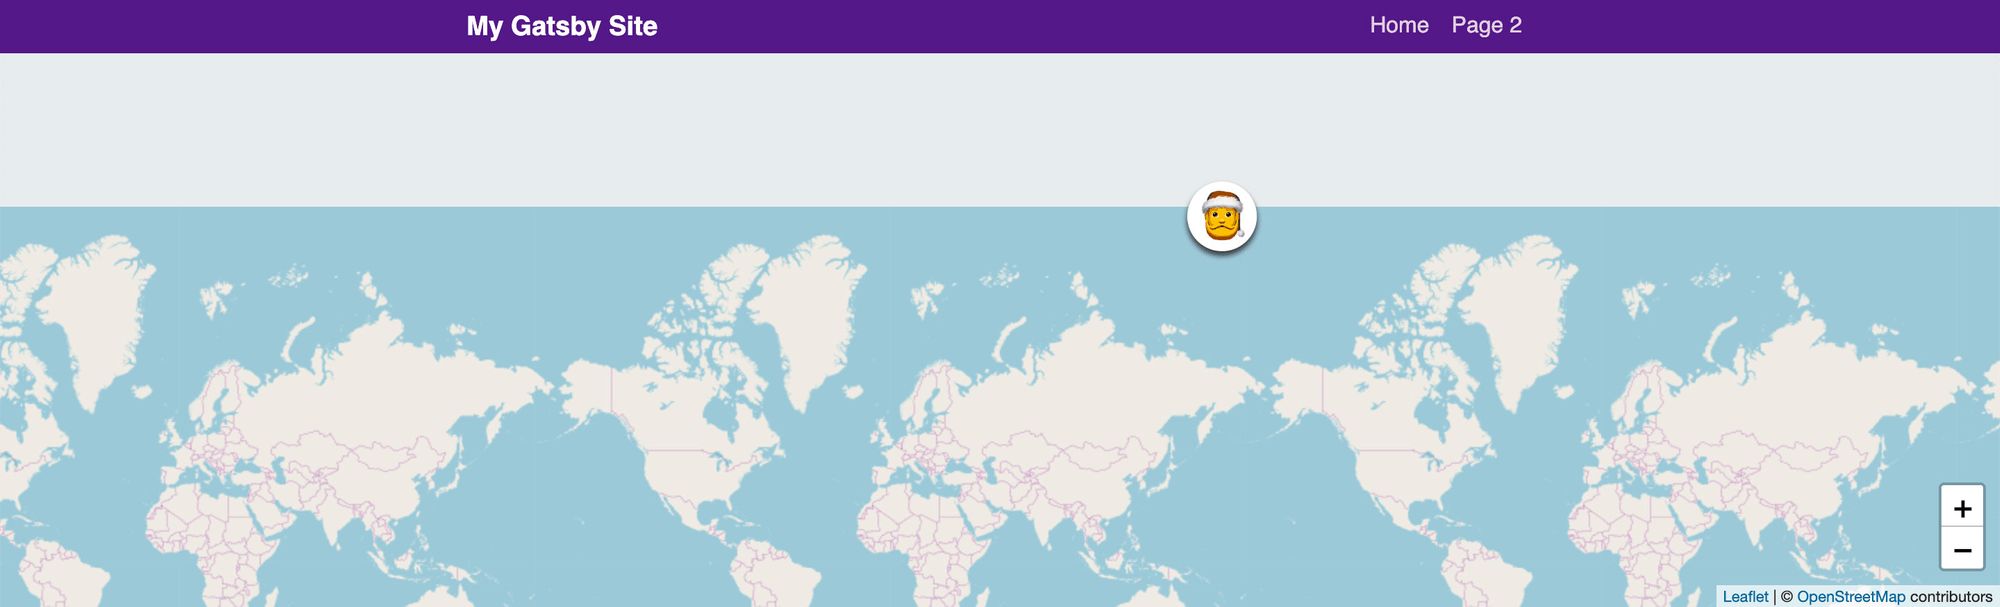 Santa styled on the map
Drawing his route
The last thing we’re going to do here is draw a path on the map showing his route so we can follow along.
To get started, let’s update our code and add this last bit after our last snippet in the mapEffect function:
// Create a set of LatLng coordinates that make up Santa's route

const santasRouteLatLngs = destinationsWithPresents.map(destination => {
  const { location } = destination;
  const { lat, lng } = location;
  return new L.LatLng( lat, lng );
});

// Utilize Leaflet's Polyline to add the route to the map

const santasRoute = new L.Polyline( santasRouteLatLngs, {
  weight: 2,
  color: 'green',
  opacity: 1,
  fillColor: 'green',
  fillOpacity: 0.5
});

// Add Santa to the map!

santasRoute.addTo(leafletElement);
What we’re doing:
- Creating an array of Leaflet LatLng instances that make up Santa’s route
- Creating a Leaflet Polyline (a multi-point line) using that routes array
- Make that Polyline green
- Add our Polyline to the map
What we get… is a bunch of squiggly lines!
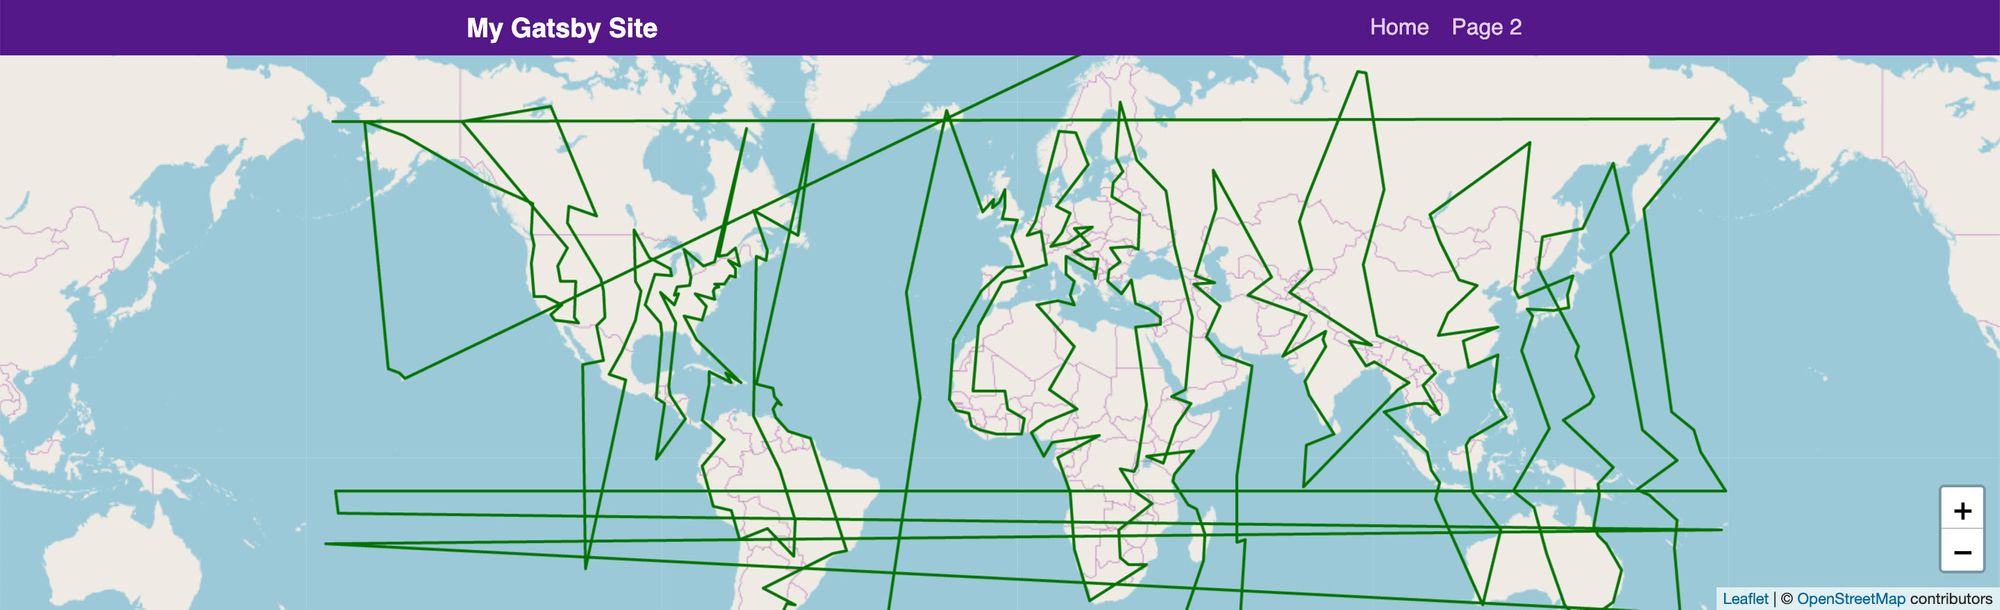 Santa's route on the map
This is expected. This gets technical really fast, but Leaflet by default can only understand 1 “portion” of the map as it wraps around in our browser. What this realistically means, is instead of drawing a line around a globe, the coordinates think it goes from one side of the world to the other as it hits the International Dateline. This is a bit out of scope for this tutorial, but you can check out Leaflet.Antimeridian to learn more and see if you can implement the solution to it.
A few quick style tweaks
One last thing! And this is completely optional. Let’s make the map a little bit bigger, set the background color to match our oceans, and zoom out a little bit. So let’s make a few changes:
// In src/pages/index.js

const DEFAULT_ZOOM = 1;
We’re setting our default zoom to 1 instead of 2 to allow the map to be zoomed out a bit.
// In src/assets/stylesheets/pages/_home.scss

.page-home {

  .map,
  .map-base {
    height: 80vh;
  }

}
We’re setting our map to a height of 80vh instead of 50vh to make it take up a little more of our screen.
// In src/assets/stylesheets/components/_map.scss
.map {

  &,
  .map-base {
    background: #acd3de;
  }

}
We’re setting the background color of our map to #acd3de instead of $blue-grey-50 which allows us to match the color of the oceans on our map.
What this achieves is being able to see Santa’s full route and Santa on the first view. Additionally, since the map only covers part of the screen, setting the background color of the map allows us to not have a little bit of a weird cutoff.
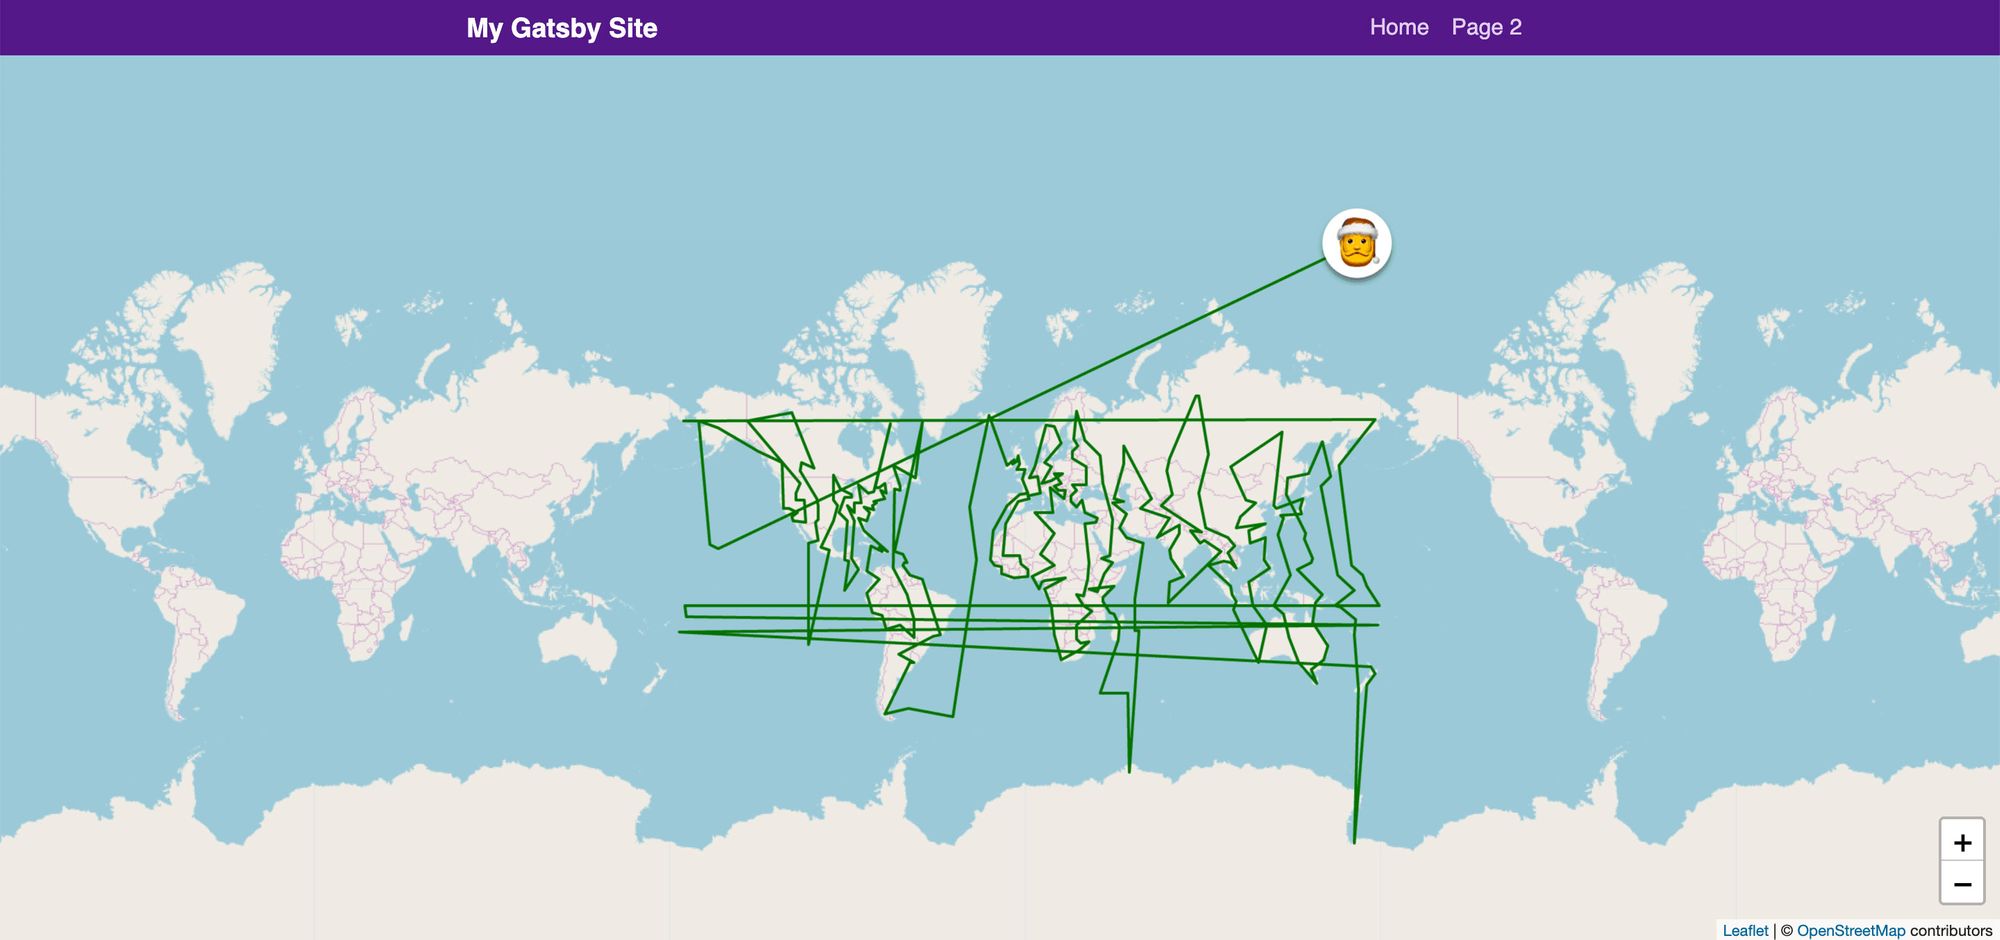 Santa's route zoomed out
Want a challenge?
To take this 1 step further, follow along with both how we added the routes and Santa to the map and try to see if you can add a marker to each destination location to show where all of the stops are. Bonus, add a popup to each one that says how many presents were delivered to that location!
To see the answer with some code organization and how I added the gift markers, check out the final version of the Santa Tracker demo.
![]() Final Santa Tracker demo
Final Santa Tracker demo
While you’re there, you can also see how I utilized Leaflet.Antimeridian to fix our map's route.
What did we learn?
Building basic apps with a map isn’t nearly as bad as we thought! We learned how to fetch some data from an API, grab the data we need, and draw representations of that data on a map.
Next time you want to add a map widget to your landing page, try Leaflet. Share what you create on Twitter! Would love to see what you come up with.
I hope you and your family have a fantastic holiday season!
 Happy Holidays from Dunder Mifflin
Want to learn more about maps?
You can check out a few of my other resources to get started:
- Anyone Can Map! Inspiration and an introduction to the world of mapping
- How to create a Coronavirus (COVID-19) Dashboard & Map App in React with Gatsby and Leaflet
- How to set up a custom Mapbox basemap style with React Leaflet and Leaflet Gatsby Starter
- How to Create a Summer Road Trip Mapping App with Gatsby and Leaflet
- How to build a mapping app in React the easy way with Leaflet

Want to read some of my other articles? Check out my blog: https://www.colbyfayock.com/2019/12/create-your-own-santa-tracker-with-gatsby-and-react-leaflet/