By Gbolahan Taoheed Fawale
Prior to using Figma, I used Adobe Illustrator for most of my designs (like logos, mockups, illustrations, and so on). But since I joined the “Figma gang” , I’ve dropped illustrator so I can focus on Figma and learn as much as I can about it.
I wanted to discover more tricks with the software, so I could arrive at end-results that aren’t “typical Figma.” This stemmed from the fact that the designs I hope to make aren’t necessarily what the software was developed to do.
Figma is more of a UI/UX design tool than a visual designing or illustrating tool like Adobe Illustrator.
This post is about me exploring Figma beyond UI/UX to uncover new ways of using it and new things I could discover while using it as my complete design tool. In the end, it didn’t really matter what type of design I might want to do or venture into.
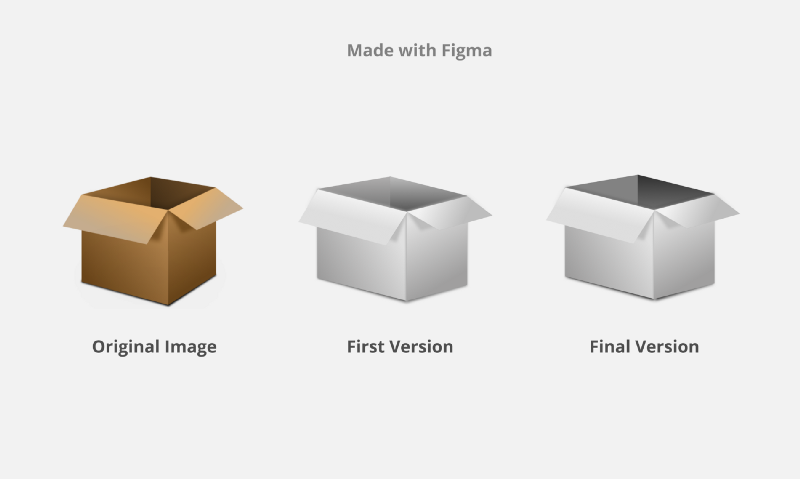
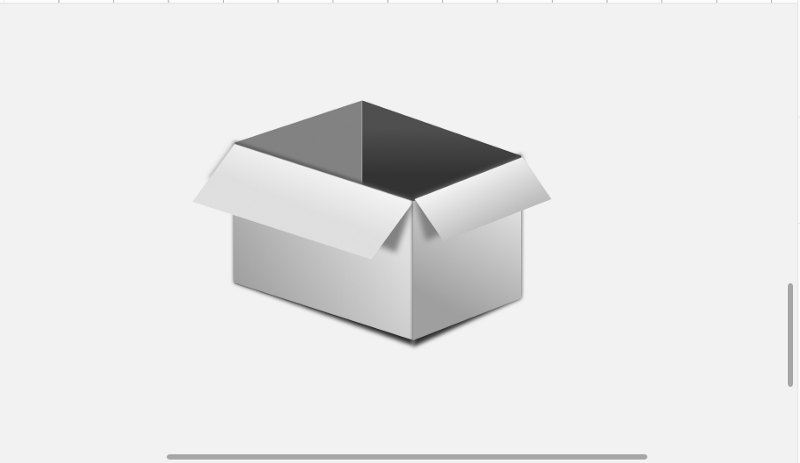
So, I will take you through the process of how I came up with the above image.
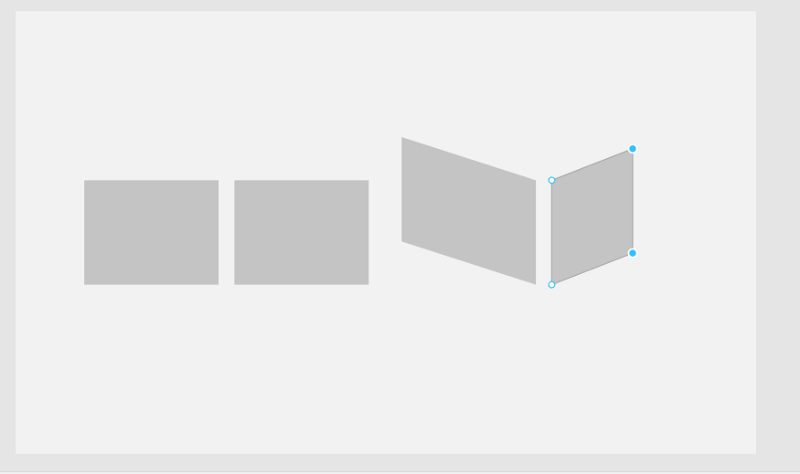
Step 1: Create a similar box
The first thing I created was a box that looks similar to the brown one in the picture above. This was created with the use of shapes (rectangles only). I know some people are fans of the pen tool. But in the above example, the pen tool doesn’t afford us the flexibility to create shadows, add gradients, or do any sort of object manipulation to individual shapes or parts of the box.
 step one ?
In the above illustration, I used the edit object tool to resize and manipulate the rectangles to make a rhombus-like shape. The next thing I did was recreate the same rectangles and turn them backwards to make up the third and fourth sides of the box.
 edit object tool
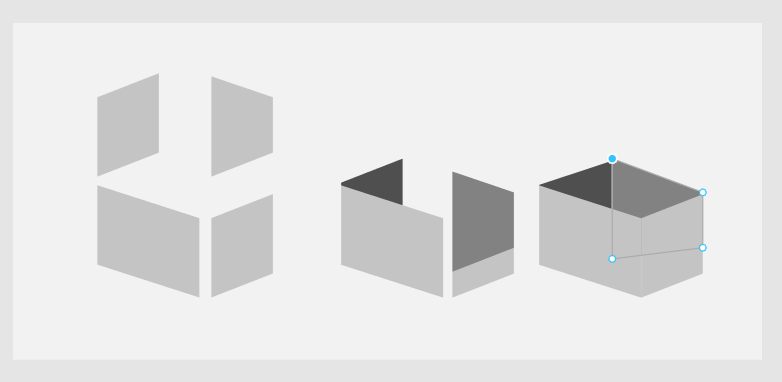
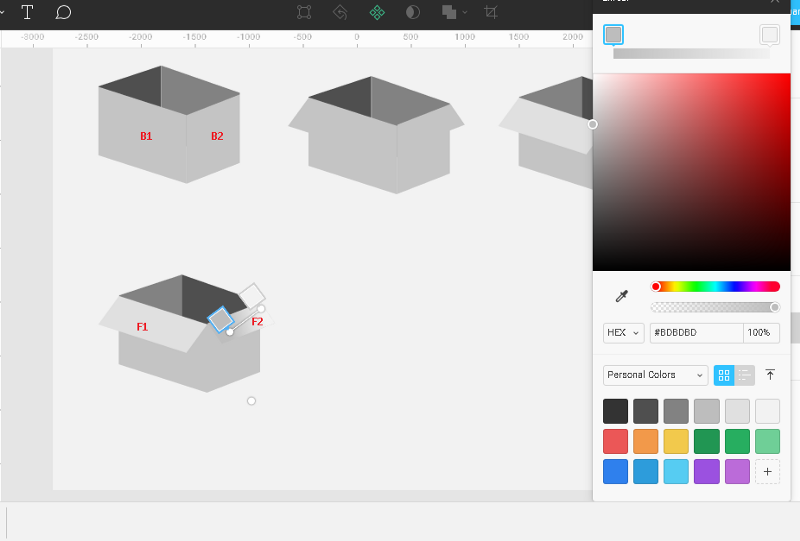
Step 2: adding shading
I added color to differentiate each side of the box, and also to give an idea of how the shadows, contrast, and gradient fill would be applied. This laid a foundation so that the sides of the box could be worked on independently. I also created the box lid pieces.
 creating covers
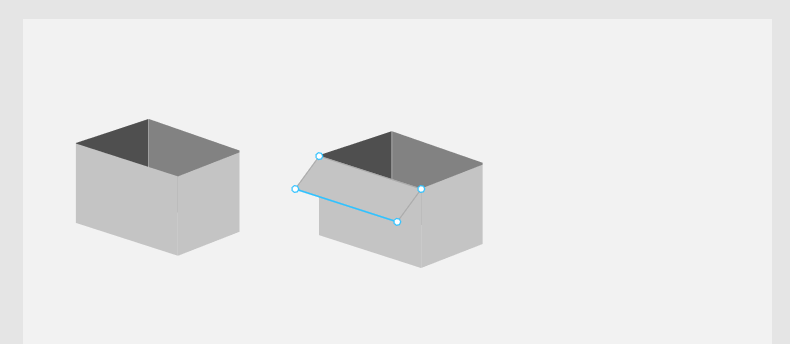
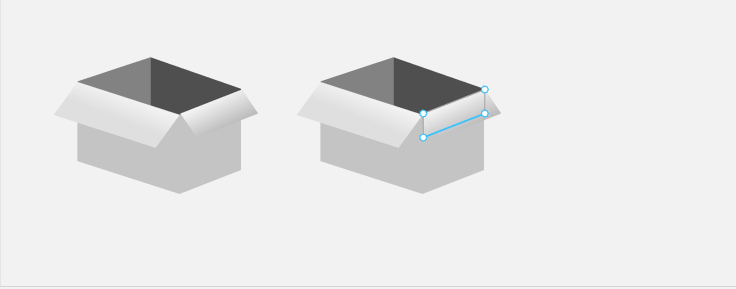
Step 3: making it more realistic
I added a gradient fill to the visible box lids (f1 & f2) to make it look much more realistic and flat. Notice the way the gradient is layered on f2? I did the same for f1, and then adjusted the degree of the gradient fill to match the direction of light on the box.
After adding the gradient, I added the shadows. When rays of light fall on an object, a shadow is automatically formed relative to the direction of light and the object.
 creating shadow layer by copying existing layer and editing it
Note: The layer highlighted above is actually beneath the visible on. That’s what will be resized to form the shadow.
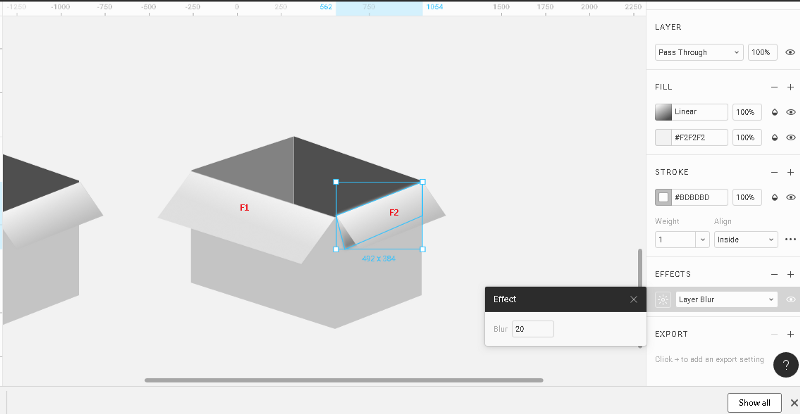
Step 4: making adjustments to the lid
To add shadow, I simply copied f1 and pasted it on the same layer. I then chose the original/initial copy of f1 (which is below the newly copied ‘f1,’) clicked the edit object tool, and resized it to protrude a little underneath “f1 copy”. This was done just to perfectly create the shadow effect. The default Figma shadow effect feature wouldn’t have given me the flexibility to create the brown box in the picture.
So I added a dark color to it and blurred it with a value of 20. You might also notice that the original f1 is not as sharp as the other layers. Blurring it gives it that cool realistic shadow effect and reduces the black color saturation. I then replicated the same process for f2.
In Figma, you can easily copy and paste a style/effect from one layer to another using ctrl + alt + c for copy and ctrl + alt + v on the layer that you want a similar effect or style to be applied to.
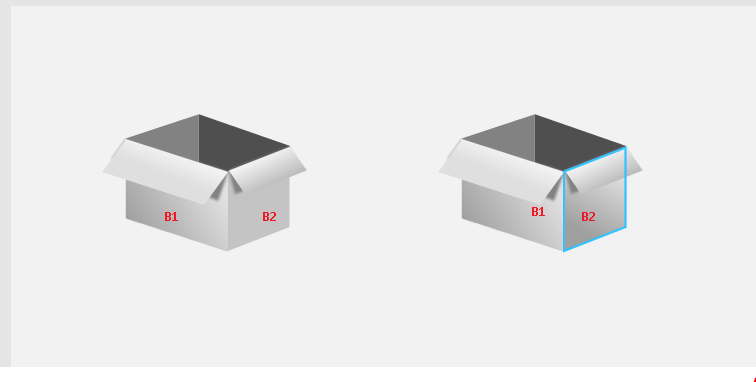
Step 5: dealing with the body
Now that we are done with the carton box cover, let’s work on the body of the box. We want to reflect the ray of light bouncing on it as well as the shadows that give the box a contrasting and realistic appearance.
 First image: B1 with gradient applied. Second image : B1 and B2 with gradient applied
All we need for b1 and b2 is gradient fill, as seen in the above illustration.
 b1 and b2
Did you notice that the box is starting to look more real? Can you spot the difference when a gradient is added to b1 but not yet to b2? Or when gradient fill is applied to both sides?
Let’s move on.
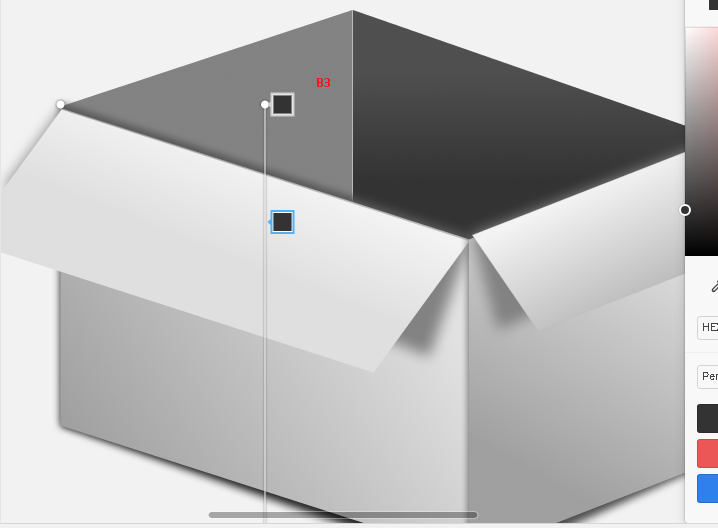
Step 6: the challenge of the interior
Working on the inner part of the box (b3 and b4) was a little bit challenging. I had to pause for a few minutes to study the shadows and level of saturation at different corners of the inner parts before thinking of a way to replicate it — all while still using shadows and gradients.
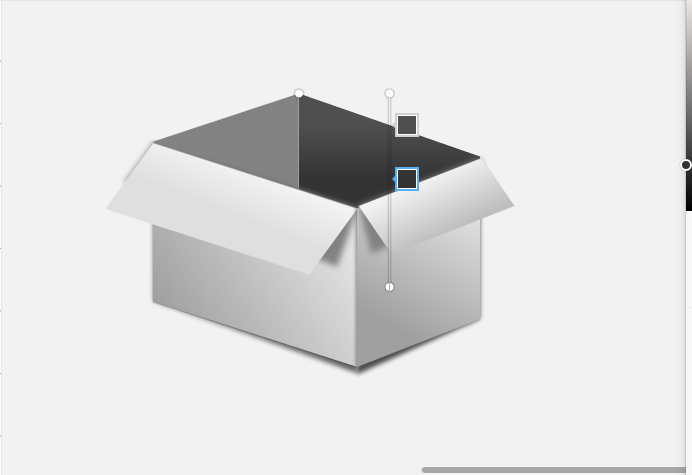
In the same way as before, I applied a layer of gradient fill on b4 with darker colors — since it’s the darkest part of the box — to achieve the level of saturation I wanted. See the image below:
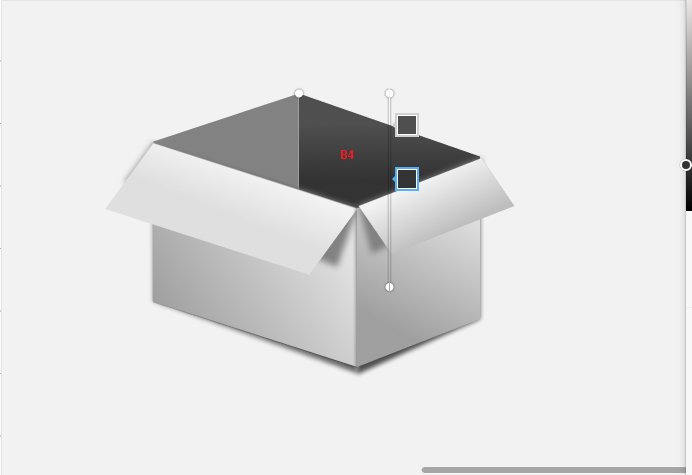
Notice the way the gradients are being arranged vertically with one of the color boxes on the gradient liner close to the other one? The idea is to make the shadow appear like it grew from inside the box. Though we can not see inside the box, we do know that as it gets deeper, rays of light reduce, which makes the innermost parts get darker automatically.
Final part: shadows underneath the box
Here, we’ll take the same idea I used above to create the shadows for the box covers above (copying the layers, resizing, and applying some dark colors and effects) and repeat it. Though I already applied it in the picture above, the one below is the workaround ?
 resizing the original b1 layer, extending the height towards the base and adding a darker gradient
I made extra copies of b1 and b2 and chose the original layer. I then dragged it down a little, added a darker color, blurred it a little, and also resized it to have that perspective view. Creating realistic images in art and architecture is all about perspective.
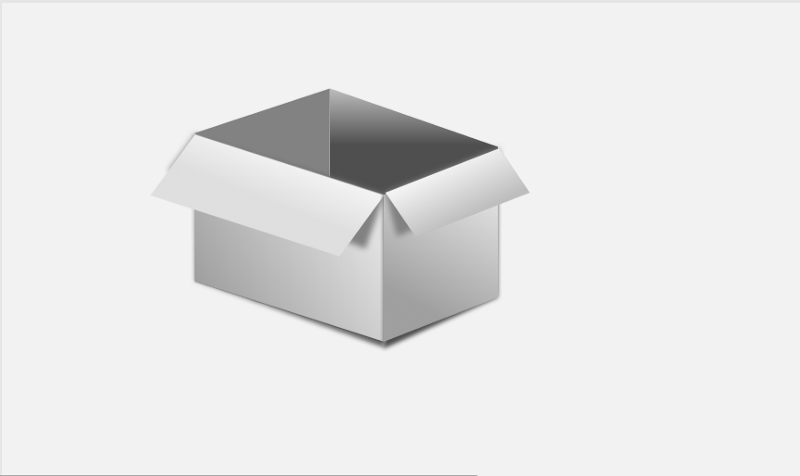
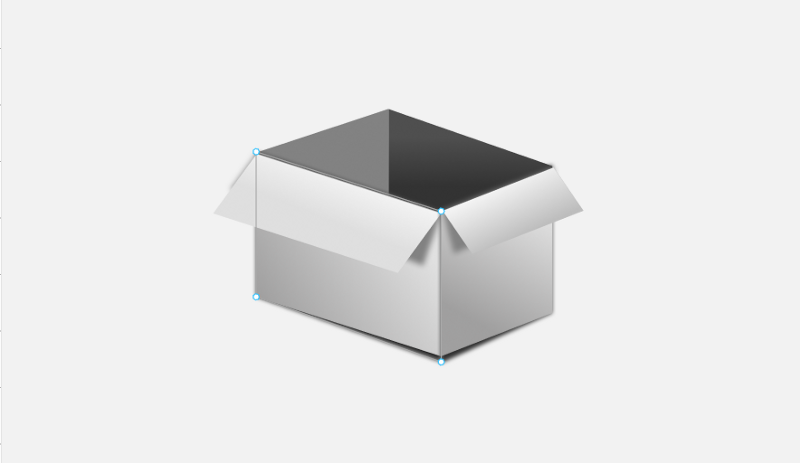
Now we have created a realistic 3D box — it’s not perfect, but it’s realistic enough. ☺️
our realistic 3d carton box
Final tweaks
At this stage, I stopped to compare what I had done with the original brown box I got off the internet. I wasn’t satisfied, so I decided to push further to see what I could achieve by attempting to make the box look very real with a high contrast.
So how did I achieve this?
I created extra copies of b3 and b4, and applied a gradient layer to their original copies (which are the dark parts facing us in the picture below).
 applying gradient to b4 to increase contrast
Upon closer observation, you will notice that it does looks like the edges of b1 and b2 have a shadow of their own towards b4 and b3, respectively. This is because light rays have fallen on them from the sides, projecting their shadows on the closest available layer or object.
Remember the extra b1 and b2 copies that I made earlier to form the shadow beneath the box? Well, first I resized these two layers (original b1 and b2) to protrude above the copied versions of (b1 and b2). You can see them as the current outer sides of the box which the ray of light falls on. Then I added another darker gradient layer.
Below is what the box looks like now.
 final version
Note: The picture above is a little different from the one in the introductory part of this piece, as I had to create another one to be able to explain some of the things I did in the first design. It was a really fast one ?
To get more details and understand everything I did, here is the link to both the original version and the example version I created.
Thanks for reading!
Feel free to reach out on twitter @GbMillz