

Hi readers, I hope you are doing great! I am back with another tutorial on web development. If you are someone who enjoys developing web apps with JavaScript and React, then this post is for you.
When you roll out a new app into production, you want to make sure that it's user friendly. A website's performance is a key part of the user experience. Every user wants the website and its contents to load quickly. Each and every second is valuable and could result into a user never visiting your website again.
In this guide, we are going to understand a very important technique in JavaScript known as debouncing. Then, I will show you how to implement the autocomplete functionality in React with debouncing.
Now, in order to get the most out of this tutorial, I am assuming you have a basic knowledge of JavaScript. If you need to get started or review, here are a couple resources for you:
Learn JavaScript basics – handbook for beginners
The freeCodeCamp JavaScript Algorithms and Data Structures certification
Table of Contents:
What is Debouncing?
Debouncing is a strategy used to improve the performance of a feature by controlling the time at which a function should be executed.
Debouncing accepts a function and transforms it in to an updated (debounced) function so that the code inside the original function is executed after a certain period of time.
If the debounced function is called again within that period, the previous timer is reset and a new timer is started for this function call. The process repeats for each function call.
An example will help you understand better. Let's take a function fun(). We want this function to execute after 500ms.
function fun() {
    console.log('This is a function')
}
After debouncing, a new function debouncedFun() is returned. Now, whenever you call debouncedFun(), it will be called after 500ms.
If you call it again within the next 500ms after first calling it, the previous timer is reset and a new timer is started for the second function call. The process repeats if you keep calling the function within 500ms.
How to Implement Debouncing in JavaScript
Let's understand how to implement debouncing in JavaScript. First, we'll go over our requirements. What behavior do we want from the debounced function?
Delay the function execution by a certain time,
delay.Reset the timer if the function is called again.
To debounce a function, we'll have a separate function that accepts the function reference and the delay as parameters, and returns a debounced function.
function debounce(func, delay) {
      return () => {}   // return debounced function
}
This function will only be called once to return a debounced function and that, in turn, will be used in the subsequent code.
To delay a function by some milliseconds, we can simply use the setTimeout function in JavaScript.
function debounce(func, delay) {
    return () => {
        setTimeout(() => {
            func()
        }, delay)
    }
}
This delays the function call by delay milliseconds. But this is incomplete as it only satisfies the first requirement. How do we achieve the second behaviour?
Let's create a variable timeout and assign it to the return value of setTimeout method. The setTimeout method returns a unique identifier to the timeout, which is held by timeout variable.
function debounce(func, delay) {
    let timeout=null
    return () => {
        timeout=setTimeout(() => {
            func()
        }, delay)
    }
}
Each time you invoke setTimeout, the ID is different. We will use this timeout variable to reset the timer.
But how do we get access to timeout from outside the debounce() method? As mentioned before, debounce() is only used once to return a debounced function. This, in turn, performs the debouncing logic.
Then, how does the debounced function have access to timeout even if it is used outside the debounce() function? Well, it uses a concept called closure.
What's a closure in JavaScript?
In JavaScript, an inner function always has access to the local variables of the outer function. In our case, the inner function has access to timeout that has function level scope in the debounce() method.
But when the outer function returns this inner function, the inner function still holds a reference to the local variables of the outer function long after the outer function has finished execution. This is the concept of a closure.
Let's understand closures with an example.
function outerFunction() {
  const x = 5;

  return () => {
    console.log(x);
  }
}

const inner = outerFunction();

inner(); // prints 5

// console.log(x)   Throws reference error
Here, if we call inner(), the code runs without any errors and prints 5. But, if we try to access x directly, JavaScript throws a reference error.
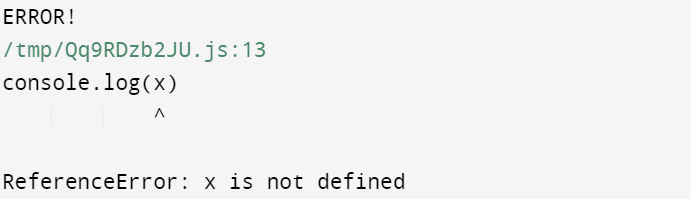
JavaScript Reference Error
Here, inner() closes over x and only this function can use the variable and no one other one can. We cannot access the variable explicitly.
You can check out this beginner-friendly tutorial to learn more about closures.
Back to Debouncing
Let's get back to where we left off:
function debounce(func, delay) {
    let timeout=null
    return () => {
        timeout=setTimeout(() => {
            func()
        }, delay)
    }
}
Here, JavaScript uses a closure to hold access to timeout every time we use the debounced function.
Let's use this to our advantage. Since debouncedFun() has access to the same timeout variable in every function call, we can add a condition to check whether a previous timeout exists. We can simply do this with a null check, if(timeout !== null) or if(timeout).
Then, we use the clearTimeout() method to cancel the previous timeout, thus resetting the timer.
Add the following statement before starting a new timeout:
if(timeout)
    clearTimeout(timeout)
Once the timeout is reset, a new timeout is started for the current function call, whose ID is then assigned to timeout. The process is repeated for the subsequent function calls who have access to the same timeout due to closures.
function debounce(func, delay) {
    let timeout=null
    return () => {
        if(timeout) clearTimeout(timeout)

        timeout=setTimeout(() => {
            func()
        }, delay)
    }
}
With this, we have satisfied our second requirement – that is, resetting the timer and starting a new one. It's time to use this debounced function.
Let's pass fun() to the debounce() method with a delay of 500ms.
const debouncedFun = debounce(fun, 500)
debouncedFun() is basically fun() with debouncing behaviour. Let's call this function at different time intervals to test our functionality.
debouncedFun()

setTimeout(debouncedFun, 300)

setTimeout(debouncedFun, 900)
The first function call is made instantly. The other two are made after 300ms and 900ms respectively. Can you guess the output?
The code prints This is a function two times. Let's understand why. Here, after the first call is made, fun() is scheduled to execute after 500ms. But the second one is made in 300ms which resets the timer and starts a new one.
500ms have passed and the fun() method executes. Then, at 900ms, another function call is made. This again executes fun() after 500ms.
There is still a small improvement we should make. Our logic does not consider function arguments. Let's replace fun() with fun(a, b).
function fun(a, b) {
    console.log(`This is a function with arguments ${a} and ${b}`)
}
To incorporate arguments while debouncing, return a debounced function that accepts arguments.
function debounce(func, delay) {
    let timeout=null
    return (...args) => {
        if(timeout) clearTimeout(timeout)

        timeout=setTimeout(() => {
            func(...args)
            timeout=null
        }, delay)
    }
}
By using the spread operator, any arguments passed to the debounced function will be stored as an array in the args variable. Then, spread out the same args array to call the actual function with the arguments passed.
const debouncedFun=debounce(fun, 500)
debouncedFun(2,3)
The above code prints This is a function with arguments 2 and 3 after 500ms.
Use Case of Debouncing
Let's see how debouncing is used in practical applications. The most common use case of debouncing is the autocomplete functionality. You must have seen many websites where you type into an input field and it shows a list of results as you type them.
Here's an example from Google Search:
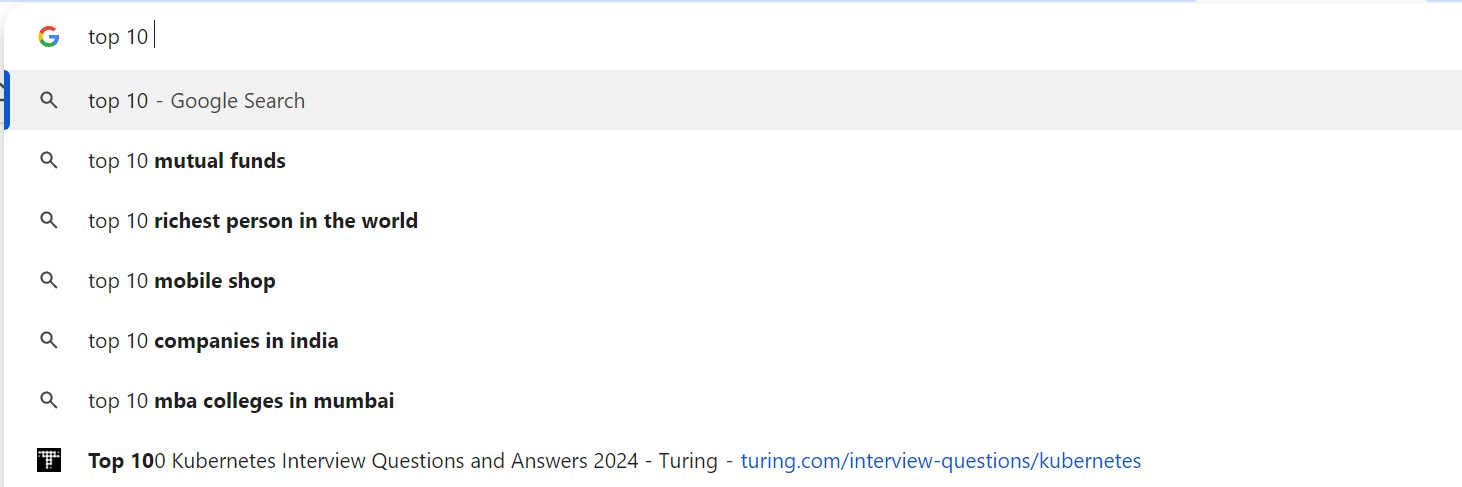
Google Search Autocomplete after typing in "Top 10"
Google search shows the most recent and commonly searched terms. The information is mostly fetched from the browser cache. But, several websites make API calls to backend server to fetch the data from a database.
This can easily be implemented by adding an onchange event to the input element and implementing the fetch logic in the event handler. But there's a slight issue with this.
Consider the following example:
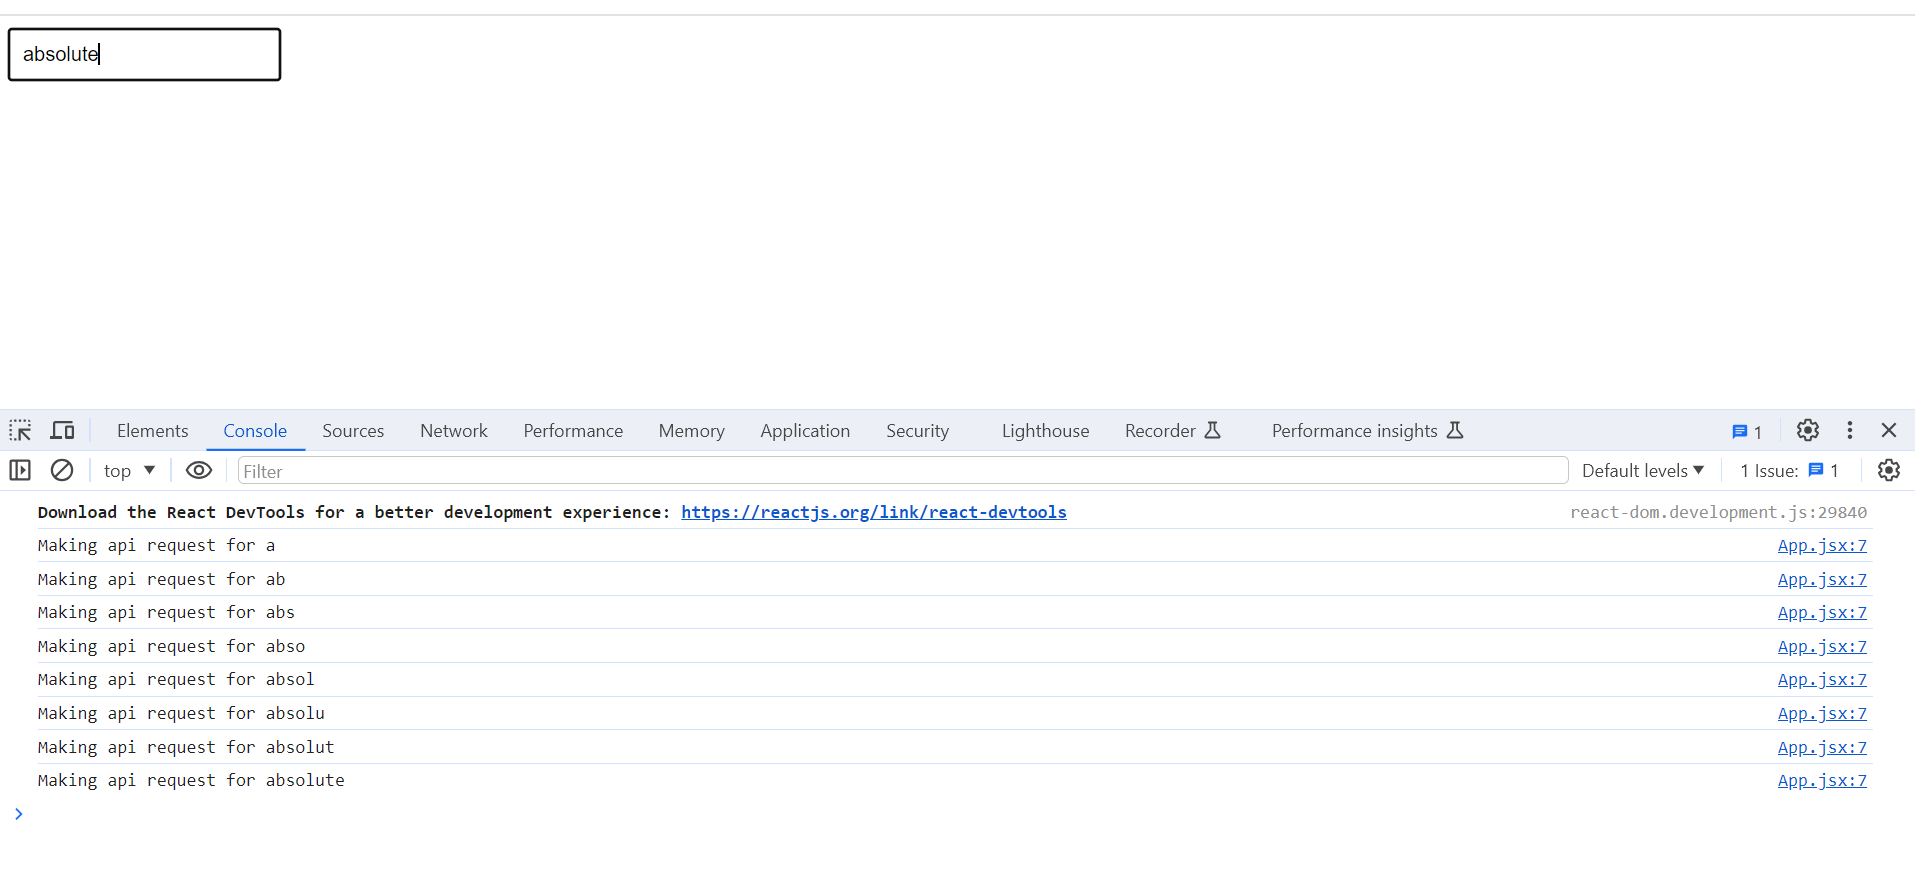
API Request made for each input value
When I type the word absolute, an API request is made every time the value of the input field changes. We are making 8 API requests in very few milliseconds which puts a lot of load on the backend server and could cause performance issues.
Ideally, we want to show the auto-complete results some time after the user has finished typing. Here, the user has typed absolute in one go, so instead of showing results every time the input changes, we could show them once the user has finished typing – that is, we could add some delay between the input change and the results being displayed.
So, we only make the API calls when the user finishes typing their word and not on every input change. This reduces the number of API calls and improves performance. We can achieve this behavior with debouncing.
Let's understand how to implement the autocomplete functionality in React.
Auto-complete example
Use create-react-app (or a modern build tool like Vite) to create the project. Remove the existing boilerplate code. There is no need to install any additional dependencies. Run npm start command to start the project. You can find the complete code on GitHub.
I have set up a Node server to fetch data for the app. You can find it in the Git repo. Run the node server command to start it. I am not going to show the Node.js code as it's out of the scope of this tutorial.
Let's get started with the implementation. We will write a simple autocomplete functionality. The app should show a list of cities that contain an input string typed by the user.
App Component
We'll first need an input element to accept user input and a results container for the search results. Attach an event handler to the input element which is an async function since it will include the fetching logic.
function App() {
    const [data, setData] = useState(null)

    const loadData = async (event) => {

    }
    return (
        <div className="App">
            <input type="text" onChange={(e) => loadData(e)}/>
            {data && data.length !== 0 &&
            <div className="results-container">
                {data.map(item => (
                    <div key={item.id} className="result-item">
                        <p> {item.city} </p>
                    </div>
                ))}
            </div>}
        </div>
    );
}
The data will be stored as state and the results will only be shown if the data is non-empty. I'll skip over the CSS for this tutorial, you can find it in the Git Repo.
Event Handler
The loadData() function fetches our data and stores the response as state.
const loadData = async (event) => {
    const value=event.target.value
    if(value === '') {
        setData(null)
        return
    }
    const response=await fetch(`http://localhost:8000/data/${value}`)
    const res=await response.json()
    setData(res)
}
If no value is entered, simply exit the function. Else, make the request to the node server endpoint. This function is called every time the input changes, so we will debounce this function.
Debounce Implementation using a Custom Hook
We will write the debouncing logic inside a custom hook. The advantage of custom hooks is that you can re-use the same logic throughout your application. It is highly advisable to do so.
Create a new folder custom-hooks and inside it, create a file useDebounce.js. As explained before, the useDebounce() method should take a function and delay as parameters and return the debounced function.
const useDebounce = (func, delay) => {
    let timeout=null

    return (...args) => {
        if(timeout) clearTimeout(timeout)

        timeout=setTimeout(() => {
            func(...args)
        }, delay)
    }
}

export default useDebounce
Now, inside the app component, call this method once to get loadDataDebounced().
const loadDataDebounced = useDebounce(loadData, 400)
We'll use this new method as the event handler for the input element.
<input type="text" onChange={(e) => loadDataDebounced(e)}/>
Output
Enter a search string inside the input element to test our code.
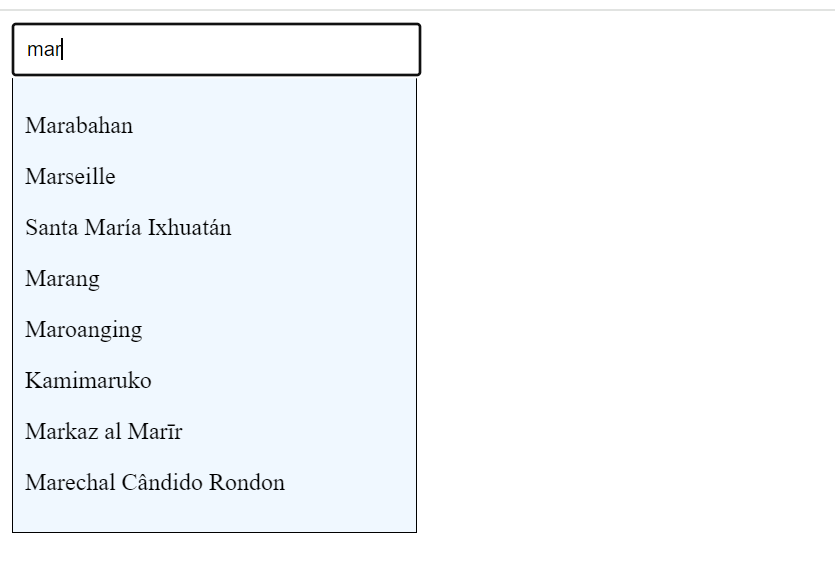
On-screen output
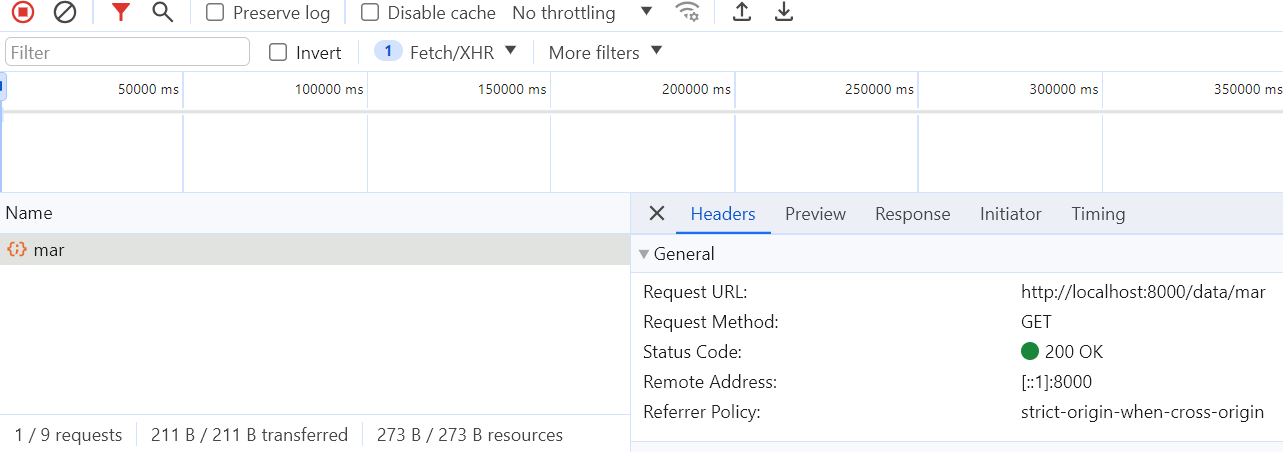
As you can see in the Network tab, only one request is getting sent instead of three. This makes the search performance much better.
Conclusion
In this tutorial, you learned what debouncing is and how it is implemented. Debouncing delays the function execution by a certain time and resets the previous timer if the function is called again.
Debouncing uses the important concept of closures. I took a slight detour from the implementation to explain what closure is. It can be a confusing concept for beginners, so take your time understanding it. Closures allow you to work with local variables even after a function has finished execution.
After that, I showed you a popular use case of debouncing, the auto-complete functionality. The performance of the feature can be improved with debouncing. I also showed you how to implement auto-complete in React and use debouncing with custom hooks. I hope this helps you in future projects.
If you are unable to understand the content or find the explanation unsatisfactory, let me know. New ideas are always appreciated! Feel free to connect with me on Twitter. Till then, Goodbye!