
Imagine you have built a great product and its user base is growing rapidly. You want to scale your product to be available to people around the world. To do this, you'll need good cloud infrastructure.
But managing your cloud infrastructure manually can be exhausting. You might start wondering, "how are the enterprise companies doing it?"
Well, they automate their cloud infrastructure management via code. And that's what AWS CloudFormation offers – a way to manage your cloud infrastructure as code.
In this tutorial, we'll explore the basics of AWS CloudFormation and how it can help you automate your cloud infrastructure management. Let's dive into the world of infrastructure as code.
What is CloudFormation?
AWS CloudFormation is a service that helps you automate creating and managing your cloud resources.
Imagine you're building a house, and you want to ensure everything is in the right place – the walls, the roof, the doors, and the windows. Before you build, you would create a blueprint for your house, and specify exactly what you want and where you want it.
Similarly, CloudFormation allows you to create a blueprint for your cloud infrastructure. You can specify what resources you want to create (for example EC2 servers, databases, storage, and so on) and how they should be configured. CloudFormation takes care of creating and managing those resources for you automatically.
CloudFormation can be helpful in many cases. I'll list a few of them here:
- Managing the infrastructure changes in multiple environments (Development, Staging, Production)
- Re-creating the same infrastructure in a different region / account
- Re-creating a resource that's been accidentally deleted with the exact configuration in seconds (not manually, as you have all configurations in your code)
The best part is that CloudFormation makes updating your infrastructure super simple and automatic. If you want to add a new resource, change a configuration, or delete a resource, you can update your blueprint, and CloudFormation will handle the changes for you.
How CloudFormation Works
You may wonder how CloudFormation works. It's simple: we'll upload our CloudFormation templates in Amazon S3 (behind the scenes) which will be pulled by CloudFormation.
One important point to note is we cannot edit the template once uploaded. We'd need to re-upload the updated template to AWS which CloudFormation compares with the existing infrastructure and makes the necessary changes.
One awesome feature is that you can delete all resources created by CloudFormation in one click by deleting the stack. The CloudFormation stack is nothing but a collection of AWS resources that you can manage as a single unit.
You define a stack by creating a CloudFormation template that describes the resources you want to create, and run the template to create the stack.
How to Deploy CloudFormation Templates
We can deploy the CloudFormation template in two ways. One is using CloudFormation Designer and the other is writing the code in a YAML/JSON file.
If you're not familiar with YAML/JSON then you can go for CloudFormation Designer. This is what I'd recommended for those who don't know how to code. It allows you to create and edit templates graphically, making it easier to visualize your infrastructure and simplify the template creation process. But in this tutorial we'll be writing YAML code to deploy our app.
How to Create a CloudFormation Template to Deploy a NodeJS App
You can create a CloudFormation Template using either a YAML or JSON file – but we're going to use a YAML file in the tutorial.
In this template, we'll be creating an EC2 instance, we'll configure a Security Group for EC2, and add a script to deploy a simple NodeJS app.
CloudFormation Template to Create an EC2 Instance
There are over 224 types of resources, but we need to create an EC2 resource. Resources represent the different AWS Components that will be created and configured. We'll define the Resource type identifiers in the below format:
AWS::aws-product-name::data-type-name
The resource format for the EC2 instance is Aws::EC2::Instance. To learn more about AWS resources and syntax, checkout the AWS official documentation and play with it. Look at the EC2 documentation to understand the declaration of EC2 instance. Both JSON and YAML syntax is available but we'll stick with YAML for this tutorial.
There are a lot of properties available to customize the creation of our EC2 instances. To make things simple, we'll be configuring AvailabilityZone, ImageId, and InstanceType which are basic properties needed to create an EC2 instance.
Resources:
  SampleNodejsDeploy:
    Type: AWS::EC2::Instance
    Properties:
      AvailabilityZone: us-east-1a
      ImageId: ami-a4c7edb2
      InstanceType: t2.micro
Here SampleNodejsDeploy refers to the name of the resource we'll be creating. You can name your resource as your wish.
Let's see the process to deploy the NodeJS app.
How to Deploy a NodeJS App using a CloudFormation Template
We're going to deploy the NodeJS app using the UserData property in the EC2 resource.
If you don't know about EC2 user data, it is a feature of AWS EC2 which allows us to pass information during the launch of the EC2 instance. You can use it to perform custom actions, such as installing software and executing the script.
Let's write the bash script to deploy the NodeJS app and attach it to the user data.
Here is the simple script to deploy the NodeJS app:
#!/bin/bash
set -e
curl -sL https://deb.nodesource.com/setup_16.x | bash -
sudo apt install nodejs
node -v
npm -v
curl -sS https://dl.yarnpkg.com/debian/pubkey.gpg | sudo apt-key add -
echo "deb https://dl.yarnpkg.com/debian/ stable main" | sudo tee /etc/apt/sources.list.d/yarn.list
sudo apt update && sudo apt install yarn
yarn --version
sudo -i -u ubuntu bash << EOF
set -e
cd /home/ubuntu
sudo npm install -g pm2
git clone https://github.com/5minslearn/node_with_docker.git
cd node_with_docker
yarn install
pm2 start yarn --time --interpreter bash --name sample_node -- start -p 8000
EOF
The above script installs NodeJS, Yarn, and PM2. It clones a NodeJS project from Git, installs the dependencies, and starts the app with PM2.
Our next step is to attach this script to the CloudFormation template.
How to Attach UserData to the CloudFormation Template
Resources:
  SampleNodejsDeploy:
    Type: AWS::EC2::Instance
    Properties:
      InstanceType: t2.micro
      ImageId: ami-014d05e6b24240371
      UserData:
        Fn::Base64:
          |
          #!/bin/bash
          set -e
          curl -sL https://deb.nodesource.com/setup_16.x | bash -
          sudo apt install nodejs
          node -v
          npm -v
          curl -sS https://dl.yarnpkg.com/debian/pubkey.gpg | sudo apt-key add -
          echo "deb https://dl.yarnpkg.com/debian/ stable main" | sudo tee /etc/apt/sources.list.d/yarn.list
          sudo apt update && sudo apt install yarn
          yarn --version
          sudo -i -u ubuntu bash << EOF
          set -e
          cd /home/ubuntu
          sudo npm install -g pm2
          git clone https://github.com/5minslearn/node_with_docker.git
          cd node_with_docker
          yarn install
          pm2 start yarn --time --interpreter bash --name sample_node -- start -p 8000
          EOF
You'll notice that the UserData property is added to the EC2 block. Fn::Base64 is a function in AWS CloudFormation that allows users to encode a string to base64 format. This function can be used to pass sensitive information, such as credentials, to AWS resources in a secure manner. Since EC2 user data is not encrypted it's always best practice to encode it.
Right below that line, you can see a small vertical bar (|). It is used for multi-line string support as our script is more than 1 line.
Alright. Now we have a script to deploy the NodeJS app. But, we have to remember one super important item. By default NodeJS applications run on port 8000. We should expose port 8000 from EC2. Now we need to create a security group configuration for our EC2 instance.
How to Create a Security Group using a CloudFormation Template
This process is similar to creating an EC2 instance, except we'll replace the type from Instance to SecurityGroup.
SampleNodejsDeploySG:
    Type: AWS::EC2::SecurityGroup
    Properties:
      GroupDescription: for the app nodes that allow ssh, http, 8000
      SecurityGroupIngress:
      - IpProtocol: tcp
        FromPort: '80'
        ToPort: '80'
        CidrIp: 0.0.0.0/0
      - IpProtocol: tcp
        FromPort: '22'
        ToPort: '22'
        CidrIp: 0.0.0.0/0
      - IpProtocol: tcp
        FromPort: '8000'
        ToPort: '8000'
        CidrIp: 0.0.0.0/0
The above code should be pretty self explanatory – we defined a Security group, allowing ports 22 (SSH port), 80 (HTTP port), and 8000 (NodeJS). We named the Resource as SampleNodejsDeploySG.
How to Attach the Security Group to EC2
You may be wondering – "We've created a template for creating a Security group but how will this be linked to the EC2 instance?"
The solution is simple. CloudFormation provides an intrinsic function called !Ref that allows us to reference a resource or parameter within a CloudFormation template.
Resources:
  SampleNodejsDeploy:
    Type: AWS::EC2::Instance
    Properties:
      InstanceType: t2.micro
      ImageId: ami-014d05e6b24240371
      SecurityGroups:
        - !Ref SampleNodejsDeploySG
      UserData:
        Fn::Base64:
          |
          #!/bin/bash
          set -e
          curl -sL https://deb.nodesource.com/setup_16.x | bash -
          sudo apt install nodejs
          node -v
          npm -v
          curl -sS https://dl.yarnpkg.com/debian/pubkey.gpg | sudo apt-key add -
          echo "deb https://dl.yarnpkg.com/debian/ stable main" | sudo tee /etc/apt/sources.list.d/yarn.list
          sudo apt update && sudo apt install yarn
          yarn --version
          sudo -i -u ubuntu bash << EOF
          set -e
          cd /home/ubuntu
          sudo npm install -g pm2
          git clone https://github.com/5minslearn/node_with_docker.git
          cd node_with_docker
          yarn install
          pm2 start yarn --time --interpreter bash --name sample_node -- start -p 8000
          EOF

  SampleNodejsDeploySG:
    Type: AWS::EC2::SecurityGroup
    Properties:
      GroupDescription: for the app nodes that allow ssh, http
      SecurityGroupIngress:
      - IpProtocol: tcp
        FromPort: '80'
        ToPort: '80'
        CidrIp: 0.0.0.0/0
      - IpProtocol: tcp
        FromPort: '22'
        ToPort: '22'
        CidrIp: 0.0.0.0/0
      - IpProtocol: tcp
        FromPort: '8000'
        ToPort: '8000'
        CidrIp: 0.0.0.0/0
You can see that the SecurityGroups property is added to the EC2 instance and the created Security Group configuration is linked to the EC2 instance by using the !Ref parameter.
Now we have the CloudFormation template. But we're not yet finished. We're still missing one more thing. Can you figure it out? We created an EC2 instance, and we allowed an SSH port...but to log in using SSH we need to attach a key-value pair, right? Let's do that.
We can attach the key-value pair name directly to the template. For example, let's assume your key-value pair name is 5minslearn you can attach the property KeyName directly to the EC2 resource block like what's shown below or we can pass it in via parameters.
Resources:
  SampleNodejsDeploy:
    Type: AWS::EC2::Instance
    Properties:
      InstanceType: t2.micro
      ImageId: ami-014d05e6b24240371
      KeyName: 5minslearn
      SecurityGroups:
        - !Ref SampleNodejsDeploySG
How to use parameters in the CloudFormation template
We can use parameters to get the name of the key-value pair from the user while creating the stack. Basically, parameters allow us to pass input values into CloudFormation templates at runtime. Let's see how to do that.
Parameters:
  SSHKey:
    Type: AWS::EC2::KeyPair::KeyName
    Description: name of the key pair to ssh into the instance
Resources:
  SampleNodejsDeploy:
    Type: AWS::EC2::Instance
    Properties:
      InstanceType: t2.micro
      ImageId: ami-014d05e6b24240371
      KeyName: !Ref SSHKey
      SecurityGroups:
        - !Ref SampleNodejsDeploySG
      UserData:
        Fn::Base64:
          |
          #!/bin/bash
          set -e
          curl -sL https://deb.nodesource.com/setup_16.x | bash -
          sudo apt install nodejs
          node -v
          npm -v
          curl -sS https://dl.yarnpkg.com/debian/pubkey.gpg | sudo apt-key add -
          echo "deb https://dl.yarnpkg.com/debian/ stable main" | sudo tee /etc/apt/sources.list.d/yarn.list
          sudo apt update && sudo apt install yarn
          yarn --version
          sudo -i -u ubuntu bash << EOF
          set -e
          cd /home/ubuntu
          sudo npm install -g pm2
          git clone https://github.com/5minslearn/node_with_docker.git
          cd node_with_docker
          yarn install
          pm2 start yarn --time --interpreter bash --name sample_node -- start -p 8000
          EOF

  SampleNodejsDeploySG:
    Type: AWS::EC2::SecurityGroup
    Properties:
      GroupDescription: for the app nodes that allow ssh, http
      SecurityGroupIngress:
      - IpProtocol: tcp
        FromPort: '80'
        ToPort: '80'
        CidrIp: 0.0.0.0/0
      - IpProtocol: tcp
        FromPort: '22'
        ToPort: '22'
        CidrIp: 0.0.0.0/0
      - IpProtocol: tcp
        FromPort: '8000'
        ToPort: '8000'
        CidrIp: 0.0.0.0/0
In the above template, we added a parameter to get the key pair name and referenced it to KeyName property.
Great! We successfully created a CloudFormation template to create an EC2 instance and security group. In addition to that, we also added a script to deploy the NodeJS app. Now it's time to create a CloudFormation stack.
How to Create a CloudFormation Stack
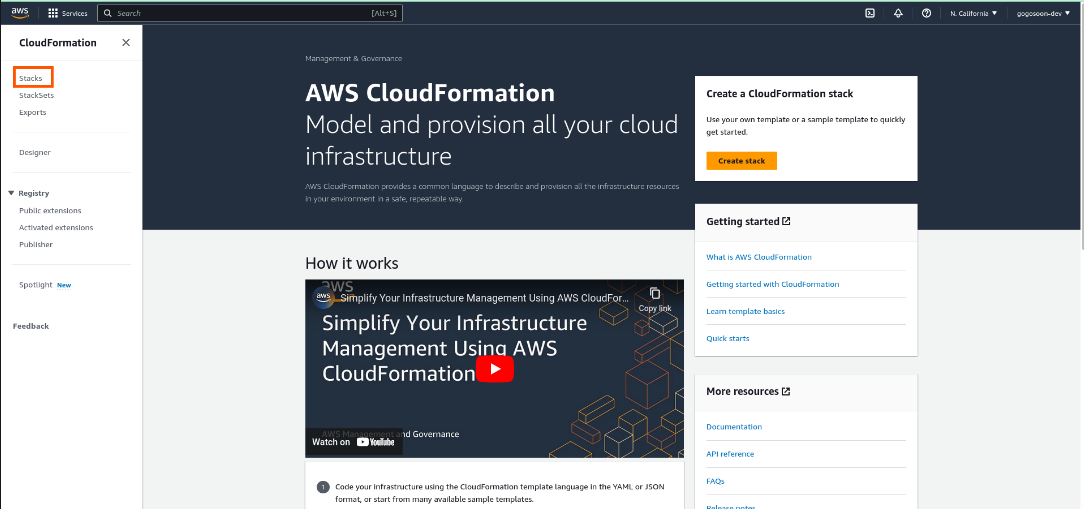
The first step is to log in to the AWS console and search for CloudFormation in the search bar (see the below screenshot). Click on stacks in the left sidebar to get started with CloudFormation.
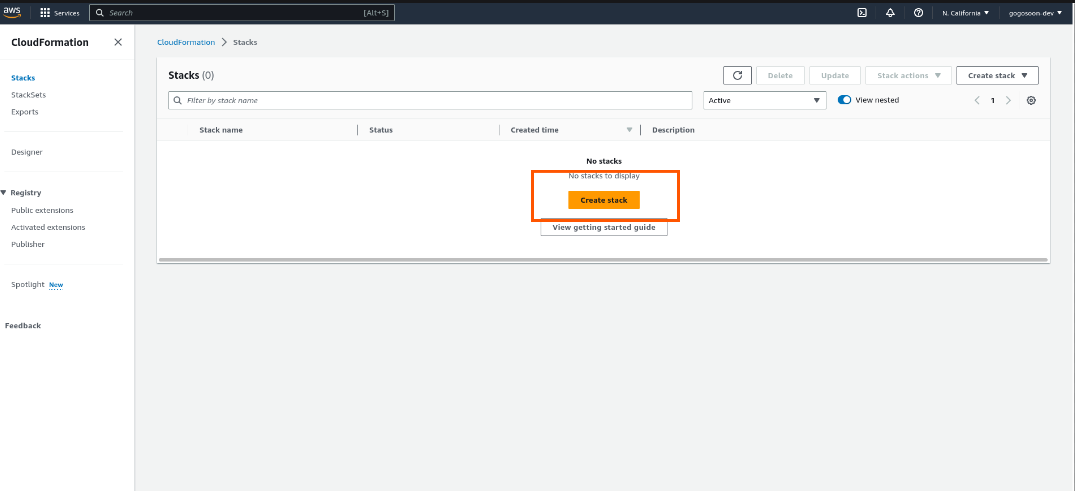
Click on the create stack button to create the CloudFormation stack.
As we have our template ready, select "Template is ready" and choose "Upload a template file" in the Template source section, and upload the template file.

Once you upload the file, the "View in Designer" button will be enabled. Click on it to view your template design.
How to Validate the CloudFormation Template

To validate our template click on the "Tick" icon on top left in the designer. It will validate and show us errors if any. Once the validation is done, click on the "Cloud" icon to the left of "Tick" icon. It will take you to the create stack page.
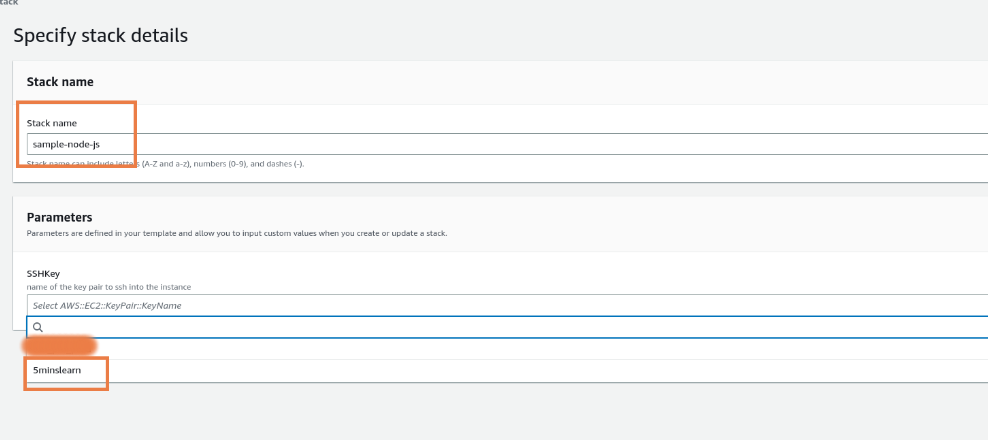
In the stack details page, enter the stack name and select your key-value pair. If you don't have key-value pair, create one and select it.
Leave the Configure stack options section as it is, and click continue since we don't need any IAM permissions or advanced options.
Finally, review the page and submit the template. The template will start creating the resources.

Once that's done, click on the resources tab. You'll be able to see the resources we created (EC2 and Security group resources).
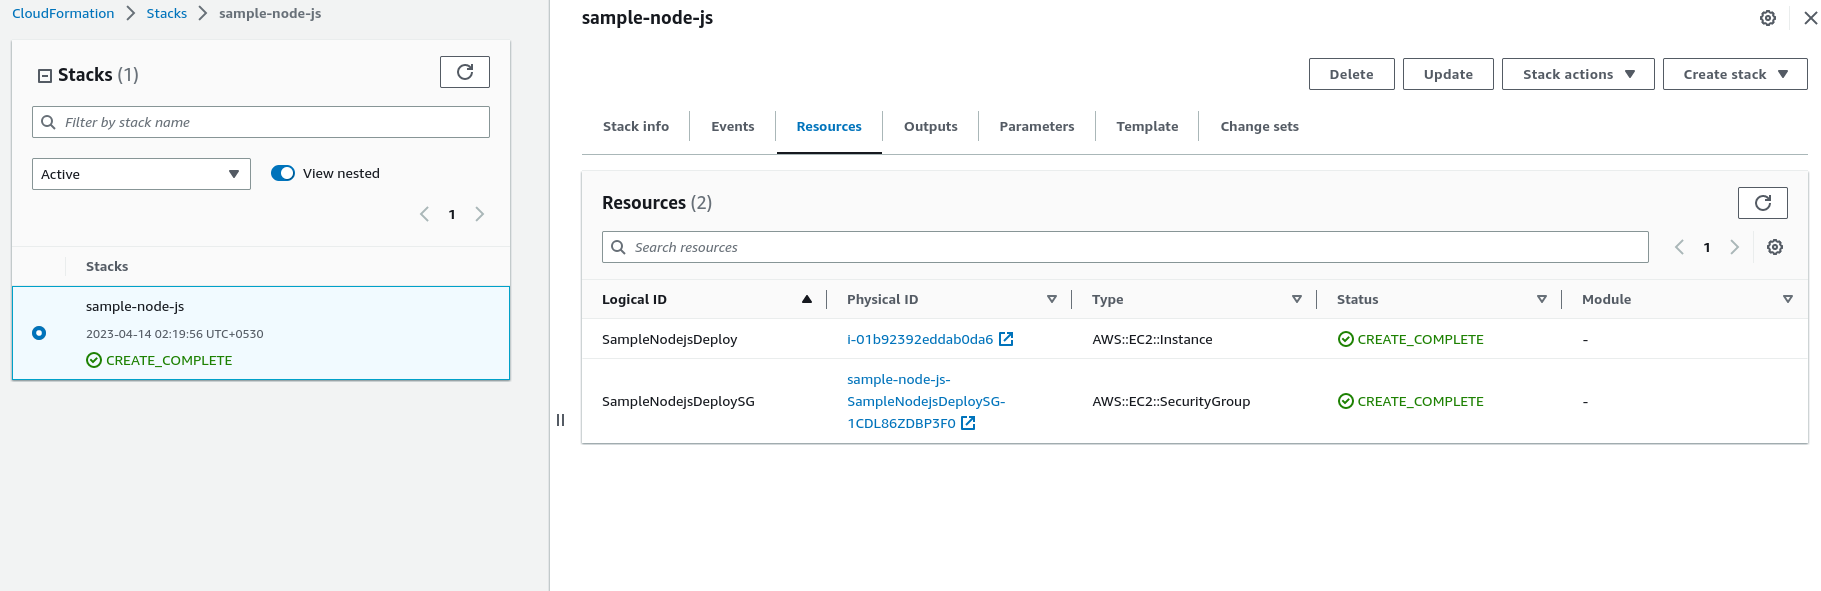 Resources created by CloudFormation Template
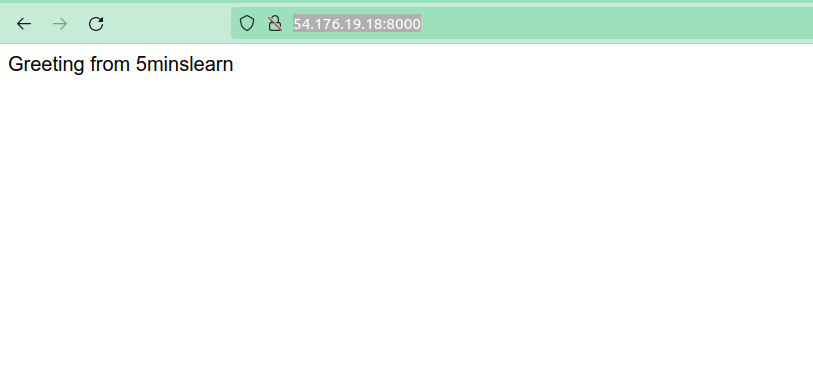
Click on the EC2 instance, and you can see that our instance will be up and running. Copy the public IPv4 address.
 EC2 instance up and running
Open your browser and hit http://<ip_address>:8000 (In my case it is http://54.176.19.18:8000/). You should be able to see a page similar to the one below:
 NodeJS app running
This represents that our NodeJS app is successfully deployed!
Note: EC2 user data will take some time to install dependencies. So for the first time, the page will take long time to load. Just be patient until the site is loaded.
How to Delete the CloudFormation Stack
If you no longer need the stack, you can delete it from the CloudFormation console.
Select the stack you want to delete, click "Delete Stack," and confirm the action. This action will delete all resources created using this stack. In our case, it'll delete both EC2 and Security Group. You don't need to delete the EC2 instance and Security Group individually.

Conclusion
In this article, we learned about CloudFormation, how it works, and how to create and delete a template stack.
Hope you enjoyed reading this article! If you are stuck at any point feel free to drop your queries to me at my email. I’ll be happy to help you.
If you wish to learn more about AWS, subscribe to my newsletter (https://5minslearn.gogosoon.com/) and follow me on social media.