
Render is a hosting platform that helps you deploy your apps easily. Whether you're building web servers, static websites, cron jobs, or containers, this tool can help you streamline the process.
If you're a developer early in your career and you need to build a compelling CV, résumé, or portfolio, Render provides a free tier that offers 1GB of storage capacity.
In this guide, we'll explore how to deploy a Django app on the Render platform. The project we create will help you showcase your coding skills and projects effectively while learning about deployment.
Prerequisites
To follow along with this guide, you'll need to have a few things set up:
- An account on the Render platform
- A Git account
- PostgreSQL installed
- A GitHub account
Now let's learn how to deploy a Django web server for free. 🚀
How to Set Up a PostgreSQL Database
First, head over to your Render dashboard and create a PostgreSQL database. Click the New + button, hover over PostgreSQL, and click it.
 Render Dashboard – creating a PostgreSQL database
Next, define your database settings by giving your database instance a name. You can choose to either let Render to define a name for a database and a user or define it yourself.
This guide is for beginners, we'll only define the instance name.
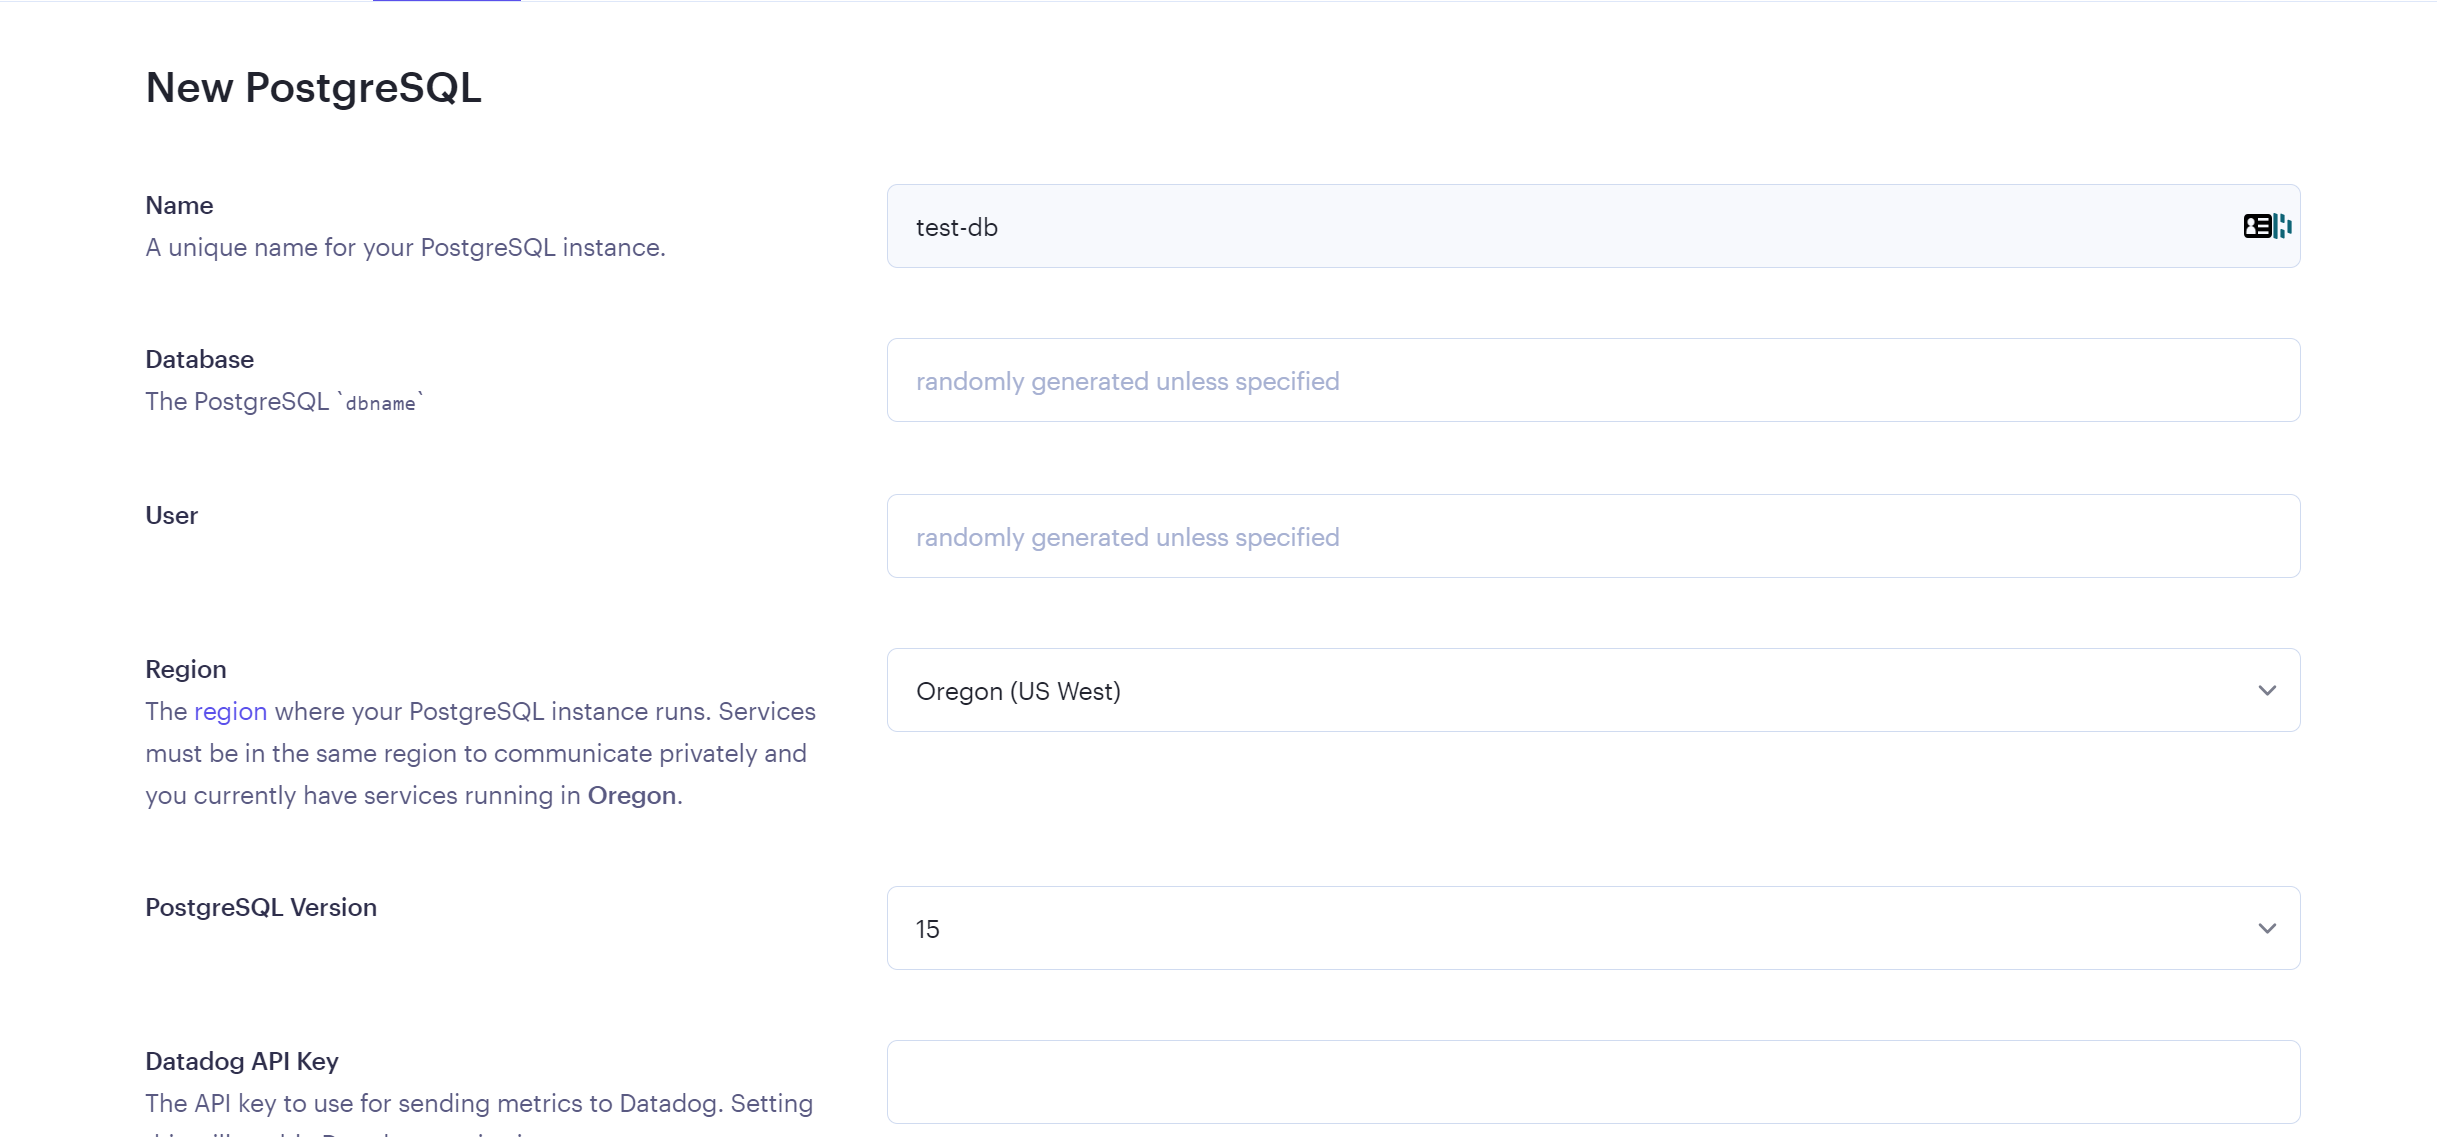 Creating a new PostgreSQL database
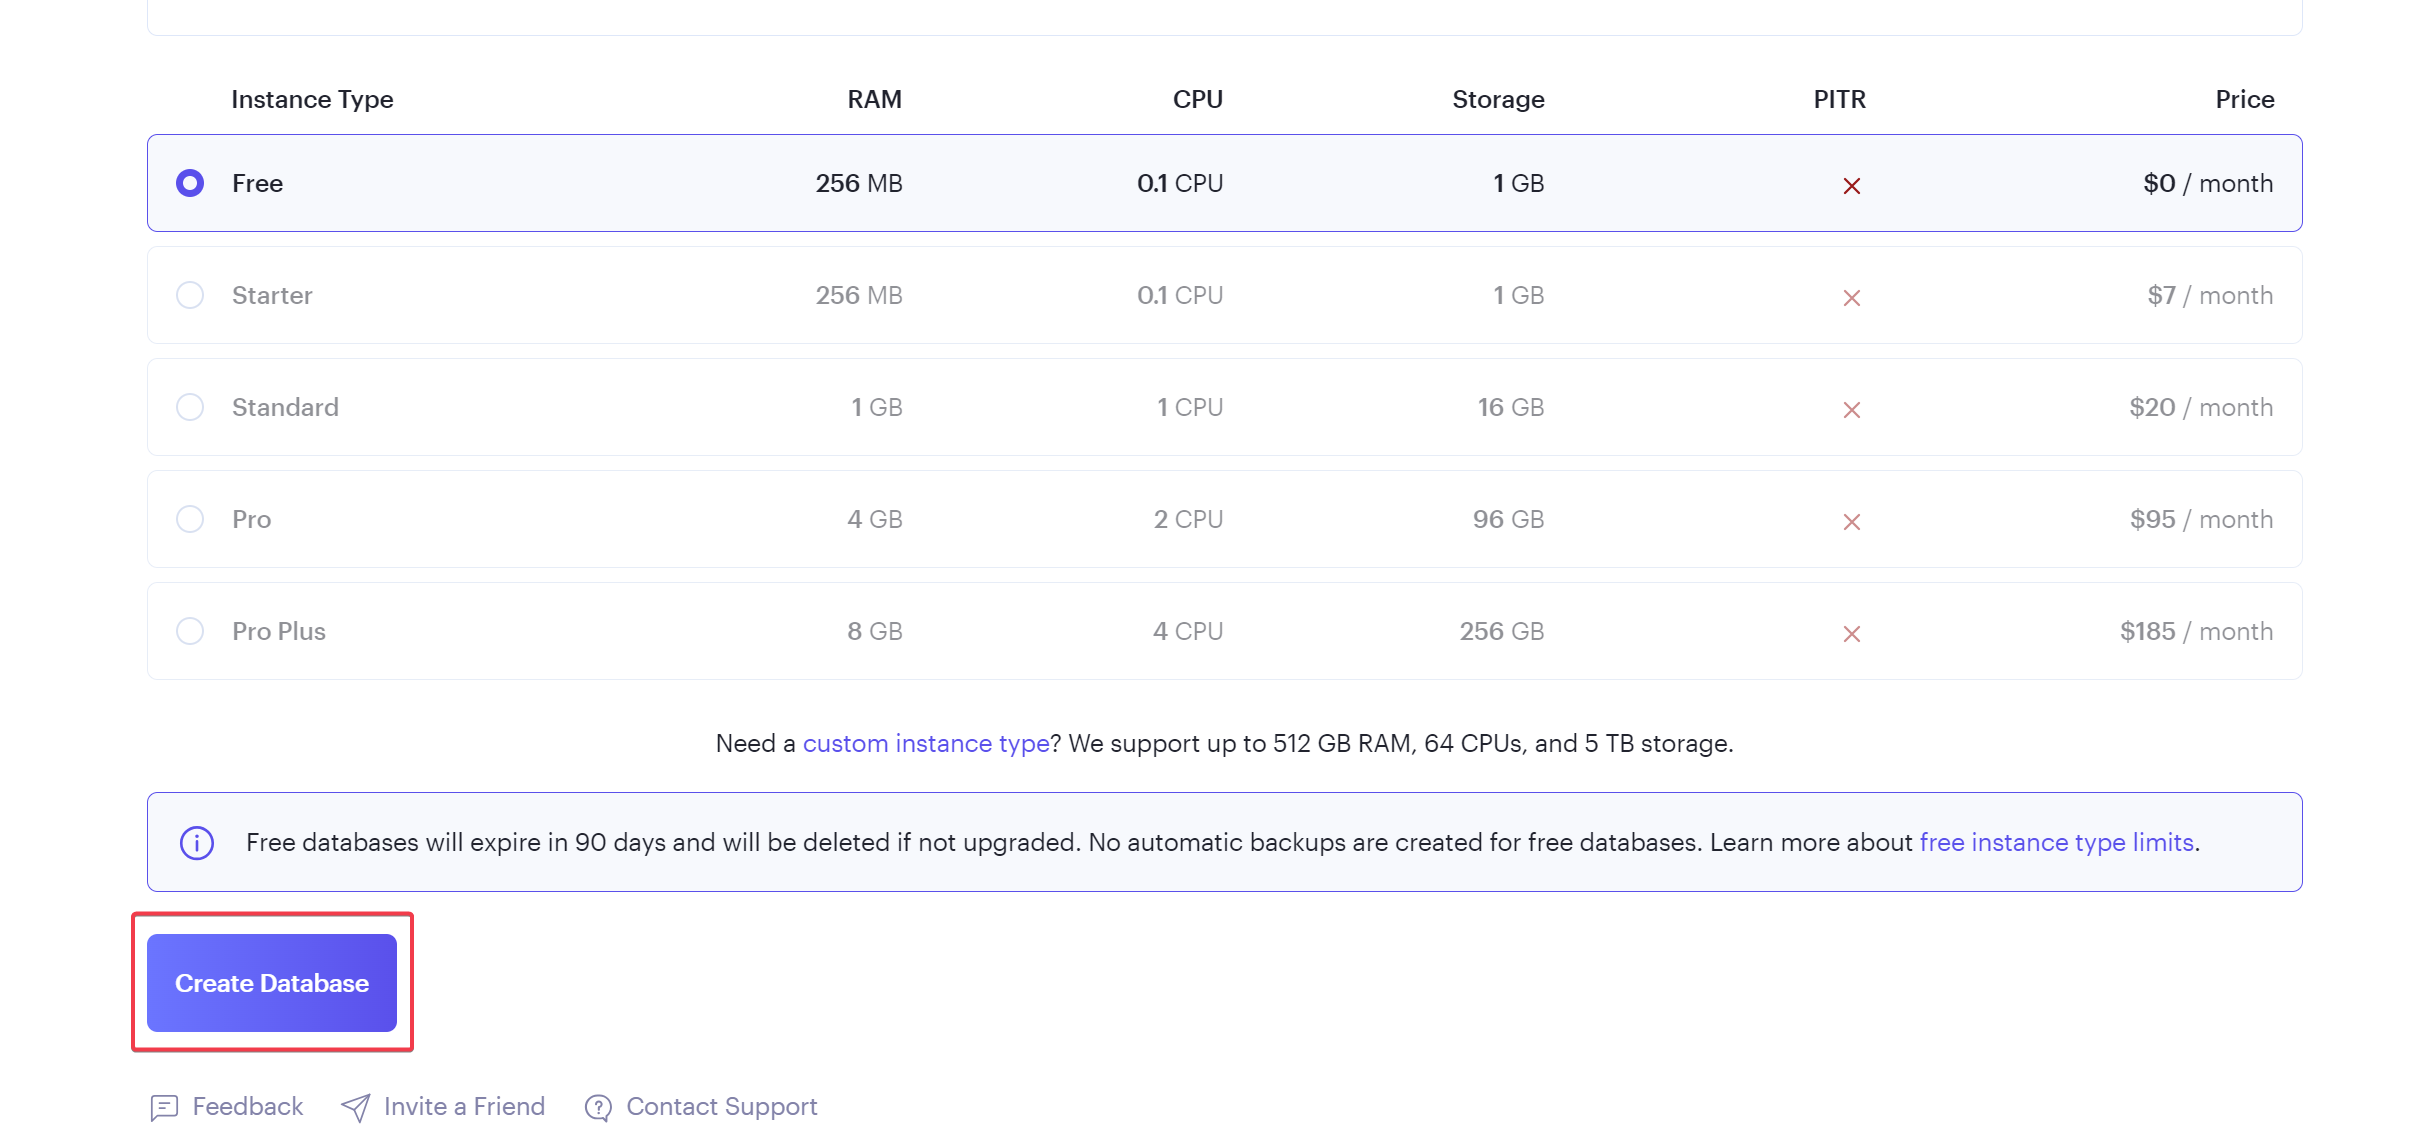
Select the free tier and click on Create Database.
Note: Every free database created on Render expires 90 days after creation. So just take note of this and upgrade if it's an important project. You can see the pricing here.
 Creating a new PostgreSQL database
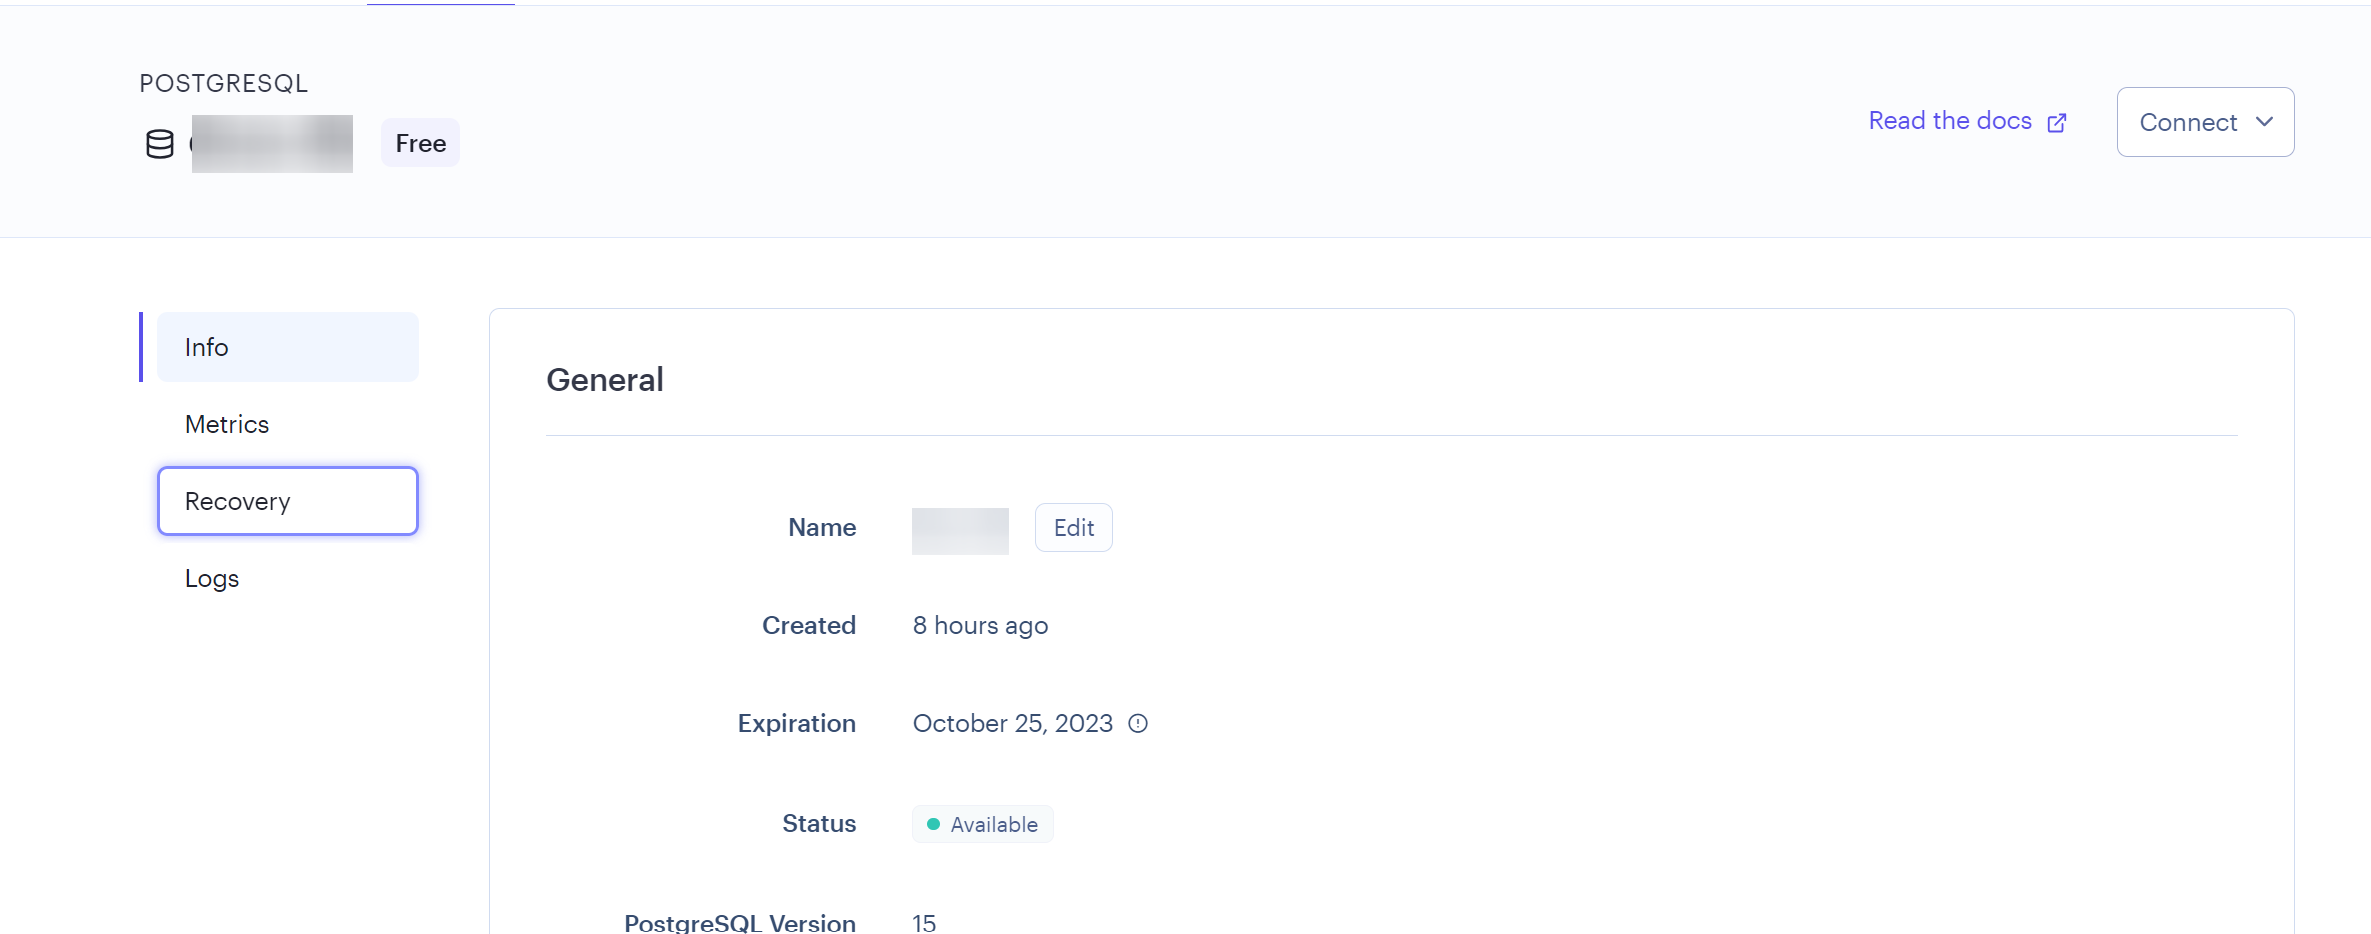
Once the status on your database shows Available, it means the database has been successfully created and is ready to use.
 Checking the status of a newly created PostgreSQL DB
Scroll down this page to see your database settings. You'll use these settings to set up your Django app.
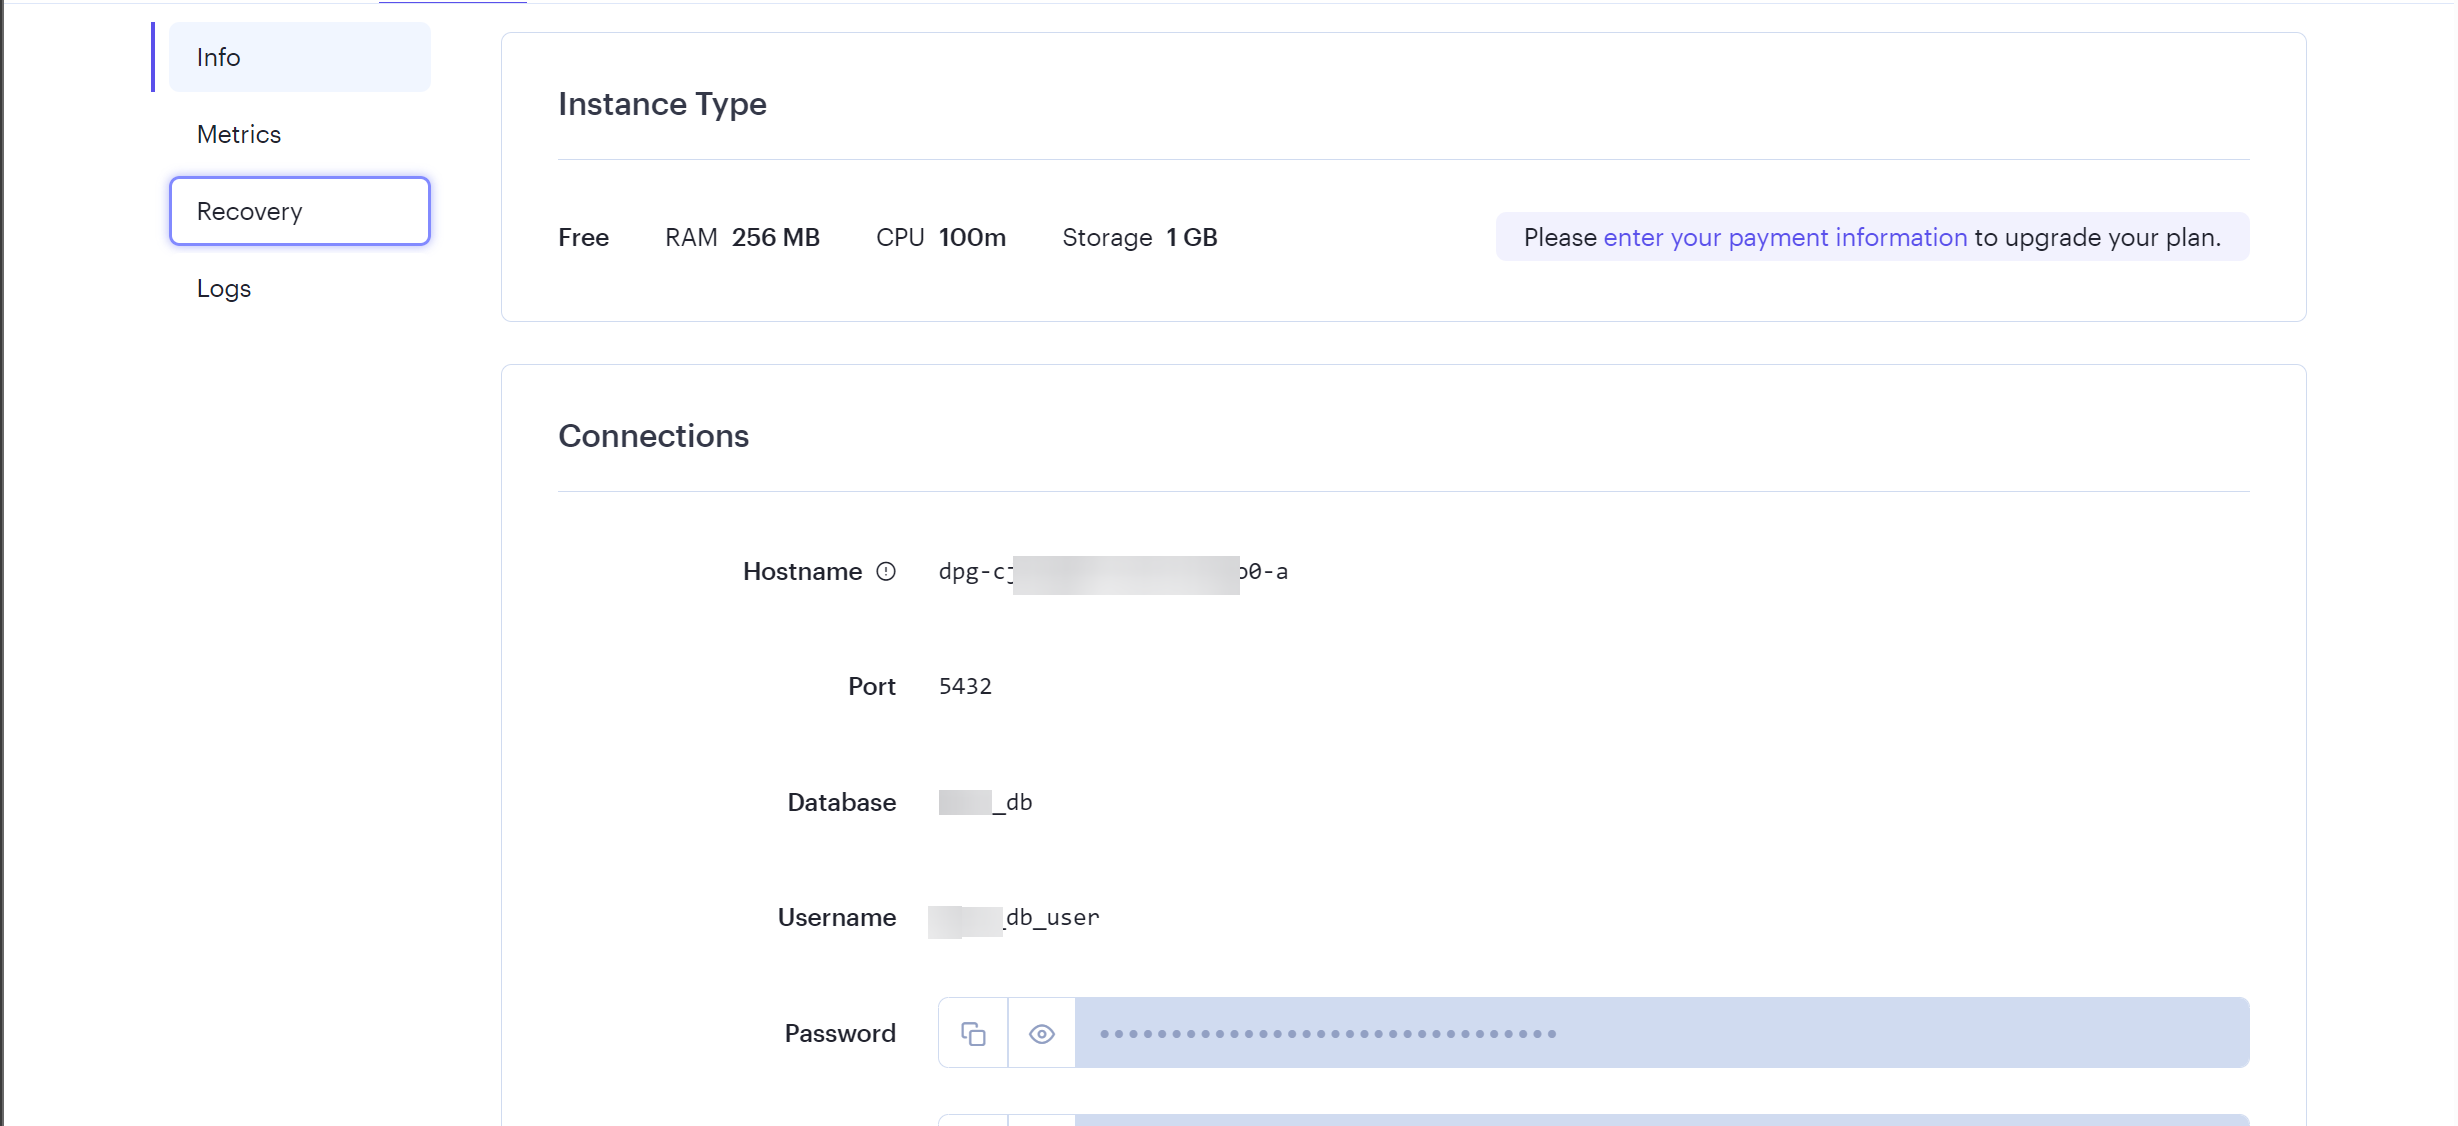 Database information
Next, access control lets you choose an IP address to access your database.
Once your database is created, it comes with a pre-defined access control route that allows you to access it from anywhere in the world using a single (1) IP address. Although, you can't set another route since you are using a free plan on Render.
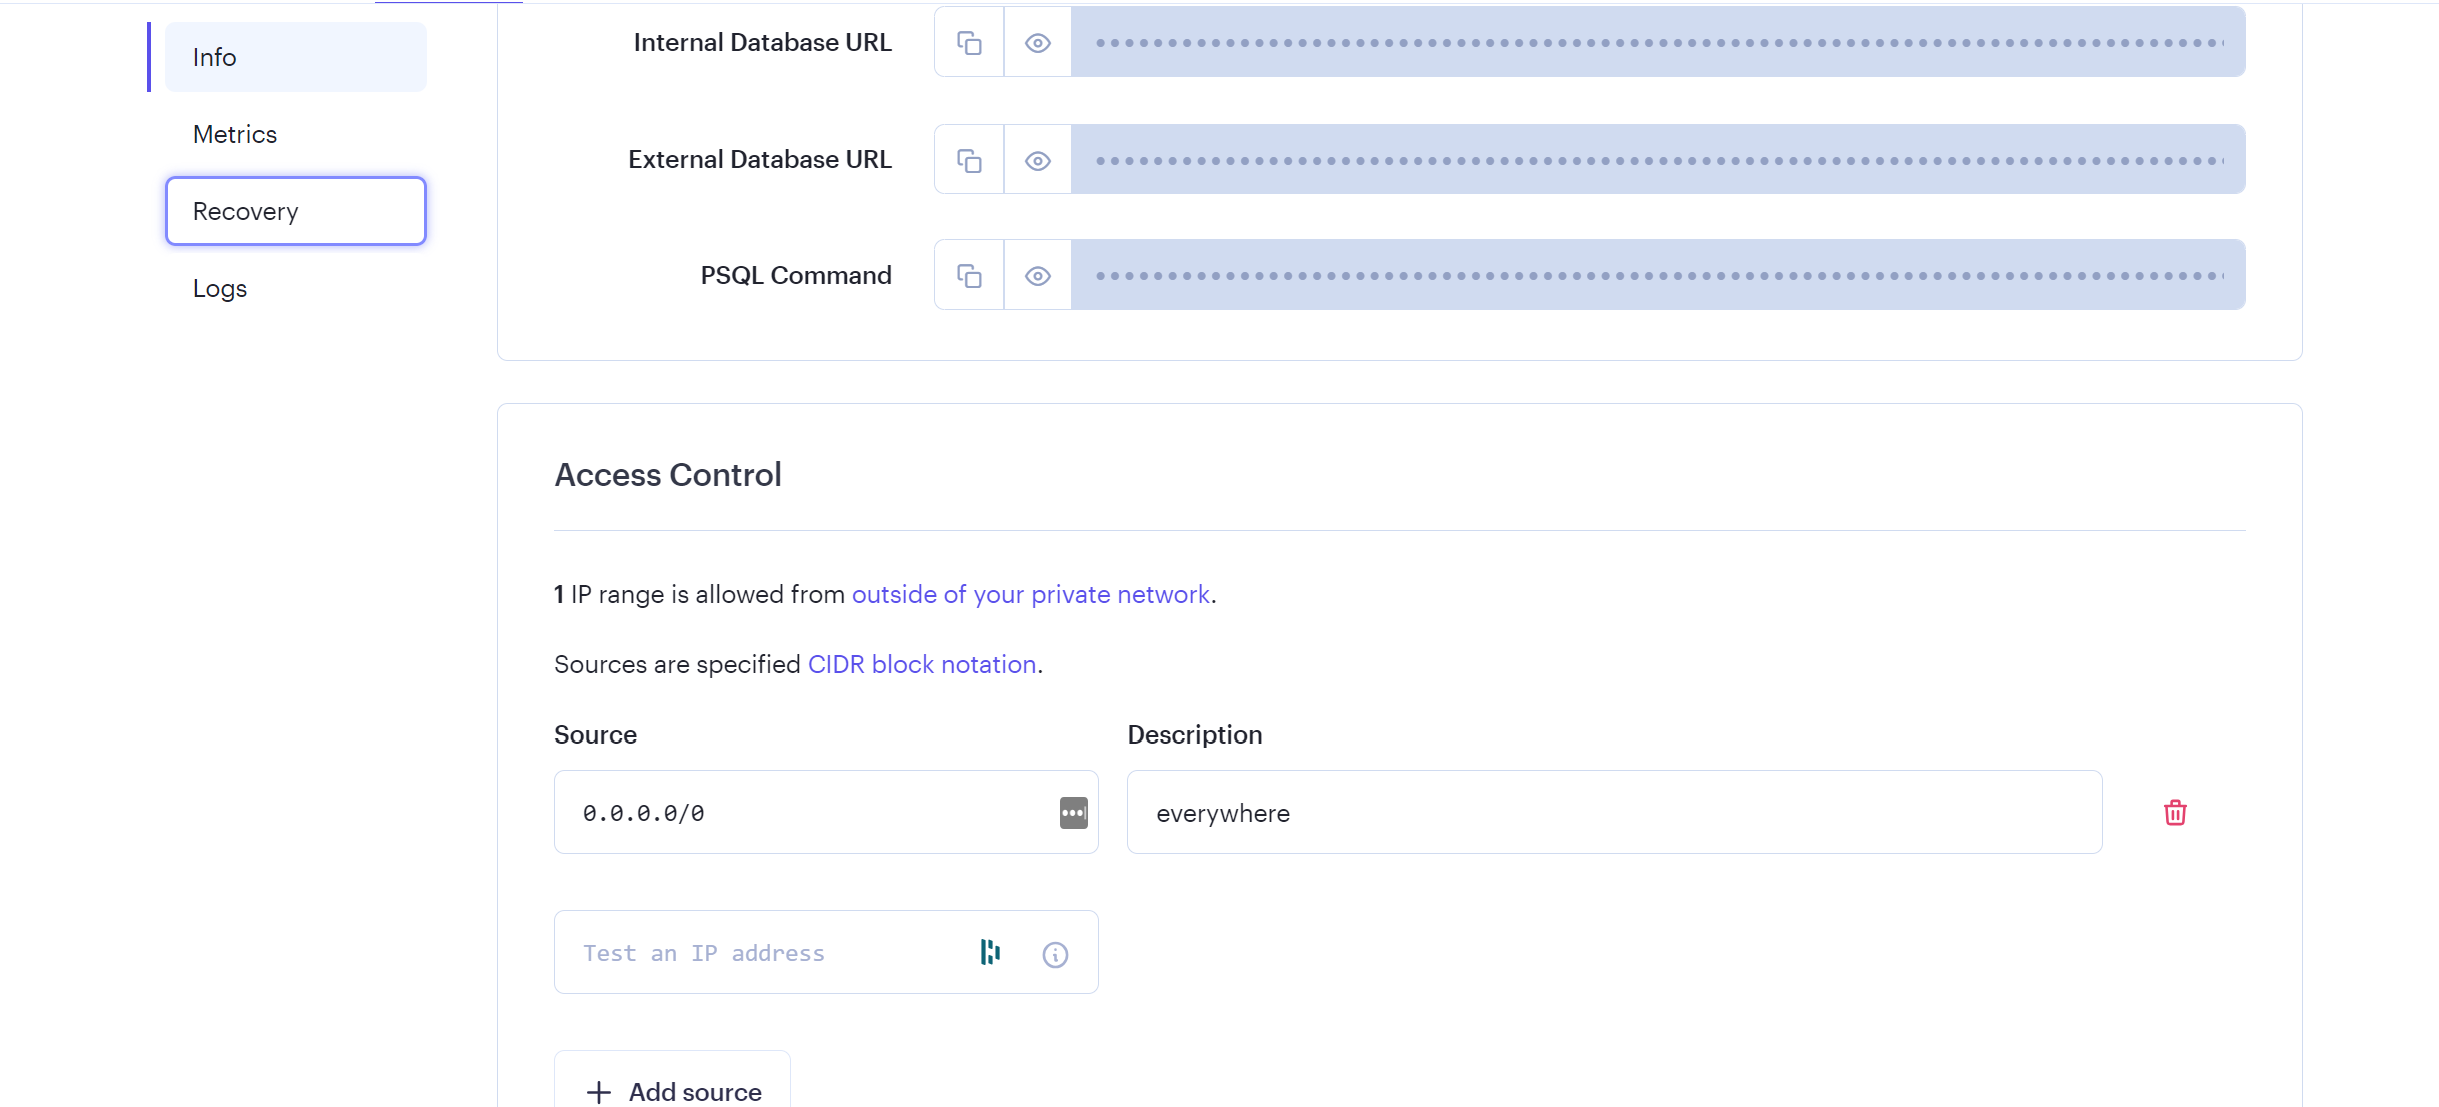 PostgreSQL access control information
You can choose to change this or leave it as the default.
Now that we've created a database, let's set it up on a Django project.
How to Connect Your Database
Once the database is set up, you need to connect it to your Django project in the settings.py file.
Head over to your codebase and connect it.
First, Install dj-database-url
pip install dj-database-url
There are different ways to connect your database to your app's project. This guide uses the external connection URL.
Head over to your database settings on Render and copy the External Database URL.
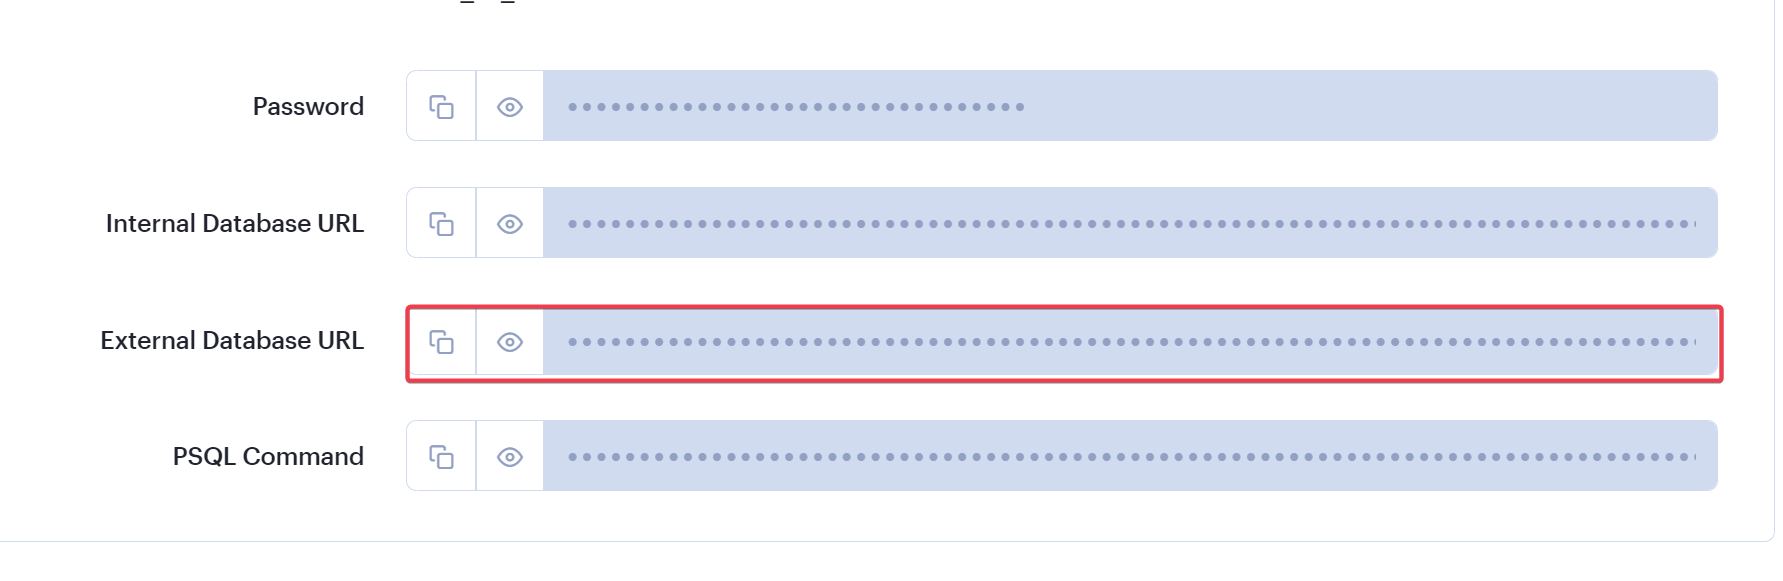 Getting External DB URL
Next, import dj-database-url in your settings.py and define the database URL (from Render) as your database.
Note: It is always wise to add sensitive information to an .env file for security reasons.
import dj-database-url
import os

DATABASES = {
    "default": dj_database_url.parse(os.environ.get("DATABASE_URL"))
}
Next, migrate your tables to your new database to ensure the connection was successful.
If you haven't made any migrations to any db.sqlite locally, ensure you make migrations first or you won't create tables when you run python manage.py migrate.
# To make migrations if this is your first time connecting to a database
python manage.py makemigrations

#To migrate tables set on your migrations folders
python manage.py migrate
If the connection was successful and you migrate all your tables, your terminal output should look like this:
 Successful migration
You are now one step away from deploying your Django project! 🎉
Don't forget to push your codebase to a Git repo with meaningful commits.
How to Create A Web Service
This is the last step to getting your project live.
Head over to your Render dashboard. Click New + and Select Web Service.
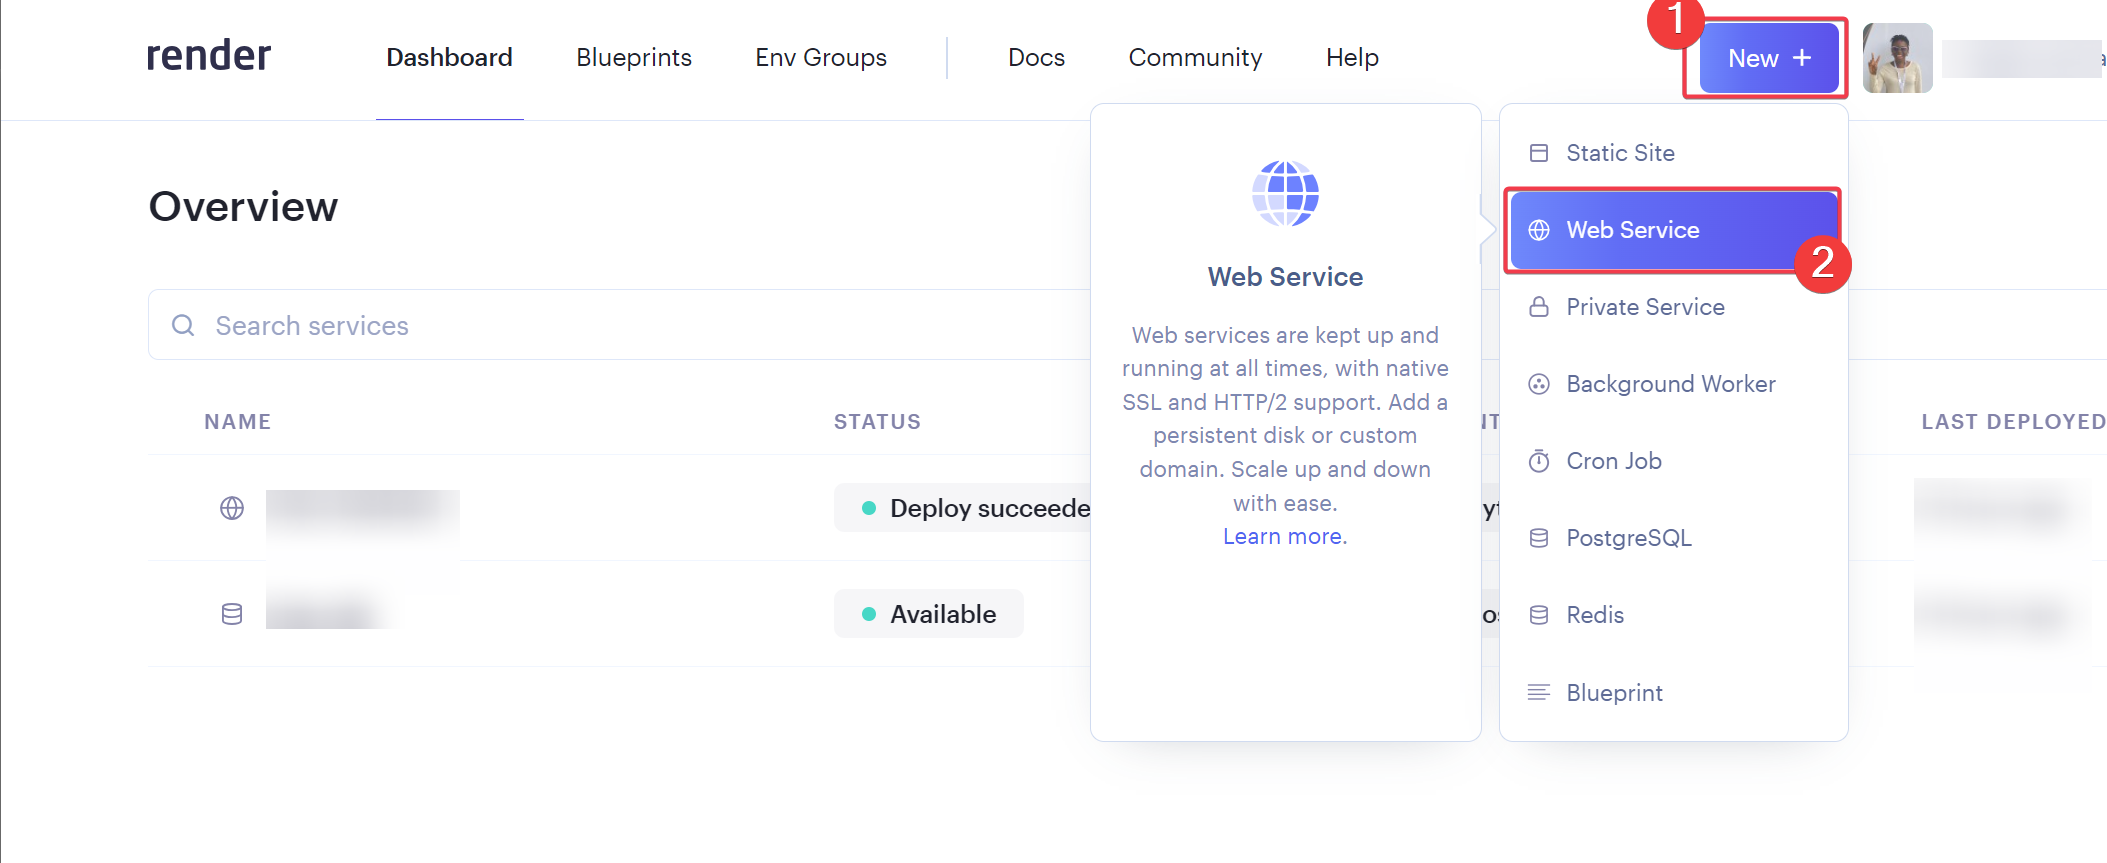 Creating a new web service
Connect your GitHub if you haven't already. It should look like this once it's connected:
 Connecting your Git to render platform
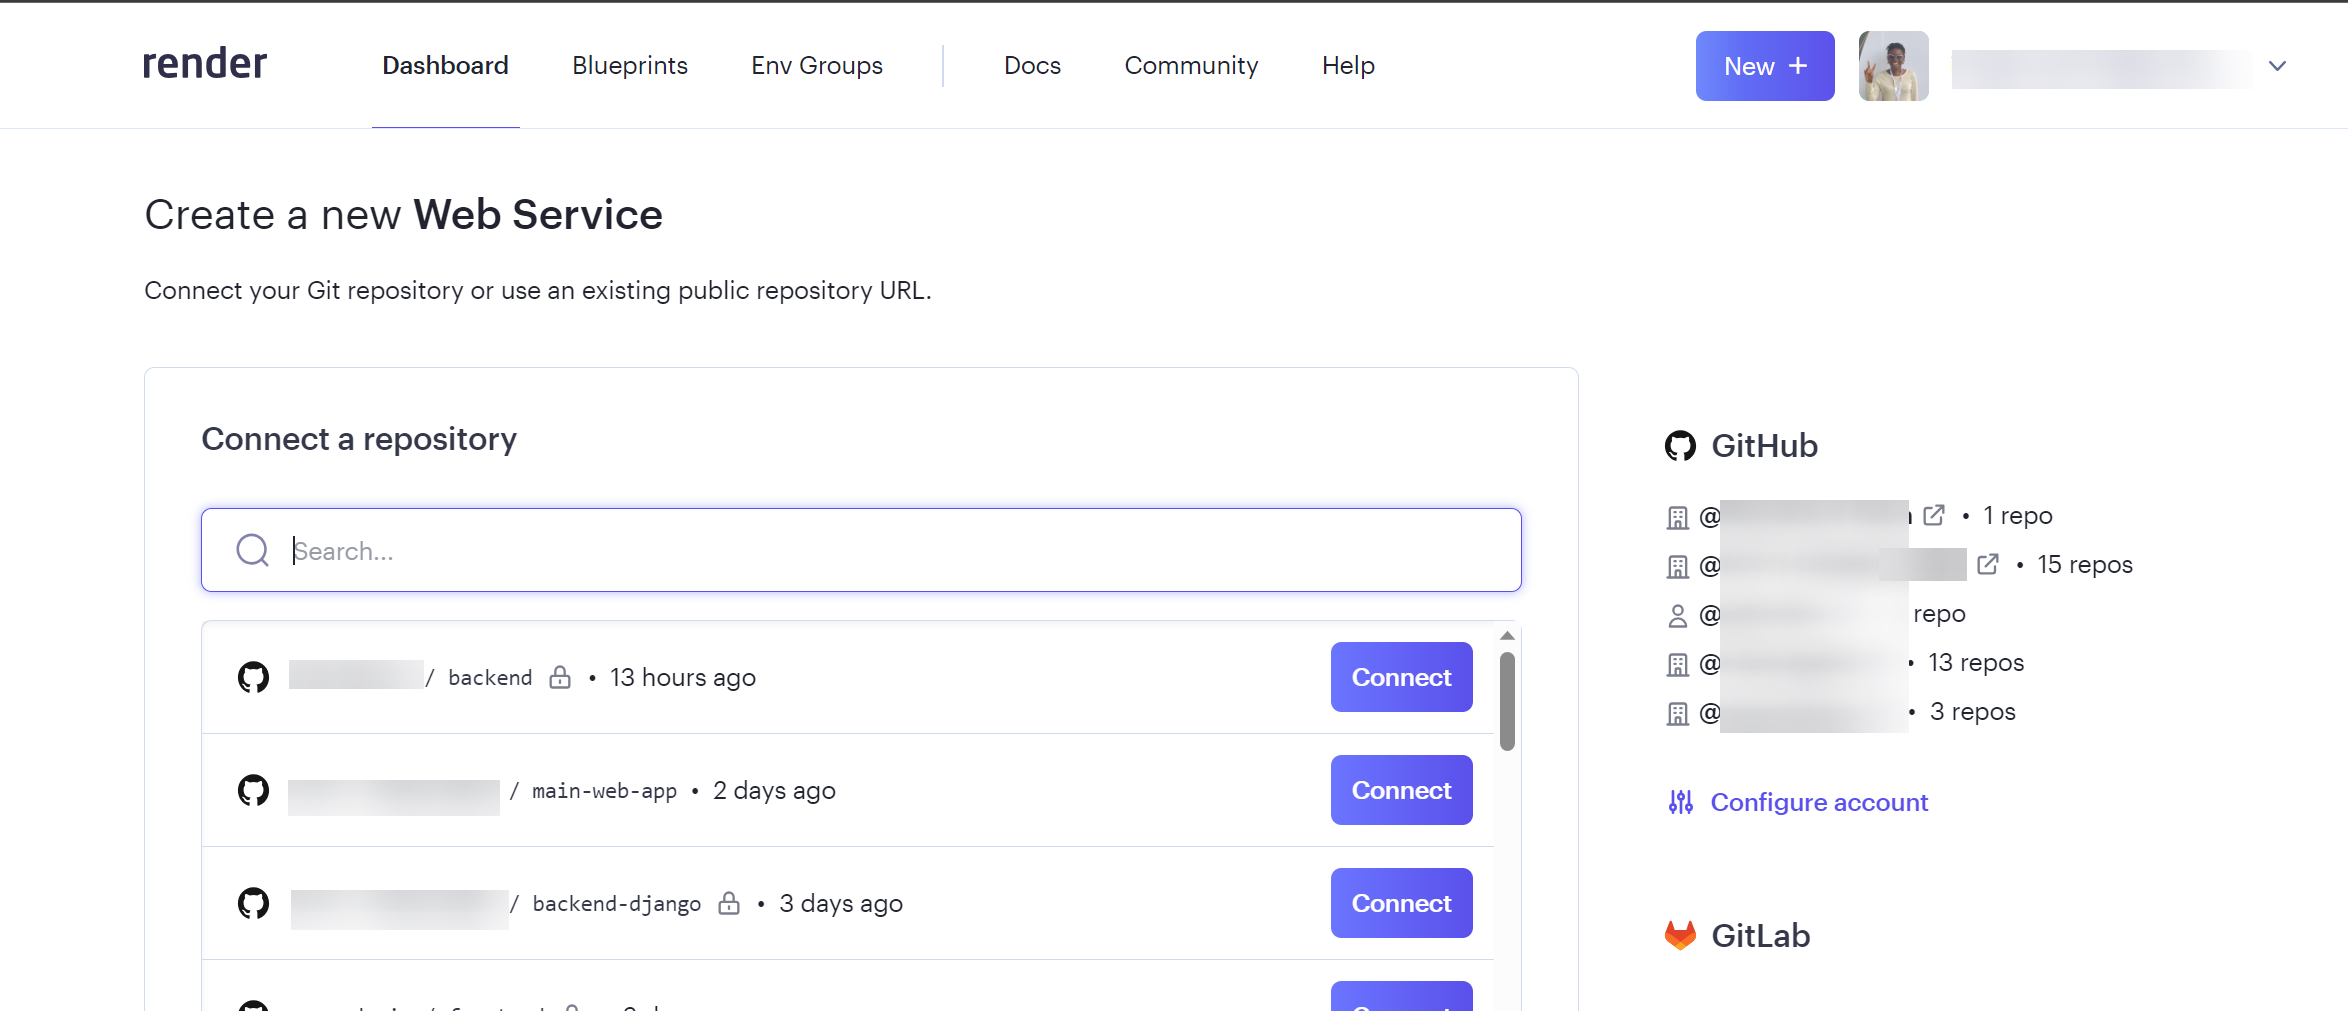
Search for the repo you want to deploy and click the Connect button. It should work seamlessly.
Then, define your repo's settings. Give your app a name and ensure you are connecting to the right branch.
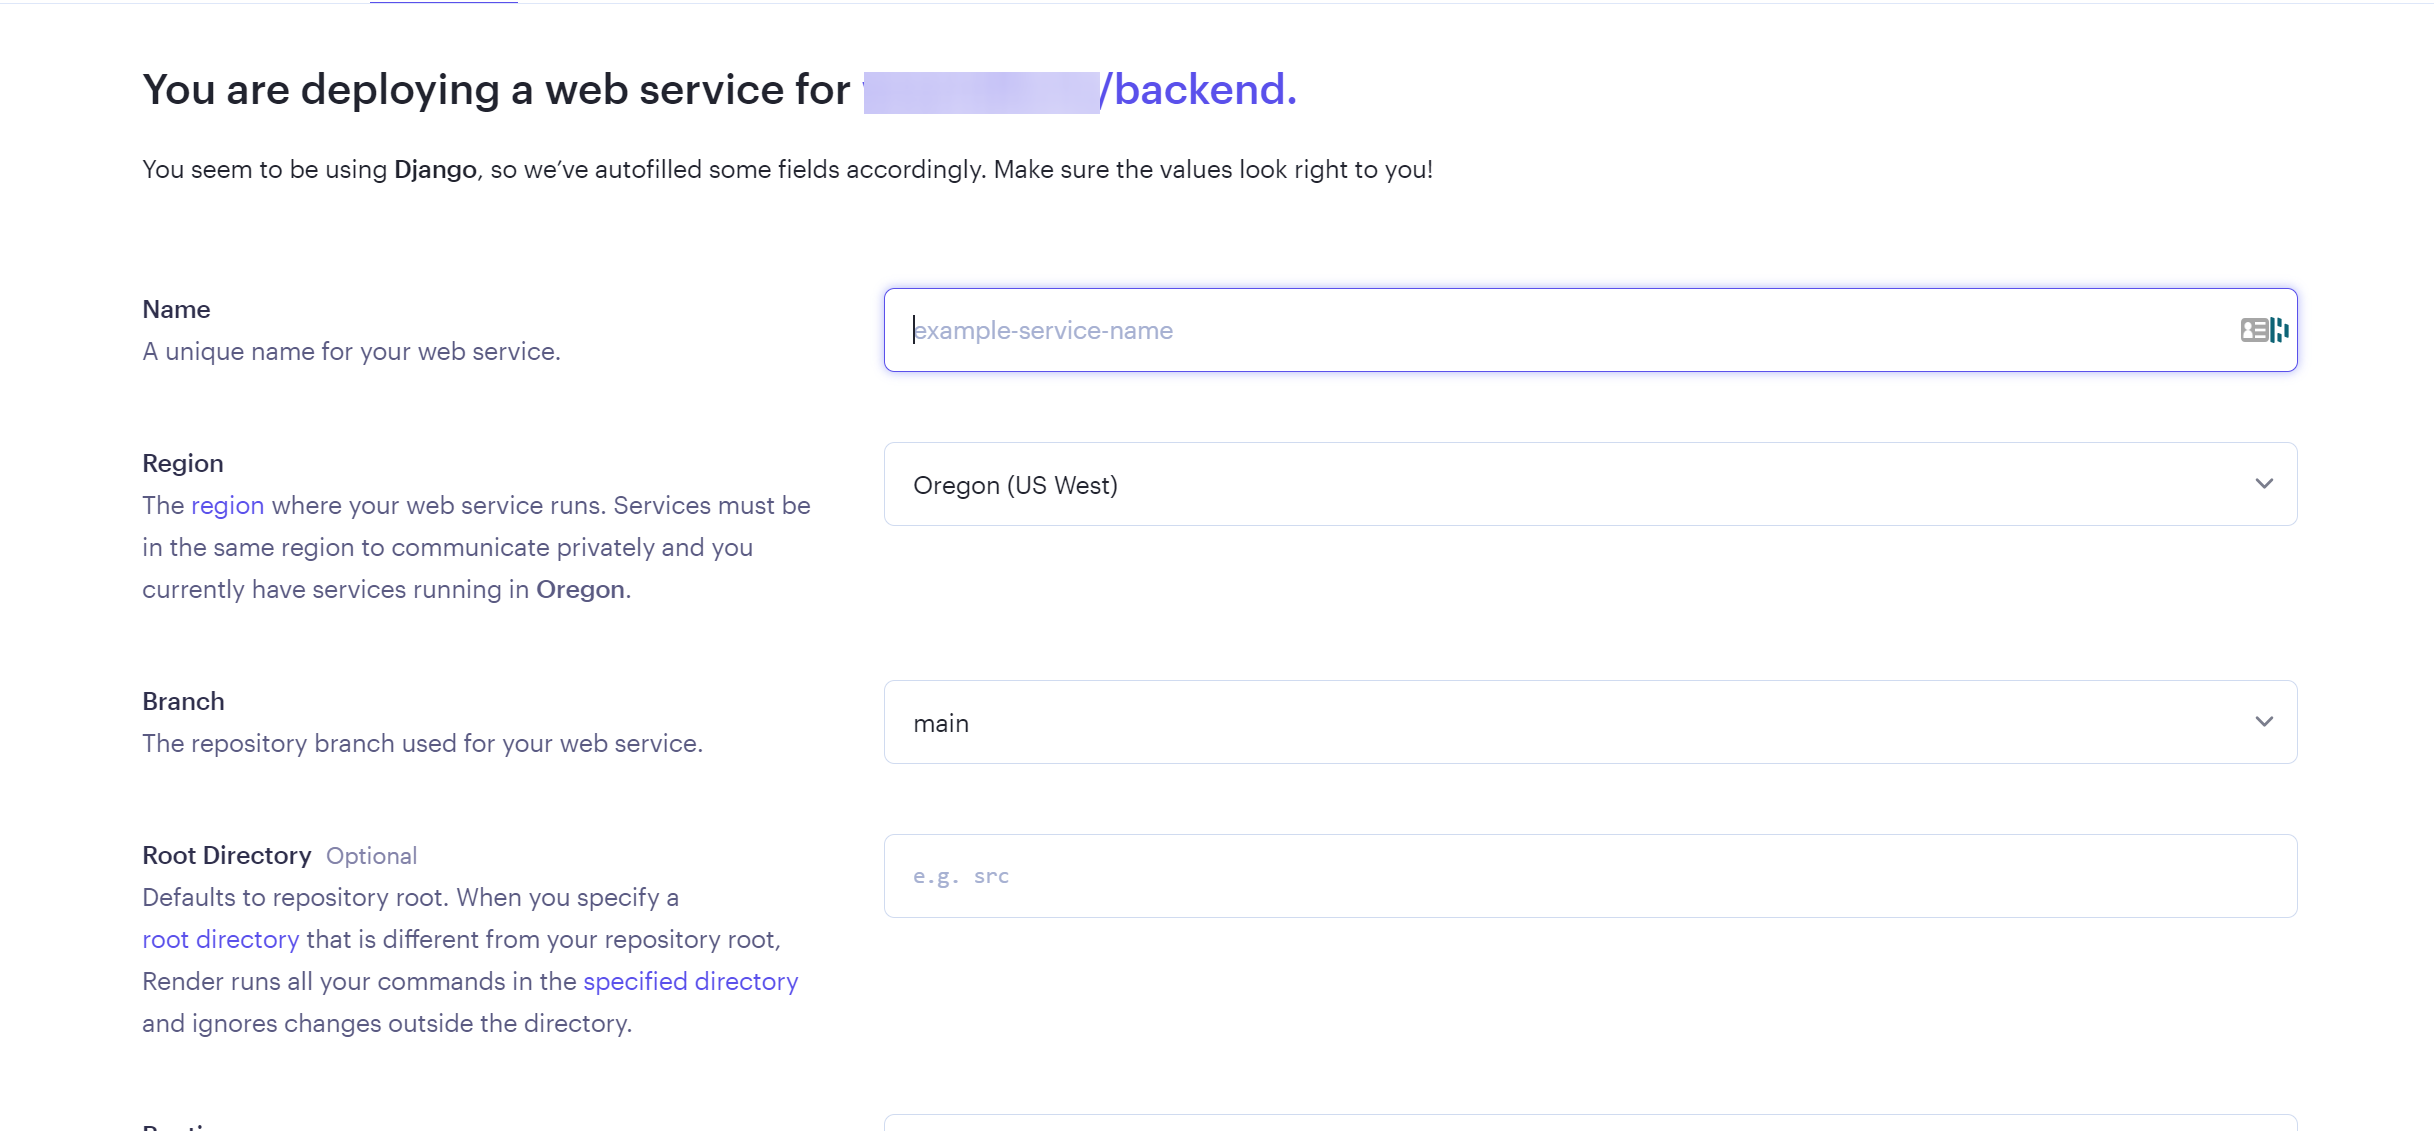 Setting Django web server
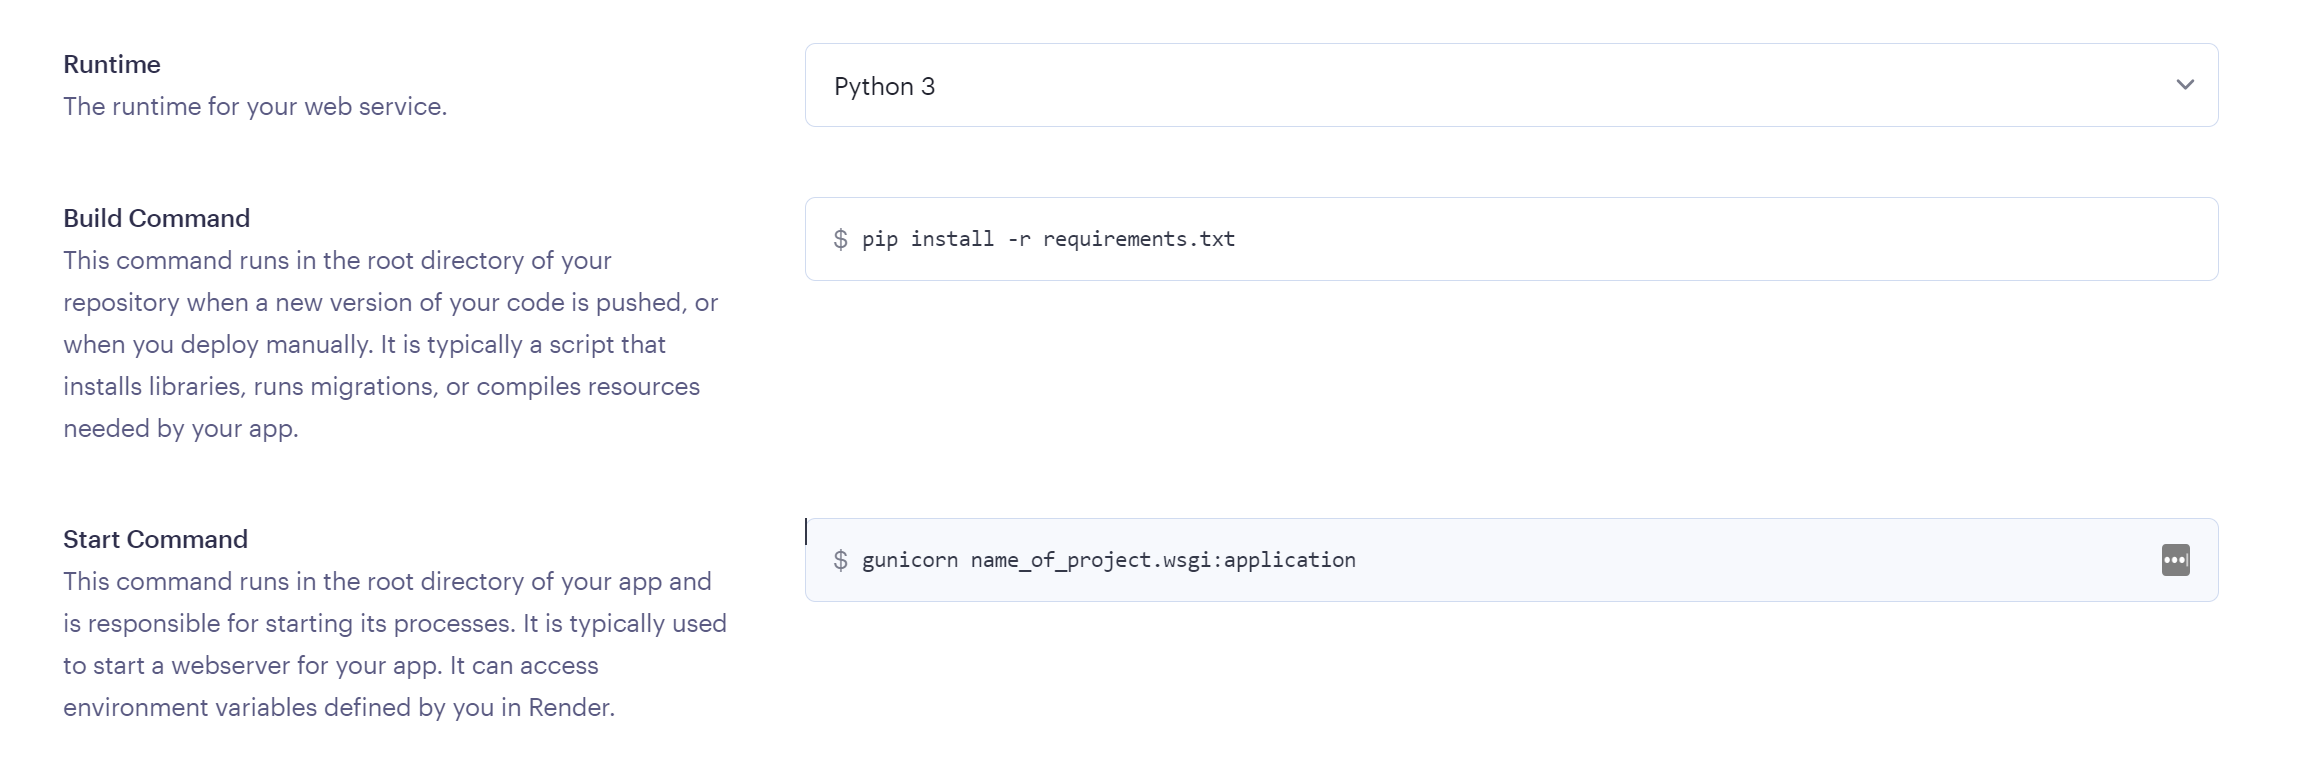
Install gunicorn and change your requirements.txt in your Django project. By performing pip freeze > requirements.txt, you can update installed packages in your requirements.txt. This automatically changes your project's list of required files.
Gunicorn is a lightweight Python web server that acts as a gateway between a web application and the internet. It is designed for deployment since it manages incoming web requests effectively.
Then, push your changes to Git. Remember, you connected Git to your web service, so Render monitors the repo and auto deploys when it detects any changes.
pip install gunicorn

pip freeze > requirements.txt # To update your requirements.txt file
Ensure you add your Render web service to ALLOWED_HOSTS in your settings.py.
Next, ensure that you set the right requirements.txt as you can see in the image below. Also, make sure you use the right Python runtime and define your project's gunicorn settings on Render platform.
Once done, scroll down and select Create Web Service.
 Creating a web service
Go back to the Render Dashboard and click on the Deployed Web Service to view your live link.
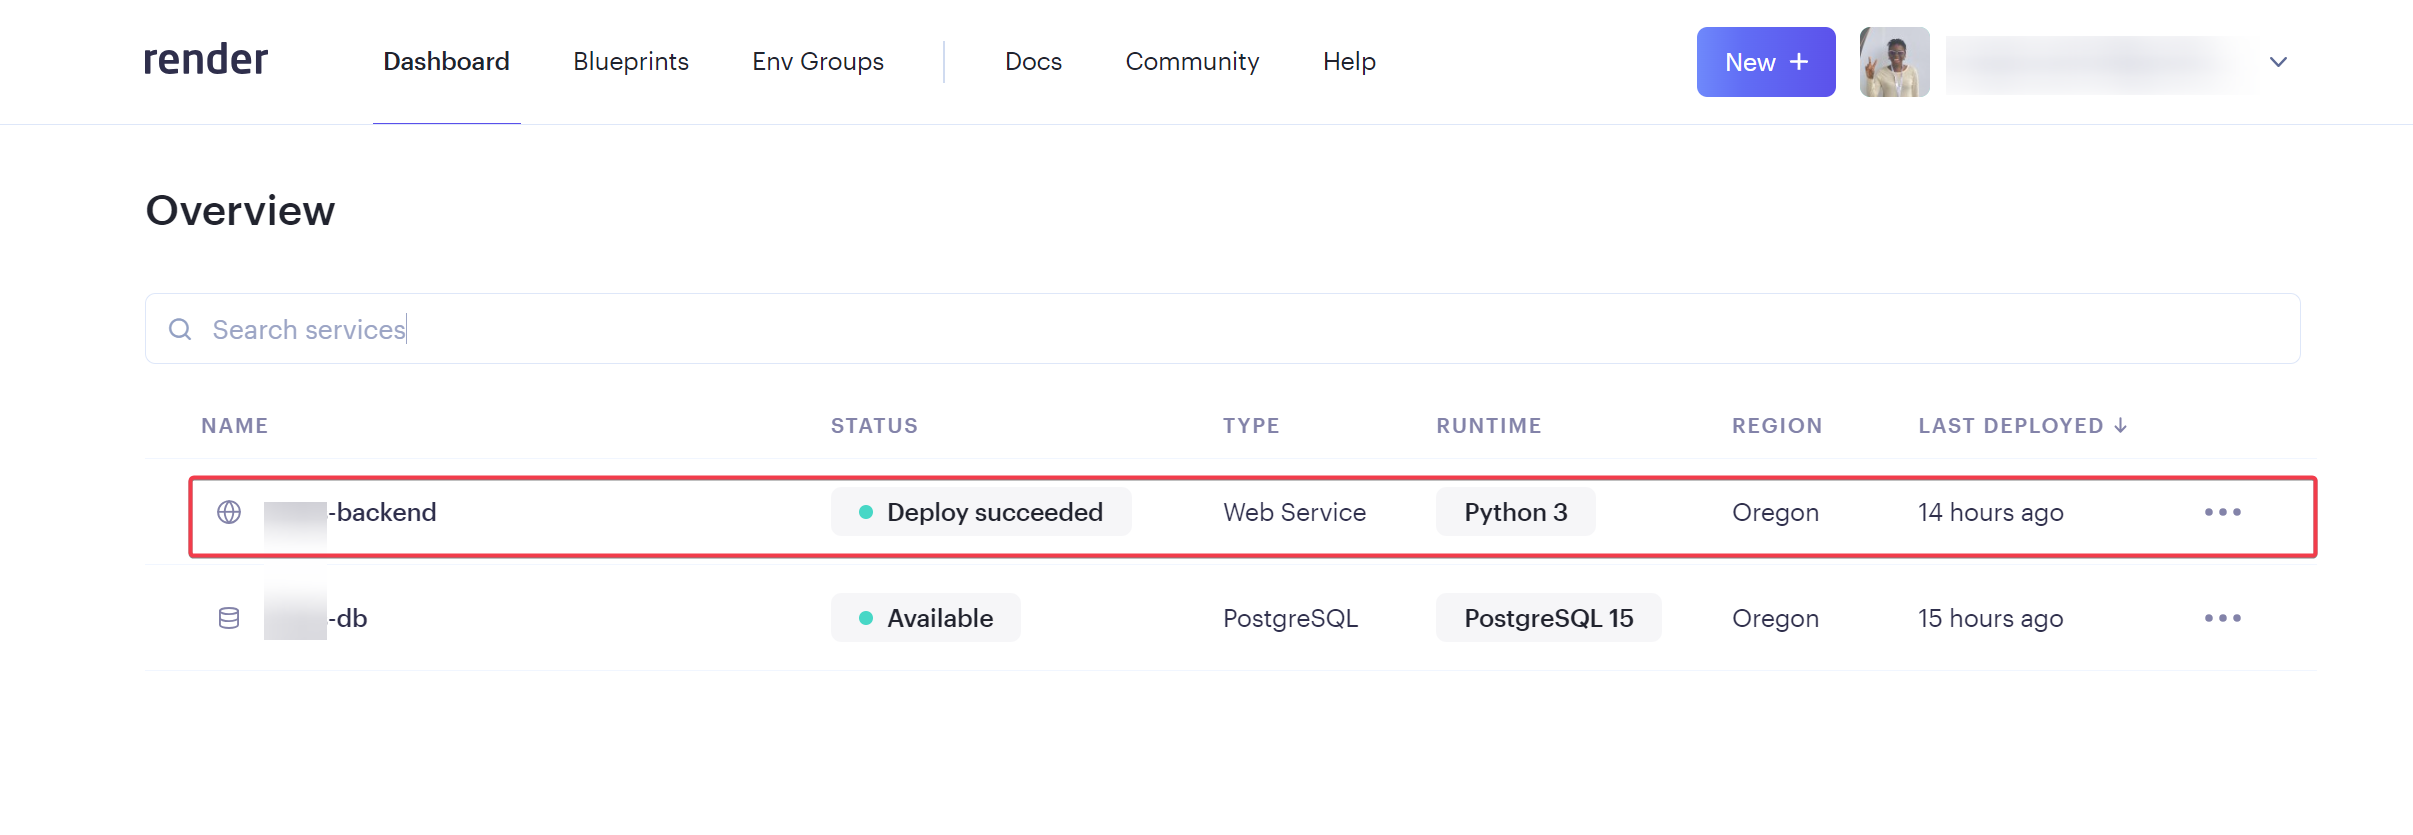 Deployed web service and database
That's it! You've deployed your first Django app on a free platform. Enjoy your web server for the next 90 days. 😎
Conclusion
To sum up, deploying a Django app/server or any server on Render is easy and efficient.
By leveraging Render's features like continuous integration and built-in monitoring, developers can focus more on building the app and its features rather than stressing over the app's infrastructure and management.