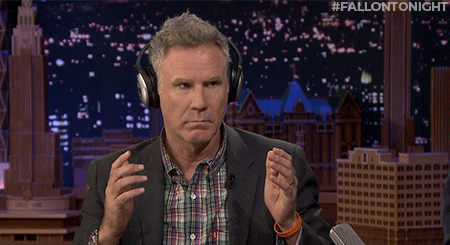

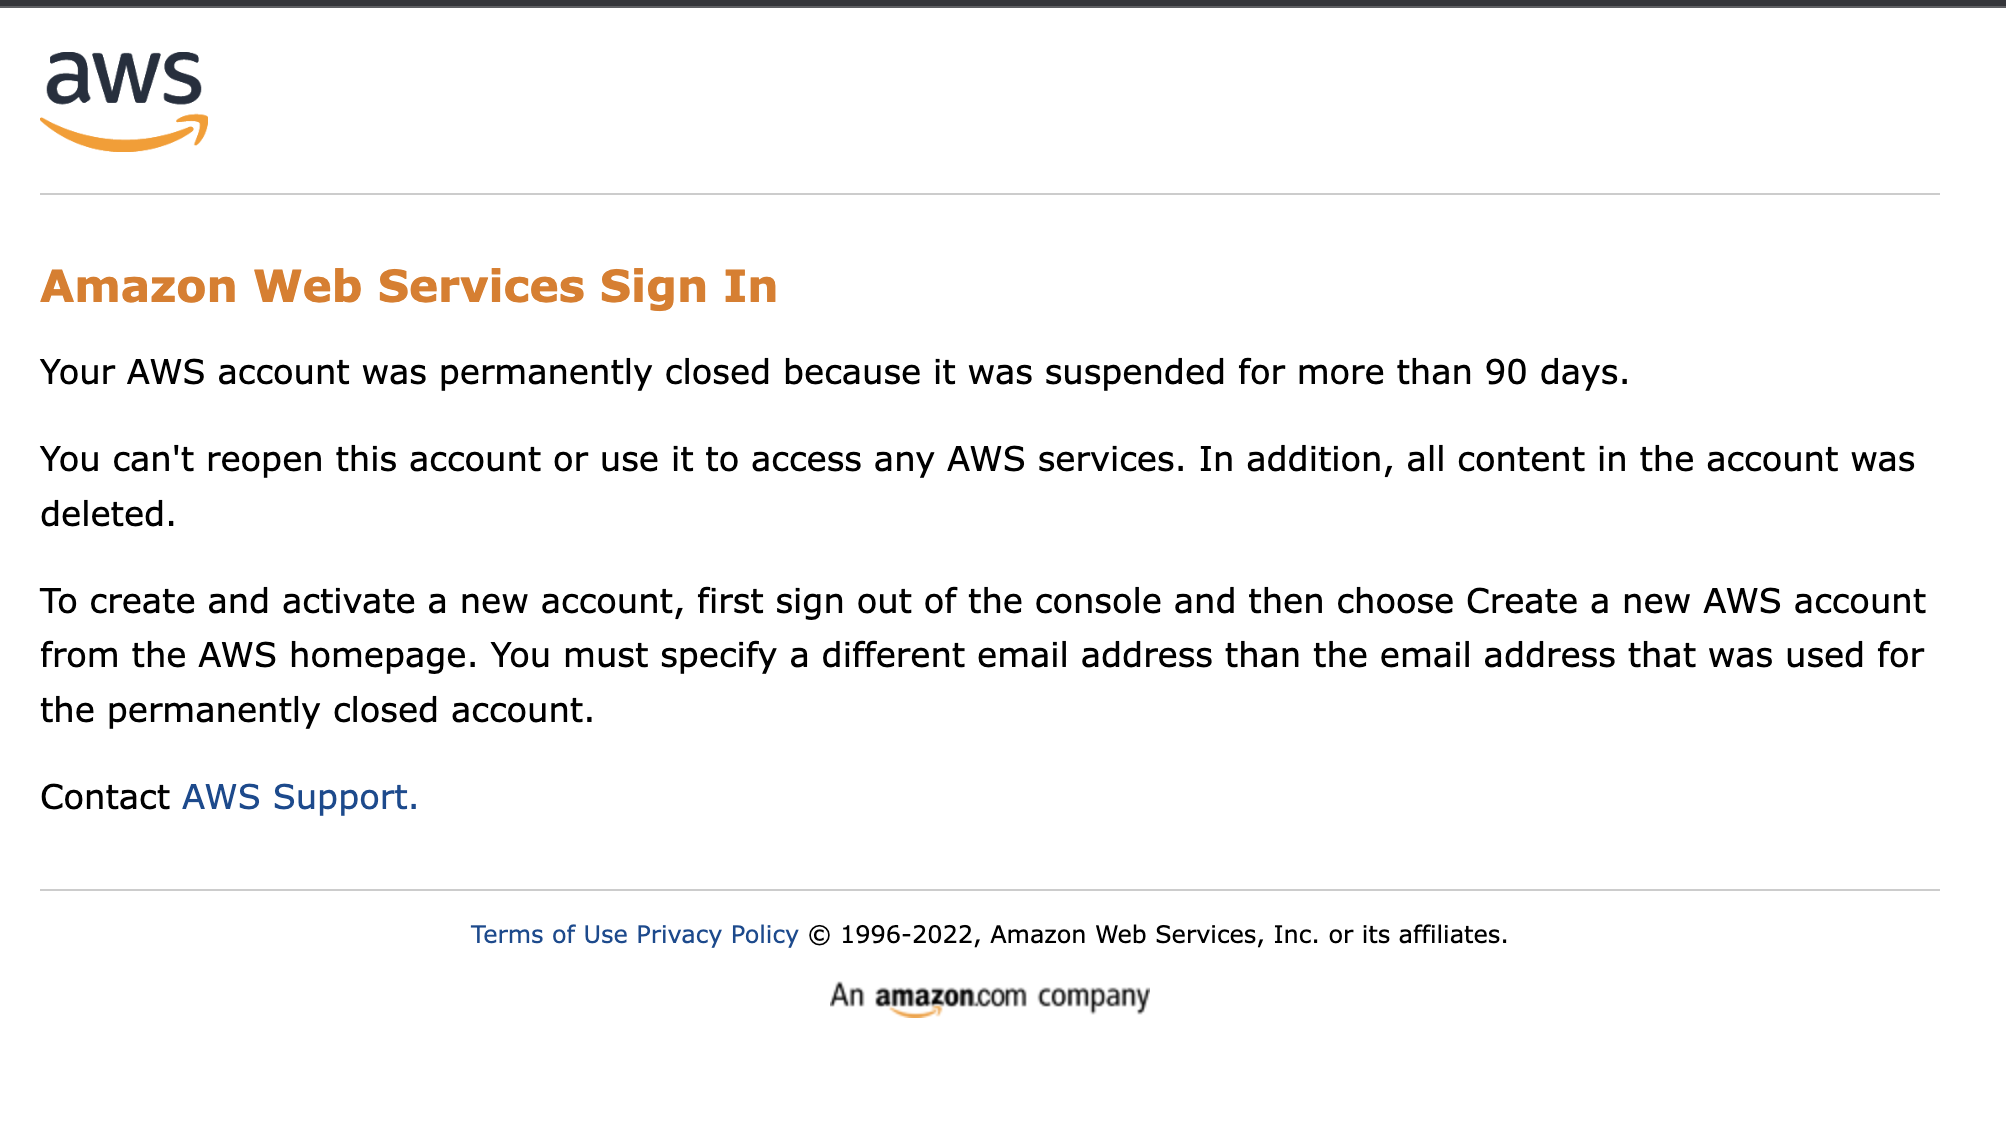
I needed to log in to AWS. But my main email address was rejected. Apparently I'd done this in the past and the account had been irreversibly deleted.
No reset option – just a message saying the account was permanently deleted:
There are about a million ways to get a new email address, but I wanted to set up one of the domains I own with email.
And I figured there would probably be a way to have that forwarded to my Gmail.
I was right!
In this quick guide, I'll walk you through:
- How to create an email alias
- Forwarding mail from the alias to a Gmail account
- Sending mail as the Email Alias
How to Create an Email Alias
I'm using Google products: Google Domains and Gmail. All these steps should apply generally to other Domain and Email services.
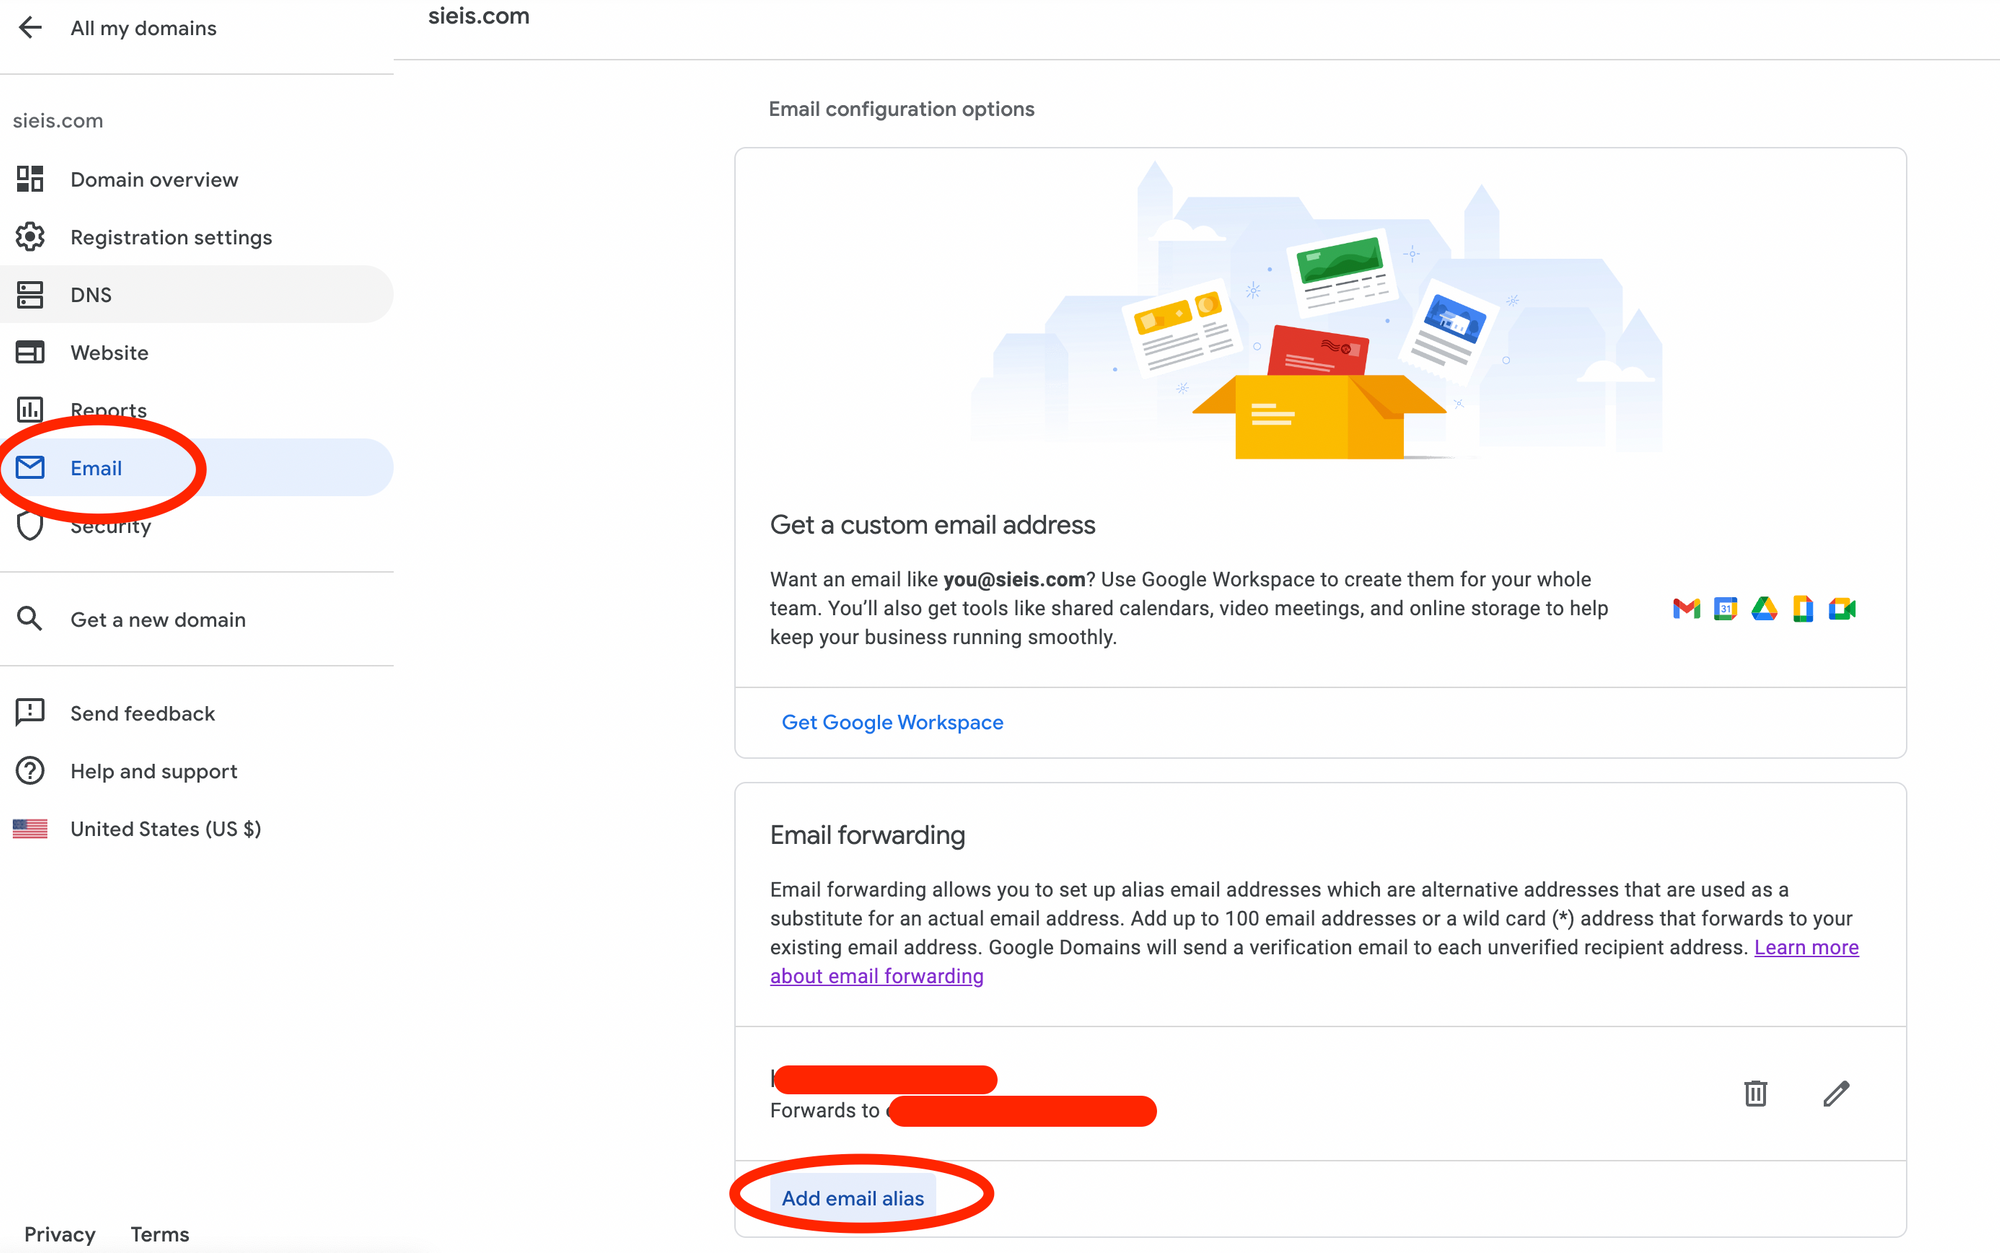
First, login to your domain provider and select the Email menu. You will be able to select "Add email alias" from the menu options.
How to Forward Email to Another Address
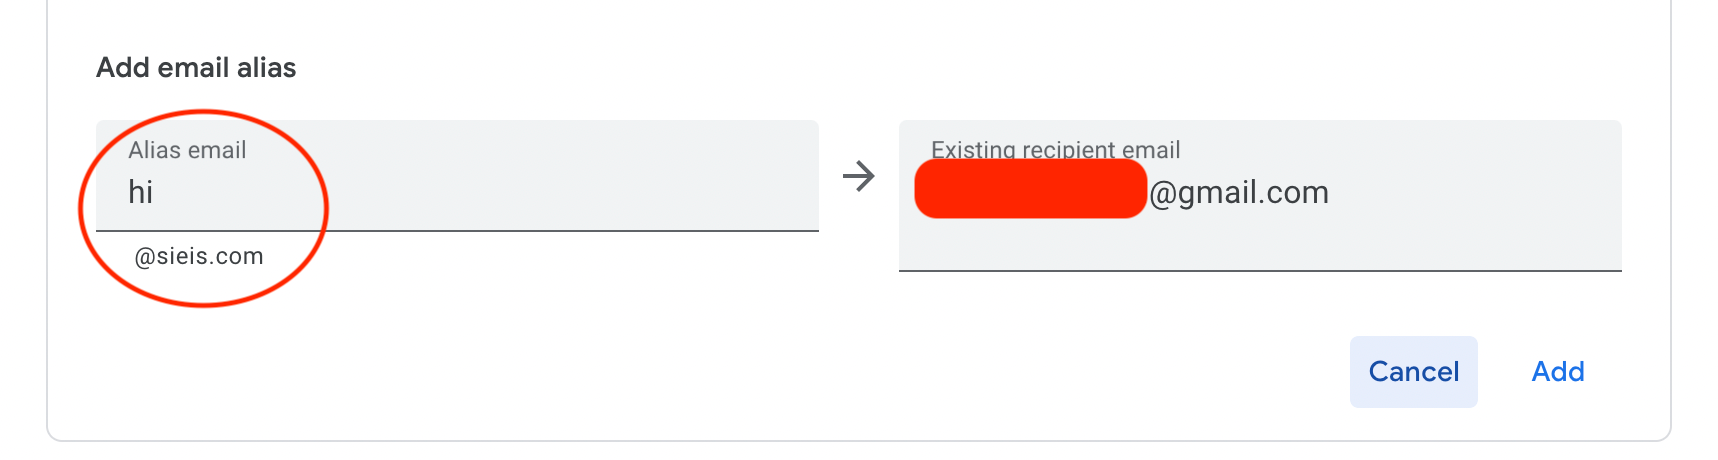
Note: if you add the asterisk (*) symbol, this will create a wildcard alias that forwards any email to the specified address. We'll be adding a specific alias in this tutorial.
Add whatever email you choose and enter where you'd like it to be forwarded to. I'll have hi@sieis.com forwarded to my main Gmail address.
If you are using Google Name servers, then Google Domains will automatically set up the correct mail records (MX).
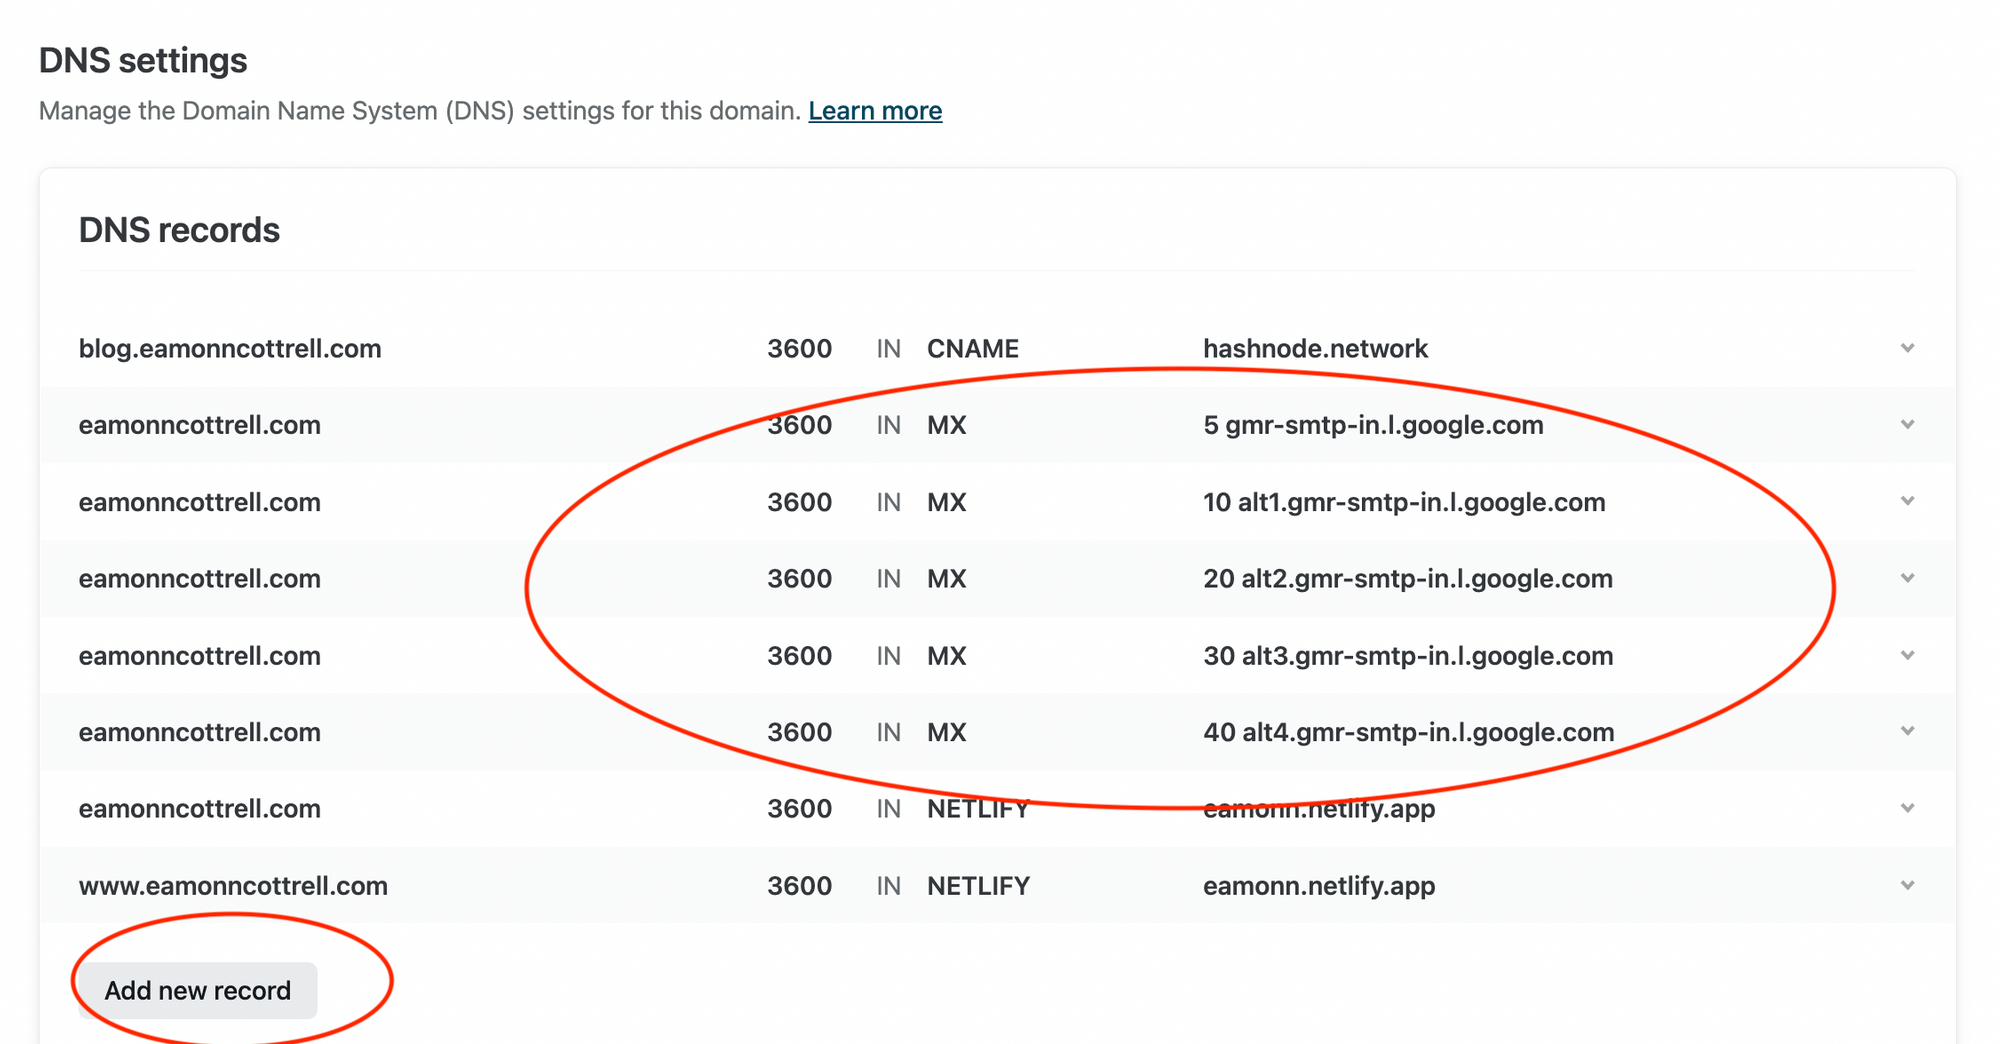
Otherwise, you'll need to set up these MX records. The process is exactly like setting up name servers if you've ever done that to host your website somewhere different than where you purchased the domain.
| Name/Host/Alias | Type | Time-to-live (TTL) | Priority | Value/Answer/Destination |
| Blank or @ | MX | 1H | 5 | gmr-smtp-in.l.google.com |
| Blank or @ | MX | 1H | 10 | alt1.gmr-smtp-in.l.google.com |
| Blank or @ | MX | 1H | 20 | alt2.gmr-smtp-in.l.google.com |
| Blank or @ | MX | 1H | 30 | alt3.gmr-smtp-in.l.google.com |
| Blank or @ | MX | 1H | 40 | alt4.gmr-smtp-in.l.google.com |
Bonus: I've done this for a site hosted on Netlify, and it is very straightforward. From the Netlify dashboard, select Options, Go to DNS panel, and then enter the MX records:
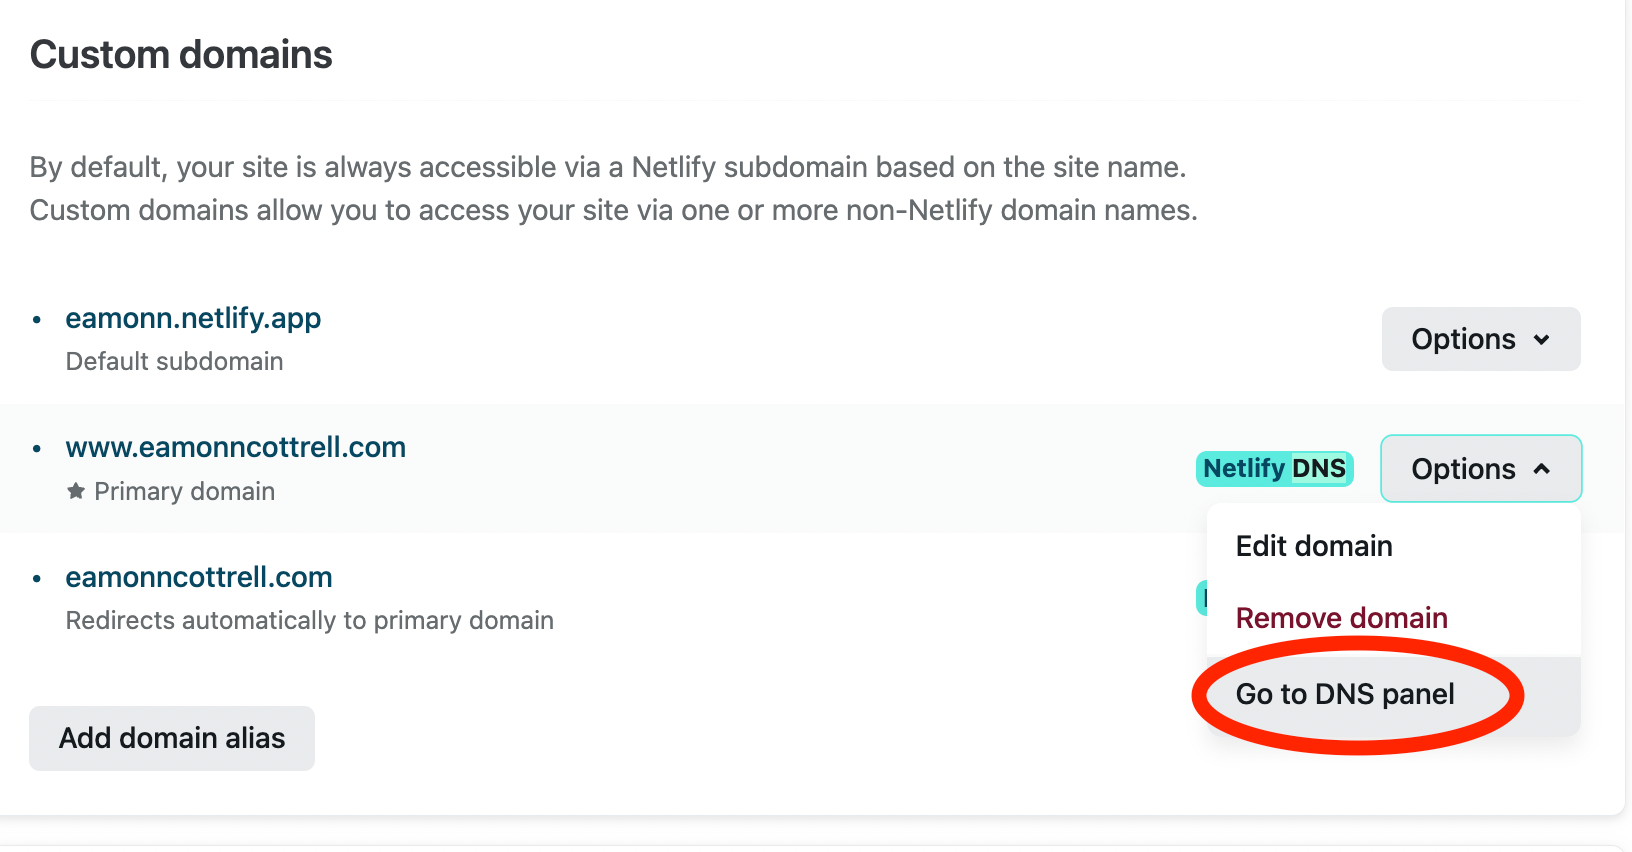
👇
Google will send a one time verification email here, but if you've previously done this verification it may not send another one.
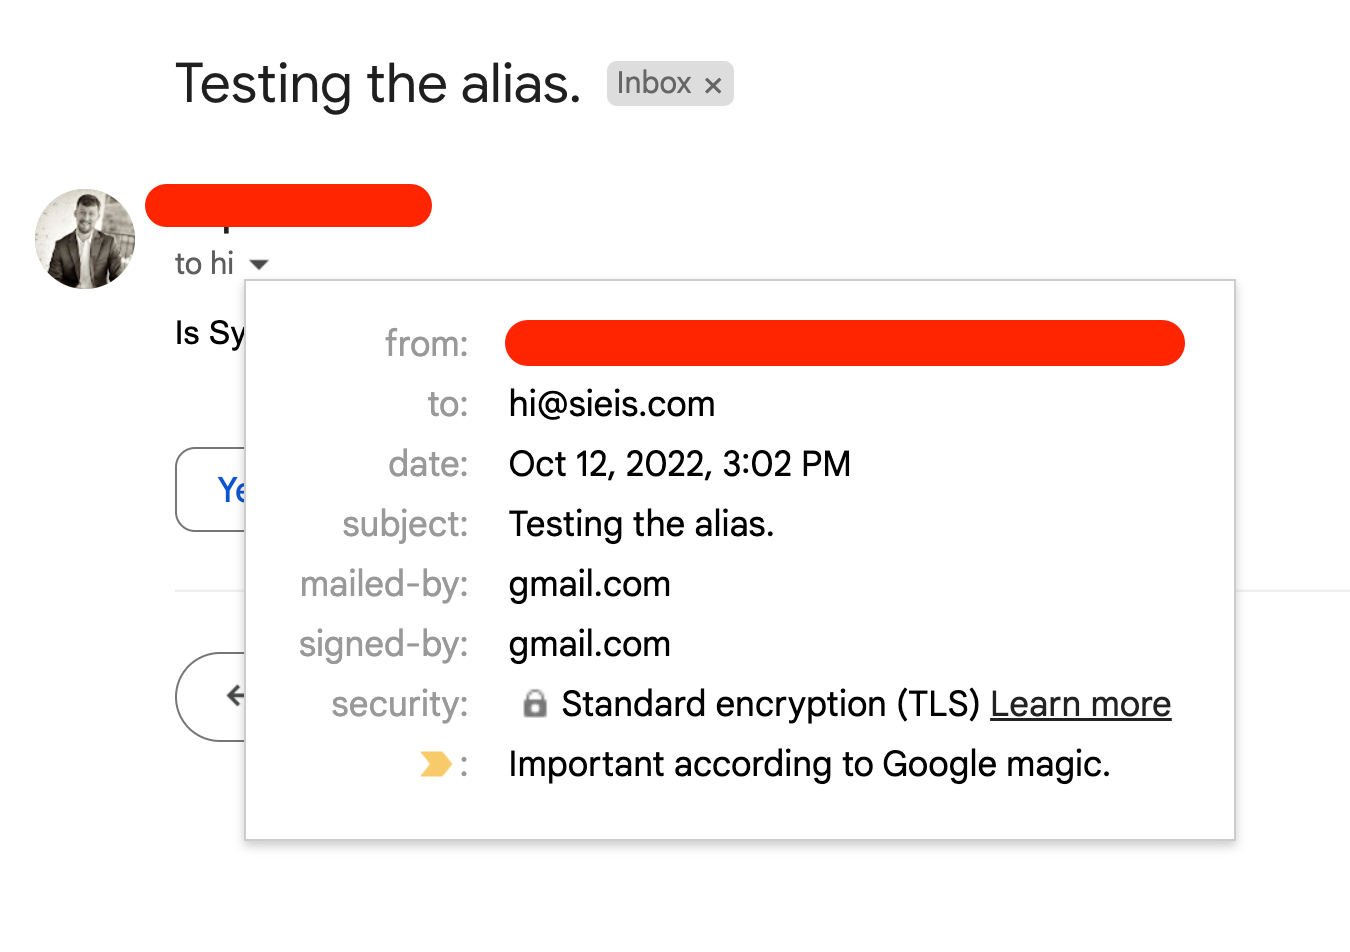
Send yourself an email from a different address and check it out!
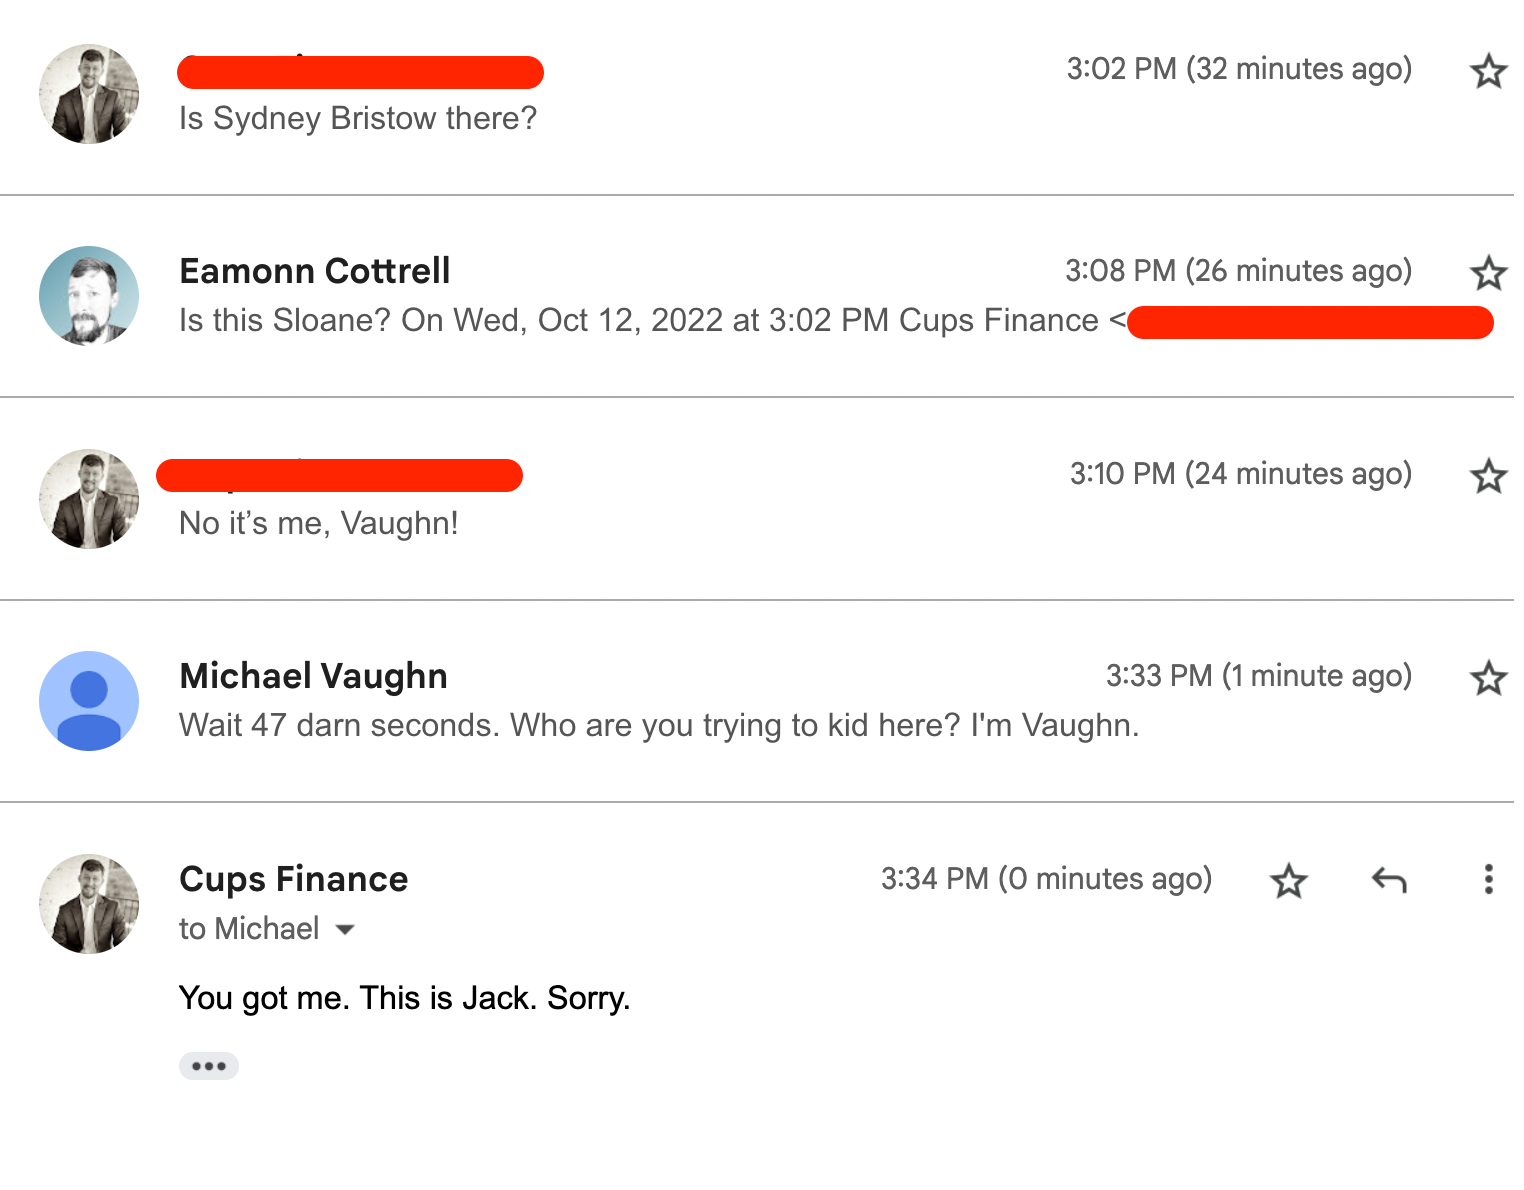
 Email sent to Alias and forwarded to main Gmail
Note: sending from your main Gmail address doesn't show up as an unread message like it normally would when you email yourself. Send it from a different address at this point. After the rest of the steps, it will behave as normal when we complete the "send email as alias" part.
How to Send Email as the Alias
If you reply from your main Gmail currently, the recipient will see that address when you reply instead of the alias. That may not be a big deal depending on the use case, but we can certainly set it up so that sent mail acts like it's coming from the custom domain as well.

You'll need to go to your Google Account Security and click App passwords.

Select Mail for the app dropdown and Other for the device dropdown.
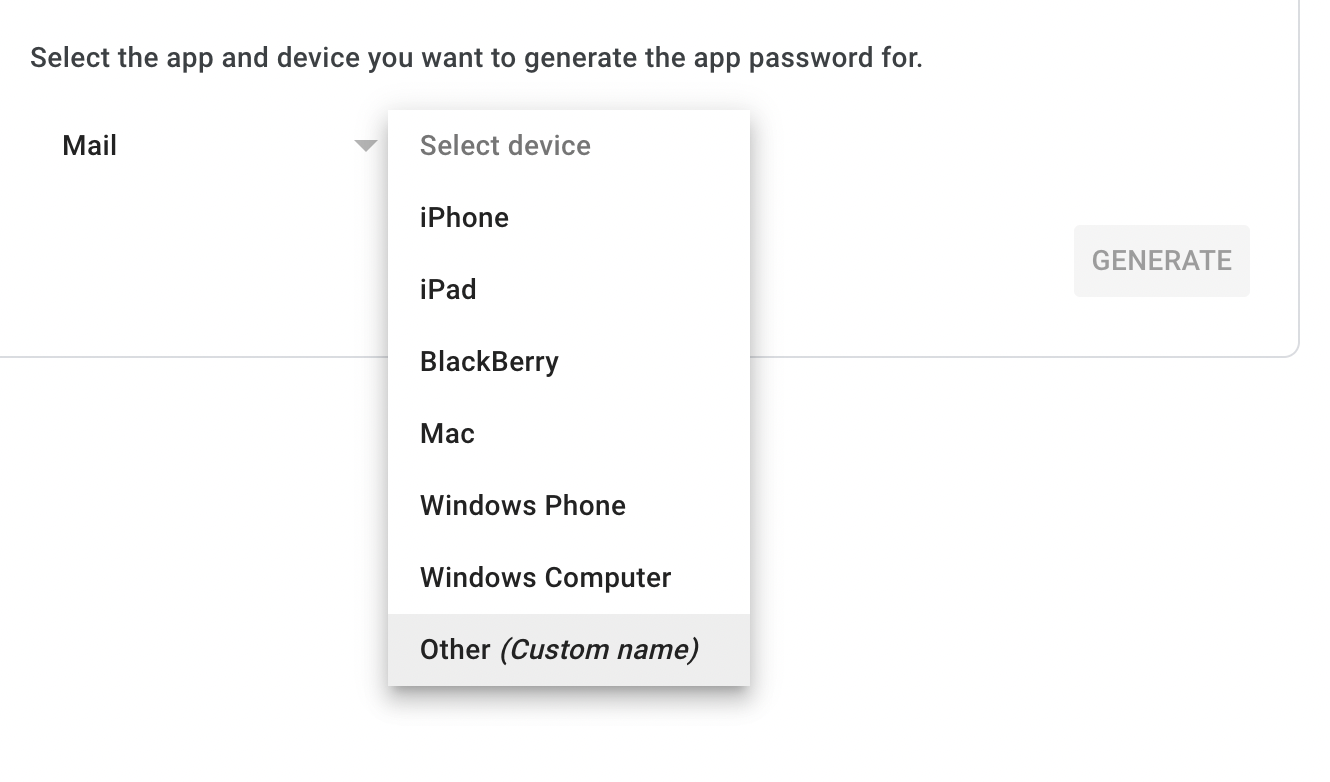
Enter the name of your domain and click Generate. It will give you a 16 digit password. Save this for use over in Gmail...

In Gmail, go to settings -> Accounts and Import and click Add another email address.
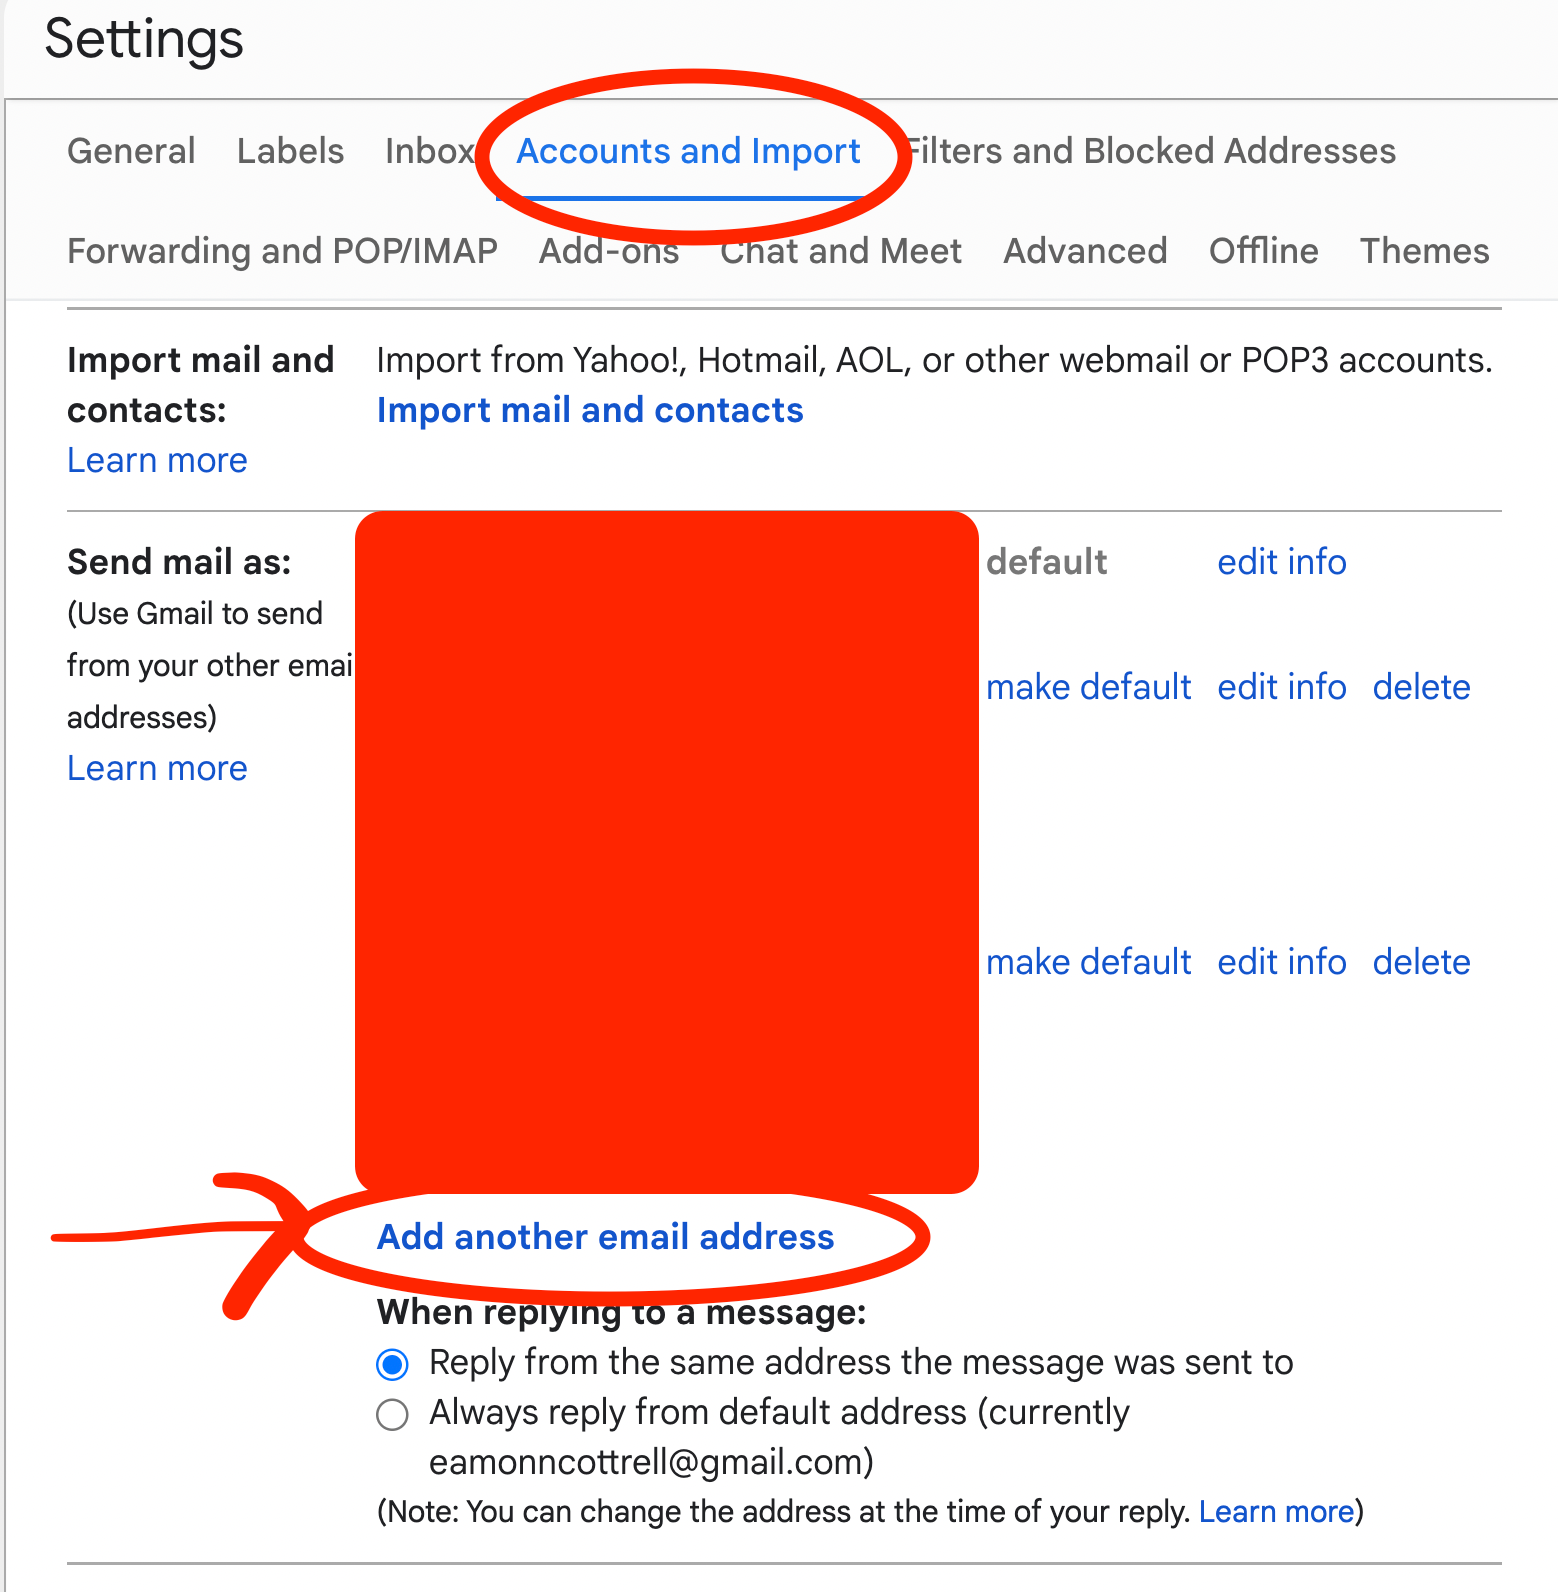
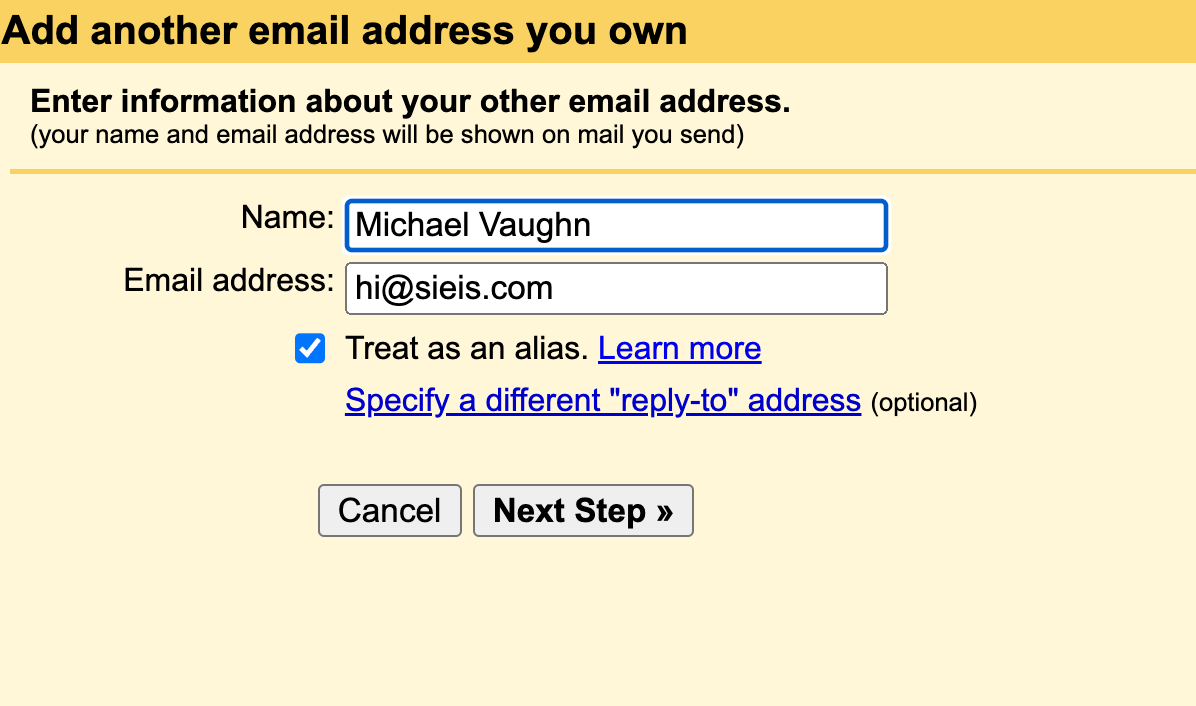
This will pop up a new small window where you will enter in the details of the alias. Enter the name you want recipients to view and the address of the alias. Make sure the "Treat as an alias" box is checked.
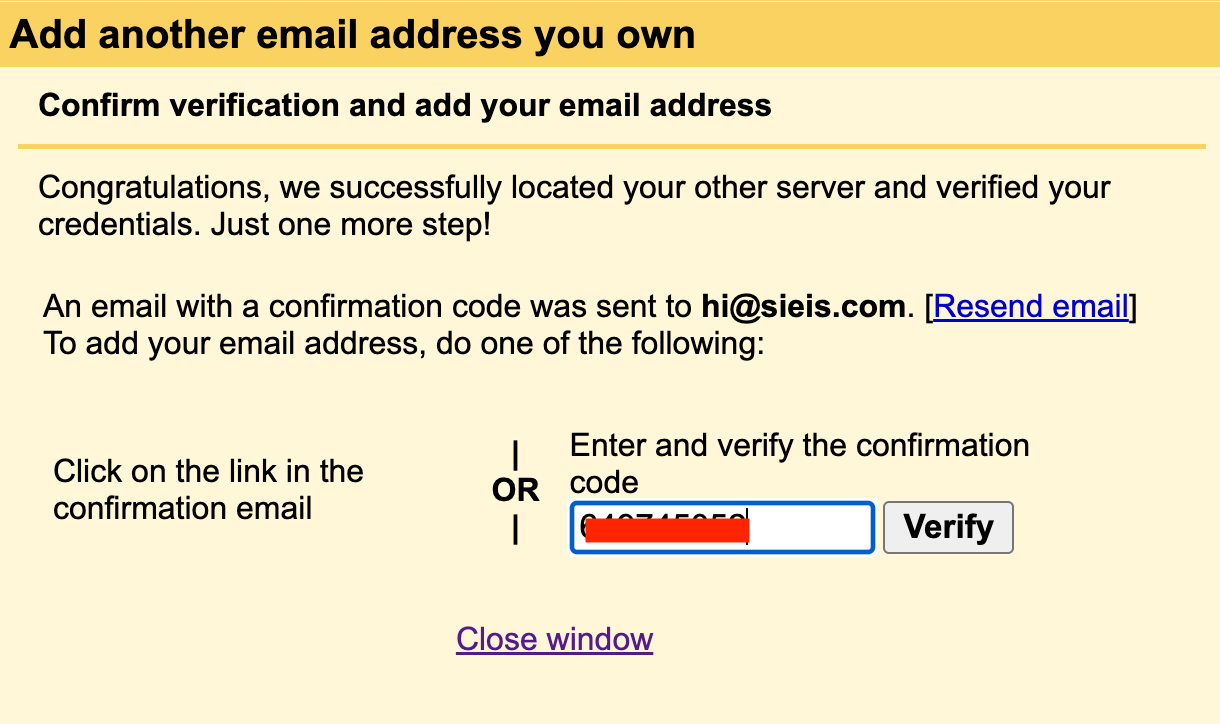
On the next screen, you'll need to change the SMTP server to smtp.gmail.com, the username to your Gmail username, and then paste in the 16 digit password you generated from Google Security in the steps above.
The port should be 587, and the TLS radial button should be checked.
Click Add Account.

This will prompt a verification code being sent to the email alias...which should in turn go to the Gmail account. Enter that in, and you'll now be good to go!
Back in our email thread in Gmail, you'll have the dropdown option when composing new messages to select which account you would like it to send from.
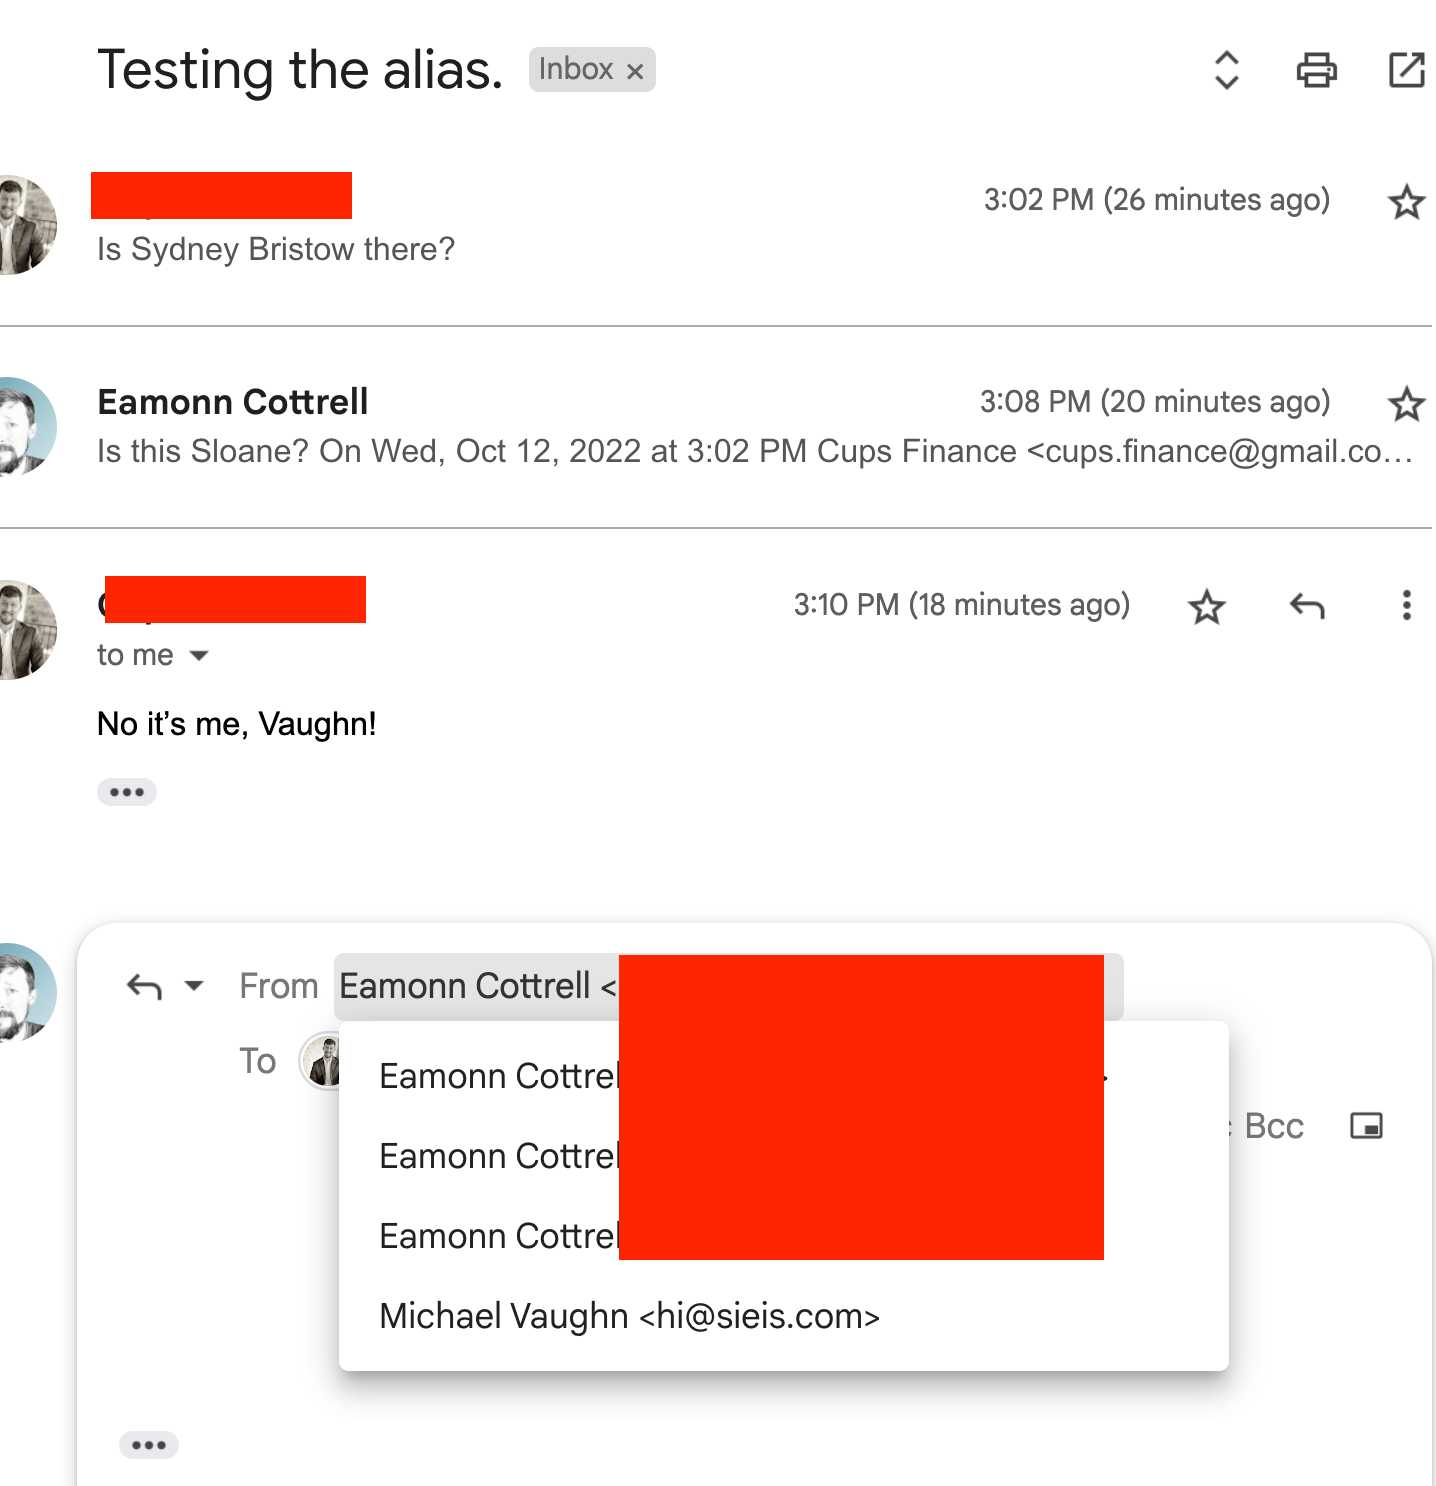
Now we can see from our full thread that our email forwards to and sends from our Gmail account using the email alias and display name we selected.
Thanks for reading!
This was enlightening for me, and I hope it's helpful for you too.
Come say hey on Twitter: https://twitter.com/EamonnCottrell