

Remote configurations are useful because they allow you to alter the behavior in your application without having to release a new version of the app. One prominent example is using remote configurations to decide if a feature should be turned on or off. That way, you can gradually roll it out to production or test it to see how users react.
If you want your application to have this functionality, you'd usually have to build your server and its logic. But we now live in an age of technological innovation, and tools have been created to help you minimize your development time.
This tool is called Firebase Remote Config — a cloud service that enables you change different functionalities of your app without releasing updates or asking users to update the app.
Overview
You can access the Remote Config feature in your project’s Firebase console. It is usually under the Release & Monitor section on the left sidebar.

There are two ways in which you can define your remote configurations:
- Using Firebase.
- Using a template file that is in JSON format.
We will focus on the first option, as the second option is a less intuitive approach.
Firebase Remote Config lets you define one or more keys during configuration. Keys can be of the following type:
- String
- Number
- Boolean
- JSON
These keys are used as the configurations for your application. For example, if you have a feature in your application that you would like to control through remote configurations, you could define a Boolean key titled enableFeatureX.
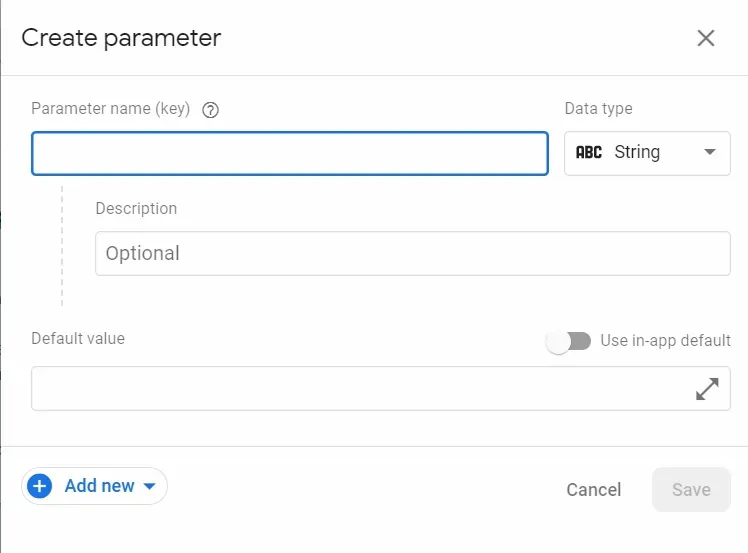
Each key you set has a few other settings that may be useful to you. For example, you can define a default value for a key (for example, false can be the default value of a Boolean key) or make it use a value that you have defined in your application.
Another cool thing you can do, by clicking on the Add new button in the image above, is to set the value of a key based on certain factors. You'll see these options when you click on the button:
- Conditional value.
- Experiment.
- Personalization.
Once you are done adding a key, make sure to publish your changes so they will be deployed.
The Conditional Value Option
You can configure how a value will be set to specific users based on various conditions.
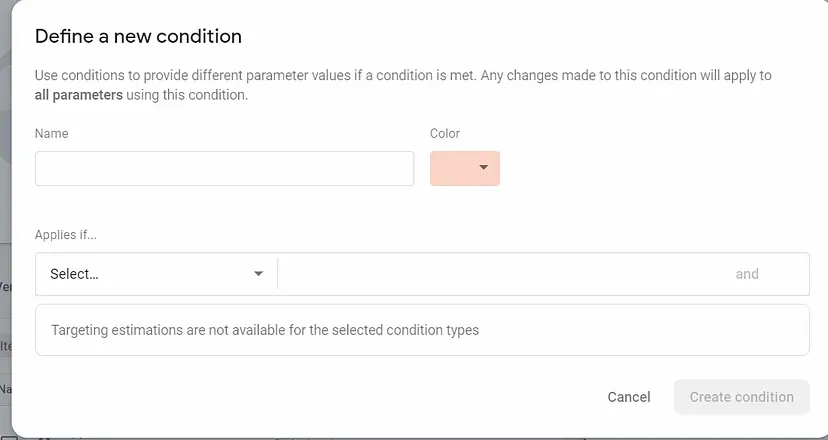
Here, you can decide on what you want to test and how. You will discover several options when you click on the “Applies if” dropdown.
To illustrate the use of this feature, let’s say that you want to target iOS users in the US. You can do that using the “Applies if” dropdown and choosing Platform and then iOS.
After that, you can press the "and" button to add a condition for Country/Region and choose United States.
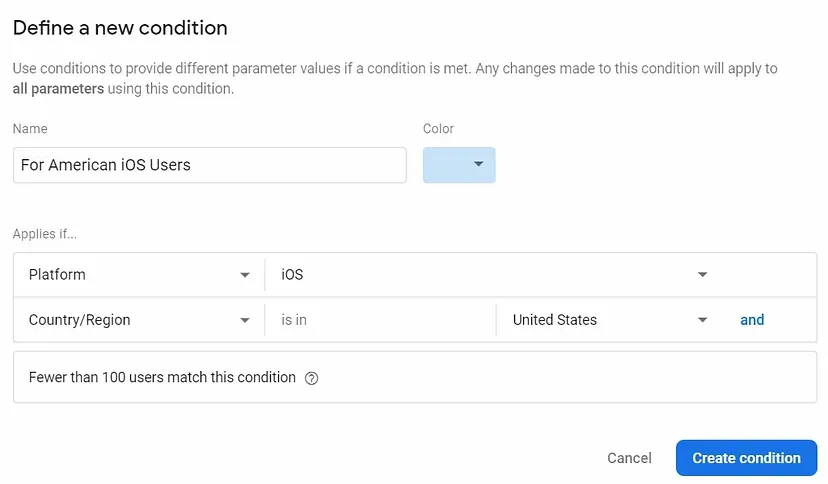
Make sure to also name your condition, otherwise, the Create condition button won’t be enabled.
Notice how the last field in defining a new condition window tells you how many users will be affected by this condition? That's a pretty cool feature.
The Experiment Option
This option lets you change the behavior of a value in your remote configurations before taking effect on all your users.
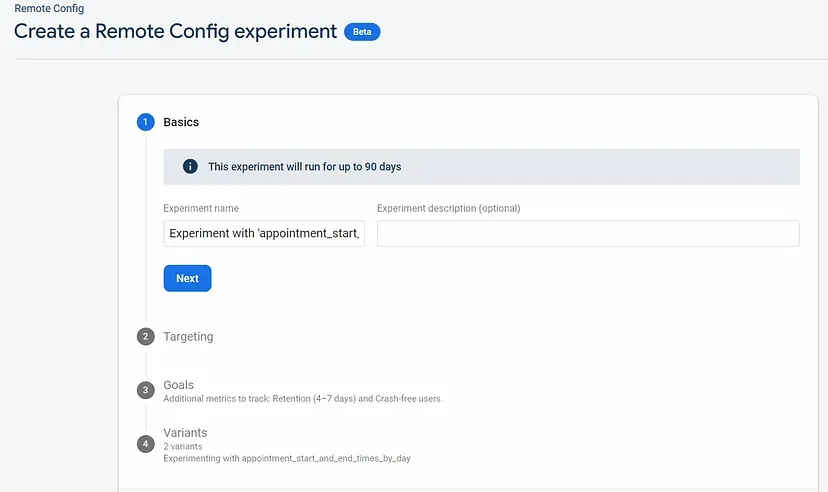
You can follow these steps to configure the experiment option:
- In the first step, you have to fill in the name and description of your experiment.
- Then, you have choose which application to target and how many users will be affected (percentage-wise) in the second step.
- The third step is to set up the metrics to measure this experiment. There are two types — the primary metrics and additional metrics.
- Lastly, you can decide on the number of A/B test groups for this experiment.
The Personalization Option
Last but not least is the option to tailor a specific value of your remote configurations to a user based on their own behavior.
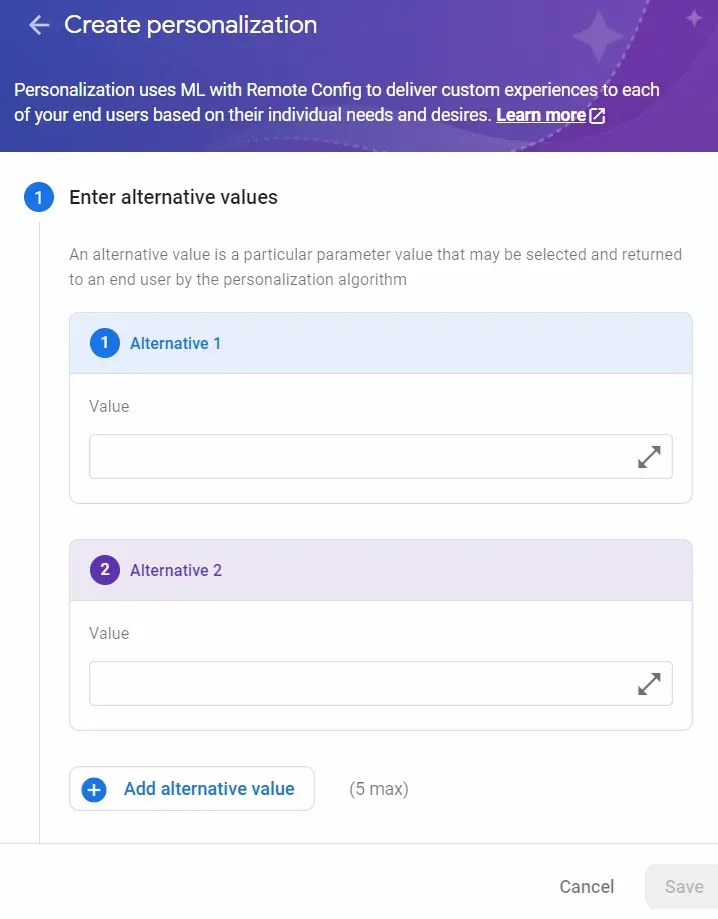
You can define values the algorithm may supply to the user based on their behavior. These will be chosen by an objective you define (Step 2). This objective can range from the engagement time of the user to the amount of clicks they perform. In Step 3, you define a condition that will target users so that they will become personalized. Lastly, in Step 4, you add the name and description of this personalization.
Each option has much more to offer than what I have described here, so if you want to learn more, you can use one of the reference links at the bottom. Now that we understand what Remote Config is, let’s see how we can add it to our application.
How to Setup Firebase Remote Config
Before you can do anything related to applying remote configurations, you need to make sure you've added Firebase to your Android project. This has been documented here.
After you have done that, follow these steps:
Step #1 - Add the Firebase remote configuration library to your project inside your application build.gradle file
implementation 'com.google.firebase:firebase-config-ktx'
There is an option to also import the Firebase Analytics module, but it is not required for remote configurations. It is used in other areas of remote configurations, such as defining a condition based on a specific event happening.
Step #2 - Use the RemoteConfig Object
After syncing your project, you can access the RemoteConfig object with this command:
val remoteConfig: FirebaseRemoteConfig = Firebase.remoteConfig
Step #3 - Define fetch interval
You can define how often your remote configurations will be fetched and updated. When you are still developing your application, setting this number to be relatively low is more ideal.
val remoteConfigSettings = remoteConfigSettings {                             minimumFetchIntervalInSeconds = 2000
}
If you set the **minimumFetchIntervalInSeconds** to be too low, Firebase will throw a FirebaseRemoteConfigFetchThrottledException, so use a low number only when you are testing things.
Step #4 - Set the configuration for the remote configuration
You can set the remote configuration using the code below:
remoteConfig.setConfigSettingsAsync(remoteConfigSettings)
Step #5 - Set default values
You can have application default values for your remote configurations. These can be created as an XML file inside the XML directory inside the res folder. Here’s what the code looks like:
:remoteConfig.setDefaultsAsync(R.xml.remote_config_defaults)
This XML file must have an underlying element of a map to wrap all your default values. For example, let’s imagine we have defined a key in remote configurations called my_key, whose value is 1. The XML for the default values will look like this:
<?xml version="1.0" encoding="utf-8"?>
<defaultsMap>
   <entry>
      <key>my_key</key>
      <value>1</value>
    </entry>
</defaultsMap>
Remote configurations need to be fetched and activated. The fetch action fetches and stores your Remote Configurations inside the Remote Config object. The activation part is to make these values available to your application. That’s why there are two API methods:
fetch(and later use activate)
remoteConfig.fetch().addOnCompleteListener { task ->               if                if (task.isSuccessful) {
              //Remote Configurations fetch successfully
           }
        }.addOnFailureListener { error ->
                //Remote Configurations fetch failure
       }
-------------------------
remoteConfig.activate().addOnCompleteListener { task ->
if (task.isSuccessful) {
        //Remote Configurations activation success
        }
   }.addOnFailureListener { error ->
               //Remote Configurations activation failure
  }
fetchAndActivate
remoteConfig.fetchAndActivate().addOnCompleteListener { task ->                                if (task.isSuccessful) {
                //Remote Configurations fetched and activated successfully                }
       }.addOnFailureListener { error ->
       //Remote Configurations fetched and activated failure
     }
Step #6 - Access configurations
Now that our remote configurations have been fetched and activated, we can access and use them in our application. We can do so by accessing the remoteConfig object and using one of the getter methods per the type of the value we set:
val myRemoteConfigValue: String = remoteConfig.getString("my_key")
Conclusion
Since your application will rely on remote configurations for its operation (or parts of it), it is crucial to decide how the application will behave if it does not arrive or takes too long to receive a response.
In essence, there are two ways to handle loading the remote configurations:
- Your application boots up and waits for the remote configurations to be activated.
- Your application boots up and does not wait for the remote configuration to be activated. Opting instead to use the remote configurations on the second application run.
It's important to understand that there is no option that is preferable over the other. It all depends on what your use case is and how you would like the user's experience to be when using your application. The first option guarantees that once your application is loaded, all the remote configurations that you have defined will be set and the user's experience will be smooth after the initial load time. If you have critical features that rely on the remote configurations, you will have to go with this option.
On the other hand, if your remote configurations concern a specific feature of your application that doesn't necessarily need to happen on the first initial launch, you might consider going for second option. That way, your application does not need to wait for the remote configurations to be received from Firebase and the logic inside your application can happen later.
There are good and bad implications for each of these methods, and it’s up to you to decide which is better suited for your application. If you choose the first option, you may add a loading screen that times out after a certain period. If you choose option two, it is recommended to create a default mechanism for features in your application and how they should work when the configuration has not yet been received.
There is more than we have discussed in this article, and I encourage you to investigate deeper things. I recently used Firebase Remote Configurations in an application I created that helps users schedule appointments.
You can check it out on the Google Play store.
And you can see the source code here:
If you want to read other articles I have written, you can find them below: