

You've probably noticed that, after visiting a website for the first time, the website loads much quicker the next time you visit.
This is because your operating system, or browser in the case of Google Chrome, cache IP addresses and DNS (Domain Name System) information of any website you visit. The DNS cache contains:
- the website address or hostname, technically called the resource data (rdata)
- the domain name of the website
- record type (IPv4 or IPv6)
- the validity of the cache or TTL (time to live)
When the TTL expires, the cache will be cleared, and the DNS is flushed for you automatically. But there are times when you don't want to wait hours or days for the TTL to expire, and want to flush your DNS manually.
In this article, I'll go over why you should flush your DNS, and how to do that in Windows 10 and Chrome.
So, Why Should You Flush (or Clear) Your DNS?
Flushing your DNS has several advantages, such as:
- hiding your search behavior from data collectors who might show you ads based on your search history
- requesting that an updated version of a website or web app is loaded. This can help resolve 404 issues if a website or web app was migrated to a new domain
- preventing DNS cache poisoning – a security situation in which black hat hackers gain maliciously gain access to your DNS cache and alter them so you get redirected to a website where sensitive information might be collected from you
How to Flush Your DNS on Windows
To flush your DNS records on Windows 10, follow the steps below:
Step 1: Click on Start or hit the Windows [logo] key on your keyboard
Step 2: Type "cmd", then select "Run as Administrator" on the right
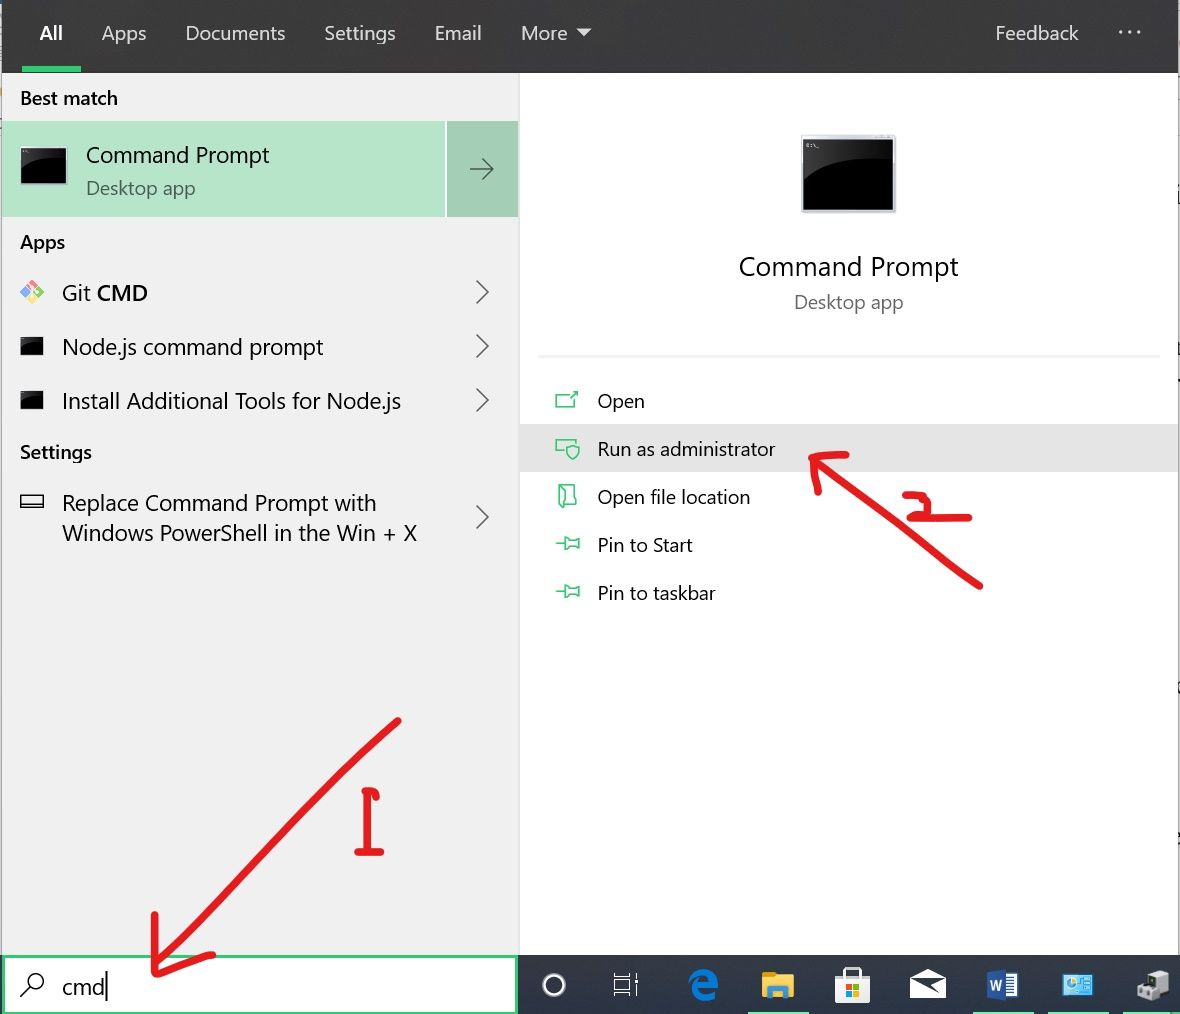
Step 3: Type in "ipconfig /flushdns" and hit ENTER
You should get a response that the DNS cache has been flushed like the one below:
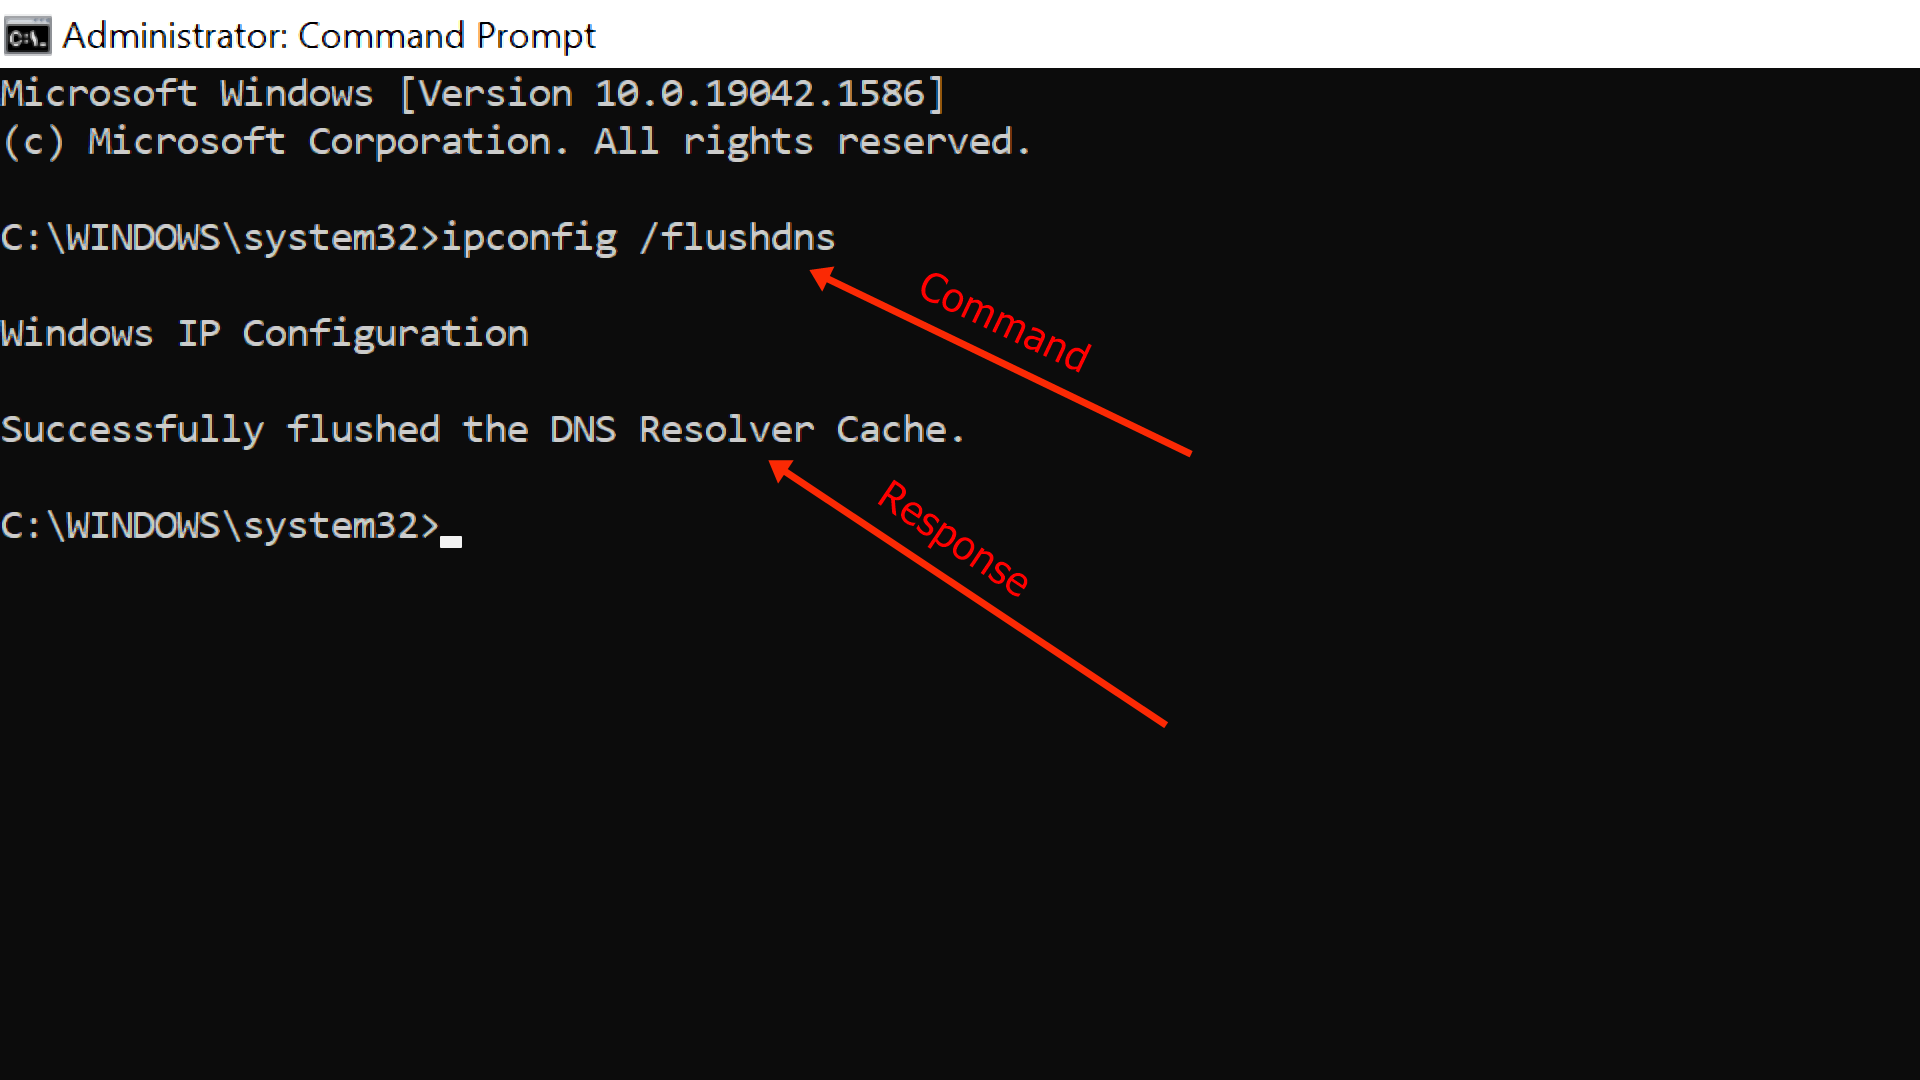
This means that your cache has been completely cleared, and fresh versions of any website you visit will be loaded.
How to Clear the DNS Cache on Google Chrome
Despite not being an operating system, Chrome keeps a DNS cache of its own to help personalize your browsing experience.
To flush Chrome's DNS, all you need to do is type chrome://net-internals/#dns in the address bar and hit ENTER.
Then click “Clear host cache”:

Conclusion
As you’ve learned in this article, flushing your DNS gives you a lot of advantages that can make your internet experience safer.
Even though the cache gets cleared after the TTL expires, you should flush your DNS as often as possible so you can get these advantages.
Thank you for reading!