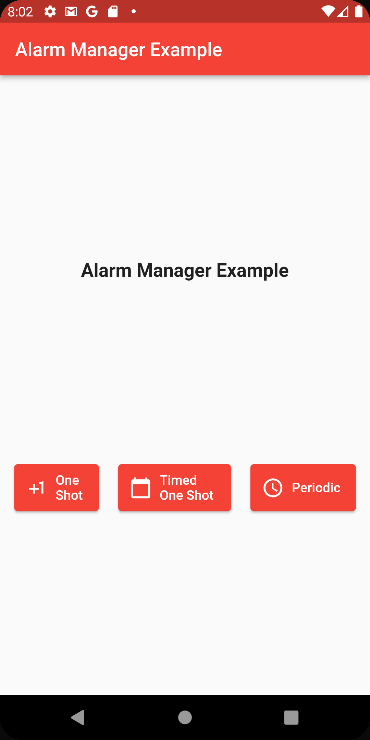
If you are an Android developer, when you want to schedule your application to run at a specific time in the future, you use the AlarmManager.
But if you are an iOS developer, this type of component does not exist there.
So if you are a Flutter developer, what do you do?
Like most things related to Flutter, when you want to use a platform specific component, you need to expose its functionality.
AlarmManager is no exception.
In this article, we'll go over the Android AlarmManager Plus package and show how you can use it in your application.
Ready to set your alarm?
Project Setup
First, open up your pubspec.yaml file and add the following:
dependencies:
  android_alarm_manager_plus: ^2.0.6
✋ Disclaimer → When I wrote this article, the latest version was 2.0.6
Then run pub get to download the dependency.
We will be using the vanilla project that you get when you create a Flutter project in Android Studio (minus all the counter logic).
Open up your AndroidManifest.xml file and add the following permissions:
<uses-permission android:name="android.permission.RECEIVE_BOOT_COMPLETED"/>
<uses-permission android:name="android.permission.WAKE_LOCK"/>

<!-- For apps with targetSDK=31 (Android 12) -->
<uses-permission android:name="android.permission.SCHEDULE_EXACT_ALARM"/>
Inside your application tag, add these as well:
<service
    android:name="dev.fluttercommunity.plus.androidalarmmanager.AlarmService"
    android:permission="android.permission.BIND_JOB_SERVICE"
    android:exported="false"/>
<receiver
    android:name="dev.fluttercommunity.plus.androidalarmmanager.AlarmBroadcastReceiver"
    android:exported="false"/>
<receiver
    android:name="dev.fluttercommunity.plus.androidalarmmanager.RebootBroadcastReceiver"
    android:enabled="false"
    android:exported="false">
    <intent-filter>
        <action android:name="android.intent.action.BOOT_COMPLETED" />
    </intent-filter>
</receiver>
At the end, your AndroidManifest file should look something like this:
<manifest xmlns:android="http://schemas.android.com/apk/res/android"
    package="com.tomerpacific.alarm_manager_example">

    <uses-permission android:name="android.permission.RECEIVE_BOOT_COMPLETED"/>
    <uses-permission android:name="android.permission.WAKE_LOCK"/>
    <!-- For apps with targetSDK=31 (Android 12) -->
    <uses-permission android:name="android.permission.SCHEDULE_EXACT_ALARM"/>

   <application
        android:label="alarm_manager_example"
        android:name="${applicationName}"
        android:icon="@mipmap/ic_launcher">
        <activity
            android:name=".MainActivity"
            android:exported="true"
            android:launchMode="singleTop"
            android:theme="@style/LaunchTheme"
            android:configChanges="orientation|keyboardHidden|keyboard|screenSize|smallestScreenSize|locale|layoutDirection|fontScale|screenLayout|density|uiMode"
            android:hardwareAccelerated="true"
            android:windowSoftInputMode="adjustResize">
            <!-- Specifies an Android theme to apply to this Activity as soon as
                 the Android process has started. This theme is visible to the user
                 while the Flutter UI initializes. After that, this theme continues
                 to determine the Window background behind the Flutter UI. -->
            <meta-data
              android:name="io.flutter.embedding.android.NormalTheme"
              android:resource="@style/NormalTheme"
              />
            <intent-filter>
                <action android:name="android.intent.action.MAIN"/>
                <category android:name="android.intent.category.LAUNCHER"/>
            </intent-filter>
        </activity>
        <!-- Don't delete the meta-data below.
             This is used by the Flutter tool to generate GeneratedPluginRegistrant.java -->
        <meta-data
            android:name="flutterEmbedding"
            android:value="2" />
       <service
           android:name="dev.fluttercommunity.plus.androidalarmmanager.AlarmService"
           android:permission="android.permission.BIND_JOB_SERVICE"
           android:exported="false"/>
       <receiver
           android:name="dev.fluttercommunity.plus.androidalarmmanager.AlarmBroadcastReceiver"
           android:exported="false"/>
       <receiver
           android:name="dev.fluttercommunity.plus.androidalarmmanager.RebootBroadcastReceiver"
           android:enabled="false"
           android:exported="false">
           <intent-filter>
               <action android:name="android.intent.action.BOOT_COMPLETED" />
           </intent-filter>
       </receiver>
    </application>
</manifest>
Alarm Bells Are Ringing
The package exposes an AndroidAlarmManager object that has the following (relevant) methods:
- oneShot – triggers a one time alarm
- oneShotAt – triggers a one time alarm at a specific date
- periodic – triggers an alarm within a defined time interval
Let’s discuss each option in detail.
How the oneShot method works
The oneShot method accepts the following arguments:
 static Future<bool> oneShot(
    Duration delay,
    int id,
    Function callback, {
    bool alarmClock = false,
    bool allowWhileIdle = false,
    bool exact = false,
    bool wakeup = false,
    bool rescheduleOnReboot = false,
  })
The first three arguments (delay, id and callback) are pretty self explanatory so we will focus on the rest.
- alarmClock – A flag that indicates if the timer will be set with Android’s AlarmManagerCompact.setAlarmClock
- allowWhileIdle – A flag that indicates if the timer will be set with AlarmManagerCompat.setExactAndAllowWhileIdle or AlarmManagerCompat.setAndAllowWhileIdle
- exact – A flag that indicates if the timer will be set with AlarmManagerCompat.setExact
- wakeup – A flag that indicates if the device will be woken up when the alarm will be triggered
- rescheduleOnReboot – A flag that indicates if the alarm will persist between reboots of the device
The oneShotAt method is very similar to the oneShot method, with one key difference. Instead of a delay of Duration type, the first argument is a DateTime object that sets when the alarm will be triggered.
static Future<bool> oneShotAt(
    DateTime time,
    int id,
    Function callback, {
    bool alarmClock = false,
    bool allowWhileIdle = false,
    bool exact = false,
    bool wakeup = false,
    bool rescheduleOnReboot = false,
  })
The periodic method accepts the following arguments:
static Future<bool> periodic(
    Duration duration,
    int id,
    Function callback, {
    DateTime? startAt,
    bool allowWhileIdle = false,
    bool exact = false,
    bool wakeup = false,
    bool rescheduleOnReboot = false,
  })
As you can see, this method is also similar in the arguments it takes. The arguments that matter the most here are:
- startAt – indicates when the alarm should be first triggered
- duration – is in charge of retriggering the alarm every duration interval.
Remember to Set Your Alarm
One thing to be aware of regarding the Alarm Manager Plus package is that it uses isolates to run the alarms. Isolates are similar to threads except they don’t share memory. Therefore, they communicate with messages.
Because of this, you must declare your alarm handlers (callbacks) as static so that they can be accessed.
You can read more about isolates here.
Wrapping Up
If you want to check out an example of everything we discussed in this article, head over here.

