For the following challenges, you are going to use MongoDB to store data. To simplify the configuration, you'll use a service called MongoDB Atlas.
Create a MongoDB Atlas Account
MongoDB Atlas is a MongoDB Database-as-a-Service platform, which means that they configure and host the database for you. Then, your only responsibility will be to populate your database with what matters: data.
- Go here to sign up for a new MongoDB Atlas account.
- Fill in the registration form with your information and click Sign up.
Create a New Cluster
- On the next page, fill in your organization's name, project's name, select JavaScript as your preferred programming language, and click the green Continue button.
- Once you create and verify your account, answer the onboarding questions (your goal, the type of application you're building, your preferred programming language, etc.) and click the green Finish button.
- On the "Deploy a cloud database" page, click the Create button under the Shared cluster type. This should be the only free option:

- In the Cloud Provider & Region dropdown, leave everything as default. Your value there will likely depend on the region you're in.
- In the Cluster Tier dropdown, leave this as the default, M0 Sandbox (Shared RAM, 512 MB Storage).
- In the Cluster Name dropdown, you can give your cluster a name, or leave it as the default, Cluster0.
- Click the green Create Cluster button at the bottom of the screen.
- You should now see the message "M0 Cluster Provisioning... This process will take 3-5 minutes." Wait until the cluster is created before going to the next step.
Create a New User for the Database
- On the left side of screen under SECURITY, click on Database Access.
- Click the green Add New Database User button.
- Under Authentication Method, make sure Password is selected, then enter in a username and password for your user.
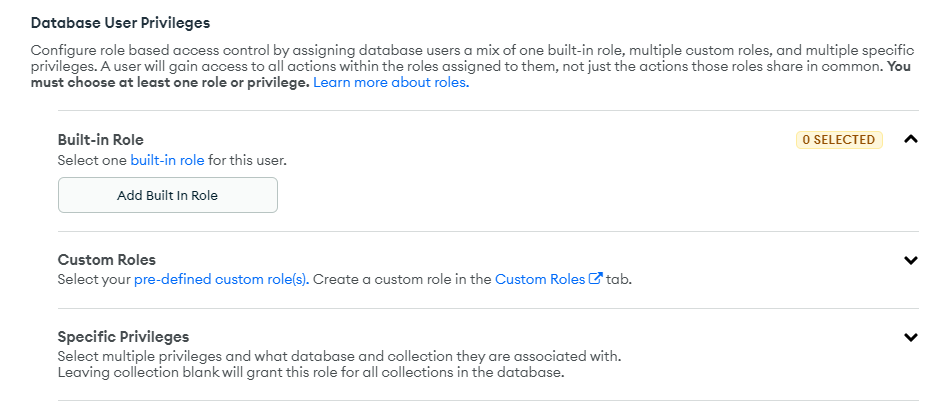
- Under Database User Privileges, leave this as the default option if there is one – it should be Read and write to any database. You may have to select this manually if the default is blank. You can select "Read and write to any database" from the "Add Built In Role" button as shown here:

- Click the Add User button to create your new user.
Allow Access From All IP Addresses
- On the left side of the screen under SECURITY, click on Network Access.
- Click the green Add IP Address button.
- In the modal, click the ALLOW ACCESS FROM ANYWHERE button. You should see
0.0.0.0/0in the Access List Entry field. - Click the green Confirm button.
Connect to Your Cluster
- On the left side of the screen under DEPLOYMENT, click on Database.
- Click the Connect button for your cluster:

- In the popup modal, click on Connect your application.
- You should see the URI string you'll use to connect to your database similar to this:
mongodb+srv://<username>:<password>@<cluster-name>.prx1c.mongodb.net/<db-name>?retryWrites=true&w=majority. - Click the Copy button to copy your URI to your clipboard.
Notice that the <username> and <cluster-name> fields of the URI you copied are already filled out for you. All you need to do is replace the <password> field with the one you created in the previous step, and be sure to add the name of your database before the query string (?retryWrites=true&w=majority).
You can call your database anything, but it's good to give it a memorable name for your project. For example, if you're working on the "MongoDB and Mongoose" challenges, you could replace <db-name> with fcc-mongodb-and-mongoose or something similar.
Connect to An Existing Database
If you've already created a cluster and a database and would like to connect it to a new application, follow these steps:
- On the left side of the screen under DEPLOYMENT, click on Database.
- Find your cluster and click the Browse Collections button to see a list of existing databases and collections.
- Copy the database name you want to connect to and replace
<db-name>with it in the URI string above.
And that's it — you now have the URI to add to your application and connect to your database. Keep this URI safe somewhere so you can use it later.
