
By Charles M.
In this tutorial you will create an app that generates dynamic animated text using Giphy's API with ReactJS.
After that I'll go over some of the other API features Giphy provides that you can use to make other interesting projects.
You can find the code for the tutorial here.
Video Tutorial
To see a preview of the finished product in action, you can watch the start of this video. If you prefer to follow a video tutorial instead of reading (or in addition to reading), you can also follow along for the rest of the video.
Getting Started
To get started you'll need a basic development environment for ReactJS. I'll be using create-react-app as the starting project template.
Next you'll need to visit Giphy's developers page and create an account so you can get your API key. Once you've created your account you'll see a dashboard like this:
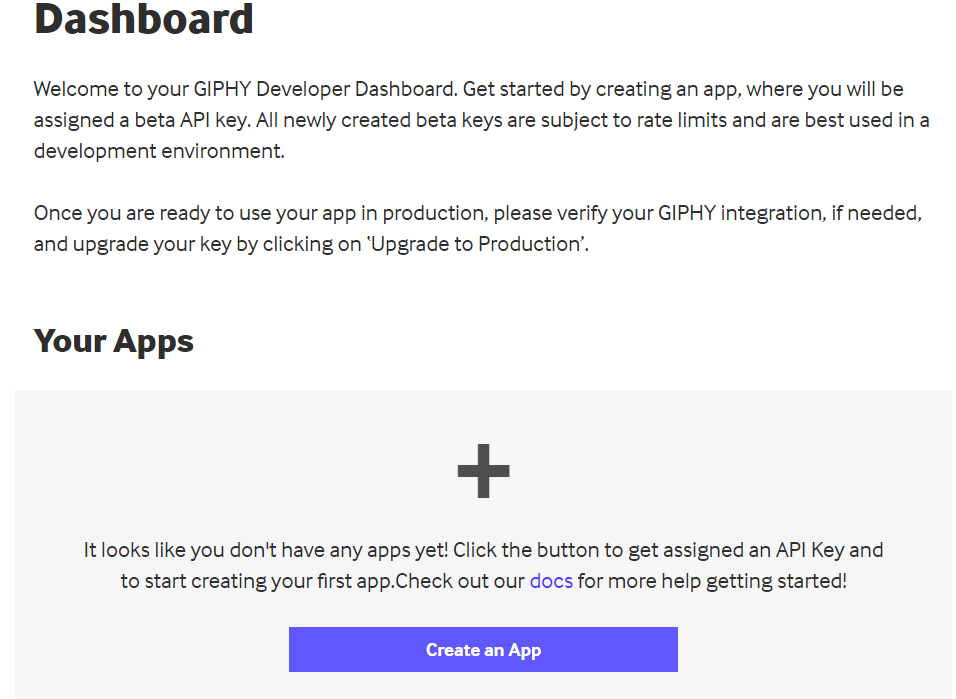
You need to click "create an App" and choose the SDK option for your app. Your dashboard will then present you with an API key you will use to make calls to the Giphy API.
How to Setup the App File and Folder
The structure for this tutorial will be standard for ReactJS projects. Inside the src directory, create a components directory and create two files, Error.js and TextList.js
You also need to create a .env file in the root of the project that you'll use to store your API key. Whatever you name your variable, you need to append REACT_APP in front of it, like this:
REACT_APP_GIPHY_KEY=apikeyhere
Install Giphy JS-fetch
The final thing you need to do is install Giphy's API helper library which you can do using the following command:
npm install @giphy/js-fetch-api
Giphy API Call
The first task in making this app is creating an input form to accept the text you want to generate from the Giphy API. You will then use that text input and send it as an API request.
Before displaying this response data, let's test it out by simply making the API request and then logging the response. Write the following code in your App.js file:
import { GiphyFetch } from '@giphy/js-fetch-api'
import {useState} from 'react'
import TextList from './components/TextList'
import Error from './components/Error'
import './App.css';

const giphy = new GiphyFetch(process.env.REACT_APP_GIPHY_KEY)

function App() {
  const [text, setText] = useState('')
  const [results, setResults] = useState([])
  const [err, setErr] = useState(false)

  const handleInput = (e) => {
    setText(e.target.value)
  }

  const handleSubmit = (e) => {
    if(text.length === 0) {

      //set error state to true
      setErr(true)
      return
    }

    console.log(text)

    const apiCall = async () => {
      const res = await giphy.animate(text, {limit: 20})
      console.log(res.data)
      setResults(res.data)
    }

    apiCall()
    setText('')
    setErr(false)

  }

  return (
    <div className="App">
      <h1>Animated Text Generator</h1>
      <h3>Type text into the form and hit submit</h3>
      <input className='input-field' value={text} onChange={handleInput} />
      <button className='submit-btn' onClick={handleSubmit}>Submit</button>
    </div>
  );
}
export default App;
Let's take a look at what's happening in this code:
const giphy = new GiphyFetch(process.env.REACT_APP_GIPHY_KEY) is where you use the Giphy helper library to create the object you'll use for interacting with the Giphy API.
process.env.REACT_APP_GIPHY_KEY is how your API key is passed as an argument from the .env file. You can also pass your API key as a string, but you won't want to do this in production because somebody could steal and use your key.
Inside the main App component, you create three pieces of state using hooks. The 1st is text which will be what stores the user input. This is what will be passed to the API as an argument to generate text.
err will be used to conditionally render an error later if the user attempts to submit an empty string.
And results is an empty array that will be used to store the results from the API response.
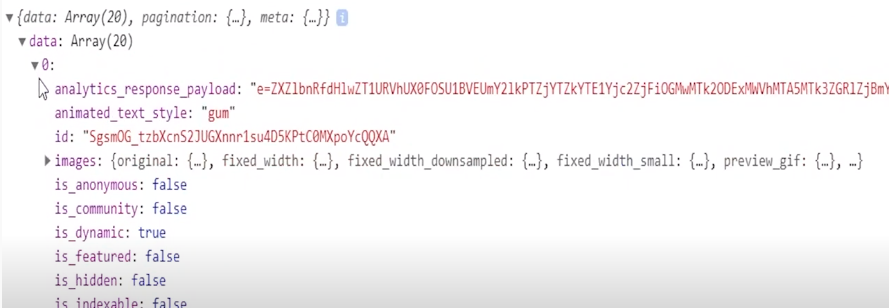
If you run the code and check your developer console, you should see that the Giphy API returned an array with 20 objects.
How to Display the Data with React
Now that the data is being properly stored in state, all you need to do is display that data with JSX. To handle that, we'll finish those two components we created earlier.
First we'll make a simple error component that can display a custom message. Place the following code into Error.js inside your components folder:
const Error = (props) => {
    if(!props.isError) {
        return null
    }

    return (
        <p className='error'>{props.text}</p>
    )
}

export default Error
The Error component is very simple. It takes the err state and a text string as props, and if the value is true it will render the text. If err is false, it returns null.
Next is the TextList component which will take the results state as props and then display the data in your app:
const TextList = (props) => {
  const items = props.gifs.map((itemData) => {
    return <Item url={itemData.url} />;
  });
  return <div className="text-container">{items}</div>;
};
const Item = (props) => {
  return (
    <div className="gif-item">
      <img src={props.url} />
    </div>
  );
};
export default TextList;
This component is a little more complicated, so here's what is happening:
The Item component accepts the URL value which is inside each value returned from the API. It uses this URL as the source for the image element.
The results state array from the App component is passed to the TextList component as gifs. The array is mapped over to generate all the Item components for all the results and assigned to the items variable and then returned inside a container div. We'll style this container later to create a grid layout.
How to Import the Components into the Main App
Now you just need to use those finished components in your JSX. The final code of your App.js file should look like this:
import TextList from './components/TextList'
import Error from './components/Error'
import { GiphyFetch } from '@giphy/js-fetch-api'
import {useState} from 'react'
import './App.css';

const giphy = new GiphyFetch(process.env.REACT_APP_GIPHY_KEY)

function App() {
  const [text, setText] = useState('')
  const [results, setResults] = useState([])
  const [err, setErr] = useState(false)

  const handleInput = (e) => {
    setText(e.target.value)
  }

  const handleSubmit = (e) => {
    if(text.length === 0) {

      //set error state to true
      setErr(true)
      return
    }

    console.log(text)

    const apiCall = async () => {
      const res = await giphy.animate(text, {limit: 20})

      setResults(res.data)
    }

    apiCall()
    //change error state back to false
    setText('')
    setErr(false)

  }

  return (
    <div className="App">
      <h1>Animated Text Generator</h1>
      <h3>Type text into the form and hit submit</h3>
      <input className='input-field' value={text} onChange={handleInput} />
      <button className='submit-btn' onClick={handleSubmit}>Submit</button>
      <Error isError={err} text='need length longer than 0 for input'/>
      {results && <TextList gifs={results}  />}
    </div>
  );
}
export default App;
The only changes here are the bottom two lines added in the return statement:
The Error component is passed the err state and a text prop which will only be rendered if an error occurs.
In this app there is only one error condition in case the input is empty, but you could add additional checks with custom error messages as well.
Then we use conditional rendering with the && logical operator. This causes the TextList component to render only if the results array is not empty, which means the API response returned successfully with our gifs.
If you run your code at this point, you should see an ugly but functional app. If you use the input field and click the submit button, the gifs should be returned and displayed in your app.
How to Add Styling with CSS
The last thing to do is make the app look a little bit prettier. Feel free to customize any of these styles if you want to adjust how things look. Place this code into your App.css file:
.App {
  text-align: center;
}

.error {
  color: #b50000;
  font-size: 20px;
  font-weight: 500;
}


.input-field {
  font-size: 20px;
  vertical-align: middle;
  transition: .5s;
  border-width: 2px;
  margin: 5px;
}

.input-field:focus {
  box-shadow: 0 14px 28px rgba(0,0,0,0.25), 0 10px 10px rgba(0,0,0,0.22);
  outline: none;
}

.input-field:hover {
  box-shadow: 0 14px 28px rgba(0,0,0,0.25), 0 10px 10px rgba(0,0,0,0.22);

}

.submit-btn {
  background-color: rgb(19, 209, 235);
  color: #fff;
  padding: 6px 30px;
  vertical-align: middle;
  outline: none;
  border: none;
  font-size: 16px;
  transition: .3s;
  cursor: pointer;
}

.submit-btn:hover {
  background-color: rgb(10, 130, 146);
}

.text-container {
  display: flex;
  flex-wrap: wrap;
  justify-content: center;
}

.gif-item {
  flex-basis: 19%;
}

img {
  max-width: 100%;
}

@media screen and (max-width: 992px) {
  .gif-item {
    flex-basis: 31%;
  }
}

@media screen and (max-width: 600px) {
  .gif-item {
    flex-basis: 48%;
  }
}
Nothing crazy going on here with the CSS. Just some styling for the submit button and some box shadow for the input field.
There are also a few media queries for some responsive design that changes the column count depending on the screen size.
Other Giphy API features
The animated text API is just one feature available in the Giphy API. I'll go over a few other features that could be useful as part of a project or as a solo project.
Animated Emoji
The Emoji endpoint is very straightforward in terms of use. It returns a bunch of animated emoji just like the animated text API you used above, except you don't need to pass any arguments to it. An example API call:
const data = await gf.emoji()
This endpoint could be useful if you are building a chat application and want to make it easy for users to use Emoji in their messages.
Pre-Built UI components
If you don't feel like messing around with a ton of custom code like we did in this tutorial, Giphy actually provides components for both ReactJS and regular JavaScript.
You can make a grid very similar to what we created in this tutorial with just a few lines of code:
import { Grid } from '@giphy/react-components'
import { GiphyFetch } from '@giphy/js-fetch-api'

// use @giphy/js-fetch-api to fetch gifs
// apply for a new Web SDK key. Use a separate key for every platform (Android, iOS, Web)
const gf = new GiphyFetch('your Web SDK key')

// fetch 10 gifs at a time as the user scrolls (offset is handled by the grid)
const fetchGifs = (offset: number) => gf.trending({ offset, limit: 10 })

// React Component
ReactDOM.render(<Grid width={800} columns={3} gutter={6} fetchGifs={fetchGifs} />, target)
You get some additional bonus features like automatic dynamic updates to fetch more content when users scroll to the bottom of the Grid.
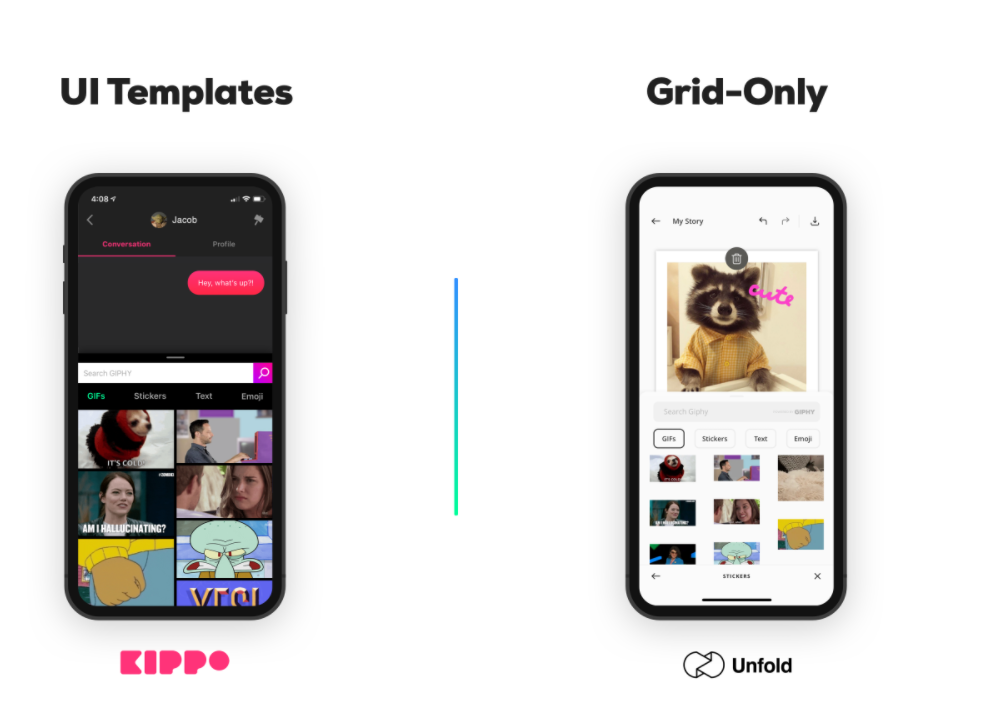
You can choose between templates which handle almost everything or just a Grid component which gives you a little more control.
Here's an interactive demo provided by Giphy.
Trending API
This endpoint returns a list of constantly updated content based on user engagement and what is currently popular on Giphy.
Search API
This endpoint is similar to the animated text endpoint, you just need to pass a search query as a parameter and you'll get an array of gifs that match.
There are many more API endpoints available. You can see the rest in Giphy's API documentation.
Conclusion
That's it for this tutorial! I hope you found it interesting and you make some cool projects using the Giphy API.
If you are interested in a bunch of other cool APIs that you can use for making portfolio projects, you can check out this video as well which goes over 8 more APIs that I think are really cool.