

The Go programming language, also known as Golang, was developed at Google in 2007 by Robert Griesemer, Rob Pike, and Ken Thompson. It was open-sourced in 2009.
Go is expressive, concise, clean, and efficient. The language is statically typed with syntax similar to the C programming language.
Go was designed to run on multiple cores, and it was built to support concurrency. You can use Go to write applications that need to be performant and can run on a modern scale, like distributed systems with hundreds of thousands of servers on a cloud platform.
In this article, you'll learn how to write a basic CLI (Command Line Interface) application in Go. First, we'll briefly go over some main Go characteristics. Then we'll talk about the basic structure of a Go file. Lastly, you'll learn how to set up Go locally to write code.
Table of Contents
- Characteristics of Go
- How to Set Up Go Locally on Windows
- How to Get Started With Writing Code in Go
- What Are Packages in Go?
- What Are Modules in Go?
- What is the Go Command?
- What are Variables in Go?
- Naming Conventions in Go
- Differences Between the
varKeyword andconstKeywords - Data Types in Go
- Operators in Go
- Wrapping Up
Characteristics of Go
Go is used as server-side and backend language
Go is commonly used to build server-side applications and backend services. This includes a wide range of applications such as microservices, web applications, API servers, and database services.
Go is designed with concurrency in mind, making it well-suited for building scalable and efficient server-side applications. Its simplicity, performance, and built-in support for concurrency make it a favorable choice for backend development.
Go uses simple syntax
Go has a straightforward and minimalistic syntax. It's intentionally designed to be easy to learn, read, and write code. Go encourages a clean and concise coding style.
A simple syntax reduces the load on developers, making it easier for them to understand and maintain code.
Go has fast build time, startup, and run time
Go's compilation process is quick, allowing developers to see the results of their code changes rapidly.
Also, Go programs generally start up quickly and have efficient runtime performance.
Go is resource efficient
Go programs typically require fewer system resources like CPU and RAM to run compared to some other languages. This is partly due to Go's statically compiled nature and efficient runtime.
Lower resource requirements make Go well-suited for building applications that need to be lightweight and efficient, particularly in environments where resources are limited. It contributes to better scalability and cost-effectiveness in server deployments.
Go is a compiled language
Go is a compiled language, meaning that source code is translated into machine code or an intermediate form before execution. This is in contrast to interpreted languages where code is executed directly by an interpreter.
Compilation offers advantages such as faster execution, as the code is pre-processed into a form that the machine can directly execute. It also ensures that potential errors are caught during the compilation phase, reducing runtime errors and improving overall program reliability.
How to Set Up Go Locally on Windows
Install Go on your System
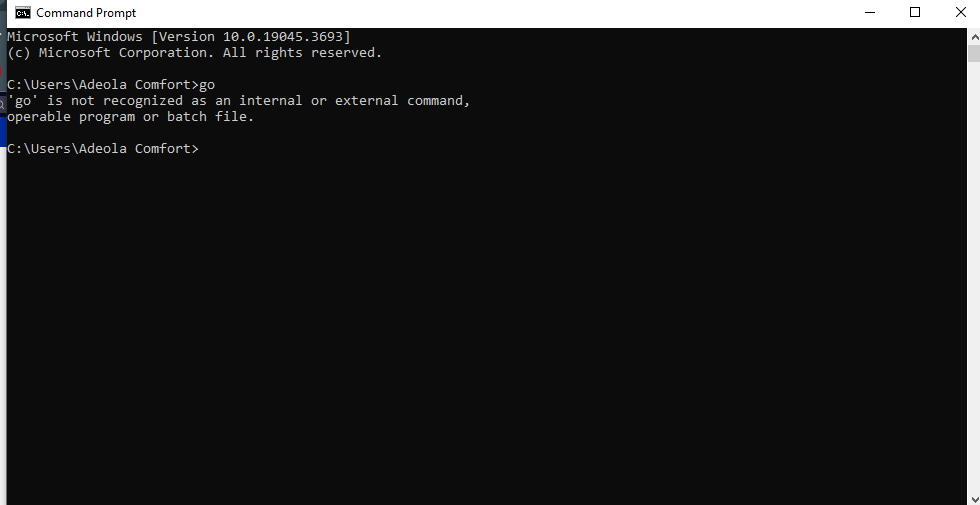
Before installing Go, open up your command prompt, type “go” and hit enter. This is to confirm whether you have Go installed on your PC or not.
When you enter “go” and hit enter, you should get a message that says “'go' is not recognized as an internal or external command, operable program or batch file”.
 Command Prompt Interface
This means you need to install it.
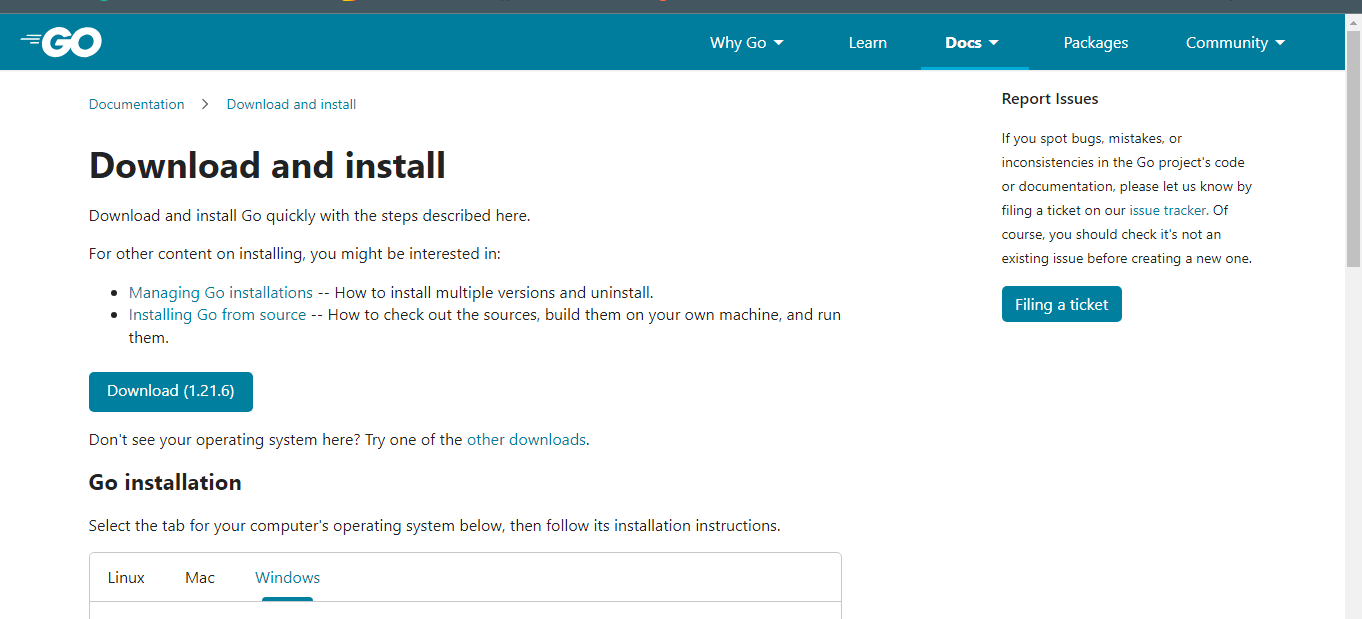
To install Go on your Windows computer, you have to first download Golang from the official website. It supports all main operating systems. Install the one that corresponds with your operating system.
 Golang Official Website Interface
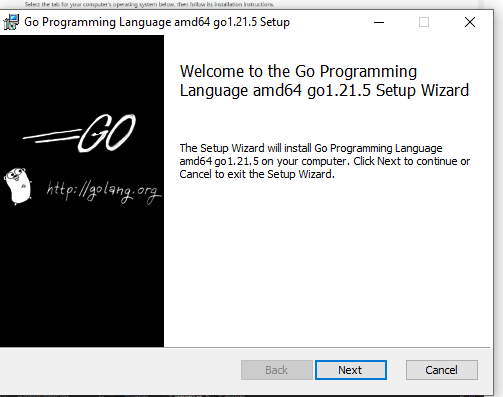
Next, double-click on the downloaded installer to install Go. Follow the prompts accordingly and Go will be installed.
 Go installer Interface
 Golang Installer Interface
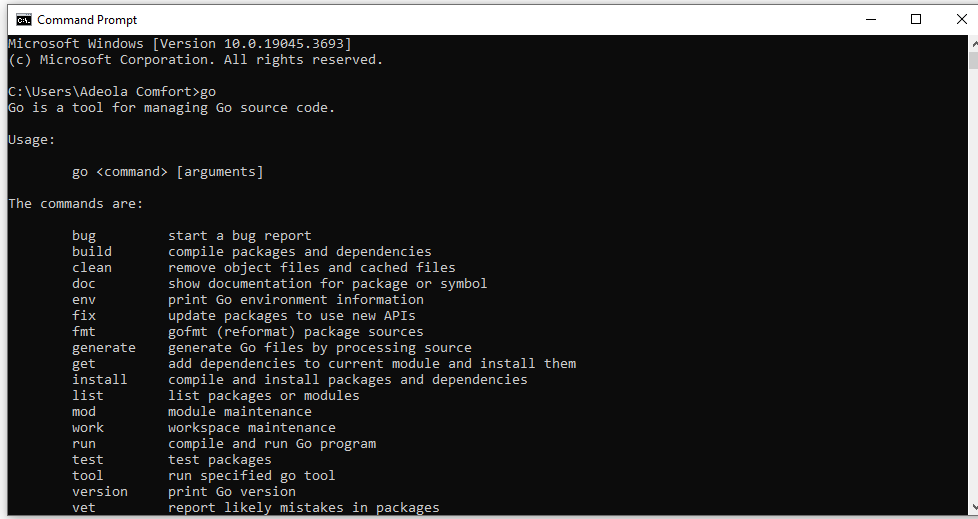
After installing Go, return to the command line and type "go" again. This time, you should see numerous commands in Go.
 Command prompt to show Go installation Completion
Now you'll need to set up your Go workspace by configuring environment variables. Go to your desktop and create a folder called "go-projects" (you can call it whatever you like). This is the folder where your Go projects will be saved.
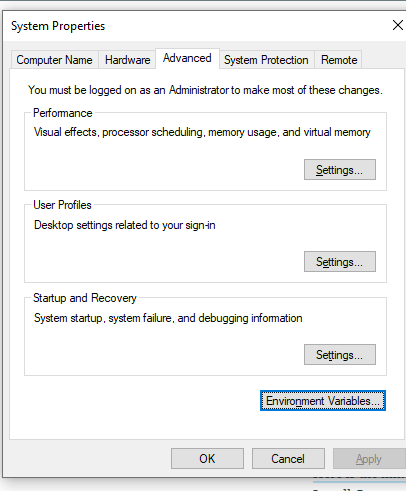
First, search for “env” on the Windows searchbar and click on “Edit the system environment variables”.
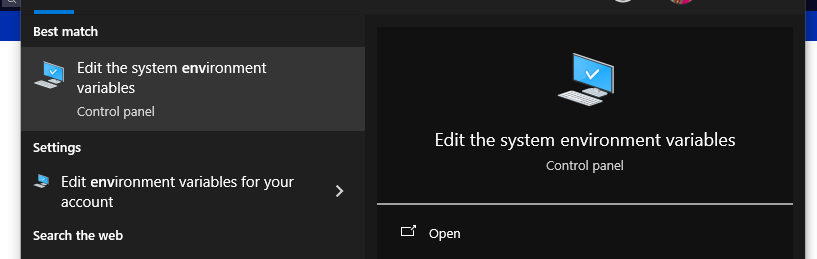 Search for Edit the system environment variables
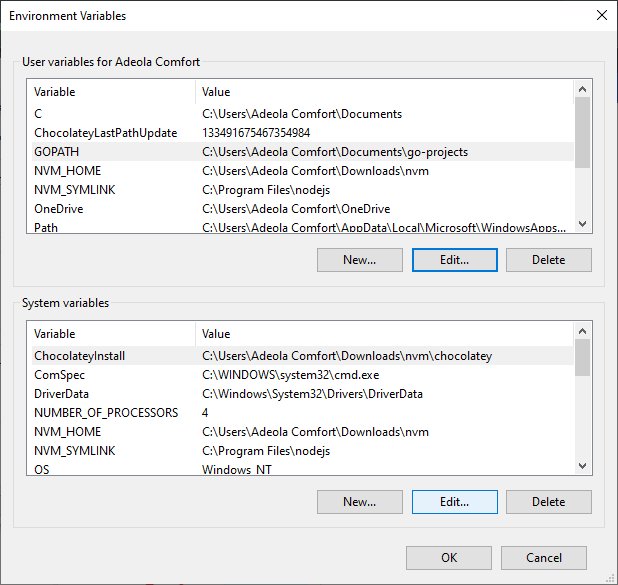
Click on the Environment variables button, as you can see below:
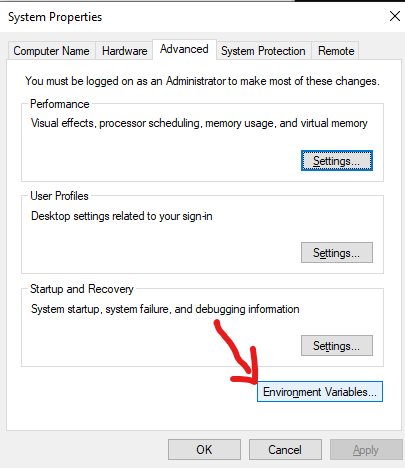 Click on the Environment variables button
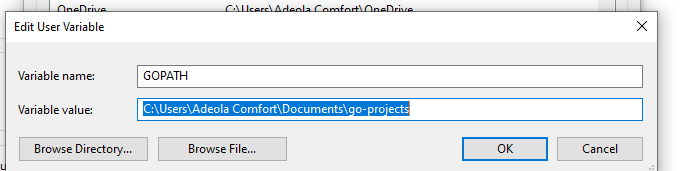
You will have to change the value of the GOPATH variable to the folder you created earlier.
Make sure “GOPATH” is selected, then click “Edit…”.
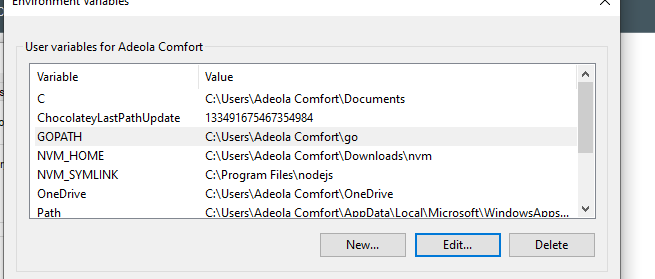 Select GOPATH
Click on “Browse Directory”
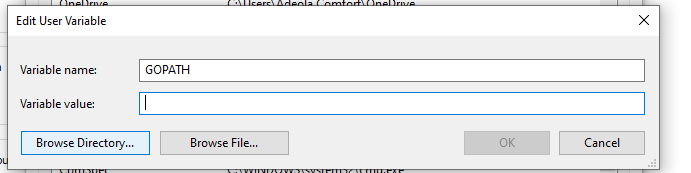 Click on “Browse Directory”
Select the folder you created earlier (“go-projects”, or whatever you named yours) and click "OK".
 Select the folder you created earlier
Click "OK" again.
 Click OK
Click "OK" again.
Click "OK" one more time.
Voilà! You are done setting the GOPATH variable.
Set Up an IDE
Install an IDE (Integrated Development Environment) of your choice if you don't have one installed already.
An IDE is an editor for writing Code, like Visual Studio Code, Sublime, and so on.
Here is the link to download Visual Studio Code.
Install the Go Extension in VS Code
Next, you'll want to install the Go extension on Visual Studio Code. It provides features like code completion, code navigation, syntax highlighting, and snippet suggestions.
 Go extension
How to Get Started Writing Code in Go
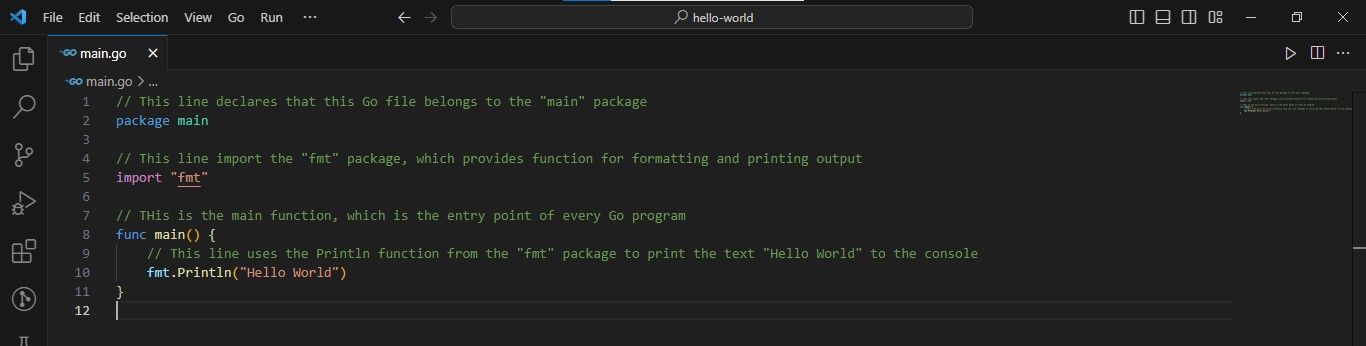
Open up the “go-projects” folder (or whatever you named it) with VS Code (or your code editor of choice). Create a folder called "hello-world" (this is optional) and create a file named main.go. You can name the file whatever you want.
 Example Go code
Here's the output:
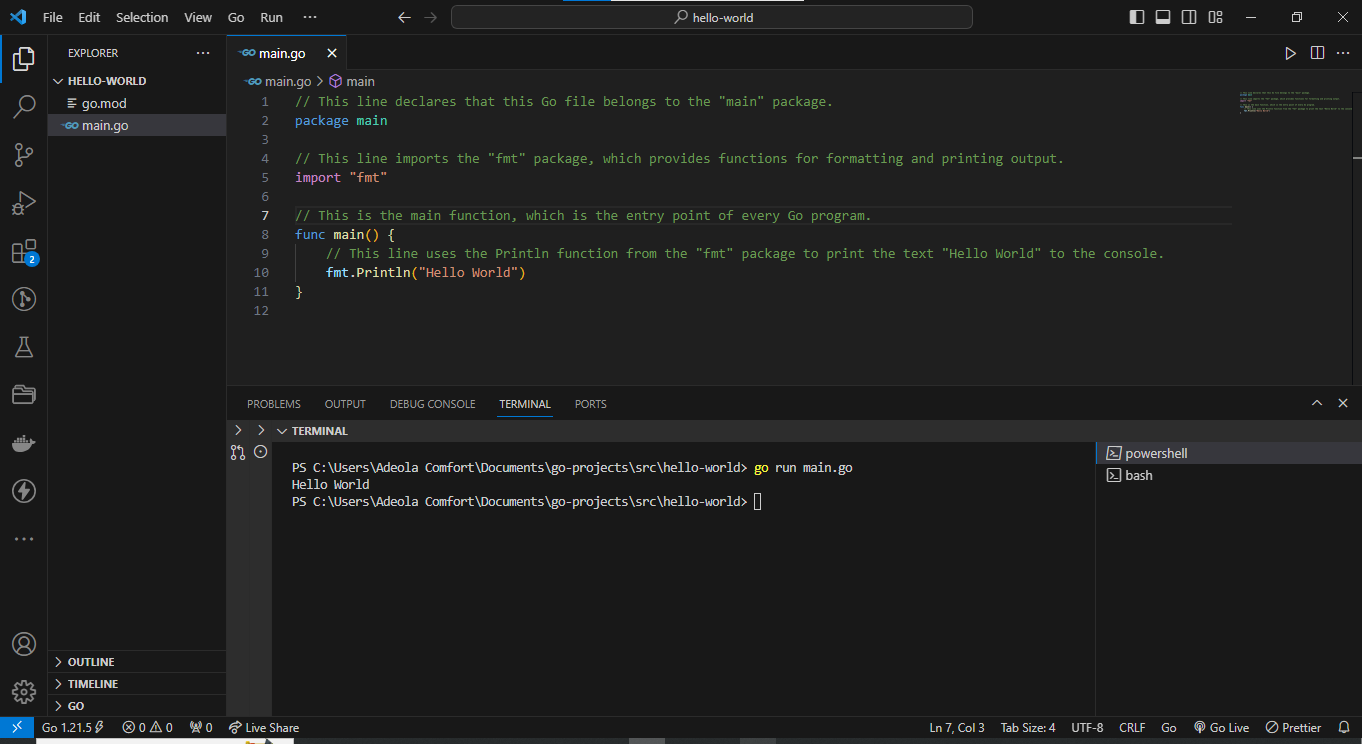 Output
You might be wondering what the code snippet above is doing 🤔. I'll explain in detail below.
Let's go 🚀🚀
- Package Declaration (
package main): Every Go program starts with a package declaration, indicating to which package the file belongs. Themainpackage is a special one, as it's the entry point for executable programs. - Import Statement (
import "fmt"): In Go, you import packages to use their functions and features. Here, we import thefmtpackage, which stands for "format" and is used for input and output operations. - Main Function (
func main()): Every Go executable program must have amainfunction. When you run your program, it's the first function that gets executed. - Print Statement (
fmt.Println("Hello World")): This line uses thePrintlnfunction from thefmtpackage to print the text "Hello World" to the console. ThePrintlnfunction is used for printing with a newline character at the end, so the next output appears on a new line.
What are Packages in Go?
Packages are Go's way of organizing code. A package is a collection of source files. It should be narrowly focused and perform a single thing like argument passing, handling HTTP request, and so on.
Programs start running in package main. This program uses the packages with import paths “fmt”.
In Go, import path is a unique identifier for a package. It specifies the location of a package in the Go module system. The import path is used in the import statement to bring in external packages or dependencies into your Go code.
Here's a breakdown of the import path:
Standard Library Packages: For packages that are part of the Go standard library, you can directly use their name in the import statement.
For example:
import "fmt"
Local Packages: If you are working on a project with multiple files or packages, you can use relative import paths to import local packages.
For example, if you have a package named "mypackage" in the same directory as your main file, you can import it like this:
import "./mypackage"
Remote Packages (from version control repositories): Go supports importing packages directly from version control repositories like GitHub. The import path includes the repository URL.
For example:
import "github.com/example/mypackage"
Remote Packages (from custom servers): You can also import packages from custom servers by specifying the full URL.
For instance:
import "myserver.com/mypackage"
Vendored Packages: If you have a vendored package (a copy of a package kept within your project's repository), you can import it using a path relative to your project root.
For example:
import "myproject/vendor/mypackage"
Packages from the Go Module Cache: With the introduction of Go modules, when using modules, Go automatically caches the dependencies in a module cache. Import paths can refer to packages in the cache.
For example:
import "example.com/mypackage"
package main is always written as the top of your code as shown below
Here's an example below:
package main

import "fmt"

func main(){
    fmt.Println("Hello World")
 }
What Are Modules in Go?
A module is a collection of packages. It contains information about your project like dependencies, the Go version, and package info. All Go projects have a go.mod file.
Here is the command for initializing the go.mod file from the terminal:
go mod init <module path>
module path is also the import path.
 How to initialize
 go.mod from the terminal
The picture above shows how modules are created right from the terminal. And this is the generated go.mod file:
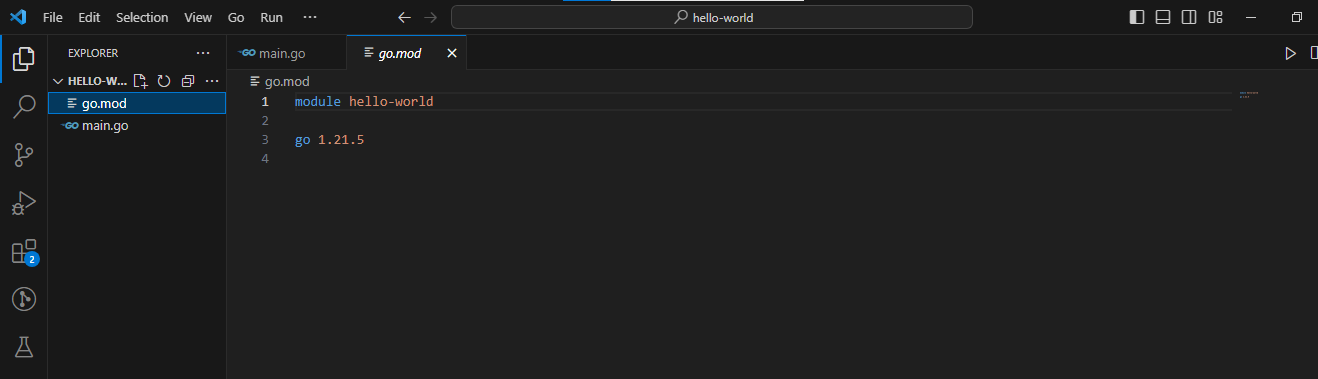 Screenshot of the
 go.mod content
What is the Go Command?
The "Go command" refers to the go command-line tool in the Go programming language. It's a versatile tool that you can use to perform various tasks related to Go development such as compiling, testing, installing packages, managing dependencies, and more.
What does the go command do?
The go command automates many aspects of the Go development workflow. It handles tasks like compiling, testing, dependency management, and more, making it easy for developers to build, test, and maintain Go projects. It also facilitates the adoption of Go modules, a dependency management system introduced to improve versioning and dependency tracking in Go projects.
You use the go command in various scenarios during the development lifecycle of a Go project:
- Running Code:
go runcompiles and executes a Go program. - Building Executables:
go buildcompiles Go source code into an executable binary. - Testing Code:
go testruns tests in the current package andgo test ./...runs tests in all subdirectories. - Package Management (with Modules):
go mod initinitializes a new module (Go project) and creates ago.modfile.go getdownloads and installs packages and dependencies.go mod tidyremoves any dependencies that are no longer necessary. Andgo list -m alllists all dependencies for the current module. - Documentation:
go docshows documentation for a package or symbol. - Dependency Analysis:
go listlists information about available packages.go list -m -versions <module>lists all known versions of a module. - Code Formatting:
go fmtformats Go source code. - Environment:
go envprints Go environment information.
What are Variables in Go?
Variables provide a way to store and access data in your program.
To create a variable, you can use single creation, compound creation, block creation, or the create and assign method. Let's go through examples of each of them now.
Single Creation
Single Creation is used when you need to create and initialize a single variable.
Example of using the single creation method:
package main

import "fmt"

func main() {
    var singleVariable int
    singleVariable = 10
    fmt.Println(singleVariable)
}
In this example, singleVariable is declared and later assigned the value 10.
Compound Creation
We can also create multiple variables at the same time. This way of creating variables makes it simple to assign multiple different data types to multiple variables.
package main

import "fmt"

func main() {
    var a, b, c  = 1, 2, "Coders"
    fmt.Println(a, b, c)
}
Block Creation
Block creation is used when you want to limit the scope of the variables to a specific block. You declare and initialize multiple variables within a code block {}.
package main

import "fmt"

func main() {
    {
        var blockVariable int
        blockVariable = 5
        fmt.Println(blockVariable)
    }

    // blockVariable is not accessible here
}
In this example, blockVar1 is only accessible within the block it is declared.
Create and Assign
You declare and initialize a variable in a single line using the := shorthand, like this:
package main

import "fmt"

func main() {
    createAndAssignVar := 42
    fmt.Println(createAndAssignVar)
}
In this example, createAndAssignVar is declared and initialized in a single line using the := shorthand.
Naming Conventions in Go
Go variable naming uses camel case. For instance:
const myVariable = 20
Whenever you are coming up with a variable name, it's a good practice to give it a descriptive name, for example conferenceName := "Linux" instead of conference := "Linux".
Difference Between var Keyword and const Keyword in Go
There are two ways to declare variables in Go: var and const. For those of you who know JavaScript, this may sound familiar.
varis used to declare variables, and their values can be changed after the declaration.constis used to declare constants, and their values cannot be changed after the declaration.
Here's an example of using both var and const to declare variables:
package main

import "fmt"

func main() {
    // Using var
    var variable1 int = 5
    variable1 = 10  // Valid, the value of variable1 can be changed

    // Using const
    const constant1 int = 5
    // constant1 = 10  // Invalid, constants cannot be reassigned

    fmt.Println(variable1, constant1)
}
In the example above, variable1 can be reassigned to a new value, while constant1 cannot be reassigned due to its const nature.
Data Types in Go
There are different data types in Golang, which include number, string, boolean, array, pointer, struct, map, and interface.
Let's see examples of each of these so you can learn how they work.
Number( int, float64) is used for representing numerical values (whole numbers or decimals). Here's an example:
package main

import "fmt"

func main() {
    // Integers
    var integerVar int = 42
    fmt.Println(integerVar)

    // Floating-point numbers
    var floatVar float64 = 3.14
    fmt.Println(floatVar)
}
In this example, integerVar is an integer variable, and floatVar is a floating-point variable.
Stringis used for representing sequences of characters (text). Here's an example:
package main

import "fmt"

func main() {
    var stringVar string = "Hello, Golang!"
    fmt.Println(stringVar)
}
In this example, stringVar is a string variable holding the text "Hello, Golang!".
Booleanis used for representing logical values (trueorfalse). Here's an example:
package main
import "fmt"
func main() {
    var boolVar bool = true
    fmt.Println(boolVar)
}
In this example, boolVar is a boolean variable set to true.
Arrayis used for storing fixed-size sequences of elements of the same type. Here's an example
package main

import "fmt"

func main() {
    var intArray [3]int = [3]int{1, 2, 3}
    fmt.Println(intArray)
}
In this example, intArray is an array of integers with a fixed size of 3.
Pointeris used for storing the memory address of a variable. Here's an example:
package main

import "fmt"

func main() {
    var originalVar int = 42
    var pointerVar *int = &originalVar
    fmt.Println(*pointerVar) // Dereferencing the pointer
}
In this example, pointerVar is a pointer to the memory address of originalVar.
Structure (Struct)is used for grouping together variables of different types under a single name. Here's an example:
package main

import "fmt"

type Person struct {
    Name string
    Age  int
}

func main() {
    var personVar Person = Person{Name: "Alice", Age: 30}
    fmt.Println(personVar)
}
In this example, personVar is a struct representing a person with a name and an age
Mapis used for representing key-value pairs. Here's an example:
package main

import "fmt"

func main() {
    var myMap map[string]int = map[string]int{"one": 1, "two": 2, "three": 3}
    fmt.Println(myMap)
}
In this example, myMap is a map with string keys and integer values.
Interfaceis used for defining a set of method signatures without specifying the implementation. Here's an example:
package main

import "fmt"

type Shape interface {
    Area() float64
}

type Circle struct {
    Radius float64
}

func (c Circle) Area() float64 {
    return 3.14 * c.Radius * c.Radius
}

func main() {
    var myShape Shape = Circle{Radius: 5.0}
    fmt.Println(myShape.Area())
}
In this example, Shape is an interface, and Circle is a type implementing the Area method of the Shape interface.
Operators in Go
There are 3 main types of operators in Go: arithmetic operators, logical operators, and relational operators
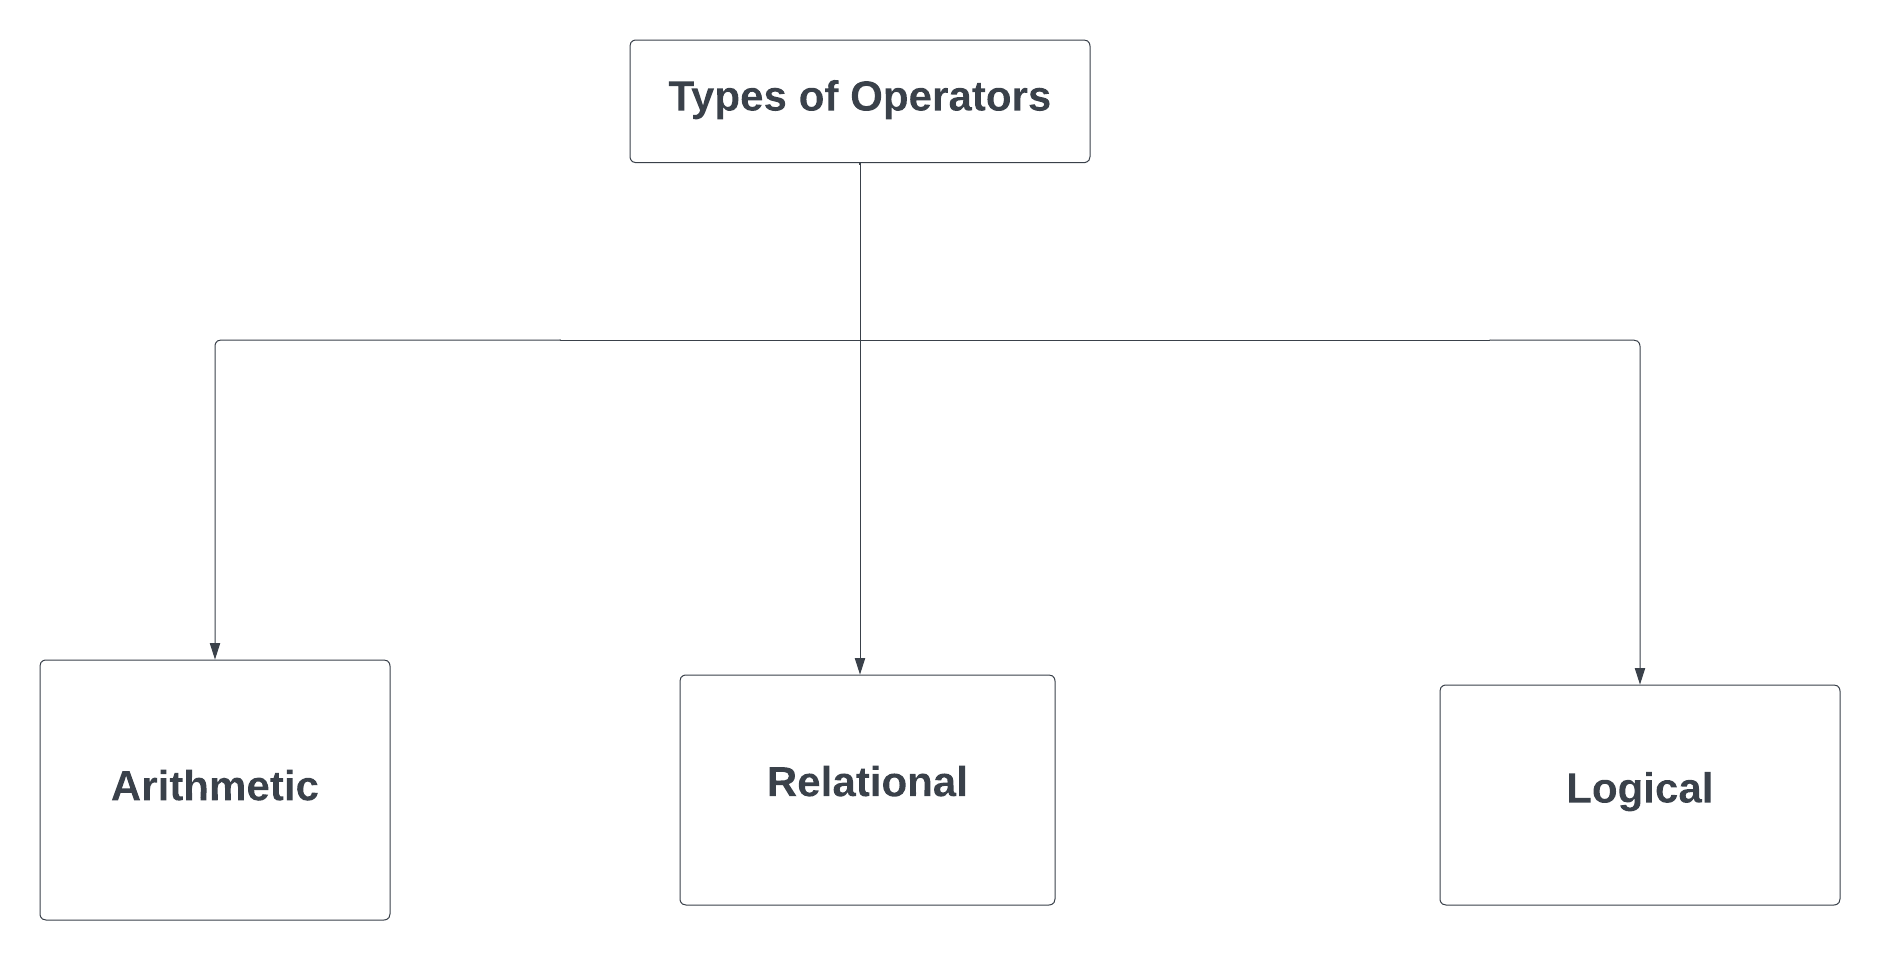
Now let's go through each category of operators and see how they work, with examples.
Arithmetic Operators
Arithmetic operators are used when you need to perform basic mathematical operations in your code. They include the following:
- Addition (+) is used for adding numerical values together. Here's an example:
package main

import "fmt"

func main (){
    a := 5
    b := 3
    result := a + b
    // result is 8
fmt.Println(result)
}
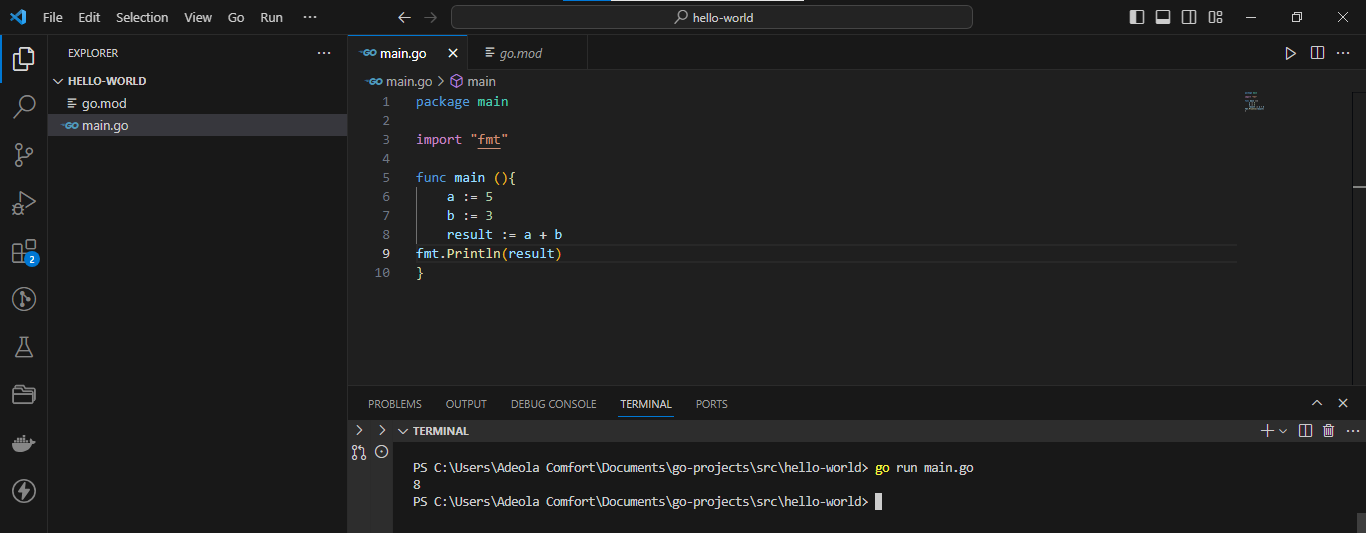 How to use the Addition operator in Go
- Subtraction (-) is used for finding the difference between two numerical values. Here's an example:
package main

import "fmt"

func main (){
    a := 8
    b := 3
    result := a - b
    // result is 5
fmt.Println(result)
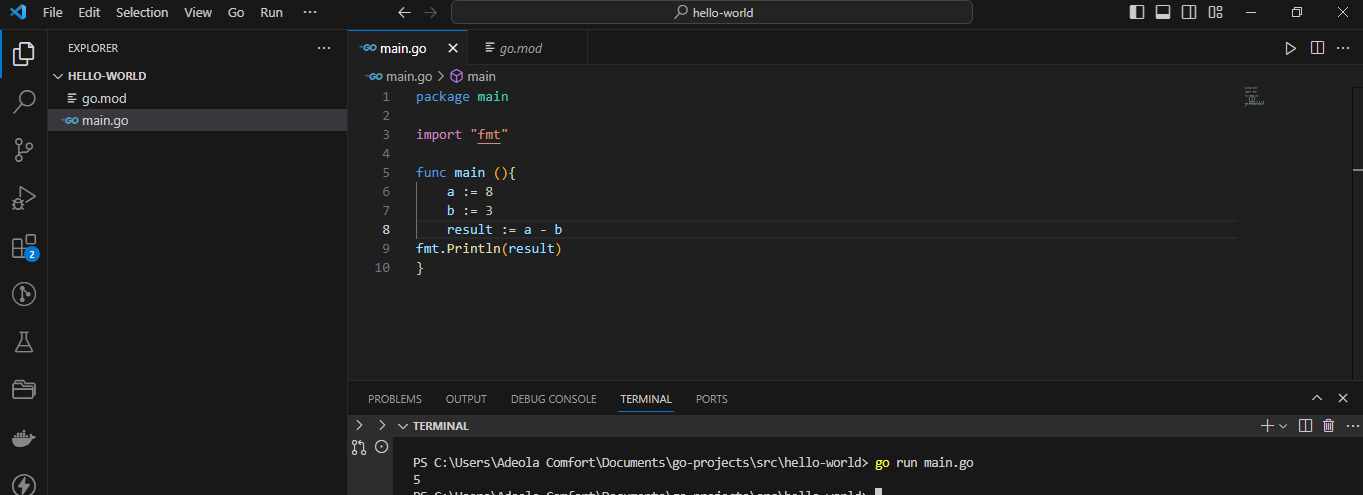 How to use the Subtraction operator
- Multiplication (*) is used for calculating the product of two numerical values. Here's an example:
package main

import "fmt"

func main (){
    a := 4
    b := 6
    result := a * b
// result is 24
fmt.Println(result)
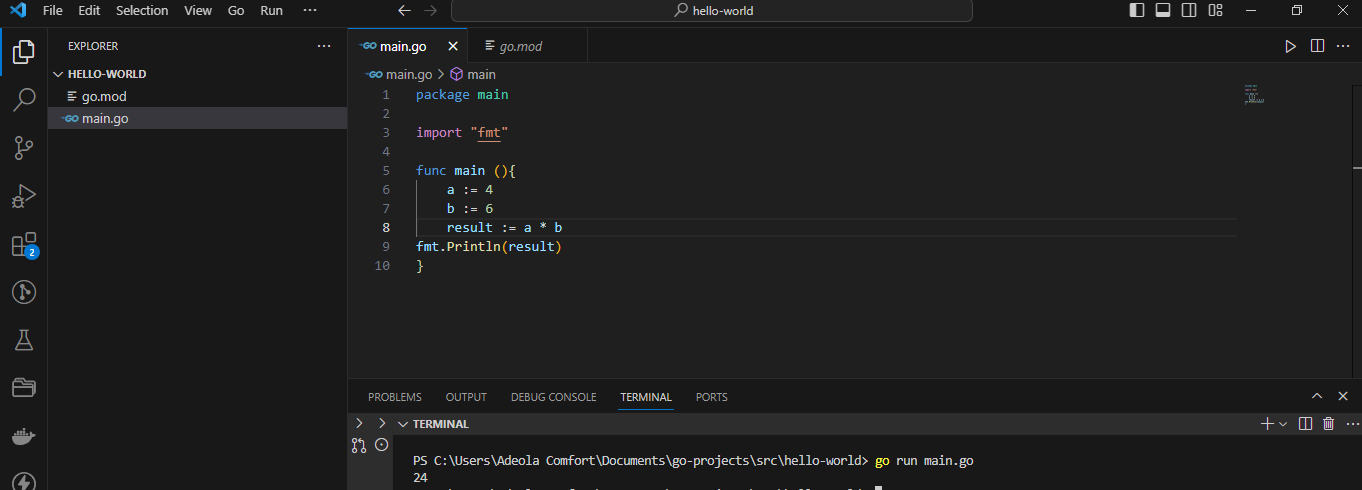 How to use the Multiplication operator
- Division (/) is used for calculating the quotient of two numerical values. Here's an example:
package main

import "fmt"

func main(){
    a := 10
    b := 2
    result := a / b
// result is 5
fmt.Println(result)
}
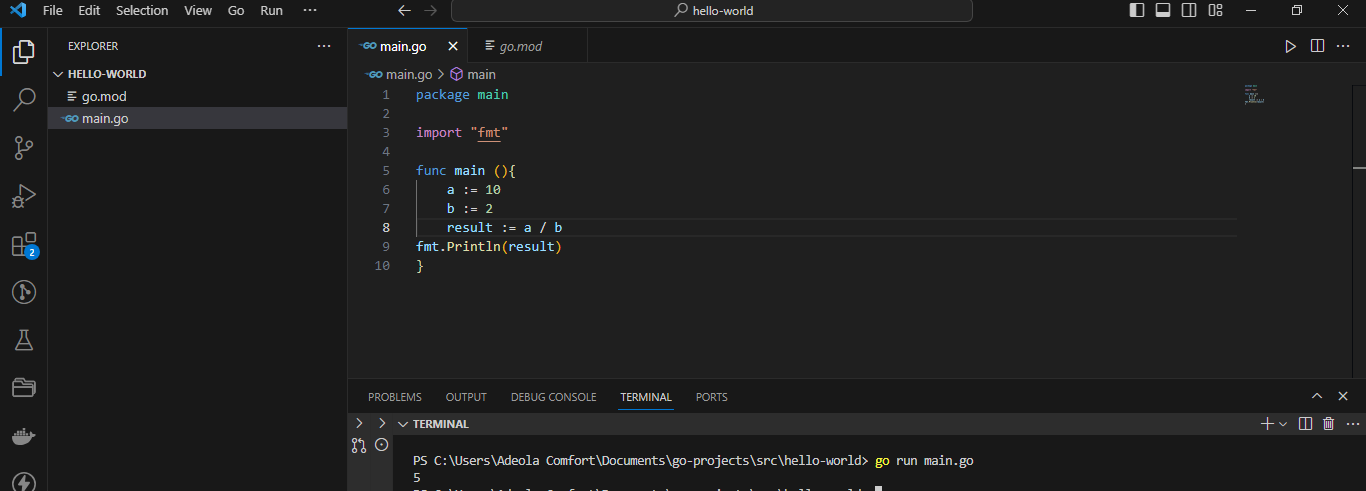 How to use the division operator
- Modulus (%) returns the remainder of the division of the left operand by the right operand. Here's an example:
package main

import "fmt"

func main (){
    a := 15
    b := 7
    result := a % b
fmt.Println(result)
}
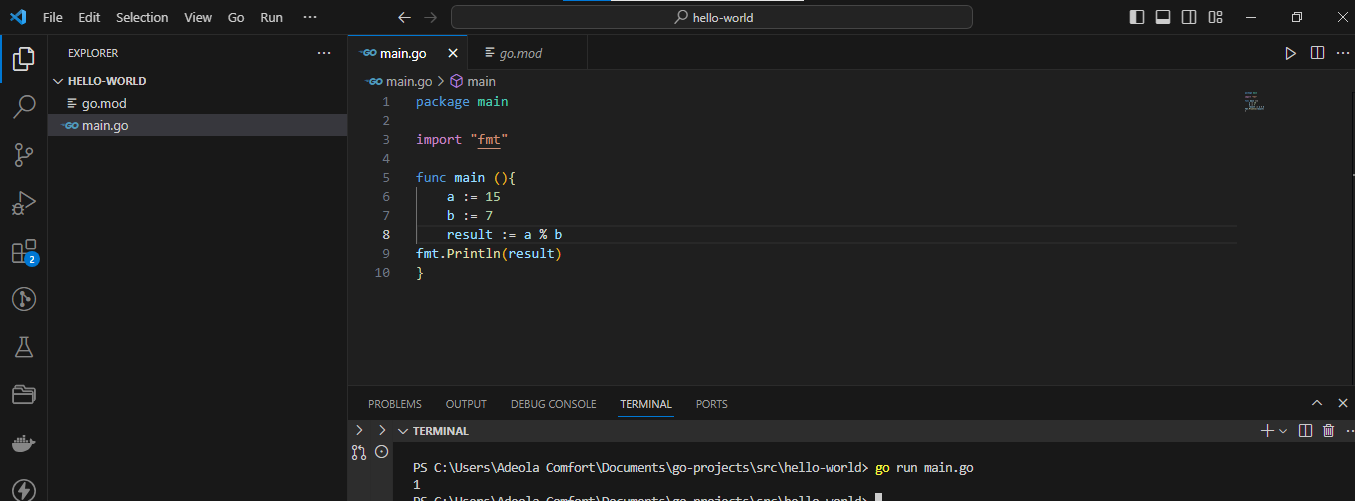 How to use the Modulus operator
Relational Operators
Relational operators are used for comparing values and making decisions based on the comparison results. It includes the following:
- Greater Than (>) is used for comparisons where the left operand is greater than the right operand. Here's an example
package main

import "fmt"

func main (){
    x := 8
    y := 5
    isGreater := x > y
// isGreater is true
fmt.Println(isGreater)
}
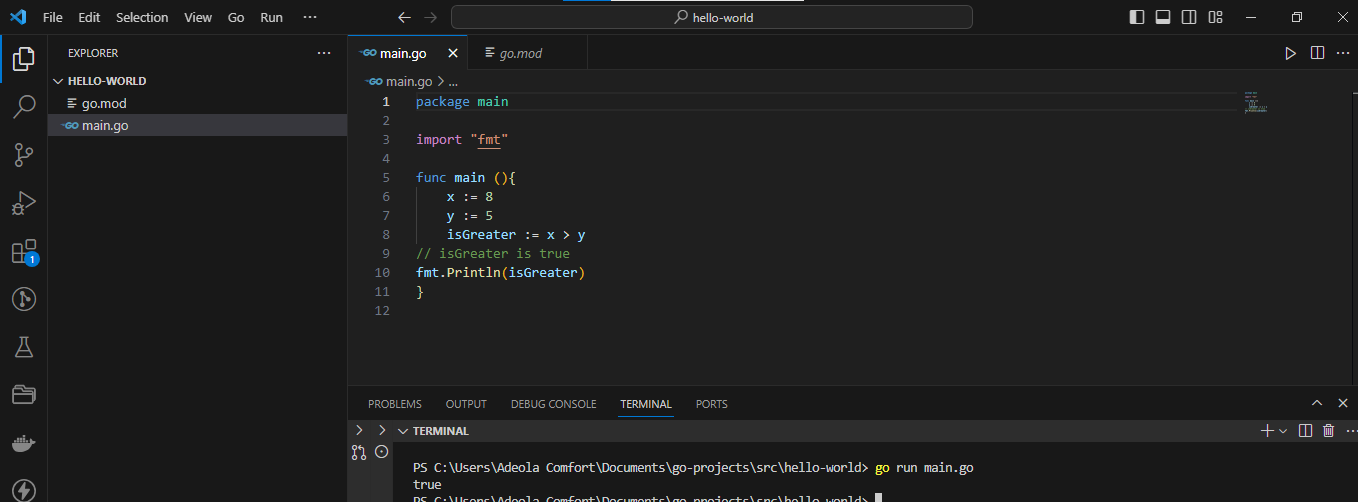 How to use the Greater than sign
- Less Than (<) is used for comparisons where the left operand is less than the right operand. Here's an example:
package main

import "fmt"

func main (){
    p := 12
    q := 18
    isLess := p < q
    // isLess is true
fmt.Println(isLess)

]
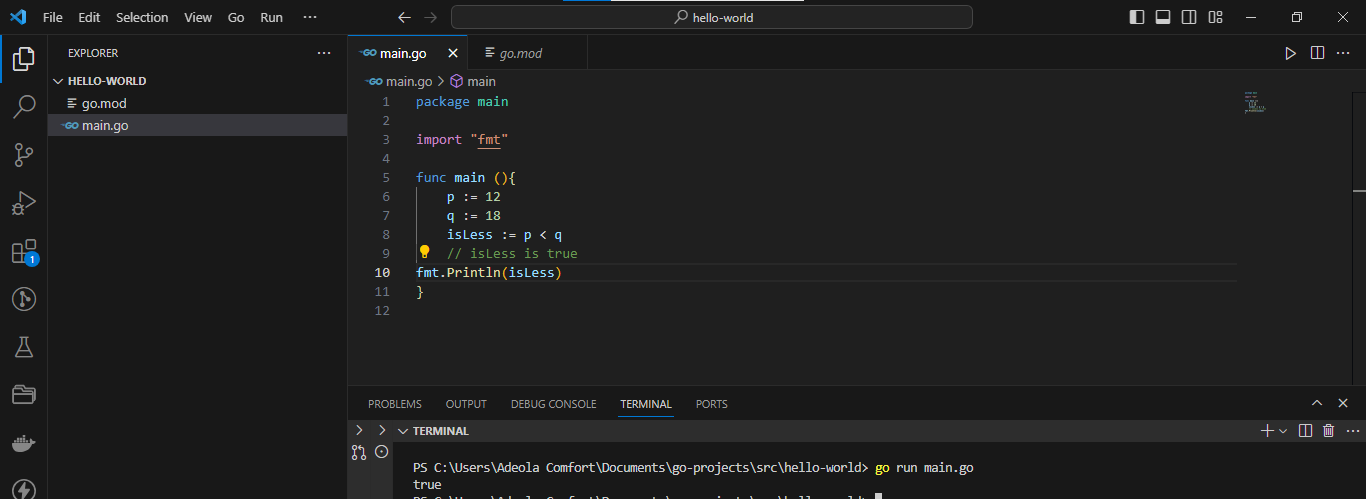 How to use the less than sign
- Greater Than or equal (>=) checks if the left operand is greater than or equal to the right operand. Here's an example:
package main

import "fmt"

func main (){
    m := 5
    n := 5
    isGreaterOrEqual := m >= n
    // isGreaterOrEqual is true
fmt.Println(isGreaterOrEqual)
}
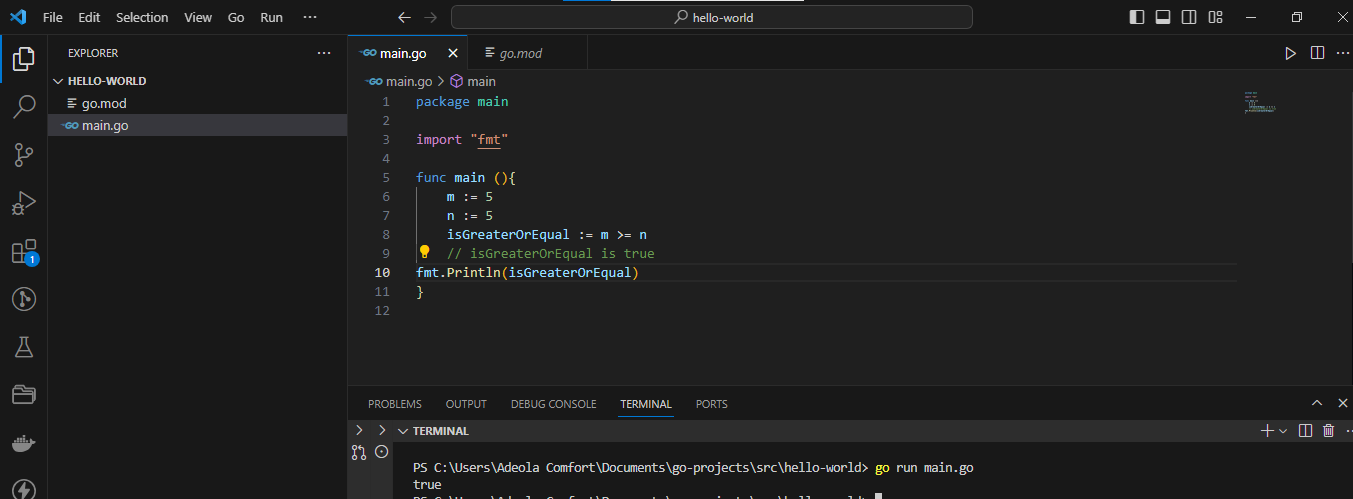 How to use the greater than or equal sign
- Less Than or Equal to (<=) checks if the left operand is less than or equal to the right operand.
package main

import "fmt"

func main (){
    r := 10
    s := 15
    isLessOrEqual := r <= s
    // isLessOrEqual is true
fmt.Println(isLessOrEqual)
}
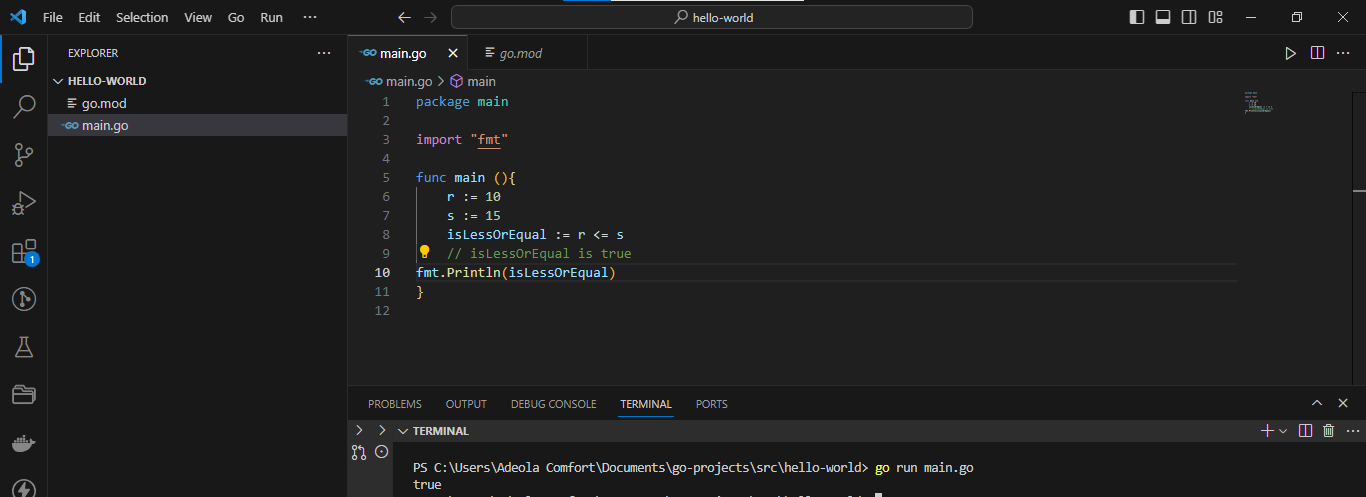 How to use the less than or equal sign
- Equivalence (==) checks if the left operand is equal to the right operand. You use this for equality comparisons. Here's an example:
package main

import "fmt"

func main (){
    age := 25
    checkAge := age == 25
    // checkAge is true
fmt.Println(checkAge)
}
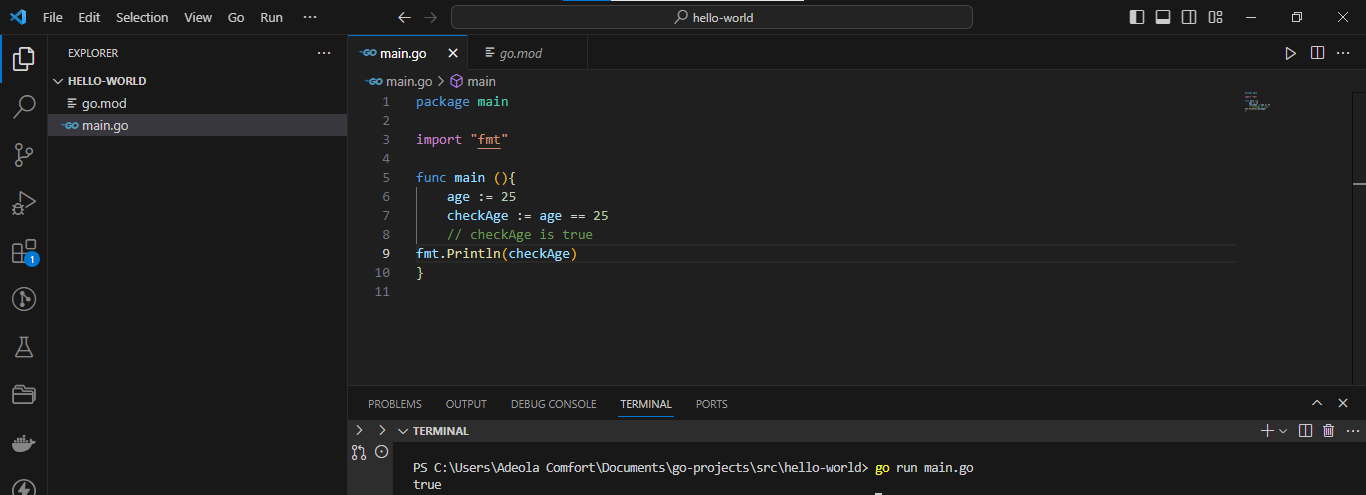 How to use the Equivalence sign
- Not Equal (!=) checks if the two operands are not equal. Here's an example:
package main

import "fmt"

func main (){
    score1 := 80
    passingScore := score1 != 75
    // passingScore is true
fmt.Println(passingScore)
}
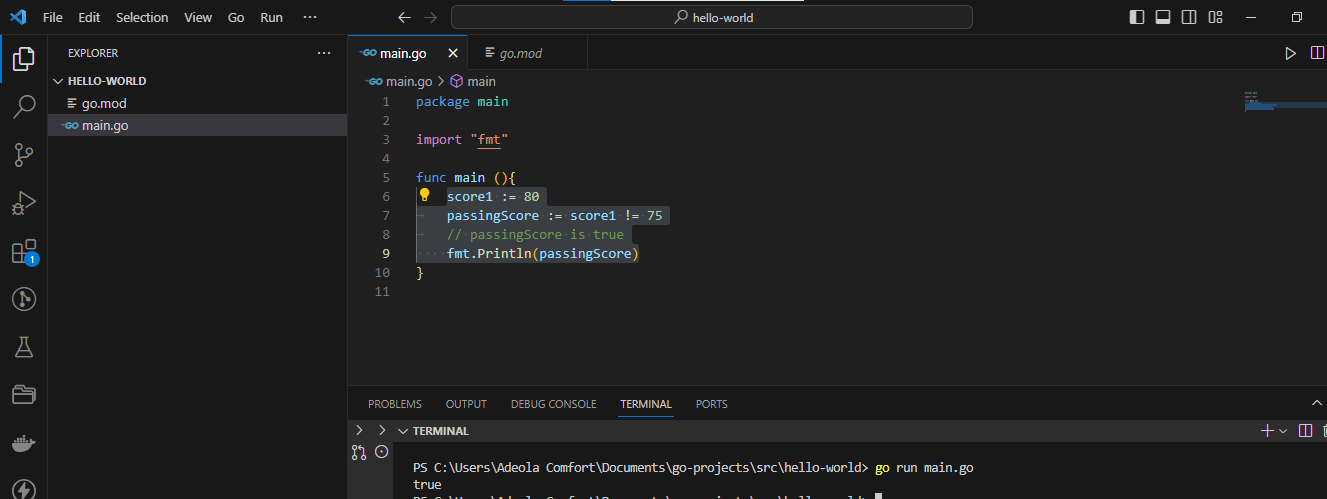 How to use the Not Equal
Logical Operators
You use logical operators when you need to implement boolean logic and make decisions based on multiple conditions.
- Logical AND (&&): This operator returns true only if both operands are true, otherwise, it returns false. Here's an example:
package main

import "fmt"

func main (){
    x := true
    y := false
    result := x && y
    // result is false
fmt.Println(result)
}
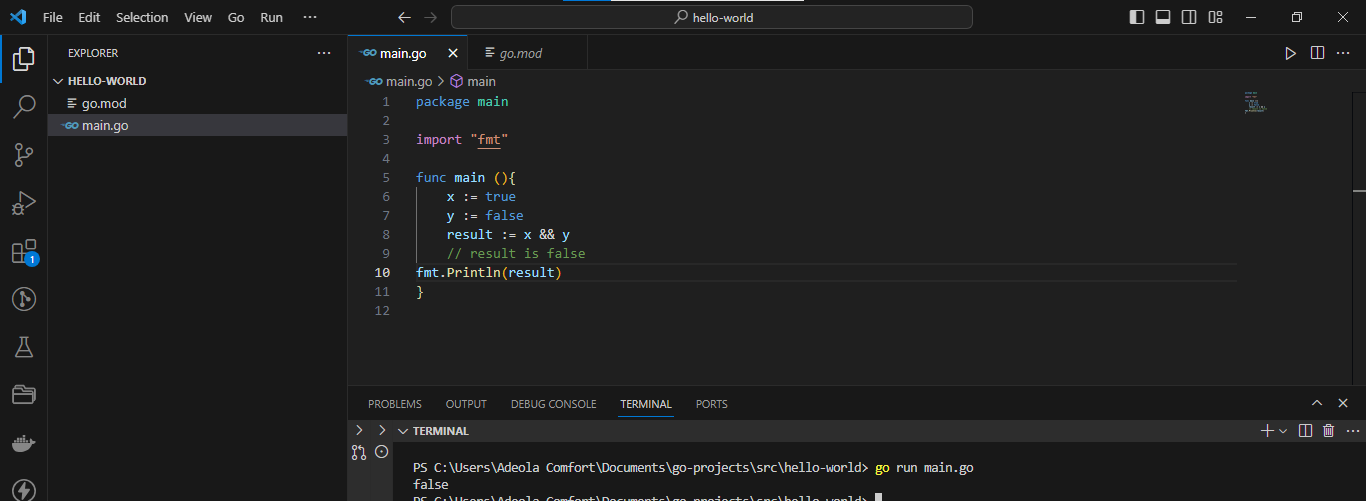 Example of Logical AND
- Logical OR (||): This operator returns true if at least one of the operands is true, otherwise, it returns false. Here's an example:
package main

import "fmt"

func main (){
    a := true
    b := false
    result := a || b
// result is true
fmt.Println(result)
}
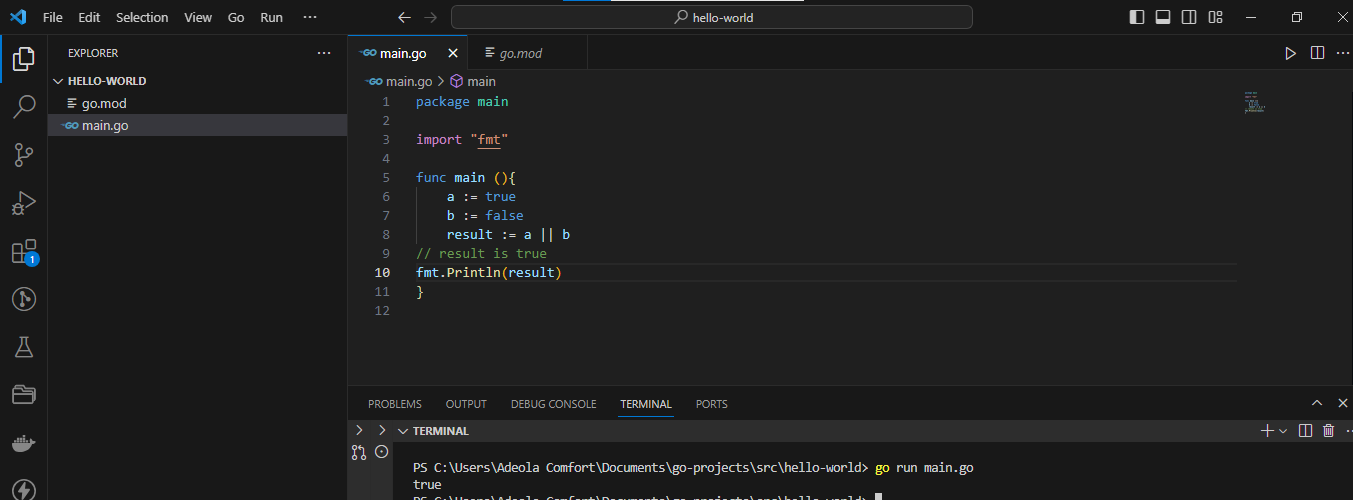 Example of logical OR
- Logical NOT (!): This operator is a unary operator, meaning it operates on only one operand. It negates the value of the operand, turning true into false and false into true. Here's an example:
package main

import "fmt"

func main (){
    isSunny := true
    isRainy := !isSunny
    // isRainy is false
fmt.Println(isRainy)
}
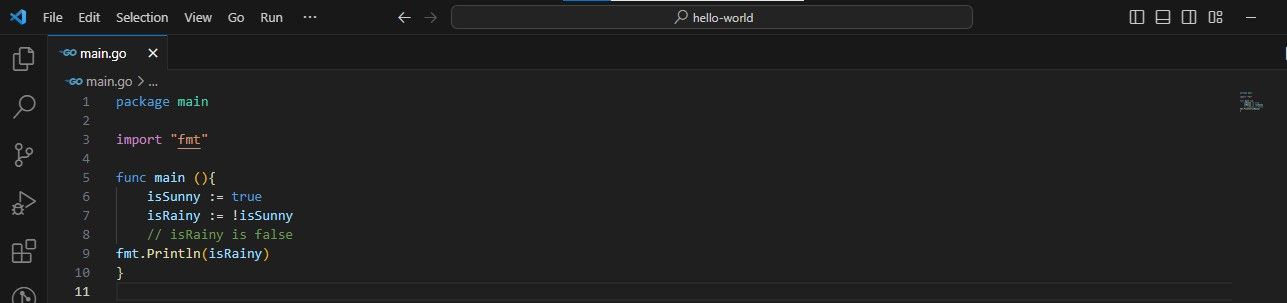 Logical NOT example
Wrapping Up
In this article, you learned about the Go programming language and why it is useful to know. You also learned about the characteristics of Go and how to set up Go locally on Windows.
Then you learned how to actually get started writing code in Go, and you saw examples of many of Go's features in action. We also talked about what packages are, how modules work, and more.
Go is well worth your time. Now, go study some more Go.
Happy Coding!