

In this article I will show you how to allow for multiple items to be selected using the drop-down data validation feature in Google Sheets.
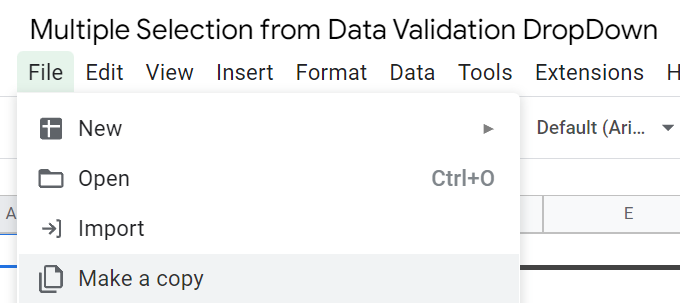
Here's the Google Sheet we'll use for the example. You can make a copy of this to edit yourself by clicking File -> Make a copy.
At the bottom of the article is a video walkthrough I recorded for this solution. 👇
The Problem 🤔
My five-year-old son posed a question that triggered a deep dive into Google Apps Script. He wanted to have multiple items selected from a data validation drop-down list.
Leave it to a five-year-old to send me to Google, YouTube, and beyond in search of a spreadsheet solution! 😅
 Gif of Michaelengelo from Teenage Mutant Ninja Turtles
We had built a spreadsheet that showed information about the Teenage Mutant Ninja Turtles. Names, birthdays, ages, favorite colors...
I was highlighting the amazing power of spreadsheets to organize, calculate, and visualize information. Typical five-year-old parenting stuff.
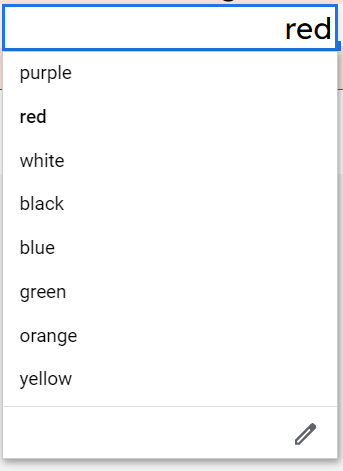
For the favorite color column, we used a drop-down list to select from a list of colors.
This is a fairly simple feature to use in Google Sheets. To create a drop-down list, select Data -> Data validation from the menu:
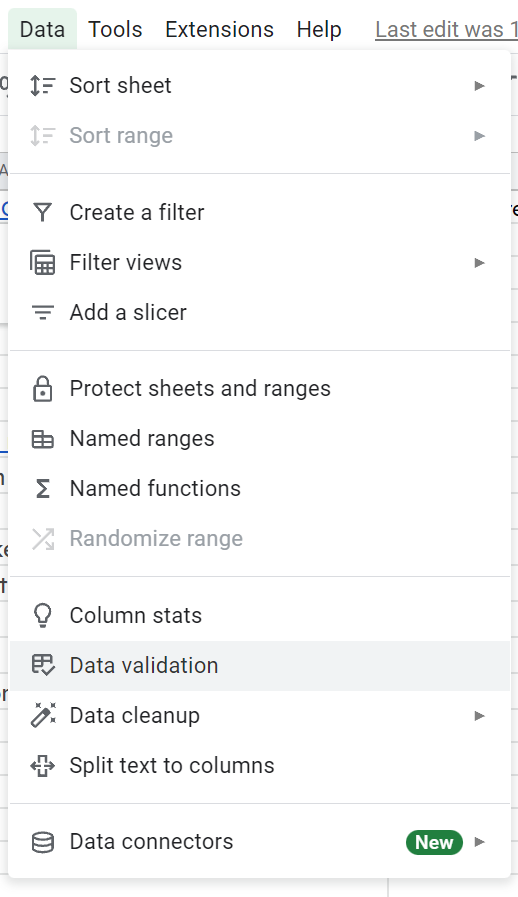 Screenshot of Google Sheet's data menu
Update: the same feature is now also available when you right-click a cell:
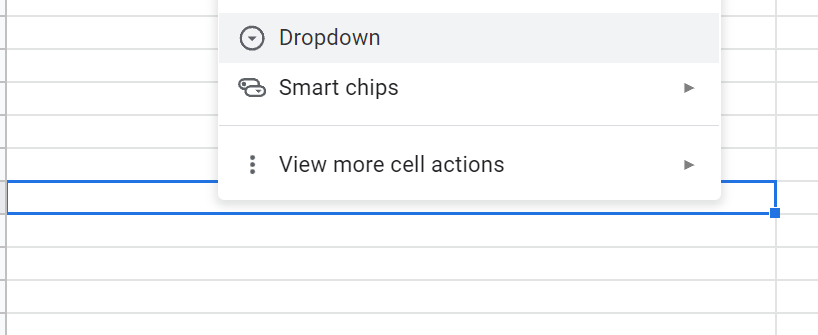 Screenshot of right-clicking menu in Google Sheets
In either case, a data validation menu will appear where you may set your conditions.
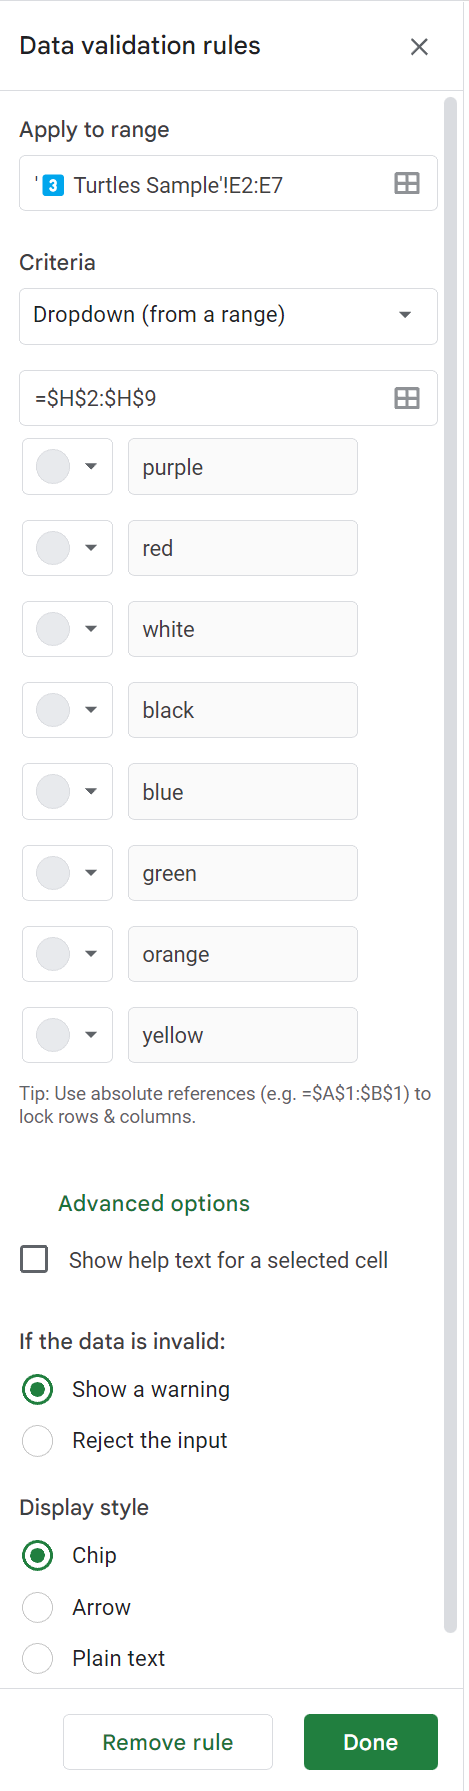
We had our list of colors in the cells H2:H9 so we selected Dropdown (from a range) in the Criteria section and then entered that range.
We wanted this to be copied to other cells without affecting that range, so we locked it in place, using the $ signs: =$H$2:$H$9.
This allows for the validation to be copied to other cells while retaining those cell references for the list of color values.
 Screenshot of Google Sheets' data validation options menu
Google Sheets Allows One Selection Only 🚩
The problem is, Google Sheets only allows for a single selection. We wanted for Leonardo to have multiple favorite colors!
Fortunately, Google Apps Script allows custom code to be written within Google Sheets, and we used this to solve our problem.
I came across the code for this from a YouTube video by Alexander Ivanov and set out to update the information with a more clearly laid out video and explanation of my own.
 Problem Solved gif
How to Use Apps Script🧑💻
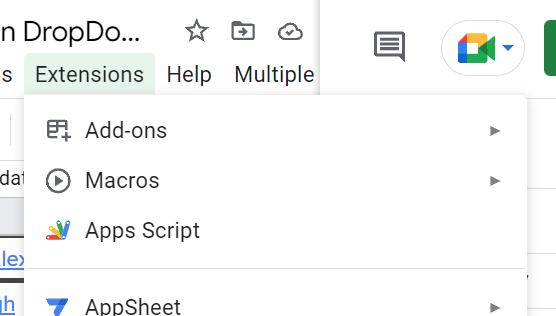
Open the Apps Script screen by selecting Extensions -> Apps Script from the menu bar.
You'll be able to create files using the plus + icon. For this project we need a Code.gs file and a Page.html file.

The Code.gs File
Start in the Code.gs file.
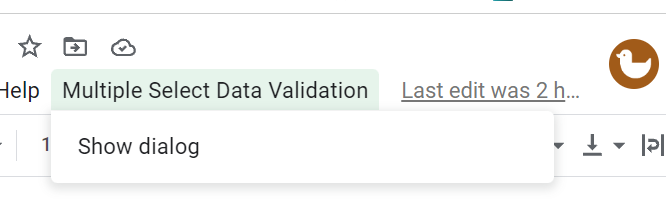
The first thing we want is a drop-down from the Google Sheets toolbar to run our code.
 Screenshot of Google Sheets' custom drop-down bar
To do this, we use the following code to add the UI option Show dialog to the menu bar. Upon clicking, it will run the showDialog function. By wrapping these methods in the built-in onOpen function, this menu in the toolbar gets added as soon as we open the spreadsheet.
function onOpen(e) {
    SpreadsheetApp.getUi()
    .createMenu('Multiple Select Data Validation')
    .addItem('Show dialog', 'showDialog')
    .addToUi();
}
There is often a short delay of a few seconds before custom menus are visible in the menu. Give it a few seconds and it will appear.
The showDialog function will create an HTML variable from a template that we will create in a moment. It then uses the built-in method .showSidebar to create a sidebar with that html.
function showDialog() {
    var html = HtmlService.createTemplateFromFile('Page').evaluate();
    SpreadsheetApp.getUi().showSidebar(html);
}
Then we have another function, valid, which will check the current cell for any data validation criteria and return those values in a 2-dimensional array.
var valid = function(){
    try{
        return SpreadsheetApp.getActiveRange().getDataValidation().getCriteriaValues()[0].getValues();
    }catch(e){
        return null
    }
}
And our final function, fillCell, will create an array to hold the resultant list of values we want the cell to contain. It then pushes these strings to the array and separates them by commas.
Lastly, it uses the built-in method, setValue to fill the current cell with the comma separated values (our favorite colors).
(fillCell and valid are called in the Page.html code we are about to go over.)
function fillCell(e){
    var s = [];
    for(var i in e){
        if(i.substr(0, 2) == 'ch') s.push(e[i]);
}
    if(s.length) SpreadsheetApp.getActiveRange().setValue(s.join(', '));
}
Here is the full code for the Code.gs file:
function onOpen(e) {
    SpreadsheetApp.getUi()
    .createMenu('Multiple Select Data Validation')
    .addItem('Show dialog', 'showDialog')
    .addToUi();
}
function showDialog() {
    var html = HtmlService.createTemplateFromFile('Page').evaluate();
    SpreadsheetApp.getUi().showSidebar(html);
}
var valid = function(){
    try{
        return SpreadsheetApp.getActiveRange().getDataValidation().getCriteriaValues()[0].getValues();
    }catch(e){
        return null
    }
}
function fillCell(e){
    var s = [];
    for(var i in e){
        if(i.substr(0, 2) == 'ch') s.push(e[i]);
}
    if(s.length) SpreadsheetApp.getActiveRange().setValue(s.join(', '));
}
The Page.html File
Now create and open a file called Page.html.
This will control a pop-up sidebar where we will handle our multiple selections, and will contain:
- a form with checkboxes next to each option
- a button to fill in the current cell
- a button to get validation from the current cell
 Screenshot of our custom Google Sheet html sidebar
We will use templated HTML for our example. First, create a variable, data, by calling the valid() function we created above. We use <? CODE_GOES_HERE ?> syntax to write code within the html template.
<? var data = valid(); ?>
Then we create a form to house all of the data pulled from the valid() function:
<form id="form" name="form">
</form>
And we'll run some code to build our list of checkboxes within this form. First, we check if the data in the cell is of type [object Array].
<? if(Object.prototype.toString.call(data) === '[object Array]') { ?>
valid() returns a two-dimensional array because it's using the built-in method getValues(). So, you can picture this being returned as an array of arrays with each individual one being one of the favorite colors:
//for illustration only; this is the type of 2D array that valid() will return

favoriteColors = [
    ["purple"],
    ["red"],
    ["white"],
    ["black"]
]
This will help as we look at the next bit of code which can appear overwhelming.
We need to access each color – the strings. We do this by nesting for loops. The first loop iterates through each position in the favorite colors array.
<? for (var i = 0; i < data.length; i++) { ?>
The second loop iterates through each element in the interior arrays. In our case, this will always be one element since each of these arrays are of length 1.
<? for (var j = 0; j < data[i].length; j++) { ?>
Remember, ["purple"] is an array of length 1. The j loop does not count the letters in the string within the array – we are just counting the length of the array.
So, we're looping through each item in the 2D array and creating a checkbox input for each one:
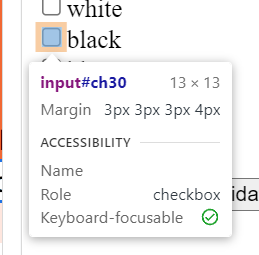
<input type="checkbox" id="ch<?= '' + i + j ?>" name="ch<?= '' + i + j ?>" value="<?= data[i][j] ?>"><?= data[i][j] ?><br>
This adds an id and name that start with "ch" and then adds the element's array position. It also pulls the value (the color) itself as a value in addition to the displayed text.
These screenshots may help connect the mental dots:
 screenshot of inspected element: the input with an id
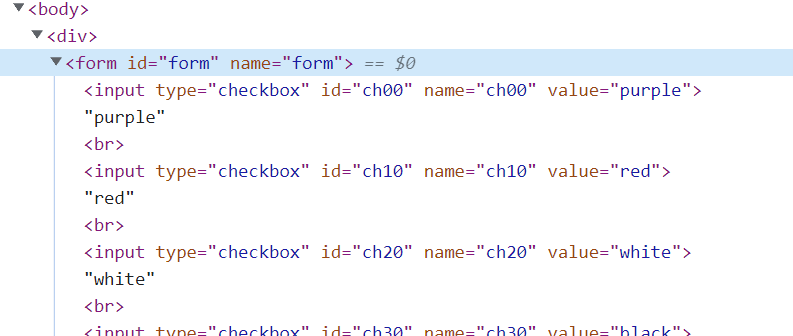 screenshot of inspected element: the form and input elements
If our initial if statement fails, we'll display a <p> indicating that perhaps there are no data validation rules in that cell while linking to a support article showing how to create an in-cell drop down list.
else { ?>
    <p>Maybe current cell doesn't have <a href="https://support.google.com/drive/answer/139705?hl=en">Data validation...</a></p>
<? } ?>
How to Code the Buttons
Then we need our two buttons.
The first button pulls the data validation from the cell. It runs the showDialog() function we created in Code.gs and builds the form of checkbox entries if there exist data validation values.
// get validation from the current cell
<input type="button" value="get validation from current" onclick="google.script.run.showDialog()" />
The second button fills the selected values into the current cell. This is what we were after all along! This runs the fillCell function in Code.gs.
// fills values into current cell
<input type="button" value="fill current" onclick="google.script.run.fillCell(this.parentNode)" />
Here is the full code for Page.html:
<div>
<? var data = valid(); ?>
<form id="form" name="form">
<? if(Object.prototype.toString.call(data) === '[object Array]') { ?>
<? for (var i = 0; i < data.length; i++) { ?>
    <? for (var j = 0; j < data[i].length; j++) { ?>
        <input type="checkbox" id="ch<?= '' + i + j ?>" name="ch<?= '' + i + j ?>" value="<?= data[i][j] ?>"><?= data[i][j] ?><br>
    <? } ?>
<? } ?>
<? } else { ?>
        <p>Maybe current cell doesn't have <a href="https://support.google.com/drive/answer/139705?hl=en">Data validation...</a></p>
<? } ?>
    <input type="button" value="fill current" onclick="google.script.run.fillCell(this.parentNode)" />
    <input type="button" value="get validation from current" onclick="google.script.run.showDialog()" />
</form>
</div>
Summary
Yes, this is quite a cumbersome solution to something relatively simple. Maybe Google will add this to the native functionality at some point. They have recently updated Data Validation to include more modern and easy to use functionality, so it's not out of the question.
Until then, this has been a great solution for me, and I'm grateful to Alexander for his initial code.
I hope this article has helped you understand the code a bit better and that it empowers you to create your own custom Google Sheets solutions!
As promised, here's my walkthrough video:
Video Walkthrough 📽️
Thanks!
Thanks for reading! If you found this helpful, I'd love it if you followed me and said hey 👋 over on LinkedIn and YouTube where you can find more content like this.
Have a great one!