By Gaurav Tewari
If you are a front end developer who is new to the world of GraphQL and you're thinking about getting started with it, this article is for you.
In this article, we will explore GraphQL basics and kick start our journey with it by building a simple project.
What is GraphQL?
GraphQL is a query language that lets apps fetch data from the API's. But what it does differently is that is allows clients to specify how to structure the data when it is returned by the server. This means that the client only asks for the data it needs and even specifies the format in which it needs the data.
But what problem does it actually solve?
It solves the problem of under fetching and over fetching. Ok but what's that? Well, let me tell you.
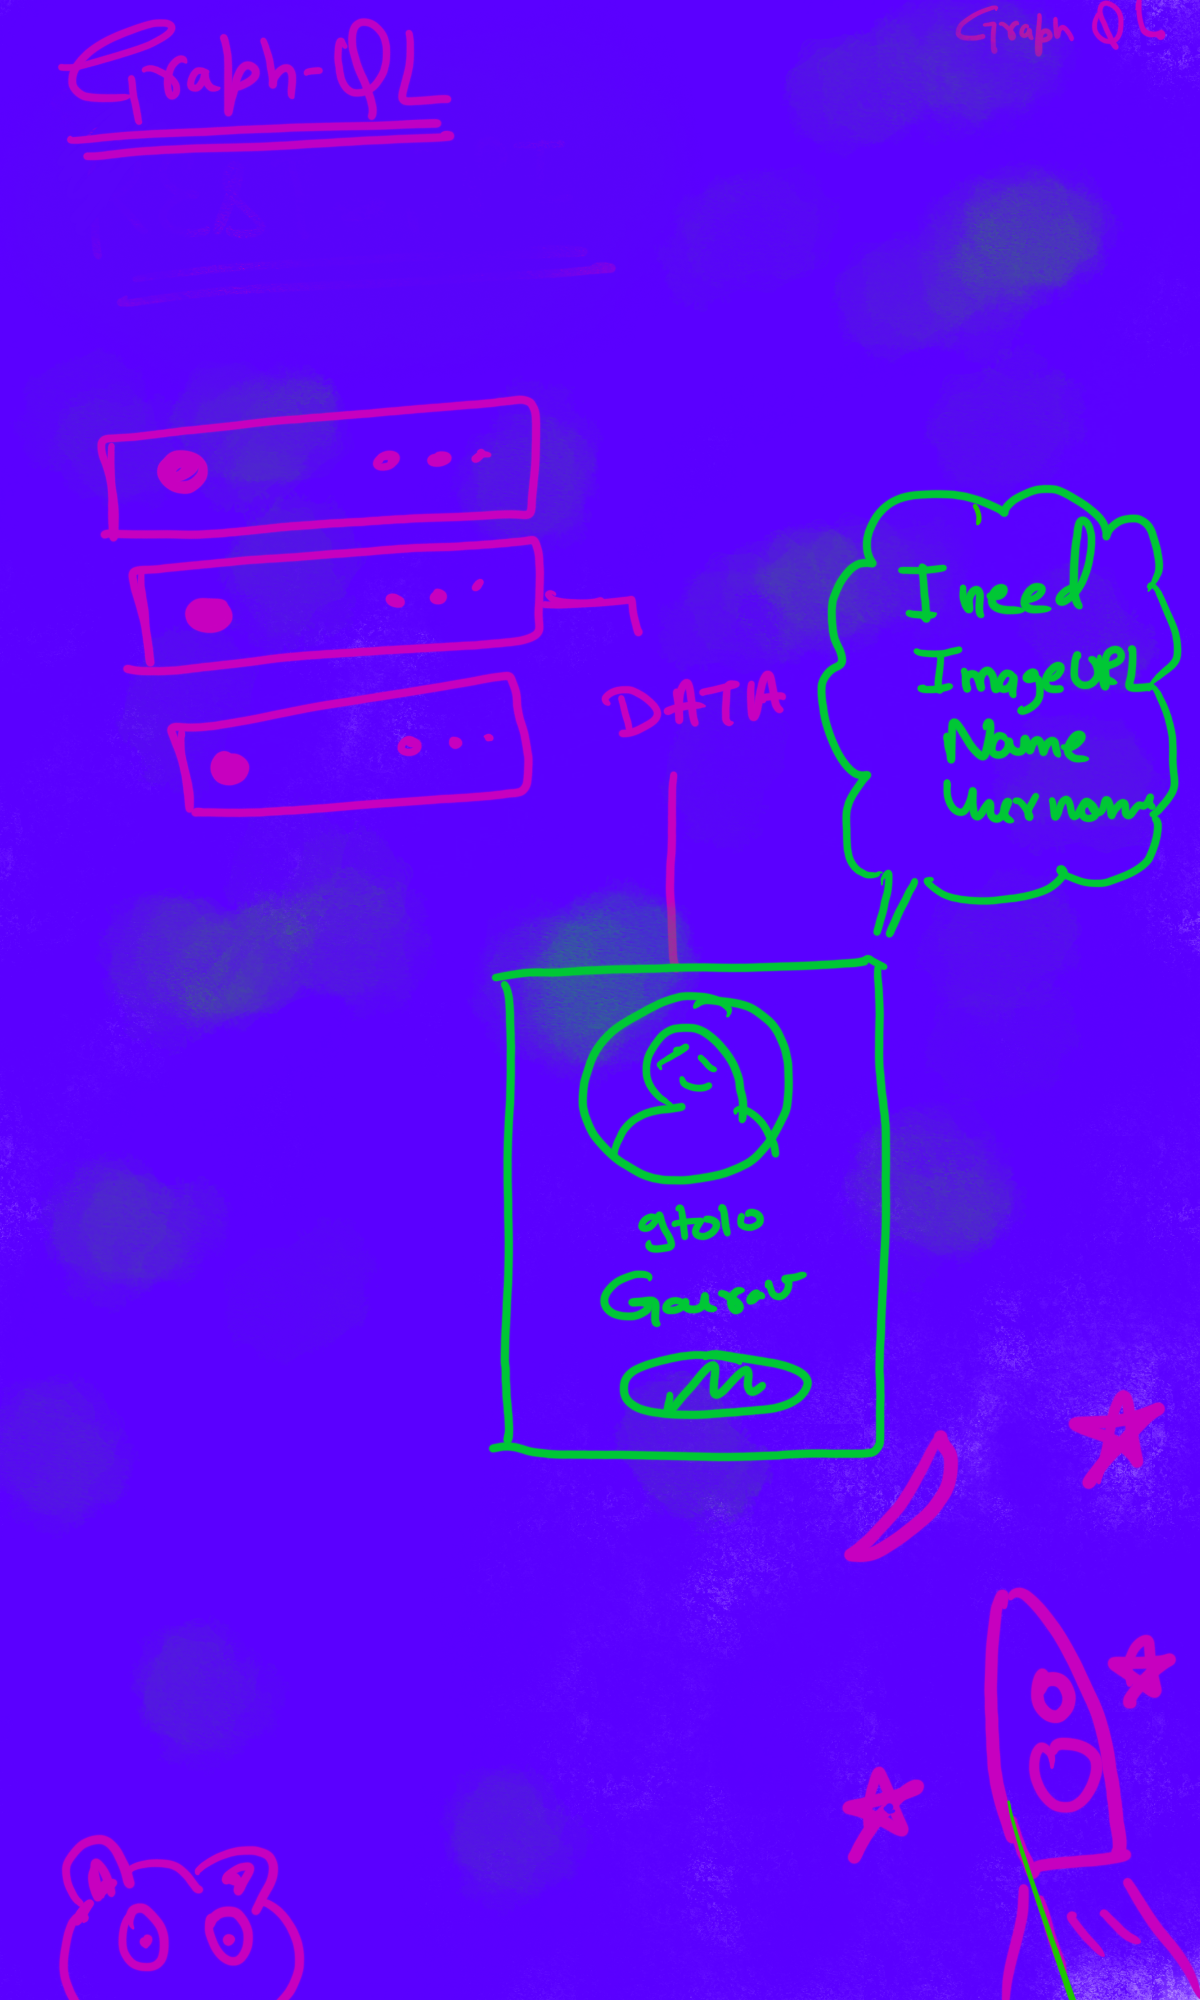
Let's say you only need to display a userName, userImage, and Name in your profile page on your website or app. But when you request the data you are getting lots of other information about the user which you don't need.
This is called over fetching – you are fetching a lot of data, even the data you don't need. On the other hand, under fetching is when we get less data than you need. So neither one is great.
 under Fetching example
You might think ok, that's not a problem at all. Well, it's not a big problem in small scale applications. But what about in large scale applications that have millions of users? In those cases, over fetching and under fetching waste a lot of resources, which is where GraphQL comes in.
How to Get Started With GraphQL
Here we'll cover some key concepts you need to know before getting started with graphQL
GraphQL PlayGround
GraphQL playground is an interactive, Graphical IDE for GraphQL where you can visually explore the server. In it you can test various GraphQL queries and see their results in front of your eyes.
Here is a link to GraphQL playground you can check out.
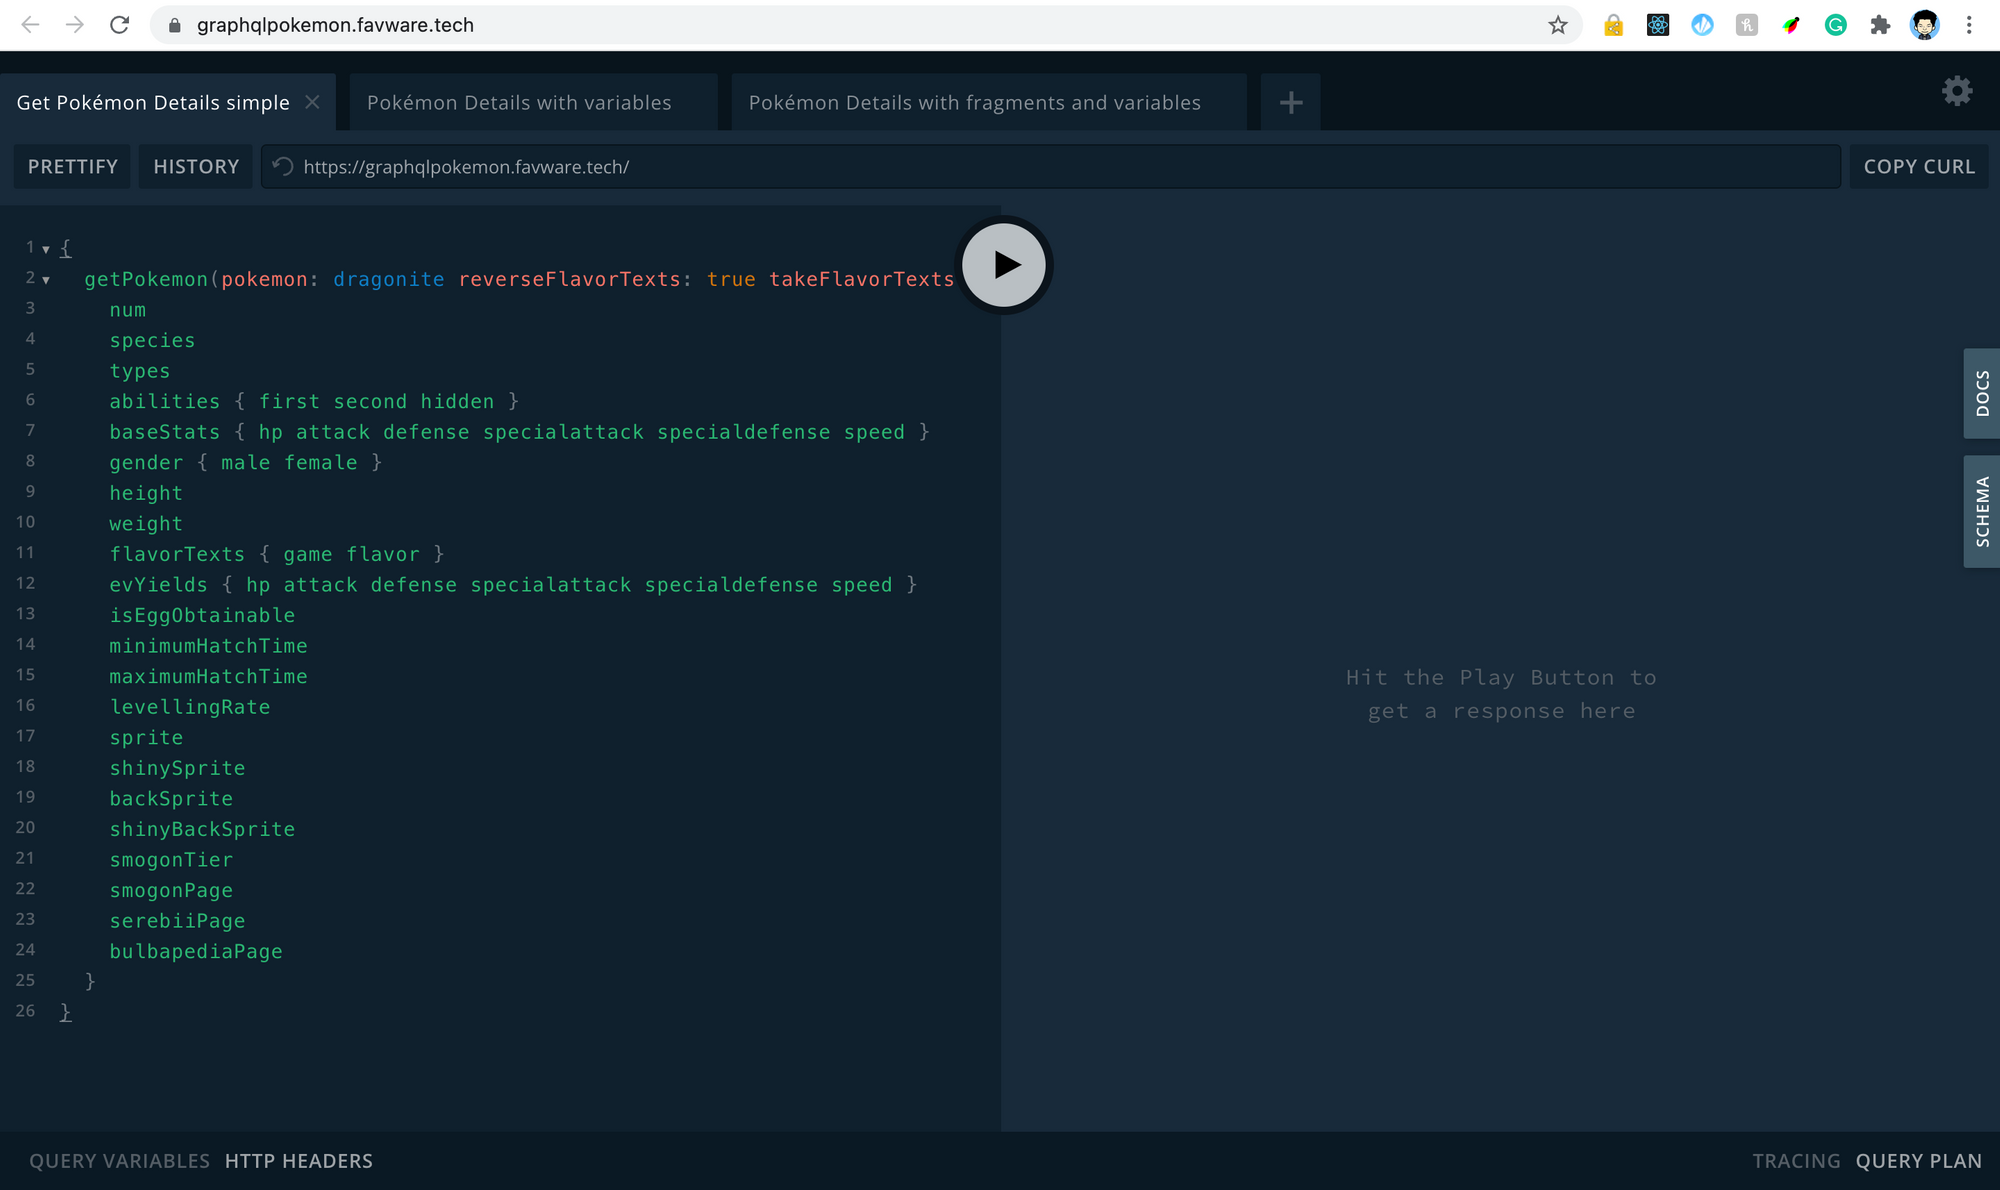 GraphQL playground
If you click on the play button it will run the query.
How do you request, write, or post data in GraphQL?
You request data through a query in GraphQL. And to write or post data, you use mutations.
Whenever we perform a GraphQL operation, we specify whether it is a mutation or a query. Then we name that operation, and this is the basic way of performing a GraphQL query.
GraphQLOperatoinType Name {
 ....
 ........
 .....
 ...
}
To make a simple query, the syntax would be:
query getData {
...
}
Similarly, to add a mutation we would write mutation in place of query.
Now since we know the basics, let's get our hands dirty. We will be using the Anilist API to get a list of anime shows.
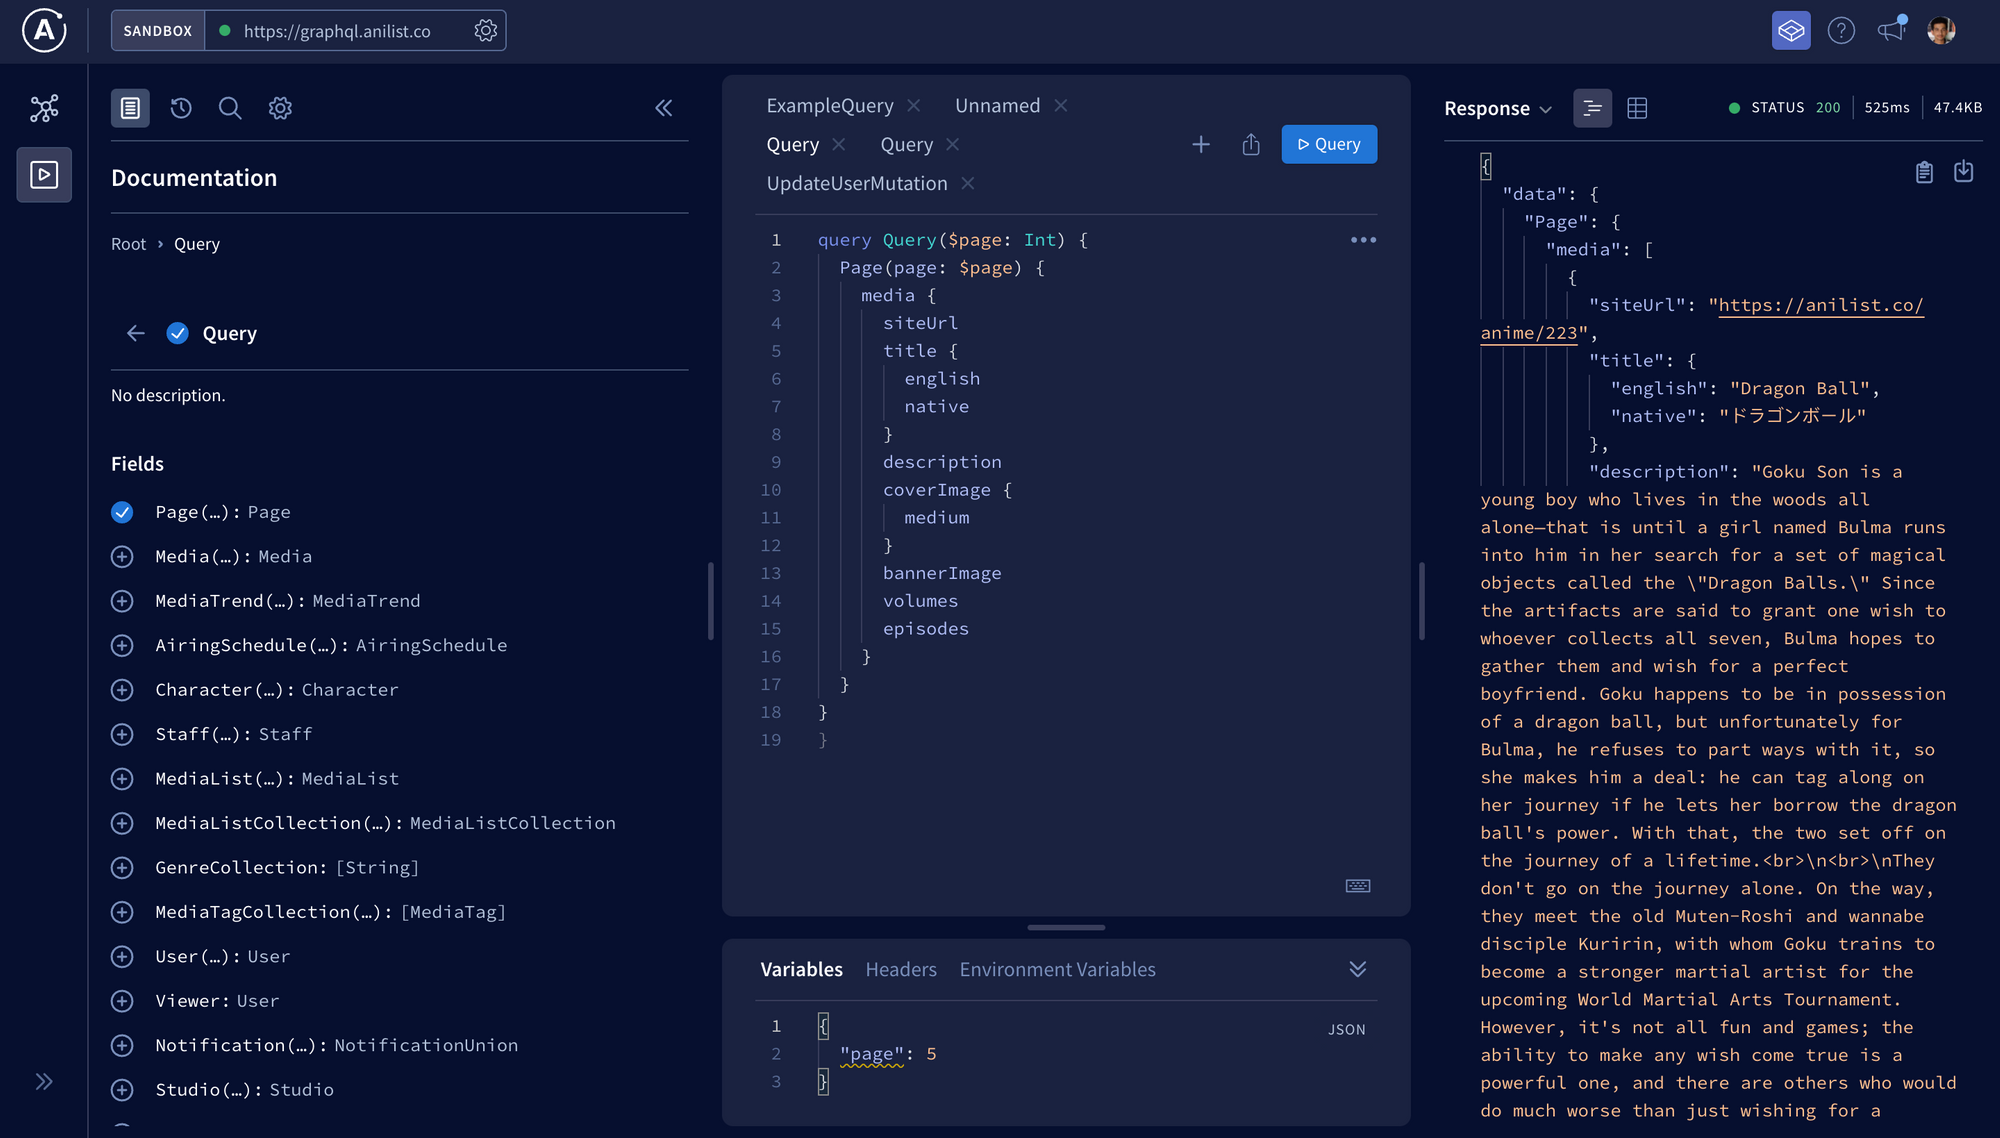 Apollo studio
How to Use Apollo Studio
You've gotten a small taste of GraphQL playground, but there's something even more awesome called Apollo Studio. It makes life easier as a front end developer. In it, you just need select the fields you want and it writes a query for you.
From the left hand side select the fields you want in your Query, and that's it. GraphQL will automatically create a query for you. Now you've made the query, but how do you use it in your application?
Well let's get started building a simple Anime App with it.
We'll use React in this project, but you can choose any framework or library you'd like.
Firstly, create a new project in React:
npx create-react-app graphql-example
Now once the project is created go inside the project directory and install the Apollo client.
npm install graphql @apollo/client
Once it's done, go the src/index.js and import ApolloClient, InMemoryCache, and ApolloProvider:
import {ApolloClient, InMemoryCache, ApolloProvider} from '@apollo/client';
Apollo Client is a class which represents the Apollo client itself, and we use it to create a new client instance.
Here we need to provide a couple of things to it. One is the URI where we specify the URL of our GraphQL server. Also every instance of our Apollo client needs a cache so it can reduce the network requests and can make our app much faster.
This is what our new client look like:
const client = new ApolloClient({
  uri : 'https://graphql.anilist.co/',
  cache: new InMemoryCache(),
})
Now we need to make this client available throughout our component tree so we wrap our app's top level component in ApolloProvider.
Now we are done with the initial setup, so it's time to make a query and ask our API for the data – but how do we do that?
We can do so using the useQuery hook. But before that we need to define a query, which we can do using the GQL (we need to wrap our query inside it). So now, import these two from the Apollo client:
import {useQuery, gql} from '@apollo/client';
After importing them, we'll wrap our query inside GQL:
 const AnimeList = gql`
 query Query {
  Page {
    media {
      siteUrl
      title {
        english
        native
      }
      description
      coverImage {
        medium
      }
      bannerImage
      volumes
      episodes
    }
  }
}
}


`;
At this point you must be wondering if the query part is done, how do we get data from it now?
That's where the useQuery hook comes handy. It returns loading, error, and data properties we can use.
const {loading, error, data} = useQuery(AnimeList);
For now we can just display the data to check whether our app works or not:
if(loading) return(<> Loading</>);
  if(error) return(<>{JSON.stringify(error)}</>)
  return (
   <>
   {JSON.stringify(data)}
   </>);
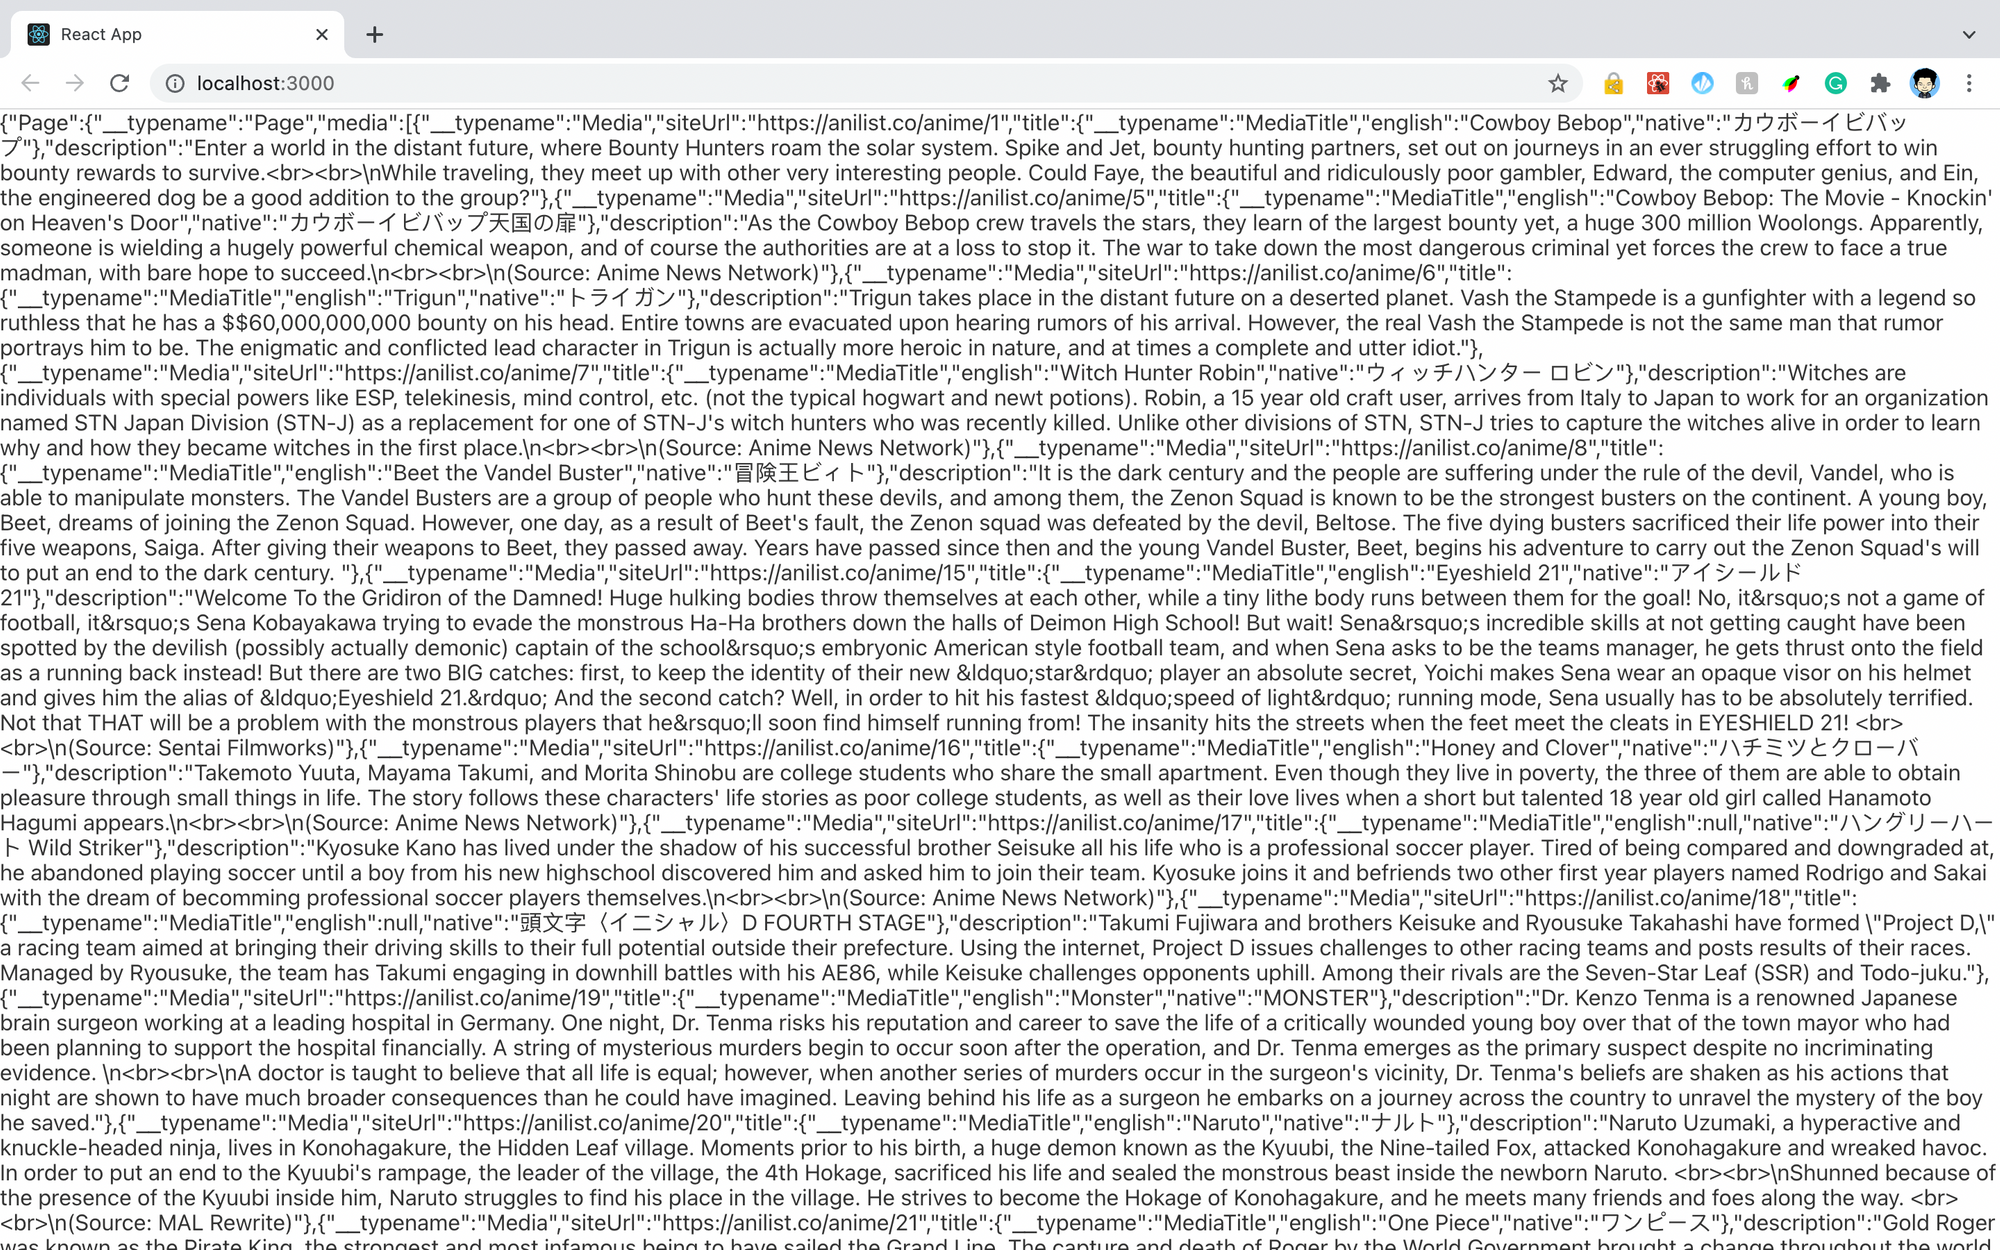
Well it works for now – time to style it.
Maybe we can use object chaining to implement that nicely:
 <div className="container">
     <h1> 🐈 Anime List </h1>
     <hr width="80%" />
   {data?.Page?.media.map(anime => (
     <>
   <div className="card" >
      <img    src={anime.coverImage.medium}/>
      <div>
         <h1>{anime.title.english} </h1>
           <div className="episodes" >Episodes  <b>{anime.episodes} </b></div>
          <div  dangerouslySetInnerHTML={{__html: anime.description}} ></div>
      </div>
  </div>
  <hr width="75%"/>
 </>
   ))}
   <div className="buttonContainer">
    { page != 1 && <button> Previous Page</button> }
     <div className="pageText"> {page}</div>
     <button onClick={NextPage}>  Next Page </button>
   </div>
   </div>);
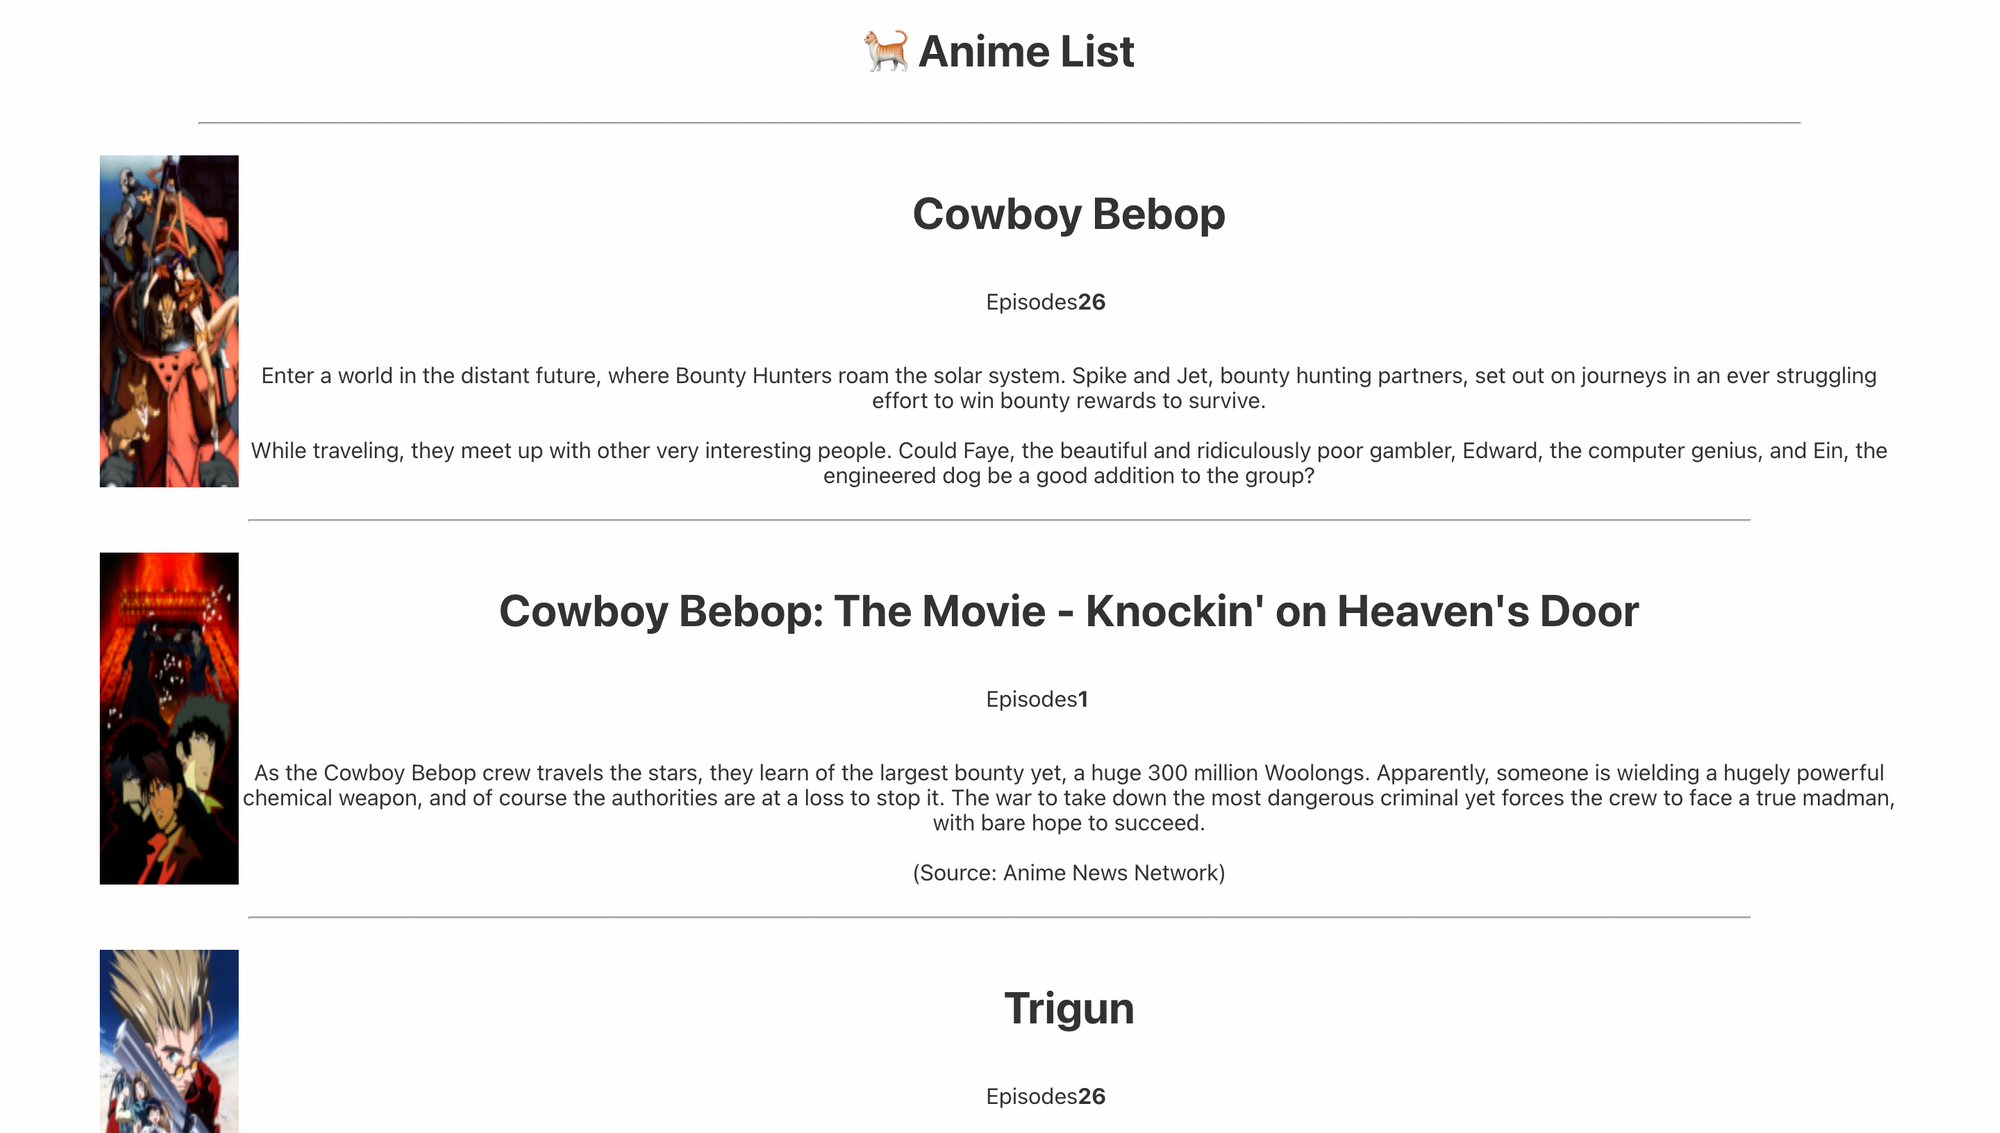 minimistic styled app
You can check out this GitHub repo for the CSS file.
Now we are able to get a list of anime films from the API. So what do we need to get them from the next page of the app?
We need to pass a variable that has a page name into the query. That's where variables in GraphQL come into the picture.
First, go to Apollo Studio and click on the arguments on the left hand side (first go to root > query >page and you'll see it):
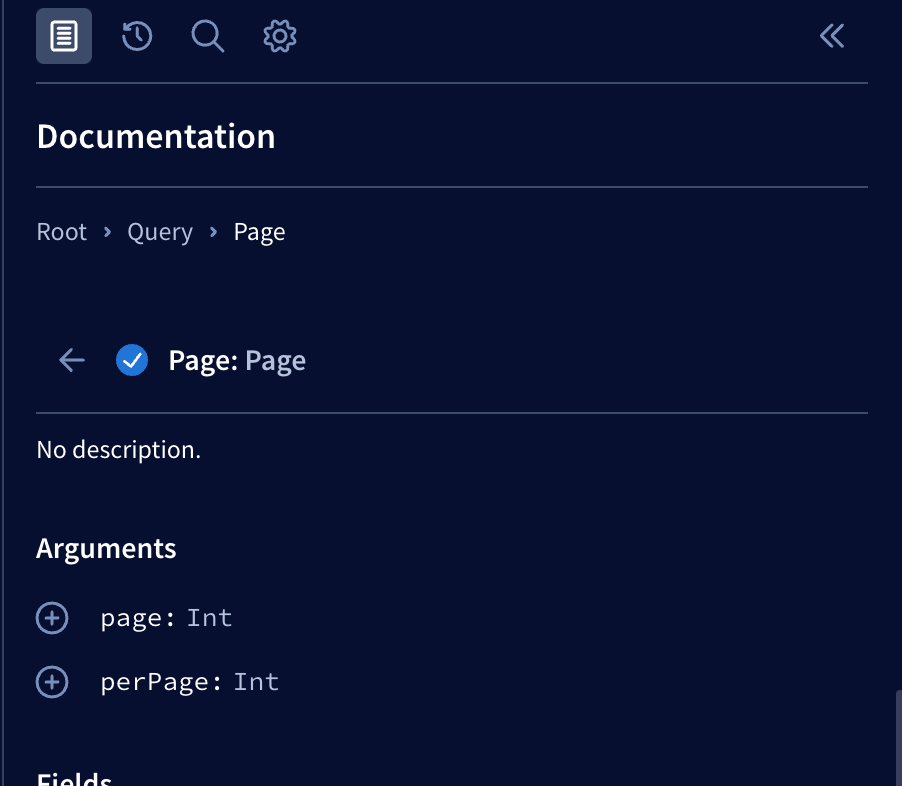
Click on page and it'll add an argument to your query.
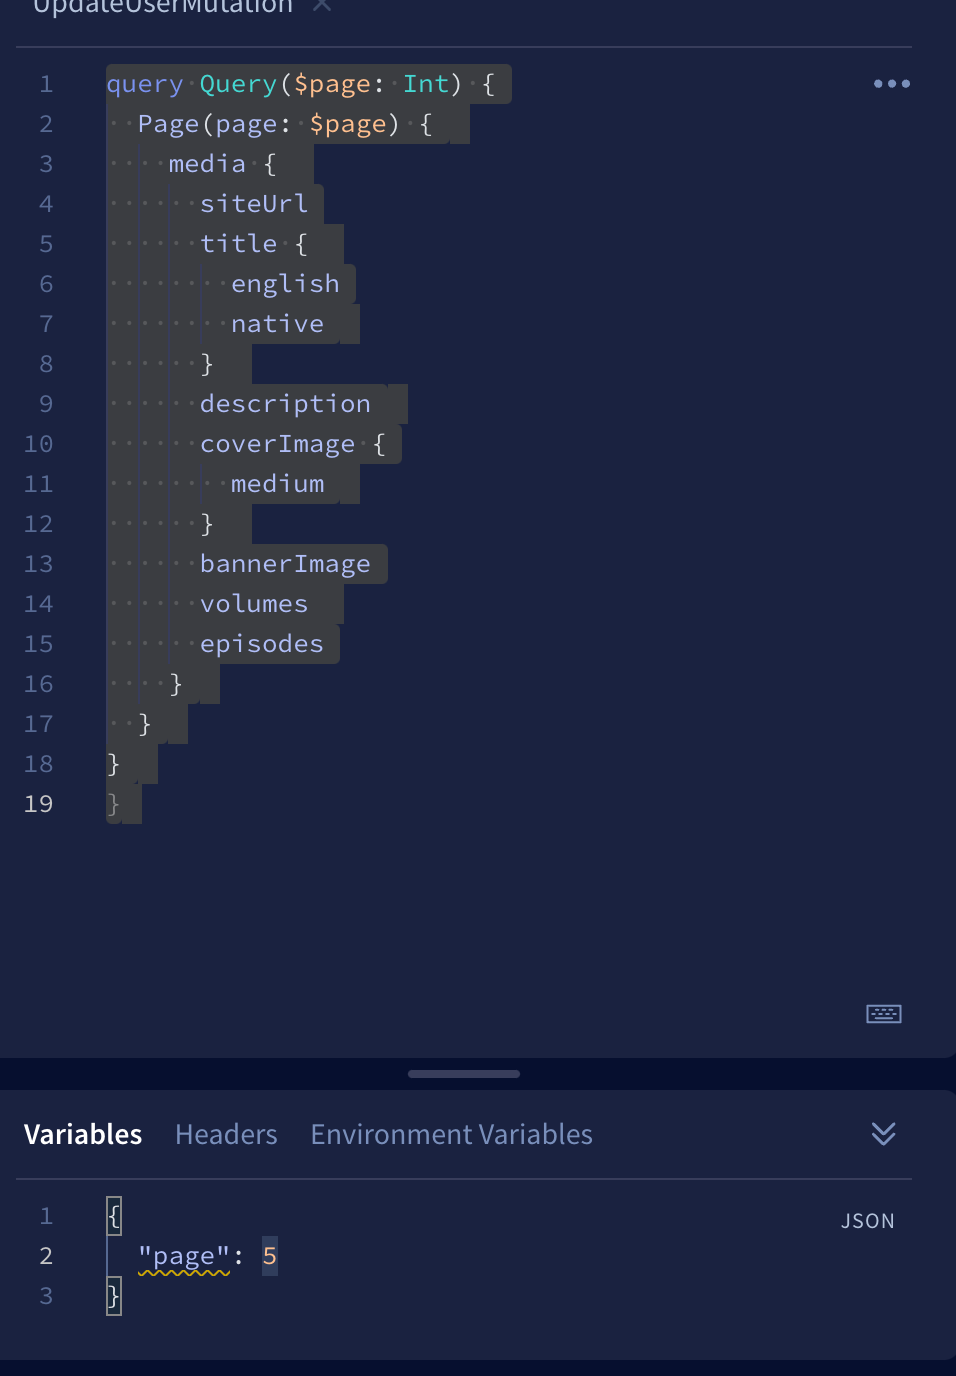
Also notice that in the variable page in the variables section, you can change its value and play around a little bit with it. But the data will only change according to the page.
Now we need to pass this variable into the query – and then we'll be able to display next page's anime in our app.
For that we'll be using the useState hook to keep a track of our current page's value. We also need to make a function to increment and decrement that as well.
  const [page, setPage] = useState(1);
  //this is how we would be passing the page in the query.
  const {loading, error, data} = useQuery(AnimeList , {  variables: { "page" : page } });

const NextPage = () => {
    setPage(page+1);
  }
  const PreviousPage = () => {
    setPage(page - 1);
  }

   <div className="buttonContainer">
    { page != 1 && <button onClick={PreviousPage}> Previous Page</button> }
     <div className="pageText"> {page}</div>
     <button onClick={NextPage}>  Next Page </button>
   </div>
And now we're done building our simple app with GraphQL. If you want to check out the codebase, here is the link.
Wrapping Up
In this article, we have covered some of the basic concepts to help you get started using GraphQL. Thank you for reading, and happy coding.