
By Rodrigo Kamada
In this article, we'll create an application using the latest version of Angular. Then we'll host it on the GitHub Pages static website service using the continuous integration tool Travis CI to deploy the application.
Prerequisites
Before you start, you need to install and configure the tools below to create the Angular application.
- Git: Git is a distributed version control system that we'll use to sync the repository.
- Node.js and npm: Node.js is a JavaScript code runtime software based on Google's V8 engine. npm is a package manager for Node.js (Node Package Manager). We'll use these to build and run the Angular application and install the libraries.
- Angular CLI: Angular CLI is a command line utility tool for Angular which we'll use to create the base structure of the Angular application.
- An IDE (like Visual Studio Code or WebStorm): an IDE (Integrated Development Environment) is a tool with a graphical interface that helps us develop applications. Here, we'll use one to develop the Angular application.
Getting started
Create and configure your account on GitHub
GitHub is a source code and file storage service with version control using the Git tool. And GitHub Pages is a static file hosting service using a public repository.
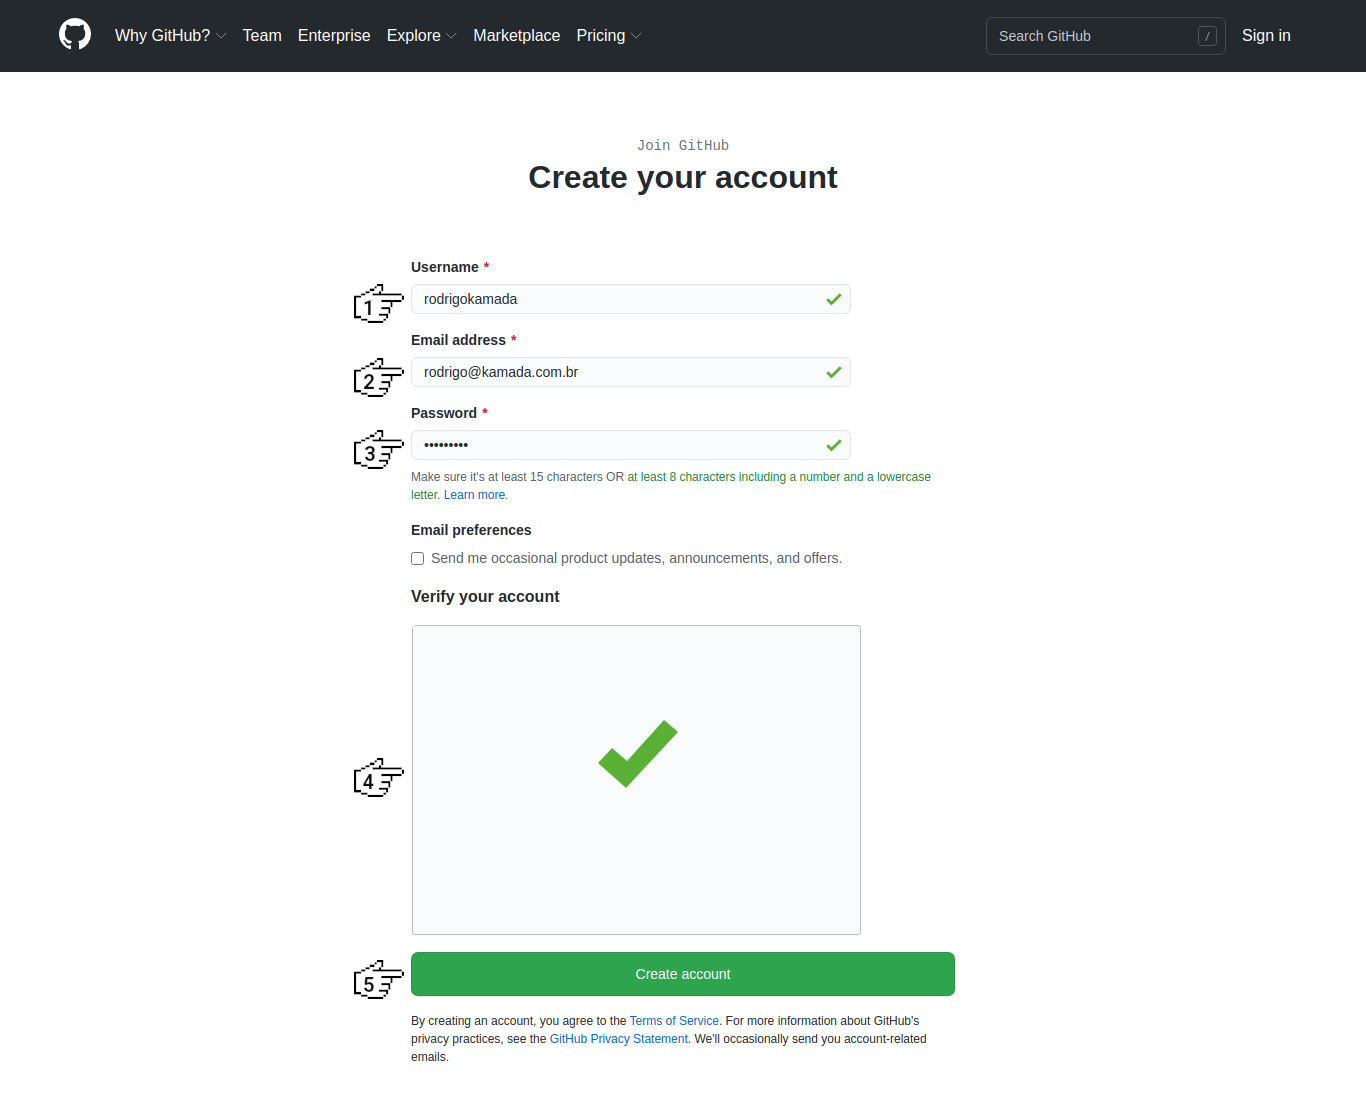
First, you'll need to create an account on GitHub if you don't have one already. Visit https://github.com/ and click on the button Sign up.

Fill in the fields for Username, Email address, and Password, click on the button Verify to solve the challenge, and then click on the button Create account.
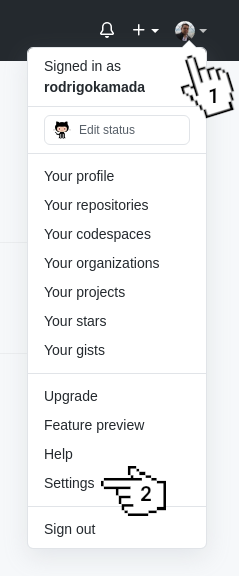
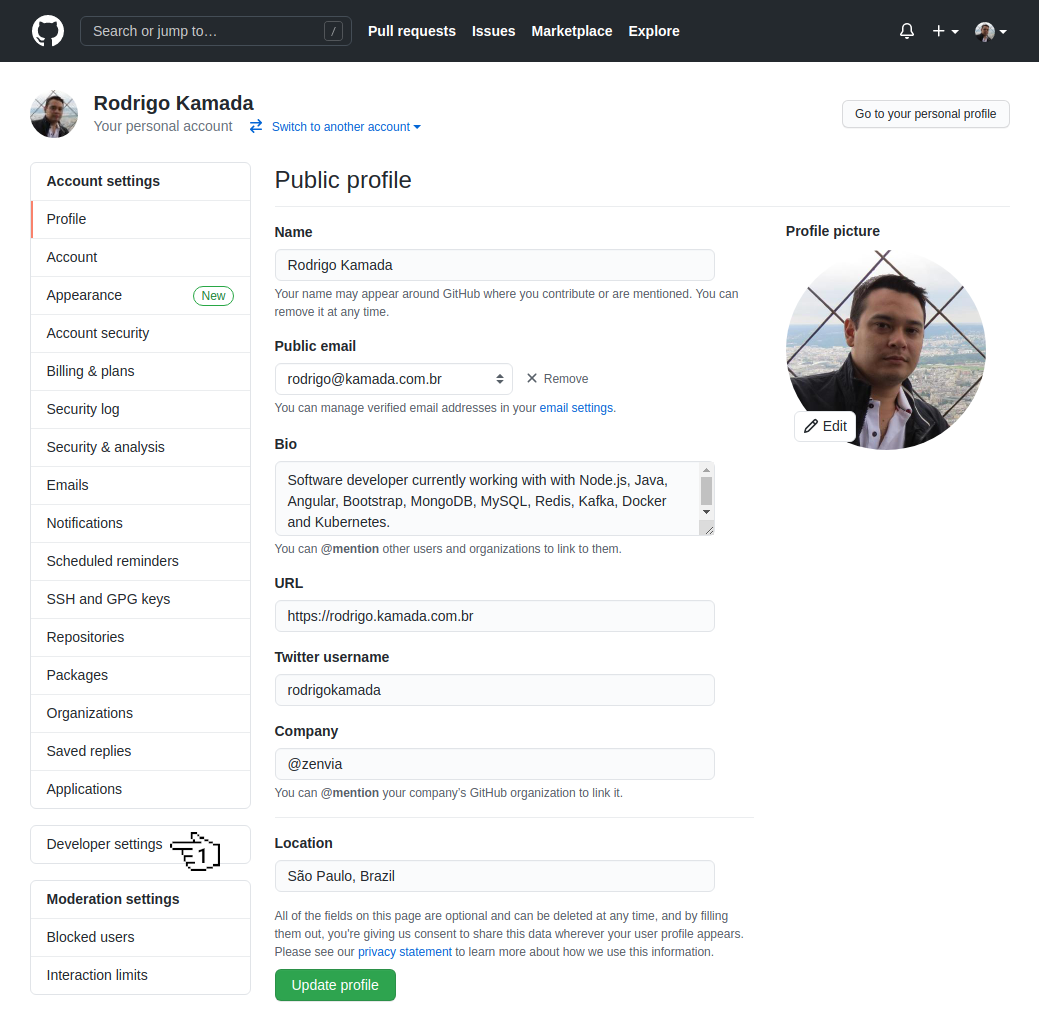
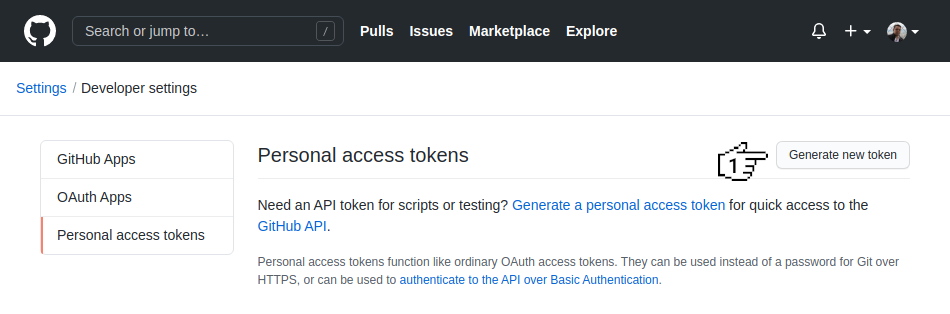
Next, we'll generate the token that will be used in Travis CI. Click on the menu with the avatar and click on the menu Settings.
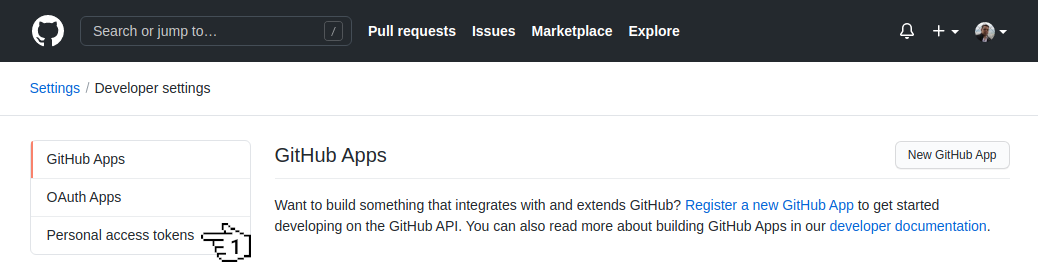
Click on the menu Developer settings.
Click on the menu Personal access tokens.
Click on the button Generate new token.
Fill in the field Note, select the option repo and click on the button Create token.

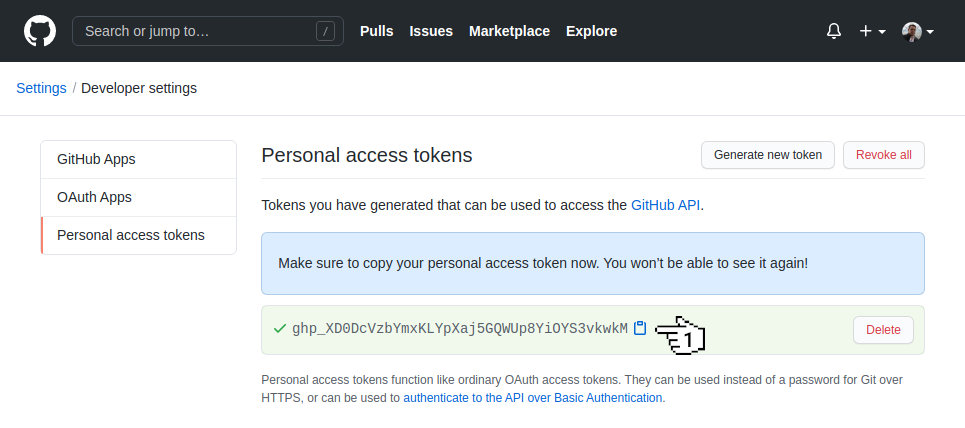
Copy the generated token. In my case, the token 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 was generated because this token will be configured in Travis CI.
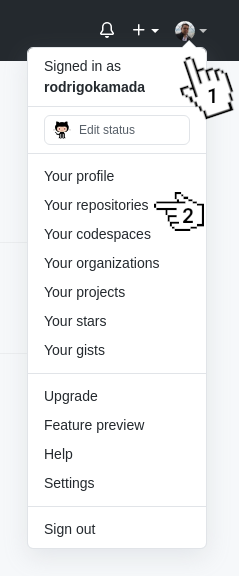
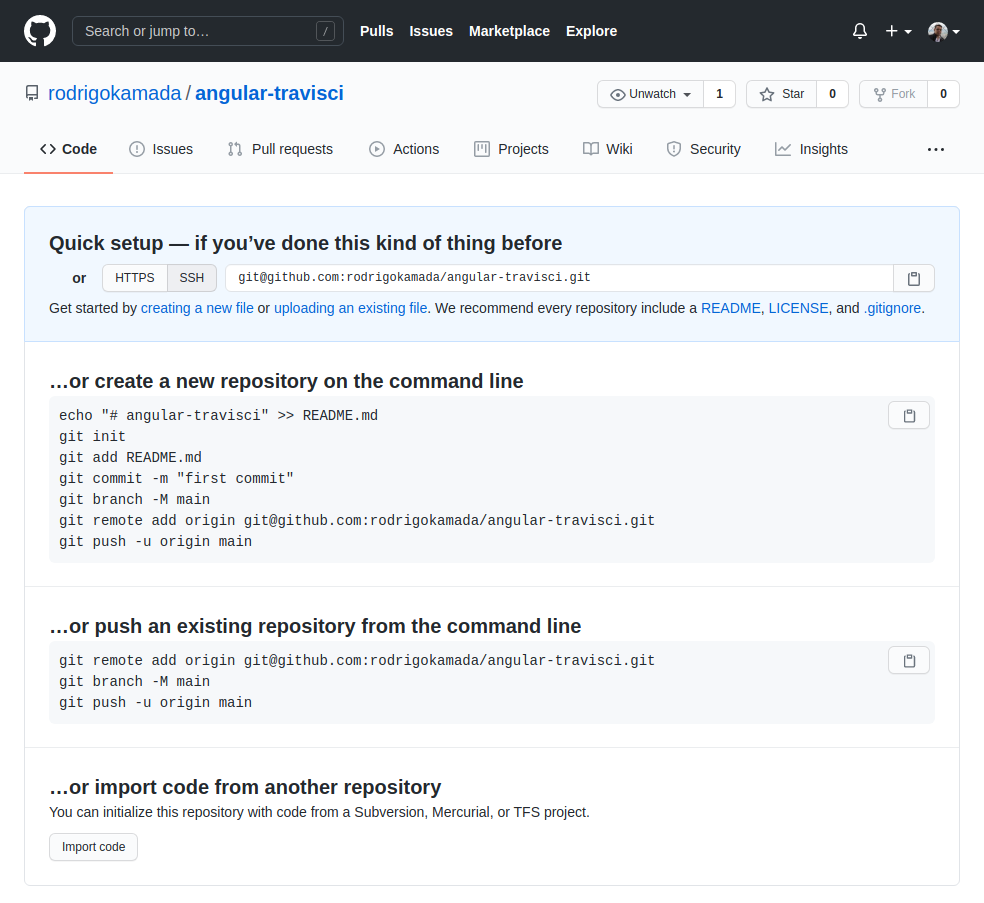
Let's create the repository. Click on the menu with the avatar and click on the menu Your repositories.
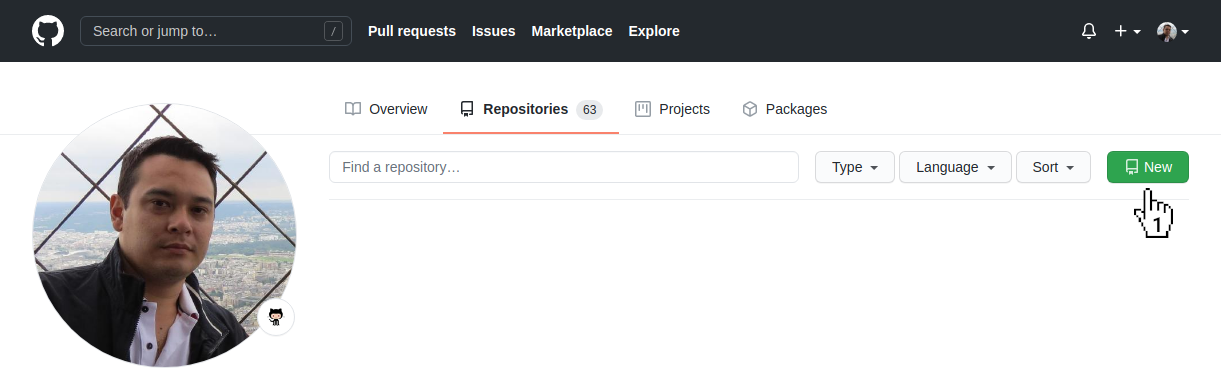
Click on the button New.
Fill in the field Repository name and click on the button Create repository.

Ready! Account created, token generated, and repository https://github.com/rodrigokamada/angular-travisci created.
Create and configure your account on Travis CI
Travis CI is a deployment service integrated with GitHub.
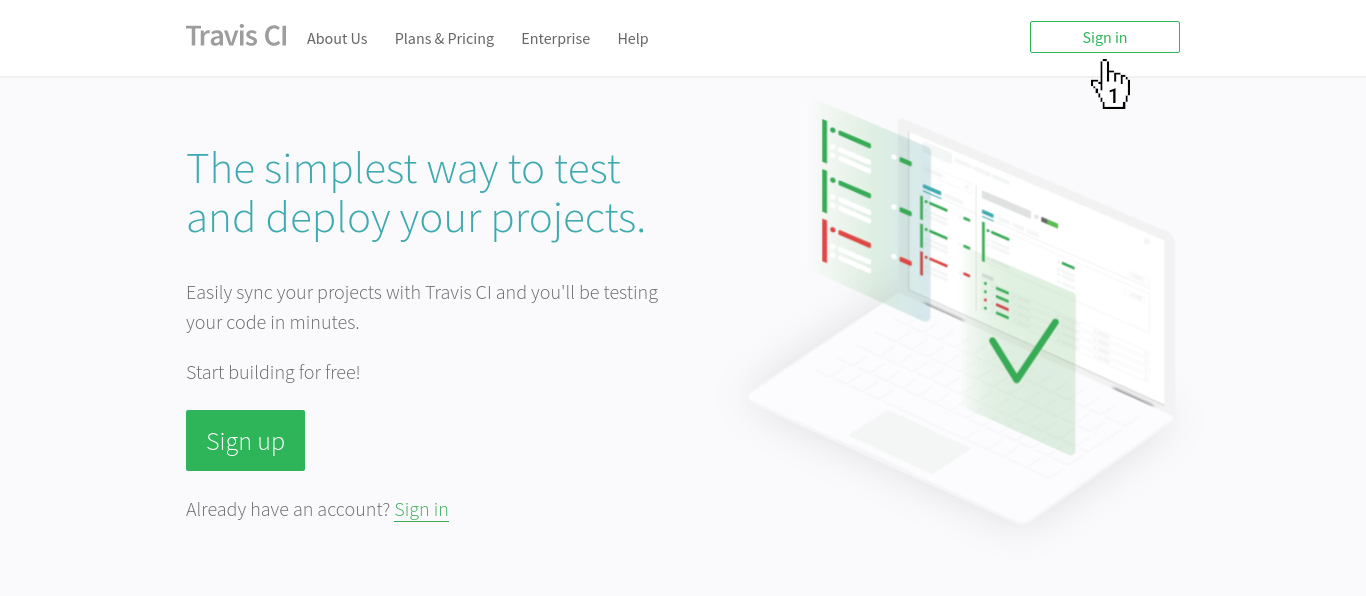
First, you'll need to create a Travis CI account if you don't already have one. Visit https://travis-ci.com/ and click on the button Sign up.
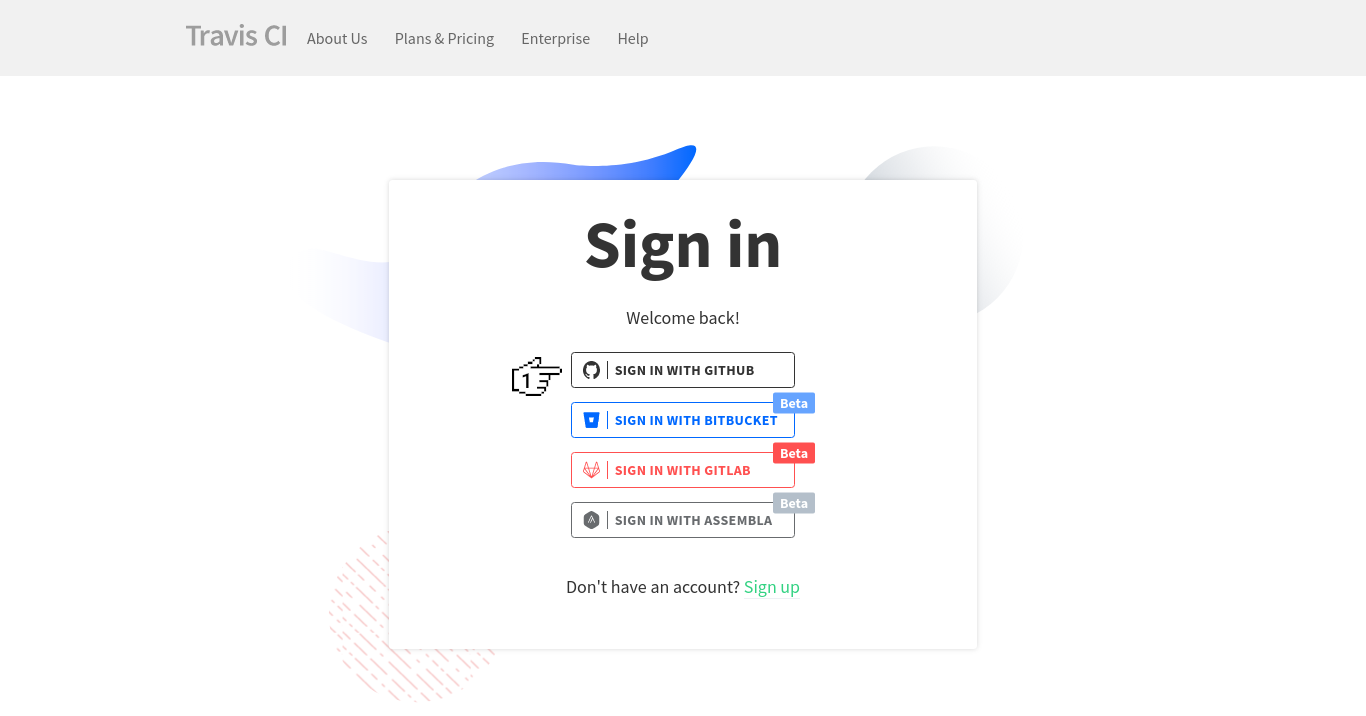
Click on the button SIGN IN WITH GITHUB to sign in with your GitHub account.
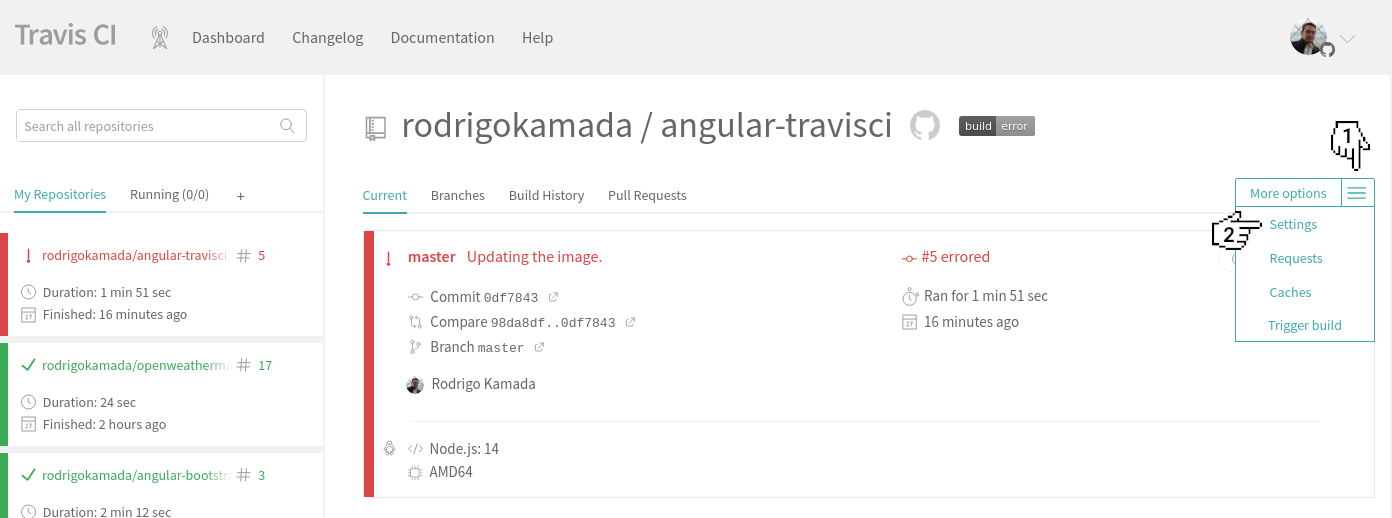
If Travis CI requests permission to list the GitHub repositories, accept the request. Click on the repository link angular-travisci.

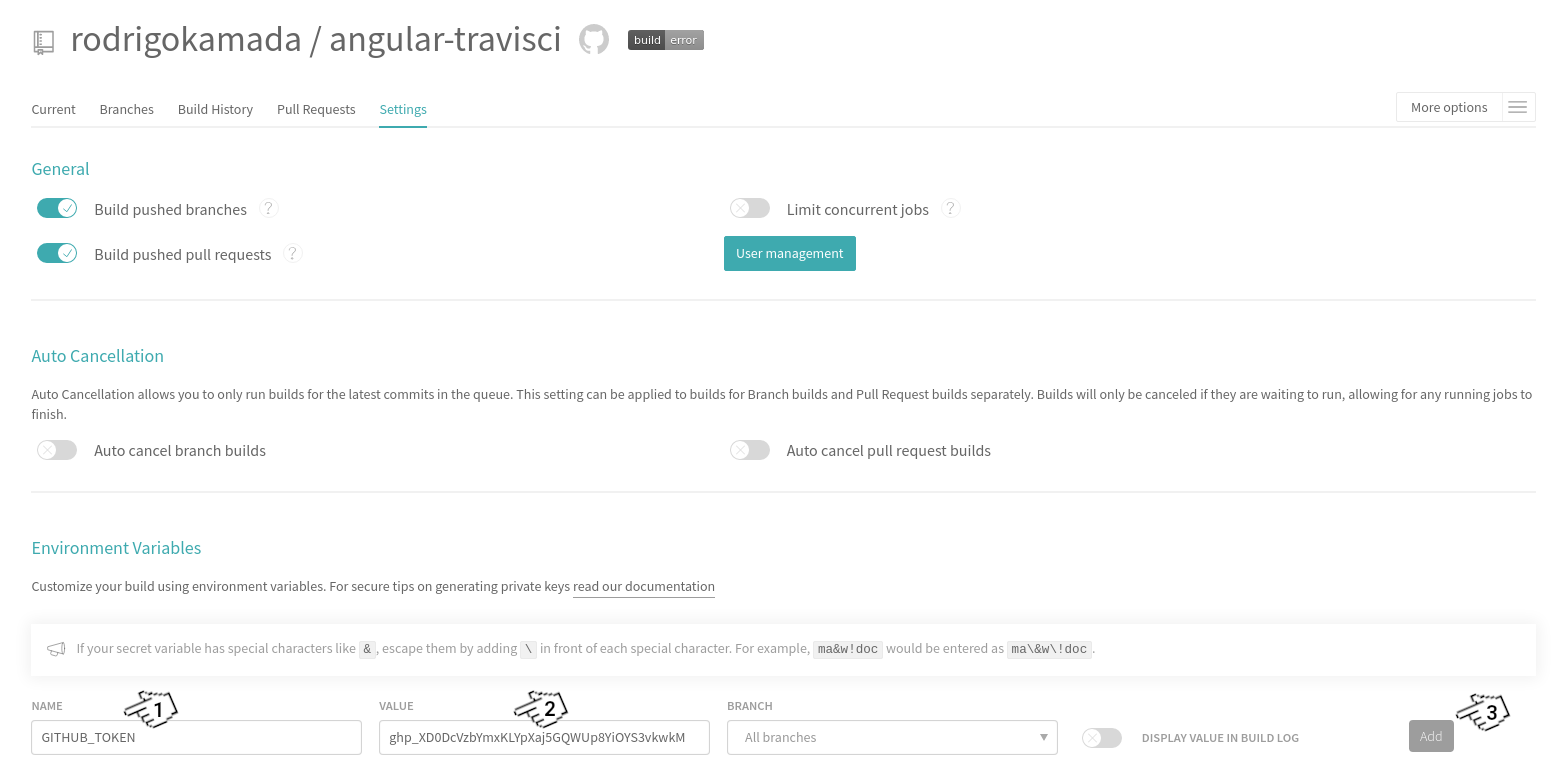
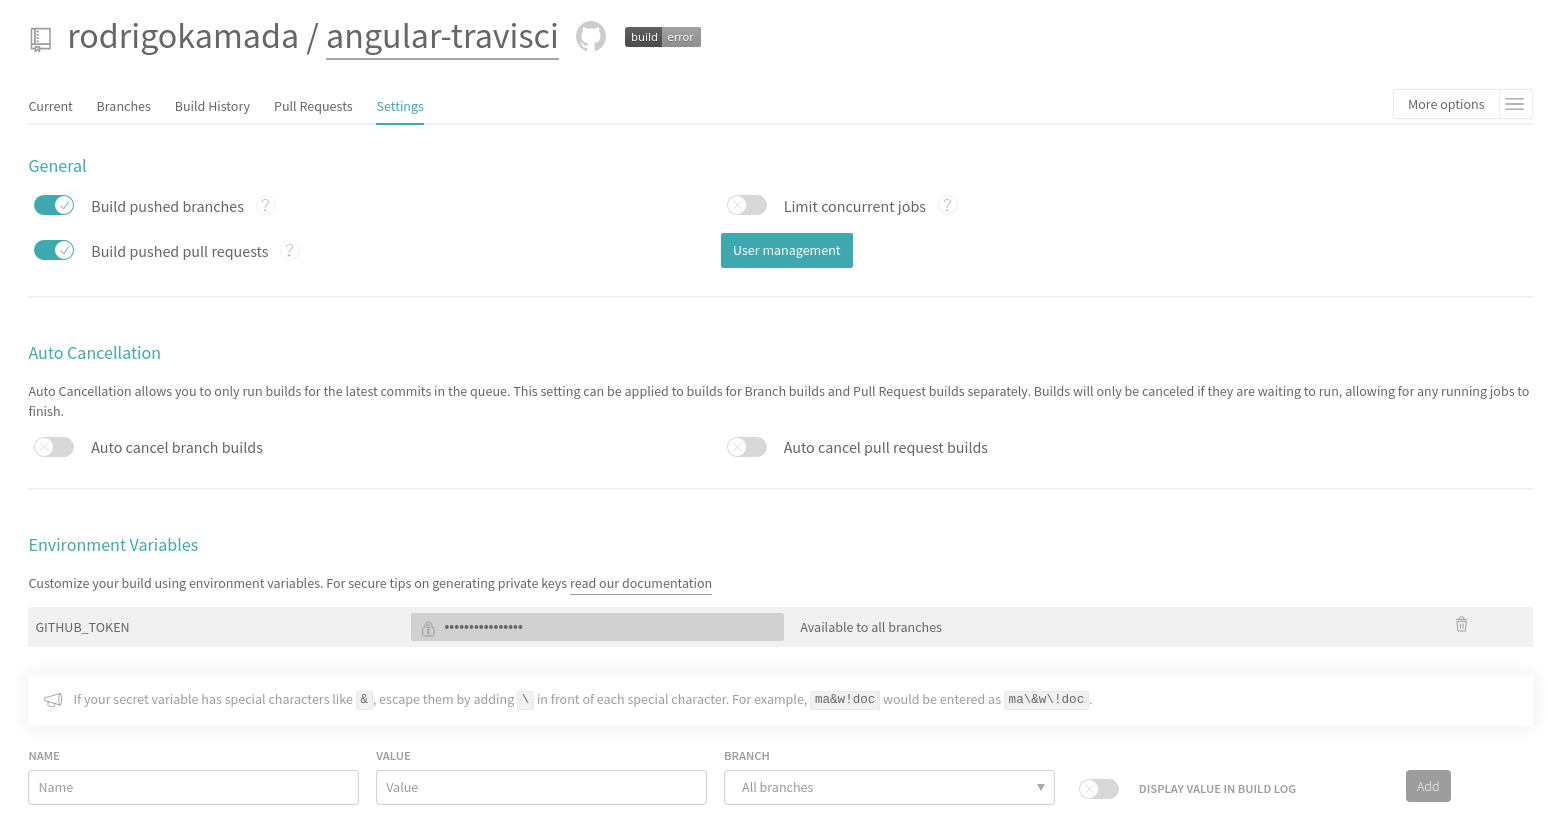
Let's set up the GitHub access token. Click on the menu More options and click on the menu Settings.
Fill in the field NAME with the value GITHUB_TOKEN, VALUE with the value of your token generated on GitHub, and click on the button Add.
Ready! Account created and repository configured.
Create your Angular application
Angular is a development platform for building Web, mobile, and desktop applications using HTML, CSS and TypeScript (JavaScript). Currently, Angular is at version 13 and Google is the main maintainer of the project.
Let's create the application with the Angular base structure using the @angular/cli with the route file and the SCSS style format.
? Would you like to add Angular routing? Yes
? Which stylesheet format would you like to use? SCSS   [ https://sass-lang.com/documentation/syntax#scss                ]
CREATE angular-travisci/README.md (1061 bytes)
CREATE angular-travisci/.editorconfig (274 bytes)
CREATE angular-travisci/.gitignore (604 bytes)
CREATE angular-travisci/angular.json (3267 bytes)
CREATE angular-travisci/package.json (1078 bytes)
CREATE angular-travisci/tsconfig.json (783 bytes)
CREATE angular-travisci/.browserslistrc (703 bytes)
CREATE angular-travisci/karma.conf.js (1433 bytes)
CREATE angular-travisci/tsconfig.app.json (287 bytes)
CREATE angular-travisci/tsconfig.spec.json (333 bytes)
CREATE angular-travisci/src/favicon.ico (948 bytes)
CREATE angular-travisci/src/index.html (301 bytes)
CREATE angular-travisci/src/main.ts (372 bytes)
CREATE angular-travisci/src/polyfills.ts (2820 bytes)
CREATE angular-travisci/src/styles.scss (80 bytes)
CREATE angular-travisci/src/test.ts (743 bytes)
CREATE angular-travisci/src/assets/.gitkeep (0 bytes)
CREATE angular-travisci/src/environments/environment.prod.ts (51 bytes)
CREATE angular-travisci/src/environments/environment.ts (658 bytes)
CREATE angular-travisci/src/app/app-routing.module.ts (245 bytes)
CREATE angular-travisci/src/app/app.module.ts (393 bytes)
CREATE angular-travisci/src/app/app.component.scss (0 bytes)
CREATE angular-travisci/src/app/app.component.html (23809 bytes)
CREATE angular-travisci/src/app/app.component.spec.ts (1087 bytes)
CREATE angular-travisci/src/app/app.component.ts (221 bytes)
✔ Packages installed successfully.
    Successfully initialized git.
Create the .travis.yml file.
touch .travis.yml
Configure the .travis.yml file with the content below:
notifications:
  email:
    recipients:
      - rodrigo@kamada.com.br

language: node_js

node_js:
  - 16

before_script:
  - npm install

script:
  - npm run test:headless

before_deploy:
  - npm run build:prod

deploy:
  provider: pages
  skip_cleanup: true
  github_token: $GITHUB_TOKEN
  local_dir: dist/angular-travisci
  on:
    branch: main
Change the package.json file and add the scripts below. Replace the rodrigokamada value with your GitHub username.
  "build:prod": "ng build --prod --base-href https://rodrigokamada.github.io/angular-travisci/",
  "test:headless": "ng test --watch=false --browsers=ChromeHeadless"
Change the src/app/app.component.spec.ts file and remove the tests should have as title 'angular-travisci' and should render title.
Run the test with the command below:
npm run test:headless

> angular-travisci@1.0.0 test:headless
> ng test --watch=false --browsers=ChromeHeadless

⠋ Generating browser application bundles (phase: setup)...Compiling @angular/core/testing : es2015 as esm2015
Compiling @angular/compiler/testing : es2015 as esm2015
Compiling @angular/platform-browser/testing : es2015 as esm2015
Compiling @angular/common/testing : es2015 as esm2015
Compiling @angular/platform-browser-dynamic/testing : es2015 as esm2015
Compiling @angular/router/testing : es2015 as esm2015
⠸ Generating browser application bundles (phase: building)...05 09 2021 19:40:04.329:INFO [karma-server]: Karma v6.3.4 server started at http://localhost:9876/
05 09 2021 19:40:04.331:INFO [launcher]: Launching browsers ChromeHeadless with concurrency unlimited
05 09 2021 19:40:04.369:INFO [launcher]: Starting browser ChromeHeadless
✔ Browser application bundle generation complete.
05 09 2021 19:40:09.704:INFO [Chrome Headless 92.0.4515.159 (Linux x86_64)]: Connected on socket NUtJhjavb1JvssqOAAAB with id 25989029
Chrome Headless 92.0.4515.159 (Linux x86_64): Executed 1 of 1 SUCCESS (0.068 secs / 0.042 secs)
TOTAL: 1 SUCCESS
Run the application with the command below. Access the URL http://localhost:4200/ and check if the application is working.
npm start

> angular-travisci@1.0.0 start
> ng serve

✔ Browser application bundle generation complete.

Initial Chunk Files | Names         |      Size
vendor.js           | vendor        |   2.39 MB
polyfills.js        | polyfills     | 128.51 kB
main.js             | main          |   8.89 kB
runtime.js          | runtime       |   6.63 kB
styles.css          | styles        |   1.18 kB

                    | Initial Total |   2.53 MB

Build at: 2021-09-05T22:35:38.010Z - Hash: a4cfc9149589386eca5b - Time: 39997ms

** Angular Live Development Server is listening on localhost:4200, open your browser on http://localhost:4200/ **


✔ Compiled successfully.
Build the application with the command below:
npm run build:prod

> angular-travisci@1.0.0 build:prod
> ng build --configuration production --base-href https://rodrigokamada.github.io/angular-travisci/

✔ Browser application bundle generation complete.
✔ Copying assets complete.
✔ Index html generation complete.

Initial Chunk Files           | Names         |      Size
main.c678fa8750e7c769.js      | main          | 177.63 kB
polyfills.6d7801353e02e327.js | polyfills     |  36.21 kB
runtime.b136bda8a38c4f2e.js   | runtime       |   1.06 kB
styles.ef46db3751d8e999.css   | styles        |   0 bytes

                              | Initial Total | 214.90 kB

Build at: 2021-09-05T22:42:19.525Z - Hash: 83bfffc079b083727ca4 - Time: 26030ms
Syncronize the application on the GitHub repository that you created.
Ready! After synchronizing the application on the GitHub repository, Travis CI builds the application and synchronizes on the branch gh-pages.
Access the URL https://rodrigokamada.github.io/angular-travisci/ and check if the application is working. Replace the rodrigokamada value with your GitHub username.
And that's it! The application repository is available at https://github.com/rodrigokamada/angular-travisci.
Conclusion
Summarizing what was covered in this article:
- We created an account on GitHub.
- We created an access token on GitHub.
- We created a repository on GitHub.
- We created an account on Travis CI.
- We configured the GitHub access token on Travis CI.
- We create an Angular application.
You can use this article to create your personal website and have an online portfolio.
Thank you for reading and I hope you enjoyed the article!
To stay updated whenever I post new articles, follow me on Twitter.
This tutorial was posted on my blog in Portuguese.