By Marcia Villalba
Containers have become the de-facto way to develop applications nowadays. They provide a standard way to package all the dependencies that your application needs.
But how you deploy a containerized application to the cloud? The cloud offers scalability, elasticity, and a "pay for what you use" model that is very desirable in modern applications.
Let's imagine that you have developed your application and packaged it in a Docker container. This application can be your website, some software that you develop for your company, or anything really.
This point is where most basic container and Docker tutorials end. But you want to deploy your application somewhere so others can use it. Now you'll have to start learning about Kubernetes and all the complex orchestration systems. They seem so complicated for just deploying a simple application.
You know that the cloud is the best place to deploy your application. Yet, most of the cloud services out there are complex.
To use them, you need to know specific cloud concepts such as networking, instance types, and others. So many challenges, and you just want to deploy a simple web application.
What if I tell you that there is a cloud service you can use to deploy your containers in a simple way? A service that provides all the benefits from the cloud, and you don't need to use any complex orchestration system to manage the container workloads.
If this sounds interesting, keep on reading. In this post, I will introduce you to Amazon Lightsail. And then I will show you a demo on how to deploy a container application to AWS using Lightsail.
What is AWS?
AWS stands for Amazon Web Services and is the most widely-adopted cloud platform. It has lots of different services that help you develop and host your applications.
Using the cloud for your applications has many benefits over using your own on-premise servers. For example, it helps you lower the costs of your application, become more agile, and innovate faster.
What is Amazon Lightsail?
Amazon Lightsail is part of AWS's cloud-based offerings. It is a service that provides everything you need to deploy applications and websites to the cloud in a simple and cost effective way.
Even the pricing is made simpler – you know every month exactly what you are paying. Amazon Lightsail is an ideal way to deploy simple applications and websites and get started with AWS.
Lightsail is powered under the hood by AWS services such as virtual machines (Amazon EC2), relational databases (Amazon RDS), and other services. It offers the same level of scalability, reliability and security that you expect from any other AWS service.
At the end of 2020, Lightsail added support for deploying containers to the cloud. To do this, all you need is to provide a Docker image for your containers and Lightsail will automatically deploy it for you.
Lightsail provides an HTTPS endpoint that is ready to serve your application. It also takes care of load balancing and orchestrating the application.
How to Deploy an Application with Lightsail
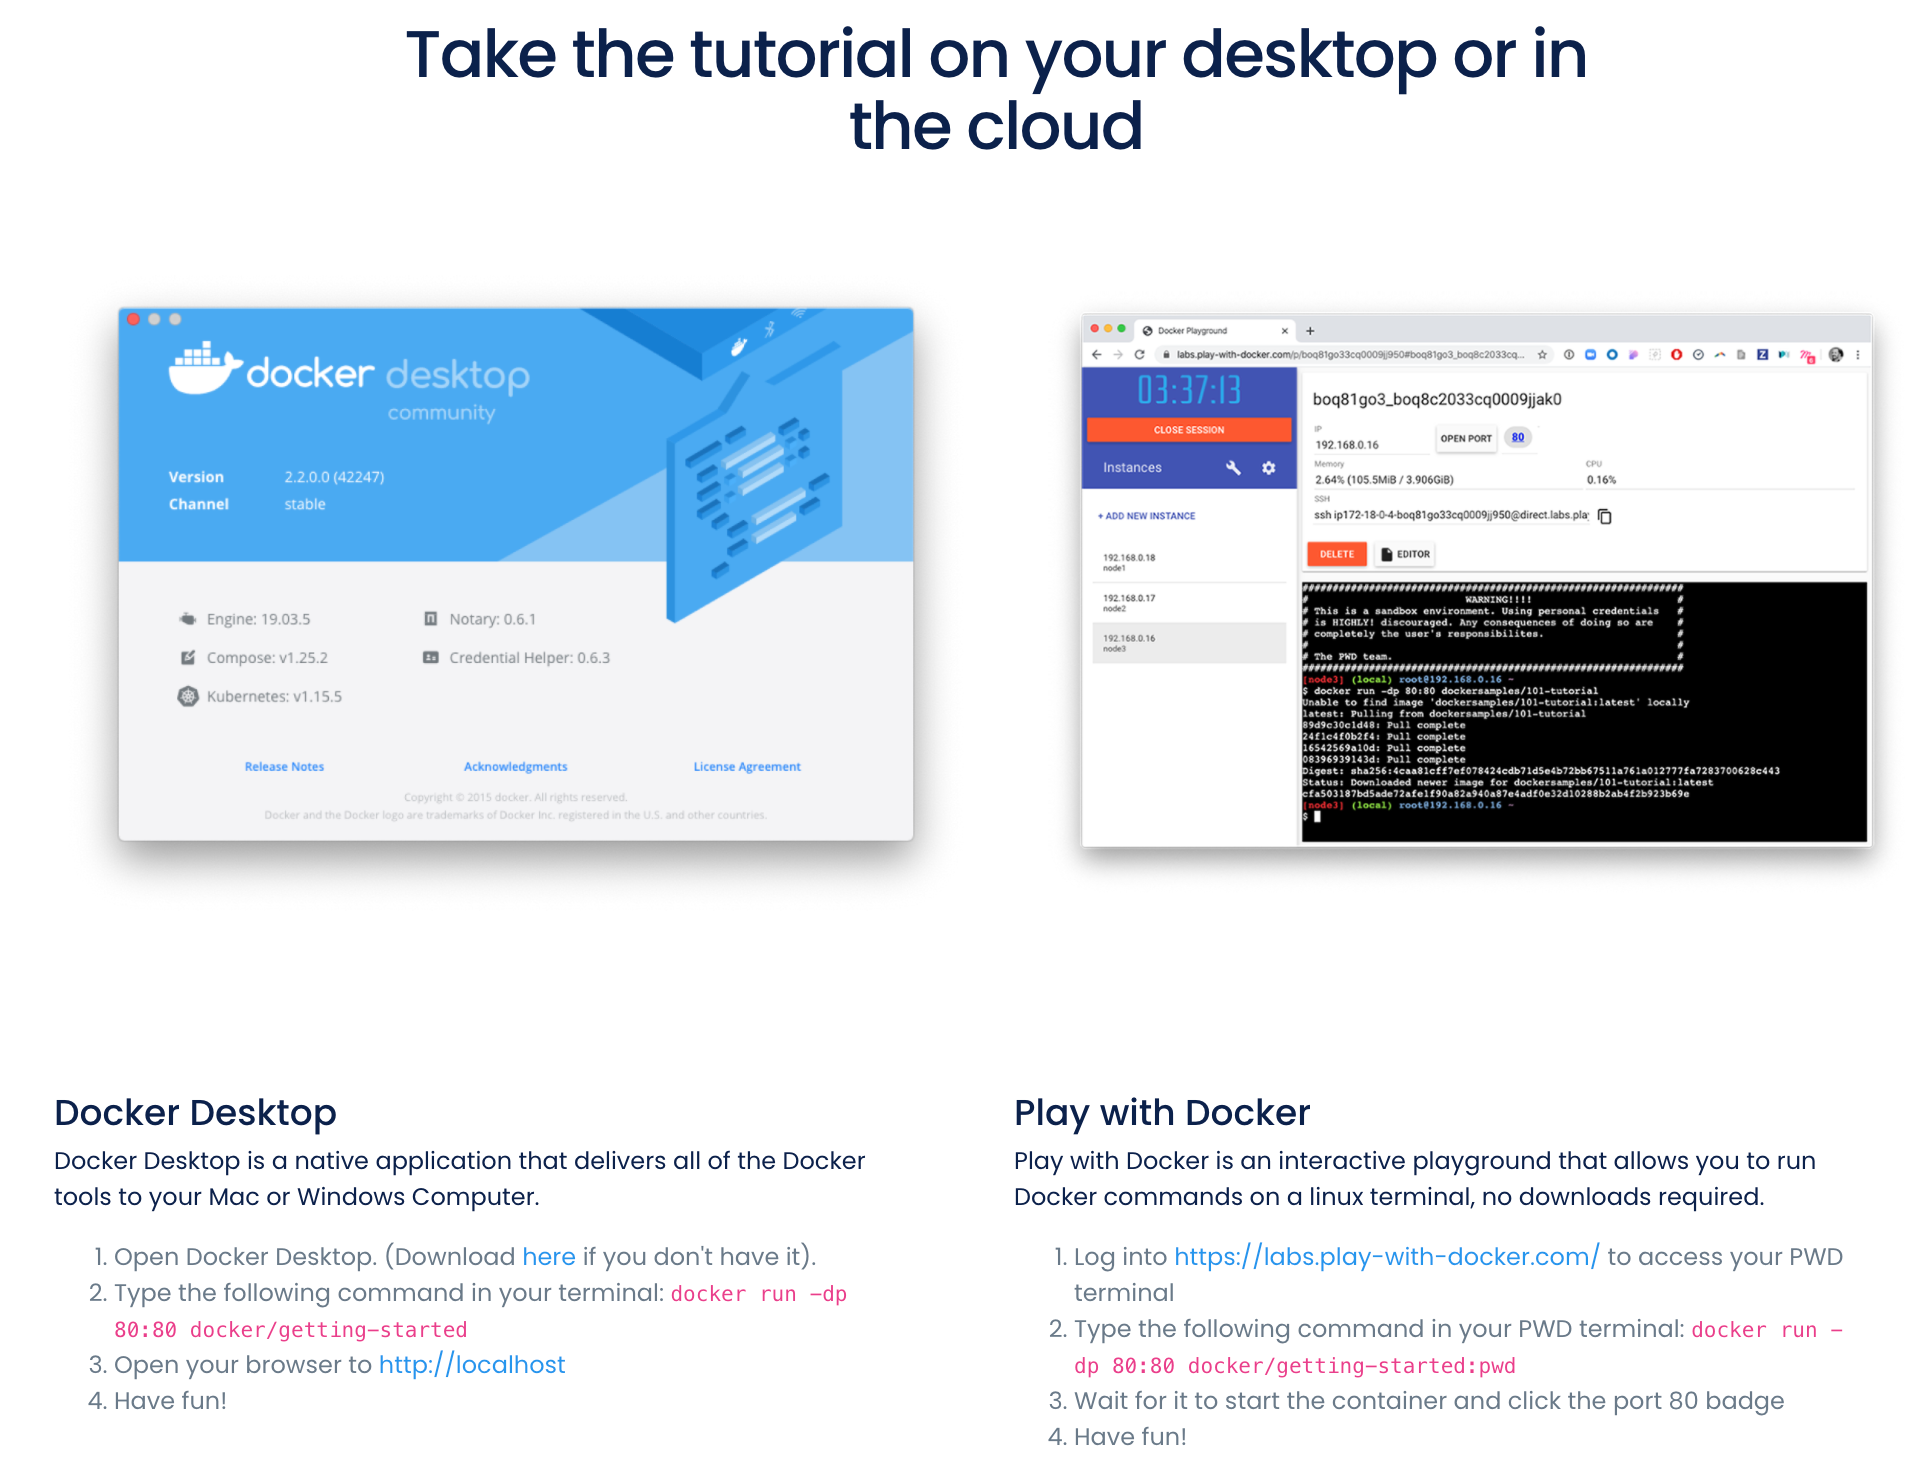
Let's see how Lightsail works by deploying a simple NodeJS application packaged as a container image. This image is the one that Docker Desktop provides for learning their platform.
We will start this demo where most tutorials end – when your application image is hosted in Docker Hub.
Step 1 - Setup your AWS account
The first step in this tutorial is to get an AWS account. In this AWS account you will be deploying your containers.
If you are just creating your account, the free tier should be enough for this project. The free tier will give you access to a lot of AWS services for free for the first 12 months. And you will get one month of Amazon Lightsail for free.
Keep in mind that having an AWS account is free if you don’t use any services. You won’t be charged for creating the account, and if you don’t use the account, nothing will be charged.
To create an AWS account you can follow the steps in this video:
Step 2 - Create your container service
By now you should have an AWS account and your application in Docker Hub - as this Docker Desktop tutorial shows.
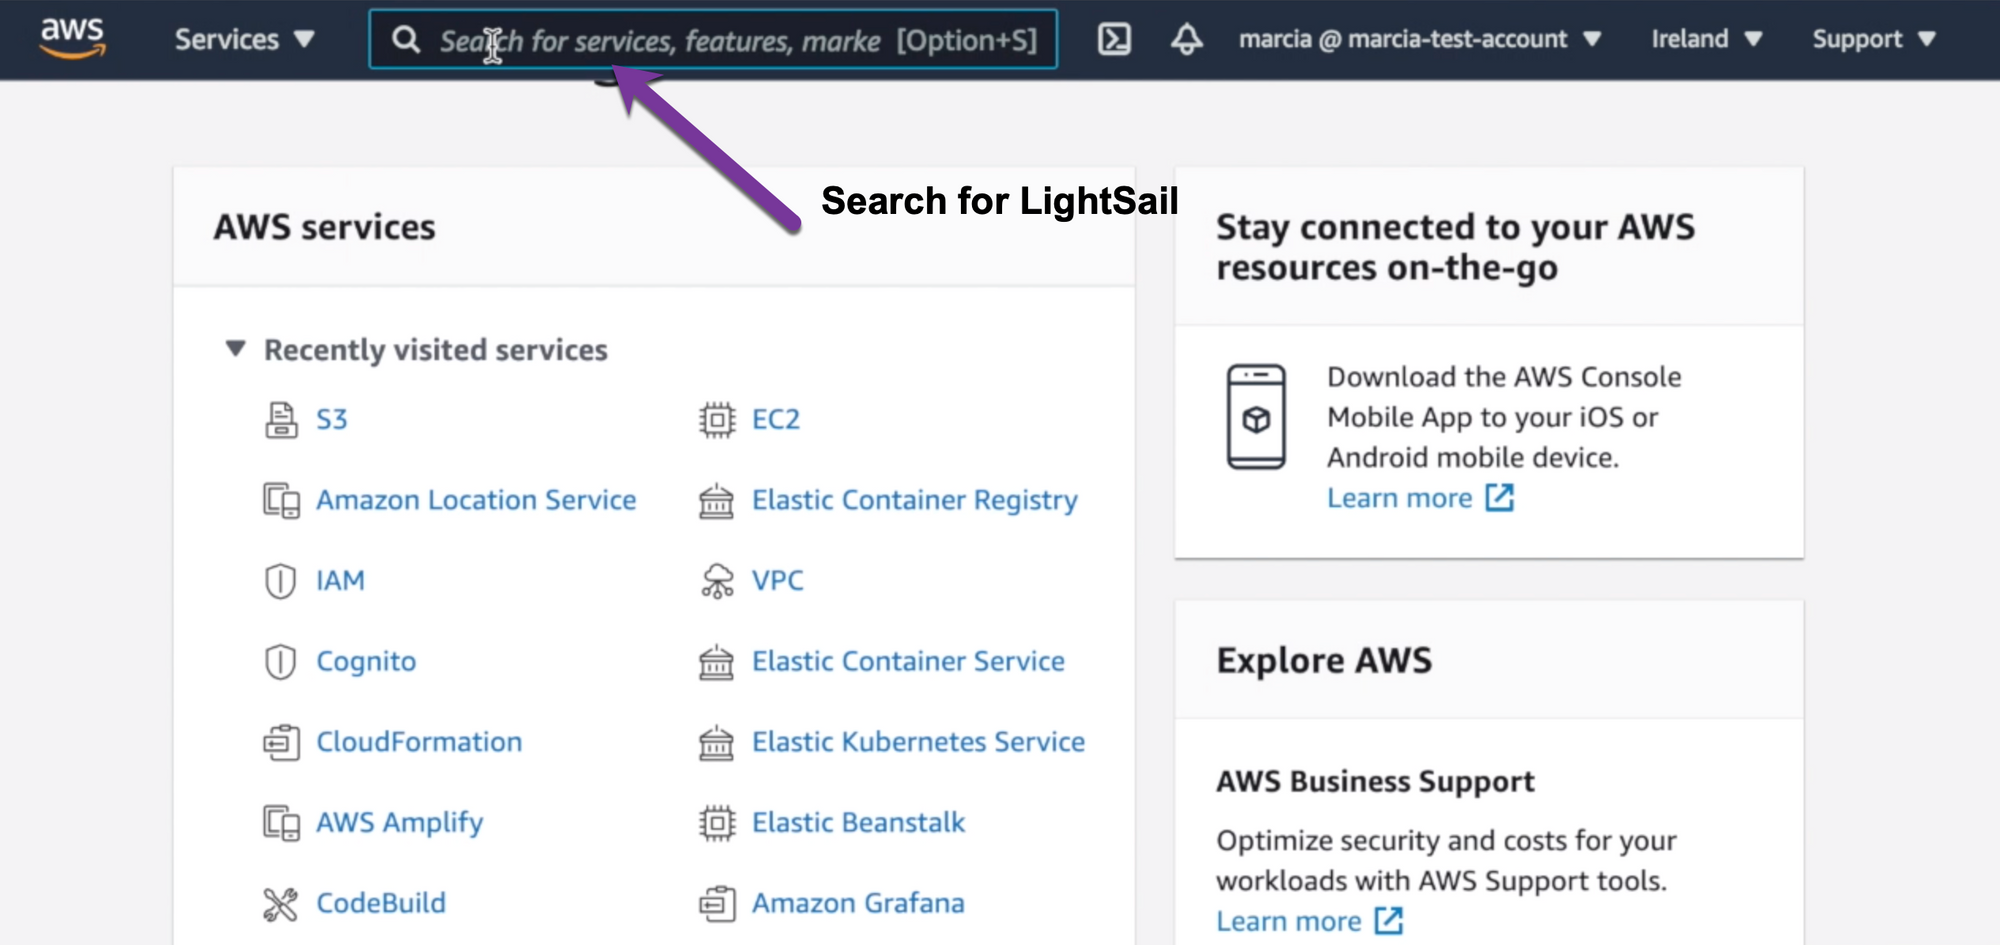
Log into your AWS account and go to Amazon Lightsail.
Amazon's Lightsail interface is quite different from the regular AWS interface. You can see that this interface has many tabs available. The one we are interested in for this post is Containers. But in a similar way you can create virtual instances, databases, and other cloud components using Lightsail.
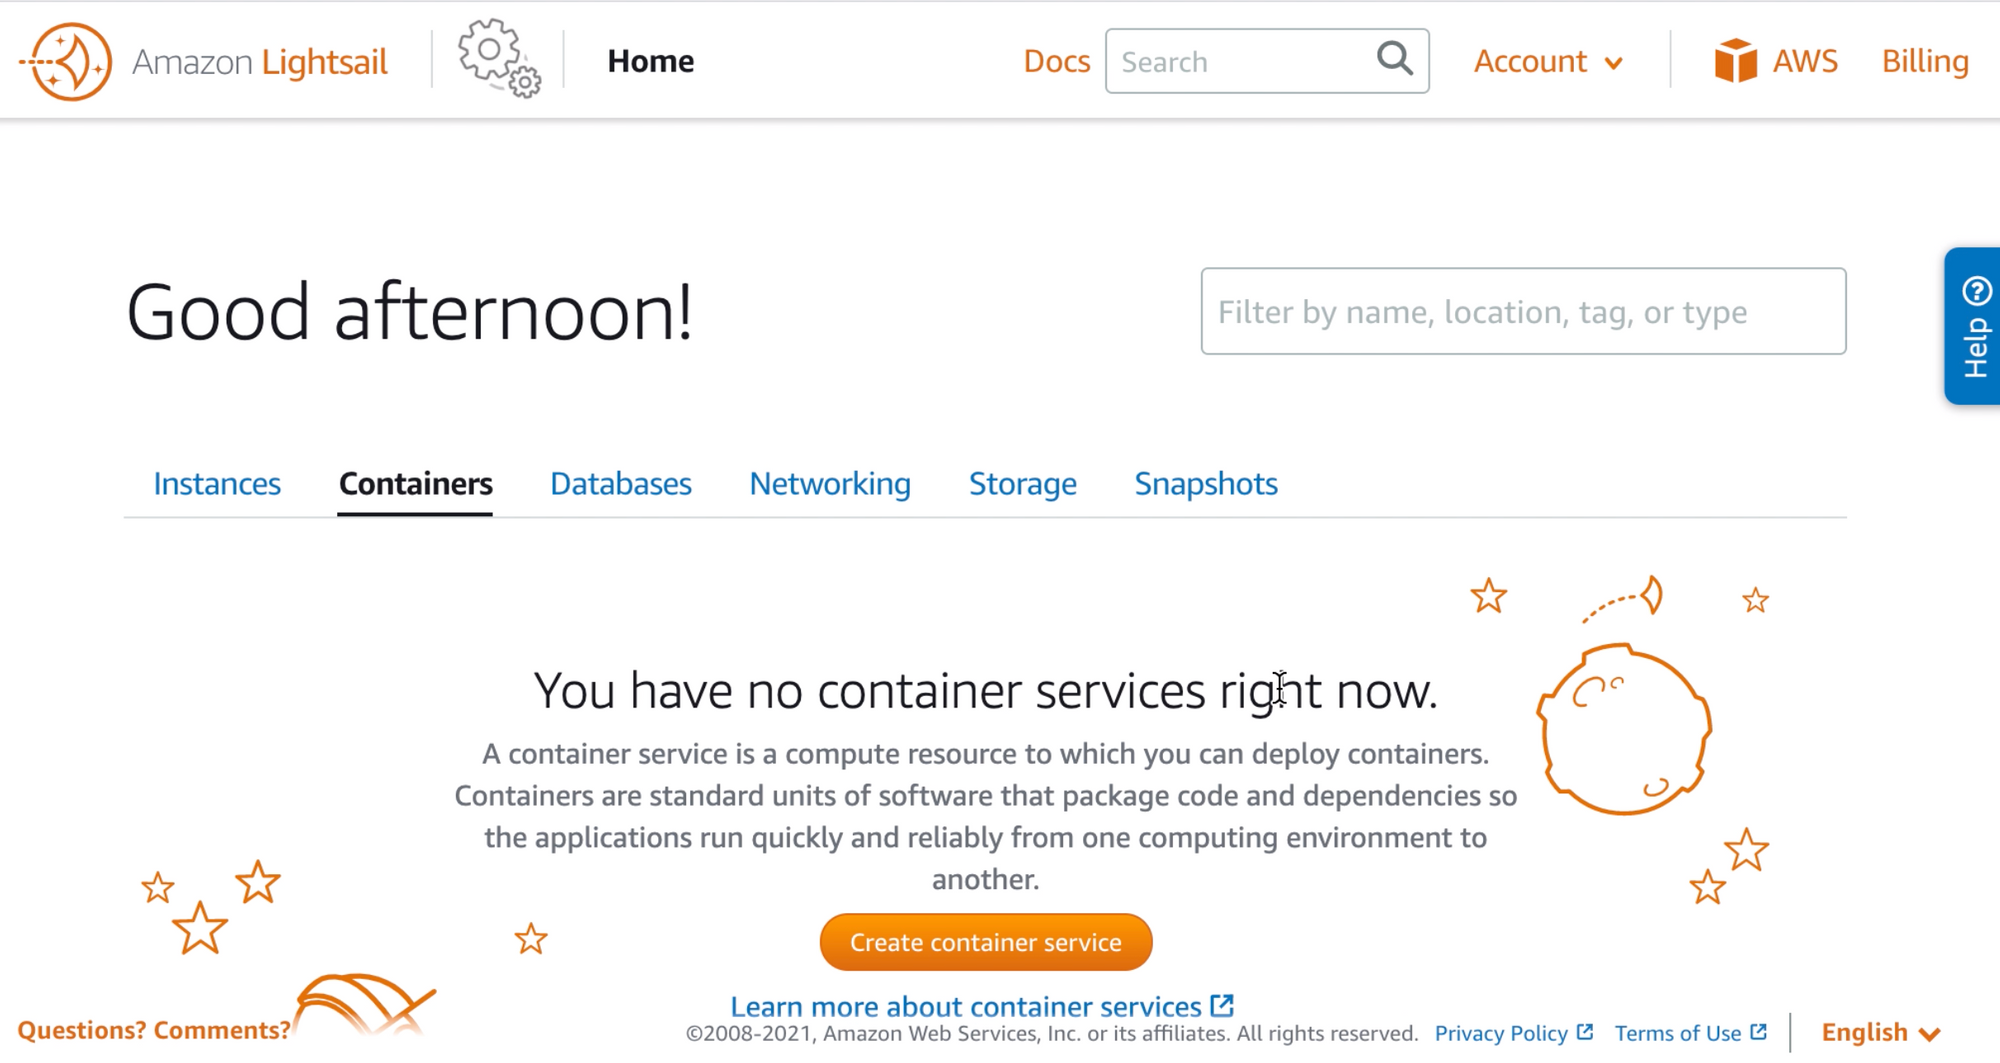
Now we can create a container service, and that will take us to a form where we need to make some simple decisions.
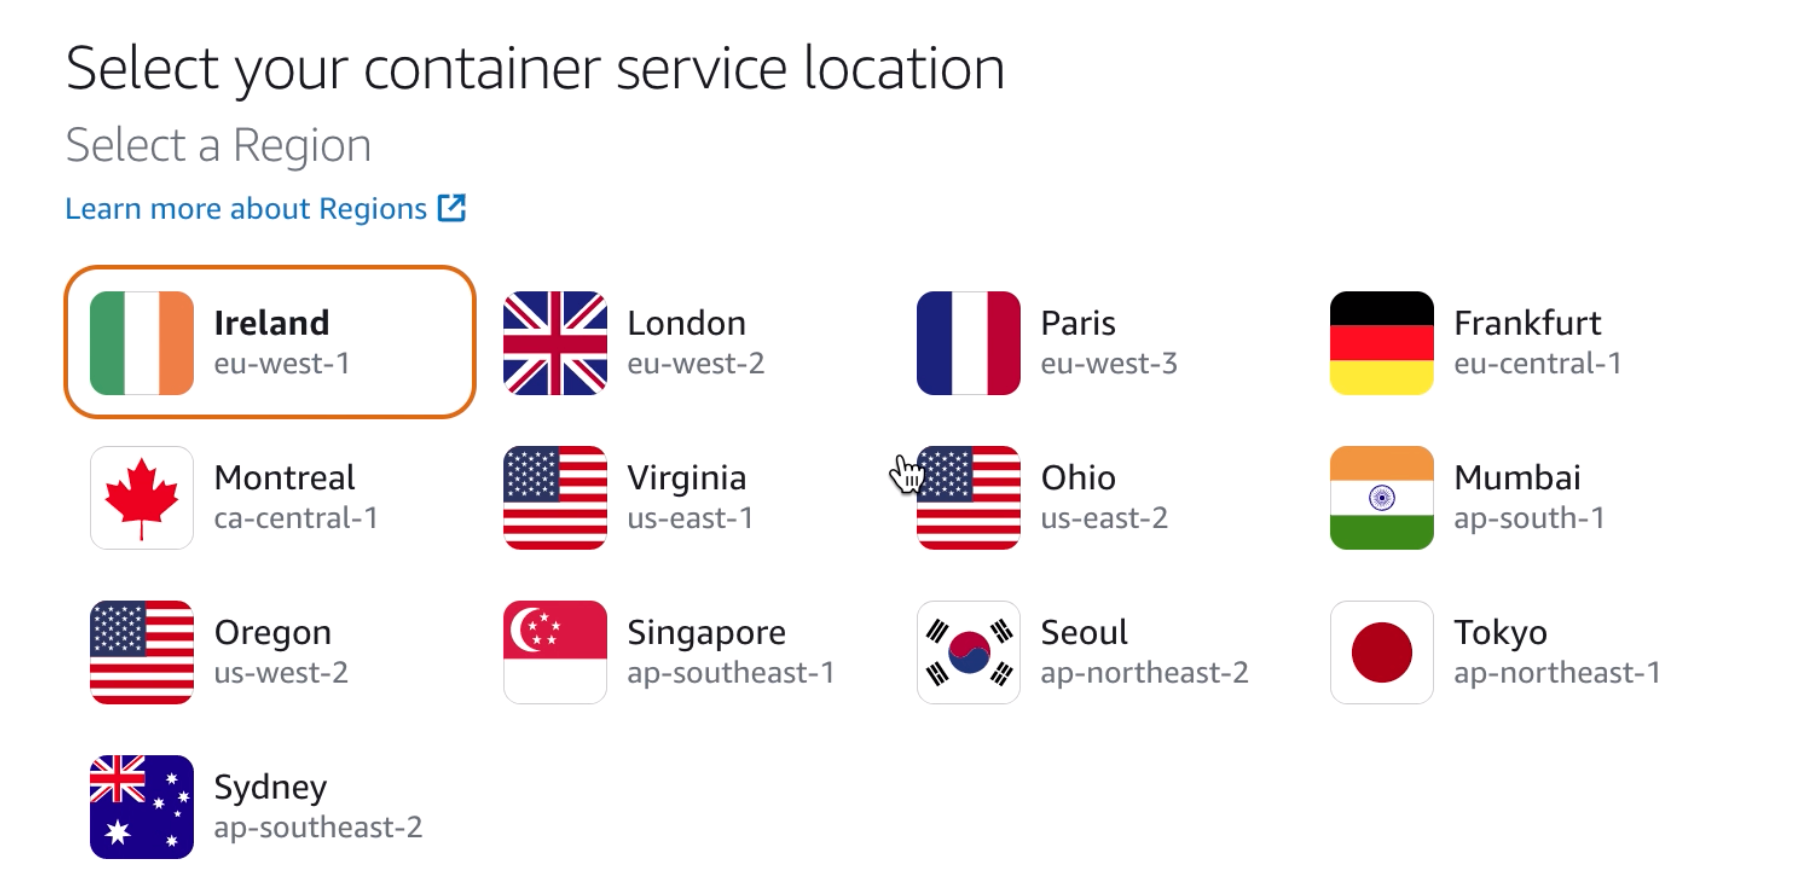
The first one is in which region we want to deploy our container image. Amazon Lightsail is available in all these regions, so you can pick the one that is the best for your application.
After that, we need to choose how much power to give to the machine that will be running our containerized application. We need to decide on the size of the machine, and how many of them we need.
You can see how much it will cost per machine and how much memory and CPU each of them have. In addition, after you select the scale, you can see exactly how much this service will cost.
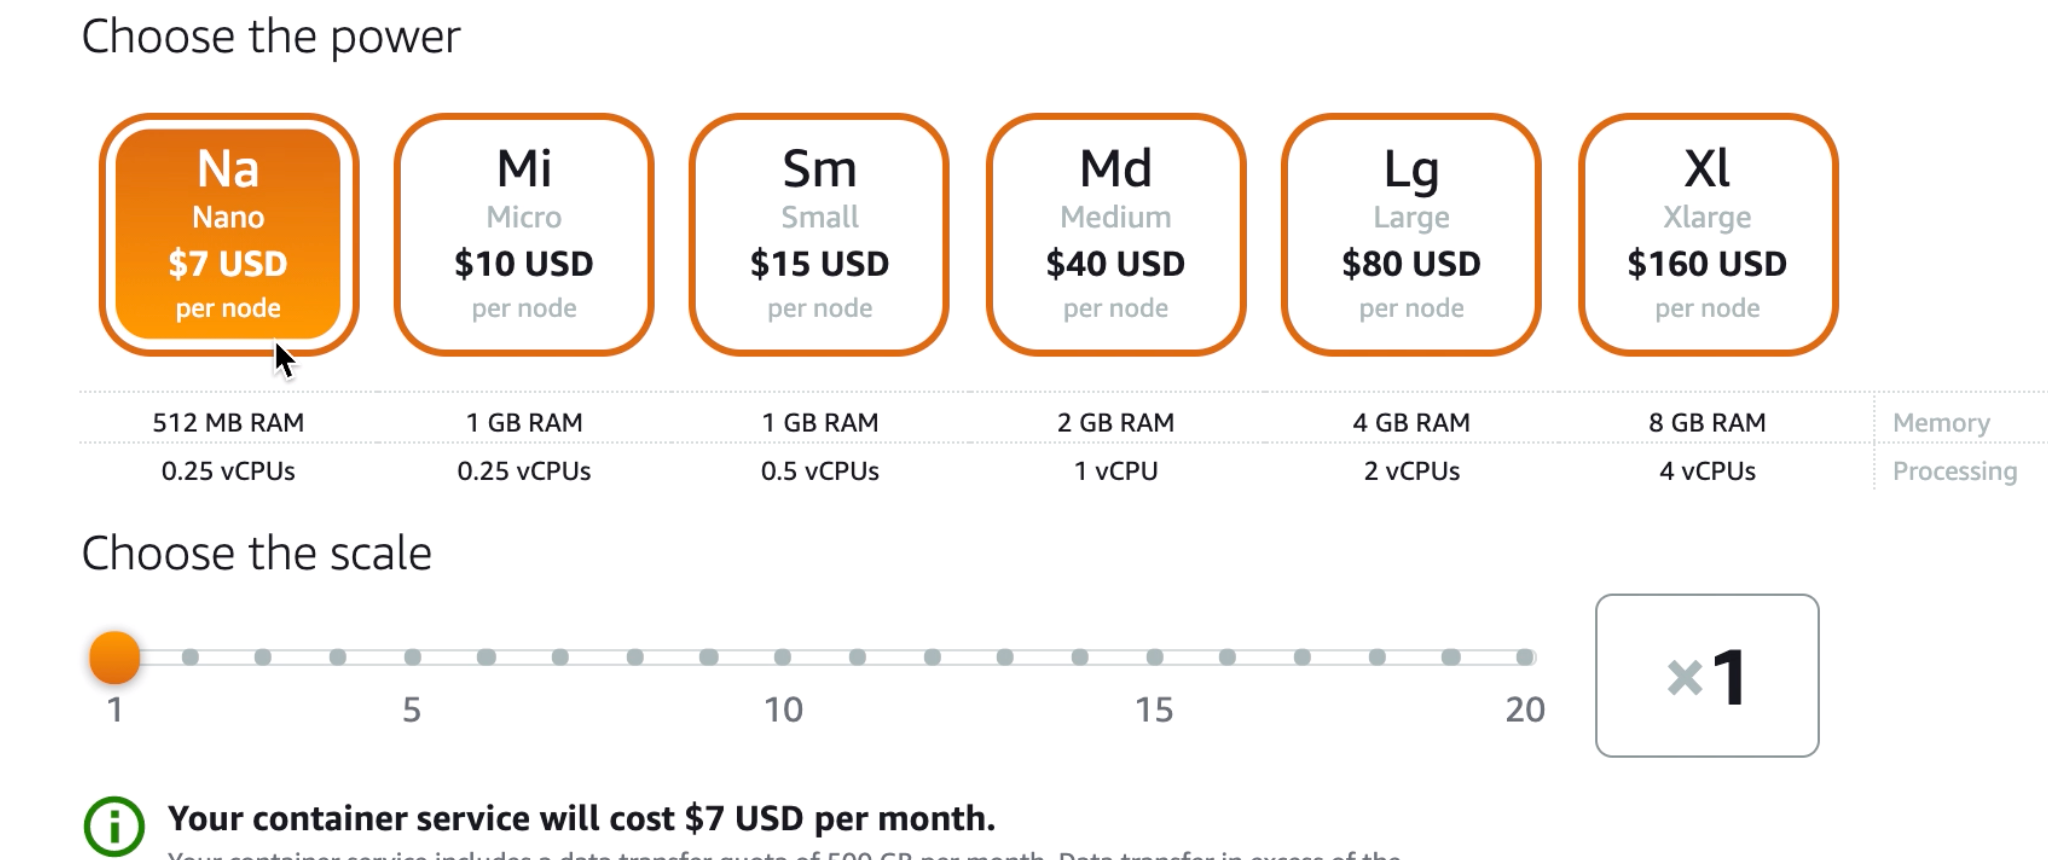
Lightsail is very clear when it comes to cost. We can see the end cost on the screen. That includes storage, load balancing, networking, and whatever this container needs to run.
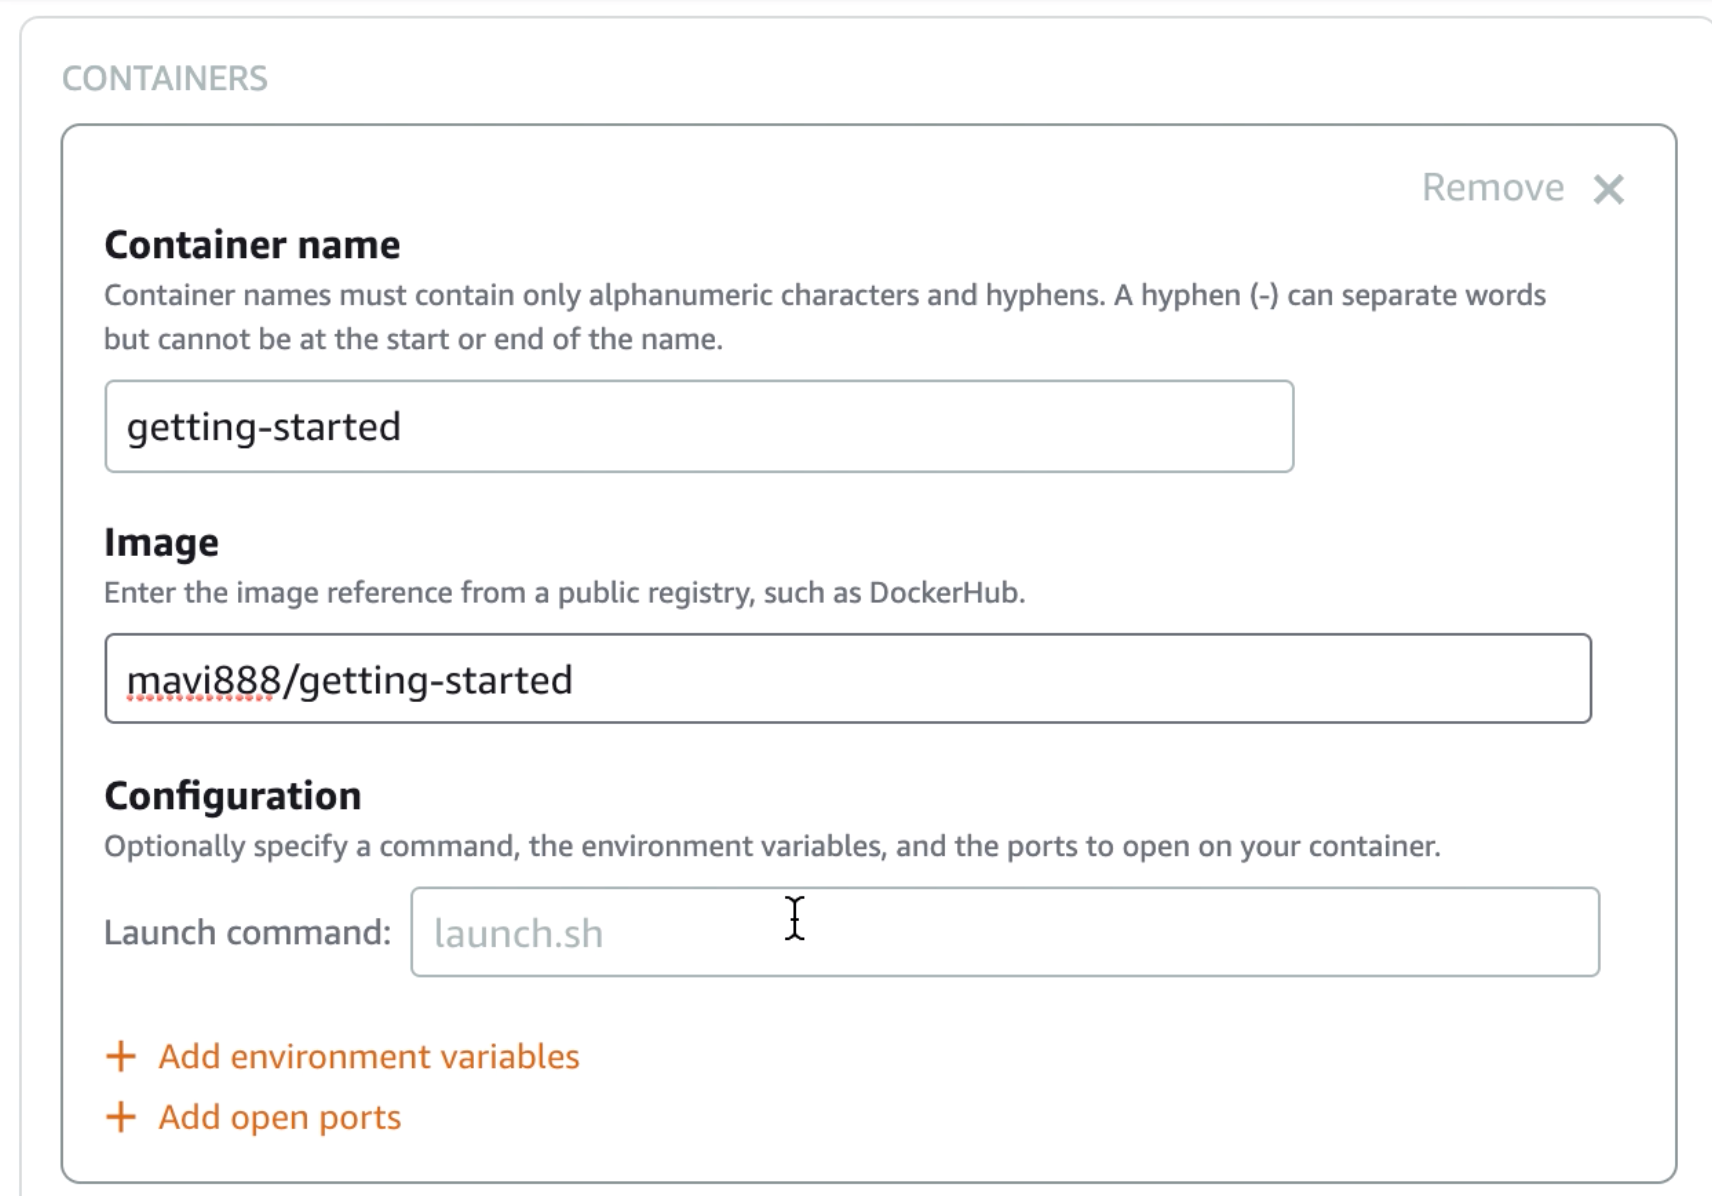
Then we need to setup our deployment. The container service we are creating can hold up to 10 container's images.
For each of the containers, we need to define a name, where the image is (the URL from Docker Hub) and how we'll run and access this application.
In our case, we will open port 3000 with the protocol HTTP so the application can be accessed via that URL.
The last thing we need to configure is a public endpoint. You can choose from your deployment what container you want to make a public endpoint on the internet.
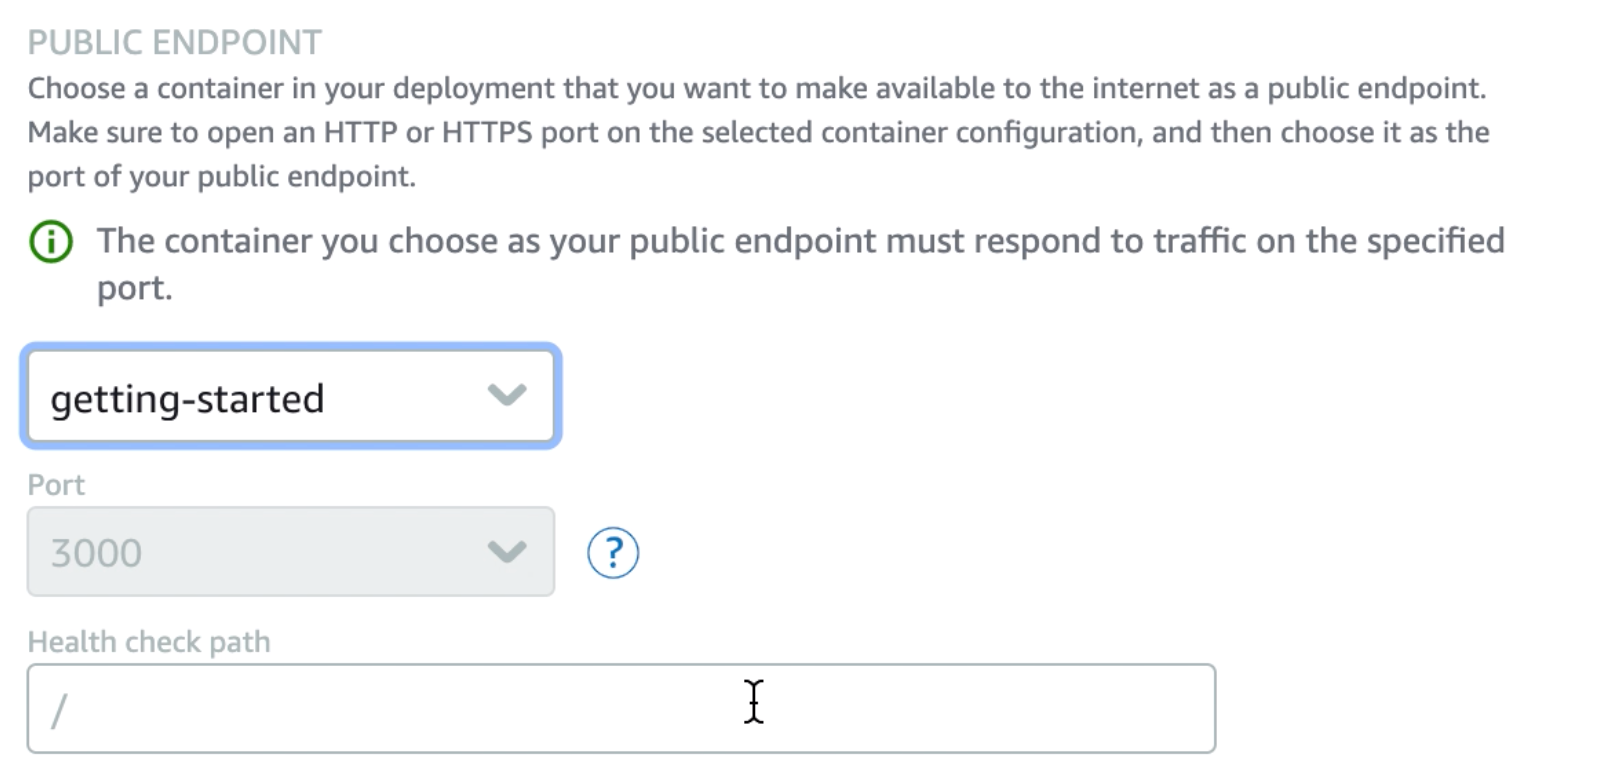
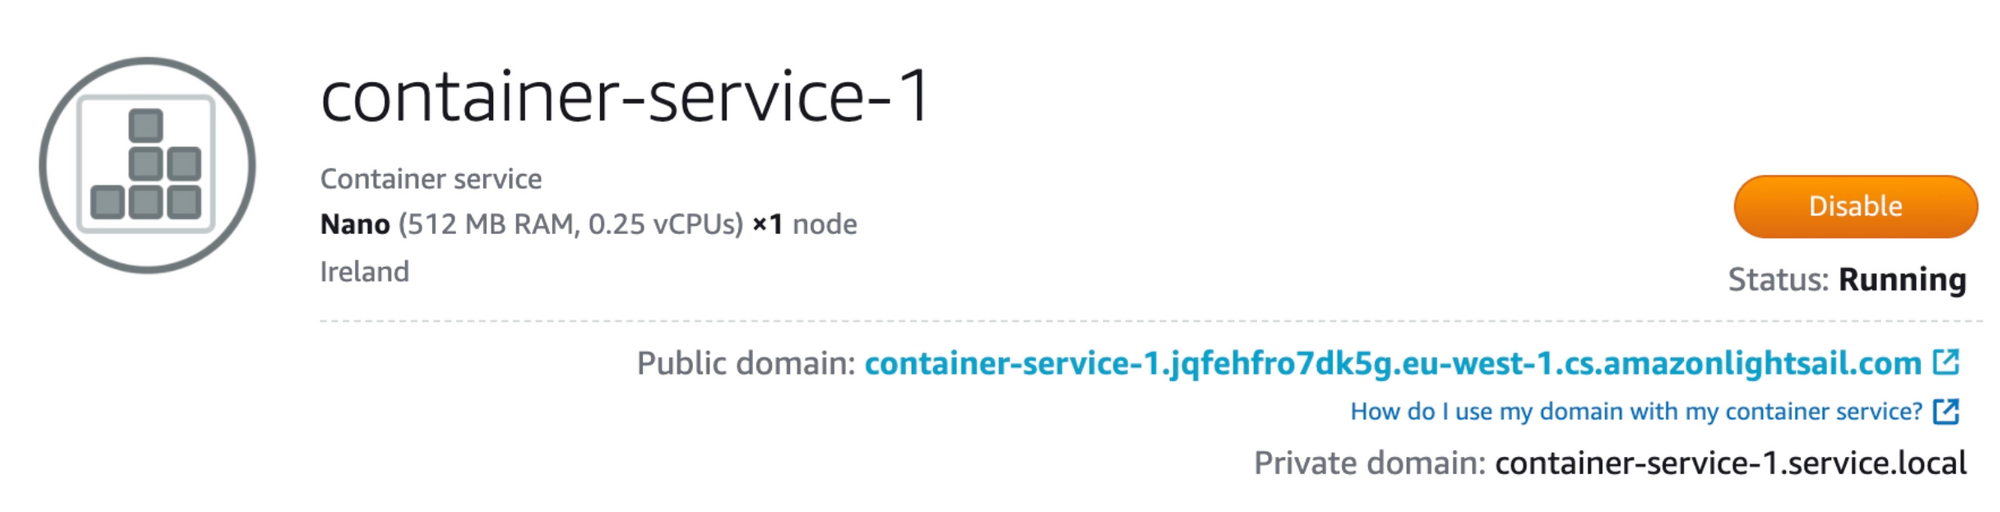
After that, you are ready to start the deployment. This takes a couple of minutes. After you are done you can access the public endpoint for this service.
At the top of the container service page, you can see the public domain. When you click that URL, you will be accessing the application you defined in the public endpoint.
If you need your containers to talk to each other without making them public, use the private domain.
Conclusion
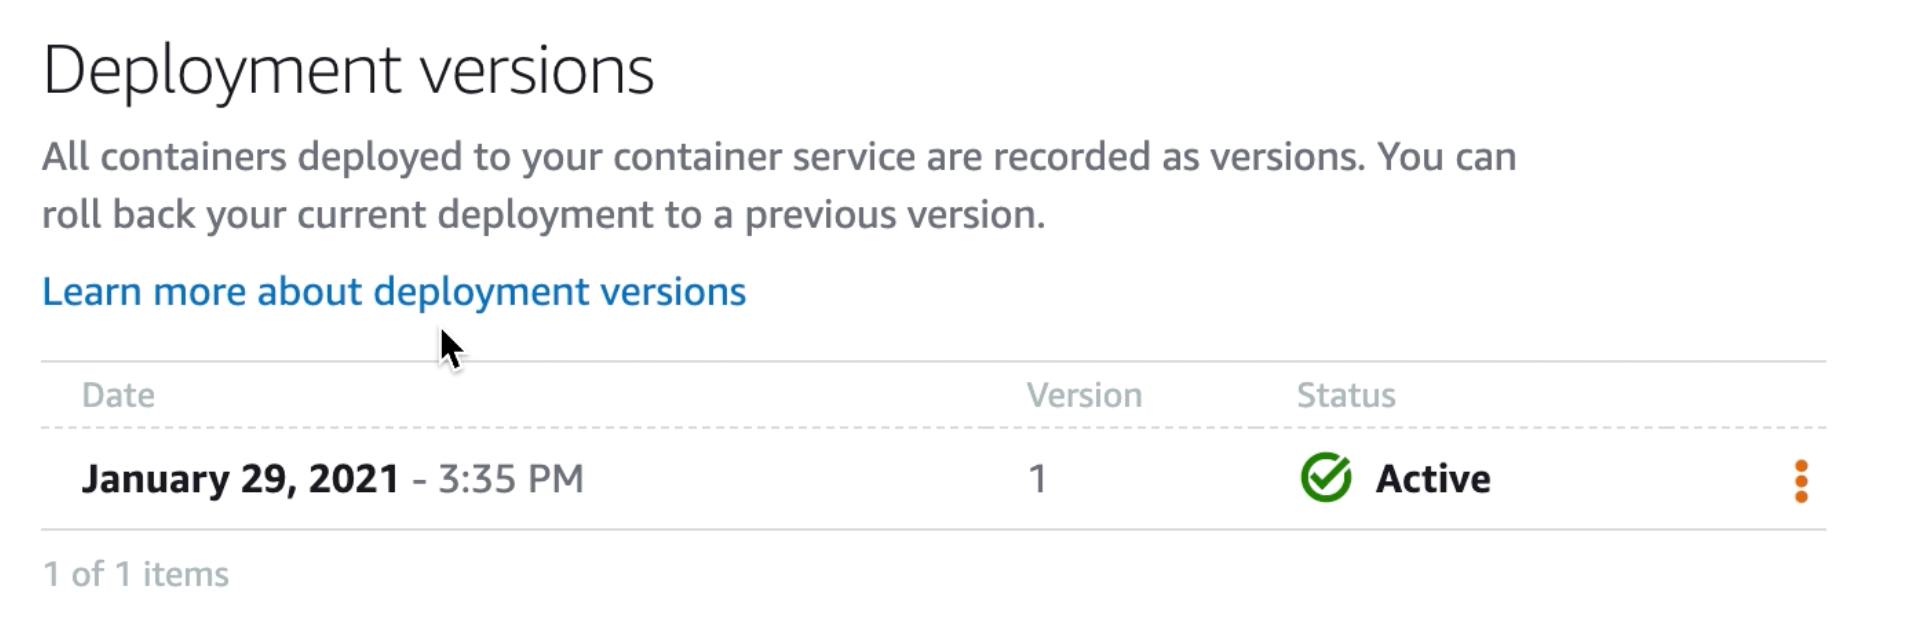
Now you have a container application deployed in the cloud. This application is scalable. You can monitor the usage of the power you defined before in the Metrics tab. You can always modify these specs if you see that you need more or less power.
In addition, if you need a domain for your application, you can get one from the Amazon Lightsail console.
If you want to watch this blog post as a video you can check it out here where we do the same together. This video is also available in Spanish if you prefer.
Thanks for reading.
I’m Marcia Villalba, Developer Advocate for AWS and the host of a YouTube channel called FooBar. There I published over 300 video tutorials about Serverless, AWS and software engineer practices.
- Twitter: https://twitter.com/mavi888uy
- Youtube: https://youtube.com/foobar_codes
- Spanish Youtube channel: https://bit.ly/aws-esp-yt