

I love animating websites. It's so fun when you just look at a site, and there are cool animations that make everything look pretty.
Getting started with an animation library does not have to be hard. Anyone can add a bit of animation to their site regardless of whether they are good working with the front end or not.
Let me show you how you can get started.
What is Rough Notation?
Rough notation is lightweight yet amazing JavaScript animation library that you can use to get started with animations pretty quickly. And it is open source!
The docs are pretty straightforward, which is one reason it's a great animation library to start with.
In this article, I'll take you through the basic steps to get started with Rough Notation, and we'll build a pretty small site with some animations.
If you like using the library, check out their super repository. Give it a star, and if you love this article, shout them out! (This isn't sponsored. I just love the library :))
You can check out the Rough Notation docs here.
Let's Get Animating
How to Code the HTML/CSS
We can't animate something we don't see. So to start, we'll create a pretty simple static page with some minimal HTML and CSS.
For now, our HTML will just look bland. Nothing much going on. Just a nicely centered thing with a Poppins font going on.
<div class="main">

        <header>
            <h1 class="header">Aloha. Hello. Salut.</h1>
        </header>

        <main>
            <p>Today, we will animate this with <scan class="rough-notation">Rough Notation</scan></p>

            <p>This is a pretty simple site. If you love this, check Rough Notation out on <scan class="link">Github</scan>. They are open source, and they are amazing!</p>

            <p>Lorem ipsum dolor sit amet, consectetur adipisicing elit. Maiores omnis molestias voluptas, odit laboriosam esse distinctio provident pariatur accusamus cum?</p>

            <h2>A bit about Rough Notation</h2>
            <ul class="list">
                <li>It's open source.</li>
                <li>It's easy to start with.</li>
                <li>I love it!</li>
            </ul>
        </main>
    </div>
In the above code, notice the classes I have added to some of the elements. This is how we select what elements to animate.
Our CSS itself is bare, but here is how it is and what our page looks like:
@import url('https://fonts.googleapis.com/css2?family=Poppins:wght@300&display=swap');
*{
    box-sizing: border-box;
    margin: 0;
    padding: 0;
}
body{
    font-family: 'Poppins', sans-serif;
}
.main{
    display: flex;
    justify-content: center;
    align-items: center;
    flex-direction: column;
    padding: 10px;
    margin: 40px;
}
h1{
    margin-bottom: 10px;
}
p{
    margin-bottom: 15px;
}
ul{
    margin: 20px;
}
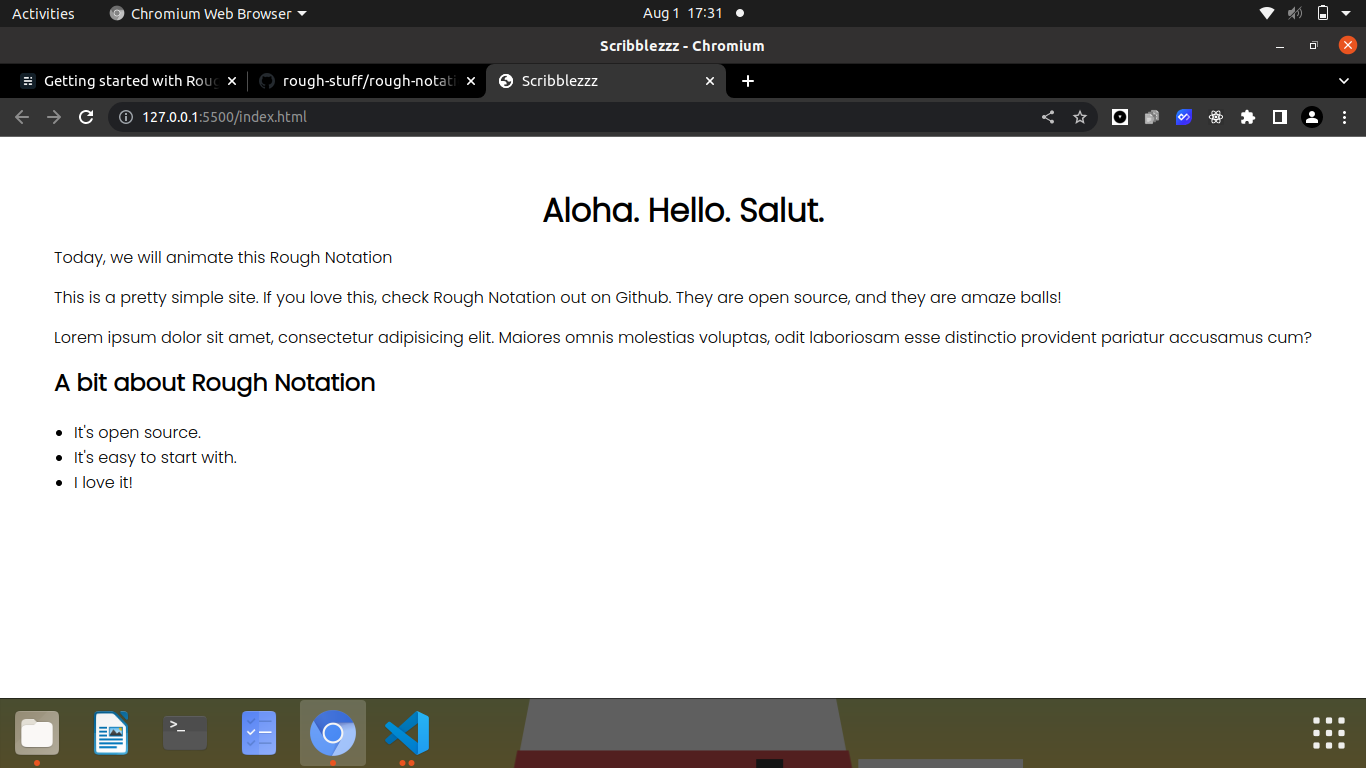
Screenshot of how our bare static page looks. There is an h1 header that says 'Aloha. Hello. Salut.' A few other paragraphs make up the page and there is an unordered list that states three little facts about Rough Notation.
Let's Add Some JavaScript
Hold on, this is the juicy part! For our animations to take any kind of effect, we need a JavaScript file. Just create one, and link it to your HTML like you would normally do.
Now let's see how Rough Notation works.
The docs offer a few ways to add the library to our projects. For the sake of simplicity, we will load the ES module directly.
Check out the repo and the docs here.
So essentially, we will add the an extra script tag to our HTML so that it looks like this:
<script type="module" src="https://unpkg.com/rough-notation?module"></script>
Now that Rough Notation is partially present in our project, we can dig into our JavaScript file, and import it. The first line of our JavaScript doc would look like this:
import { annotate } from 'rough-notation';
Now that Rough Notation is fully set up, let's grab what we want to animate from the page. Based on what elements we added classes to, we would have the following:
const header = document.querySelector('.header');
const roughNotation = document.querySelector('.rough-notation');
const link = document.querySelector('.link');
const list = document.querySelector('.list');
The next step is what will bring our page to life. Say, I wanted to highlight the header a light pink color. I would write this code:
const annotation = annotate(header, { type: 'highlight' , color:'pink'});
annotation.show();
We assign the variable annotation to a function called annotate. The annotate function takes two parameters – the element we want to annotate, and an object.
The object can take in a few attributes. In this case we have two: the type of annotation we want on the header, and the color.
And just to mention a few other types of annotations that we can do:
Highlight
Circle
Underline
Brackets
Box
Strike-through
Crossed-off
Back to our header animation. The last line is annotation.show() which just basically displays our animation.
If we save our page, and check our browser, nothing happens. It was supposed to work (according to the docs), but we get nothing.
I found a solution to the problem on a YouTube video, and in order for us to make the animation come to life, we have to adjust the import line in our JavaScript file.
So you can update it like this:
import { annotate } from "https://unpkg.com/rough-notation?module";
If you are like me, and love opening issues to complain (just kidding) about open source projects, feel free to raise an issue on the Rough Notation repository if the animation doesn't work for you either. But only open an issue if no one has beat you to it yet. So do check recent open and closed issues first. May the best issue opener win :)
If you refresh after fixing the problem we had, our header gets a nice pink highlight. You see it nicely swooshing across the page.
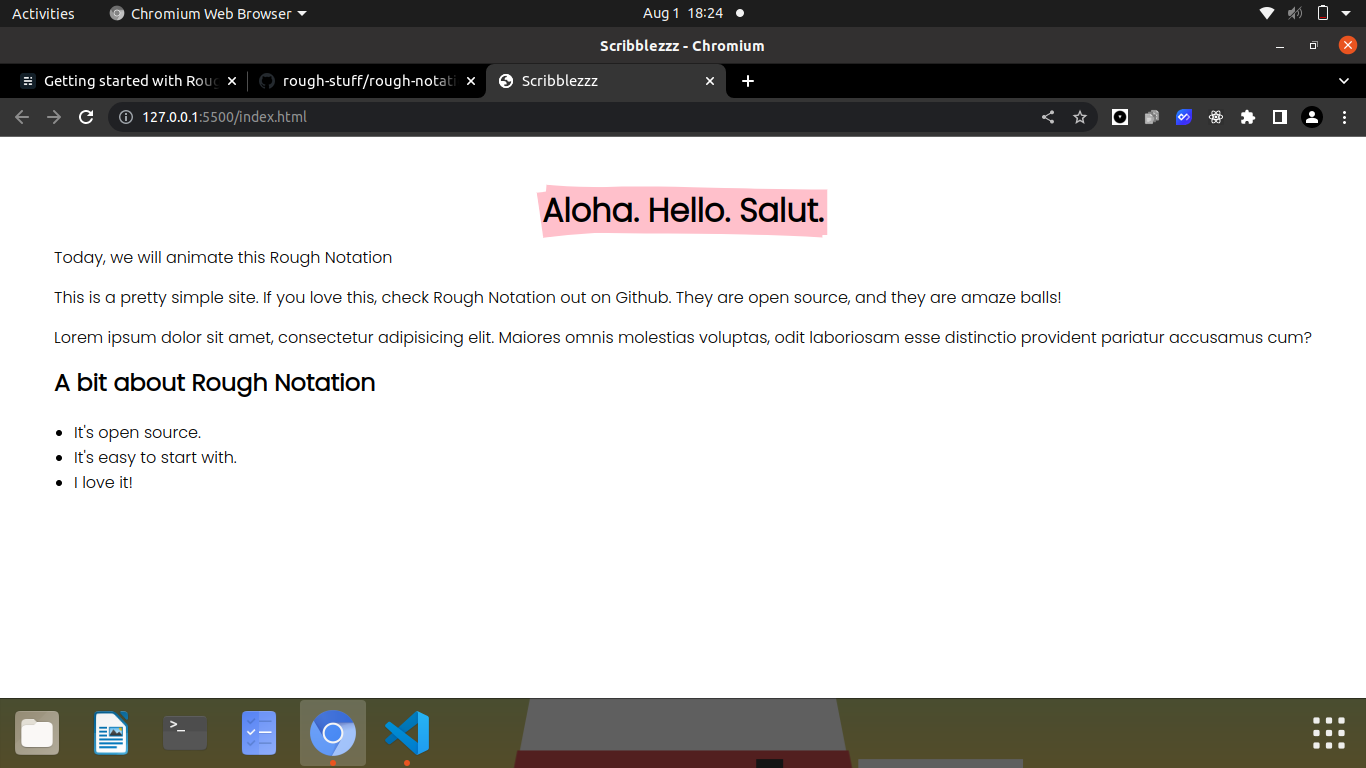
Screenshot of our site now, with the header highlighted in pink.
Nice and pretty, right?
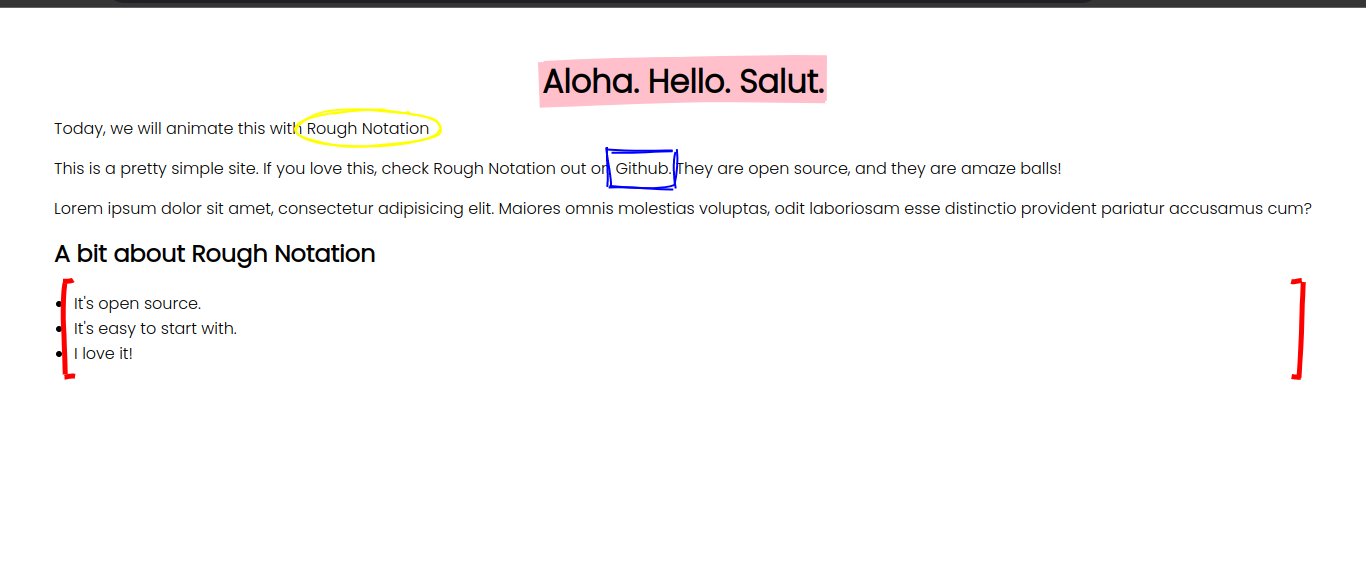
Let's go ahead and add a few more animations:
const annotation = annotate(header, { type: 'highlight' , color:'pink'});
const annotation2 = annotate(roughNotation, {type:'circle', color:'yellow', padding:7});
const annotation3 = annotate(link, { type: 'box' , color:'blue', padding:7});
const annotation4 = annotate(list, { type: 'bracket' , color:'red', brackets:['left', 'right'], strokeWidth:5});

const array = annotationGroup([annotation, annotation2, annotation3, annotation4]);
array.show();
This time, we have added quite a bit. But don't let it get overwhelming. We'll walk through it step by step.
First, we have added padding to our annotation2 animation. Just like we saw with the header, the roughNotation (which is the rough-notation class in our HTML) gets a yellow circle with a padding of 7.
But padding isn't the only new attribute we introduced. annotation4 has a few new things we need to learn about. The object parameter has an attribute, brackets, with an array as value. left and right indicate that we want opening and closing brackets on both sides of the element. It also has strokeWidth, which determines the thickness of the brackets.
Since we have to "show" the animation of each element, which kind of gets boring if we have to animate a lot, I created an array, stored each animation in it, and then "showed" the array all at once. It's neat, and saves a lot of time.
So we've introduced annotationGroup. For this to take effect, we are going to add it to our import line like this:
import { annotate, annotationGroup } from "https://unpkg.com/rough-notation?module";
So... our final site looks like this:
The animations will work better on your browser, because you get to refresh and see them take effect one after the other.
Conclusion
Writing this was fun! And I hope that you not only learned something new, but that you tried it out too.
Make sure to check out the Rough Notation repository and docs, because they cover a whole lot more than what we discussed in this article.
Happy animating!