

In this article, I will describe how to use microservices architecture and Kubernetes to build a blockchain.
The technologies usually used for blockchains are purpose-driven, and you can use them for other projects as well.
The examples in this article can readily handle heavy loads and remain responsive and quick to execute user requests.
Because the cryptocurrency industry is growing fast, a lot of countries are setting rules around how everything should be managed. As a result, I will adhere to certain regulations and take into account certain details, such as the characteristics of the blockchain technology.
For instance, you can have overloads and performance problems with blockchain technology. And as the market for cryptocurrencies and blockchain technology expands, new products are more likely to appeal to a wide range of active blockchain technology users.
Because of this, I had to find a way to prevent the program from becoming overloaded in the event of a significant increase in users.
Tutorial Prerequisites
For this walkthrough, these are the following technologies we will be using. You should be familiar with them:
- Node.js (specifically, the NestJS framework) for backend development. Nest.js forces you to use a modular structure where each feature can be isolated and easily connected/disconnected to/from other modules. Nest supports TypeScript out-of-the-box.
- PostgreSQL is the database we'll use to collect data.
- Kafka JS serves incoming loads and establishes communication between microservices.
- Helm charts and Kubernetes (k8s) for deployment. These tools will enable easy deployment of scalable microservices infrastructure on any cloud platform (we will use AWS EKS)
Also, this article assumes you have a decent level of knowledge about Kubernetes, Helm, and Node. Let's dive in.
Development Method
Our primary goal for the first phase is to divide our application into microservices.
In addition to helping with service communication, load balancing with Kafka enables the one-by-one processing of input data. When we have many customers, processing times may increase, but at least the service will continue and be preserved.
Additionally, if the cluster has enough resources, we can spawn extra consumers for the group that manages particular events. This reduces delays and accelerates task processing.
In this situation, we will develop six different microservices:
- Admin Microservice – We'll use the admin microservice for all administrative panel logic, which should be isolated from user-facing functionality.
- Core Microservice – Logic pertaining to users and their accounts is contained in the core microservice. Identification, gifts, charts, profiles, and so on. However, this microservice does not carry out the duties of a financial service, such as processing payments and exchanging currency.
- Payment Microservice – A financial service called a "payment microservice" includes logic for trade, exchange, and withdrawal transactions. There will be integrations with CEX and DeFi solutions.
- Email and notification service – This microservice is in charge of informing the user of emails, push notifications, and other types of alerts. It contains a separate Kafka queue for requests from other microservices to send users emails or notifications.
- Cron Tasks – A microservice called Cron Tasks Service transmits predetermined events for task processing. Microservices don't carry out tasks on their own. Holding such a microservice helps prevent skipping cron job iterations when, for instance, the processing service is down due to deployment or a breakdown. The event will remain in a queue as it waits to be executed.
- Webhooks Microservice – The goal of the webhooks microservice is to prevent any events from external APIs that may be very significant and contain transaction statuses or other vital data from being missed. Such events are processed after being queued up (based on the sender API).
Now let's see how to make these microservices using Nest.js.
For the Kafka messages broker, you'll need to create configuration options. In order to store the shared modules and configurations of all microservices, we will establish a shared resources folder.
Microservices Configuration Options
Production apps must have configuration. The configuration is crucial for understanding what your production application consumes as you build out a microservice application. It is usually recommended practice to keep configuration settings distinct from your code when developing microservices.
import { ClientProviderOptions, Transport } from '@nestjs/microservices';

import CONFIG from '@application-config';

import { ConsumerGroups, ProjectMicroservices } from './microservices.enum';

const { BROKER_HOST, BROKER_PORT } = CONFIG.KAFKA;


export const PRODUCER_CONFIG = (name: ProjectMicroservices): ClientProviderOptions => ({

 name,

 transport: Transport.KAFKA,

 options: {

   client: {

     brokers: [${BROKER_HOST}:${BROKER_PORT}],

   },

 }

});


export const CONSUMER_CONFIG = (groupId: ConsumerGroups) => ({

 transport: Transport.KAFKA,

 options: {

   client: {

     brokers: [${BROKER_HOST}:${BROKER_PORT}],

   },

   consumer: {

     groupId

   }

 }

});
Let's link our microservice for the admin panel to Kafka in consumer mode. We can detect and manage events from topics thanks to it.
Make the app operate in microservice mode so that events can be consumed like this:
app.connectMicroservice(CONSUMER_CONFIG(ConsumerGroups.ADMIN));

 await app.startAllMicroservices();
We can see that groupId is included in the consumer configuration. It's a crucial choice that will enable customers from the same group to get events from topics and share them with one another to process them more quickly.
For instance, we can use autoscaling to launch more pods to divide loading between them and speed up the process double if our microservice receives events more quickly than it can process them.
Consumers must be included in the group for this to work, and after scaling, spawned pods will also be included. They won't have to handle the same subject events from several Kafka partitions because they can share loading.
Let's look at an illustration of how we can use Nest to capture and handle Kafka events.
Consumer Controller
import { Controller } from '@nestjs/common';

import { Ctx, KafkaContext, MessagePattern, EventPattern, Payload } from '@nestjs/microservices';


@Controller('consumer')

export class ConsumerController {

 @MessagePattern('hero')

 readMessage(@Payload() message: any, @Ctx() context: KafkaContext) {

   return message;

 }


 @EventPattern('event-hero')

 sendNotif(data) {

   console.log(data);

 }

}
Customers can operate in two modes. It accepts events, processes them without delivering a response (EventPattern decorator), or, after processing an event, returns the response to the producer (MessagePattern decorator).
Since it doesn't contain any additional source code layers to enable request/response functionality, EventPattern is preferable and you should choose it wherever possible.
Who Are the Producers?
We must supply producer configuration for a module that will be in charge of transmitting events in order to link producers.
Producer Connection
import { Module } from '@nestjs/common';

import DatabaseModule from '@shared/database/database.module';

import { ClientsModule } from '@nestjs/microservices';

import { ProducerController } from './producer.controller';

import { PRODUCER_CONFIG } from '@shared/microservices/microservices.config';

import { ProjectMicroservices } from '@shared/microservices/microservices.enum';


@Module({

 imports: [

   DatabaseModule,

   ClientsModule.register([PRODUCER_CONFIG(ProjectMicroservices.ADMIN)]),

 ],

 controllers: [ProducerController],

 providers: [],

})

export class ProducerModule {}
Event-based producer
import { Controller, Get, Inject } from '@nestjs/common';

import { ClientKafka } from '@nestjs/microservices';

import { ProjectMicroservices } from '@shared/microservices/microservices.enum';


@Controller('producer')

export class ProducerController {

 constructor(

   @Inject(ProjectMicroservices.ADMIN)

   private readonly client: ClientKafka,

 ) {}


 @Get()

 async getHello() {

   this.client.emit('event-hero', { msg: 'Event Based'});

 }

}
Request/response-based producer
import { Controller, Get, Inject } from '@nestjs/common';

import { ClientKafka } from '@nestjs/microservices';

import { ProjectMicroservices } from '@shared/microservices/microservices.enum';


@Controller('producer')

export class ProducerController {

 constructor(

   @Inject(ProjectMicroservices.ADMIN)

   private readonly client: ClientKafka,

 ) {}


 async onModuleInit() {

   // Need to subscribe to a topic

   // to make the response receiving from Kafka microservice possible

   this.client.subscribeToResponseOf('hero');

   await this.client.connect();

 }


 @Get()

 async getHello() {

   const responseBased = this.client.send('hero', { msg: 'Response Based' });

      return responseBased;

 }

}
Each microservice has the option of operating in one of the two modes—producer or consumer—or in both modes simultaneously (mixed).
Microservices typically employ mixed mode for load balancing, producing events to the subject, and consuming them while equally splitting the load.
For each microservice, we'll use a Kubernetes setup based on Helm chart templates.
There are several configuration files in the template:
- Hpa (horizontal pod autoscaler)
- Ingress controller
- Service
- Deployment
We'll examine each configuration file separately (without Helm templating).
How to deploy the admin-API
apiVersion: apps/v1

kind: Deployment

metadata:

 name: admin-api

spec:

 replicas: 1

 selector:

   matchLabels:

     app: admin-api

 template:

   metadata:

     labels:

       app: admin-api

   spec:

     containers:

     - name: admin-api

       Image: xxx208926xxx.dkr.ecr.us-east-1.amazonaws.com/project-name/stage/admin-api

       resources:

         requests:

           cpu: 250m

           memory: 512Mi

         limits:

           cpu: 250m

           memory: 512Mi

       ports:

         - containerPort: 80

       env:

         - name: NODE_ENV

           value: production


         - name: APP_PORT

           value: "80"
You can include more minimal configurations, such as resource limitations, health check configurations, update strategies, and so on in a deployment.
Admin-API service
---

apiVersion: v1

kind: Service

metadata:

 name: admin-api

spec:

 selector:

   app: admin-api

 ports:

   - name: admin-api-port

     port: 80

     targetPort: 80

     protocol: TCP

 type: NodePort
To use this service, we must make it available to the public. Let's utilise SSL setup to leverage a secure HTTPS connection and expose our app via a load balancer.
On our cluster, we must deploy a load balancer controller. The most widely used answer is as follows: Load Balancer Controller for AWS.
Next, we must set up ingress with the following settings:
Admin-API ingress controller
apiVersion: networking.k8s.io/v1

kind: Ingress

metadata:

 namespace: default

 name: admin-api-ingress

 annotations:

   alb.ingress.kubernetes.io/load-balancer-name: admin-api-alb

   alb.ingress.kubernetes.io/ip-address-type: ipv4

   alb.ingress.kubernetes.io/tags: Environment=production,Kind=application

   alb.ingress.kubernetes.io/scheme: internet-facing

   alb.ingress.kubernetes.io/certificate-arn: arn:aws:acm:us-east-2:xxxxxxxx:certificate/xxxxxxxxxx

   alb.ingress.kubernetes.io/listen-ports: '[{"HTTP": 80}, {"HTTPS":443}]'

   alb.ingress.kubernetes.io/healthcheck-protocol: HTTPS

   alb.ingress.kubernetes.io/healthcheck-path: /healthcheck

   alb.ingress.kubernetes.io/healthcheck-interval-seconds: '15'

   alb.ingress.kubernetes.io/ssl-redirect: '443'

   alb.ingress.kubernetes.io/group.name: admin-api

spec:

 ingressClassName: alb

 rules:

   - host: example.com

     http:

       paths:

         - path: /*

           pathType: ImplementationSpecific

           backend:

             service:

               name: admin-api

               port:

                 number: 80
Once this configuration has been applied, a new alb load balancer will be formed. We must construct a domain with the name we specified in the 'host' option and direct traffic to our load balancer from this host.
Admin-API autoscaling configuration
apiVersion: autoscaling/v2beta1

kind: HorizontalPodAutoscaler

metadata:

 name: admin-api-hpa

spec:

 scaleTargetRef:

   apiVersion: apps/v1

   kind: Deployment

   name: admin-api

 minReplicas: 1

 maxReplicas: 2

 metrics:

   - type: Resource

     resource:

       name: cpu

       targetAverageUtilization: 90
How Does Helm Come into the Picture?
When we want to make our k8s infrastructure less complex, Helm is quite helpful. Without this tool, running it on a cluster requires writing numerous YML files.
Additionally, we must consider the relationships among applications, labels, names, and so on. Helm, on the other hand, can simplify things. It functions similarly to a package manager, allowing us to make an app template, prepare it using short commands, and then launch it.
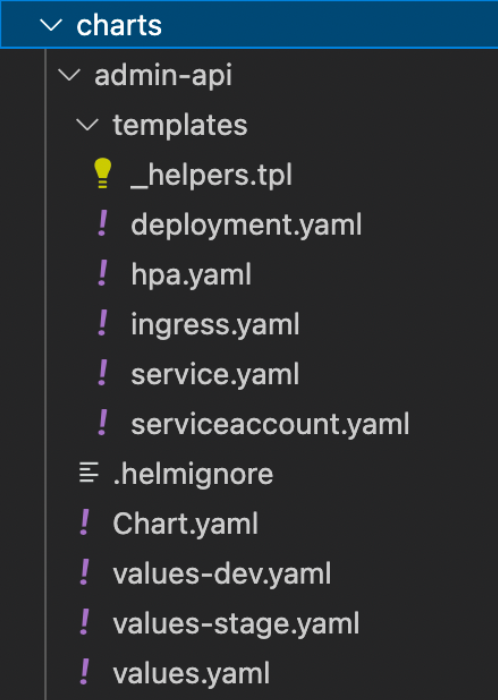
Let's create our templates using Helm.
Admin-API deployment (Helm chart)
apiVersion: apps/v1

kind: Deployment

metadata:

 name: {{ .Values.appName }}

spec:

 replicas: {{ .Values.replicas }}

 selector:

   matchLabels:

     app: {{ .Values.appName }}

 template:

   metadata:

     labels:

       app: {{ .Values.appName }}

   spec:

     containers:

     - name: {{ .Values.appName }}

       image: {{ .Values.image.repository }}:{{ .Values.image.tag }}"

       imagePullPolicy: {{ .Values.image.pullPolicy }}

       ports:

       - containerPort: {{ .Values.internalPort }}

       {{- with .Values.env }}

       env: {{ tpl (. | toYaml) $ | nindent 12 }}

       {{- end }}
Admin-API service (Helm chart)
apiVersion: v1

kind: Service

metadata:

 name: {{ .Values.global.appName }}

spec:

 selector:

   app: {{ .Values.global.appName }}

 ports:

   - name: {{ .Values.global.appName }}-port

     port: {{ .Values.externalPort }}

     targetPort: {{ .Values.internalPort }}

     protocol: TCP

 type: NodePort
Admin-API ingress (Helm chart)
apiVersion: networking.k8s.io/v1

kind: Ingress

metadata:

 namespace: default

 name: ingress

 annotations:

   alb.ingress.kubernetes.io/load-balancer-name: {{ .Values.ingress.loadBalancerName }}

   alb.ingress.kubernetes.io/ip-address-type: ipv4

   alb.ingress.kubernetes.io/tags: {{ .Values.ingress.tags }}

   alb.ingress.kubernetes.io/scheme: internet-facing

   alb.ingress.kubernetes.io/certificate-arn: {{ .Values.ingress.certificateArn }}

   alb.ingress.kubernetes.io/listen-ports: '[{"HTTP": 80}, {"HTTPS":443}]'

   alb.ingress.kubernetes.io/healthcheck-protocol: HTTPS

   alb.ingress.kubernetes.io/healthcheck-path: {{ .Values.ingress.healthcheckPath }}

   alb.ingress.kubernetes.io/healthcheck-interval-seconds: {{ .Values.ingress.healthcheckIntervalSeconds }}

   alb.ingress.kubernetes.io/ssl-redirect: '443'

   alb.ingress.kubernetes.io/group.name: {{ .Values.ingress.loadBalancerGroup }}

spec:

 ingressClassName: alb

 rules:

   - host: {{ .Values.adminApi.domain }}

     http:

       paths:

         - path: {{ .Values.adminApi.path }}

           pathType: ImplementationSpecific

           backend:

             service:

               name: {{ .Values.adminApi.appName }}

               port:

                 number: {{ .Values.adminApi.externalPort }}
Admin-API autoscaling configuration (Helm chart)
{{- if .Values.autoscaling.enabled }}

apiVersion: autoscaling/v2beta1

kind: HorizontalPodAutoscaler

metadata:

 name: {{ include "ks.fullname" . }}

 labels:

   {{- include "ks.labels" . | nindent 4 }}

spec:

 scaleTargetRef:

   apiVersion: apps/v1

   kind: Deployment

   name: {{ include "ks.fullname" . }}

 minReplicas: {{ .Values.autoscaling.minReplicas }}

 maxReplicas: {{ .Values.autoscaling.maxReplicas }}

 metrics:

 {{- if .Values.autoscaling.targetCPUUtilizationPercentage }}

   - type: Resource

     resource:

       name: cpu

       targetAverageUtilization: {{ .Values.autoscaling.targetCPUUtilizationPercentage }}

 {{- end }}

 {{- if .Values.autoscaling.targetMemoryUtilizationPercentage }}

   - type: Resource

     resource:

       name: memory

       targetAverageUtilization: {{ .Values.autoscaling.targetMemoryUtilizationPercentage }}

 {{- end }}

{{- end }}
The "values.yml," "values-dev.yml," and "values-stage.yml" files contain the values for the templates. The environment will determine which of them is used.
Let's look at few samples of dev env values.
Admin-API Helm values-stage.yml file
env: stage

appName: admin-api

domain: admin-api.xxxx.com

path: /*

internalPort: '80'

externalPort: '80'


replicas: 1

image:

 repository: xxxxxxxxx.dkr.ecr.us-east-2.amazonaws.com/admin-api

 pullPolicy: Always

 tag: latest


ingress:

 loadBalancerName: project-microservices-alb

 tags: Environment=stage,Kind=application

 certificateArn: arn:aws:acm:us-east-2:xxxxxxxxx:certificate/xxxxxx

 healthcheckPath: /healthcheck

 healthcheckIntervalSeconds: '15'

 loadBalancerGroup: project-microservices


autoscaling:

 enabled: false

 minReplicas: 1

 maxReplicas: 100

 targetCPUUtilizationPercentage: 80


env:

 - name: NODE_ENV

   value: stage


 - name: ADMIN_PORT

   value: "80
We must upgrade the chart and restart our deployment in order for the configuration to take effect on the cluster.
Let's investigate the GitHub Actions steps in question.
How to apply Helm configuration in GitHub Actions
GitHub actions are CI/CD services from GitHub. They provide straightforward work processes arranged as Yaml files which run configurable blocks of code based on GitHub events. Since they are integrated into GitHub, they reduce significantly the overhead in getting a CI/CD pipeline setup.
 - name: Admin image build and push

       run: |

         docker build -t project-admin-api -f Dockerfile.admin .

         docker tag project-admin-api ${{ env.AWS_ECR_REGISTRY }}/project/${{ env.ENV }}/admin-api:latest

         docker push ${{ env.AWS_ECR_REGISTRY }}/project/${{ env.ENV }}/admin-api:latest


     - name: Helm upgrade admin-api

       uses: koslib/helm-eks-action@master

       env:

         KUBE_CONFIG_DATA: ${{ env.KUBE_CONFIG_DATA }}

       with:

         command: helm upgrade --install admin-api -n project-${{ env.ENV }} charts/admin-api/ -f charts/admin-api/values-${{ env.ENV }}.yaml


     - name: Deploy admin-api image

       uses: kodermax/kubectl-aws-eks@master

       env:

         KUBE_CONFIG_DATA: ${{ env.KUBE_CONFIG_DATA }}

       with:

         args: rollout restart deployment/admin-api-project-admin-api --namespace=project-${{ env.ENV }}
Summary
In this article, we looked at infrastructure-building and Kubernetes cluster deployment steps for microservices. By using straightforward examples and avoiding further complexity with full configurations, I hope it was relatively easy to grasp.
Connect with me on LinkedIn and Twitter
Hasta la vista!