

When you work in IT operations, automation is a key part of your job.
You'll have various repetitive tasks you have to deal with, and you don’t want to waste your time doing something that can be done by a script.
Here are some great reasons to automate repetitive tasks:
- doing repetitive tasks doesn't help your career or develop your skillset at all
- there’s plenty of room for mistakes
- as I said before, you feel you’re wasting your time. And if you just asked someone else to do these tasks, so would they.
When is it time to automate a task?
Well, the more you advance along your career path, the more you'll understand when you can try to automate a process.
Based on my personal experience, you need to be able to answer these three questions:
1. How often do you perform this task?
Keep track of how many times you've performed the task during the last month. If it needs to be done every week or less, you should try to automate it
2. How long does this process take?
Try to estimate the average time you need to complete the task. If it is equal to or more than 30 minutes, I think it is worth thinking about how to automate it.
Just to give you an idea, let’s say you perform the task every day and it takes 30 minutes. That's 2.5 hours a week and 10 hours a month. Assuming you work eight hours per day you spend more than a day per month dealing with that task. When it comes to budgeting, that's a lot of money
3. How much does automation cost?
You need a cost estimation: how many hours do you need to develop the script? Do you need to use any third party services such as libraries, cloud services, and so on?
If you decide that the development is quick and not expensive, you can consider going ahead with the implementation.
How to Automate Tasks
Ok, let’s see now how you can automate a simple but frequent task.
When you work in IT operations, you'll need to generate reports or files with updated information for other departments quite often. Let’s say you’re asked to generate a file with some information about a specific GitHub profile.
GitHub offers APIs where you can get information about a single profile:
We can write a quick script with Node.js and Axios to call the endpoint, get the information we need, and create a text file to store it in a specific directory.
This is our script:
const axios = require('axios');
const fs = require('fs');

axios.get('https://api.github.com/users/<USERNAME>')
  .then(response => {
    const file_text = response.data.login + " " + response.data.name
    const nome = Date.now()
    console.log(response.data.login);
    console.log(response.data.name);
    fs.writeFile('./fileCreated/' + nome + '.txt', file_text, err => {
      if (err) {
        console.error(err)
        return
      }
    })

  })
  .catch(error => {
    console.log(error);
  });
As you can see, once we call the endpoint, we log the username and name to the console. Then we print this information in a text file named by the timestamp, and save in a directory called “fileCreated”.
How to run the script periodically
There are tons of tools that help you run a script at any given time. For this tutorial, I decided to use Azure WebJobs.
It is a service included in Azure’s Pass solution, “Web App”, and it allows you to run scripts, manually or periodically, written with the world’s most popular languages such as Java, Python, .NET, and, of course, NodeJs.
You can find the full list here.
How to use Azure WebJobs
I assume you already created your Web App. Just consider that, at the time I’m writing this tutorial, Webjobs are available only on Windows Web Apps.
If you need help getting started, I suggest you check out this tutorial by Microsoft.
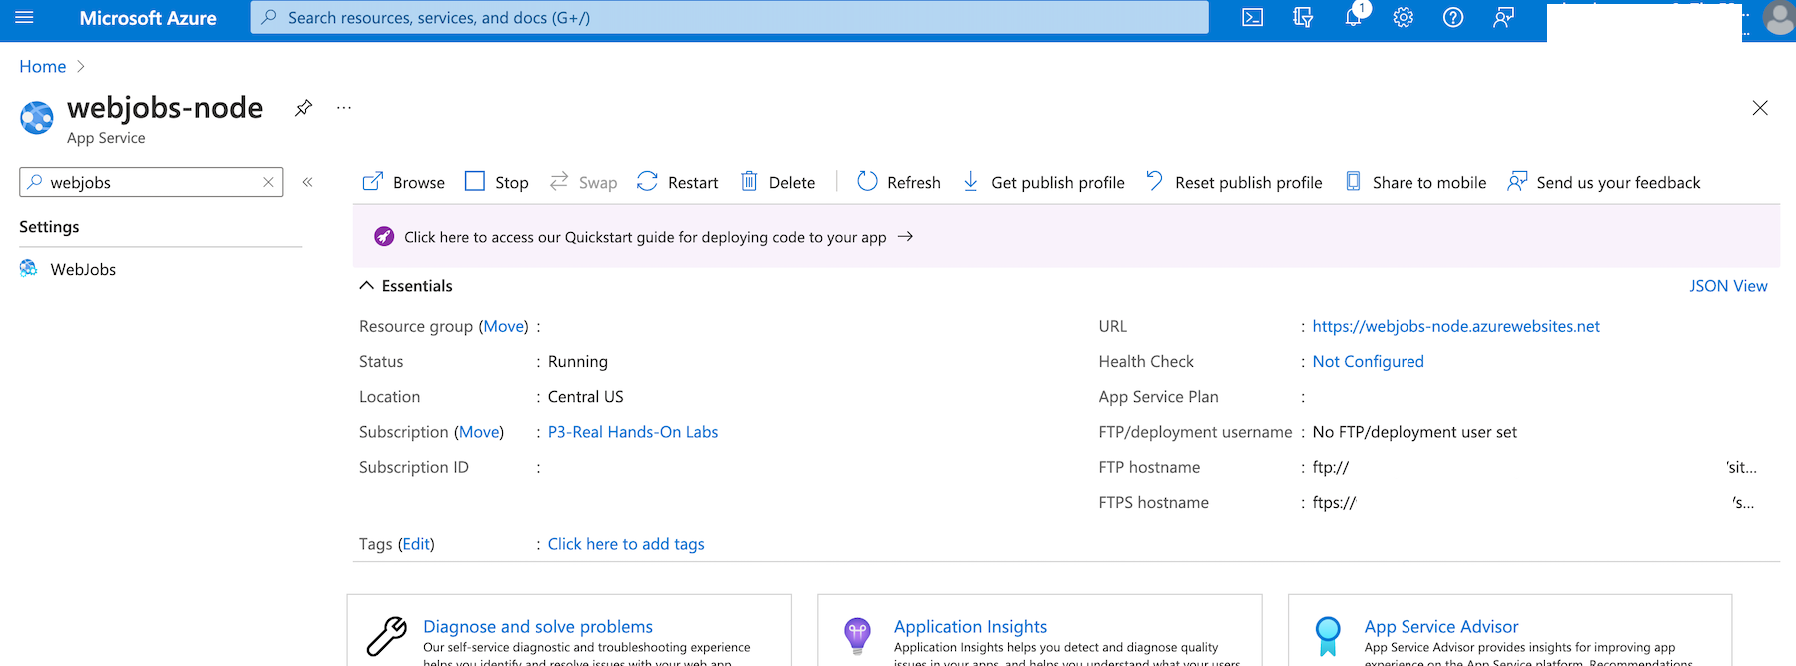
On the WebApp menu (left sidebar) I filtered options by typing “WebJobs” and clicking on it:
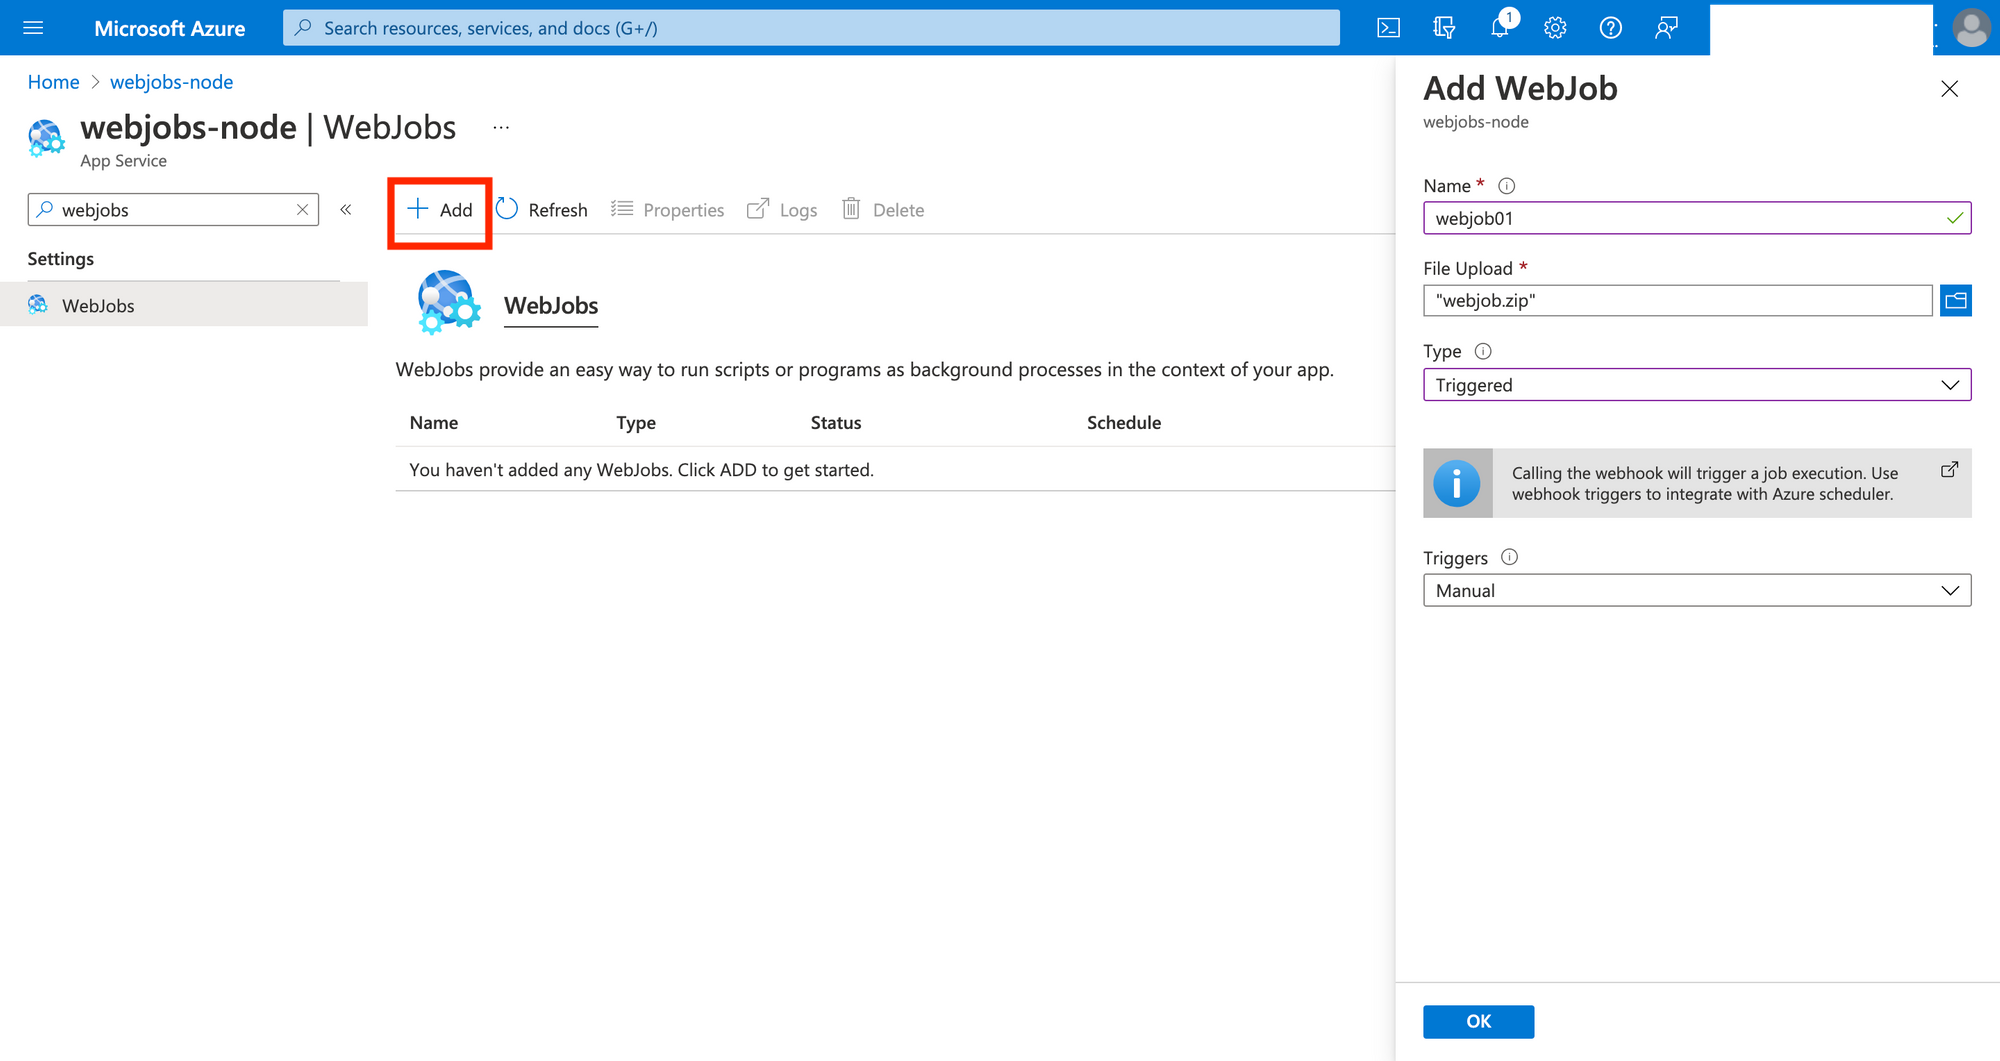
Once on the WebJobs panel, I clicked “Add” to add my script (I zipped my file with all its dependencies and called it “axiosexample”). Then,
- I entered the name
- I uploaded the zipped file
- I chose “triggered” since I don’t want this task to be performed continuously
On the “Triggers” option, I chose “Manual” because I wanted to run it now to show you the result for this tutorial. But you can schedule the WebJobs by choosing “Scheduled” and specifying the CRON expression. Check out this tutorial by Microsoft to see how to write a CRON expression.
If you want to learn more about CRON expressions, the internet is full of literature about it. You can simply start from the Wikipedia page, check out this tutorial on freeCodeCamp, and then continue with other useful content such as Cronitor.
Next, click “Ok”.
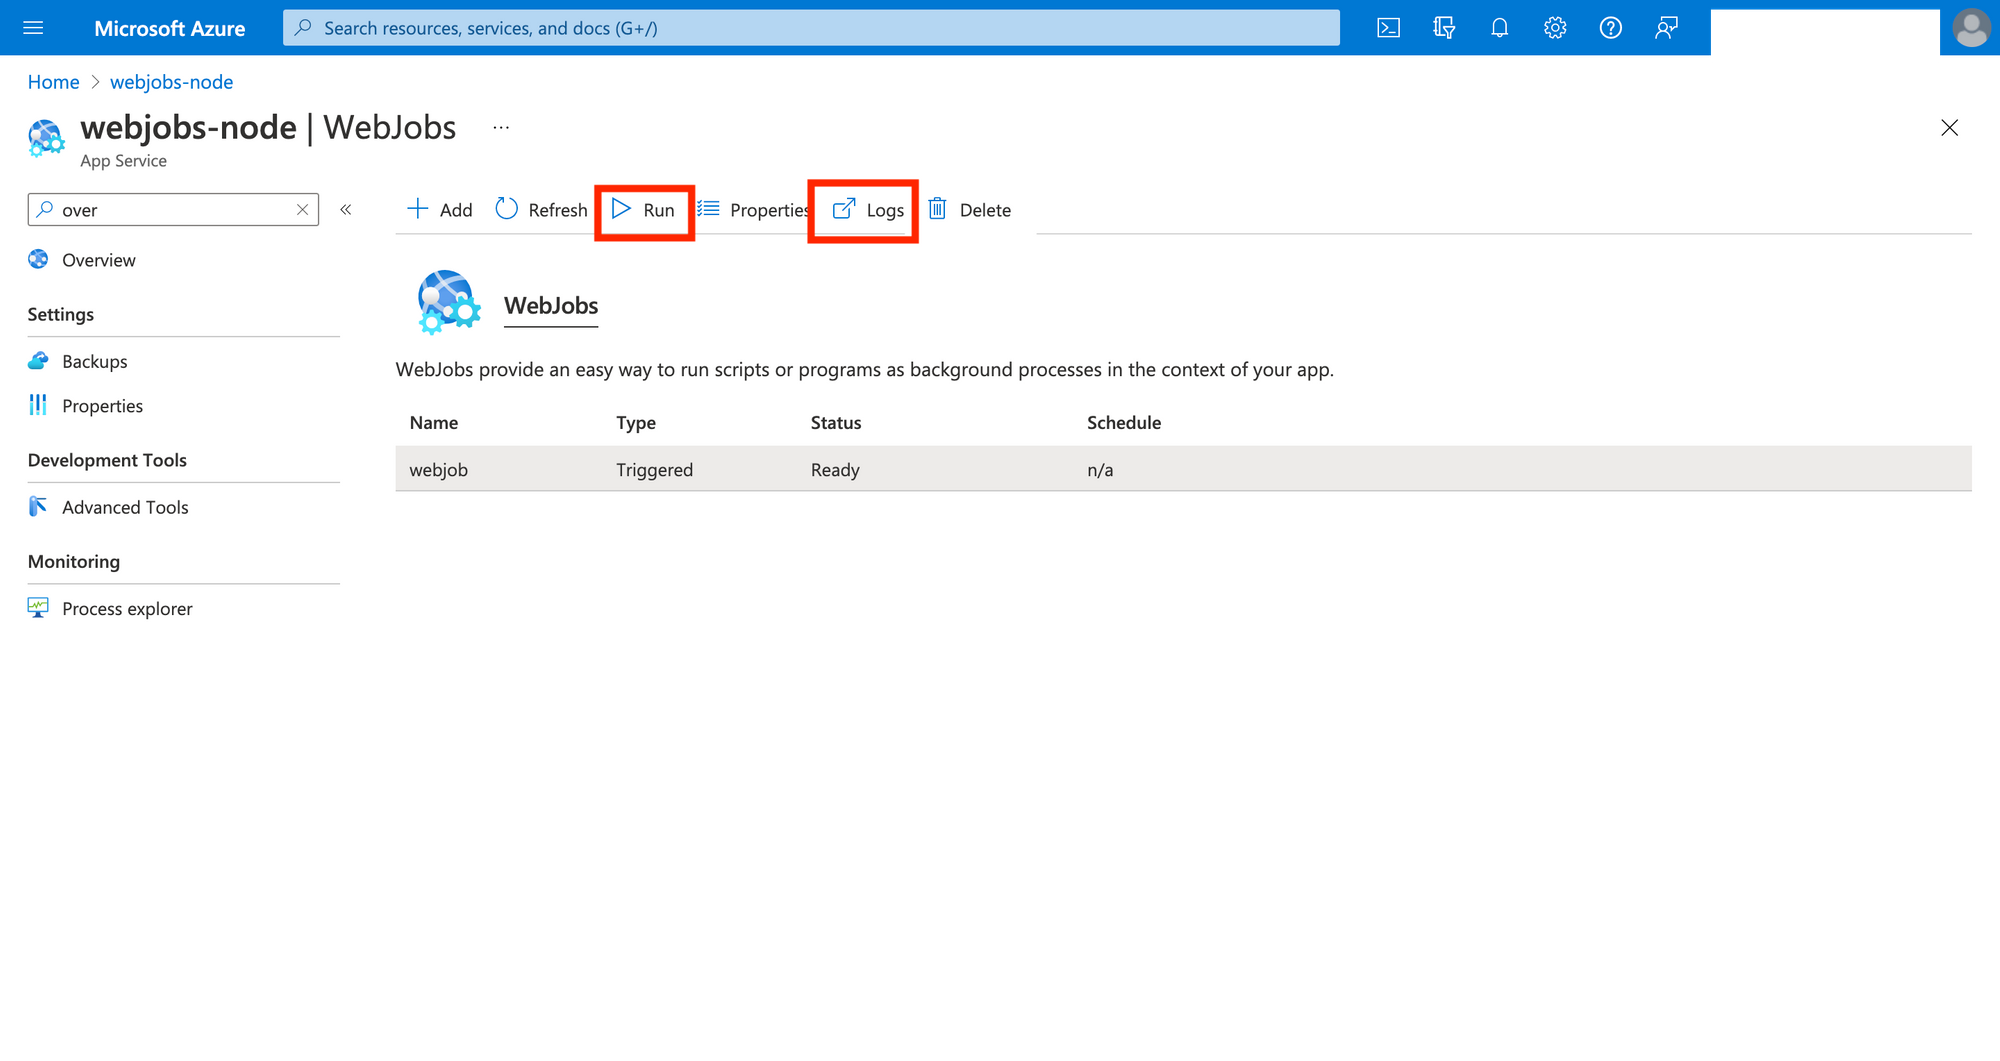
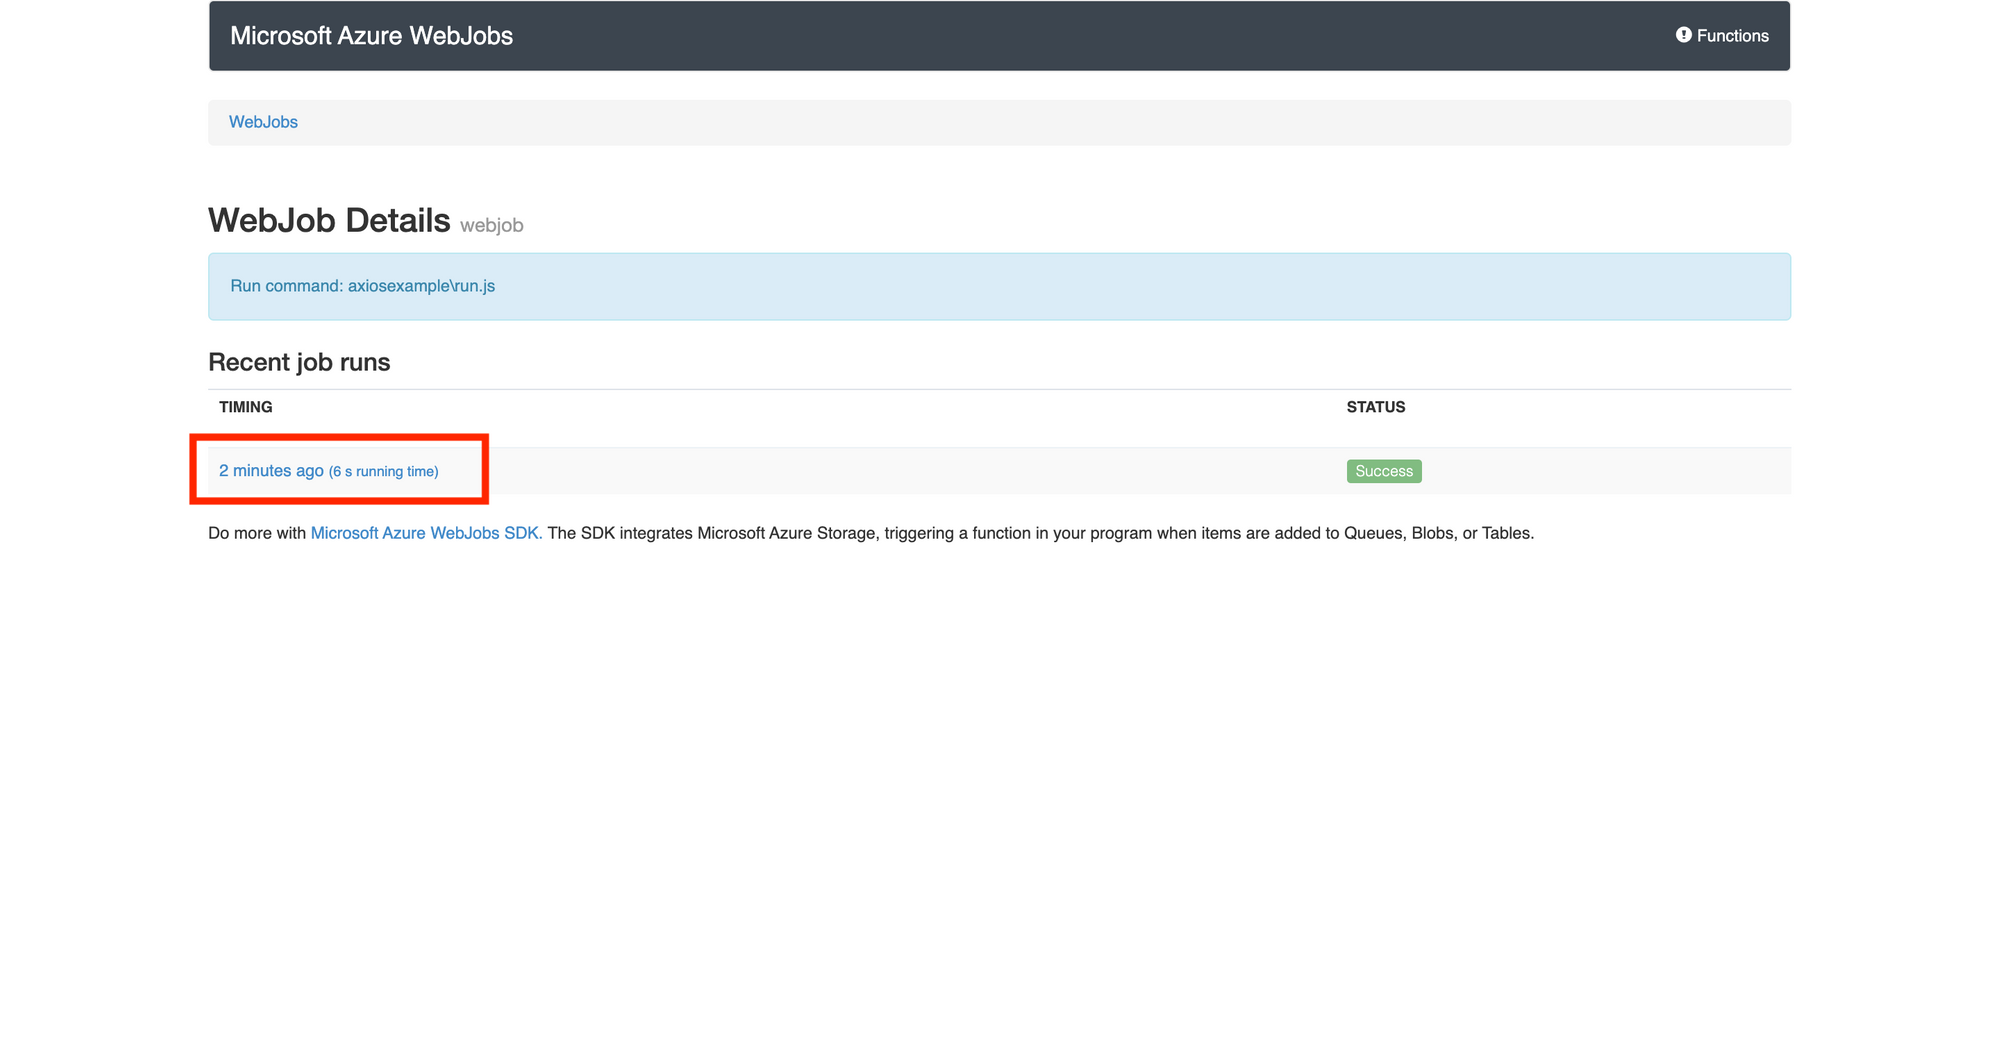
Once saved, hit “Run” to perform the task immediately. Then click “Logs” to see the results of our WebJobs.
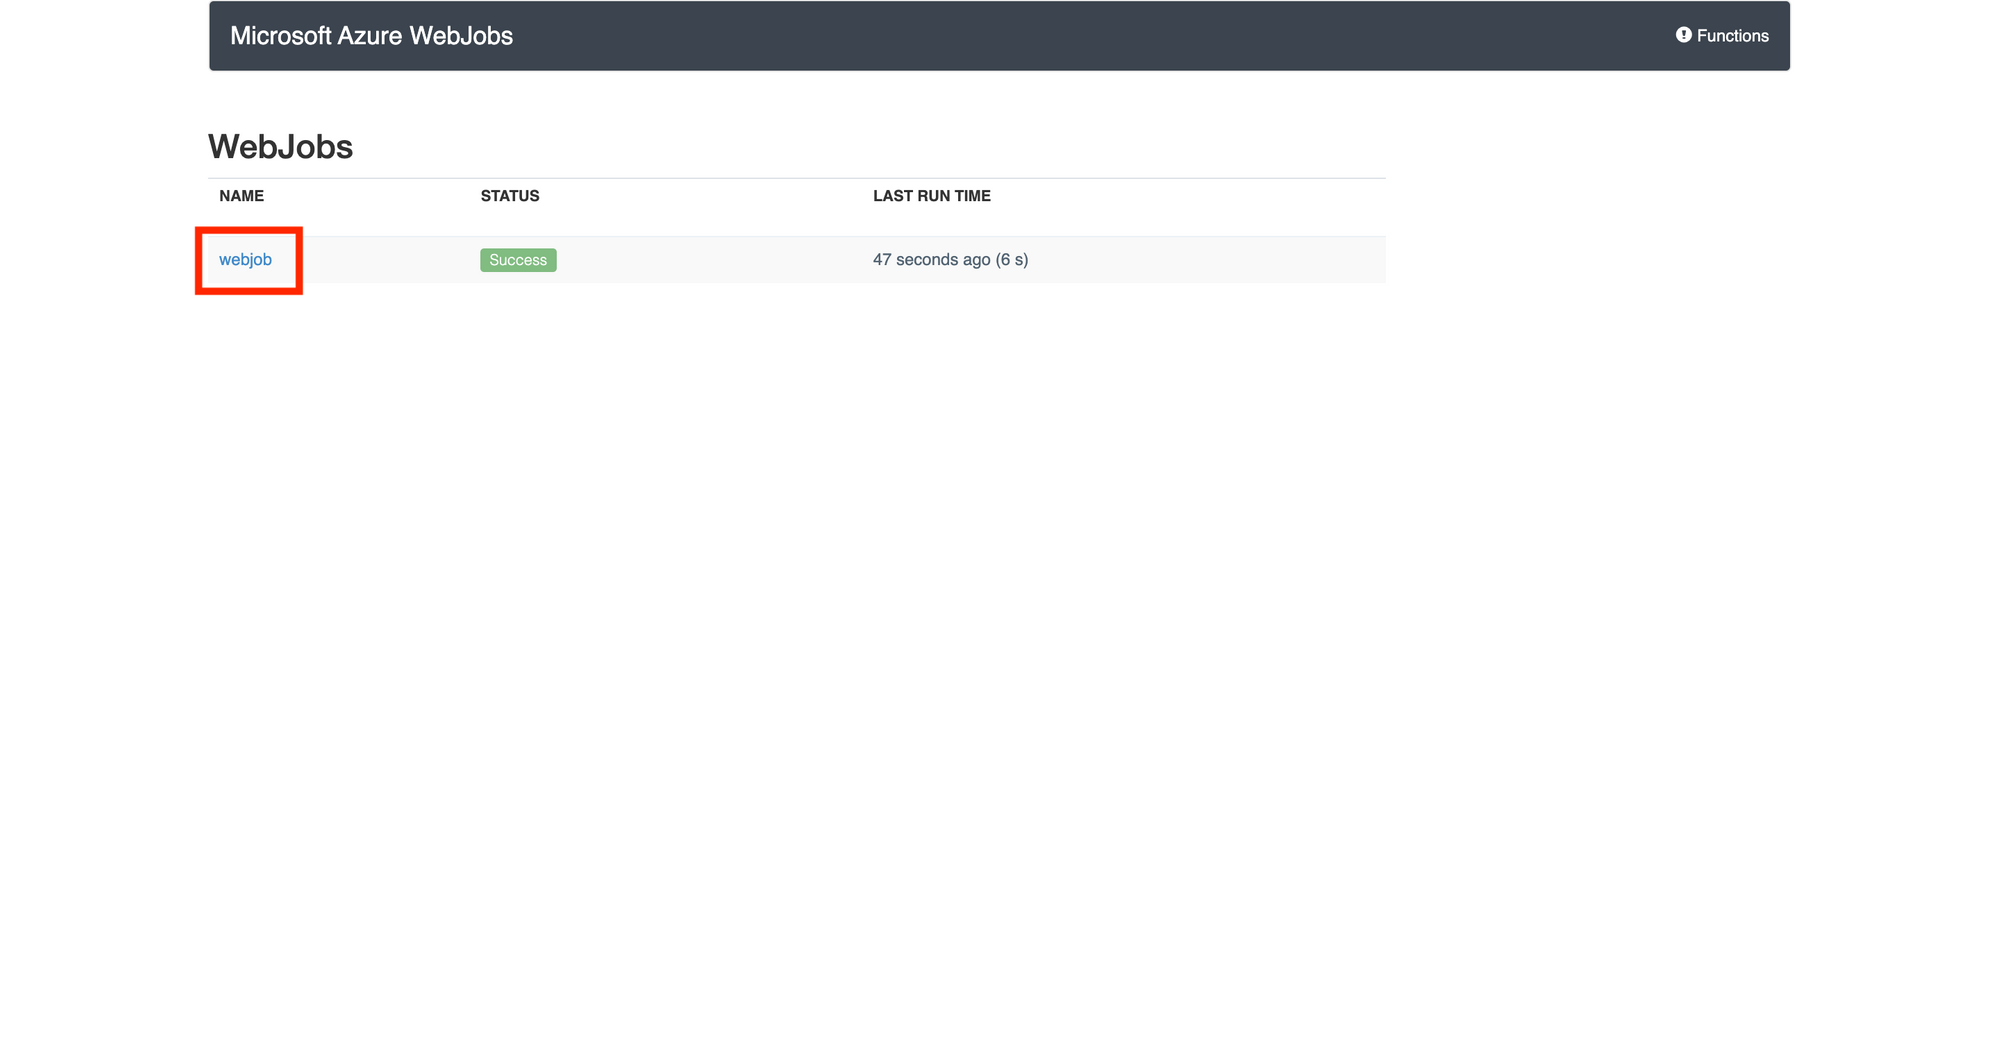
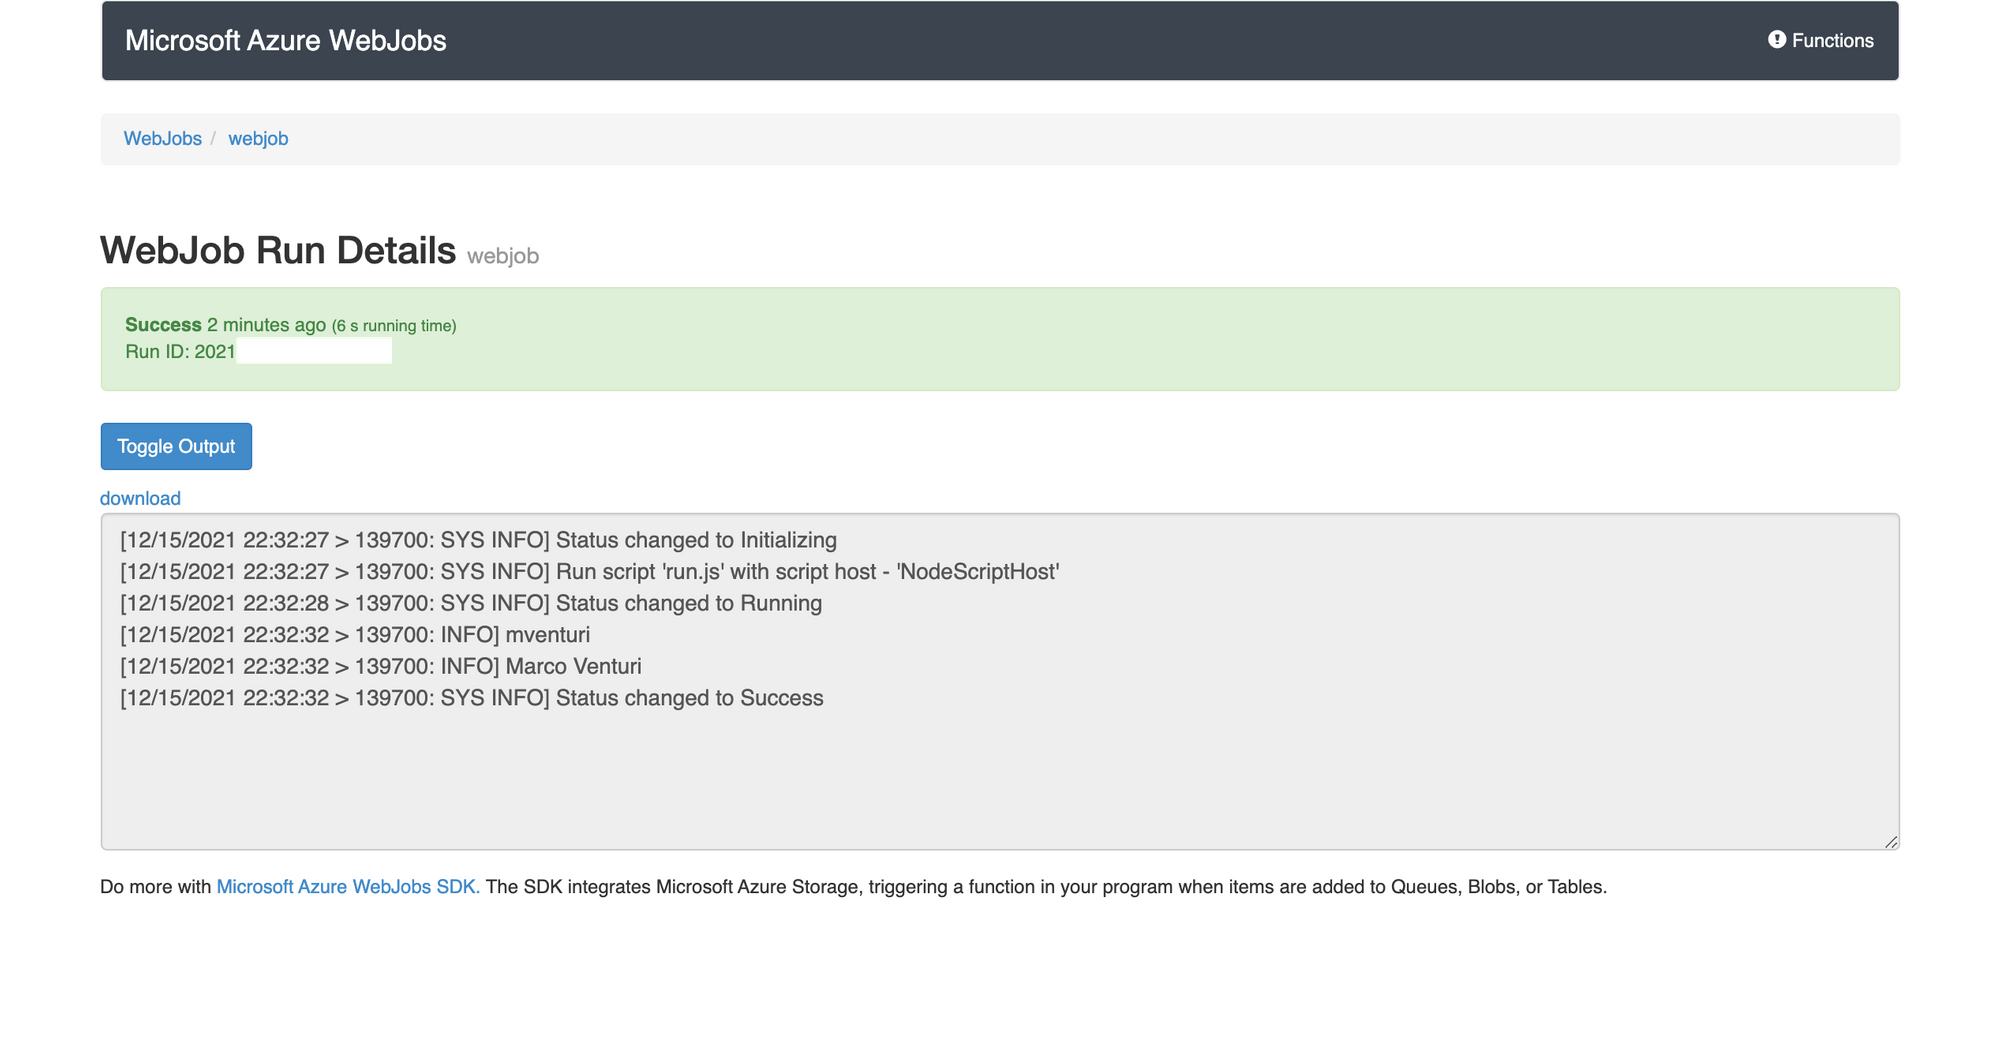
Once on the “Logs” page, hit webjobs to get further details:
Next let's set the “Timing” of our WebJobs:
And we see the log messages, like this:
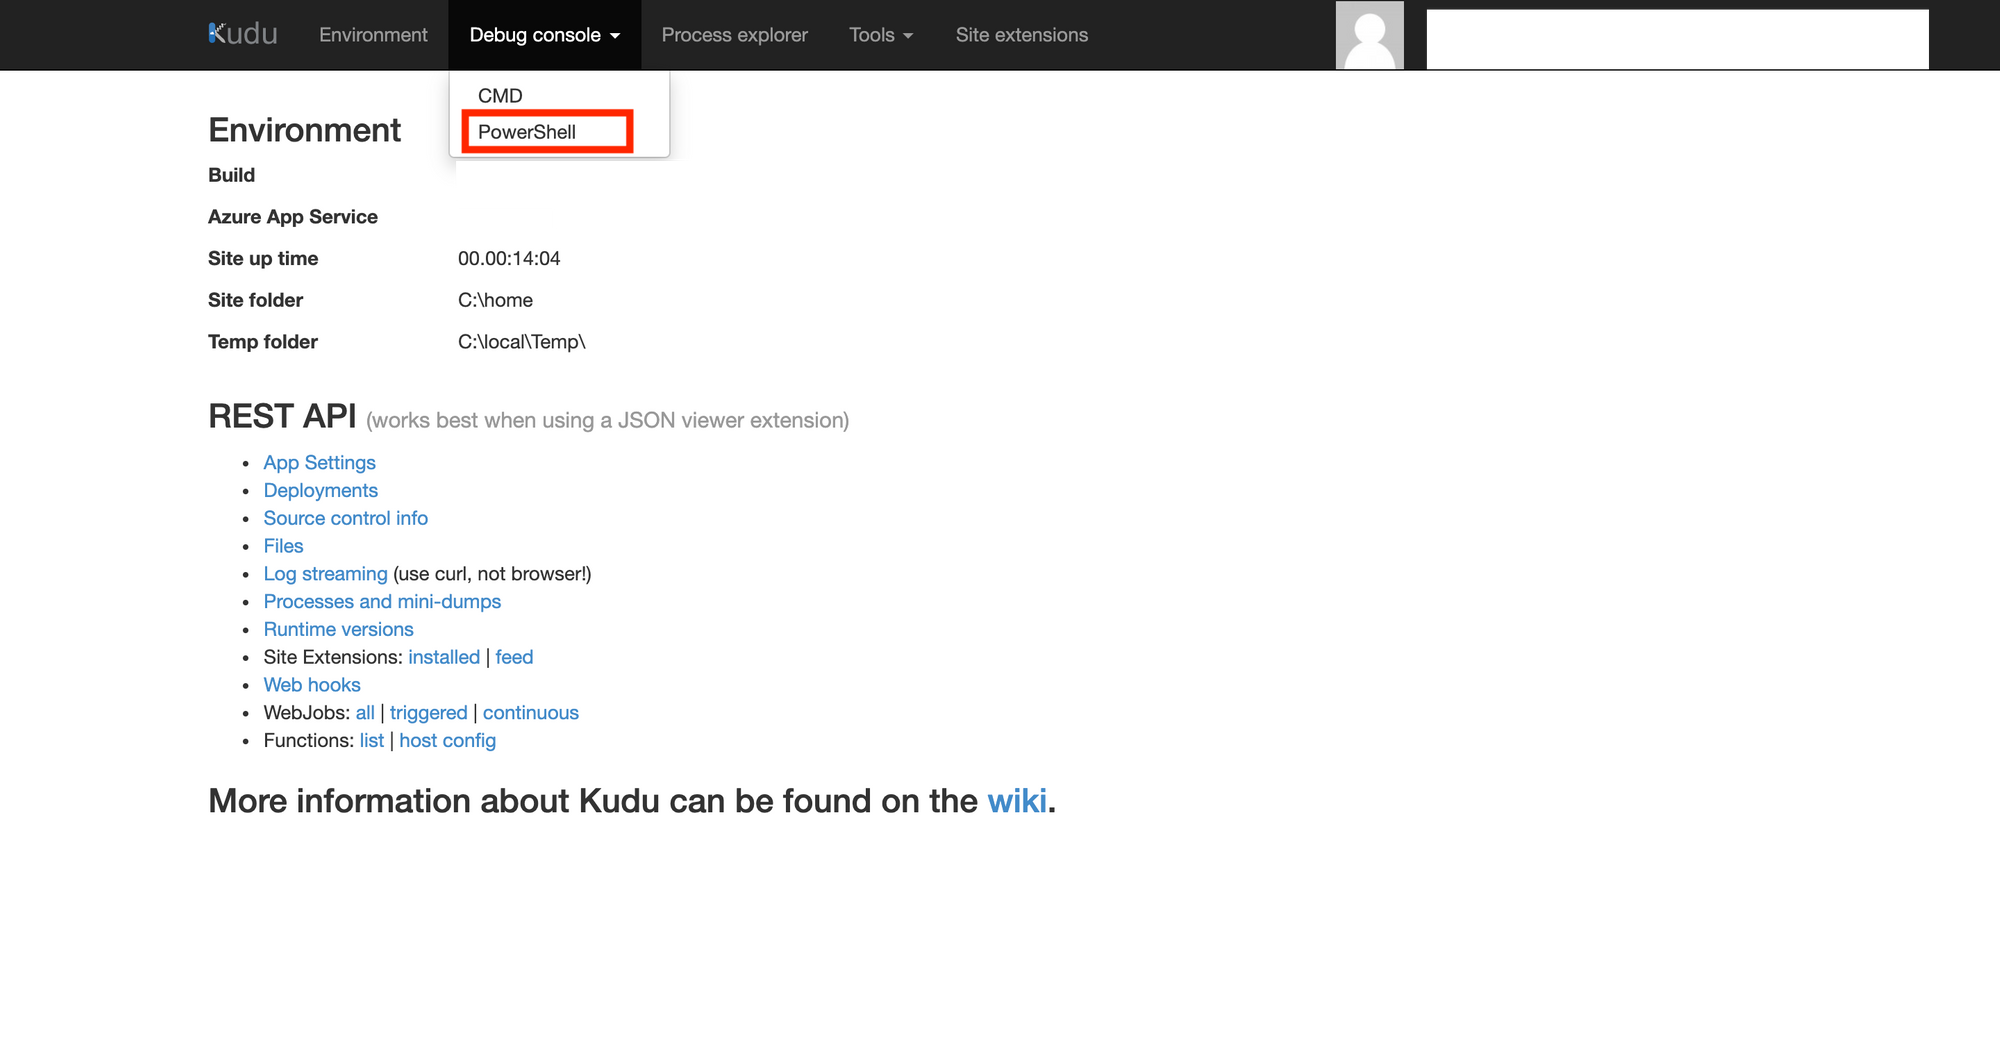
Now, by using the “Kudu” service available in our Web App, go to the directory where you saved your file via Powershell.
“Kudu” is a very useful service available on Azure’s Web Apps that allows you to get a lot of information about the Web App itself such as App settings, Run Commands, and much more. You can see the full list here.
You'll reach the directory you created. The path is:
\home\site\wwwroot\App_Data\jobs\triggered\webjob\axiosexample\fileCreated
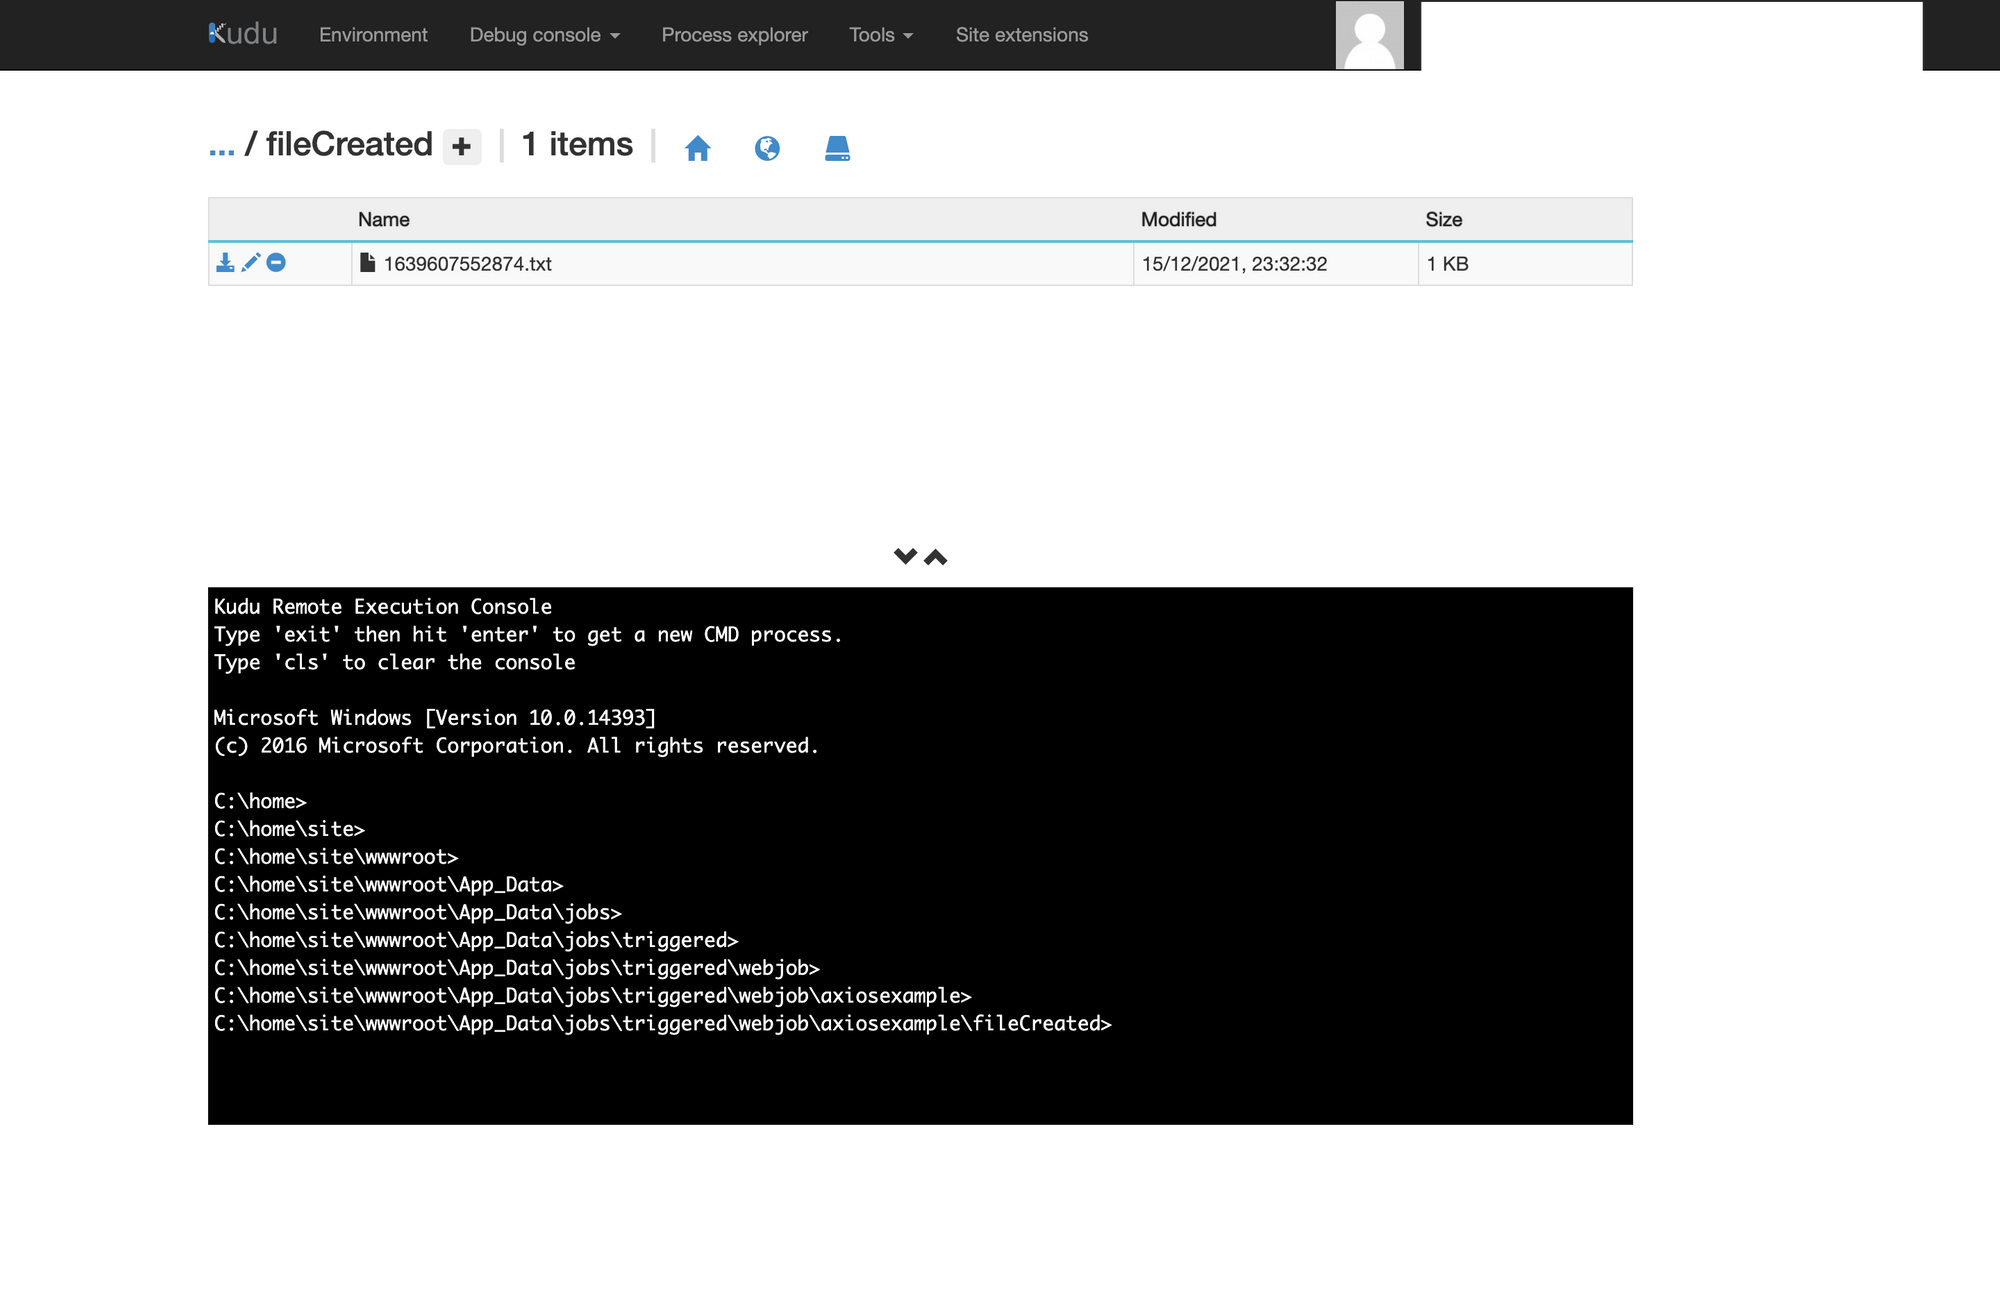
Once you reach the file, just open it and this is what you should see:

Wrapping Up
So, this is a quick example of how you can simply automate a task with a few lines of JavaScript and Azure Webjobs.
Just look around you and see what you find repetitive and time consuming. Then, think how you could put those actions into a script and that's it!
Automation is all around you! 😀 Don't forget: the more you automate, the more time you have to think about more automations... Feel free to have a look at my repo on GitHub.