
By Aaron Katz
I wanted to set up a fun project for myself to learn some new technologies. And this time I decided I wanted to learn a bit about Static Site Generators (SSGs).
My goal was to build a blog using an SSG and have it deploy any time the code repository changed. You can see the result at https://caliburnsecurity.com.
Blog Requirements
Below are the requirements I put together when determining what I wanted my blog to support.
- Support Markdown for content generation
- Syntax highlighting
- Code line numbering
- "Serverless"
- Ready made themes/plugins - I am so NOT a frontend developer
- SEO capabilities
- Browse by keyword/category
- Search support (because this is statically generated, searching is through Google's index - there are other articles that discuss how to add a dynamic JavaScript powered search)
- RSS support
- Version controlled
- Static - no dynamic content (with a neat side effect of shrinking the site's attack surface and improving security)
So what actually is a Static Site Generator?
In short, an SSG is a framework designed to manage your website and transform it into a site serving only static pages.
Why use a SSG to build the blog?
One thing that took me some time to comprehend was why I would use a static site, if I already had a CMS. There were so many articles online about using an SSG with a headless CMS...but why?
Best I can tell, the benefits are simply that you have more flexibility using familiar frameworks such as React or Vue, while using a CMS to handle all content.
However, as I am by no means a frontend developer, I was close to scrapping this project. I thought "Oh well, I should just use Ghost - it's only $5/month if hosted on a platform like DigitalOcean, and is an all-in-one platform to serve content as well as manage the content".
However, I really wanted to try to learn something new, and see if I could just deploy a blog for free using only Markdown.
As always ends up happening, what I was hoping would take a few hours took quite a bit more time as I went down the rabbit hole of research into various technologies.
I played around with several different technologies, such as (not all of these are SSGs, more on that later):
- Pelican (Python)
- Hugo (Go)
- Hexo
- Gridsome (Vue - JS)
- VuePress (Vue - JS)
- Ghost
- Gatsby (React - JS)
- Jekyll (Ruby)
Why I Chose Hugo
I won't go in too much detail on all of the technologies I looked at. But in general, I found Hugo to be super quick to set up and build, and just the SIMPLEST of all the options.
While I know this is similar to Jekyll, I really just didn't want to deal with configuring a Ruby environment, and the speed of Hugo left everything else in the dust.
How to Start Building the Blog
For this exercise, let's build a static blog hosted by Netlify (free!).
Note: I'll be using PowerShell on my Windows box for this tutorial, so please recall that if copy/pasting.
Make sure you have these dependencies:
- Git
- Visual Studio Code (or your preferred editor)
- Hugo binary
Here's a high level overview of our workflow:
- Download/Install Hugo
- Create a Hugo project
- Add and configure a theme
- Add to Git
- Deploy to Netlify
- (Optional) Configure the free Netlify CMS
Download or install Hugo
To install Hugo, I went over to their GitHub Releases page and downloaded their standalone Windows x64 binary. I placed it in my Projects directory, where we will be creating our site (you can always install it properly/add the binary to your PATH, but I wanted quick).
How to Create the Hugo Site
To create a new site, simply run the below commands:
.\hugo.exe new site hugo-blog
mv .\hugo.exe .\hugo-blog
cd .\hugo-blog
.\hugo.exe server -D --gc
We now have our project created, and have just started the Hugo server. We used the -D flag to tell Hugo to show draft content, and I typically add in --gc to ensure that cleanup is run each time by clearing the cache.
You can access your site at http://localhost:1313.
Understanding the directory structure
You should now see the following directory structure:
|__archetypes
|__assets *this will not show up by default
|__config *this will not show up by default
|__content
|__data
|__layouts
|__static
|__themes
|__config.toml
- archetypes: Content template files with pre-configured front matter. We won't really be touching this.
- assets: Store any files processed by Hugo Pipes. This is out of scope for this tutorial.
- config: Optional directory to store configuration files. We won't be doing anything too crazy, so we will just use the default config.toml file.
- content: This is where your content lives - your posts and pages. The top level folders within this directory are treated as a section.
- data: Contains configuration files used by Hugo. I never had a need to touch this directory.
- layouts: Stores partial or full page HTML templates for the site. Anything in here can overwrite a corresponding entry from your theme, allowing you to customize the theme without modifying the theme's actual files.
- static: Store any static content, such as images, CSS, or scripts. Anything in this folder is copied as-is, without any modification or interpretation by Hugo. This is where you will store your media, such as images, for reference in your blog posts.
- themes: The directory where you will install any Hugo themes.
- config.toml: The default site configuration. You can use a separate directory if you want to separate different environments.
How to Add Your First Theme
For this blog, we will use the tale theme for Hugo. Run the following commands from the root of the project:
git submodule add https://github.com/EmielH/tale-hugo.git .\themes\tale
We will NOT be editing any files from the theme, but will make all modifications in the layouts folder discussed above. This will let us always update the submodule to update our theme without worry that we will overwrite any changes we have made.
To initialize the theme, edit the config.toml in your root directory and add the following lines (while also editing the defaults):
# Theme Settings
theme = "tale"
[params]
  Author = "Aaron Katz" # Add the name of the author (this theme only supports one author)
[author]
  name = "Caliburn Security" # Used by the foot copyright
There we go, the theme is now active! (Note that in many cases, themes will require you to copy and paste the theme's theme.toml file into your config.toml)
Go ahead and check out your page – every time you save a file Hugo rebuils the site live.
How to modify theme files
One issue with the current theme is that non-post content will be displayed in the homepage list.
To change this, let's copy the .\themes\tale\layouts\index.html page to .\layouts\index.html.
Once there, replace: {{range (.Paginate .Site.RegularPages).Pages}} with {{ range where .Paginator.Pages "Section" "post" }}. This will ensure only the "post" section will be displayed in the list.
I also wanted to add a brief footer, so go ahead and create a new file at .\layouts\footer.html and add the following code:
<footer>
<span>
© <time datetime="{{ now }}">{{ now.Format "2006" }}</time> {{ .Site.Author.name }}
</span>
</footer>
How to Add Google Analytics
I also wanted to add some Google Analytics to my blog, and I noticed the theme didn't incorporate this functionality.
Luckily, Hugo makes adding analytics extremely simple. Open up the config.toml file and add the following line:
googleAnalytics = "" # The UA-XXX number from Google Analytics
Once the configuration is saved, copy the .\themes\tale\layouts\partial\head.html file to .\layouts\partial\head.html and add the following code right below the head tag:
{{ template "_internal/google_analytics_async.html" . }}
There we go, now we have Google Analytics working. Cool!
How to Write Content
Let's add a nice About page so people know everything there is about me. :)
.\hugo.exe new about.md
To ensure that this page is added to the main menu, add the following line to the page's front matter: menu: main.
Note: To build Hugo, which will generate the content under the .\public folder, simply run .\hugo.exe
What is front matter?
This was a new term for me. Essentially, front matter is just structured metadata for your content.
By default, your template will add the following metadata fields to each page or post you create:
- title
- date
- draft
Other potentially useful front matter elements are:
- description - This allows you to enter a description for the content.
- expiryDate - Set a datetime for when the content should no longer be published.
- keywords - The meta keywords for the content.
- lastmod - The datetime for when the content was last modified (if you are using the enableGitInfo configuration command, this will be automatically set as the last time the file was mofieid in Git)
- markup - When set to "rst", you can use reStructuredText instead of Markdown (this feature is experimental)
- publishDate - Set a date in the future for the content to be displayed.
- slug - The tail of the output URL. Defaults to the filename if not specified.
- summary - The text used when providing a summary of the article. I find this useful if I don't want the first paragraph to appear in the summary, which is the typical default.
- - Use the plural form of the taxonomy index, such as tags or categories.
How to create an archetype for blog posts
Let's go ahead and change the default front matter we see for blog posts. In the archetypes folder, create a new file called posts.md and add the following:
---
title: "{{ replace .Name "-" " " | title }}"
date: {{ .Date }}
draft: true

slug: {{ .File.BaseFileName }} # Will take the filename as the slug. Feel free to change this to any format you like.  I like including this, so that I remind myself I have the option to change if I want.

summary: "" # Remove this if you want Hugo to just use the first 70 (configurable) characters of the post as the summary.
description: ""

# Lists
keywords:
tags:
categories:
---
Now let's do one final build with .\hugo.exe and get ready to configure our Git repository.
How to Configure Git
Time to configure the project for Git:
git init
git remote add origin <YOUR GIT URL>
git push -u origin master
Great, we now have our code stored within our repository, and we are ready for deployment!
How to Deploy Your Blog
Now that we have our site stored in Git, it's time to deploy! Almost done - I'll now show how to deploy to Netlify in under 10 minutes.
First, we need to create the Netlify application (feel free to create an account using any method available):
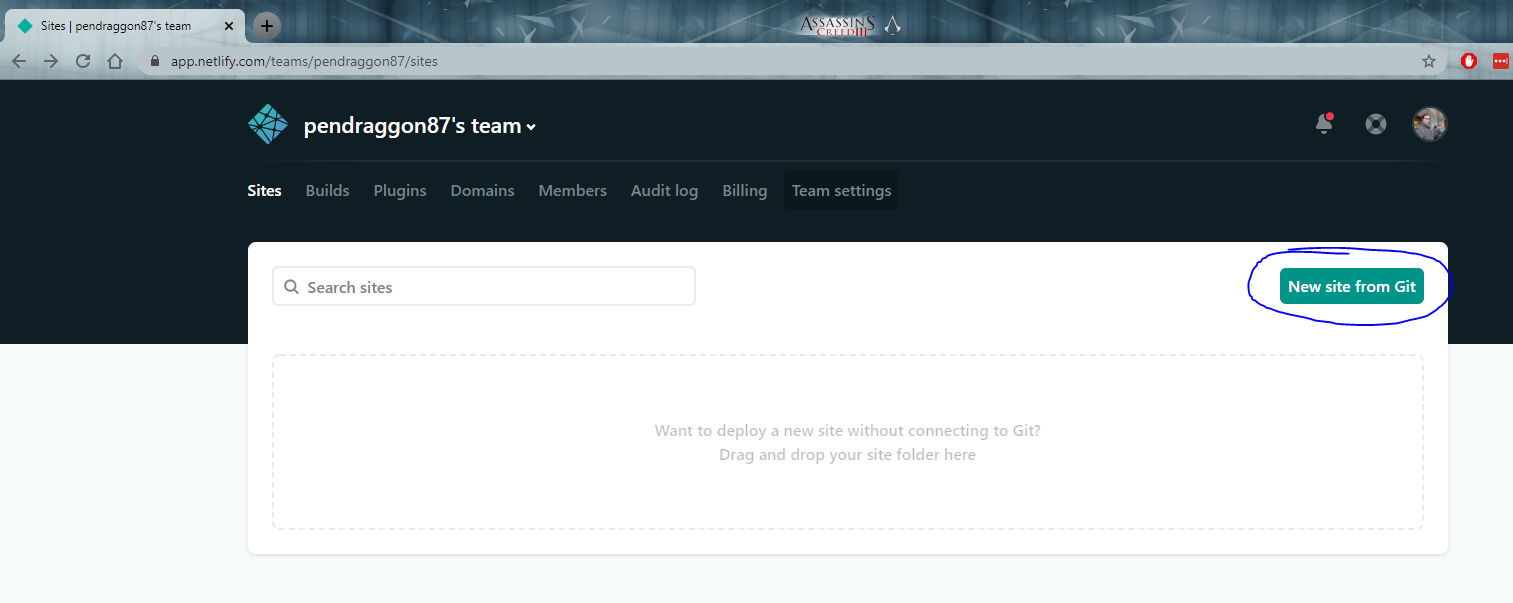
Next, we need to create the site and tell it where our Git repository is for our Hugo content:
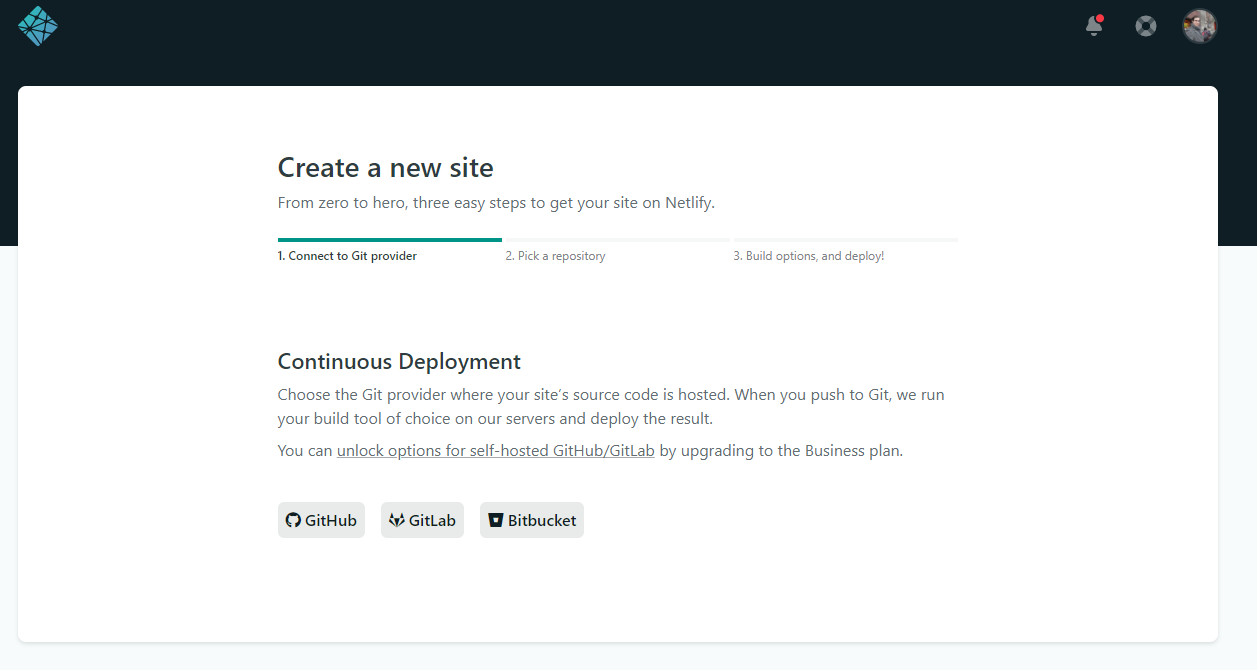 Tell Netlify where your site is located
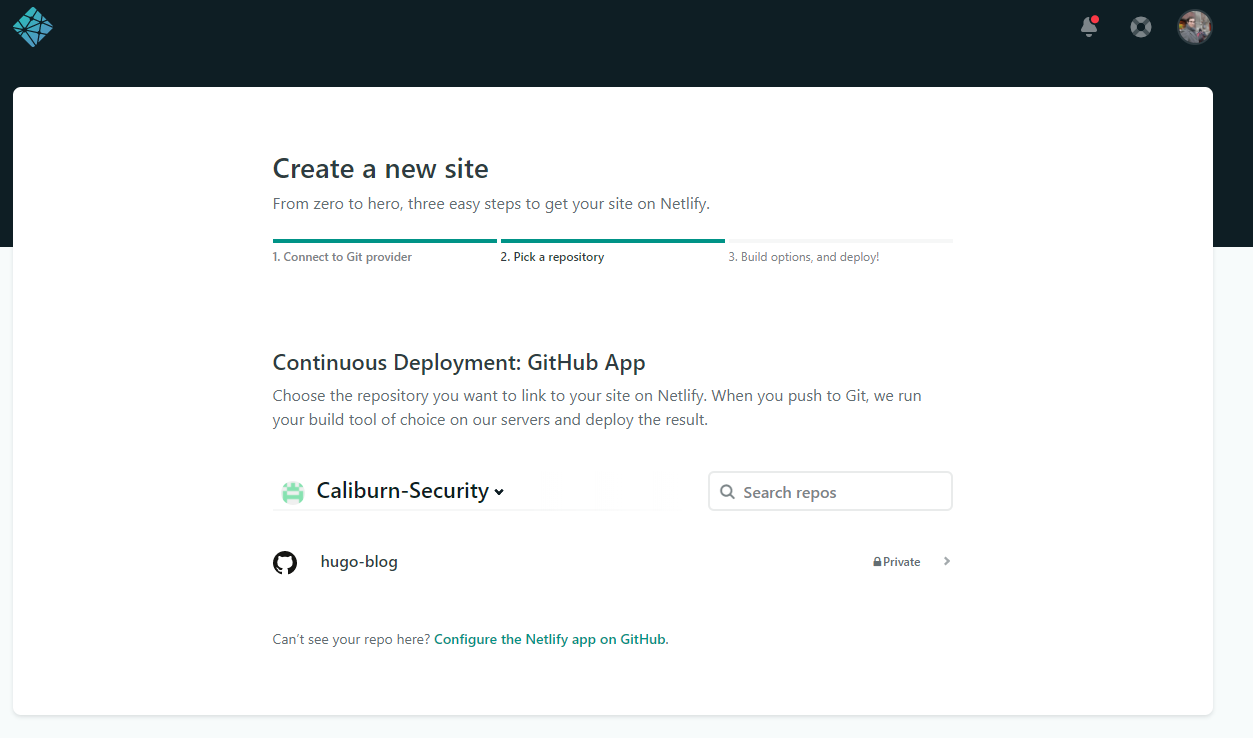 Select the repository
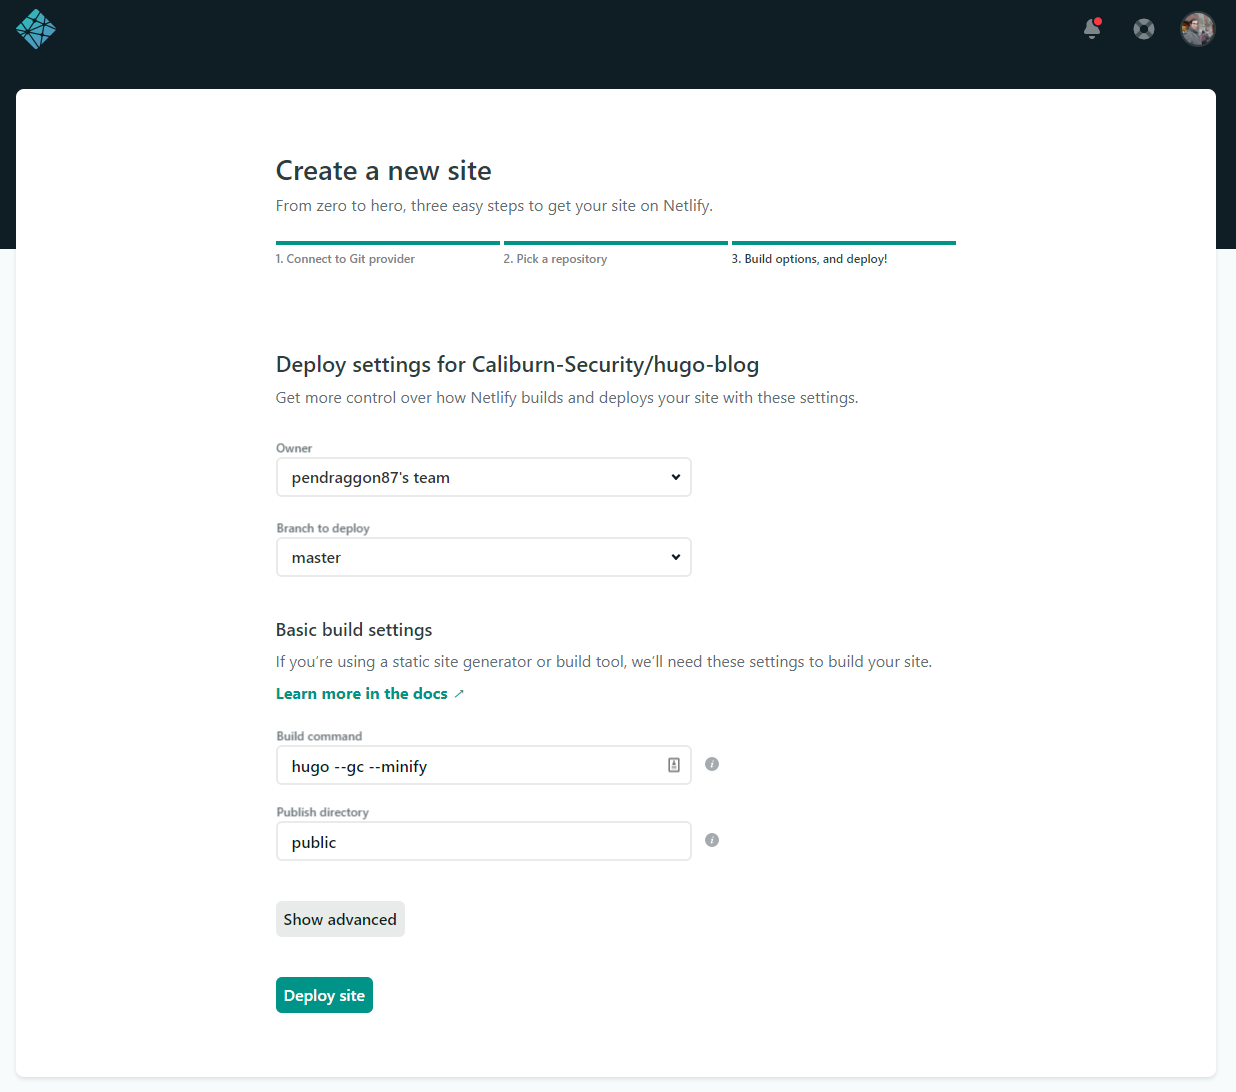 These can be left at the default settings
Next up, we will set up a custom domain for our site:
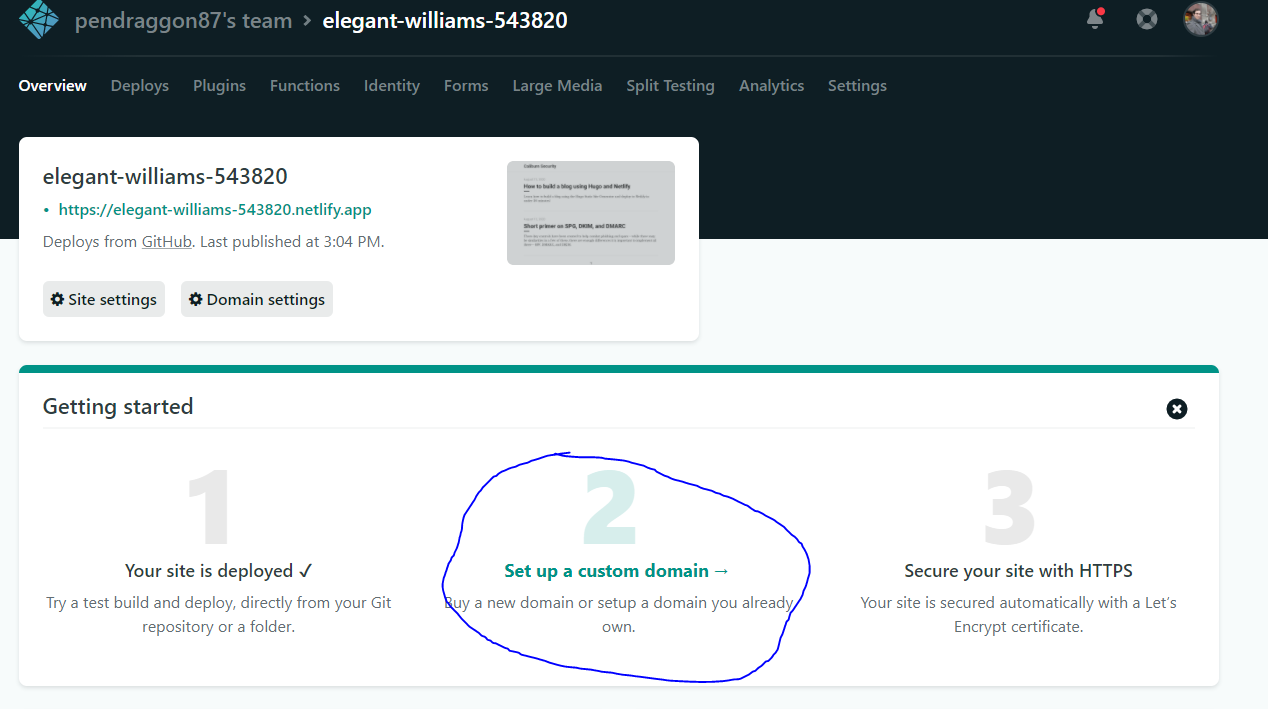 Select the custom domain option
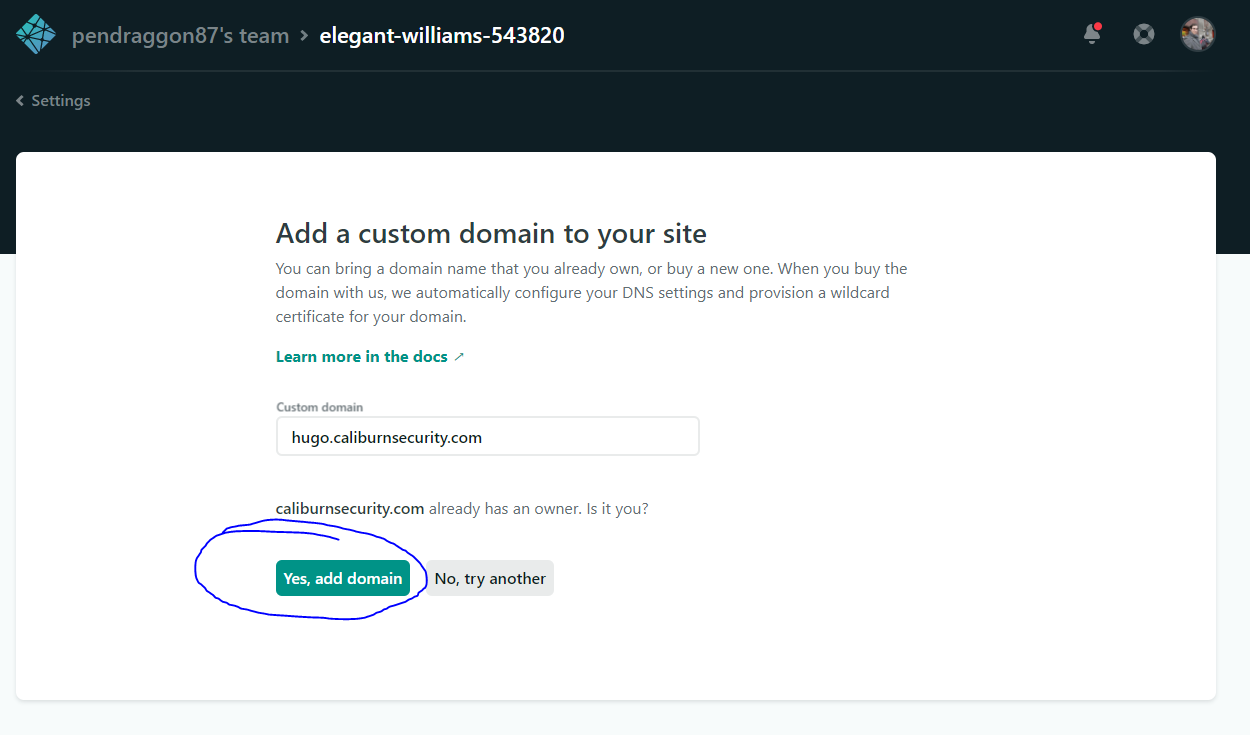 Enter your custom domain
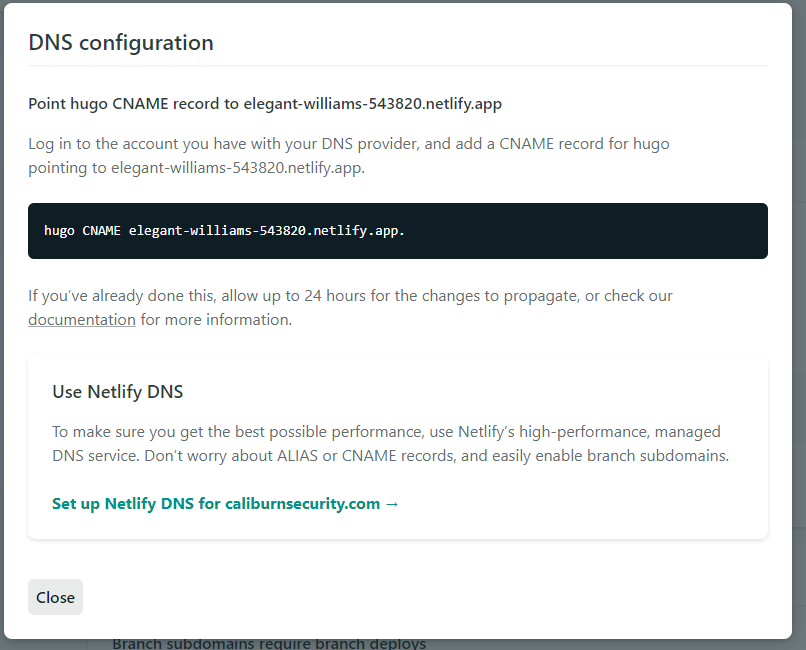
You should now see your domain with a message saying to Check DNS configuration. Click on that, and enter the provided DNS record information into whichever service provider manages your DNS records:

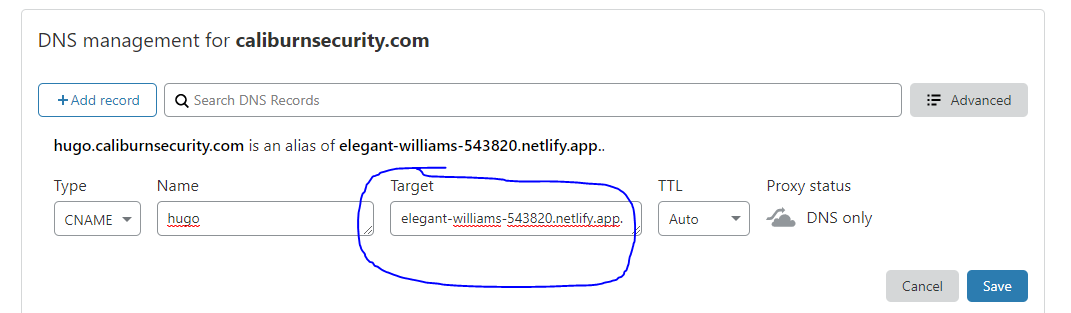 Example configuration within my Cloudflare account
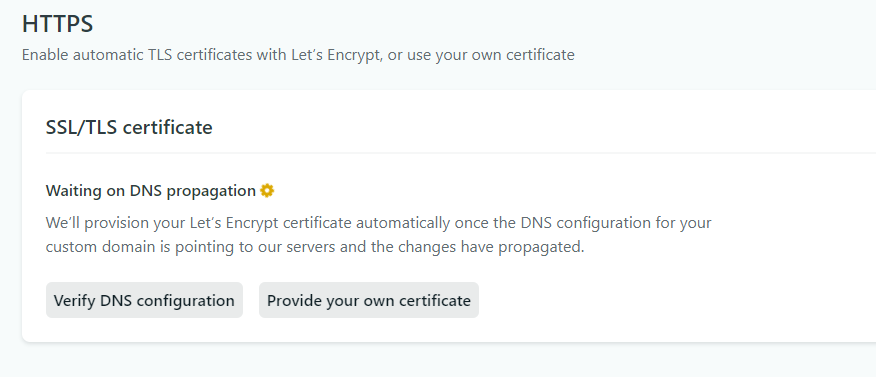
Once complete, wait a few minutes for the DNS settings to propagate, and then select Verify DNS configuration:
Behold, your site is now live!
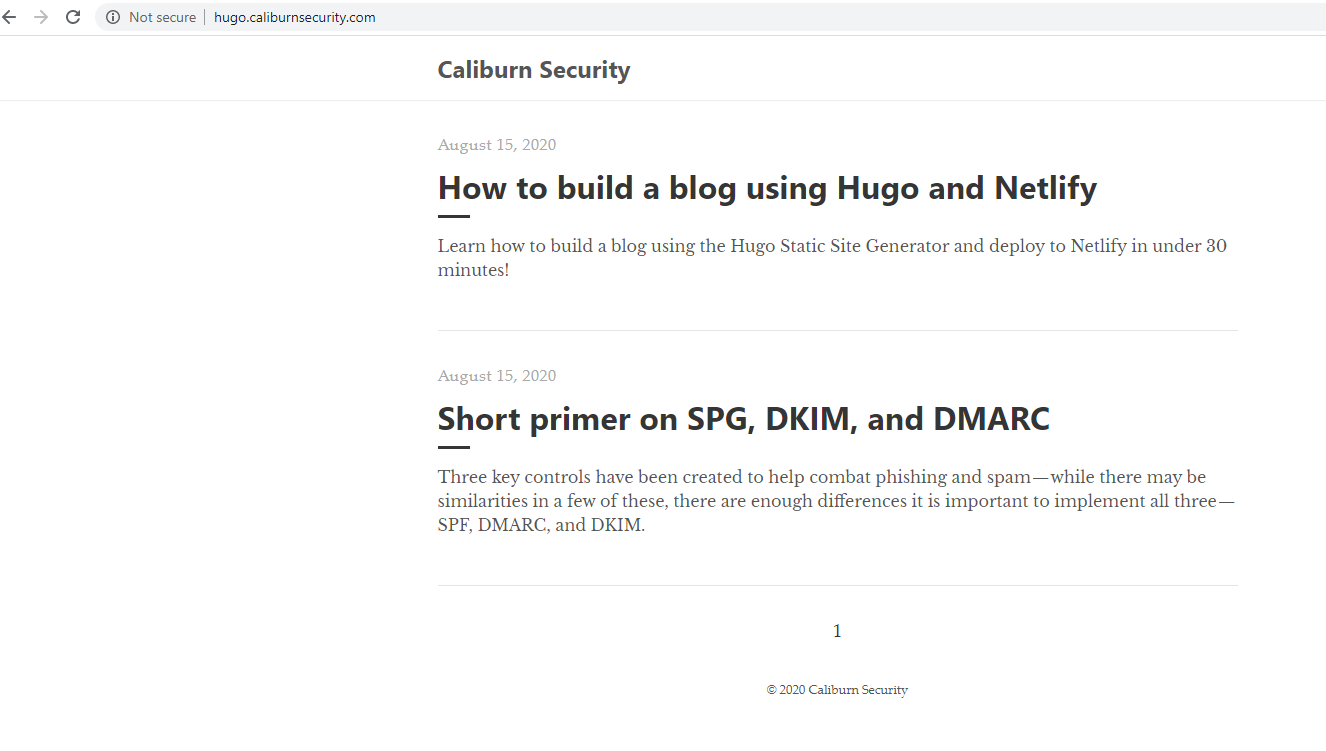 Example of my new blog hosted on Netlify!
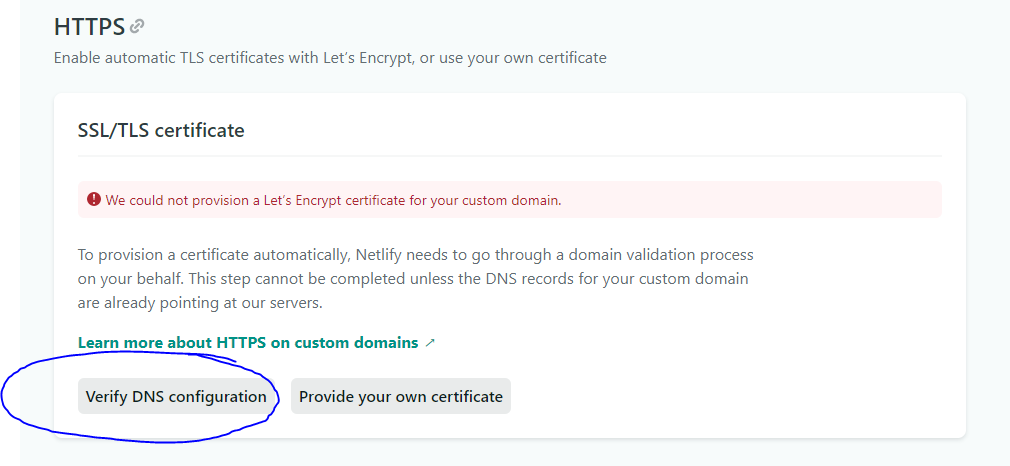
Last, we should set up SSL for our site as a best practice. Netlify offers the option to use Let's Encrypt to automatically provision a certificate for your application. To do so, simply select Provision certificate:
Note: It can take quite some time for the certificate to be generated, so just be patient.
Netlify deployment settings
We have one final step before we are truly ready to use Netlify. Unfortunately, the version of Hugo used by Netlify is somewhat outdated by default. However, we can fix this by creating our own configuration for Netlify to follow when deploying our site.
First, create a file called netlify.toml in the root of your repository, and then add the following configuration:
[build]
publish = "public"
command = "hugo --gc --minify"

[context.production.environment]
HUGO_VERSION = "0.74.3"
HUGO_ENV = "production"
HUGO_ENABLEGITINFO = "true"

[context.split1]
command = "hugo --gc --minify --enableGitInfo"

[context.split1.environment]
HUGO_VERSION = "0.74.3"
HUGO_ENV = "production"

[context.deploy-preview]
command = "hugo --gc --minify --buildFuture -b $DEPLOY_PRIME_URL"

[context.deploy-preview.environment]
HUGO_VERSION = "0.74.3"

[context.branch-deploy]
command = "hugo --gc --minify -b $DEPLOY_PRIME_URL"

[context.branch-deploy.environment]
HUGO_VERSION = "0.74.3"

[context.next.environment]
HUGO_ENABLEGITINFO = "true"
All that's left to do is select Deploy site within the Netlify console, and your site is now live on a custom domain with SSL!
Wrapup
Whew! That was a lengthy blog post, but hopefully this shows how quick it is to get up and running with a "serverless" blog. Let's see what I learned :)
What I loved
- Super simple to build, just run
hugo serve - Live reload - make a change, save, and the page will reload
- Just simple in general - I didn't need to deal with grunt, gulp, webpack, or others
- Customizable output formats let you generate your static site, as well as a Google AMP site, JSON files, and so on.
- FAST. Did I mention fast?
- Can be deployed just about anywhere - whether using Netlify (my current choice), Amazon S3 & Cloudfront, Heroku, GitHub Pages, and more.
- Shortcodes are available if Markdown isn't enough
- Continuous deployment - everything is version controlled, and deployed when I publish to the master branch
- Allow commenting and sharing of posts
Challenges
- Hugo is sometimes too simple. No plugins or extensions at all, etc.
- Using Go is less intuitive and the shortcode feels messier than something like Vue
- Not too many themes available, but I expect the library to keep growing, as there is a very active user base
So do I need a CMS?
After all of this, I still had this question in the back of my mind. And the answer is, "it depends".
If I were to incorporate a lot of media, such as images or videos that I need to upload, it would certainly get tedious adding and organizing them all to the images folder in static.
At that point, I would look into a headless CMS such as Ghost, Netlify, or Sanity to manage the content, as long as I could still write my posts using Markdown.
References
- https://medium.com/backticks-tildes/hugo101-getting-started-with-hugo-and-deploying-to-netlify-9a813fe23b94
- https://blog.risingstack.com/static-site-generator-hugo-netlify/
- http://cloudywithachanceofdevops.com/posts/2018/05/17/setting-up-google-analytics-on-hugo/
- https://www.sitepoint.com/premium/books/a-beginner-s-guide-to-creating-a-static-website-with-hugo/read/1