

Svelte is an open-source front-end JavaScript framework used for building web applications, designed to make developing interactive user interfaces more efficient and performant.
Compared to other front-end frameworks like React, Vue, or Angular, it focuses on a different approach by compiling components.
In most traditional frameworks, you build components using a virtual DOM (Document Object Model) abstraction.
In these frameworks, changes to the UI are first made to a virtual representation of the UI which calculates the differences and updates the actual DOM accordingly. This process can introduce overhead and performance bottlenecks, especially for complex applications.
Svelte, on the other hand, takes a different approach.
It shifts much of the work to the build process, compiling components into highly optimized JavaScript code that directly manipulates the DOM during runtime.
Svelte applications have a smaller runtime footprint and can often achieve better performance compared to applications built with traditional frameworks.
In this tutorial, you will learn how to build a simple calculator using Svelte.
Unlike most frameworks, Svelte does not have a steep learning curve. A basic understanding of HTML, CSS and JavaScript is sufficient to grasp Svelte.
The following are the prerequisites for this tutorial:
Basic knowledge of HTML, CSS and JavaScript
Willingness to learn
You can experience how the calculator works here.
How to Plan the Project
Those who fail to plan, plan to fail. It's a good practice to plan what you are building.
We want the calculator application to follow some criteria as follows:
The calculator should have a user-friendly interface with buttons for digits (0-9), decimal point (.), and arithmetic operations (+, -, *, /).
It should display the current input and the result on the screen.
The calculator should support multiple arithmetic operations in sequence (for example: 2 + 3 * 5).
The user should be able to clear the input and reset the calculator.
The calculator should handle edge cases and prevent invalid inputs.
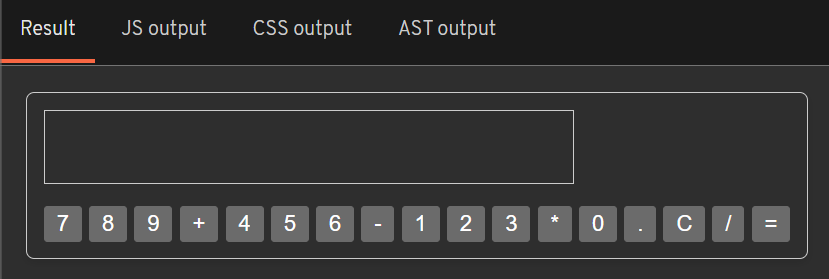
Below is a design of how the calculator should look like. You can use tools like Figma or Adobe XD to draw how you want your UI to look or sketch it on paper.

How to Build the User Interface
The calculator you will build is a simple app using Svelte REPL. It's an interactive coding environment that allows you to play with Svelte without going through the hassle of getting it set up locally on your PC.
But if you to prefer to follow locally, ensure you have Node.js installed, and run the following code on your terminal:
npm create svelte@latest <name-of-your-app>
cd myapp
npm install
npm run dev
You can read more here on how to get started.
Svelte allows you to build apps based on components written in a .svelte file. A web application contains components such as buttons, headers and so on.
Svelte simplifies this process by allowing you to create it once and reuse it in any part of your application. Most web applications contain one or more components.
The main application is in App.svelte, which contains the main code for the calculator app you are about to build.
When you open the Svelte REPL, you can see the default application prints Hello World on the screen:
<script>
    let name = 'world';
</script>

<h1>Hello {name}!</h1>

A .svelte file contains JavaScript, HTML and CSS.
The JavaScript, is written in the <script>...</script> tag, while you can write the HTML code below it, and apply CSS styling in the <style>...</style> tag.
<script>
    let name = 'world';
</script>

<h1>Hello {name}!</h1>
<style>
    h1{
        background: red;
    }
</style>

Variables declared in the script tag are displayed using the curly parentheses {}. Just like you can see Hello Word displayed using the name variable.
Now let's start building the application, copy and paste the following code into App.svelte:
<script>
</script>

<div class="calculator">
    <div class="display"></div>
    <div class="buttons">
        <button>7</button>
        <button>8</button>
        <button>9</button>
        <button class="operator">+</button>
        <button>4</button>
        <button>5</button>
        <button>6</button>
        <button class="operator">-</button>
        <button>1</button>
        <button>2</button>
        <button>3</button>
        <button class="operator">*</button>
        <button>0</button>
        <button>.</button>
        <button class="clear">C</button>
        <button class="operator">/</button>
        <button class="equals">=</button>
    </div>
</div>

<style>

</style>

If you have done that, you have created two divs – calculator and display. calculator is the parent div that contains display and the calculator buttons.
All arithmetic operations carry the class name operator. The clear sign also has the class name clear, and the equal sign has the class name equals.
You might not see the display now because we haven't applied CSS styling.
Inside the <style></style> tag, paste the code below:
<script>

</script>

...

<style>
.calculator {
    display: inline-block;
    border: 1px solid #ccc;
    padding: 10px;
    border-radius: 5px;
    box-shadow: 0 2px 5px rgba(0, 0, 0, 0.1);
}

.display {
    font-size: 24px;
    border: 1px solid #ccc;
    height: 24px;
    padding: 10px;
    margin-bottom: 10px;
    width: 300px;
    text-align: right;
}
</style>
Now let's style the buttons into a grid of four columns.
Update the <style></style> tag with the buttons and button style below:
...

<style>
 ...
.buttons {
    display: grid;
    grid-template-columns: repeat(4, 75px);
    gap: 5px;
}

button {
    padding: 10px;
    font-size: 18px;
    border: none;
    cursor: pointer;
    border-radius: 5px;
    font-family: Arial, sans-serif;
    text-align: center;
}
</style>
Note that buttons is the class name for the div containing the various HTML button tags.

Next, let's style the buttons to improve user experience for anyone using the calculator and make the equal button occupy the empty spaces.
Update the <style></style> tag as follows:
...
<style>
 ...
 .operator{
    border: 0px solid #A46D19;
    background: #F90;
}
.clear{
    border: 0px solid #000;
    background: red;
}
.equals{
    border: 0px solid #000;
    background: #245BE9;
    width: 320px
}
</style>
Not done yet, one last thing to do.
You need to include hovering effect on all buttons, allowing a user to know when the mouse is on a particular button. This will make for a better user experience.
Update the <style></style> tag as follows:
...
<style>
    ...
.operator:hover{
    background: #FFD700;
}
.clear:hover {
    background: #FFC0CB ;
}
.equals:hover {
    background: #ADD8E6;
}
</style>
Now we are done with the calculator's user interface.
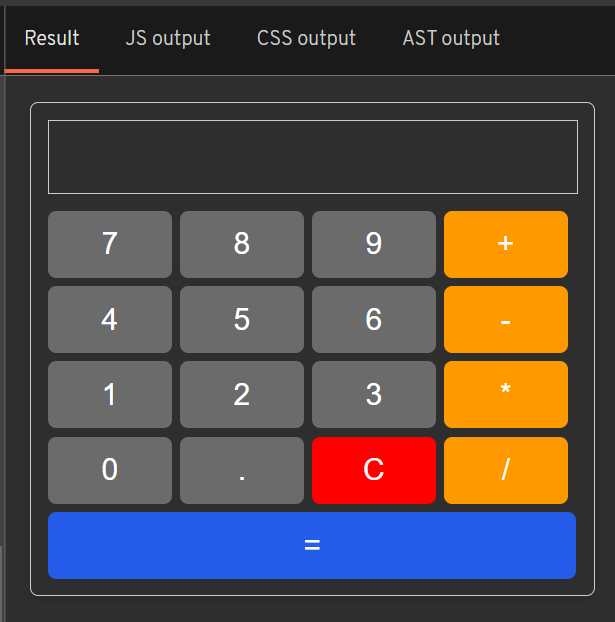
If you did everything right, your code should look like this:
<script>
</script>

<div class="calculator">
    <div class="display"></div>
    <div class="buttons">
        <button>7</button>
        <button>8</button>
        <button>9</button>
        <button class="operator">+</button>
        <button>4</button>
        <button>5</button>
        <button>6</button>
        <button class="operator">-</button>
        <button>1</button>
        <button>2</button>
        <button>3</button>
        <button class="operator">*</button>
        <button>0</button>
        <button>.</button>
        <button class="clear">C</button>
        <button class="operator">/</button>
        <button class="equals">=</button>
    </div>
</div>

<style>
.calculator {
    display: inline-block;
    border: 1px solid #ccc;
    padding: 10px;
    border-radius: 5px;
    box-shadow: 0 2px 5px rgba(0, 0, 0, 0.1);
}

.display {
    font-size: 24px;
    border: 1px solid #ccc;
    height: 24px;
    padding: 10px;
    margin-bottom: 10px;
    width: 300px;
    text-align: right;
}
.buttons {
    display: grid;
    grid-template-columns: repeat(4, 75px);
    gap: 5px;
}

button {
    padding: 10px;
    font-size: 18px;
    border: none;
    cursor: pointer;
    border-radius: 5px;
    font-family: Arial, sans-serif;
    text-align: center;
}
.operator{
    border: 0px solid #A46D19;
    background: #F90;
}
.clear{
    border: 0px solid #000;
    background: red;
}
.equals{
    border: 0px solid #000;
    background: #245BE9;
    width: 320px
}
.operator:hover{
    background: #FFD700;
}
.clear:hover {
    background: #FFC0CB ;
}
.equals:hover {
    background: #ADD8E6;
}
</style>
Now let's start cooking!
How to Handle Interactivity
Now that you have finished with the UI, let's make the calculator interactive by starting with the number buttons.
Copy and paste the following code into the <script></script> tag in App.svelte:
<script>
    let display_number = "";
    const select = (num) => () => (display_number += num);
    const clear = () => (display_number = "");
</script>
...
...
display_numberis the number displayed on the calculator screen.selectis the function that allows any number clicked, to appear on the screen.clearis the function that clears the screen, resetting the value of display number to an empty string.
Note that display_number is a string data type. Later on you will learn how to convert it to a numeric data type and perform calculations with it.
Next let's implement the select and clear function into the HTML.
Modify the HTML as follows:
...
<div class="calculator">
    <div class="display">{display_number}</div>
        <div class="buttons">
            <button on:click={select(7)}>7</button>
            <button on:click={select(8)}>8</button>
            <button on:click={select(9)}>9</button>
            <button class="operator" >+</button>
            <button on:click={select(4)}>4</button>
            <button on:click={select(5)}>5</button>
            <button on:click={select(6)}>6</button>
            <button class="operator" >-</button>
            <button on:click={select(1)}>1</button>
            <button on:click={select(2)}>2</button>
            <button on:click={select(3)}>3</button>
            <button class="operator">*</button>
            <button on:click={select(0)}>0</button>
            <button on:click={select(".")}>.</button>
            <button on:click={clear} class="clear">C</button>
            <button class="operator">/</button>
            <button class="equals" >=</button>
        </div>
</div>

...
Svelte on:click directive allows you attach an event handler to an element, so that when you call the select function for an element, it displays the number of that element appended to the previous value.
The clear button also has the event handler clear, to clear the screen and reset to "" anytime it's called.
If you get everything right, you should see the value of the buttons clicked on the screen.

Let's create an event handler to perform an addition function and display the result. This will serve as the basis for all other operations in the calculator.
Update the <script></script> tag as follows:
<script>
    ...
    let operand;
    let result;

    function addition() {
        operand = Number(display_number);
        display_number = "";
    }

    function equals() {
        display_number = Number(display_number);
        result = operand + display_number
        display_number = result.toString()
    }
</script>
...
...
When performing calculations, you can have two or more operands – operand is the variable where the previous operand is stored, while display_number contains the current operand.
result is the final result after performing an arithmetic operation.
The addition function takes the initial value displayed, converts it to a Number and stores it in the new variable operand, which resets display_number to its initial value "".
The equals function takes the new currently displayed number, adds it to operand and saves it as the final result. result is now converted to a string and saved as display_number so it appears on the screen.
Note that the equals function converts result to a string. When you want to use it for another calculation, the addition function will handle the conversion to a Number.
Try performing an addition operation to see if you got it right.
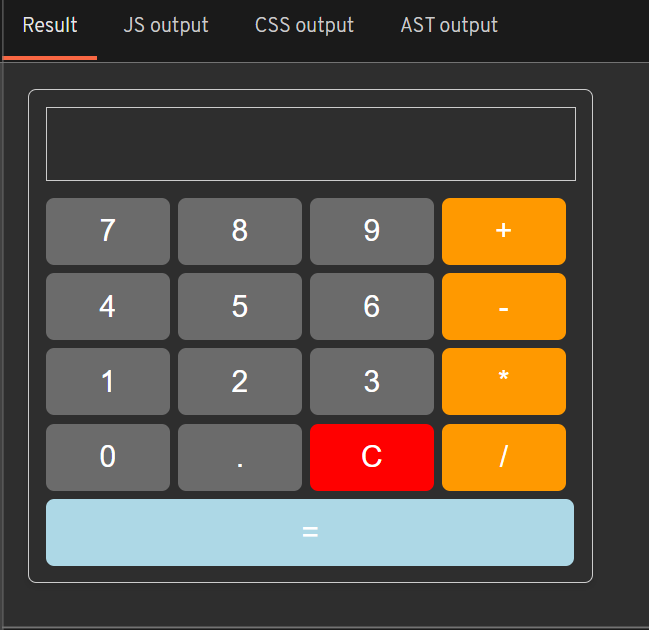
By now, App.svelte should look like this:
<script>
    let display_number = "";
    const select = (num) => () => (display_number += num);
    const clear = () => (display_number = "");

    let operand;
    let result;

    function addition() {
            operand = Number(display_number);
            display_number = "";
      }

    function equals() {
            display_number = Number(display_number);
            result = operand + display_number
            display_number = result.toString()
      }
</script>

<div class="calculator">
    <div class="display">{display_number}</div>
        <div class="buttons">
            <button on:click={select(7)}>7</button>
            <button on:click={select(8)}>8</button>
            <button on:click={select(9)}>9</button>
            <button on:click={addition} class="operator" >+</button>
            <button on:click={select(4)}>4</button>
            <button on:click={select(5)}>5</button>
            <button on:click={select(6)}>6</button>
            <button class="operator" >-</button>
            <button on:click={select(1)}>1</button>
            <button on:click={select(2)}>2</button>
            <button on:click={select(3)}>3</button>
            <button class="operator">*</button>
            <button on:click={select(0)}>0</button>
            <button on:click={select(".")}>.</button>
            <button on:click={clear} class="clear">C</button>
            <button class="operator">/</button>
            <button on:click={equals} class="equals" >=</button>
        </div>
</div>

<style>
.calculator {
    display: inline-block;
    border: 1px solid #ccc;
    padding: 10px;
    border-radius: 5px;
    box-shadow: 0 2px 5px rgba(0, 0, 0, 0.1);
}

.display {
    font-size: 24px;
    border: 1px solid #ccc;
    height: 24px;
    padding: 10px;
    margin-bottom: 10px;
    width: 300px;
    text-align: right;
}
.buttons {
    display: grid;
    grid-template-columns: repeat(4, 75px);
    gap: 5px;
}

button {
    padding: 10px;
    font-size: 18px;
    border: none;
    cursor: pointer;
    border-radius: 5px;
    font-family: Arial, sans-serif;
    text-align: center;
}
.operator{
    border: 0px solid #A46D19;
    background: #F90;
}
.clear{
    border: 0px solid #000;
    background: red;
}
.equals{
    border: 0px solid #000;
    background: #245BE9;
    width: 320px
}
.operator:hover{
    background: #FFD700;
}
.clear:hover {
    background: #FFC0CB ;
}
.equals:hover {
    background: #ADD8E6;
}
</style>
Let's improve the code to support other operations – subtraction, multiplication and division:
<script>
...
let operator;
let operators = ["+", "-", "*", "/"];

function operation(sign) {
        operand = Number(display_number);
        operator = sign;
        display_number = "";
  }

function equals() {
    display_number = Number(display_number);
    if (operator === "+") {
      result = operand + display_number;
    } else if (operator === "-") {
      result = operand - display_number;
    } else if (operator === "*") {
      result = operand * display_number;
    } else if (operator === "/") {
      result = operand / display_number;
    }
display_number = result.toString()
</script>
...
...
The addition function changes to operation, which supports the sign argument.
The equals function performs operations based on the value of the sign argument in the function operation.
Update the HTML code to add event handlers to the various arithmetic operations:
<div class="calculator">
    <div class="display">{display_number}</div>
        <div class="buttons">
            <button on:click={select(7)}>7</button>
            <button on:click={select(8)}>8</button>
            <button on:click={select(9)}>9</button>
            <button on:click={() => operation(operators[0])} class="operator" >+</button>
            <button on:click={select(4)}>4</button>
            <button on:click={select(5)}>5</button>
            <button on:click={select(6)}>6</button>
            <button on:click={() => operation(operators[1])} class="operator" >-</button>
            <button on:click={select(1)}>1</button>
            <button on:click={select(2)}>2</button>
            <button on:click={select(3)}>3</button>
            <button on:click={() => operation(operators[2])} class="operator">*</button>
            <button on:click={select(0)}>0</button>
            <button on:click={select(".")}>.</button>
            <button on:click={clear} class="clear">C</button>
            <button on:click={() => operation(operators[3])} class="operator">/</button>
            <button on:click={equals} class="equals" >=</button>
        </div>
</div>
Each function takes its sign value by accessing the respective sign in operators.
We now have a working calculator.
Now, how do we handle something like this?

The above is a bug where the numbers exceed the display boundaries.
To solve this error, update the display div as follows:
...
<div class="calculator">
    <div class="display">{display_number.length < 23? display_number: display_number.substring(0,23)}</div>
    ...
</div>
...
If the length of display_number is greater than 22, which is the number of digits the display screen can contain, the first twenty-two characters is selected.
This will fix the above bug.
Challenge
You can further extend the calculator by:
Adding advanced mathematical and scientific operations.
Giving room for users to use their keyboard to input values.
Displaying the arithmetic operations on screen, before calculating.
Conclusion
In this tutorial, you have learned how to use Svelte to create interactivity in a web app. And you also learned about Svelte event handlers.
You can further your current Svelte knowledge by visiting the official documentation.