
Hello, welcome to this tutorial. Today we're going to build a production-ready eCommerce website using ReactJS, TailwindCSS, PlanetScale, and Stripe.
Before we begin, you should be familiar with the basics of React.js and Next.js to get the most out of this guide.
If you're not and need to brush up, I recommend you go through the ReactJS and NextJS documentation.
The stack we will use:
ReactJS is a JavaScript library for building user interfaces. It is declarative and component-based.
NextJS is a React-based framework that lets us render data on the server side. It helps Google crawl the application which results in SEO benefits.
PlanetScale is a database as a service that is developed on Vitess, an open-source technology that powers YouTube and uses MySQL internally.
TailwindCSS is a utility-first CSS framework packed with classes that can be composed to build any design, directly in our markup.
Prisma is an ORM built for NodeJS and TypeScript which handles automated migrations, type-safety, and auto-completion.
Vercel will host our application. It scales well, all without any configuration, and deployment is instant.
Stripe is a payment gateway, and we will use it to accept online payments on the website.
Table of Contents
How to Configure PlanetScale, Stripe, NextJS, Prisma and Other Libraries
How to Implement Mock Data, Category-Products API and All Category-Single Category UI
I am going to divide this tutorial into four separate sections.
At the start of every section, you will find a Git commit that has the code developed in that section. Also, if you want to see the complete code, then it is available in this repository.
How to Configure PlanetScale, Stripe, NextJS, TailwindCSS, and Prisma.
In this section, we'll implement the following functionality:
Create a PlanetScale Account and Database.
Create a Stripe Account.
Configure NextJS, TailwindCSS, and Prisma.
You can find the eCommerce website code implemented in this section at this commit.
How to Configure PlanetScale:
To create a PlanetScale account, visit this URL. Click on Get started button at the top right corner.

PlanetScale Landing Page
You can either create an account using GitHub or a traditional email-password. Once the account is created, then click on the "create" link.

PlanetScale Dashboard Page
You'll receive the following modal:
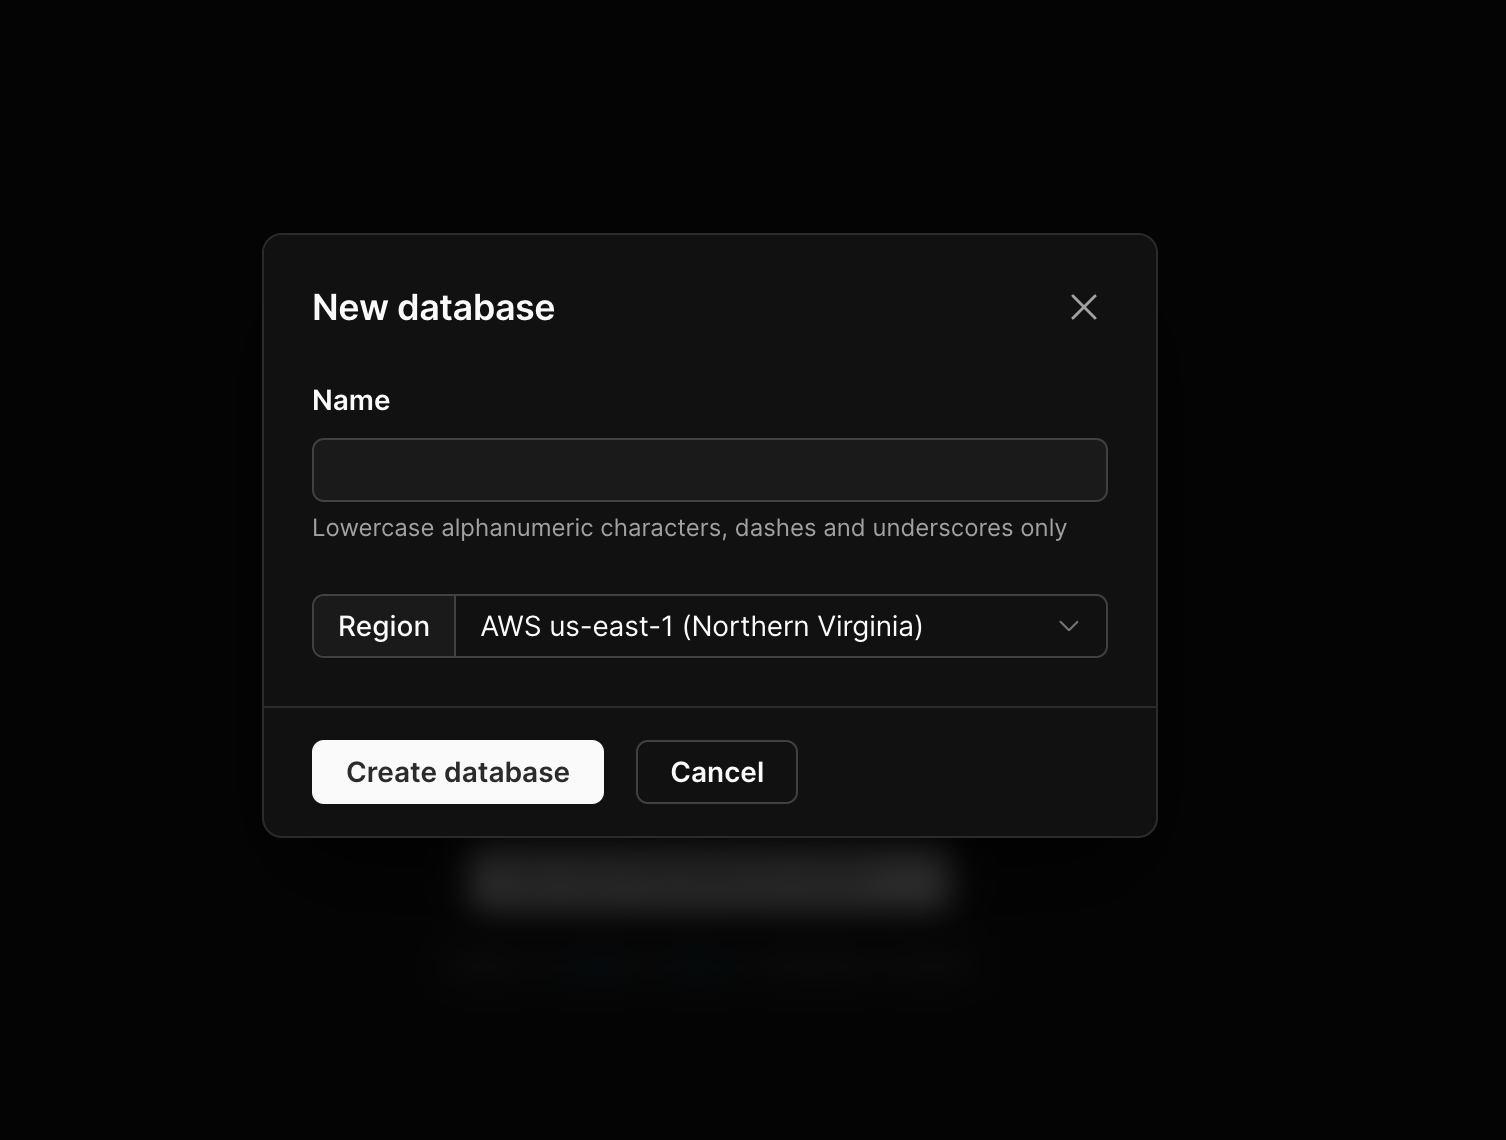
PlanetScale New Database Modal
Fill in the details and click on the Create database button. Once the database is created you'll be redirected to the following page:
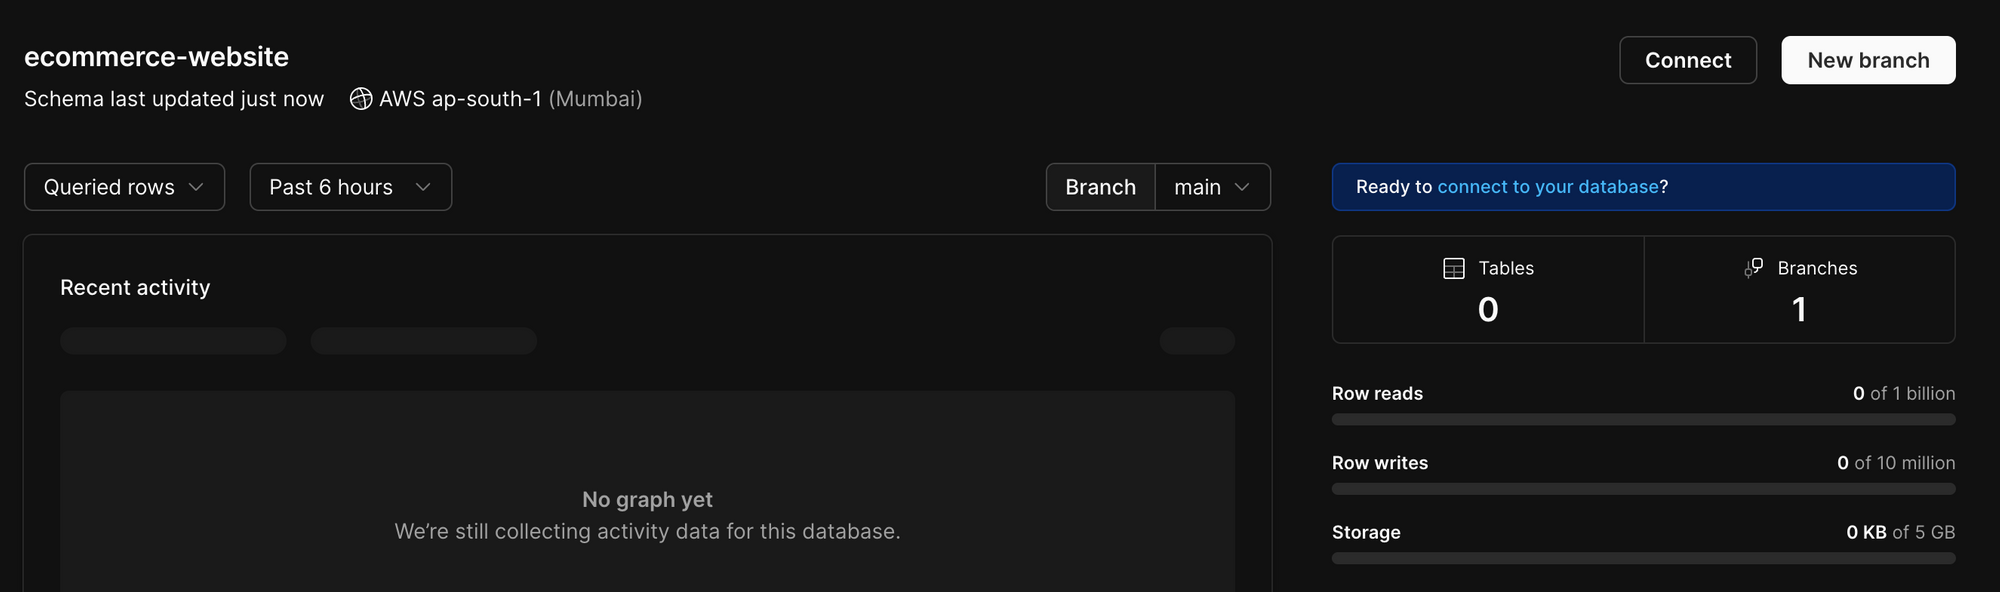
PlanetScale Ecommerce Website Database Page
Click on connect and a modal will open. This modal will contain a Database URL and this password cannot be generated again. So copy and paste it into a safe location.
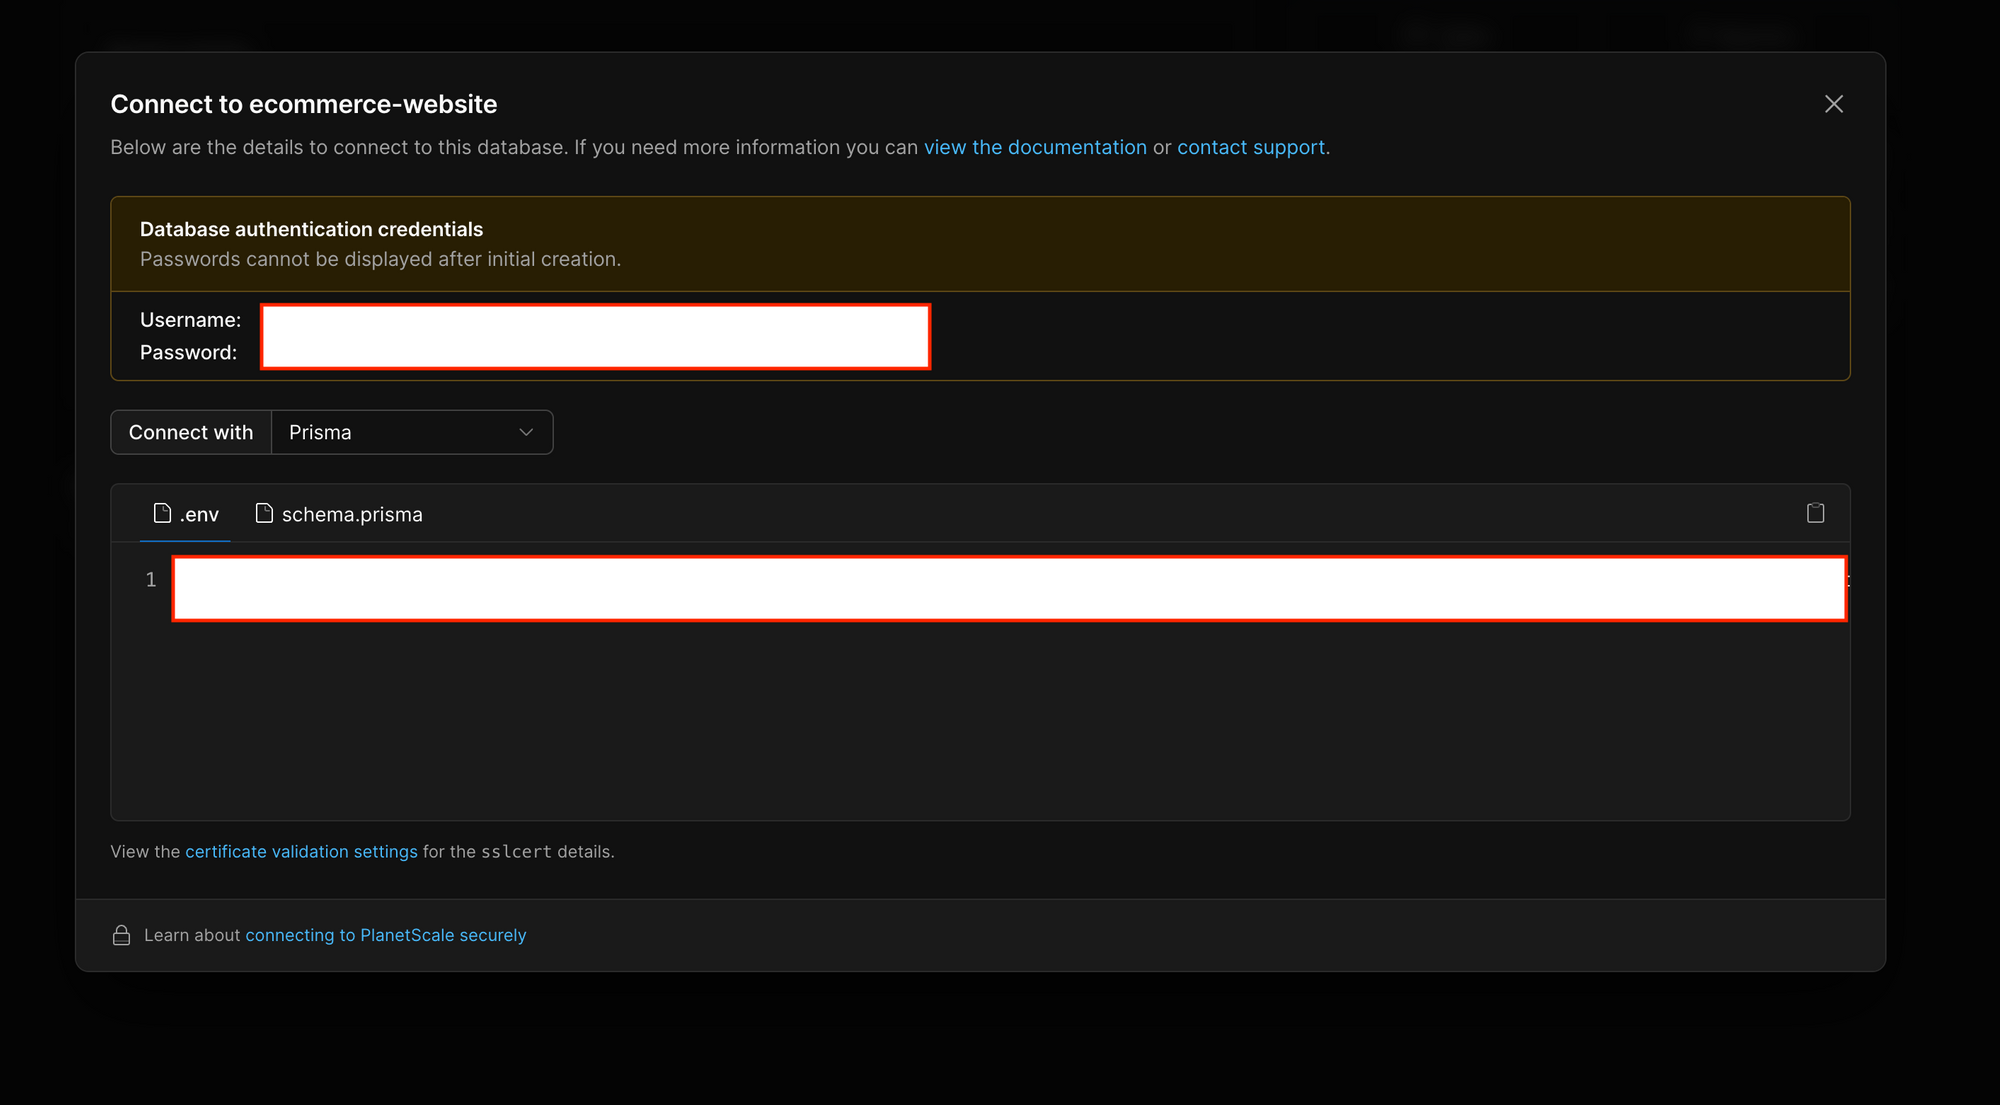
PlanetScale Database Username and Password Modal
How to Configure Stripe:
To create a Stripe account, go to this URL. Once you've created the account, click on the Developer Button from the Nav menu. You'll see API keys on the left side and you'll find the Publishable key and Secret key under Standard keys.
Publishable key: These are the keys that can be publicly-accessible in a web or mobile app’s client-side code.
Secret key: This is a secret credential and should be securely stored in the server code. This key is used to call the Stripe API.
How to Configure NextJS, TailwindCSS, and Prisma.
First, we will create a NextJS app using the following command:
npx create-next-app ecommerce-tut --ts --use-npm
Once the project is created, open it with your favourite editor. You'll get the following structure:
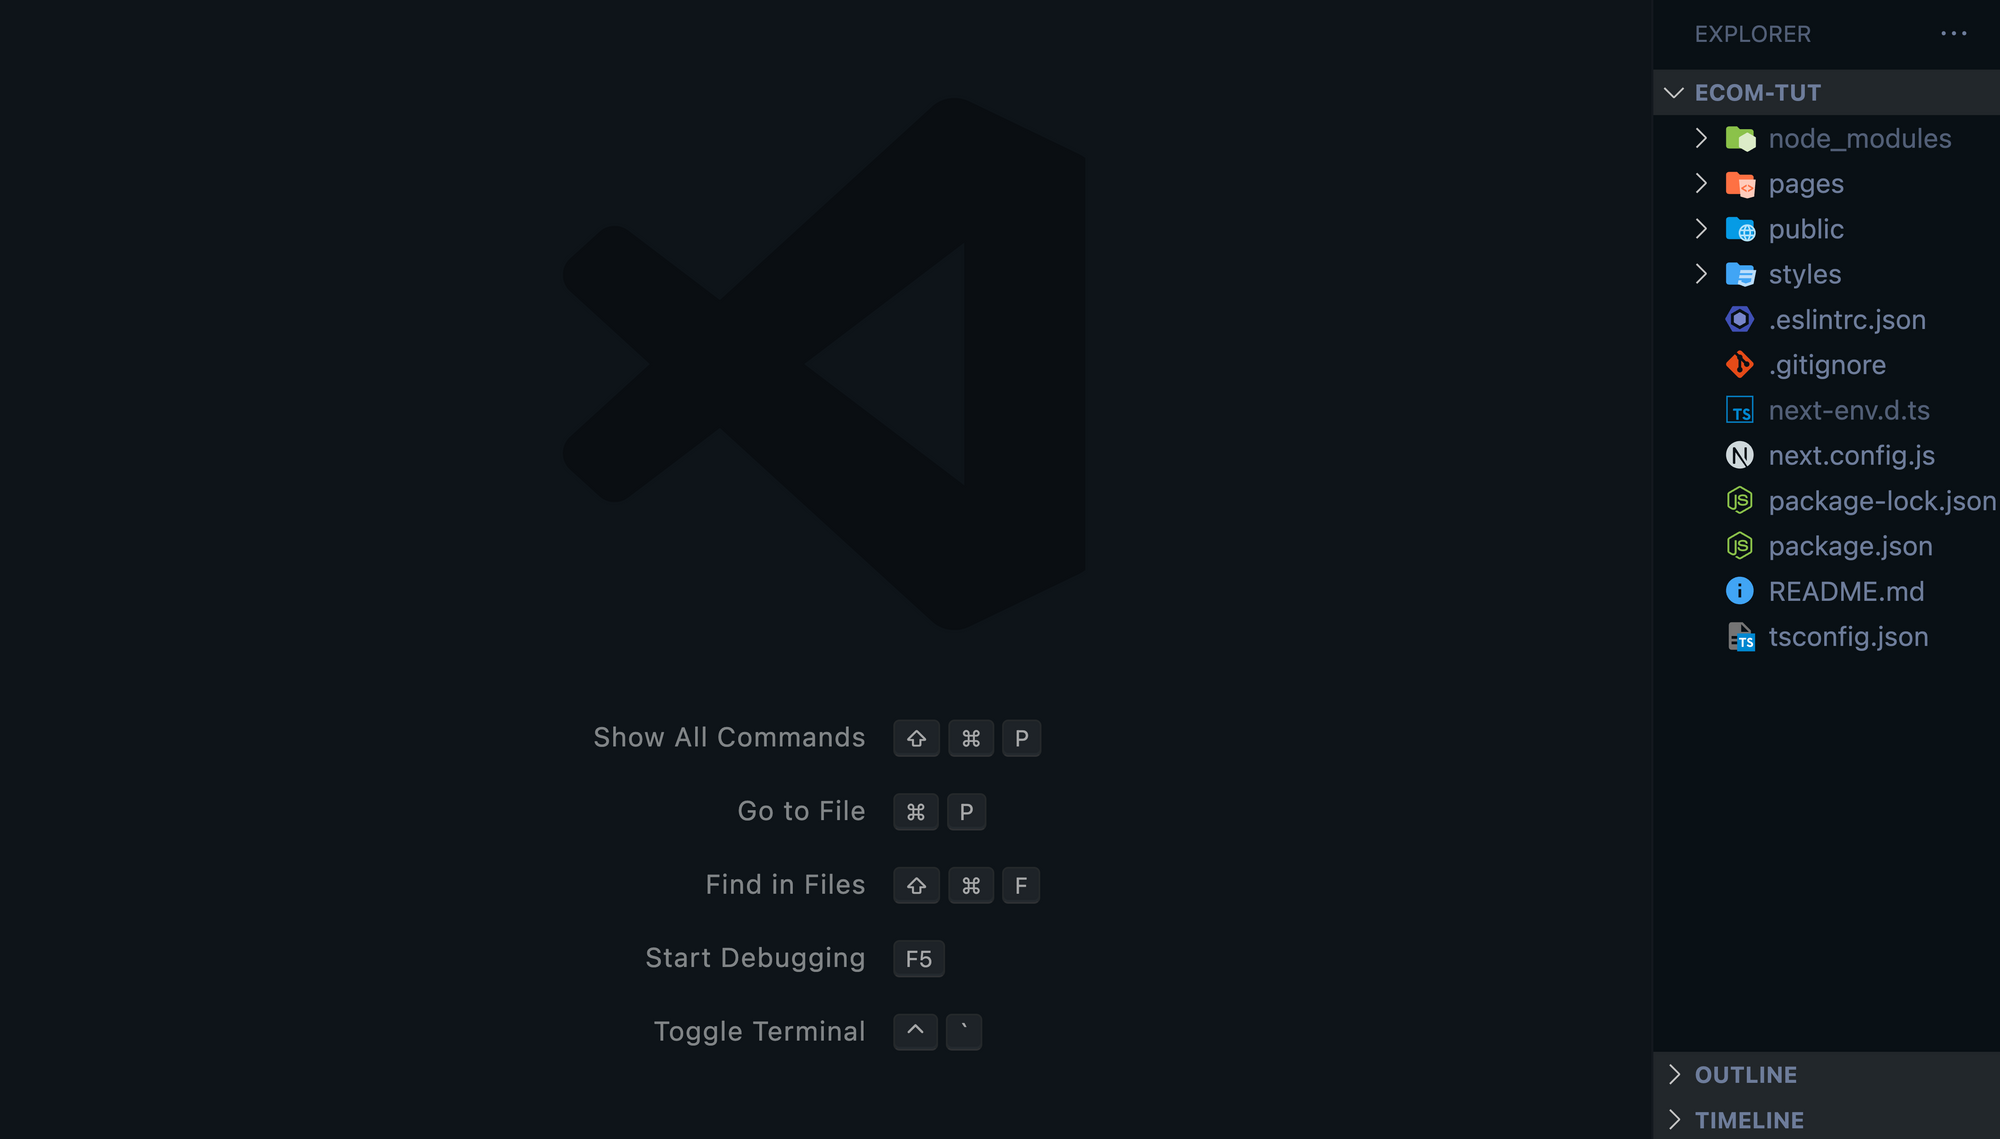
Project Structure
Let's create a directory named src. We will move the pages and styles directory to that src folder. You'll get the following structure:
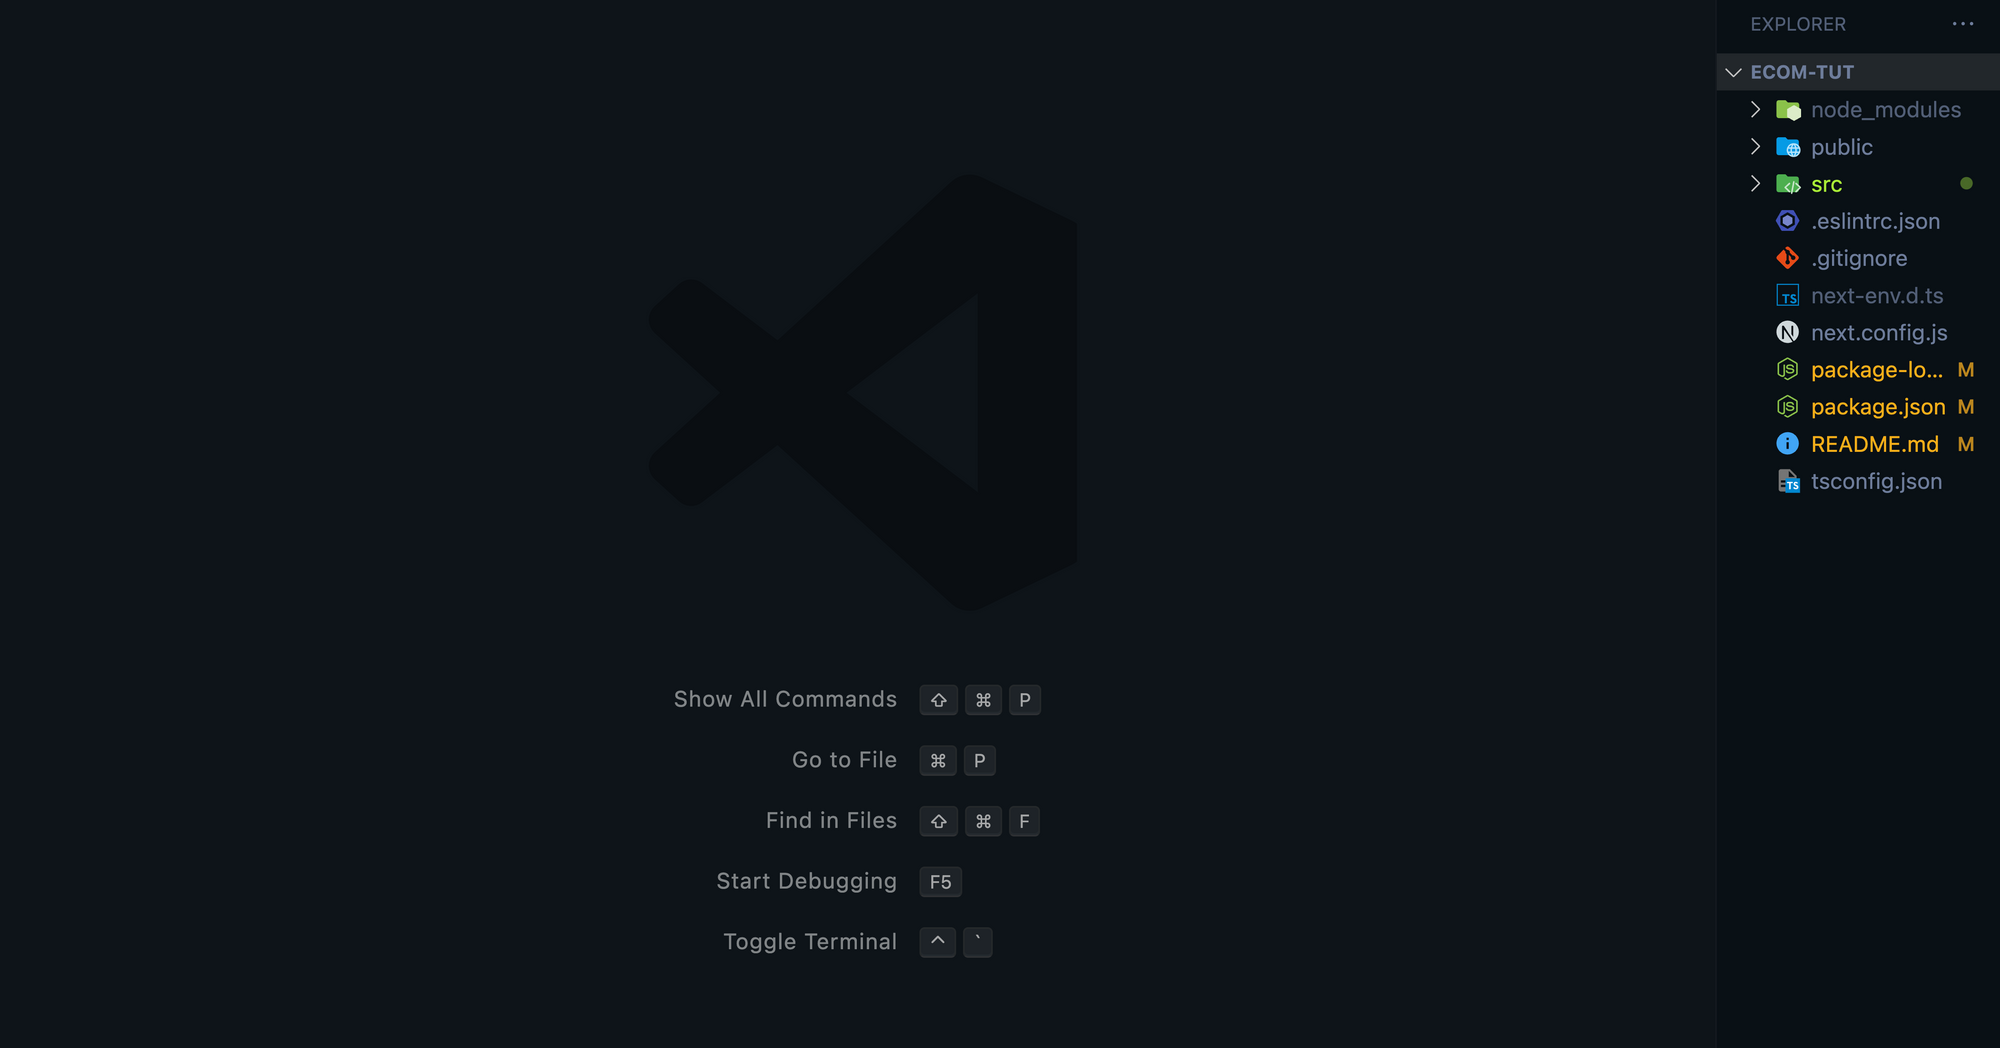
Project Structure after moving Pages and Styles.
Install the following packages:
npm i @ngneat/falso @prisma/client @stripe/stripe-js @tanstack/react-query currency.js next-connect react-icons react-intersection-observer stripe
We also need to install dev dependencies:
npm i --save-dev @tanstack/react-query-devtools autoprefixer postcss tailwindcss
Let's understand each of the packages:
@ngneat/falso: We will use this library to create mock data for our eCommerce website. In an ideal world, you would have an admin panel to add the products, but it is not in the scope of this tutorial.
@prisma/client: We will use this library to connect to our database, run migrations, and do all CRUD operations on the database.
@stripe/stripe-js: We will use this library to redirect users to the stripe checkout page and process payment.
@tanstack/react-query: We will use this library for managing our asynchronous state, that is caching API responses.
currency.js: We will use this library for converting our prices to two decimal format.
next-connect: We will use this library for routing purposes on our Next API layer.
react-icons: We will use this library for adding icons to our buttons and links.
react-intersection-observer: Have you seen infinite scrolling on a lot of websites and wondered how it is implemented? We will use this library to implement that based on the viewport.
stripe: We will use the Stripe library to connect with Stripe API from our Next API layer.
@tanstack/react-query-devtools: We will use this library as the only dev dependency to view and manage our cache during development time.
TailwindCSS: We will use this as our CSS library that also requires PostCSS and AutoPrefixer.
Let's configure TailwindCSS into our project using the following command:
npx tailwindcss init -p
You'll get the following response:

TailwindCSS Config Success
Now go to tailwind.config.js and update it with the following code:
/** @type {import('tailwindcss').Config} */
module.exports = {
    content: [
        "./src/pages/**/*.{js,ts,jsx,tsx}",
        "./src/components/**/*.{js,ts,jsx,tsx}",
    ],
    theme: {
        extend: {},
    },
    plugins: [],
};
To generate the CSS, Tailwind needs access to all the HTML Elements. We will be writing the UI components under pages and components only, so we pass it under content.
If you need to use any plugins, for example, typography, then you need to add them under the plugins array. If you need to extend the default theme provide by Tailwind, then you need to add it under theme.extend section.
Now go to /src/styles/globals.css and replace the existing code with the following:
@tailwind base;
@tailwind components;
@tailwind utilities;
We will add these three directives in our globals.css file. The meaning of each directive is as follows:
@tailwind base: This injects a base style provided by Tailwind.
@tailwind components: This injects classes and any other classes added by the plugin.
@tailwind utilities: This injects hover, focus, responsive, dark mode and any other utility added by the plugin.
Remove the Home.module.css from src/styles directory and go to src/pages/index.ts and replace the existing code with the following:
import type { NextPage } from "next";
import Head from "next/head";

const Home: NextPage = () => {
    return (
        <div>
            <Head>
                <title>All Products</title>
                <meta name="description" content="All Products" />
                <link rel="icon" href="/favicon.ico" />
            </Head>

            <main className="container mx-auto">
                <h1 className="h-1">Hello</h1>
            </main>
        </div>
    );
};

export default Home;
When we run the create-next-app command to create the project, it adds some boilerplate code. Here we removed that in some instances while replacing index.ts with an h1 and text that says "Hello".
It's time to run the website using the following command:
npm run dev
You'll get the following response:

Open http://localhost:3000 on your browser, and you'll get the following screen with a hello message:

Screen with Hello Message
Let's configure Prisma into our project using the following command:
npx prisma init
You'll get the following response:

Prisma Successfully Configured Message
Under prisma/schema.prisma replace the existing code with the following code:
// This is your Prisma schema file,
// learn more about it in the docs: https://pris.ly/d/prisma-schema

generator client {
  provider        = "prisma-client-js"
  previewFeatures = ["referentialIntegrity"]
}

datasource db {
  provider             = "mysql"
  url                  = env("DATABASE_URL")
  referentialIntegrity = "prisma"
}

model Category {
  id        String    @id @default(cuid())
  name      String    @unique
  createdAt DateTime  @default(now())
  products  Product[]
}

model Product {
  id          String    @id @default(cuid())
  title       String    @unique
  description String
  price       String
  quantity    Int
  image       String
  createdAt   DateTime  @default(now())
  category    Category? @relation(fields: [categoryId], references: [id])
  categoryId  String?
}
This file consists of our database source that is MySQL. We are using MySQL because PlanetScale supports MySQL only.
Also, we have created two models that are:
Category:
name: Every category will have a unique title.
createdAt: The date when a category is added.
products: A foreign relationship with the product model.
Product:
title: Every product will have a unique title.
description: This is just information about the product.
price: It is of
Stringtype because it will hold a decimal value.quantity: It is of
Inttype because it will hold a numerical value.image: Representation of what the product will look like. We will use placeimg for the purpose of this tutorial.
createdAt: The date when a product is added.
category: A foreign relationship with the category model.
We are using cuid() instead of uuid() for the id because they are better for horizontal scaling and sequential lookup performance. Prisma has inbuilt support for CUID. You can read more about it here.
Now time to update our .env file with the following:
DATABASE_URL=

STRIPE_SECRET_KEY=

NEXT_PUBLIC_STRIPE_PUBLISHABLE_KEY=
You'll find the Stripe secret key and publishable key under the dashboard. The database URL is the one that we had copy-pasted earlier and kept in a safe location. Update this .env with those credentials.
Also, note that the .gitignore file created by NextJS doesn't ignore the .env file. It is configured to ignore the .env.local file. But Prisma requires .env, so we will replace the .gitignore file content with the following:
# See https://help.github.com/articles/ignoring-files/ for more about ignoring files.

# dependencies
/node_modules
/.pnp
.pnp.js

# testing
/coverage

# next.js
/.next/
/out/

# production
/build

# misc
.DS_Store
*.pem

# debug
npm-debug.log*
yarn-debug.log*
yarn-error.log*
.pnpm-debug.log*

# local env files
.env
.env*.local

# vercel
.vercel

# typescript
*.tsbuildinfo
next-env.d.ts
Ideally, Prisma manages schema migration using the prisma migrate command. But as PlanetScale has its schema migration mechanism inbuilt, we will use that. Use the following command to push migration to our current main branch.
Note, our main branch is not yet promoted as a production branch.
npx prisma db push
Now let's generate the Prisma client using the following command:
npx prisma generate
Go to the PlanetScale Dashboard, and there you'll find two tables created:
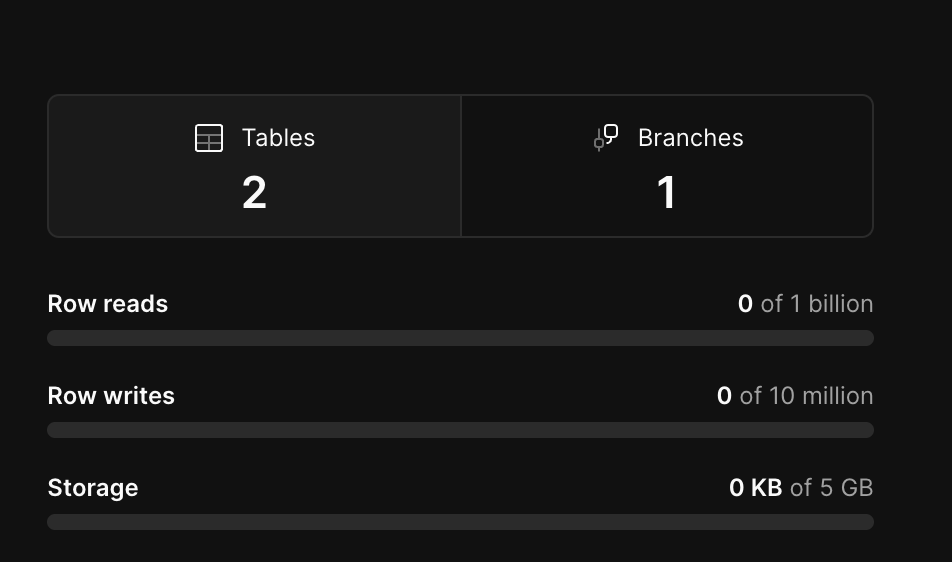
PlanetScale Two Tables Created
Click on these tables, and you'll be redirected to the following page:

PlanetScale Database Schema
How to Implement Mock Data, Category-Products API, and All Category-Single Category UI.
In this section, we'll implement the following functionality:
Create mock data
Create a Category and Product API.
Create an All Category and Single Category UI.
You can find the eCommerce website code implemented in this section at this commit.
How to Create the Mock Data:
Under the prisma directory, create a file named seed.ts and copy-paste the following code:
import {
    randBetweenDate,
    randNumber,
    randProduct,
    randProductAdjective,
} from "@ngneat/falso";
import { PrismaClient } from "@prisma/client";

const primsa = new PrismaClient();

const main = async () => {
    try {
        await primsa.category.deleteMany();
        await primsa.product.deleteMany();
        const fakeProducts = randProduct({
            length: 1000,
        });
        for (let index = 0; index < fakeProducts.length; index++) {
            const product = fakeProducts[index];
            const productAdjective = randProductAdjective();
            await primsa.product.upsert({
                where: {
                    title: `${productAdjective} ${product.title}`,
                },
                create: {
                    title: `${productAdjective} ${product.title}`,
                    description: product.description,
                    price: product.price,
                    image: `${product.image}/tech`,
                    quantity: randNumber({ min: 10, max: 100 }),
                    category: {
                        connectOrCreate: {
                            where: {
                                name: product.category,
                            },
                            create: {
                                name: product.category,
                                createdAt: randBetweenDate({
                                    from: new Date("10/06/2020"),
                                    to: new Date(),
                                }),
                            },
                        },
                    },
                    createdAt: randBetweenDate({
                        from: new Date("10/07/2020"),
                        to: new Date(),
                    }),
                },
                update: {},
            });
        }
    } catch (error) {
        throw error;
    }
};

main().catch((err) => {
    console.warn("Error While generating Seed: \n", err);
});
Here we are creating 1000 fake products and adding them to the database.
We are following these steps to add the products:
Delete all the categories using the
deleteMany()function.Delete all the product using the
deleteMany()function.The above are optional steps, but it's always a good idea to rerun the seed script with a clean table.
As the
titleattribute from theproducttable has unique property associated with it we bind it with therandProductAdjectivefunction output to make repetitions less likely.But still, there is a probability that the title property created by the
falsogets repeated. So we use the upsert method from@prisma/client.We are also creating/associating the category when we create a product.
Now go to package.json and update the following code below scripts:
"prisma": {
    "seed": "ts-node --compiler-options {\"module\":\"CommonJS\" prisma/seed.ts"
},
We will use the ts-node package to run our seed script command. The seed script is written in TypeScript while ts-node converts TypeScript code to JavaScript.
Use the following command to install the package:
npm i --save-dev ts-node
As the ts-node will convert the code to JavaScript, we can execute the following command to seed the tables with mock data:
npx prisma db seed
You'll get the following output that will show it has started running. It will take some time to seed the tables with mock data.

Once the seed command is successful, you'll get the following response:

The benefit of Prisma is that it also has a studio, which can be used to view the database in a local development environment. Use the following command to run this studio:
npx prisma studio
Open http://localhost:5555, on your browser, and you'll get the following screen with all the tables:
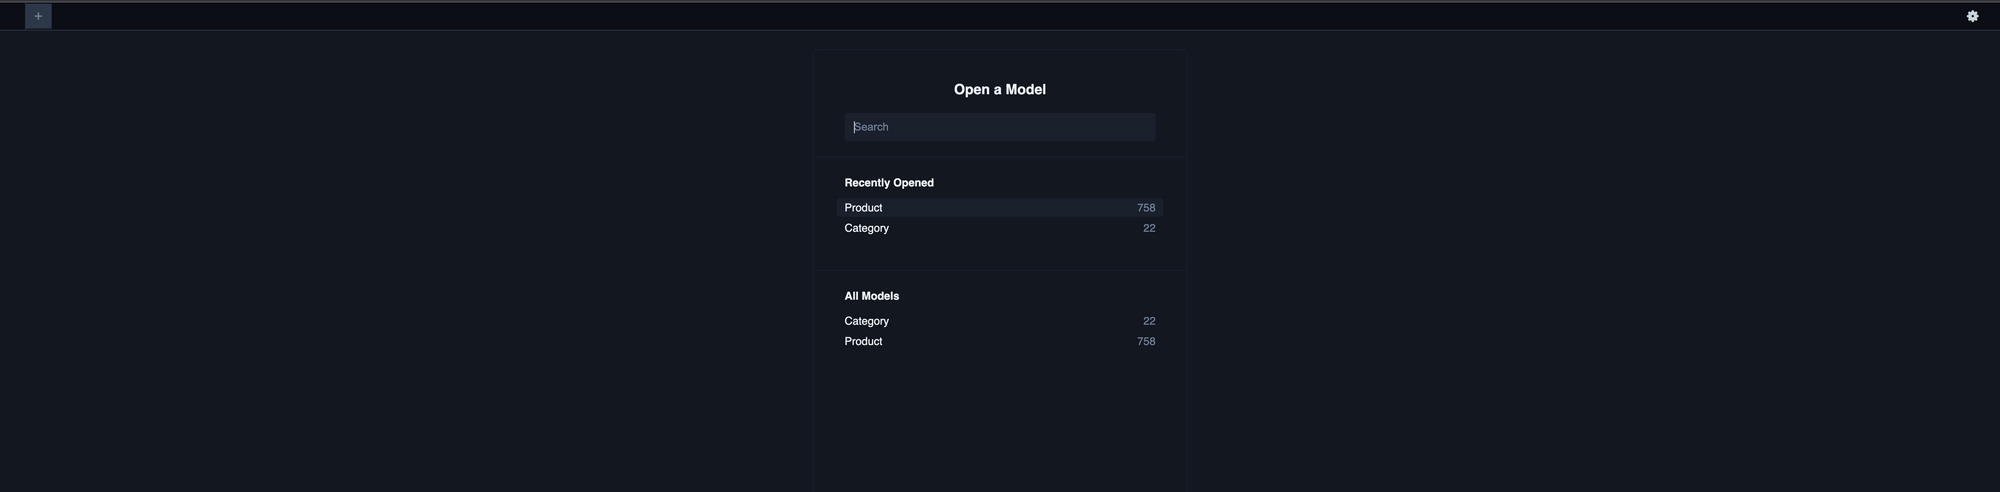
Prisma Studio
The number of Products and Categories may vary on your side or be similar, as this is random data.
How to Create the Category and Product APIs:
Under the src/pages/api category you'll find a file named hello.ts. Remove this file and create two directories named categories and products.
Inside those categories, create a file named index.ts and copy-paste the following code:
import type { NextApiRequest, NextApiResponse } from "next";
import nc from "next-connect";
import { prisma } from "../../../lib/prisma";
import { TApiAllCategoriesResp, TApiErrorResp } from "../../../types";

const getCategories = async (
    _req: NextApiRequest,
    res: NextApiResponse<TApiAllCategoriesResp | TApiErrorResp>
) => {
    try {
        const categories = await prisma.category.findMany({
            select: {
                id: true,
                name: true,
                products: {
                    orderBy: {
                        createdAt: "desc",
                    },
                    take: 8,
                    select: {
                        title: true,
                        description: true,
                        image: true,
                        price: true,
                    },
                },
            },
            orderBy: {
                createdAt: "desc",
            },
        });
        return res.status(200).json({ categories });
    } catch (error) {
        return res.status(500).json({
            message: "Something went wrong!! Please try again after sometime",
        });
    }
};

const handler = nc({ attachParams: true }).get(getCategories);

export default handler;
In the above snippet, we are doing the following:
When we create a file under the
pages>apidirectory, NextJS treats it as a Serverless API. So by creating a file namedcategories/index.tswe are informing Next that it needs to convert this to the/api/categoriesAPI.Using the
next-connectlibrary we are making sure that only thegetoperation is allowed for thegetCategoriesfunction.Under this function, we are querying the database with an order as
descfor thecreatedAtproperty and we only take the latest eight product rows for each category row. We also select a specific property from the product and category that are required by the front end.
We don't query all the products for each category in this API, because it will slow down our response time.
You'll find that we have imported prisma and types files. Let's create two directories under src named lib and types.
Under the lib directory, create a file named prisma.ts, and under the types directory create a file named index.ts.
Let's create our global Prisma constant under prisma.ts. Copy-paste the following code:
import { PrismaClient } from "@prisma/client";

declare global {
    var prisma: PrismaClient;
}

export const prisma =
    global.prisma ||
    new PrismaClient({
        log: [],
    });

if (process.env.NODE_ENV !== "production") global.prisma = prisma;
Here we are creating a global prisma variable which we can use across the project.
Let's add the types that we will use application-wide under src/types/index.ts.
Copy-paste the following code:
export type TApiAllCategoriesResp = {
    categories: {
        id: string;
        name: string;
        products: {
            title: string;
            description: string;
            image: string;
            price: string;
        }[];
    }[];
};

export type TApiSingleCategoryWithProductResp = {
    category: {
        id: string;
        name: string;
        products: {
            id: string;
            title: string;
            description: string;
            image: string;
            price: string;
            quantity: number;
        }[];
        hasMore: boolean;
    };
};

export type TApiSingleProductResp = {
    product: {
        title: string;
        description: string;
        price: string;
        quantity: number;
        image: string;
    };
};

export type TApiErrorResp = {
    message: string;
};
Here we are creating four types which will be used across the project.
I'll be using Postman to test this API. Postman is a utility for developing APIs. You can call the APIs, and Postman will show the response based on how you structure it.
Just update the URL in Postman to:
http://localhost:3000/api/categories
And you'll get the following response:
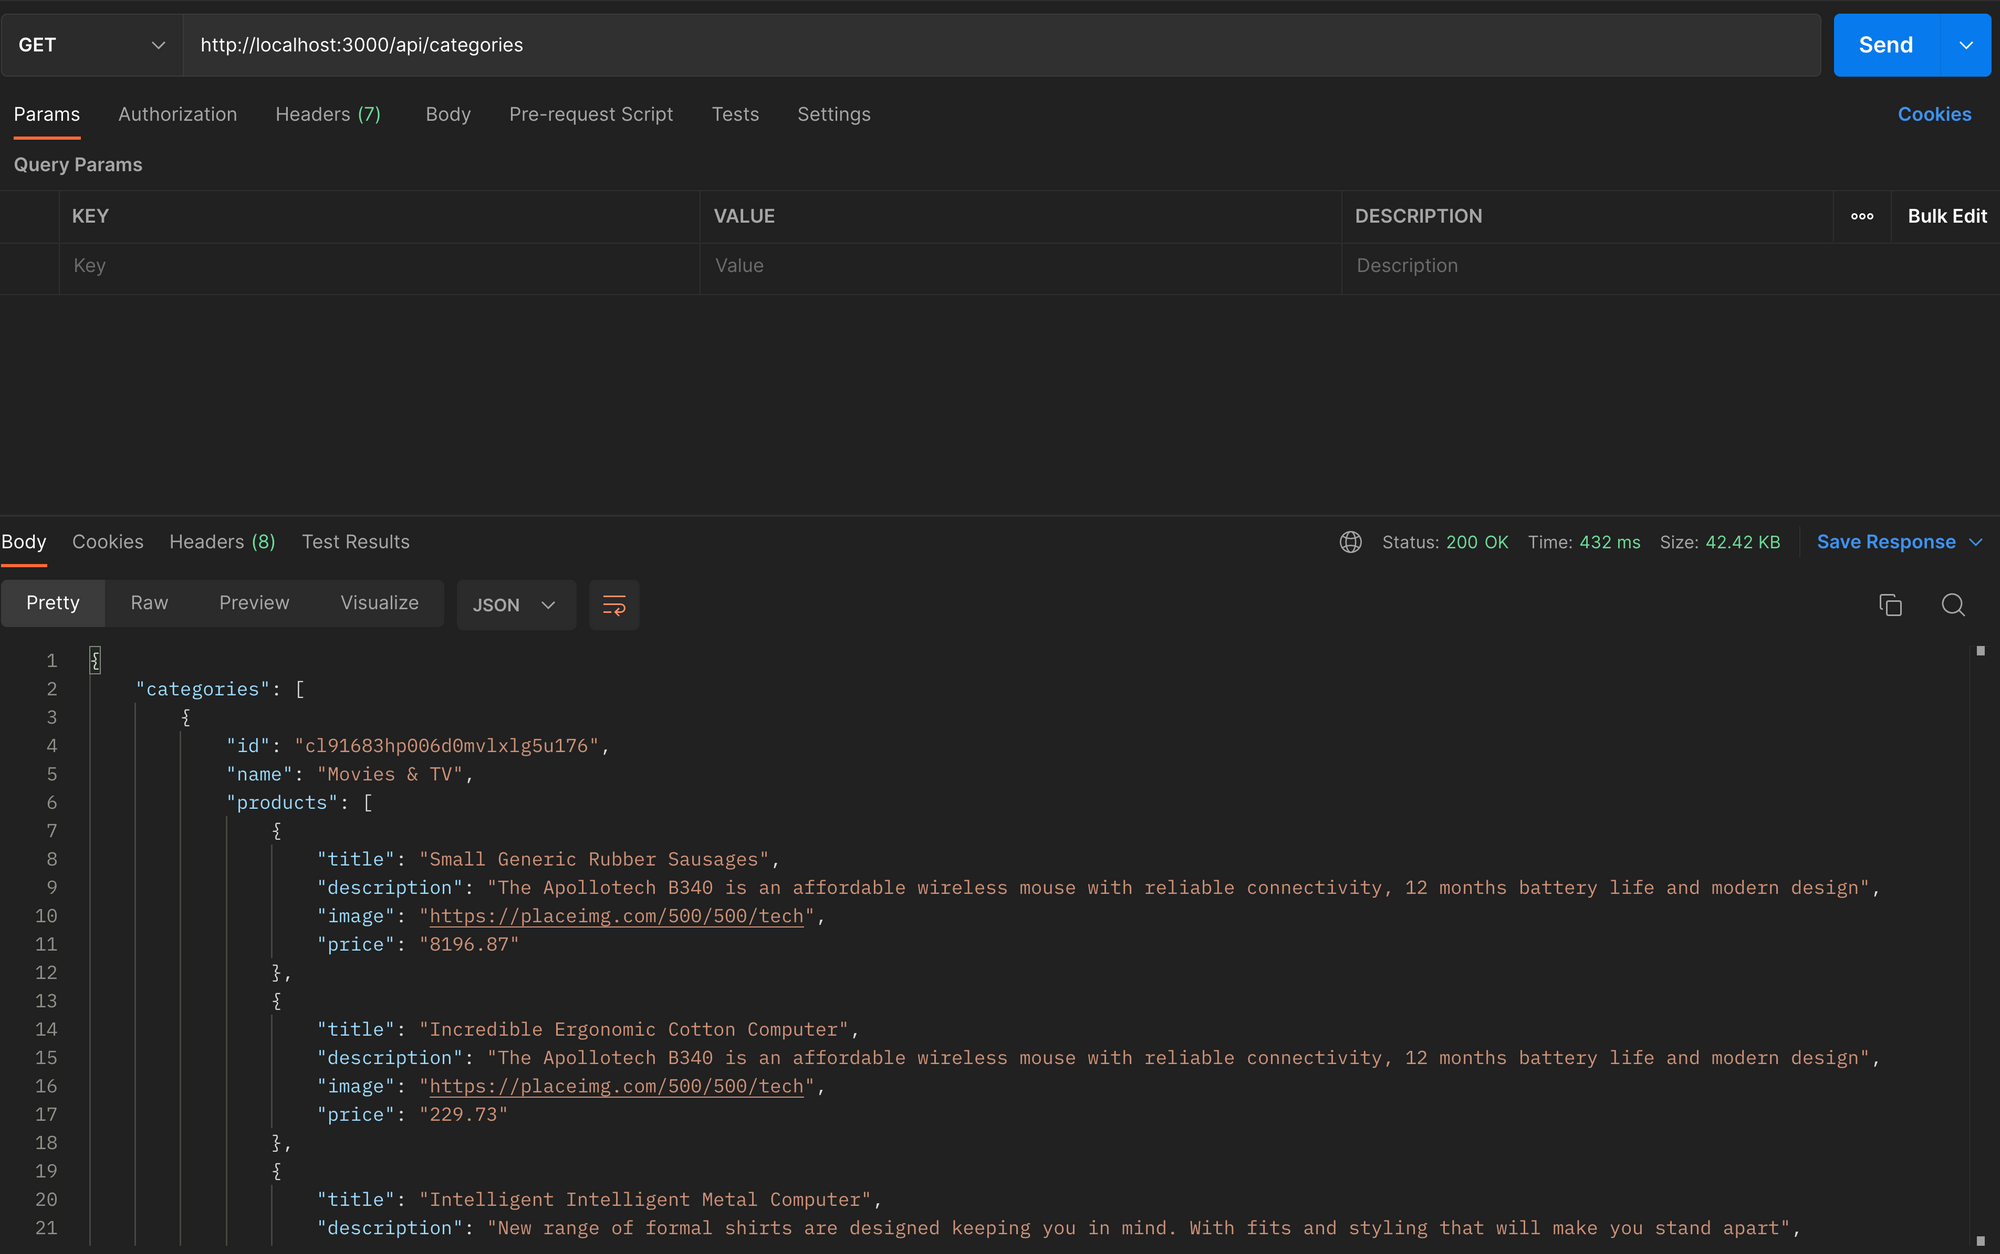
All Categories Resp
Now let's create an API to get a single category's information with its products.
Under the src/pages/api/categories directory create a file named [id].ts and copy-paste the following code:
import type { NextApiRequest, NextApiResponse } from "next";
import nc from "next-connect";
import { prisma } from "../../../lib/prisma";
import {
    TApiErrorResp,
    TApiSingleCategoryWithProductResp
} from "../../../types";

const getSingleCategory = async (
    req: NextApiRequest,
    res: NextApiResponse<TApiSingleCategoryWithProductResp | TApiErrorResp>
) => {
    try {
        const id = req.query.id as string;
        const cursorId = req.query.cursorId;
        if (cursorId) {
            const categoriesData = await prisma.category.findUnique({
                where: {
                    id,
                },
                select: {
                    id: true,
                    name: true,
                    products: {
                        orderBy: {
                            createdAt: "desc",
                        },
                        take: 12,
                        skip: 1,
                        cursor: {
                            id: cursorId as string,
                        },
                        select: {
                            id: true,
                            title: true,
                            description: true,
                            image: true,
                            price: true,
                            quantity: true,
                        },
                    },
                },
            });

            if (!categoriesData) {
                return res.status(404).json({ message: `Category not found` });
            }

            let hasMore = true;
            if (categoriesData.products.length === 0) {
                hasMore = false;
            }

            return res
                .status(200)
                .json({ category: { ...categoriesData, hasMore } });
        }

        const categoriesData = await prisma.category.findUnique({
            where: {
                id,
            },
            select: {
                id: true,
                name: true,
                products: {
                    orderBy: {
                        createdAt: "desc",
                    },
                    take: 12,
                    select: {
                        id: true,
                        title: true,
                        description: true,
                        image: true,
                        price: true,
                        quantity: true,
                    },
                },
            },
        });
        if (!categoriesData) {
            return res.status(404).json({ message: `Category not found` });
        }

        let hasMore = true;
        if (categoriesData.products.length === 0) {
            hasMore = false;
        }

        return res
            .status(200)
            .json({ category: { ...categoriesData, hasMore } });
    } catch (error) {
        return res.status(500).json({
            message: "Something went wrong!! Please try again after sometime",
        });
    }
};

const handler = nc({ attachParams: true }).get(getSingleCategory);

export default handler;
In the above snippet, we are doing the following:
By creating a file named
[id].tsundersrc/pages/api/categorieswe are telling NextJS to convert this to the/api/categories/[id]API.The
[id]is the category id from the category table.Using the
next-connectlibrary we are making sure that only thegetoperation is allowed for thegetSingleCategoryfunction.Under this function, we are querying the database with order as
descfor thecreatedAtproperty and we only take the latest twelve product rows. We also select a specific property from the product that is required by the front end.
In this API, you will find that we have implemented pagination also. It helps us get more products under one category.
There are two kinds of pagination. One is cursor based, and another is offset-based pagination.
So why did we choose cursor-based pagination instead of offset-based pagination?
"Offset pagination does not scale at a database level. For example, if you skip 200,00 records and take the first 10, the database still has to traverse the first 200,00 records before returning the 10 that you asked for - this negatively affects performance."
For more information read this helpful guide.
Update the URL in Postman to:
http://localhost:3000/api/categories/cl91683hp006d0mvlxlg5u176?cursorId=cl91685ht00b00mvllxjwzkqk
Our URL consists of two ids and you'll need to add cl91683hp006d0mvlxlg5u176 from the previous all-category response. This cl91685ht00b00mvllxjwzkqk id is just the cursor of the product and you can add this as the last one you want.
You'll get the following response:
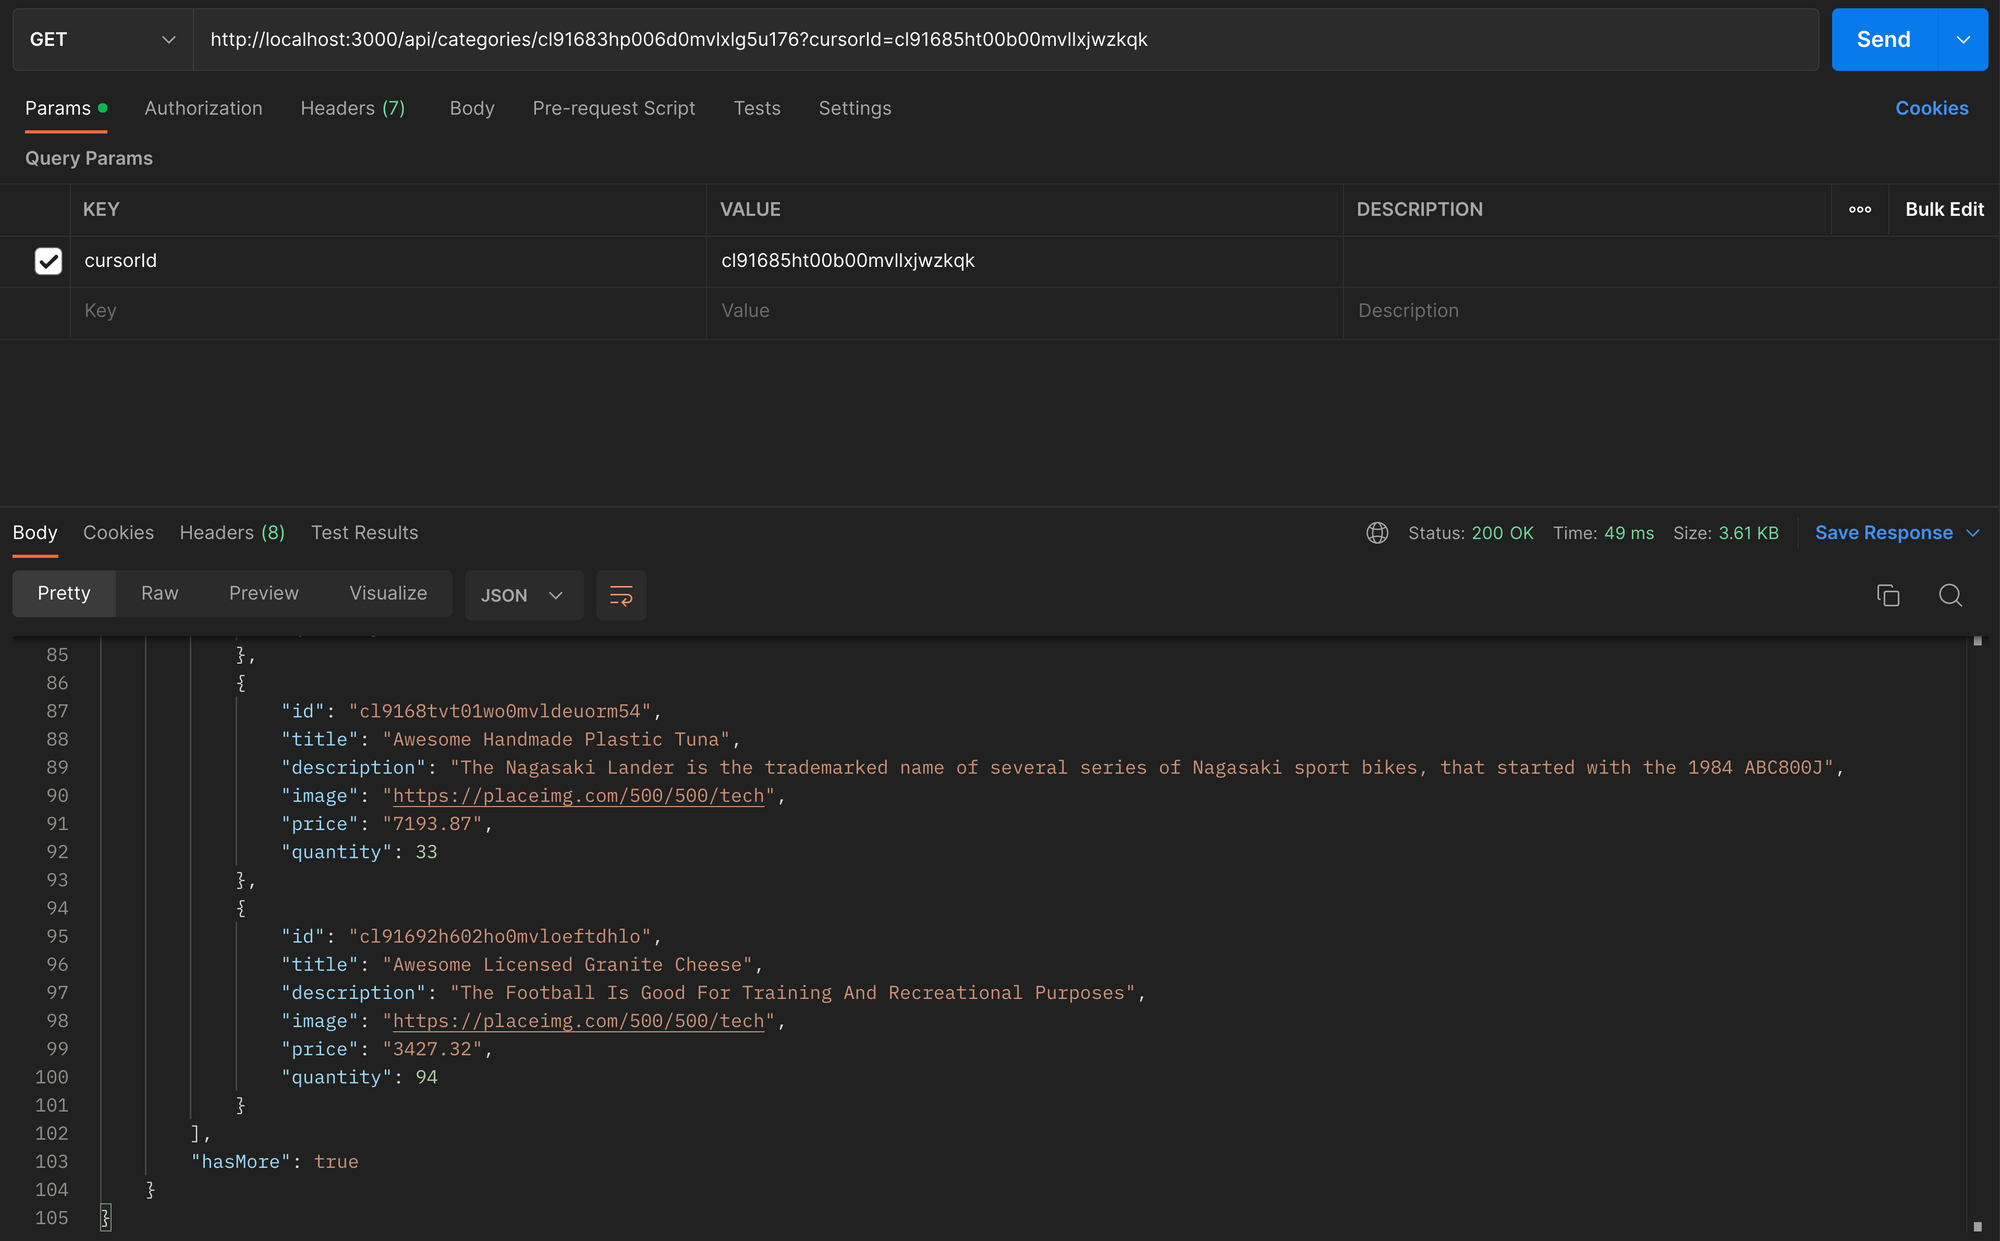
Single Category Resp
Now let's create an API to get single product information.
Under the src/pages/api/products directory create a file named [title].ts and copy-paste the following code:
import type { NextApiRequest, NextApiResponse } from "next";
import nc from "next-connect";
import { prisma } from "../../../lib/prisma";
import { TApiErrorResp, TApiSingleProductResp } from "../../../types";

const getSingleProduct = async (
    req: NextApiRequest,
    res: NextApiResponse<TApiSingleProductResp | TApiErrorResp>
) => {
    try {
        const title = req.query.title as string;
        const product = await prisma.product.findUnique({
            where: {
                title,
            },
            select: {
                title: true,
                description: true,
                price: true,
                quantity: true,
                image: true,
            },
        });
        if (!product) {
            return res.status(404).json({ message: `Product not found` });
        }
        return res.status(200).json({ product });
    } catch (error) {
        return res.status(500).json({
            message: "Something went wrong!! Please try again after sometime",
        });
    }
};

const handler = nc({ attachParams: true }).get(getSingleProduct);

export default handler;
In the above snippet, we are doing the following:
By creating a file named
[title].tsundersrc/pages/api/productswe are informing NextJS to convert this to the/api/products/[title]API.The
[title]is the product title from the product table.Using the
next-connectlibrary we are making sure that only thegetoperation is allowed for thegetSingleProductfunction.Under this function, we are querying the database using the
findUniquequery based on the title.
Update the URL in Postman to:
http://localhost:3000/api/products/Practical Gorgeous Fresh Shoes
Here Practical Gorgeous Fresh Shoes is the title of the product we want to get. You can replace it with any product title from your database.
You'll get the following response:
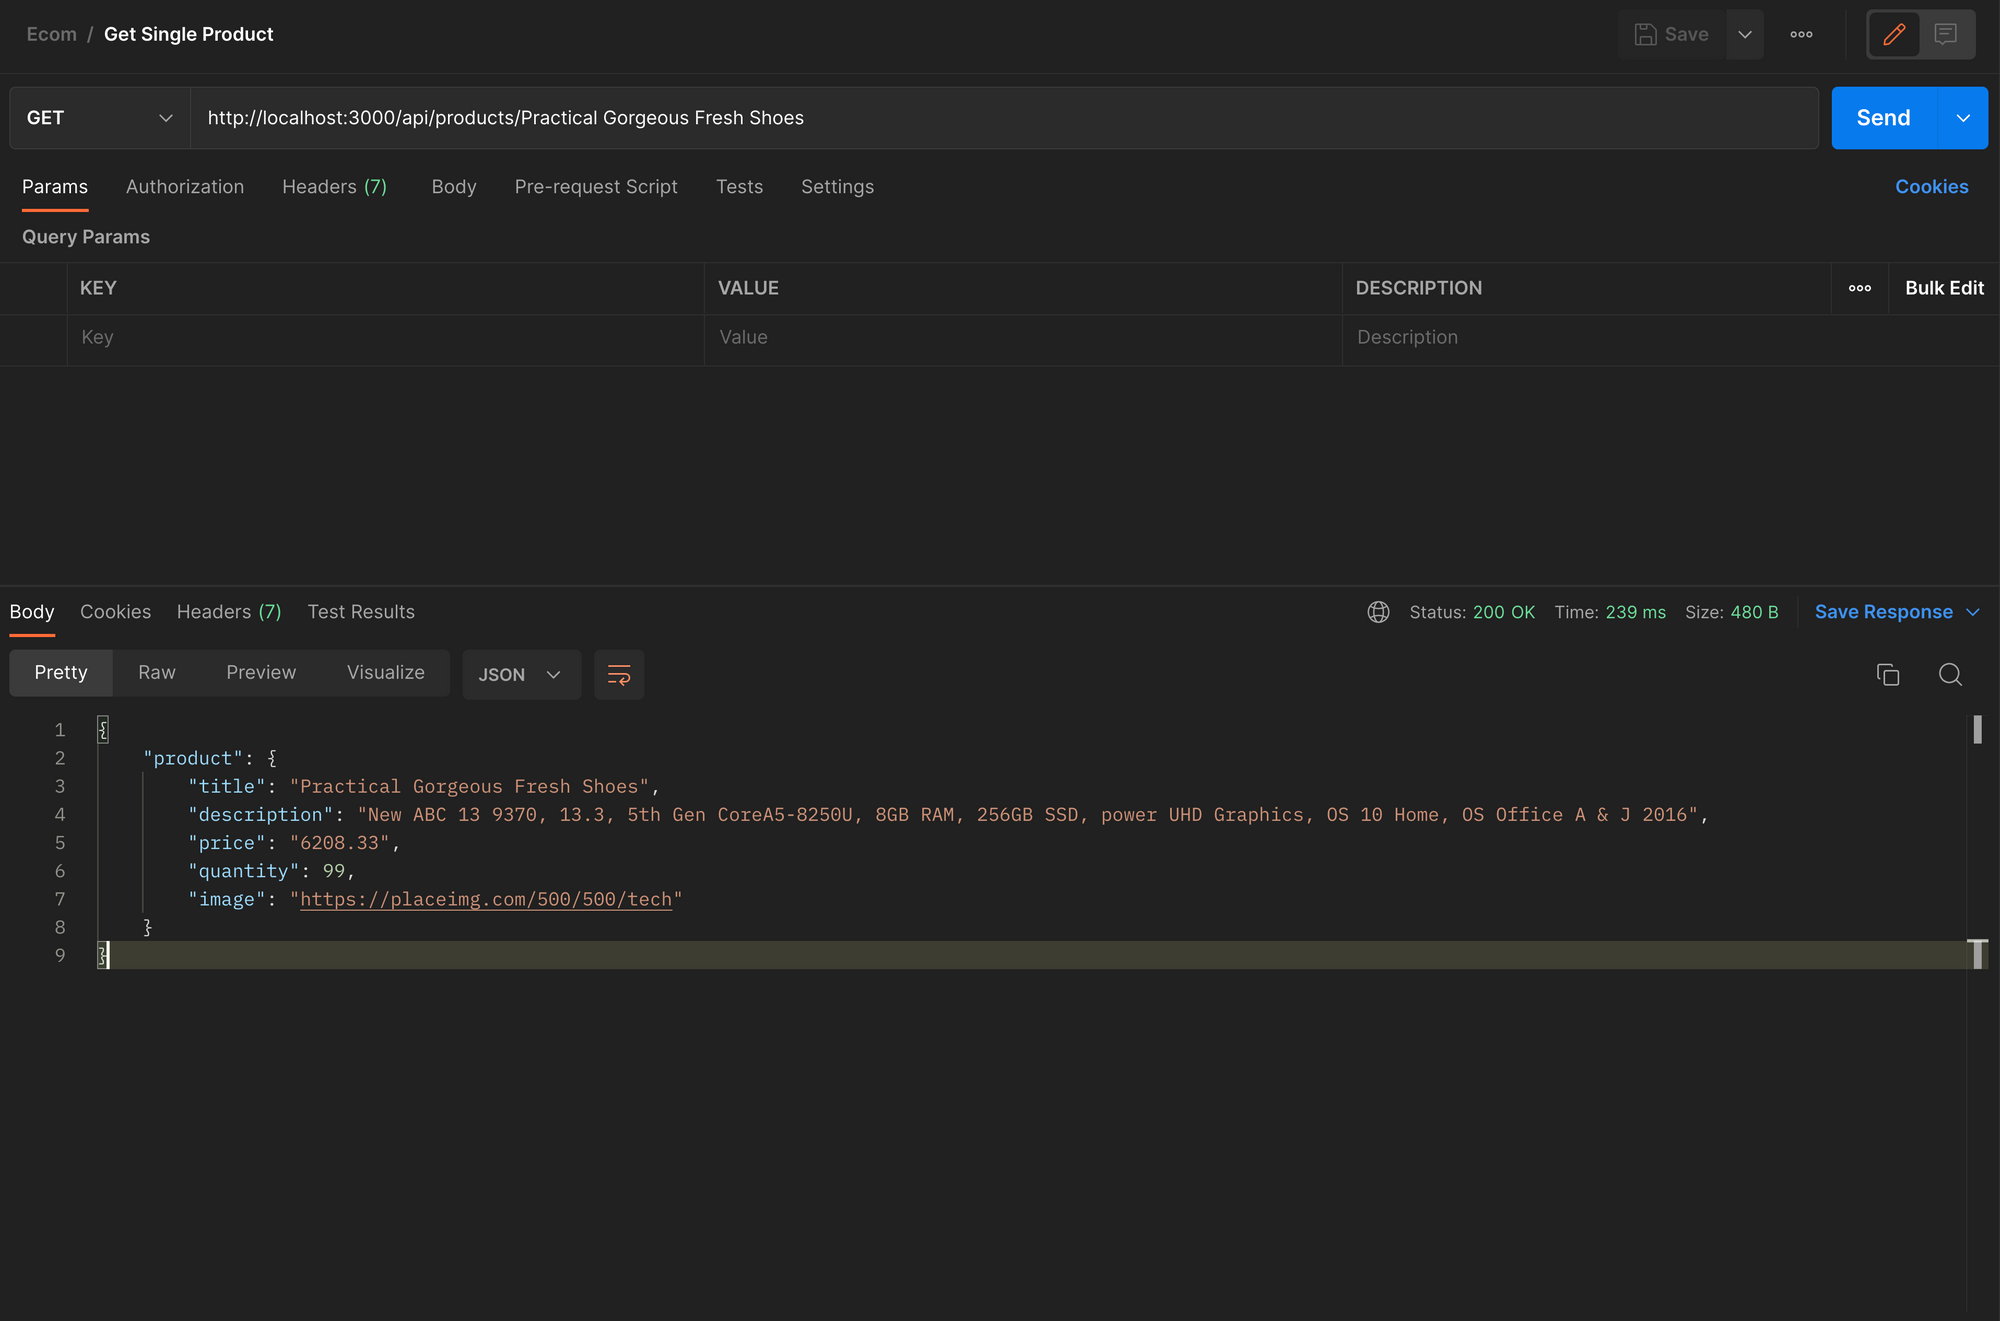
Single Product Resp
How to Create the All Category and Single Category UIs:
Under src/pages/_app.tsx, replace the existing code with the following:
import { QueryClientProvider } from "@tanstack/react-query";
import { ReactQueryDevtools } from "@tanstack/react-query-devtools";
import type { AppProps } from "next/app";
import queryClient from "../lib/query";
import "../styles/globals.css";

function MyApp({ Component, pageProps }: AppProps) {
    return (
        <QueryClientProvider client={queryClient}>
            <ReactQueryDevtools initialIsOpen={false} />
            <Component {...pageProps} />
        </QueryClientProvider>
    );
}

export default MyApp;
Here we are wrapping all our components with React QueryClient Provider. But we also need to pass in the Client Context.
Under the src/lib directory create a new file named query.ts and copy-paste the following code:
import { QueryClient } from "@tanstack/react-query";

const queryClient = new QueryClient();

export default queryClient;
We are initiating a new QueryClient object and assigning it to the queryClient variable and exporting it as default. The reason we do this is that in this way we get to keep the queryClient object as a global context.
Under src/pages/index.tsx, replace the existing code with the following:
import { useQuery } from "@tanstack/react-query";
import type { NextPage } from "next";
import Head from "next/head";
import Navbar from "../components/Navbar";
import ProductGrid from "../components/ProductGrid";
import Skelton from "../components/Skelton";

const Home: NextPage = () => {
    const getAllCategories = async () => {
        try {
            const respJSON = await fetch("/api/categories");
            const resp = await respJSON.json();
            return resp;
        } catch (error) {
            throw error;
        }
    };

    const { isLoading, data } = useQuery(
        ["AllCategoreiesWithProducts"],
        getAllCategories
    );

    const categories = data?.categories;

    return (
        <div>
            <Head>
                <title>All Products</title>
                <meta name="description" content="All Products" />
                <link rel="icon" href="/favicon.ico" />
            </Head>

            <main className="container mx-auto">
                <Navbar />
                {isLoading ? (
                    <Skelton />
                ) : (
                    <>
                        {categories && categories?.length > 0 && (
                            <ProductGrid
                                showLink={true}
                                categories={categories}
                            />
                        )}
                    </>
                )}
            </main>
        </div>
    );
};

export default Home;
Let's understand our code.
Here we are fetching the data from the /api/categories endpoint that we wrote earlier. We are using useQuery to cache this data with the key AllCategoreiesWithProducts.
But there are three components that we haven't created yet. Let's create those and understand each one.
Under the src directory, create a components directory. Under the newly created components directory, create three files named Navbar.tsx, ProductGrid.tsx and Skelton.tsx.
Under Navbar.tsx copy-paste the following code:
import NextLink from "next/link";

const Navbar = () => {
    return (
        <div className="relative bg-white mx-6">
            <div className="flex items-center justify-between pt-6 md:justify-start md:space-x-10">
                <div className="flex justify-start lg:w-0 lg:flex-1">
                    <h1 className="text-2xl">
                        <NextLink href="/" className="cursor-pointer">
                            Ecomm App
                        </NextLink>
                    </h1>
                </div>
            </div>
        </div>
    );
};

export default Navbar;
Here we have created an h1 with the text as Ecomm App. We have wrapped this text around NextLink and set the location as /. So when user clicks on this, they will be redirected to the home page.
Under ProductGrid.tsx copy-paste the following code:
import NextImage from "next/image";
import NextLink from "next/link";
import { useEffect } from "react";
import { AiOutlineRight } from "react-icons/ai";
import { useInView } from "react-intersection-observer";
import { TApiAllCategoriesResp } from "../types";

interface IProductGrid extends TApiAllCategoriesResp {
    showLink: boolean;
    hasMore?: boolean;
    loadMoreFun?: Function;
}

const ProductGrid = (props: IProductGrid) => {
    const { categories, showLink, loadMoreFun, hasMore } = props;
    const { ref, inView } = useInView();

    useEffect(() => {
        if (inView) {
            if (loadMoreFun) loadMoreFun();
        }
    }, [inView, loadMoreFun]);

    return (
        <div className="bg-white">
            {categories.map((category) => (
                <div className="mt-12  p-6" key={category.name}>
                    <div className="flex flex-row justify-between">
                        <span className="inline-flex items-center rounded-md bg-sky-800 px-8 py-2 text-md font-medium text-white">
                            {category.name}
                        </span>
                        {showLink && (
                            <NextLink href={`/category/${category.id}`}>
                                <p className="flex flex-row gap-2 underline hover:cursor-pointer items-center">
                                    View More
                                    <AiOutlineRight />
                                </p>
                            </NextLink>
                        )}
                    </div>
                    <div className="mt-6  grid grid-cols-1 gap-y-10 gap-x-6 xl:gap-x-8 sm:grid-cols-2 lg:grid-cols-4">
                        {category?.products.map((product) => (
                            <div
                                className="p-6 group rounded-lg border border-gray-200 bg-neutral-200"
                                key={product.title}
                            >
                                <div className="min-h-80 w-full overflow-hidden rounded-md group-hover:opacity-75 lg:aspect-none lg:h-80">
                                    <NextImage
                                        priority={true}
                                        layout="responsive"
                                        width="25"
                                        height="25"
                                        src={`${product.image}`}
                                        alt={product.title}
                                        className="h-full w-full object-cover object-center lg:h-full lg:w-full"
                                    />
                                </div>
                                <div className="relative mt-2">
                                    <h3 className="text-sm font-medium text-gray-900">
                                        {product.title}
                                    </h3>
                                    <p className="mt-1 text-sm text-gray-500">
                                        {product.price}
                                    </p>
                                </div>
                                <div className="mt-6">
                                    <NextLink
                                        href={`/product/${product.title}`}
                                    >
                                        <p className="relative flex items-center justify-center rounded-md border border-transparent bg-sky-800 py-2 px-8 text-sm font-medium text-white hover:bg-sky-900 hover:cursor-pointer">
                                            View More Details
                                        </p>
                                    </NextLink>
                                </div>
                            </div>
                        ))}
                    </div>
                    {!showLink && (
                        <div className="flex items-center justify-center mt-8">
                            {hasMore ? (
                                <button
                                    ref={ref}
                                    type="button"
                                    className="inline-flex items-center rounded-md border border-transparent bg-sky-800 px-4 py-2 text-sm font-medium text-white shadow-sm hover:bg-sky-900"
                                >
                                    Loading...
                                </button>
                            ) : (
                                <div className="border-l-4 border-yellow-400 bg-yellow-50 p-4 w-full">
                                    <div className="flex">
                                        <div className="ml-3">
                                            <p className="text-sm text-yellow-700">
                                                You have viewed all the Products
                                                under this category.
                                            </p>
                                        </div>
                                    </div>
                                </div>
                            )}
                        </div>
                    )}
                    {showLink && (
                        <div className="w-full border-b border-gray-300 mt-24" />
                    )}
                </div>
            ))}
        </div>
    );
};

export default ProductGrid;
Here we have created a grid that will show 1 column for the base screen. For the sm screen it will show 2 columns and for the lg screen it will show 4 columns.
Under this, we have a single card which has a Title, Price, and View More Details button. The View More Details button redirects the user to a single product page which will create a bit later.
Apart from that, we are using the useInView hook from the react-intersection-observer library to find the user's cursor on the screen. This ref is attached to a Loading... button and once user is near it then we execute the loadMoreFn function.
It makes an API call to the server to get the next twelve rows from the last cursor.
Under Skelton.tsx copy-paste the following code:
const Skelton = () => {
    return (
        <>
            <div className="mt-12 h-8 w-40 rounded-lg bg-gray-200" />
            <div className="mt-6 grid grid-cols-1 gap-y-10 gap-x-6 sm:grid-cols-2 lg:grid-cols-4 xl:gap-x-8">
                {Array(16)
                    .fill(0)
                    .map((_val, index) => (
                        <div className="rounded-2xl bg-black/5 p-4" key={index}>
                            <div className="h-60 rounded-lg bg-gray-200" />
                            <div className="space-y-4 mt-6 mb-4">
                                <div className="h-3 w-3/5 rounded-lg bg-gray-200" />
                                <div className="h-3 w-4/5 rounded-lg bg-gray-200" />
                            </div>
                        </div>
                    ))}
            </div>
        </>
    );
};

export default Skelton;
We are using placeimg to get fake images for our product and we are using the Next Image component which requires that it be mentioned under next.config.js.
Replace the existing code in next.config.js with the following code:
/** @type {import('next').NextConfig} */
const nextConfig = {
    reactStrictMode: true,
    swcMinify: true,
    images: {
        domains: ["placeimg.com"],
    },
};

module.exports = nextConfig
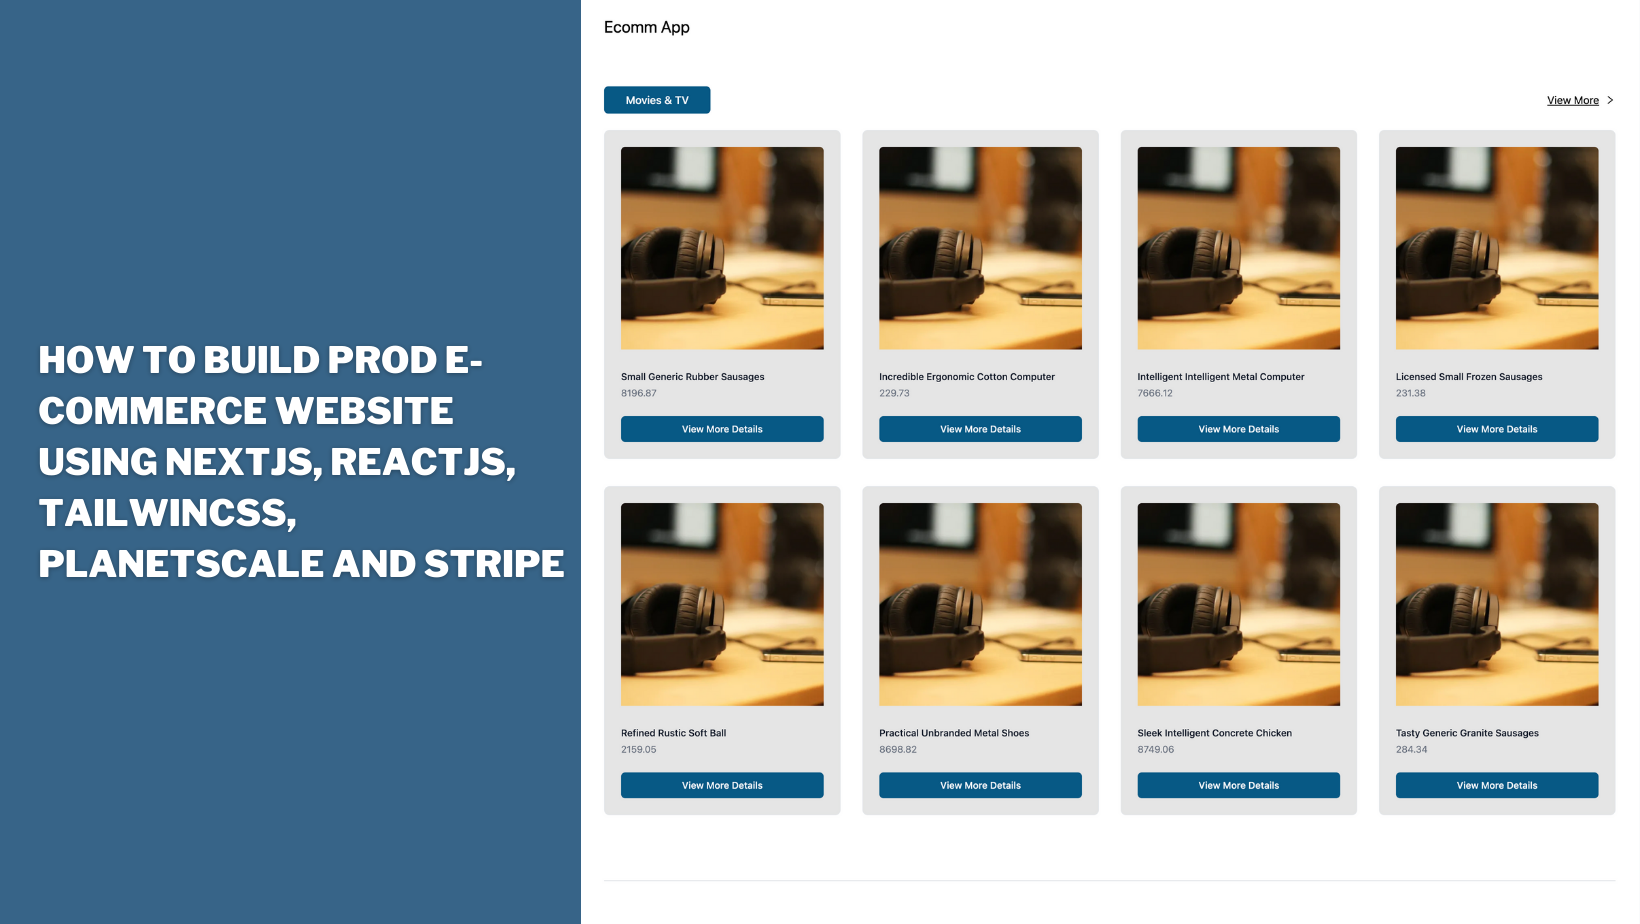
We will need to restart our server. Use the following command to start your development server again:
npm run dev
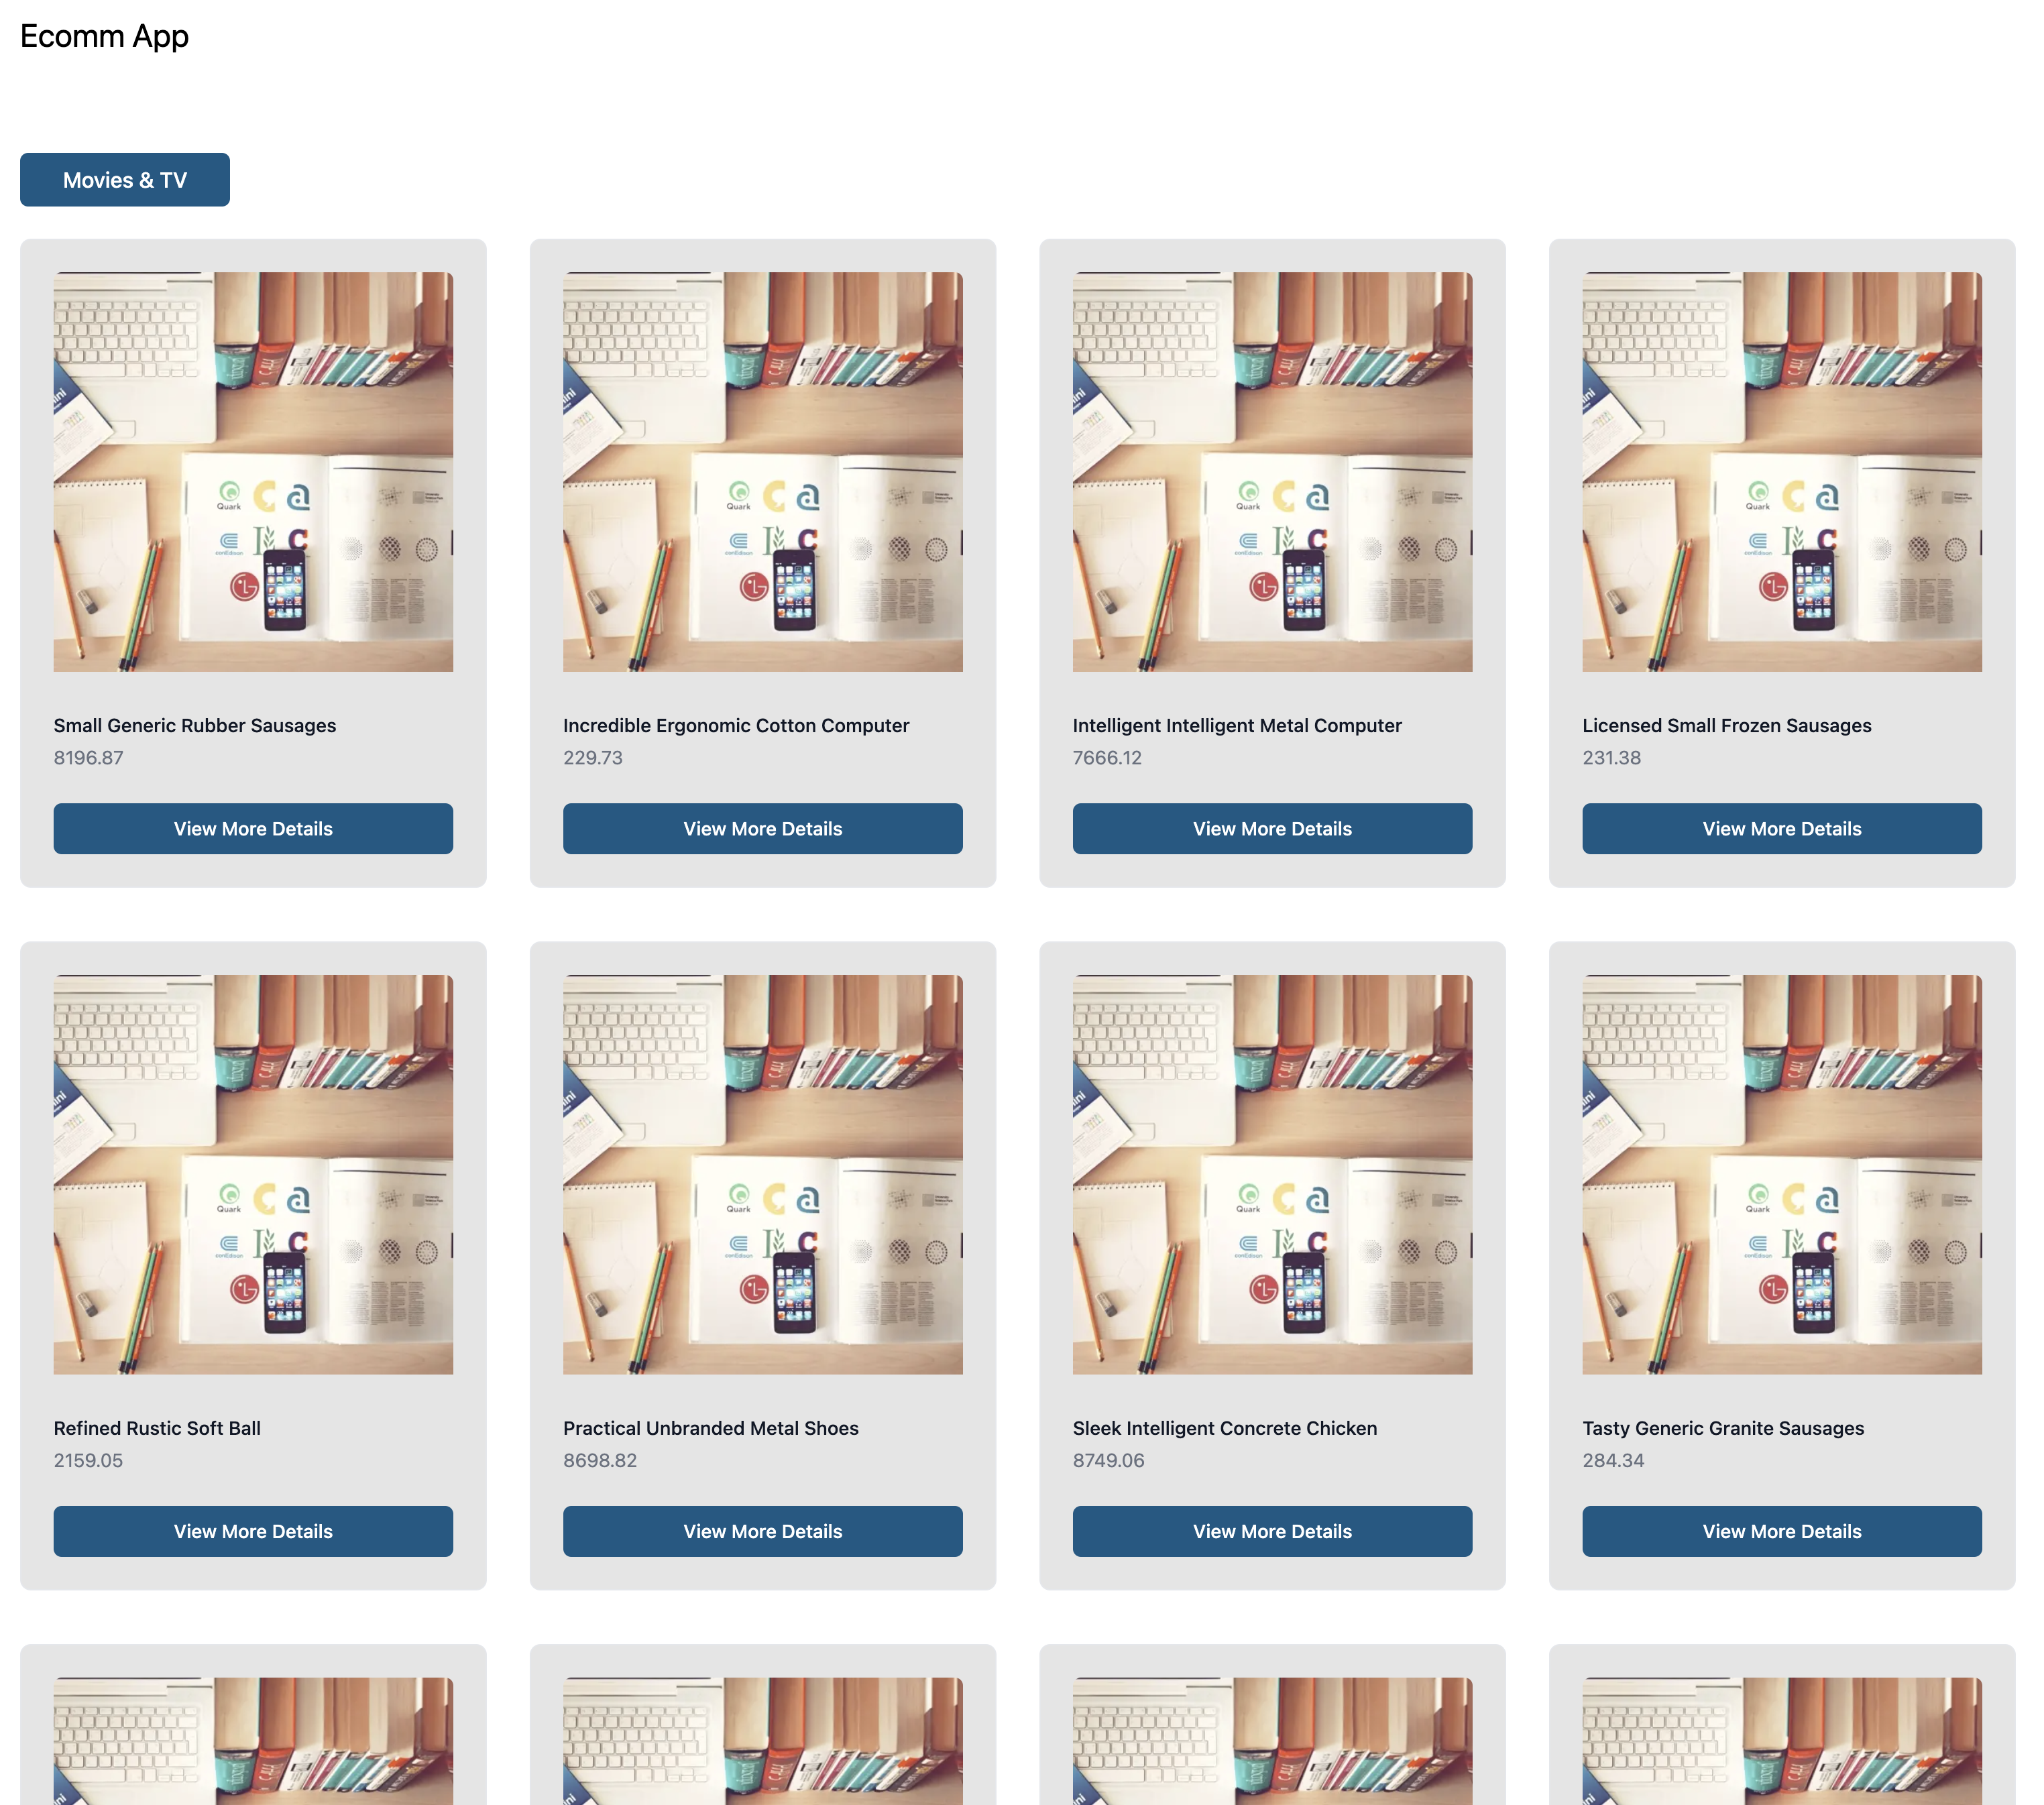
Open http://localhost:3000/ and you'll see the following UI:
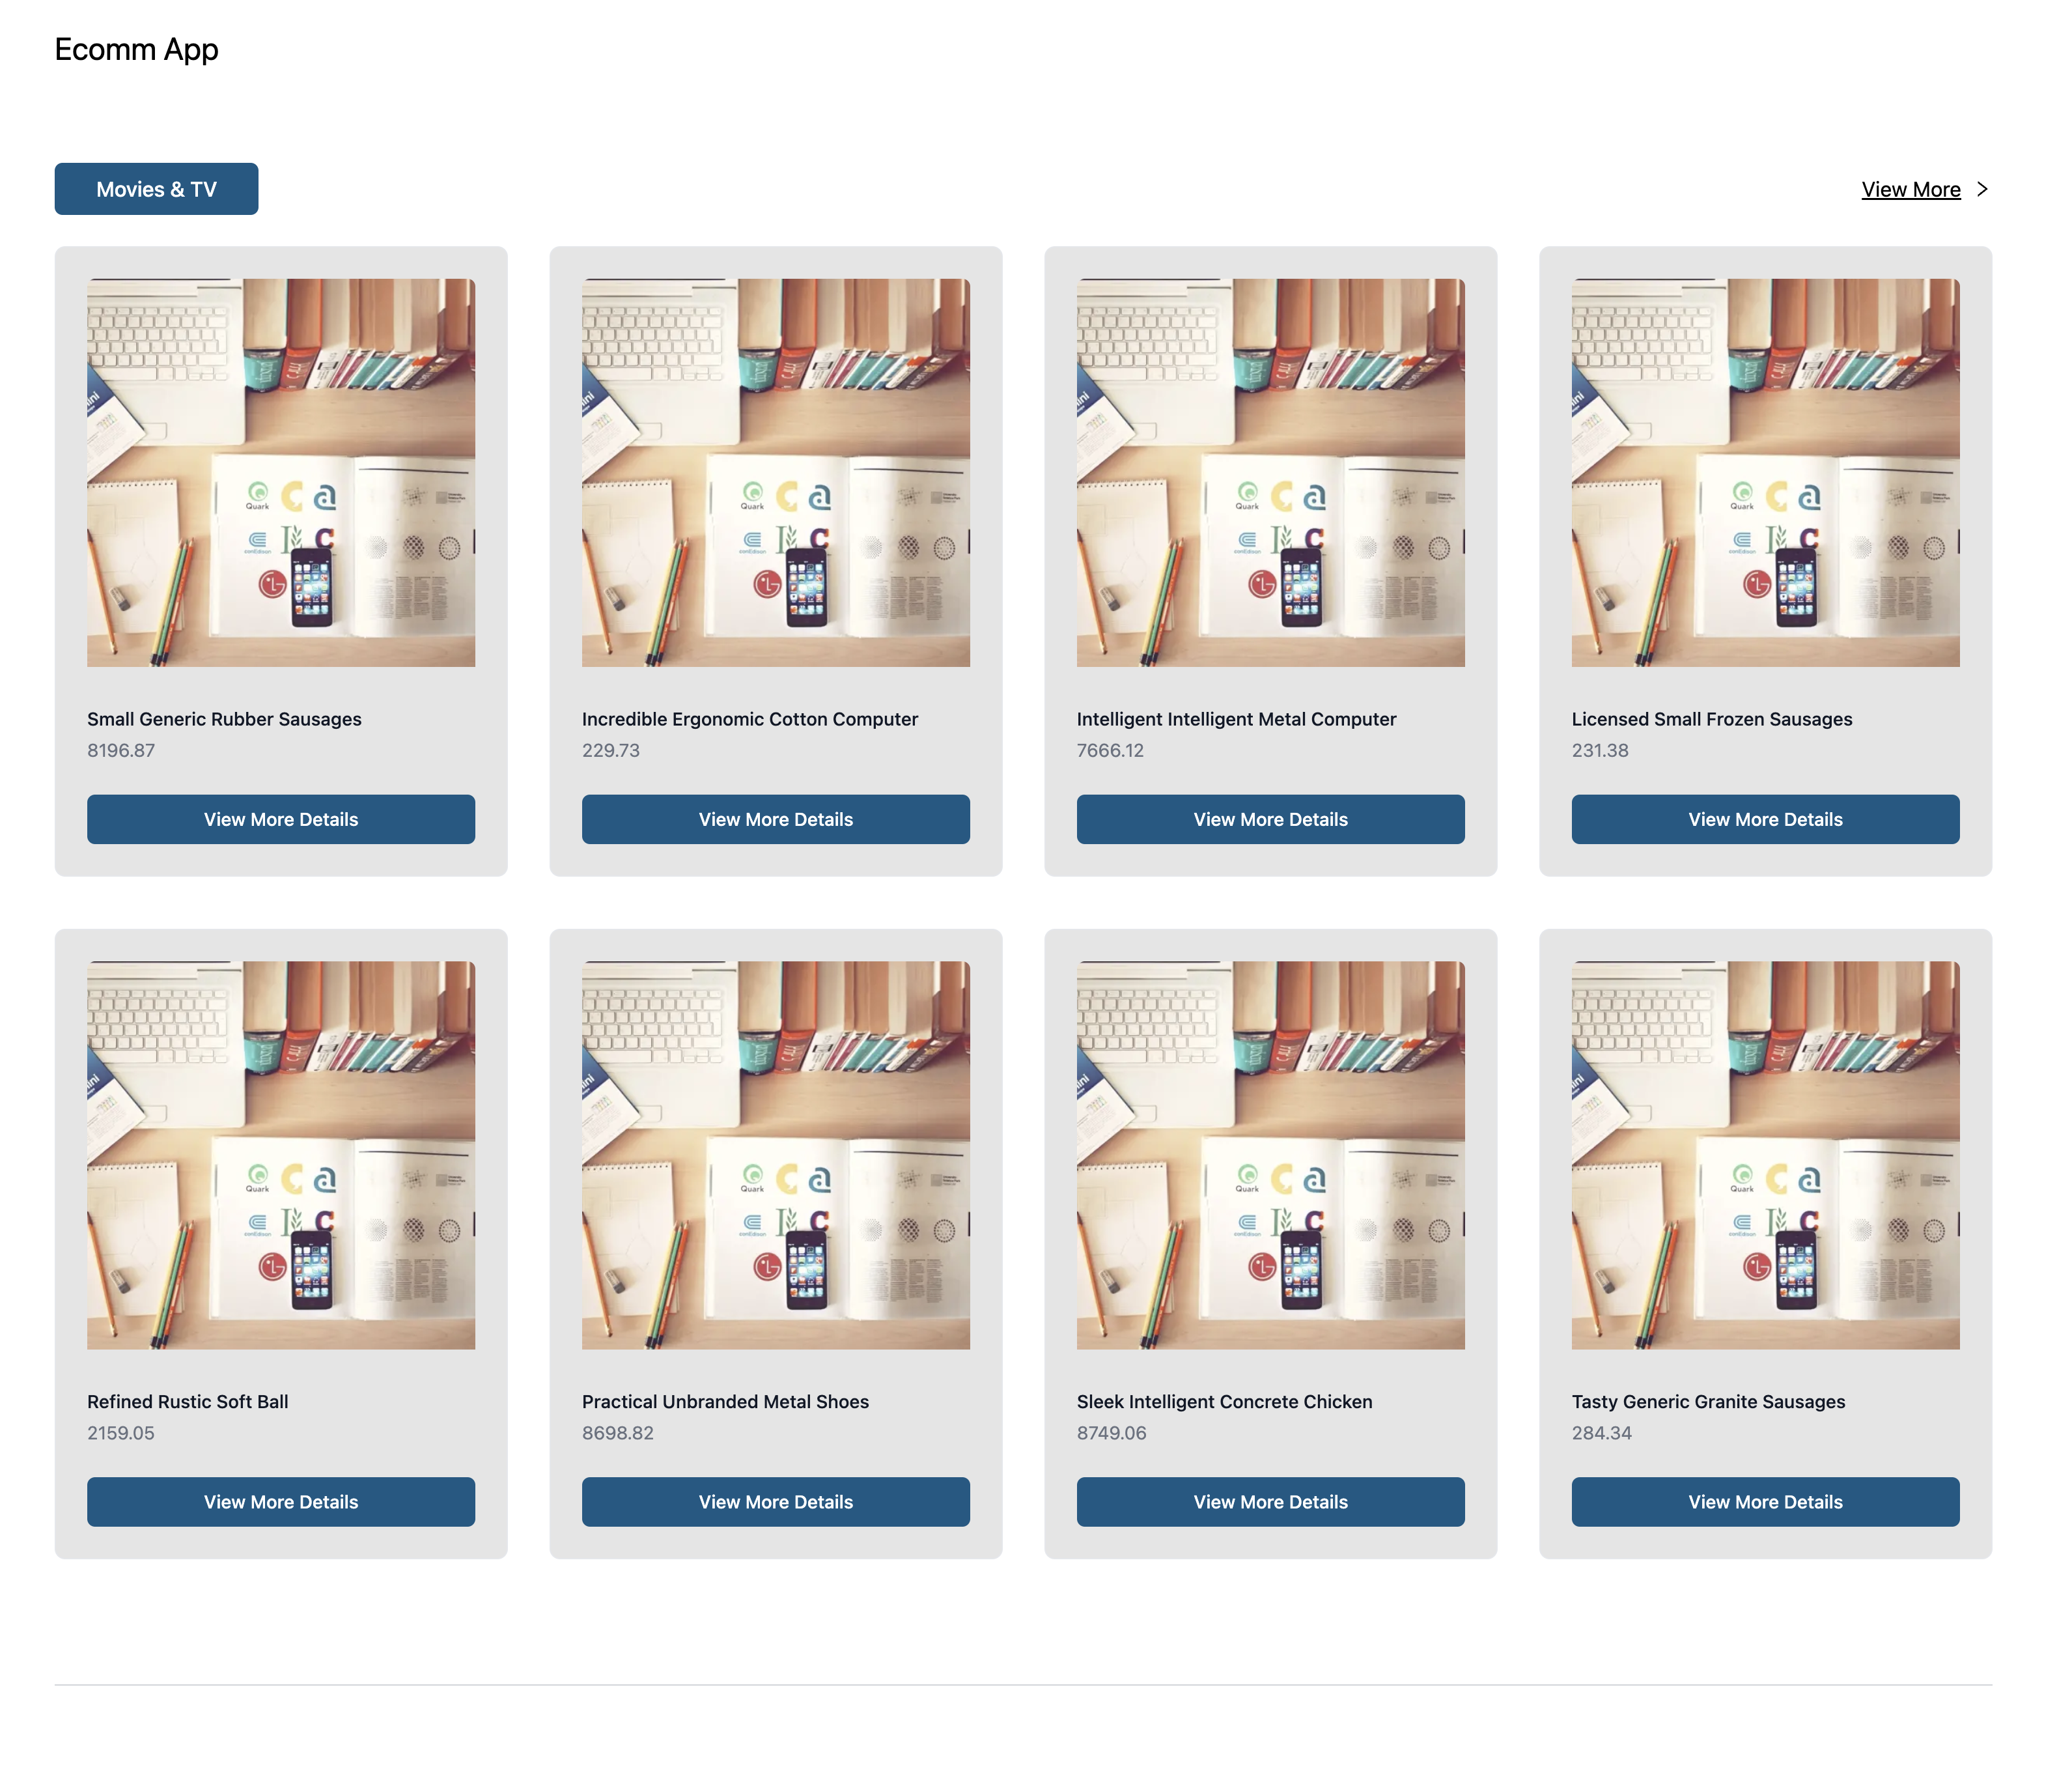
All Products Page
Now let's create a single category page that the user can go to using a View More link.
Under src/pages create a directory named category. Under this directory create a file named [id].tsx and copy paste the following code:
import { useInfiniteQuery } from "@tanstack/react-query";
import Head from "next/head";
import { useRouter } from "next/router";
import Navbar from "../../components/Navbar";
import ProductGrid from "../../components/ProductGrid";
import Skelton from "../../components/Skelton";

const SingleCategory = () => {
    const router = useRouter();

    const getSingleCategory = async ({ pageParam = null }) => {
        try {
            let url = `/api/categories/${router.query.id}`;
            if (pageParam) {
                url += `?cursorId=${pageParam}`;
            }
            const respJSON = await fetch(url);
            const resp = await respJSON.json();
            return resp;
        } catch (error) {
            throw error;
        }
    };

    const { isLoading, data, fetchNextPage, isError } = useInfiniteQuery(
        [`singleCategory ${router.query.id as string}`],
        getSingleCategory,
        {
            enabled: !!router.query.id,
            getNextPageParam: (lastPage) => {
                const nextCursor =
                    lastPage?.category?.products[
                        lastPage?.category?.products?.length - 1
                    ]?.id;
                return nextCursor;
            },
        }
    );

    const allProductsWithCategory: any = {
        name: "",
        products: [],
        hasMore: true,
    };

    data?.pages.map((page) => {
        if (page?.category) {
            if (page.category?.name) {
                allProductsWithCategory.name = page.category?.name;
            }
            if (page.category?.products && page.category?.products.length > 0) {
                allProductsWithCategory.products.push(
                    ...page.category?.products
                );
            }
        }
        return page?.category;
    });

    if (data?.pages[data?.pages.length - 1]?.category?.products.length === 0) {
        allProductsWithCategory.hasMore = false;
    }

    return (
        <div>
            <Head>
                <title>
                    {isLoading
                        ? "Loading..."
                        : `All ${allProductsWithCategory?.name} Product`}
                </title>
                <meta
                    name="description"
                    content="Generated by create next app"
                />
                <link rel="icon" href="/favicon.ico" />
            </Head>
            <main className="container mx-auto">
                <Navbar />
                {isLoading ? (
                    <Skelton />
                ) : (
                    <>
                        {allProductsWithCategory &&
                            allProductsWithCategory.products.length > 0 && (
                                <ProductGrid
                                    hasMore={allProductsWithCategory.hasMore}
                                    showLink={false}
                                    categories={[allProductsWithCategory]}
                                    loadMoreFun={fetchNextPage}
                                />
                            )}
                    </>
                )}
            </main>
        </div>
    );
};

export default SingleCategory;
Here we are calling the /api/categories/[id] API to get the latest twelve products for that category id.
We are using the useInfiniteQuery hook from react query to fetch the data. This hook is useful for cursor-based pagination. We will be using the ProductGrid component that we created earlier.
Open http://localhost:3000/, click on the View More link for any of the category, and you'll see the following UI:
Single Category Page
The difference between the previous UI and the current is that we now don't have the View More Link in the top right corner. Also, when you scroll below, you'll get more products for that category.
Once we scroll through all the products in that category we will see the following warning alert:

How to Implement Single Product UI and Stripe Checkout.
In this section, we'll implement the following functionality:
Create Single Product UI
Create Stripe Checkout
You can find the eCommerce website code implemented in this section at this commit.
How to Create the Single Product UI:
Under the src/pages directory create a directory named product.
Under this directory create a file named [title].tsx and copy-paste the following code:
import { loadStripe, Stripe } from "@stripe/stripe-js";
import { useMutation, useQuery } from "@tanstack/react-query";
import Head from "next/head";
import NextImage from "next/image";
import { useRouter } from "next/router";
import Navbar from "../../components/Navbar";
import Skelton from "../../components/Skelton";

const stripePromiseclientSide = loadStripe(
    process.env.NEXT_PUBLIC_STRIPE_PUBLISHABLE_KEY!
);

const SingleProduct = () => {
    const router = useRouter();

    const getSingleProduct = async () => {
        try {
            const title = router?.query?.title;

            const respJSON = await fetch(`/api/products/${title}`);
            const resp = await respJSON.json();
            return resp;
        } catch (error) {
            throw error;
        }
    };

    const { mutate, isLoading: mutationIsLoading } = useMutation(
        async (body: any) => {
            try {
                const respJSON = await fetch("/api/create-checkout-session", {
                    method: "POST",
                    body: JSON.stringify(body),
                });
                const resp = await respJSON.json();
                const stripe = (await stripePromiseclientSide) as Stripe;
                const result = await stripe.redirectToCheckout({
                    sessionId: resp.id,
                });
                return result;
            } catch (error) {
                throw error;
            }
        }
    );

    const { data, isLoading } = useQuery(
        [`singleProduct, ${router?.query?.title}`],
        getSingleProduct,
        {
            enabled: !!router?.query?.title,
        }
    );

    const product = data?.product;

    return (
        <div>
            <Head>
                <title>{isLoading ? "Loading..." : `${product?.title}`}</title>
                <meta
                    name="description"
                    content="Generated by create next app"
                />
                <link rel="icon" href="/favicon.ico" />
            </Head>
            <main className="container mx-6 md:mx-auto">
                <Navbar />
                {isLoading ? (
                    <Skelton />
                ) : (
                    <div className="bg-white">
                        <div className="pt-6 pb-16 sm:pb-24">
                            <div className="mx-auto mt-8">
                                <div className="flex flex-col md:flex-row gap-x-8">
                                    <div className="min-h-80 w-full overflow-hidden rounded-md group-hover:opacity-75 lg:aspect-none lg:h-80">
                                        <NextImage
                                            layout="responsive"
                                            width="25"
                                            height="25"
                                            src={`${product.image}`}
                                            alt={product.title}
                                            className="h-full w-full object-cover object-center lg:h-full lg:w-full"
                                        />
                                    </div>
                                    <div className="lg:col-span-5 lg:col-start-8 mt-8 md:mt-0">
                                        <h1 className="text-xl font-medium text-gray-900 ">
                                            {product.title}
                                        </h1>
                                        <p className="text-xl font-light text-gray-700 mt-4">
                                            {product.description}
                                        </p>
                                        <p className="text-xl font-normal text-gray-500 mt-4">
                                            USD {product.price}
                                        </p>
                                        <button
                                            onClick={() =>
                                                mutate({
                                                    title: product.title,
                                                    image: product.image,
                                                    description:
                                                        product.description,
                                                    price: product.price,
                                                })
                                            }
                                            disabled={mutationIsLoading}
                                            type="button"
                                            className="inline-flex items-center rounded-md border border-transparent bg-sky-800 px-4 py-2 text-sm font-medium text-white shadow-sm hover:bg-sky-900  mt-4"
                                        >
                                            Buy Now
                                        </button>
                                    </div>
                                </div>
                            </div>
                        </div>
                    </div>
                )}
            </main>
        </div>
    );
};

export default SingleProduct;
Here we are calling /api/products/title API to get the latest product. We have also created Stripe Interface for creating a checkout method once a user clicks the Buy Now button.
Once the user clicks the Buy Now button, we make an API call to /api/create-checkout-session using the useMutation hook. On a successful response, we redirect the user to the Stripe default checkout page.
Open http://localhost:3000/ and click on View More Details button for any product.
You'll see the following UI:
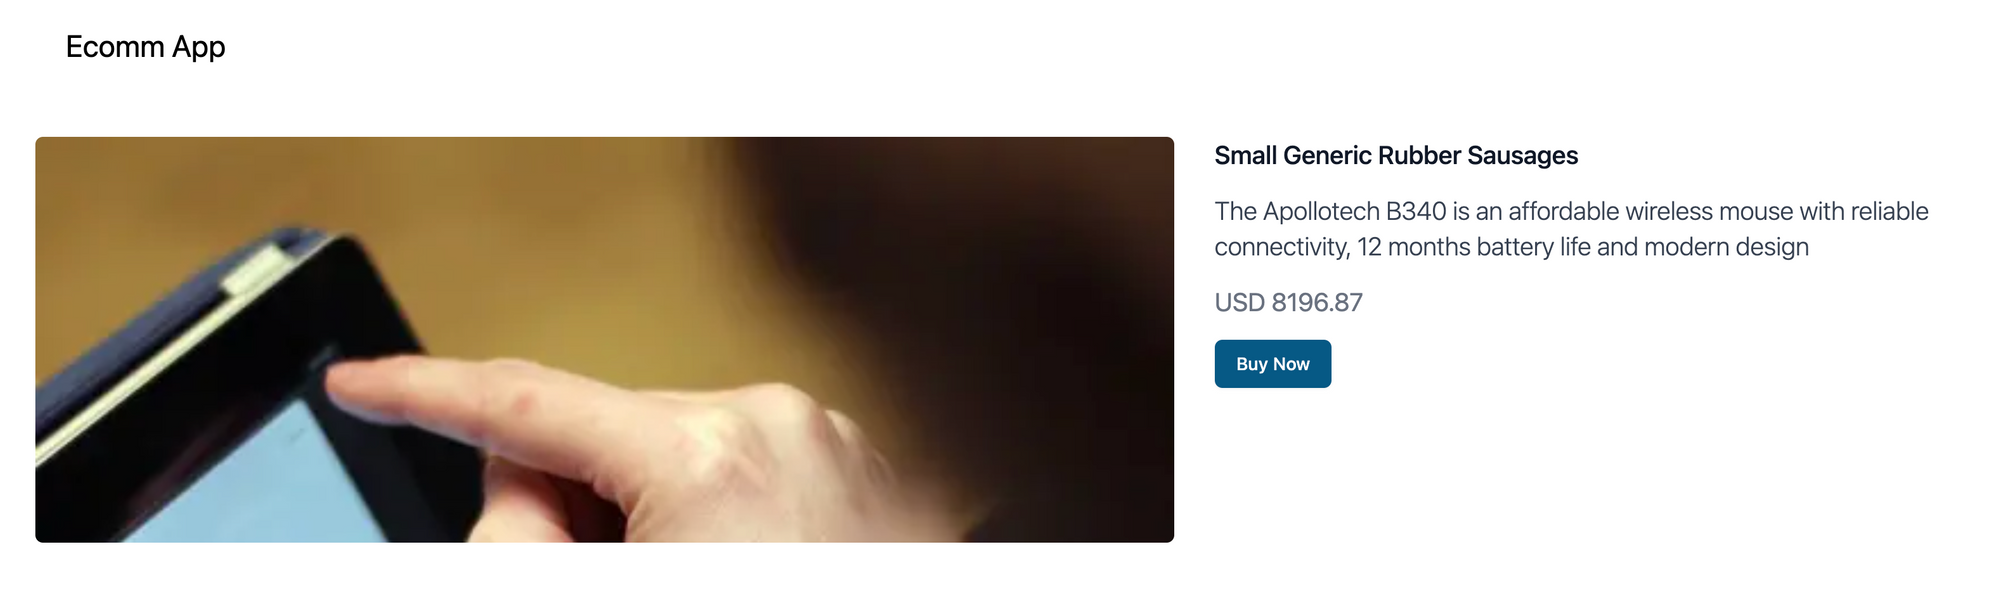
Single Product Page
You can also visit this page by clicking on the View More link and then clicking on the View More Details button for any product.
How to Set Up Stripe Checkout:
To set up Stripe Checkout, we need to add a new file under the lib directory.
Create a new file named stripe.ts under the lib directory and copy paste the following code:
import Stripe from "stripe";

const stripeServerSide = new Stripe(process.env.STRIPE_SECRET_KEY!, {
    apiVersion: "2022-08-01",
});

export { stripeServerSide };
Here we are creating server-side instances of Stripe. Now under the pages/api directory, create a new file named create-checkout-session.ts and copy-paste the following code:
import currency from "currency.js";
import type { NextApiRequest, NextApiResponse } from "next";
import nc from "next-connect";
import { stripeServerSide } from "../../lib/stripe";
import { TApiErrorResp } from "../../types";

const checkoutSession = async (
    req: NextApiRequest,
    res: NextApiResponse<any | TApiErrorResp>
) => {
    try {
        const host = req.headers.origin;
        const referer = req.headers.referer;
        const body = JSON.parse(req.body);
        const formatedPrice = currency(body.price, {
            precision: 2,
            symbol: "",
        }).multiply(100);
        const session = await stripeServerSide.checkout.sessions.create({
            mode: "payment",
            payment_method_types: ["card"],
            line_items: [
                {
                    price_data: {
                        currency: "usd",
                        product_data: {
                            name: body?.title,
                            images: [body.image],
                            description: body?.description,
                        },
                        unit_amount_decimal: formatedPrice.toString(),
                    },
                    quantity: 1,
                },
            ],
            success_url: `${host}/thank-you`,
            cancel_url: `${referer}?status=cancel`,
        });
        return res.status(200).json({ id: session.id });
    } catch (error) {
        return res.status(500).json({
            message: "Something went wrong!! Please try again after sometime",
        });
    }
};

const handler = nc({ attachParams: true }).post(checkoutSession);

export default handler;
In the snippet above we are doing the following:
Formatting the price with precision as two and multiplying it by 100 as Stripe expects the unit_amount in cents by default.
We create the session and pass the id as the response.
Now we need to create another page named thank-you.tsx under the src/pages directory. Once the product purchase is successful, Stripe Checkout will redirect to this page.
Copy-paste the following code under this file:
import Head from "next/head";
import { useRouter } from "next/router";
import { HiCheckCircle } from "react-icons/hi";
import Navbar from "../components/Navbar";

const ThankYou = () => {
    const router = useRouter();
    return (
        <div>
            <Head>
                <title>Thank You</title>
                <meta name="description" content="All Products" />
                <link rel="icon" href="/favicon.ico" />
            </Head>

            <main className="container mx-auto">
                <Navbar />
                <div className="rounded-md bg-green-50 p-4 mt-8">
                    <div className="flex">
                        <div className="flex-shrink-0">
                            <HiCheckCircle
                                className="h-5 w-5 text-green-400"
                                aria-hidden="true"
                            />
                        </div>
                        <div className="ml-3">
                            <h3 className="text-sm font-medium text-green-800">
                                Order Placed
                            </h3>
                            <div className="mt-2 text-sm text-green-700">
                                <p>
                                    Thank you for your Order. We have placed the
                                    order and your email will recieve further
                                    details.
                                </p>
                            </div>
                            <button
                                onClick={() => router.push("/")}
                                type="button"
                                className="inline-flex items-center rounded-md border border-transparent bg-sky-800 px-4 py-2 text-sm font-medium text-white shadow-sm hover:bg-sky-900 mt-4"
                            >
                                Continue Shopping
                            </button>
                        </div>
                    </div>
                </div>
            </main>
        </div>
    );
};

export default ThankYou;
Open http://localhost:3000/ and click on the View More Details button of any product.
Click on the Buy Now button and you'll be redirected to the following page:
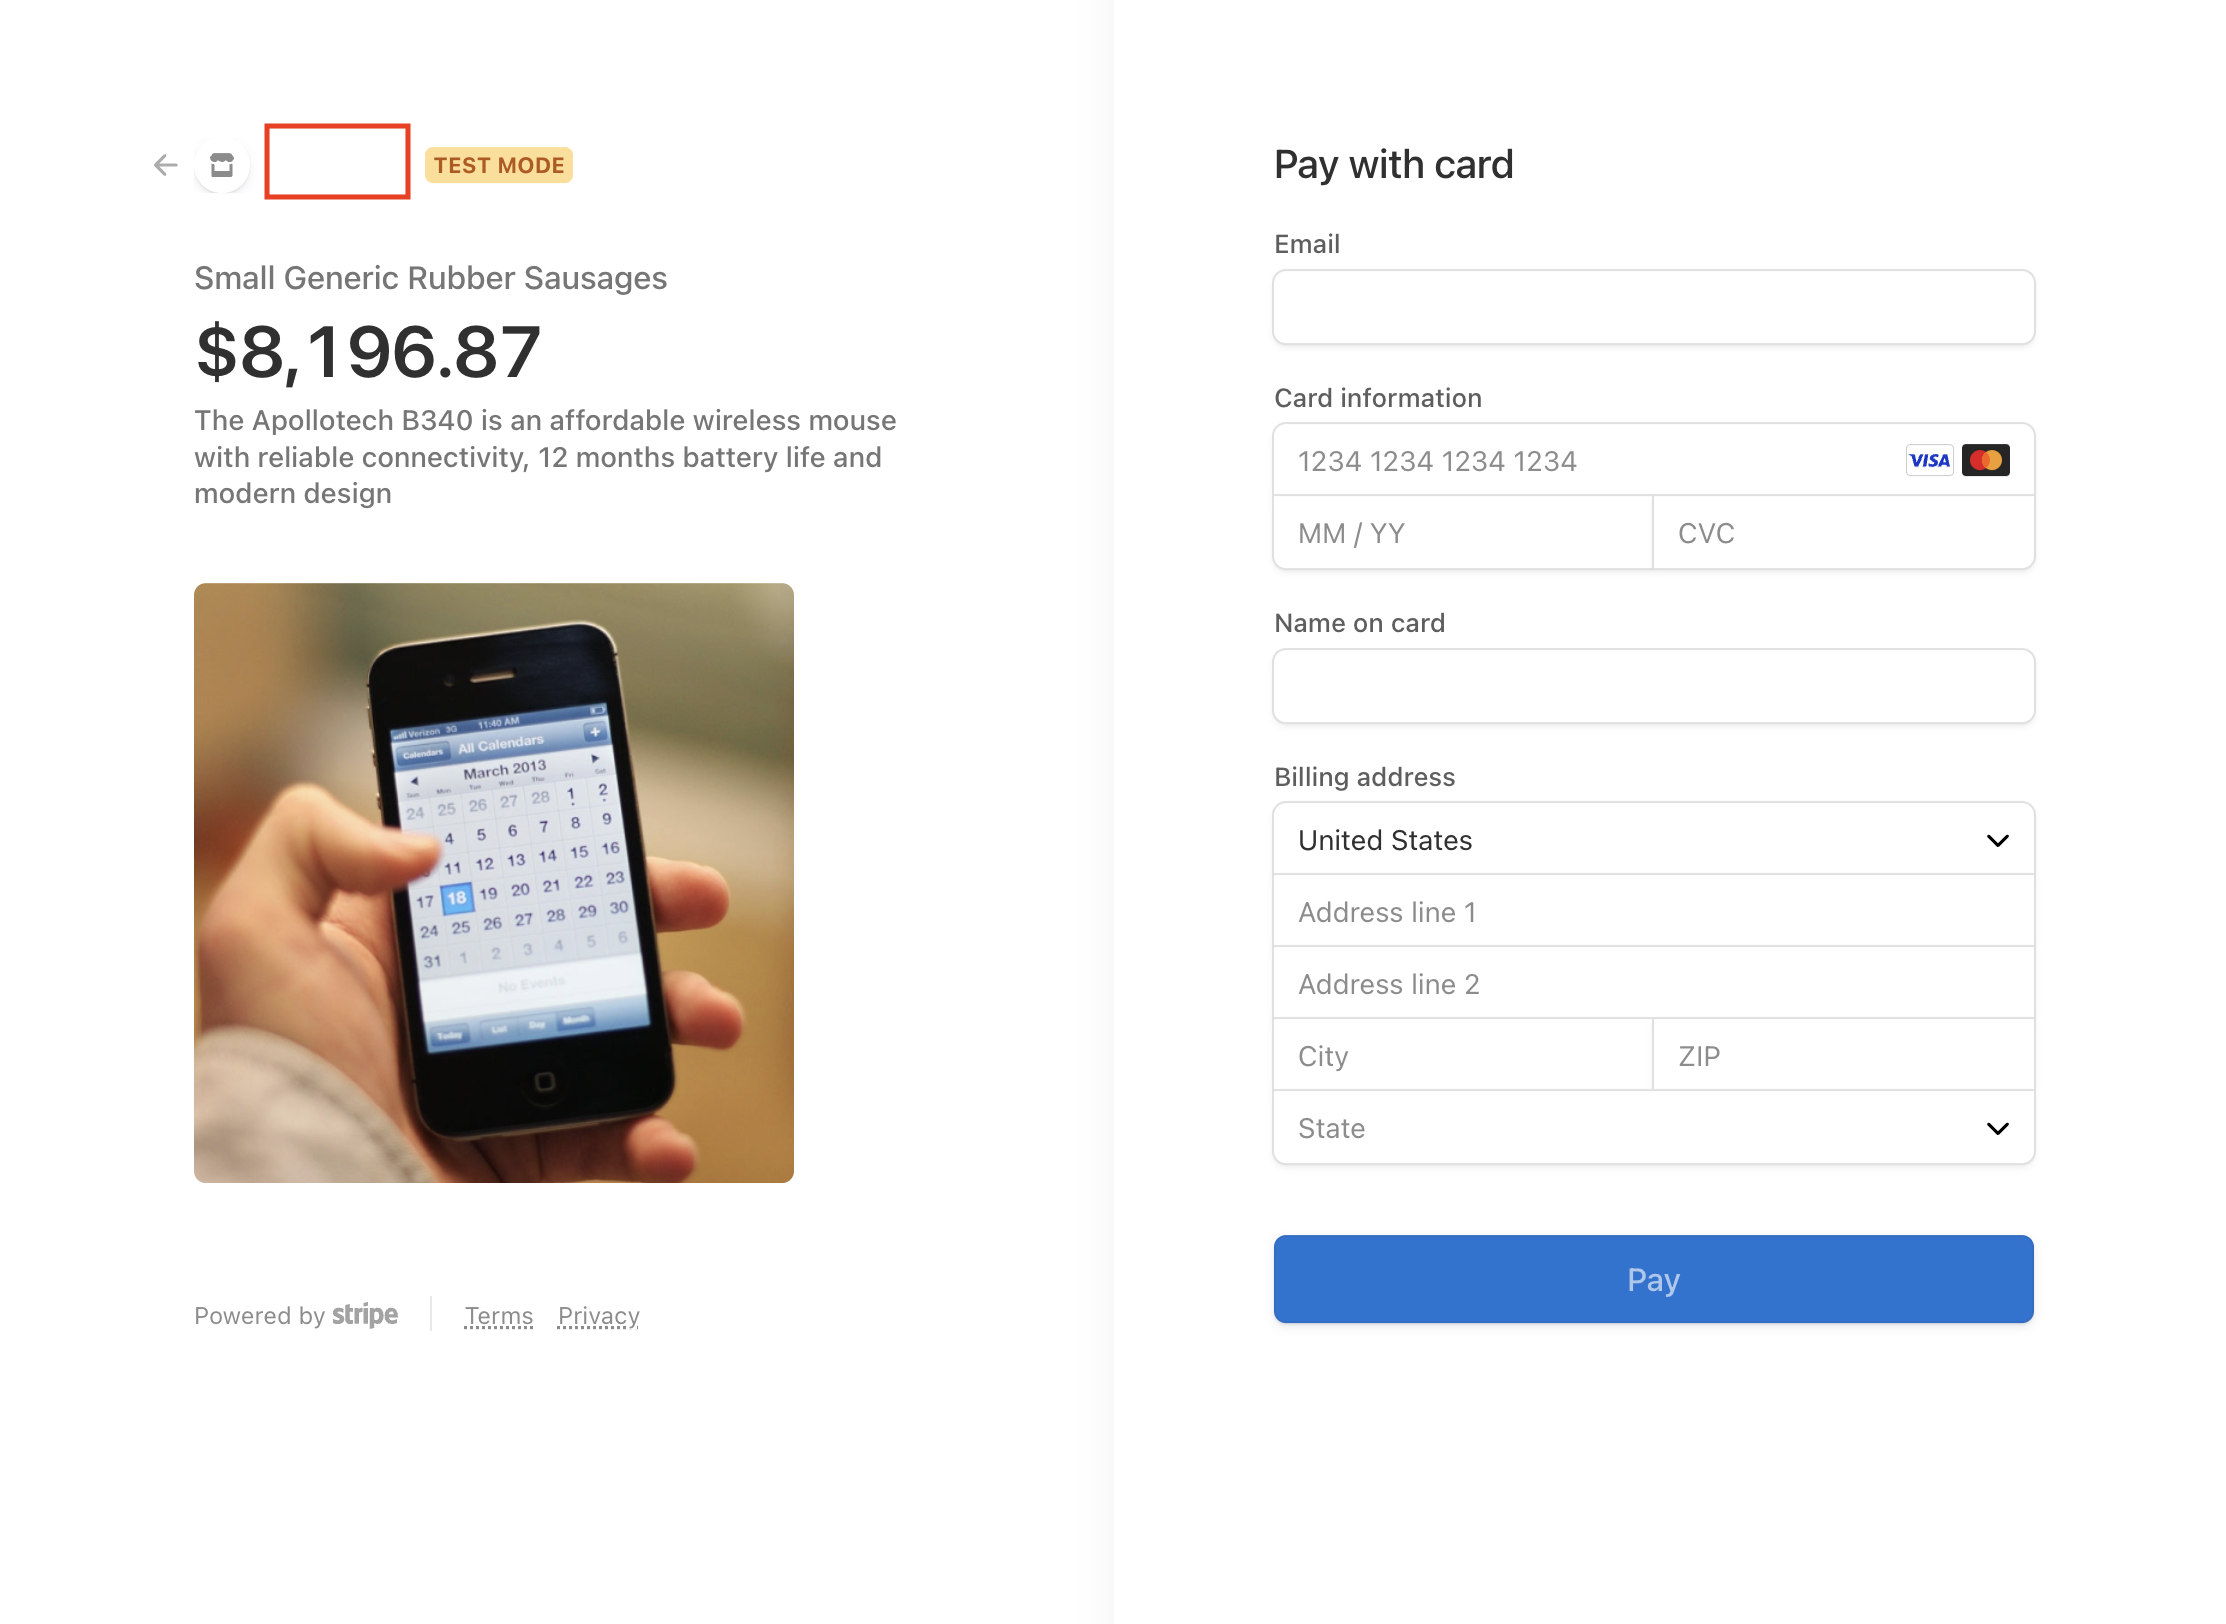
Add all the details for the test card. You can use any card from this link. Stripe provides various test cards which work only during Test Mode. Once you click on Pay and payment processing happens, Stripe will redirect you to the success page.

Thank You Page
How to Deploy the Website to Production
In this section, we'll implement the following functionality:
Promote our PlanetScale branch to Main.
Deploy the app on Vercel.
How to Promote the PlanetScale Branch to Main:
To promote the branch to main, we can do it either via the terminal or dashboard. I'll use the dashboard for this tutorial.
Go to your project on PlanetScale and you'll find the following message on the dashboard:

PlanetScale Database Promotion
Let's click on the Promote a branch to production button and you'll get a confirmation model. Click on the Promote branch button. Once done you'll get a toast with a success message.
How to Deploy to Vercel:
If you don't have an account on Vercel, you can create one here.
You can create a project on GitHub and push it to the Main branch. If you don't know how, you can check out this tutorial.
Once the project is pushed on GitHub, go to Vercel and create an Add New button and select Project from the drop down.
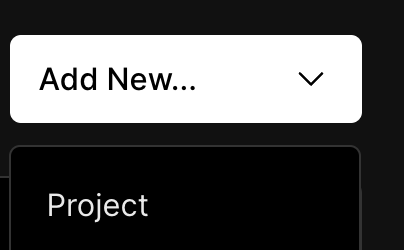
Add New Project Vercel
You'll get the following the UI:
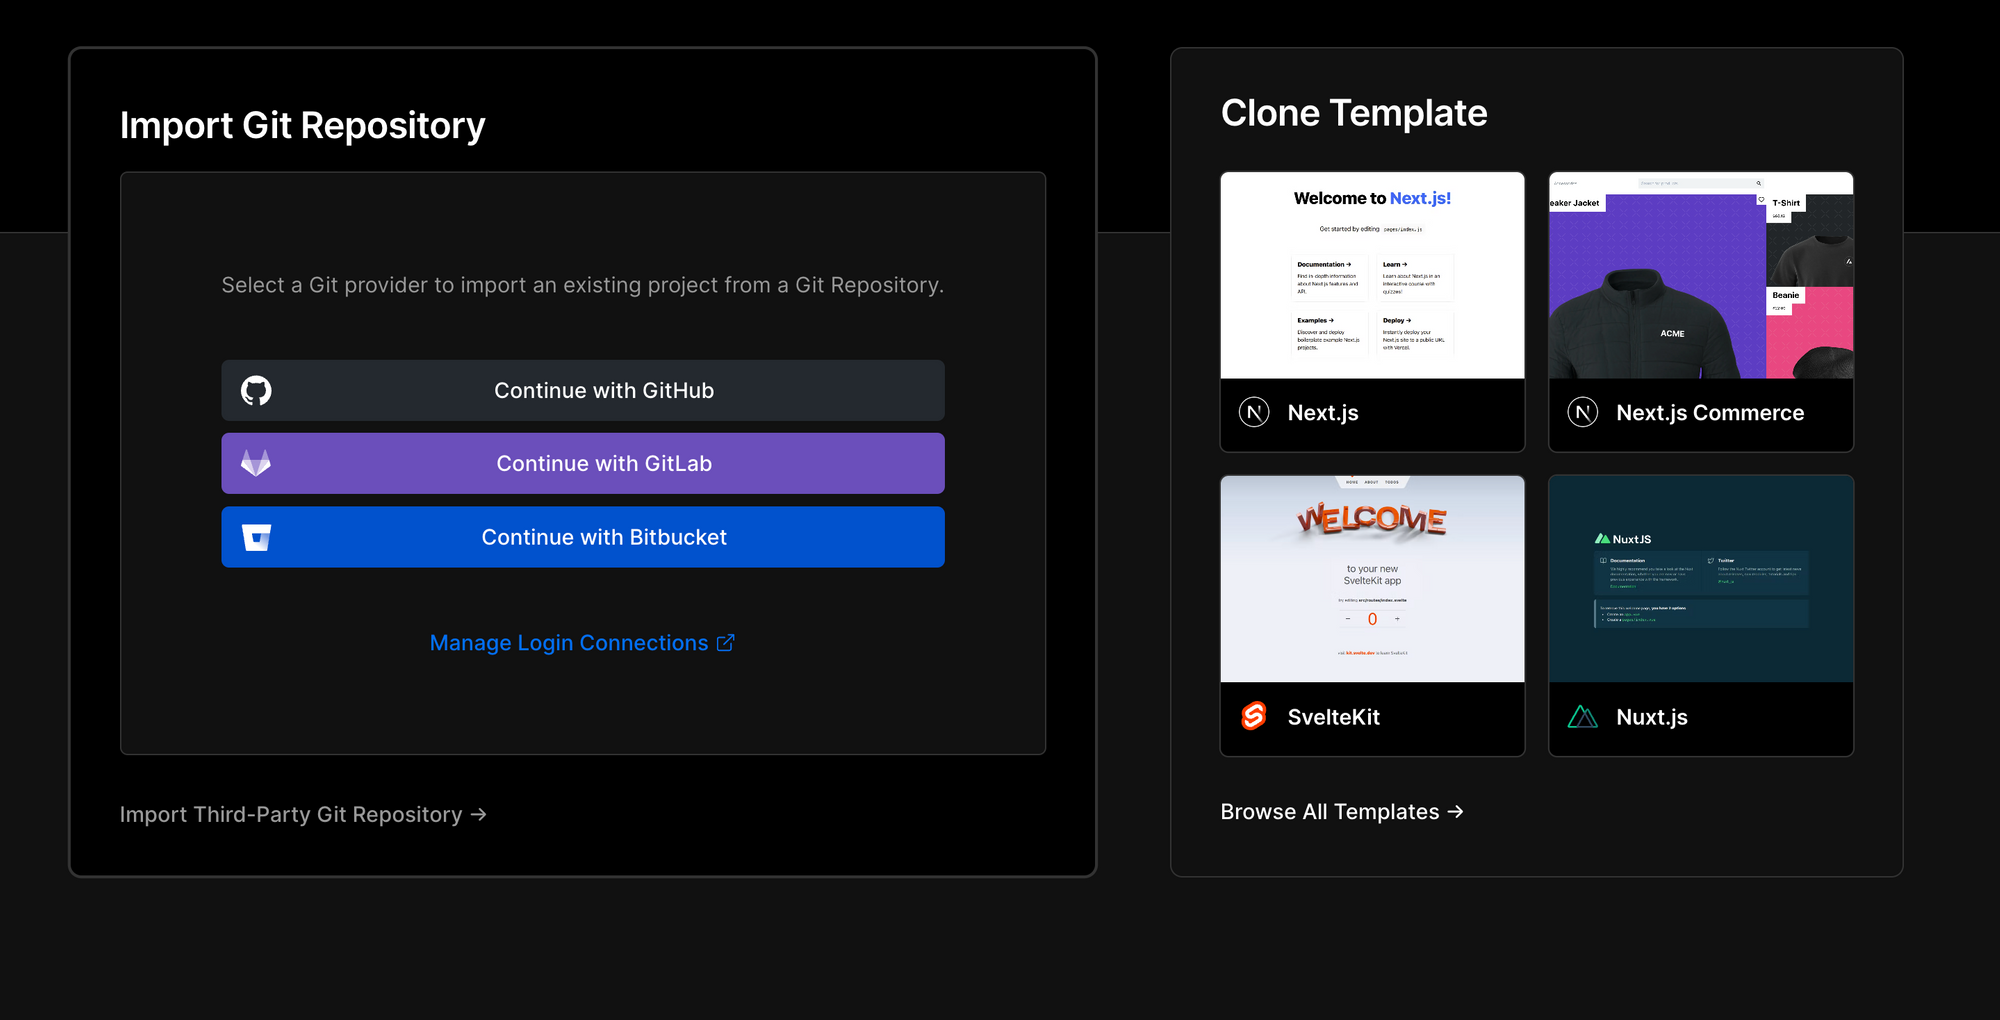
Select Git Provider Vercel
As we have pushed the code on GitHub, let's click on the Continue with GitHub button. You'll get the following UI:
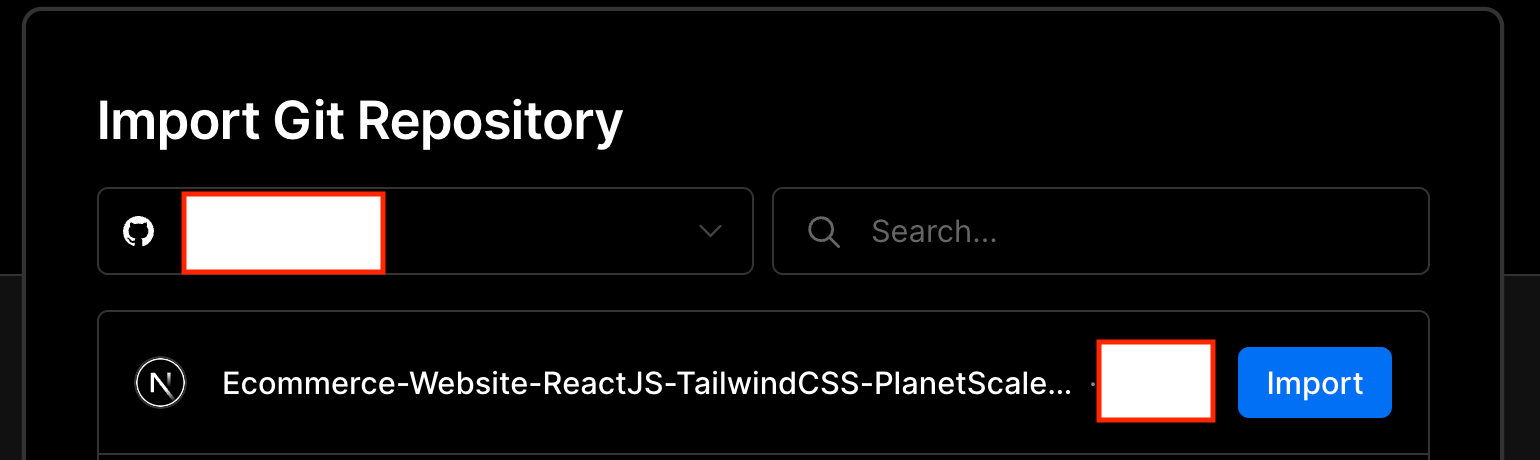
Select Git Repository Vercel
Click on Import and you'll get the following UI:
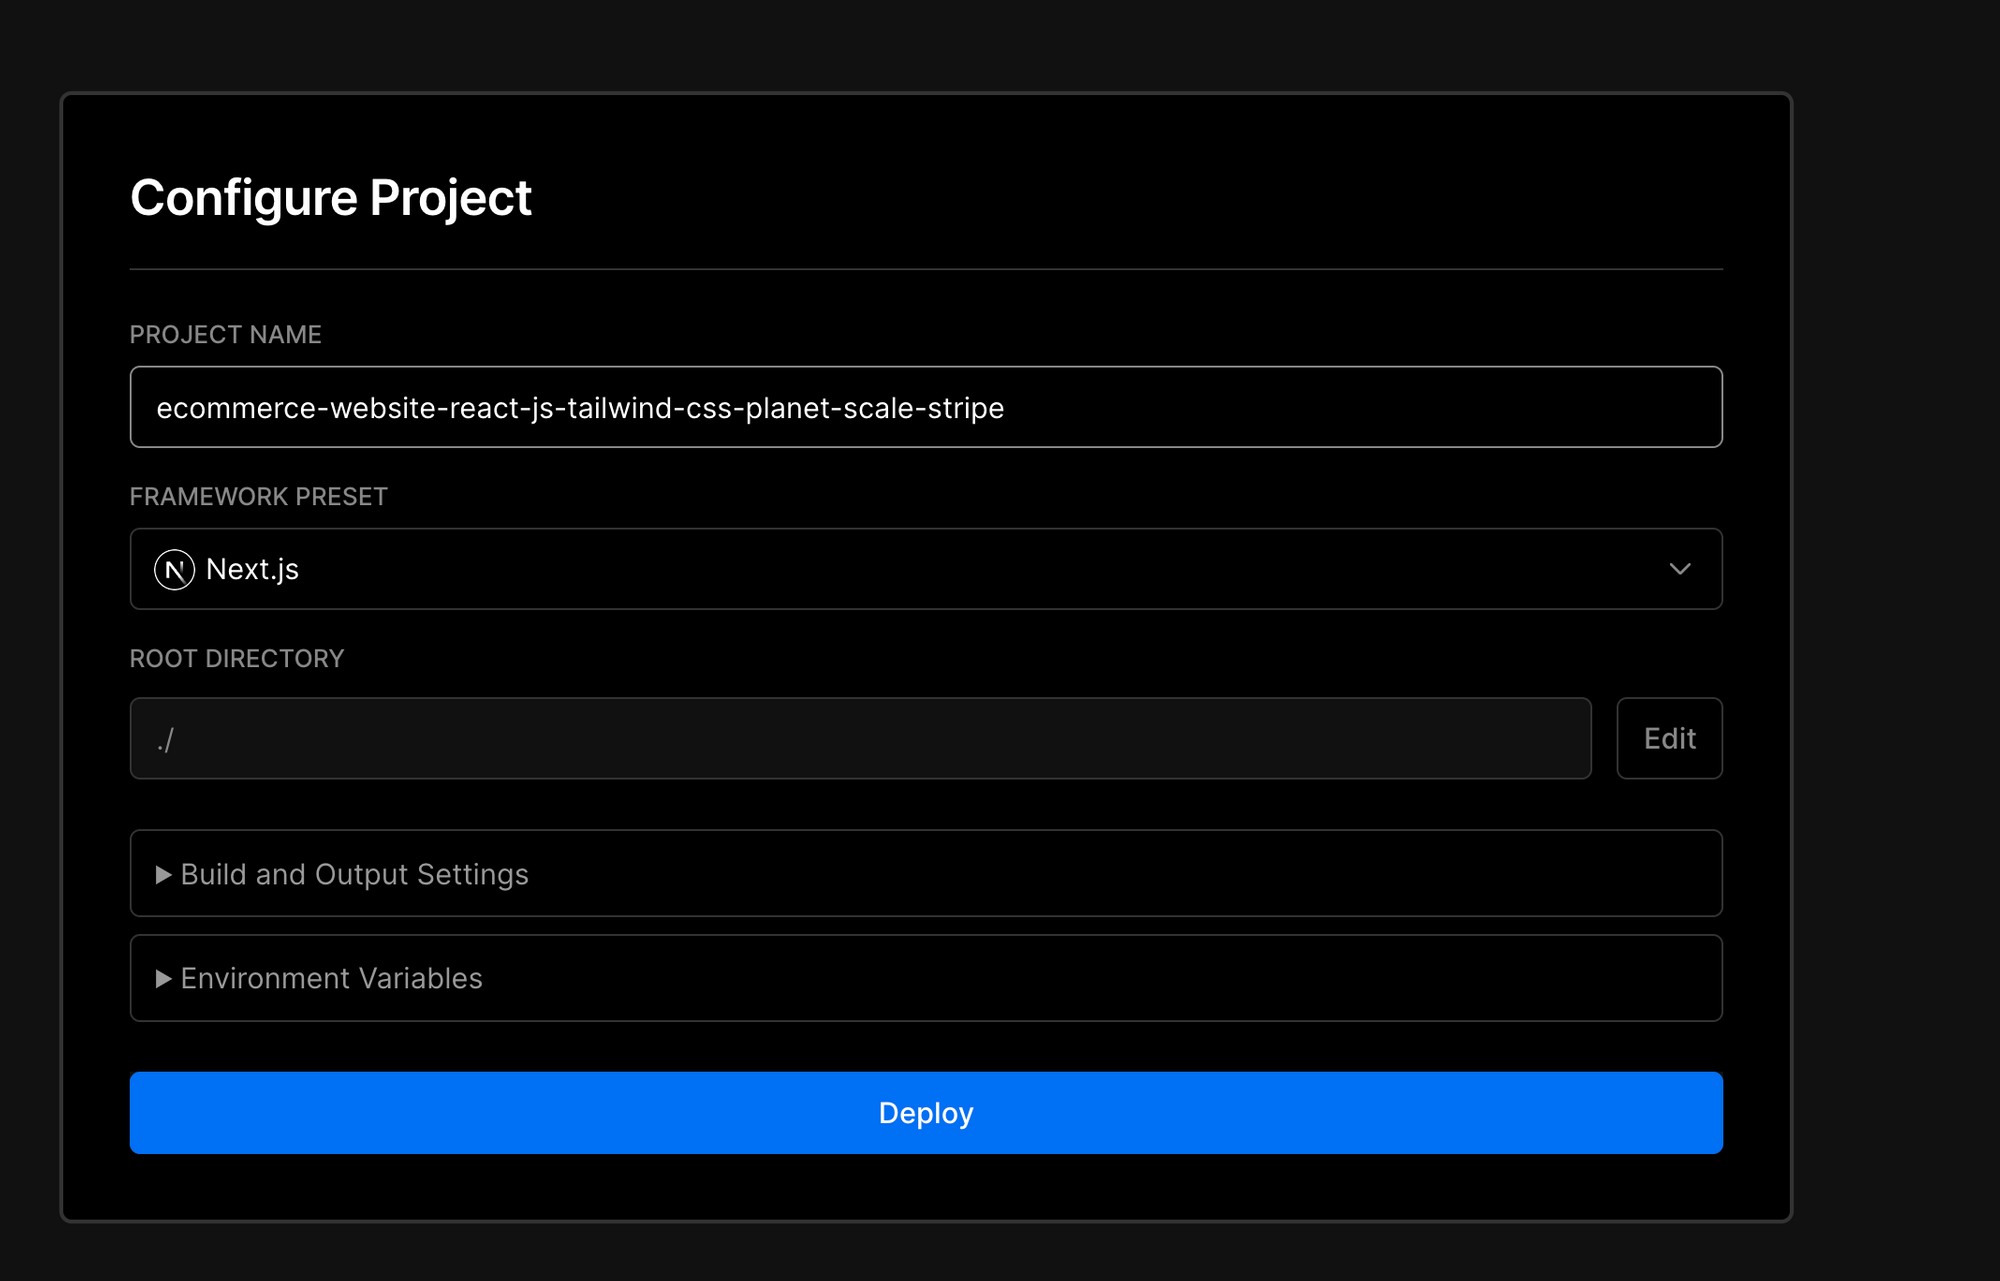
Configure Project Vercel
Click on the Environment Variables and add these three there:

Add NEXT_PUBLIC_STRIPE_PUBLISHABLE_KEY, STRIPE_SECRET_KEY, and DATABASE_URL
Once done click the Deploy button. You'll get the following UI once the deployment starts:
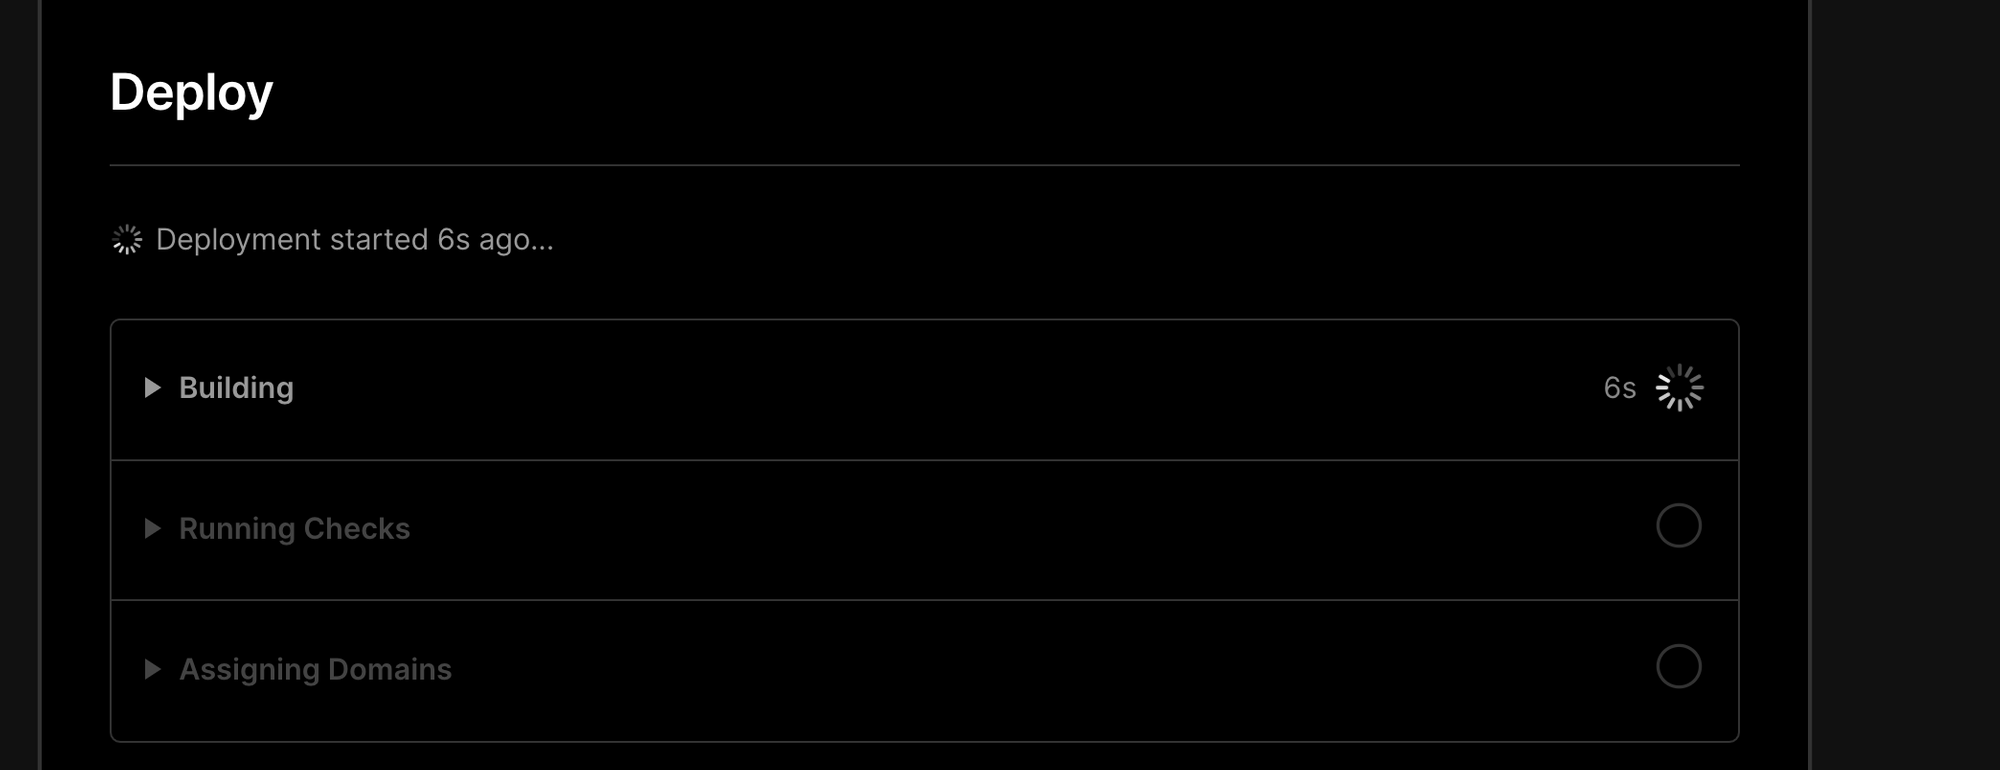
Deploying Vercel
Once deployed, Vercel will give you a Unique URL.
Visit this URL and you'll find its failing. Let's go to the deployment > functions and you'll see the following error:

Prisma generate Fails
We need to update our build command in package.json as follows:
"build": "npx prisma generate && next build",
Push the code again to the Git repository and you'll find that Vercel starts redeploying your project.
Once the deployment is done, you can visit your application URL and you'll find it shows all your products.
With this, we have created our production-ready eCommerce application. If you have built the website along with the tutorial, then a very big congratulations to you on this achievement.
Thank you for reading!
Feel free to connect with me on Twitter and Github.
If you want any project to be developed or want to consult with me, you can DM me on my Twitter (@sharvinshah26 ).