

Ghost CMS is a platform specifically designed for bloggers and writers. Using Ghost, you can quickly get a blog website up and running.
Ghost targets primarily writers and all the features are specifically built for writing.
Ghost's new dashboard gives you a user-friendly interface, and beginners can easily understand the functionality. In addition, Ghost's free tutorials will help you if you have any problems.
Some cool Ghost features:
- Open-source
- Membership support
- Rich text editor (Koenig editor)
- Newsletters
- Email subscriber support
- Login functionality support
- Integration plugin
- Analytics dashboard
- Inbuilt comment support
- Inbuilt search support
- Inbuilt search functionality
- SEO and different types of metadata support social media
- Custom theme design
You can check out all the code available for this project on GitHub here.
Here's what we'll cover:
- Self-Hosting vs Hosting with Ghost
- What Are the Drawbacks of Ghost?
- How to Install the Ghost CMS
- Understanding the Ghost Folder Structure
- Understanding the Ghost Theme Folder Structure
- How to Create a New Theme with the npm CLI Tool
- How to Create a New Ghost Theme from Scratch
- How to Install ghost-cli Globally
- How to install Ghost locally
- How to Configure Tailwind CSS
- Other Important Commands in the Ghost CLI
- How to Write the Code for Our Custom Ghost Theme
- How to add theme configuration in package.json
- How to Use Theme Helpers
- What is the Partials Folder?
- How to Create a Default Page
- How to Create an Index Page
- How to Create a Posts Page
- How to Create Information Pages
- How to Create an Author Page
- How to Create a Tags Page
- How to Create an Error Page
- How to Enable Comments
- How to Set Up Search
- Conclusion
Self-hosting vs Hosting with Ghost
Ghost provides two ways to create/host your website:
- Self-hosting
- With the Ghost cloud platform
Self-hosting
If you choose to self-host, you'll host your website on any cloud platform like Google cloud, AWS cloud, Azure cloud, Digital Ocean, and so on. These are some of the most used cloud platforms in the market.
Most cloud platforms come with one click to deploy solutions. This means you can deploy your Ghost blog with a single click.
Before deploying your Ghost blog, you should compare all cloud platforms based on pricing before choosing one.
Self-hosting your Ghost blog is free, and you do not need to pay anything to the Ghost platform. You'll just pay your cloud provider.
Hosting with the Ghost Cloud Platform
If you choose to host with Ghost, they'll help create the blog and host it on the Ghost platform itself. The Ghost team handles all the maintenance and security. You won't have to worry about updating Ghost and any themes you're using – the Ghost staff will handle that for you.
Self-hosting focuses more on developers, while hosting with the Ghost platform targets anyone who doesn't know about computers and programming.
Ghost hosting comes with a paid plan – it's not free. But they give you 14 day free trial period, after which you shift automatically into a paid plan.
What should you choose, paid or self-hosting?
In my experience, hosting with the Ghost platform is the best solution for beginner developers, non-developers, and writers. The Ghost team handles everything for you. You do not worry about traffic, security, or maintenance and do not need to update the Ghost CMS. This lets you focus on writing.
As a developer, I always recommended that you self-host Ghost. I have run my self-hosted Ghost blog with Google Cloud for two years with a Bitnami one-click deployment.
After six months, I'd used up my $200 free credit, and then I started to pay monthly to Google Cloud hosting.
For a non-technical person, I highly recommended using the Ghost (pro) cloud platform and as well any other platform that provides Ghost-based cloud and shares hosting.
I found a list of Ghost-hosting platforms on the internet. Perhaps one of these will solve your hosting issues or questions. If you plan to deploy Ghost with the Google Cloud platform, I have an article on that.
What are the Drawbacks of Ghost CMS?
The biggest drawback of Ghost is that web performance can feel slow. If you want good web performance, you'll likely need to use a CDN for media (images, videos, and PDFs) and also for CSS and JavaScript.
The second biggest drawback is cost. I've been running my blog with Ghost for two years, and I pay 10 to 20 times extra to Google Cloud for hosting as a self-deploy.
My website has 4000 to 5000 active monthly users, and I pay 20 times extra. Because of this, I shifted my website to Hugo.
Now I still have 4000 to 5000 active users on the website, and I pay zero money to Netlify.
The Solution for Developers
The best solution for developers is to use Ghost as a backend and, with the REST API, choose any JavaScript framework like Next.js, Fresh, Astro, and so on.
There are a lot of frameworks that can help you build a static website. In addition, static websites are fast and deploy with zero JavaScript.
In this method, you may not use all Ghost's features, but you can save a lot of money. Still, building the website with a JavaScript framework takes a lot of time just to run the essential version of the website.
My solution only works well for a small team. So if your team has a lot of writers and submits many articles in a single day, I'd recommend sticking with Ghost CMS as a frontend and backend.
Ghost version 5.0 is 20% faster than the old version. Suppose you use Ghost and want to design your own custom theme – then this article is for you. Let's get started.
How to Install the Ghost CMS
How you install Ghost CMS changes according to your operating system. We'll discuss installation for all operating systems in this guide. You can install Ghost with npm, yarn, and Docker.
Now let's look at how to install Ghost for:
- Windows, Linux, and macOS
- Docker image
How to Install Ghost on Windows, Linux, and macOS
Setting up the Ghost theme development environment in Windows and macOS is a straightforward process. But it's best if you've installed the npm or yarn package manager. If you don't have Node.js, npm, and yarn, yolu'll need to install them – Node.js comes with preinstalled npm and yarn.
To install Ghost CMS globally and locally, follow these basic steps:
How to install ghost-CLI globally
First, you can install ghost-cli globally on your machine using npm or yarn. Here are the commands:
npm install ghost-cli@latest -g
    OR
yarn global add ghost-cli@latest
How to install Ghost locally
Next, when your ghost-CLI installation is complete, then run the ghost local command in your terminal. It looks like this:
ghost install local
The command output looks like this:
 Ghost cms folder structure
Note: you'll need to run the ghost install local command in an empty folder. Otherwise, you'll face an error:
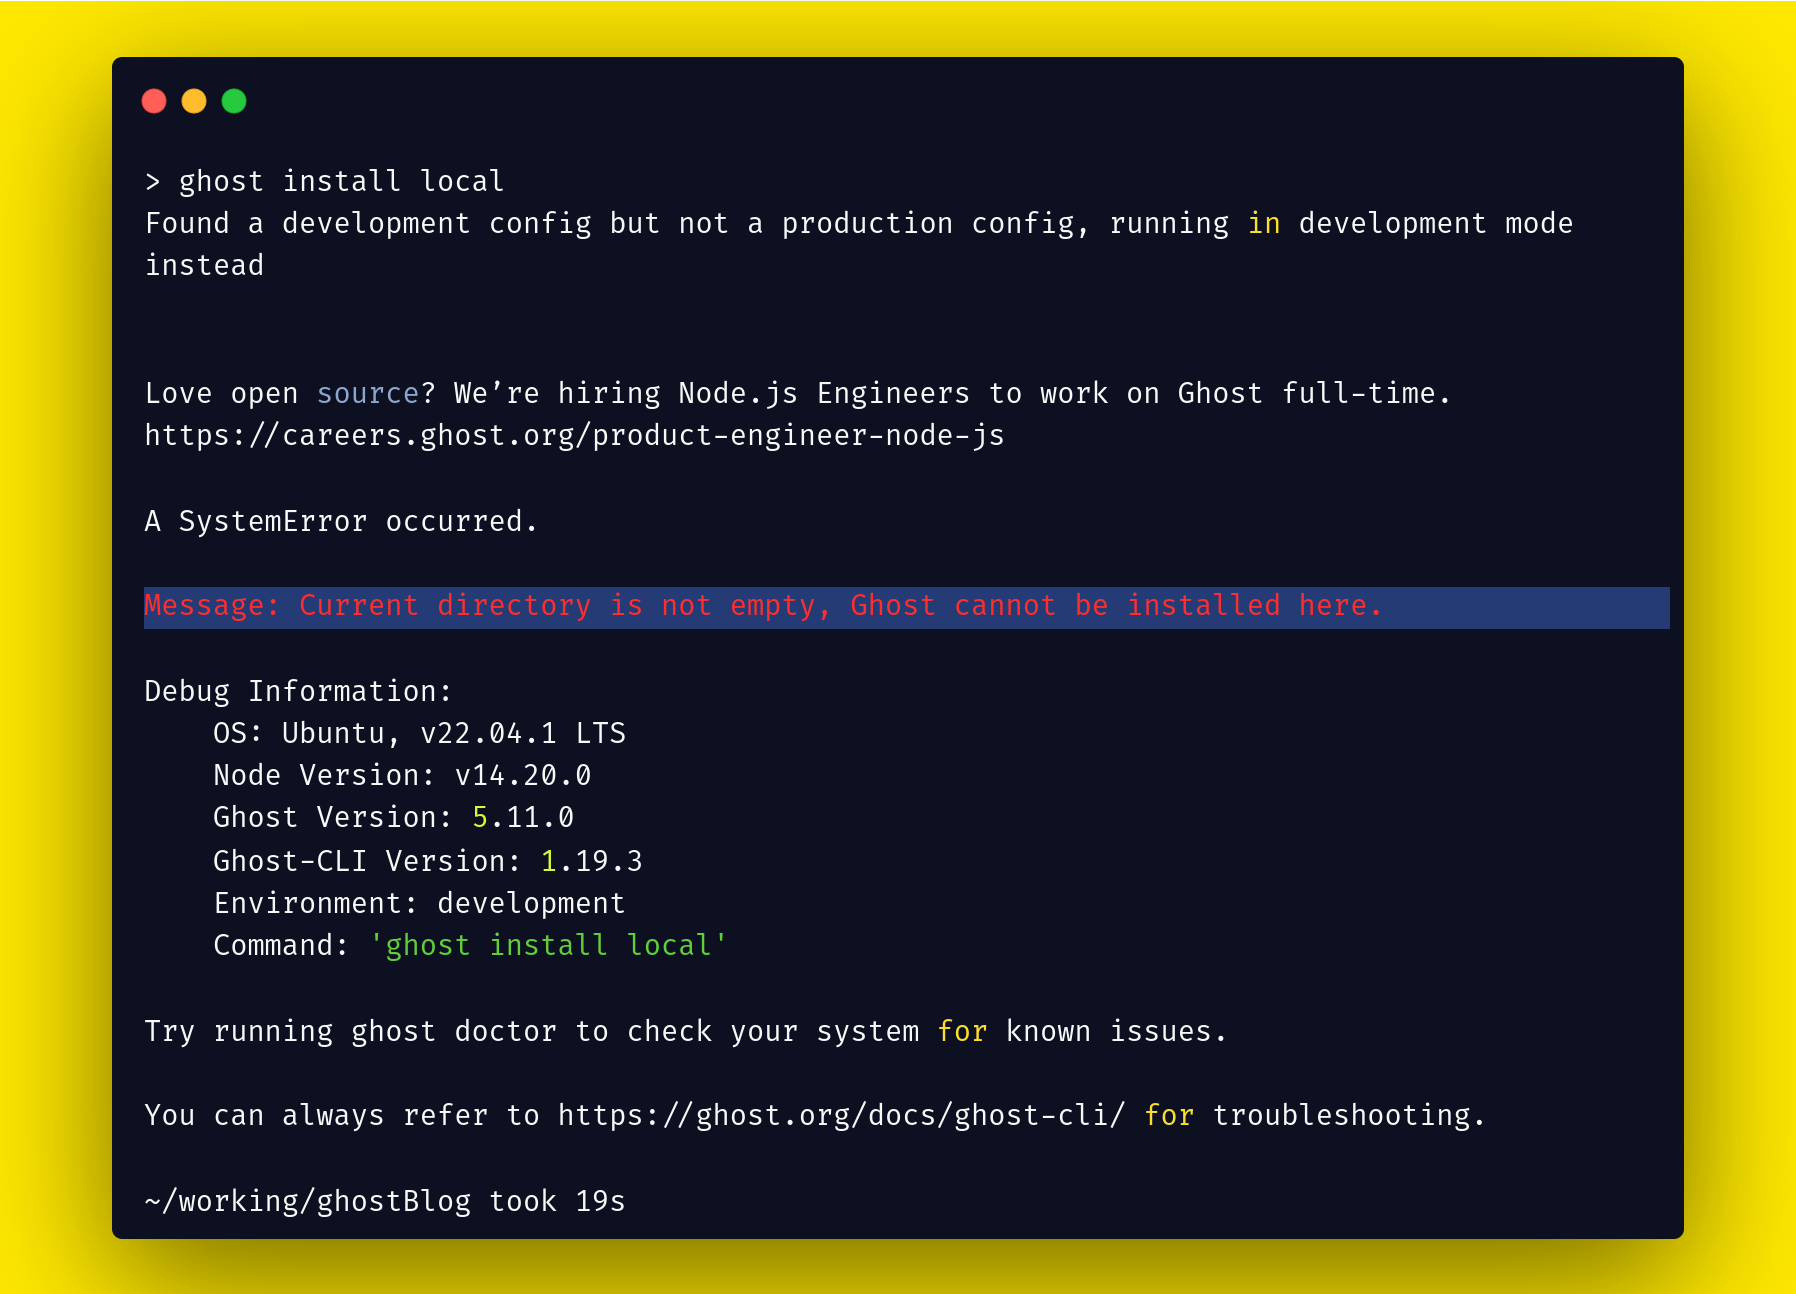 Not empty directory error with ghost-cli
To start the local development server, run the ghost start command in your terminal.
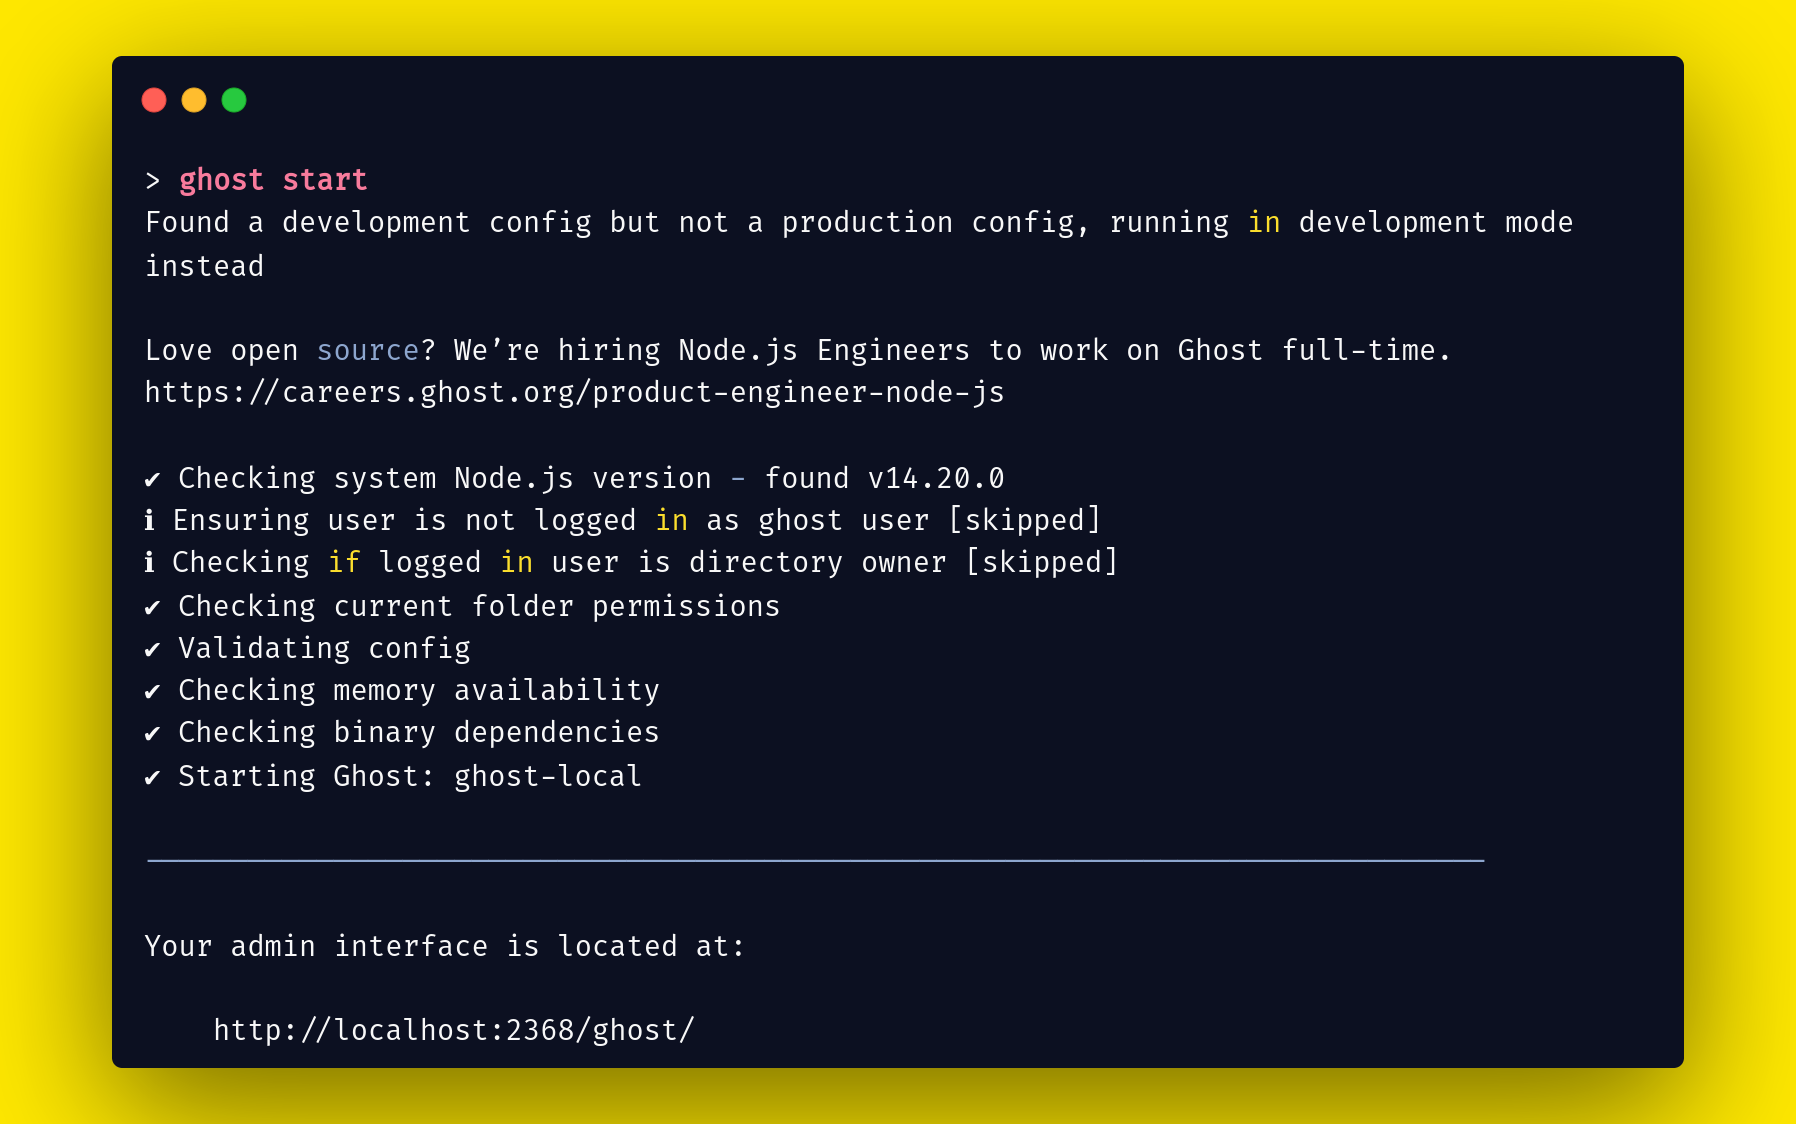 Ghost start command
If you get an error when running ghost start in Ubuntu, run the following command: ghost start --no-setup-linux-user.
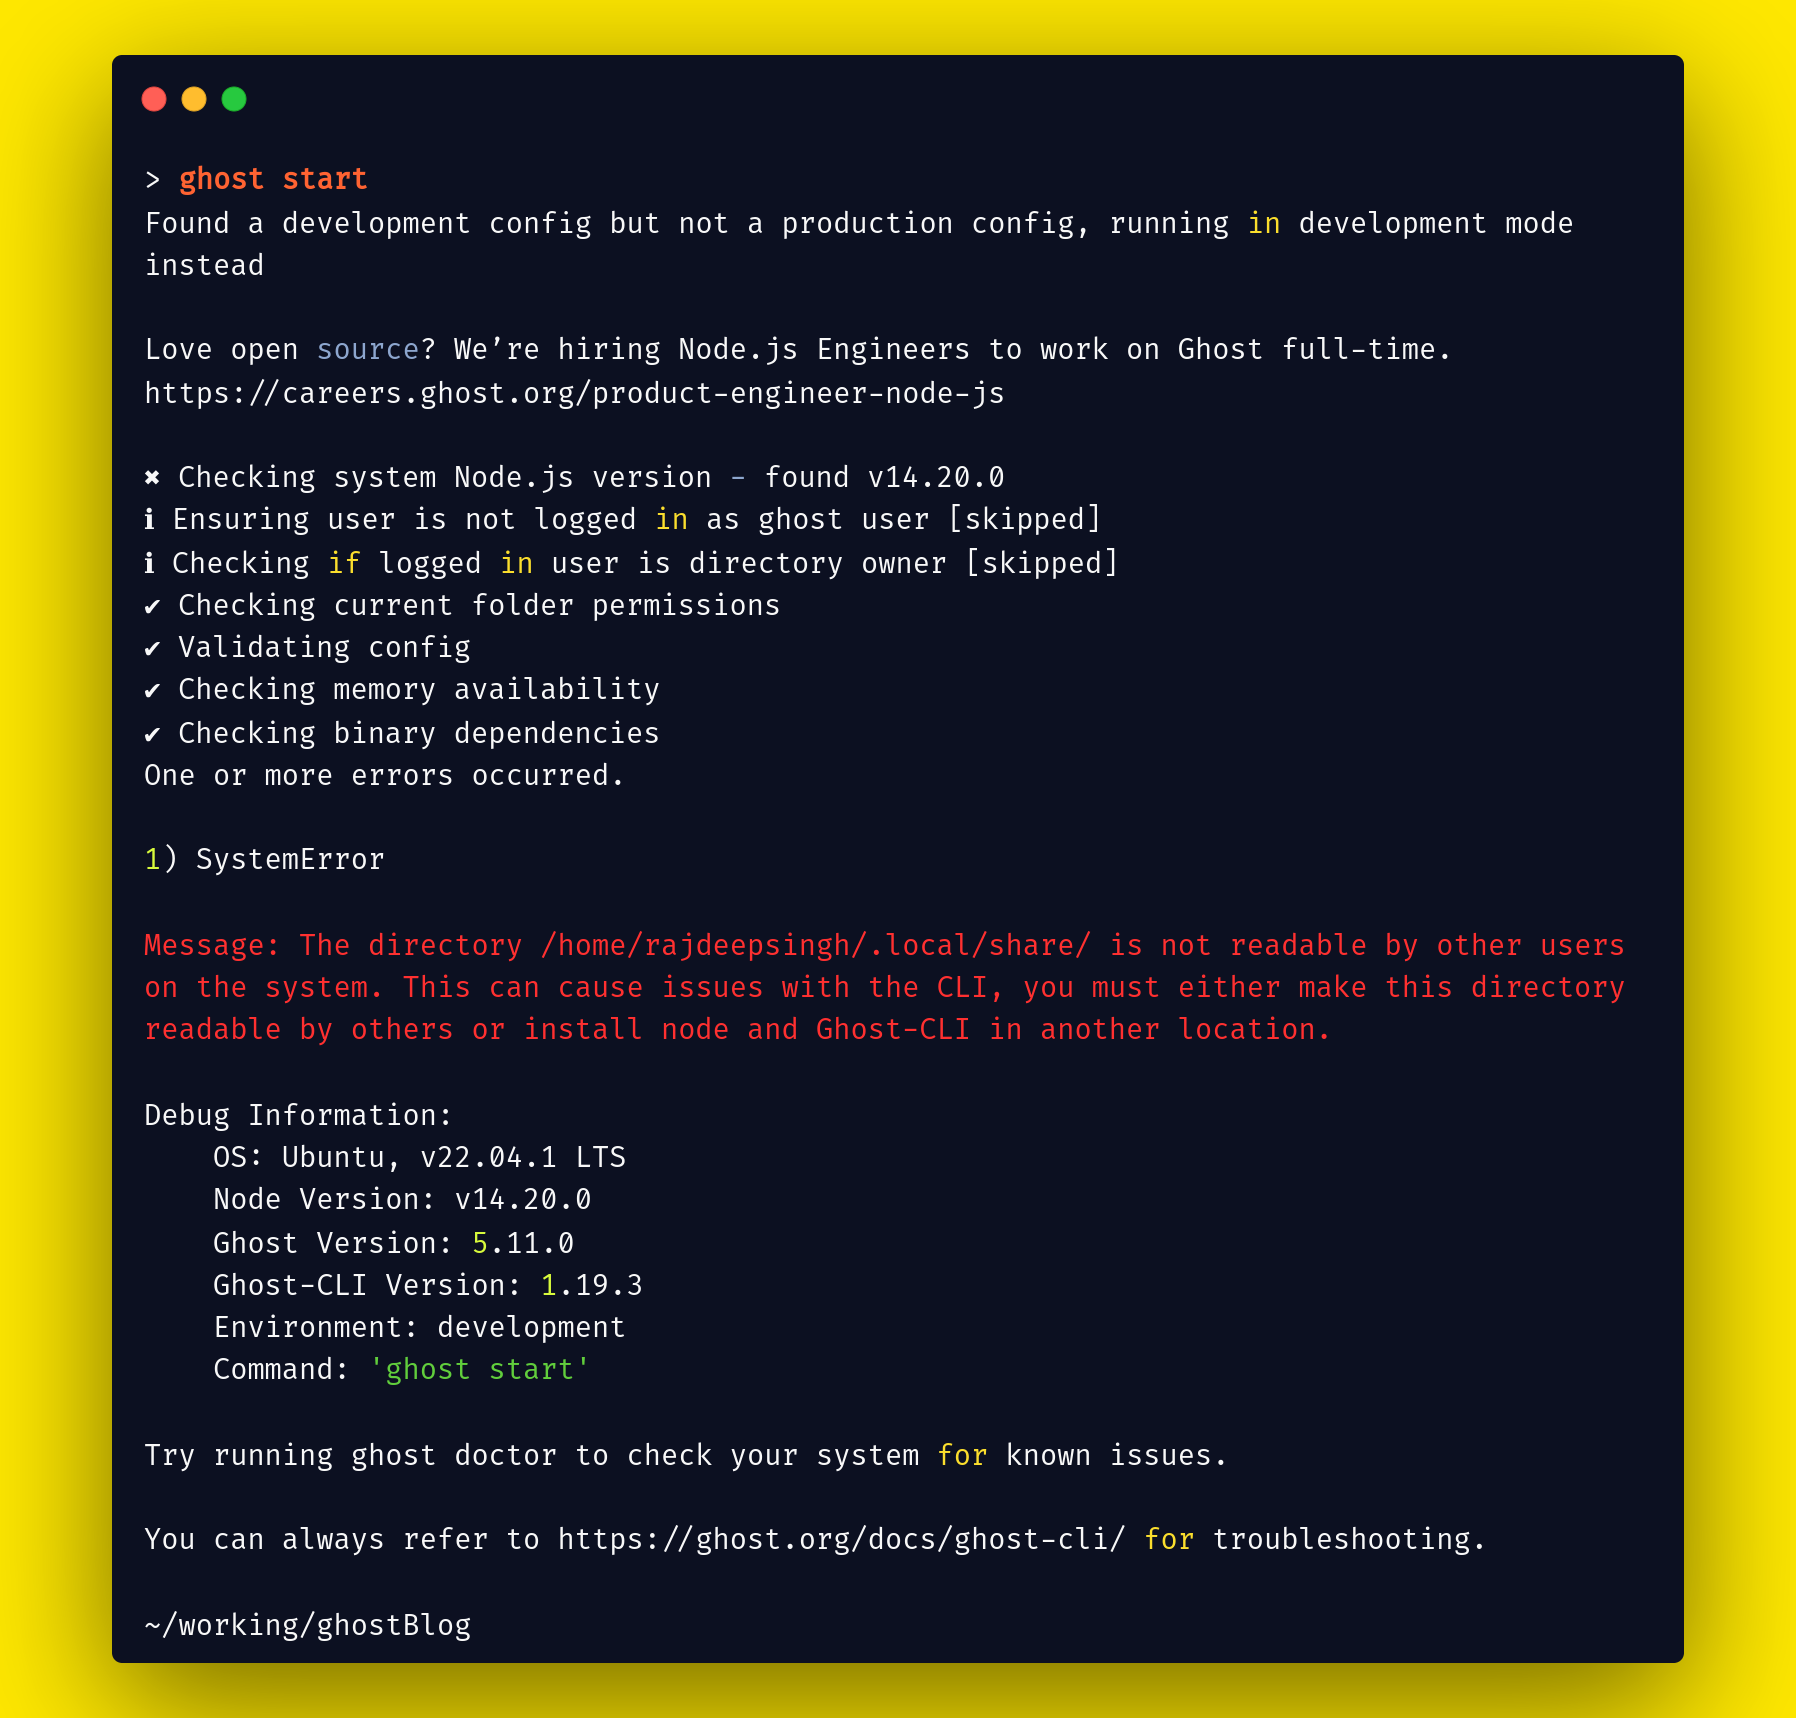 The directory is not readable by other users' error in Ghost CMS.
How to Set Up Your Environment Using a Docker Image
Docker is also a great way to set up a theme development or production environment for Ghost. The Ghost team provides an official Ghost Docker image on Docker Hub.
To start the setup, you'll need the docker-compose.yml file in your root project folder. Then run the docker-compose up command in your terminal.
version: '3.8'
services:
  blog:
    image: ghost
    restart: always
    ports:
      - 8080:2368
    volumes:
      - ./custom-ghost-theme:/var/lib/ghost/content/themes/custom-ghost-theme/
    environment:
      url: http://localhost:808
      NODE_ENV: development
In the volume section, you pass your file. In my case, I added a specific file in my Ghost theme folder.
version: '3.8'
services:
  blog:
    image: ghost
    restart: always
    ports:
      - 8080:2368
    volumes:
      - ./assets:/var/lib/ghost/content/themes/fastest/assets
      - ./partials:/var/lib/ghost/content/themes/fastest/partials
      - ./author.hbs:/var/lib/ghost/content/themes/fastest/author.hbs
      - ./default.hbs:/var/lib/ghost/content/themes/fastest/default.hbs
      - ./error-404.hbs:/var/lib/ghost/content/themes/fastest/error-404.hbs
      - ./error.hbs:/var/lib/ghost/content/themes/fastest/error.hbs
      - ./gulpfile.js:/var/lib/ghost/content/themes/fastest/gulpfile.js
      - ./index.hbs:/var/lib/ghost/content/themes/fastest/index.hbs
      - ./package-lock.json:/var/lib/ghost/content/themes/fastest/package-lock.json
      - ./package.json:/var/lib/ghost/content/themes/fastest/package.json
      - ./page.hbs:/var/lib/ghost/content/themes/fastest/page.hbs
      - ./post.hbs:/var/lib/ghost/content/themes/fastest/post.hbs
      - ./query.hbs:/var/lib/ghost/content/themes/fastest/query.hbs
      - ./tag.hbs:/var/lib/ghost/content/themes/fastest/tag.hbs
      - ./readme.md:/var/lib/ghost/content/themes/fastest/readme.md
    environment:
      url: http://localhost:8080
      NODE_ENV: development
In your custom-ghost-theme folder, you need the index.hbs, post.hbs, and package.json files to start theme development. But, you'll get an error when you activate your theme in the Ghost dashboard without requiring a file.
Here's the GitHub repo if you want to follow along:
Errors
In Ubuntu (22.04) or any other Linux distros, you'll get the Message: The directory /home/rajdeepsingh/ is not readable by other users on the system error. This means yours is old. So update your ghost-cli then run the ghost start command in your folder.
Understanding the Ghost Folder Structure
The Ghost folder structure has three main folders and one file. They are:
- The
config.development.jsonfile contains the configuration for Ghost development. - The
currentfolder is a link (symbolic link) that targets the install version. - The
versionfolder contains all versions of Ghost cms. - The content folder is the main folder containing our database file, settings, theme, images, media, and so on.
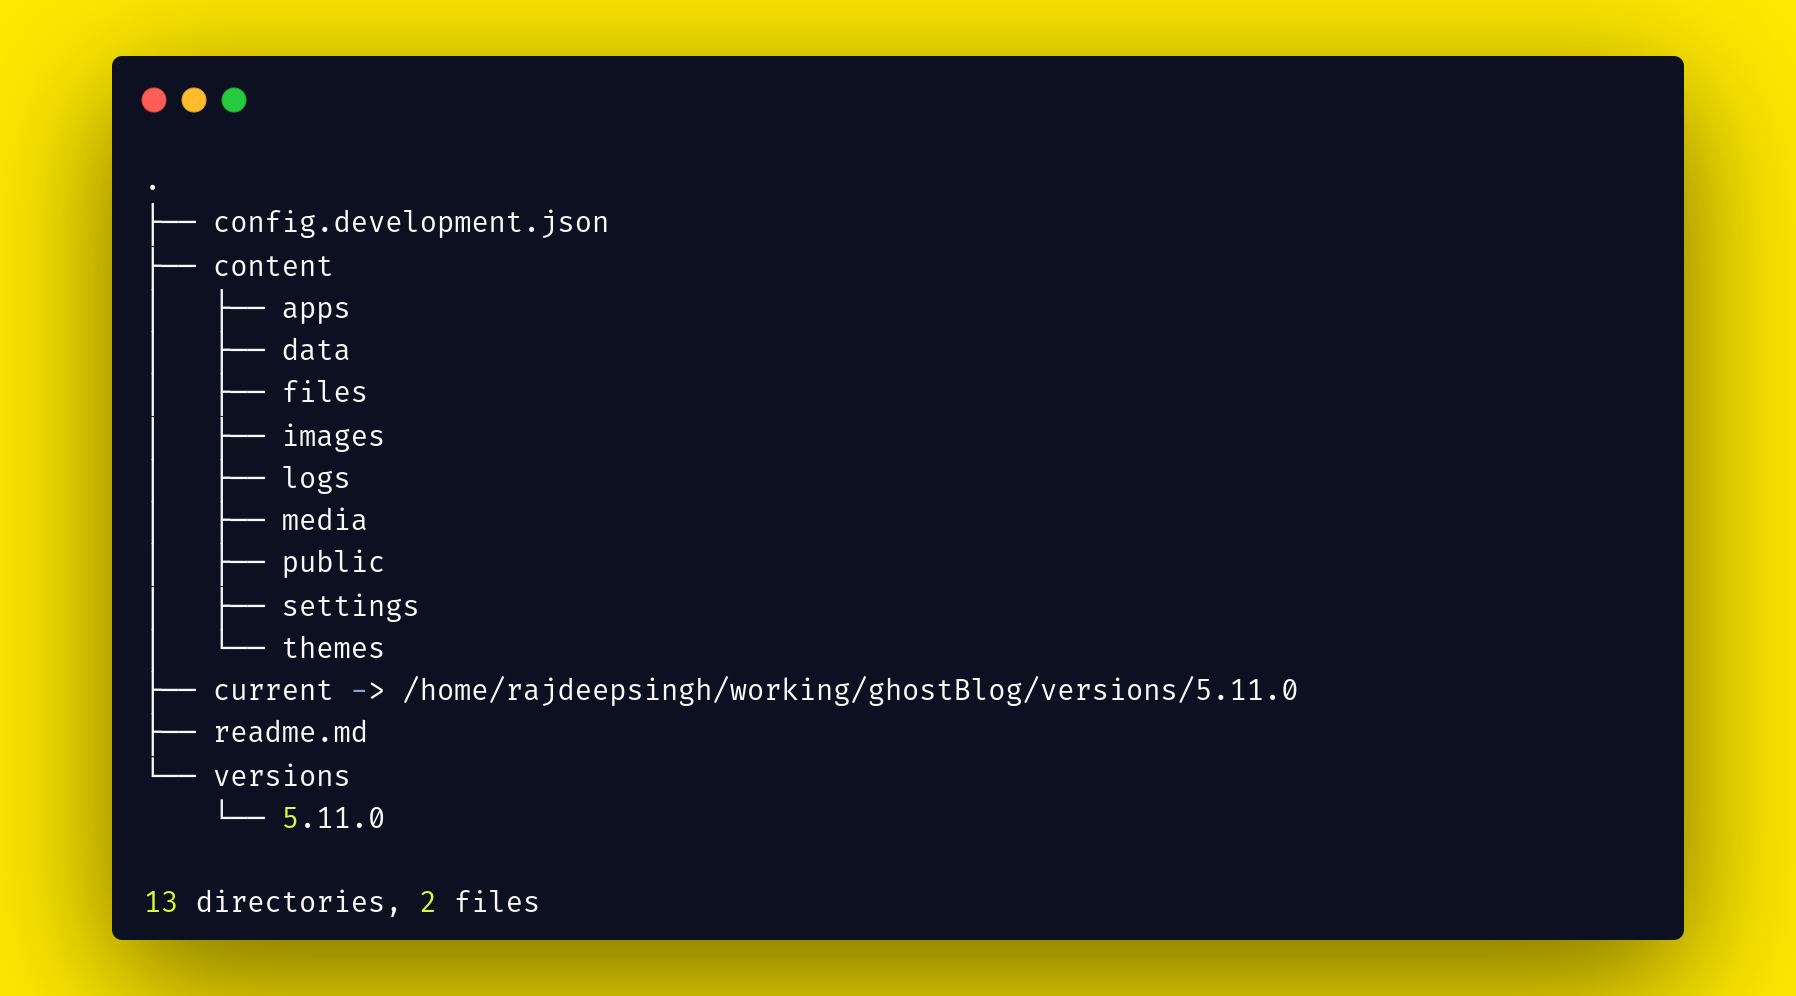 Ghost CMS folder Structure
The folder structure might change according to the operating system but the content folder is the same in every operating system.
The content folder contains all the important files for Ghost. They are:
- The data folder contains an SQLite3 database file. Ghost, by default, uses the SQLite3 database.
- Files, images, and media folders contain all files which writers upload.
- The public folder contains all public CSS and JavaScript files – for example, card and member JavaScript and CSS files.
- Finally, the settings folder contains all the settings, for example, the
router.xmlfile. - The theme folder contains all files and folders used to develop the theme.
Understanding the Ghost Theme Folder Structure
You can build a new custom theme store in the content/theme folder. To develop a new theme, you'll always need to create a new folder with the theme name and store all files in the theme name folder.
// theme structure

content
content/theme
content/theme/my-theme-name
content/theme/my-theme-name/index.hbs
content/theme/my-theme-name/post.hbs
content/theme/my-theme-name/package.json

// rest of file created in my-theme-name folder
Ghost CMS uses handlebars to build a Ghost theme. There are a number of files but only three files are required:
index.hbsin the main file (required) to design the home page of the website.post.hbsthe file (required) is used to read and design the full article.package.jsonfile (required) is used for Node.js config, and it also uses the theme name, description, version, custom config, and so on.- The
default.hbsfile is used to build the layout of the theme. - The assets folder contains all the JavaScript, CSS, fonts, and image files.
- The partials folder helps divide files into small partials (parts) for better code readability.
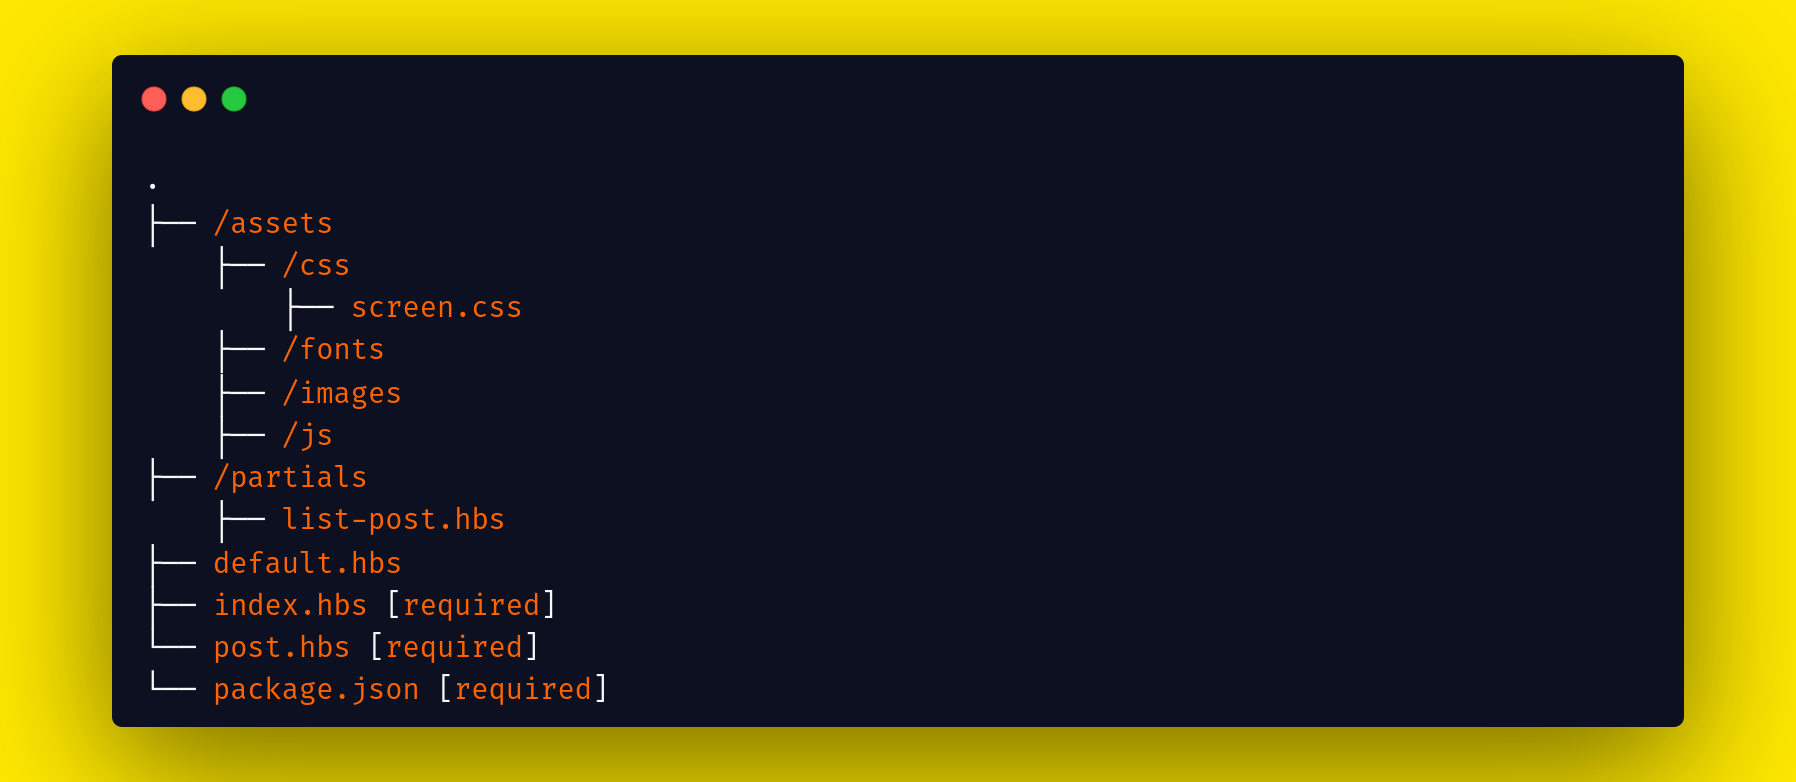 Ghost theme folder structure
How to Create a New Theme with the npm CLI Tool
The easiest way to start a new Ghost theme is with the create-ghost-theme CLI. I built it, and I maintain it. The create-ghost-theme CLI helps you create the following folder structure that we'll discuss next. But currently, it only supports Tailwind CSS.
First, we'll create a new theme with the create-ghost-theme CLI and restart the Ghost CMS local server again.
Folder structure
After creating a new theme with create-ghost-theme CLI, your folder structure looks like this:
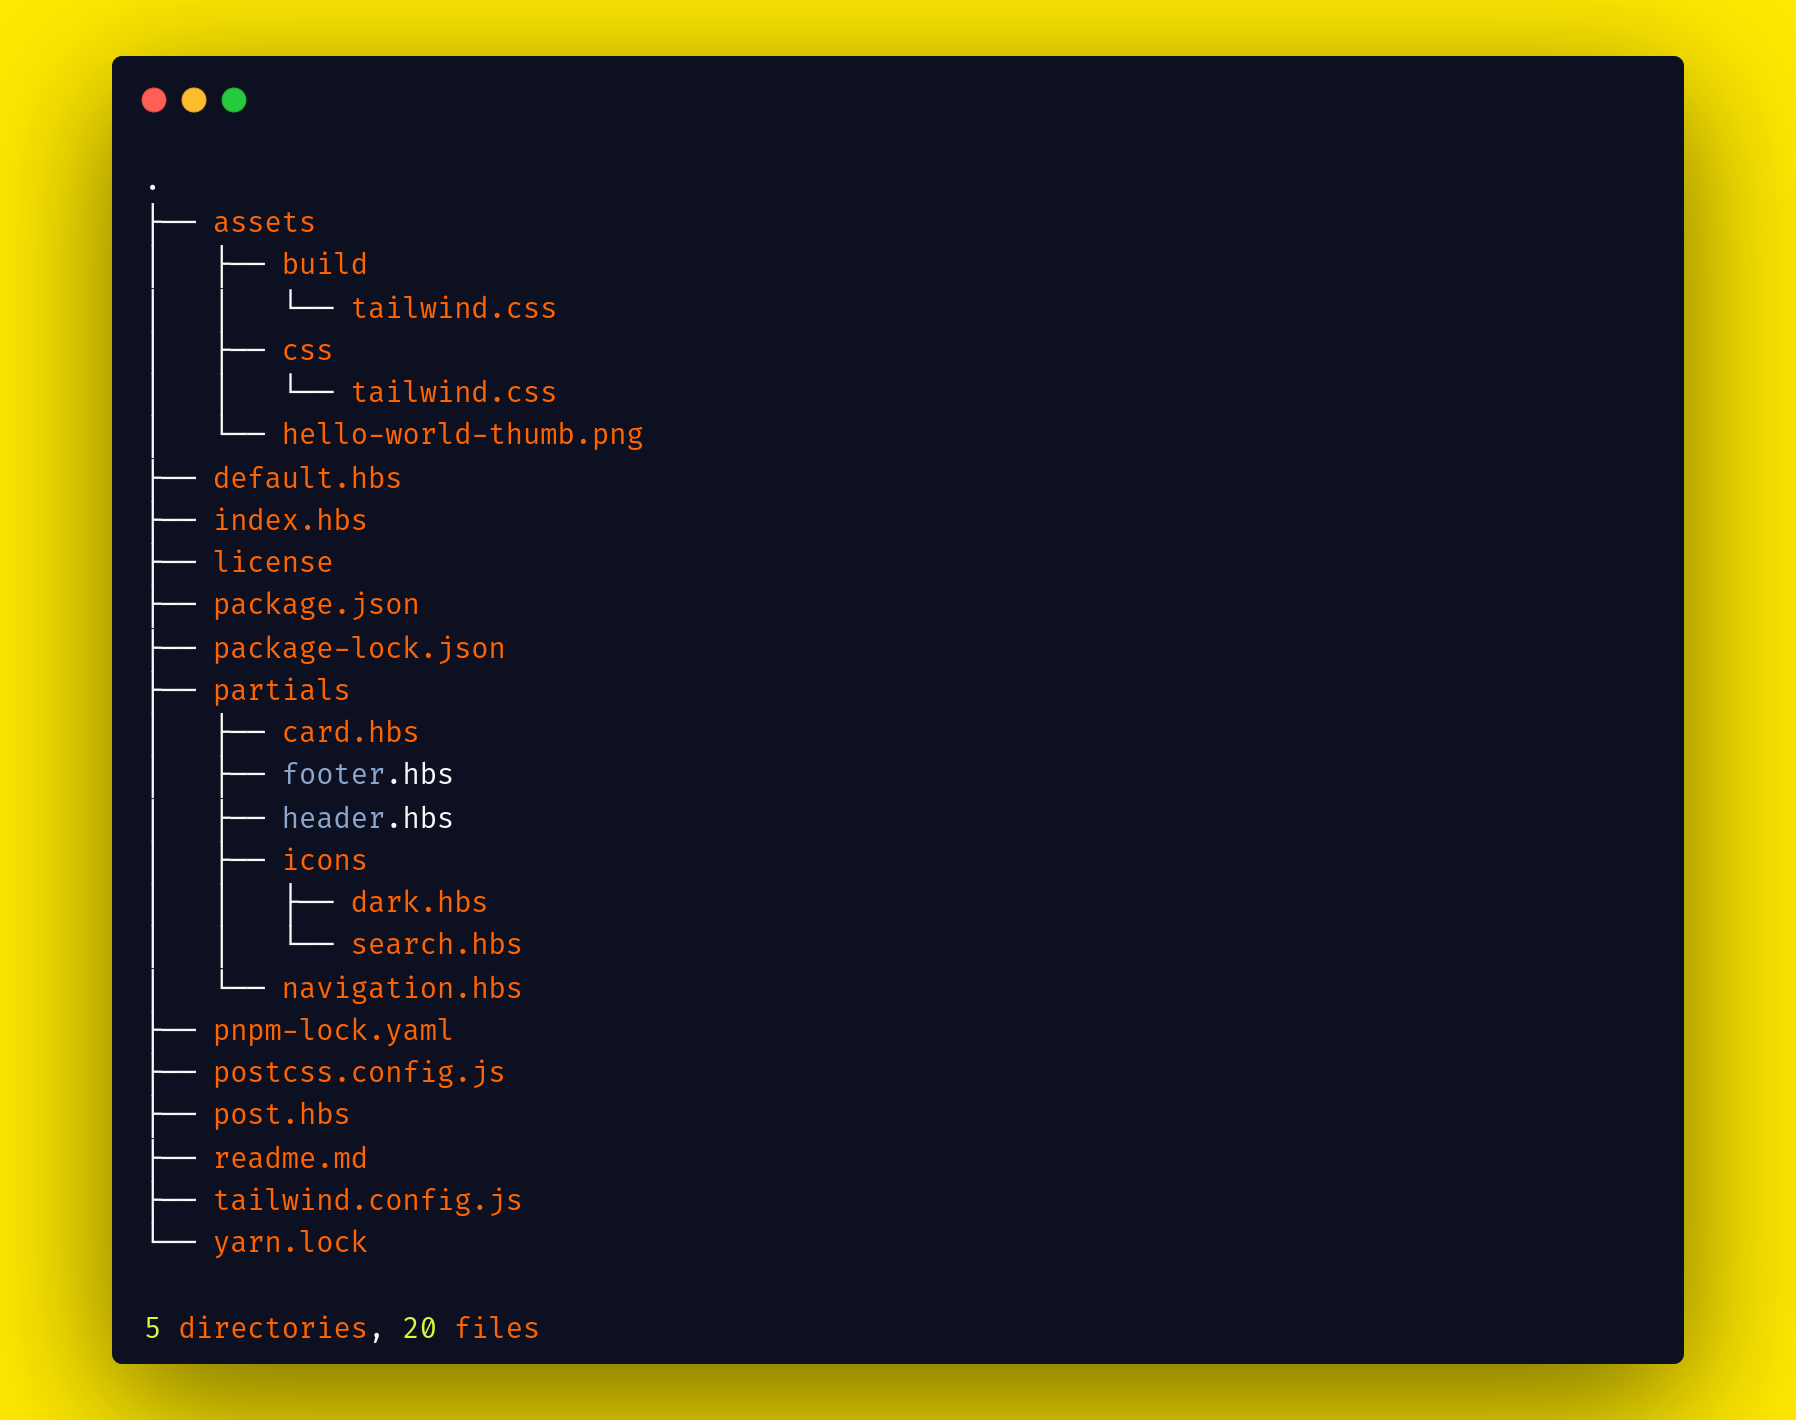 create-ghost-theme cli folder structure
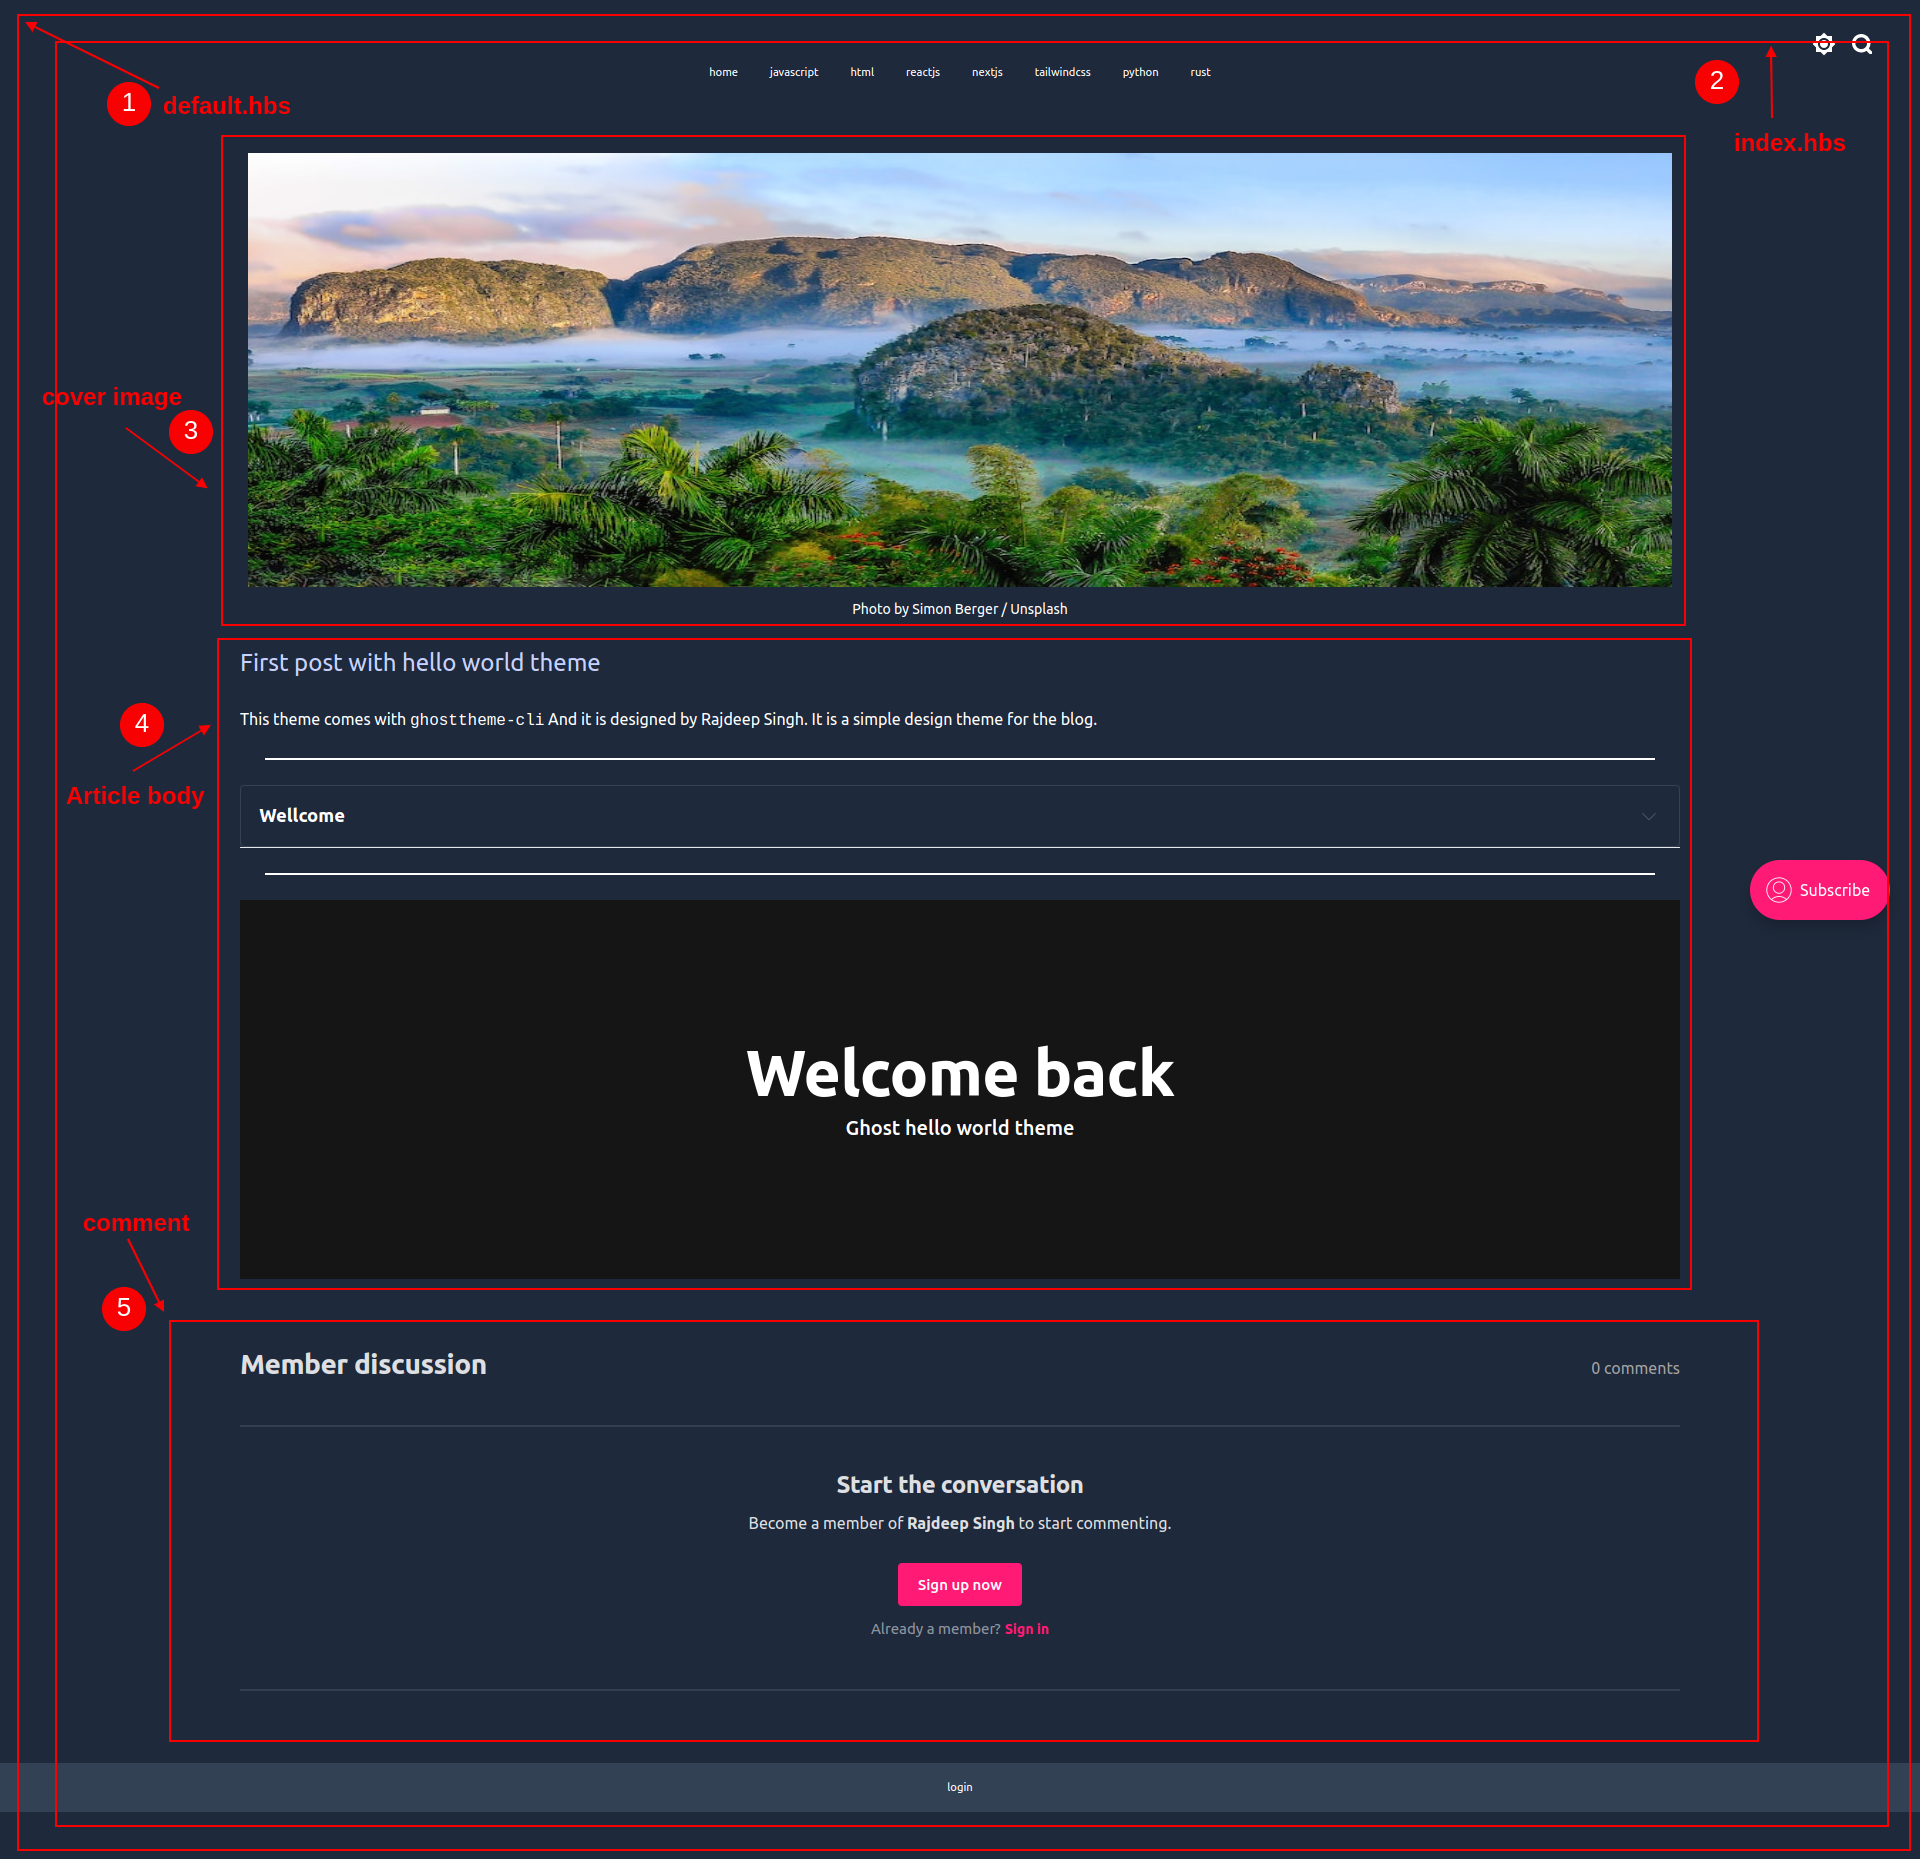
Understanding the New Website Layout
After creating the theme with create-ghost-theme CLI, your theme looks like this.
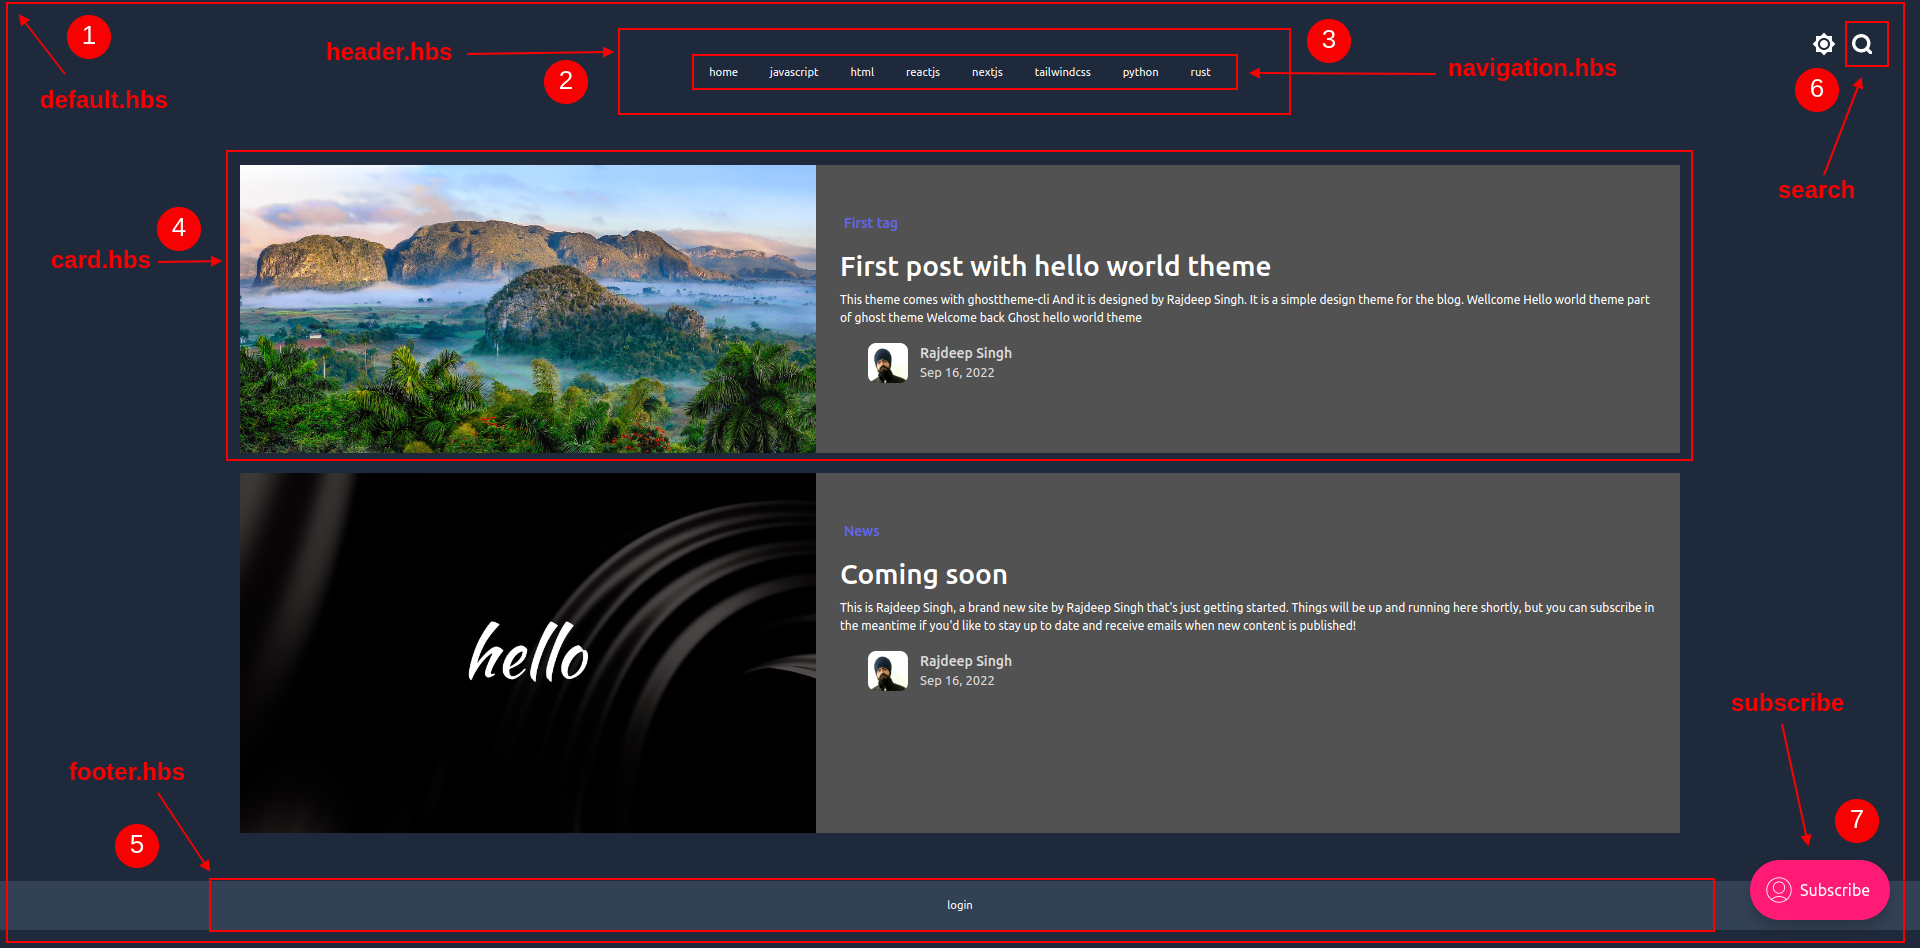 index.hbs
Your website reading page will look like this:
Your new tag page looks like this:

How to Create a New Ghost Theme from Scratch
When you're learning about Ghost theme development, my recommendation is to start creating a new theme from scratch. Then you can use the CLI tool I just showed you. This will be a lot easier for you.
So now, that's what we're going to cover in-depth: how to create a new Ghost CMS theme from scratch.
Requirements:
To create a new theme, you'll need two libraries: the first is ghost-cli and the second is Tailwind CSS.
Here's what we'll go over in the coming sections:
- How to install
Ghost-cliglobally - How to configure Tailwind CSS
- How to understand more commands in the Ghost CLI
- Finally, we'll write the code
How to Install ghost-cli Globally
We went over how to do this above, but in case you need a reminder here it is:
First, you can install ghost-cli globally on your machine using npm or yarn. Here are the commands:
npm install ghost-cli@latest -g
    OR
yarn global add ghost-cli@latest
How to Configure Tailwind CSS
Tailwind CSS is a powerful CSS library for designing the front end of a website. And you can easily use it with Ghost.
Install Tailwind CSS in your theme folder like this:
npm install -D tailwindcss postcss autoprefixer
After Tailwind and another package have been successfully installed, then run the following command to configure Tailwind for your theme development:
npx tailwindcss init
The tailwindcss init command creates a tailwind.config.js file. Here's what you'll see:
/** @type {import('tailwindcss').Config} */
module.exports = {
content: [],
  theme: {
    extend: {},
  },
  plugins: [],
}
Config your template path in the content section, so Tailwind CSS tracks the CSS classes. Then compile those classes in the production file.
/** @type {import('tailwindcss').Config} */
module.exports = {
  content: ["*.hbs","partials/*.hbs"],
  darkMode: 'class',
  theme: {
    extend: {},
  },
  plugins: [],
}
Create a main.css or dev.css and use any other file name to create the file for Tailwind directives. Then paste the following tailwind CSS directives code into the file:
@tailwind base;
@tailwind components;
@tailwind utilities;
Create the script for Tailwind CSS to check all the classes then create a production-ready CSS file for your theme.
    "scripts": {
        "start": "npx tailwindcss -i ./assets/css/dev.css -o ./assets/build/css/build.css --watch"
    },
The last step is to link the production-ready CSS file to your theme like this:
<head>
    {{!-- link production ready css file  --}}
    <link rel="stylesheet" href="{{asset 'build/css/build.css'}}" />
</head>
The one problem you might face when you enable Tailwind CSS in a Ghost theme is that refreshing your site in the development process is manual. When you change anything related to Tailwind classes, you'll need manually refresh your website again. I haven't found a solution yet, but you can use the live server for that for now.
Other Important Commands in the Ghost CLI
There are a number of other commands you'll use often when working in the Ghost CLI. Let's go through them now. Here's what we'll discuss:
- ghost stop
- ghost ls
- ghost doctor
- ghost uninstall
- ghost version
- ghost restart
- ghost update
- ghost version
- ghost --help
How to use the ghost stop command
The ghost stop command stops the currently running instance.

How to use the ghost ls command
The ghost ls command prints the current installs instance list in your machine.

How to use the ghost doctor command
The ghost doctor command checks the system's health to see if everything is fine before running the ghost install or ghost update command.
If you face any errors in Ghost, you can also use the ghost doctor command to check the errors.

How to use the ghost uninstall command
The ghost uninstall command removes the Ghost instance and related configuration files as well.
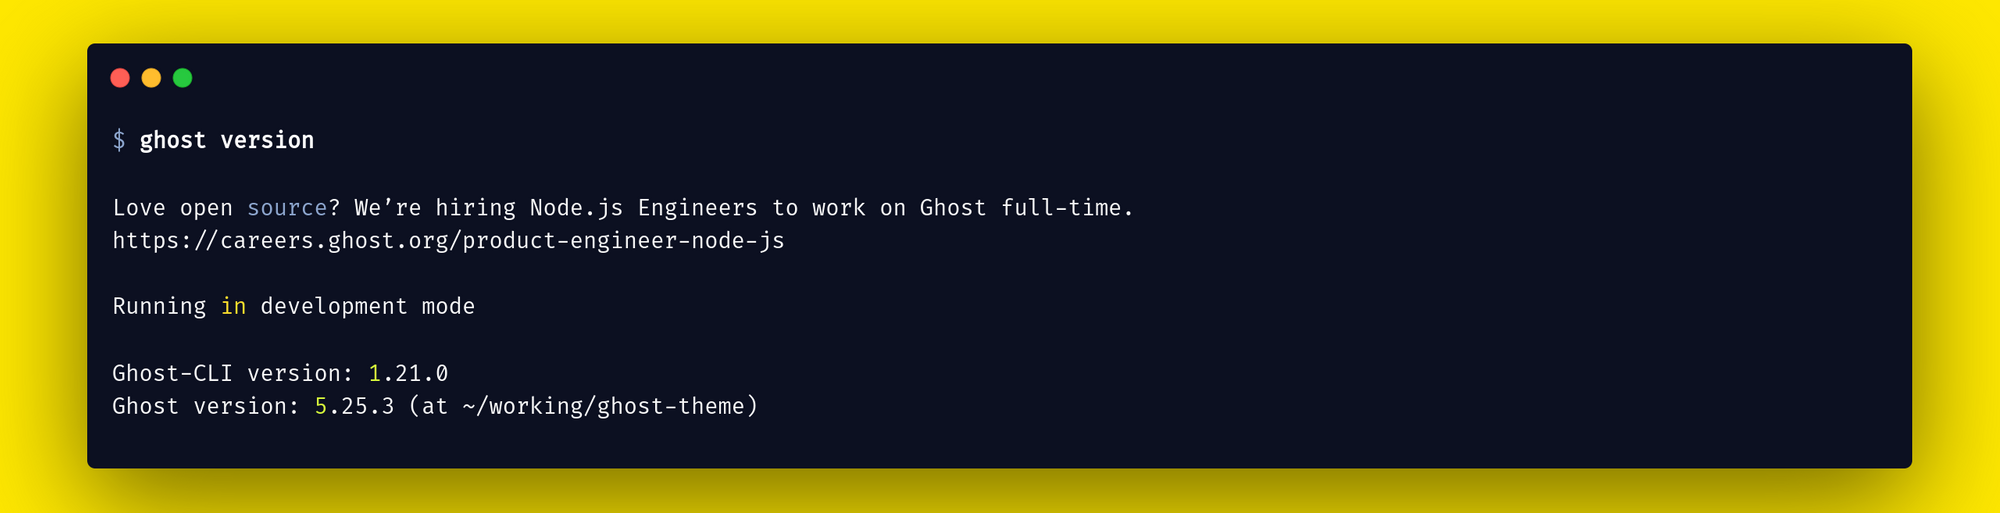
How to check the Ghost version
You can use the ghost version command to check your currently installed version of Ghost.
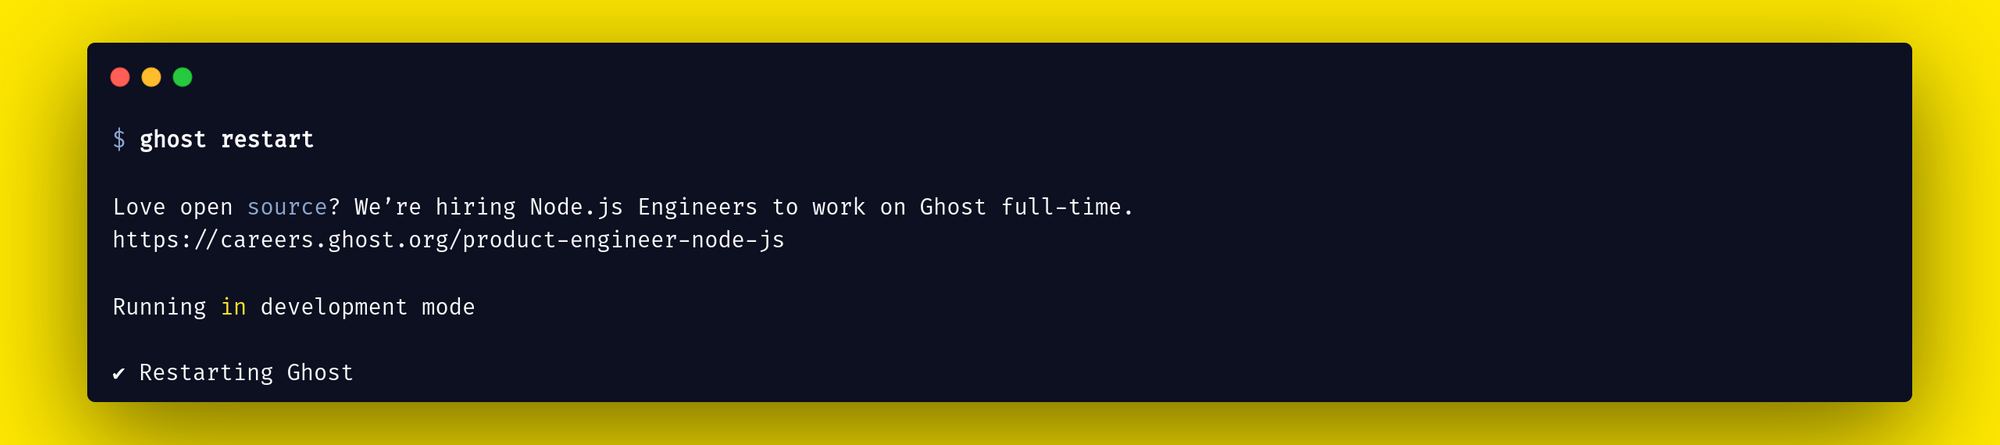
How to use the ghost restart command
The ghost restart command restarts your currently running Ghost instance.
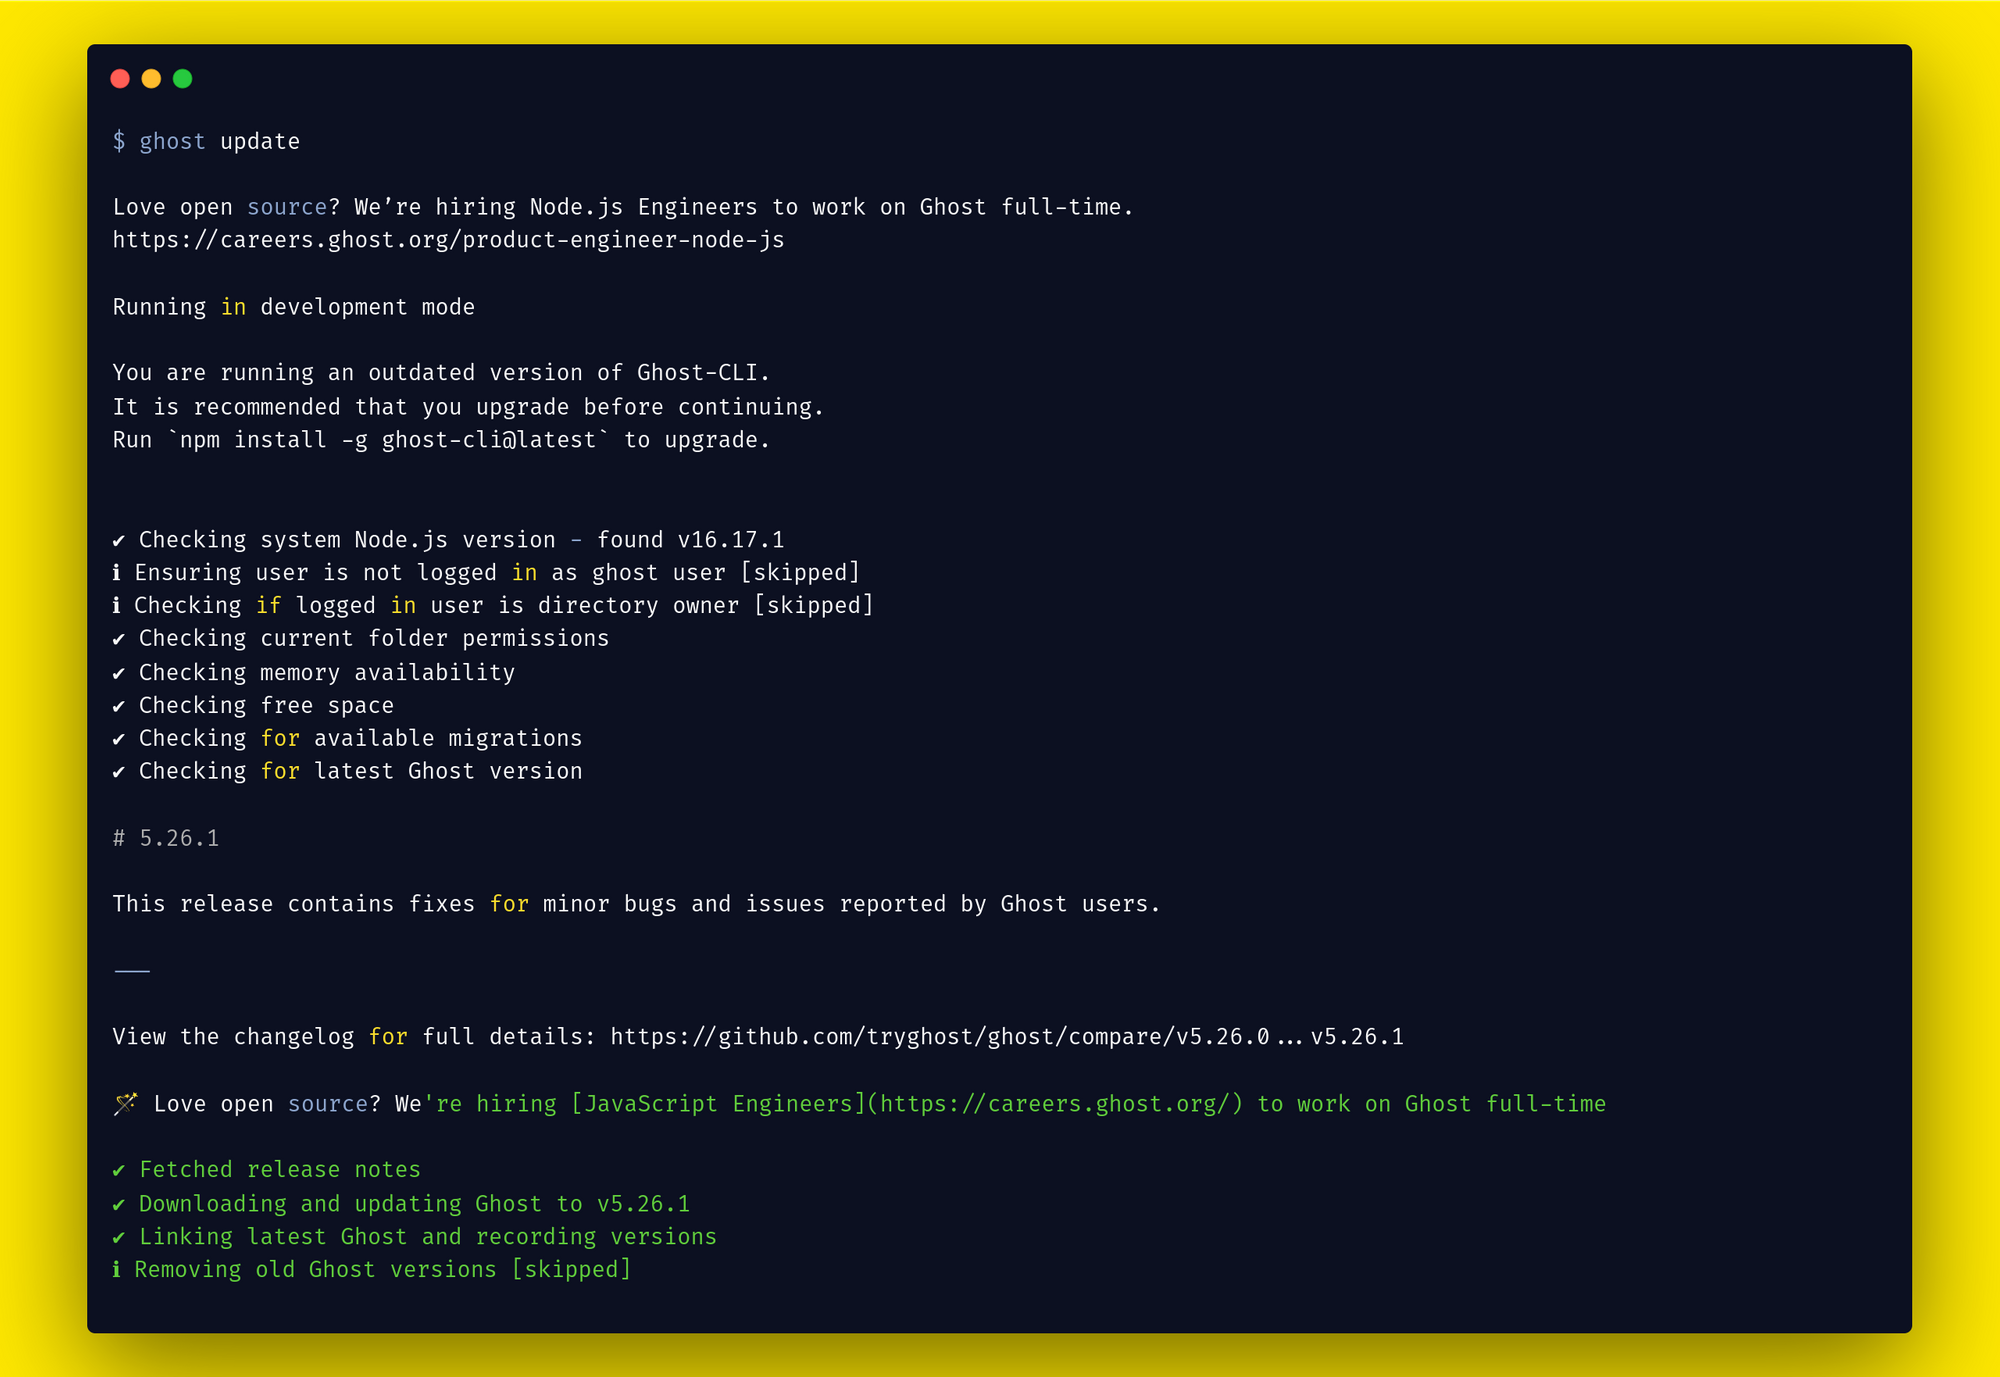
How to use the ghost update command
The ghost update command updates your old Ghost version to the new version.
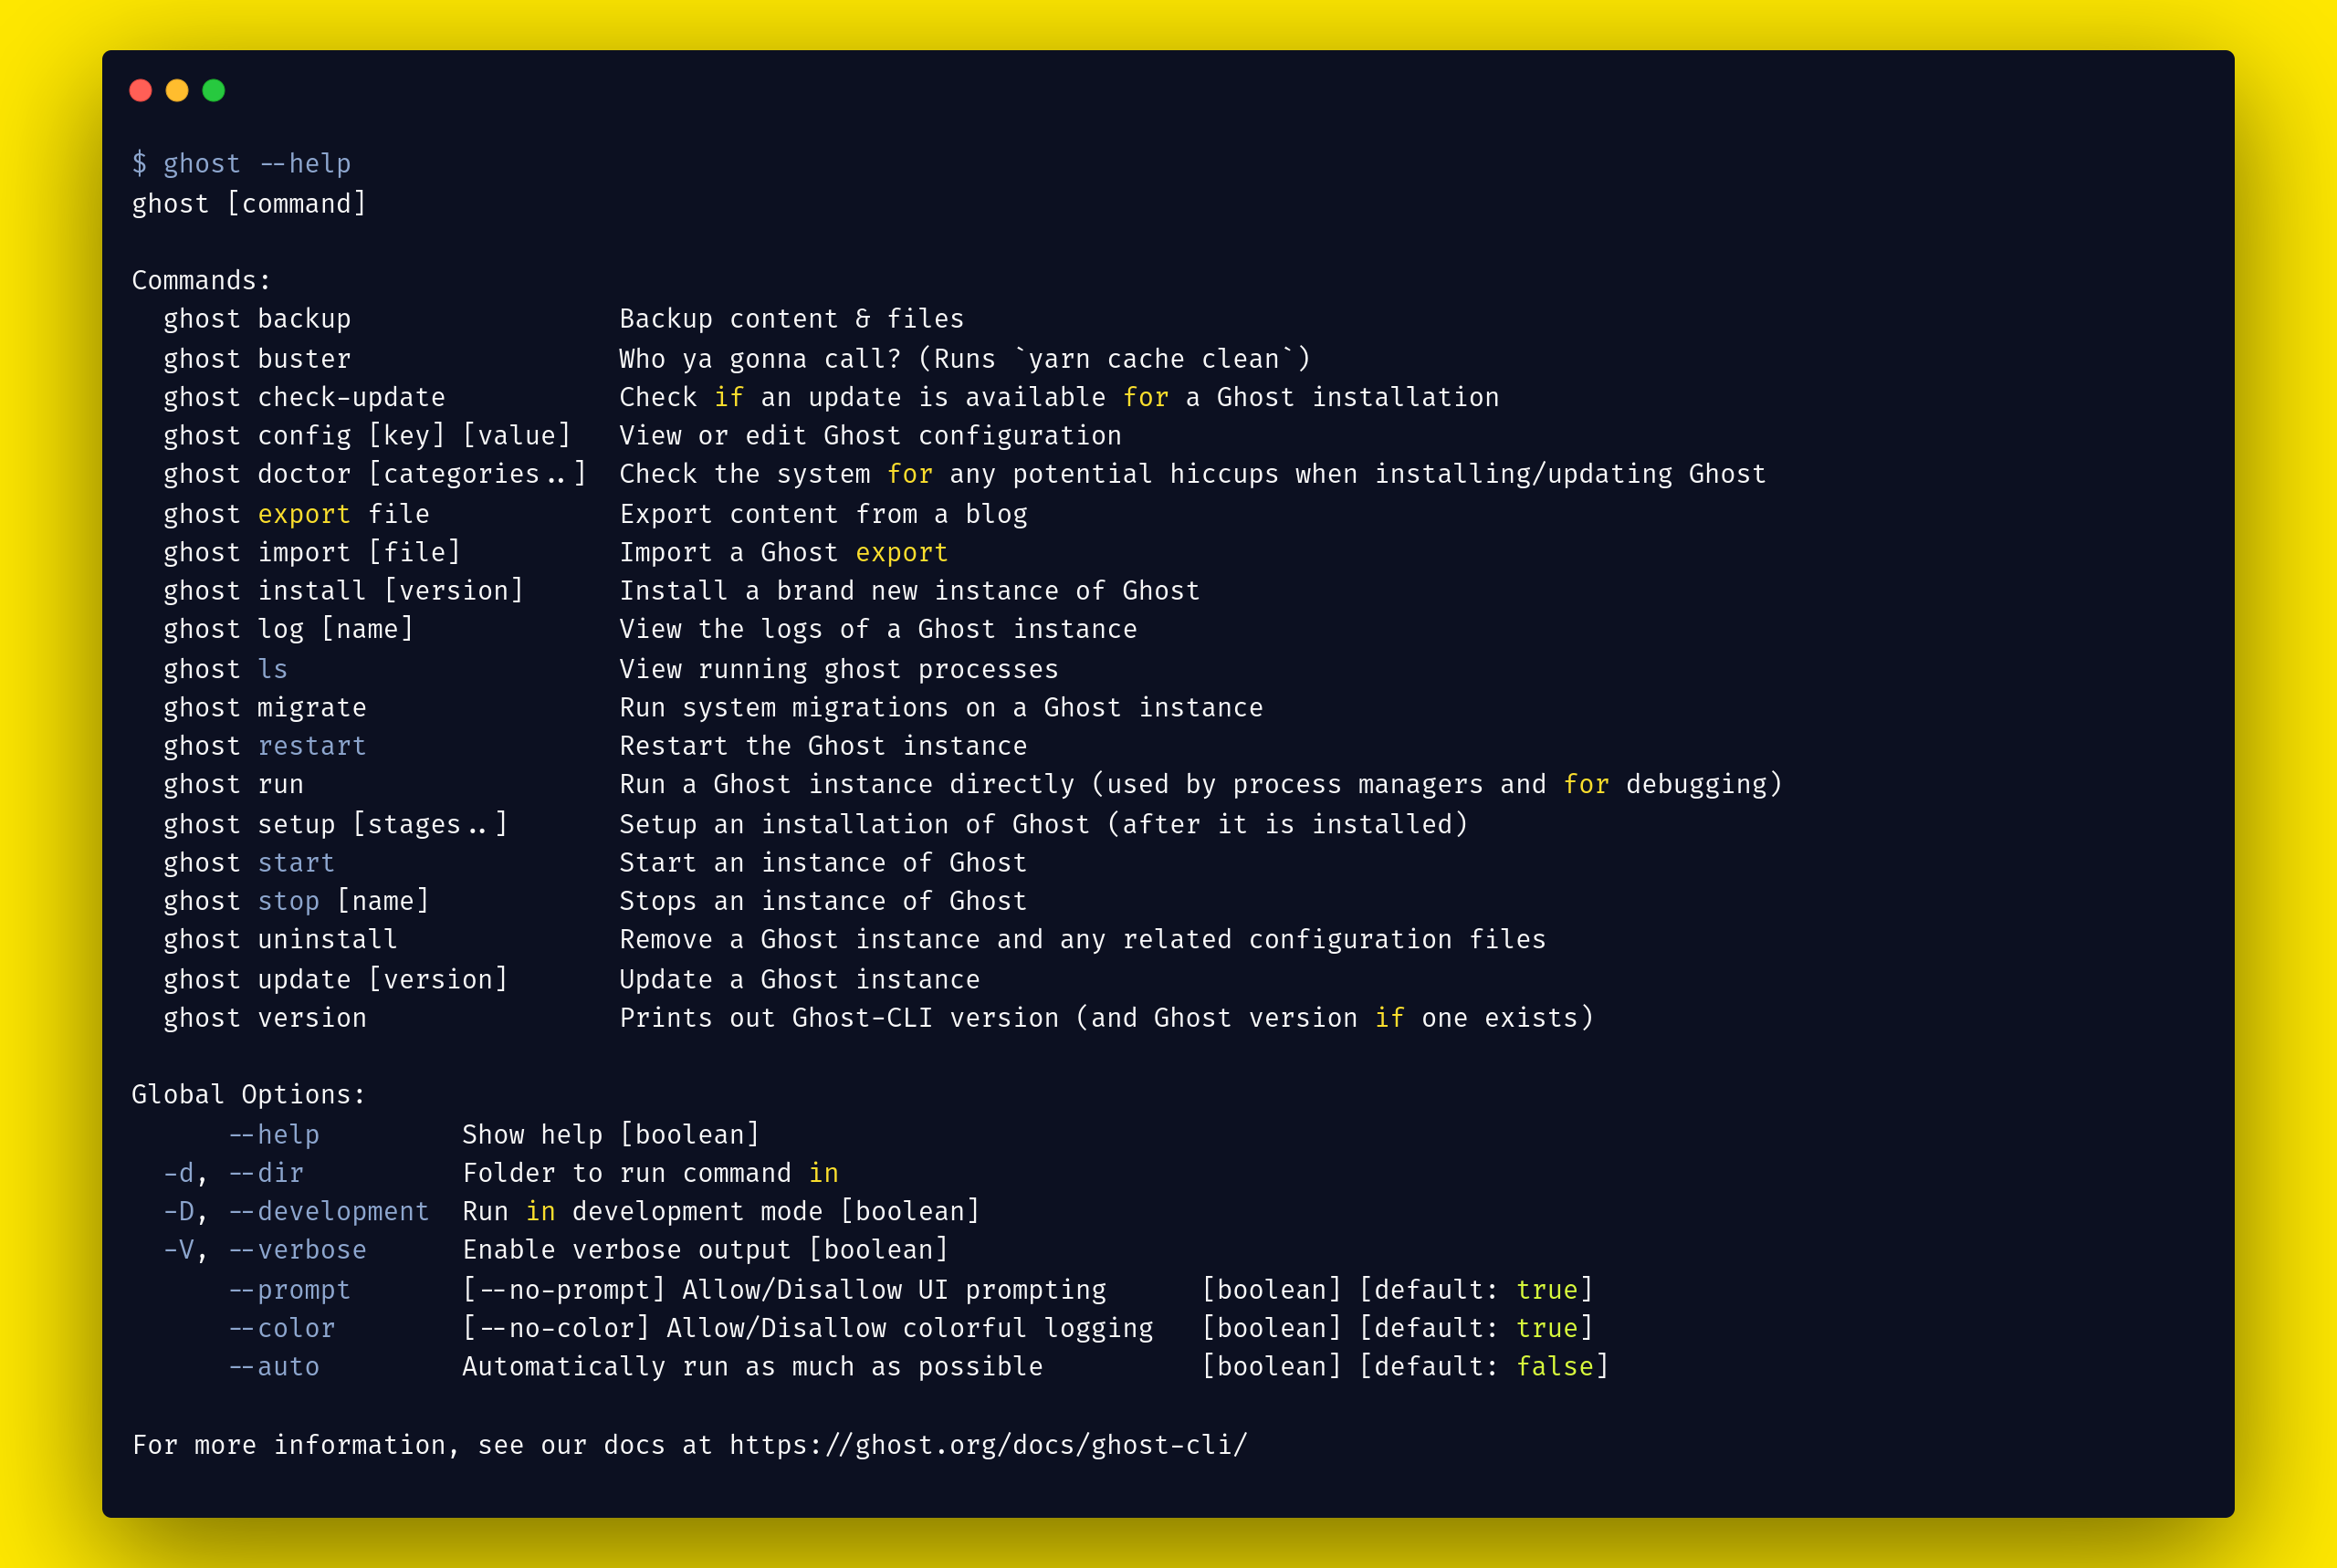
How to use the ghost --help command
The ghost --help command prints a help page:
Finally, we'll write the code
Now we get to start writing the code. Here's what we'll cover in the coming sections:
- How to add theme configuration in
package.json[required] - How to use theme helpers
- What is the partials folder?
- How to create a default page
- How to create an index page [required]
- How to create a posts page [required]
- How to create informational page
- How to create a tags page
- How to set up comments
- How to enable search
How to add theme configuration in package.json
The package.json file is the main file where you add or change the theme name, description, and custom configuration for the theme.
The first step is to create package.json file and add the theme name, description, version, and additional configuration.
The following properties are used by Ghost themes: name, description, version, engines, card_assets, license, author, keywords, screenshots, and config in the package.json file.
The most important properties are name, description, version, engines, card_assets, and config. Here's what this looks like in the code:
{
    "name": "fastest",
    "description": "Fastest ghost cms base theme. Fastest is light weight, modern open-source theme",
    "version": "1.0.7",
    "engines": {
        "ghost": ">=5.0.0"
    },
    "license": "MIT",
    "scripts": {
        "dev": "gulp",
        "start": "npx tailwindcss -i ./assets/css/dev.css -o ./assets/build/css/build.css --watch"
    },
    "author": {
        "name": "Rajdeep Singh",
        "email": "officialrajdeepsingh@gmail.com",
        "url": "https://officialrajdeepsingh.dev"
    },
    "keywords": [
        "ghost",
        "theme",
        "blog",
        "light weight",
        "ghost-theme"
    ],
    "screenshots": {
        "desktop": [
            "assets/dark.png",
            "assets/light.png"
        ],
        "mobile": "assets/mobile.png"
    },
    "config": {
        "posts_per_page": 10,
        "card_assets": true,
        "image_sizes": {},
        "custom": {
            "linkedin_url": {
                "type": "text",
                "default": "None"
            },
            "github_url": {
                "type": "text",
                "default": "None"
            },
            "instagram_url": {
                "type": "text",
                "default": "None"
            },
            "copyright": {
                "type": "text",
                "default": "Copy right by Rajdeep Singh"
            },
            "copyright_url": {
                "type": "text",
                "default": "https://officialrajdeepsingh.dev/pages/terms-and-conditions/"
            },
            "adsense_enable": {
                "type": "select",
                "options": [
                    "Disable",
                    "Enable"
                ],
                "default": "Disable"
            }
        }
        },
    "devDependencies": {
        "@tailwindcss/typography": "^0.5.8",
        "autoprefixer": "^10.4.13",
        "cssnano": "^5.0.17",
        "gscan": "^4.22.0",
        "gulp": "4.0.2",
        "gulp-autoprefixer": "^8.0.0",
        "gulp-concat": "^2.6.1",
        "gulp-cssnano": "^2.1.3",
        "gulp-livereload": "4.0.2",
        "gulp-sourcemaps": "^3.0.0",
        "gulp-uglify": "^3.0.2",
        "postcss": "^8.4.20",
        "tailwindcss": "^3.2.4"
    }
}
You can learn more about card_assets and config for the theme. The config section helps add configuration for Ghost. You can also add more custom configuration for Ghost and enable and disable it with the Ghost UI.
To check all configurations, go to Ghost > Settings > Design > and click Site-wide. There you can check all configuration lists provided by the theme developer.
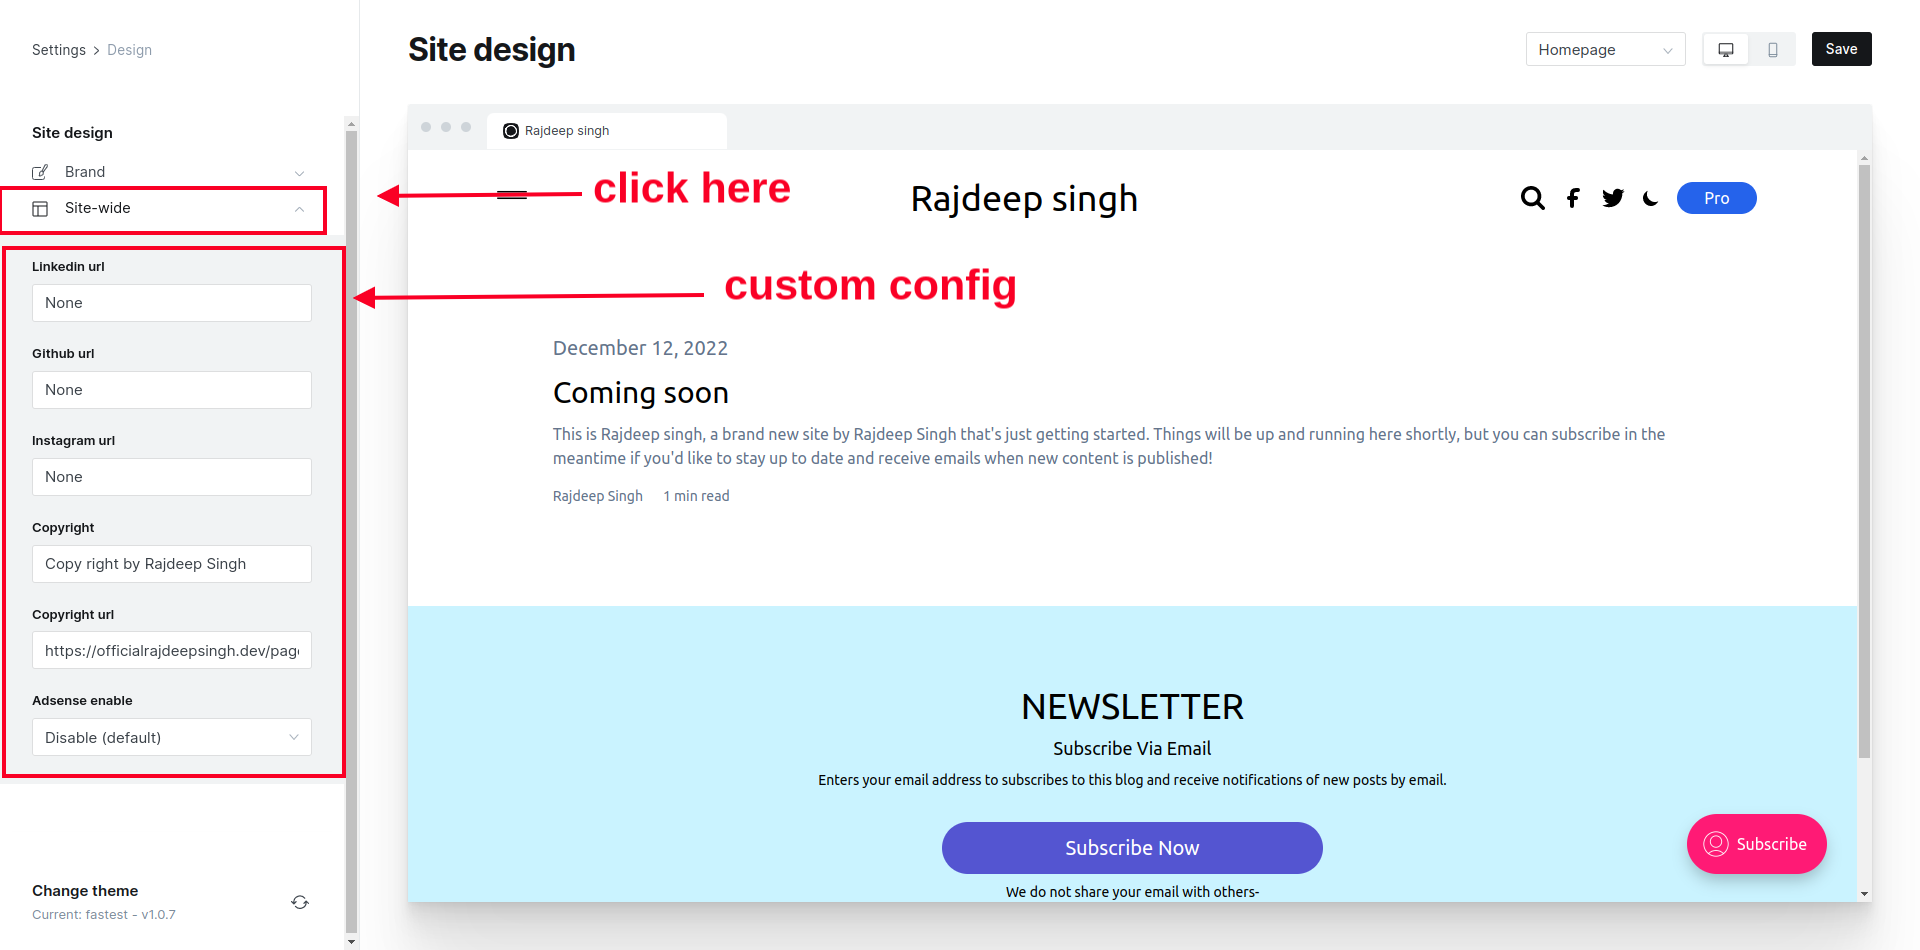 custom config enable and disable in ghost cms
How to Use Theme Helpers
The Ghost team provide lots of helpful functions to add additional functionality to the Ghost theme with handlebars. Some of the functionality by default comes with handlebars and other functionality is built by the Ghost team and maintained by the community.
The Ghost team uses handlebars to build the entire Ghost CMS and theme. Basically, handlebars.js is a template language that helps you build both static and dynamic websites.
There are lots of Ghost helpers like foreach, get, if, is, match, @config, comments, navigation, post, total_members, total_paid_members, block, asset, ghost_head, ghost_foot, pagination, partials, body_class, block, search and many more.
You can read about all of the helpers on the official docs. You can also copy-paste some of the code so you do not need to remember.
What is the Partials Folder?
The partials folder is like a component folder where you define all components for your theme. Basically, components are reusable code that you can reuse as often as you need. In the theme structure, we call these partials. All the partials are created with handlebars.js.
 partials for ghost theme
I create more than 24 partials for my Ghost theme and you can easily reuse them across websites. You can use partials with the following syntax: {{> your-partials-file-name}}.
How to Create a Default Page
First, we need to built a default.hbs file. The default.hbs file helps us build a layout for the website. Here's the code:
<!DOCTYPE html>

<html class="dark scroll-smooth overflow-x-hidden" lang="{{@site.locale}}">

<head>
    <meta name="viewport" content="width=device-width, initial-scale=1.0">

    {{!-- link production ready css file  --}}
    <link rel="stylesheet" href="{{asset 'build/css/build.css'}}" />
   {{!-- ghost header --}}
      {{ghost_head}}

</head>


<body class="{{body_class}} bg-white dark:bg-slate-800 dark:text-white antialiased scroll-smooth ">

  {{!-- partials/header --}}
    {{> header}}

    <main class="mt-6 flex flex-col">

{{!-- Render other pages  --}}
        {{{body}}}

    </main>
{{!-- partials/footer --}}
    {{> footer}}
    {{> banner}}

{{!-- ghost header --}}
    {{ghost_foot}}

    <script src="{{asset 'build/js/main.js'}}"></script>

</body>

</html>
Let's see what's going on here:
{{meta_title}}provides the title from the website.- The
@siteis a global variable and you can access a title with{{@site.title}}. - Include a Ghost
{{ghost_head}}in the head tag. - Include a Ghost
{{ghost_foot}}in the footer tag. - Inserted all other templates with the
{{{body}}}tag in index.hbs, post.hbs, and so on. - All other templates get inserted in index.hbs, post.hbs, and so on.
- Include dynamic CSS classes with
{{body_class}}in the<body>tag - Add footer partials in the default
{{> footer}}file - Add header partials in default
{{> header}}file - Include assets from the
{{asset "build/tailwind.css"}}folder.
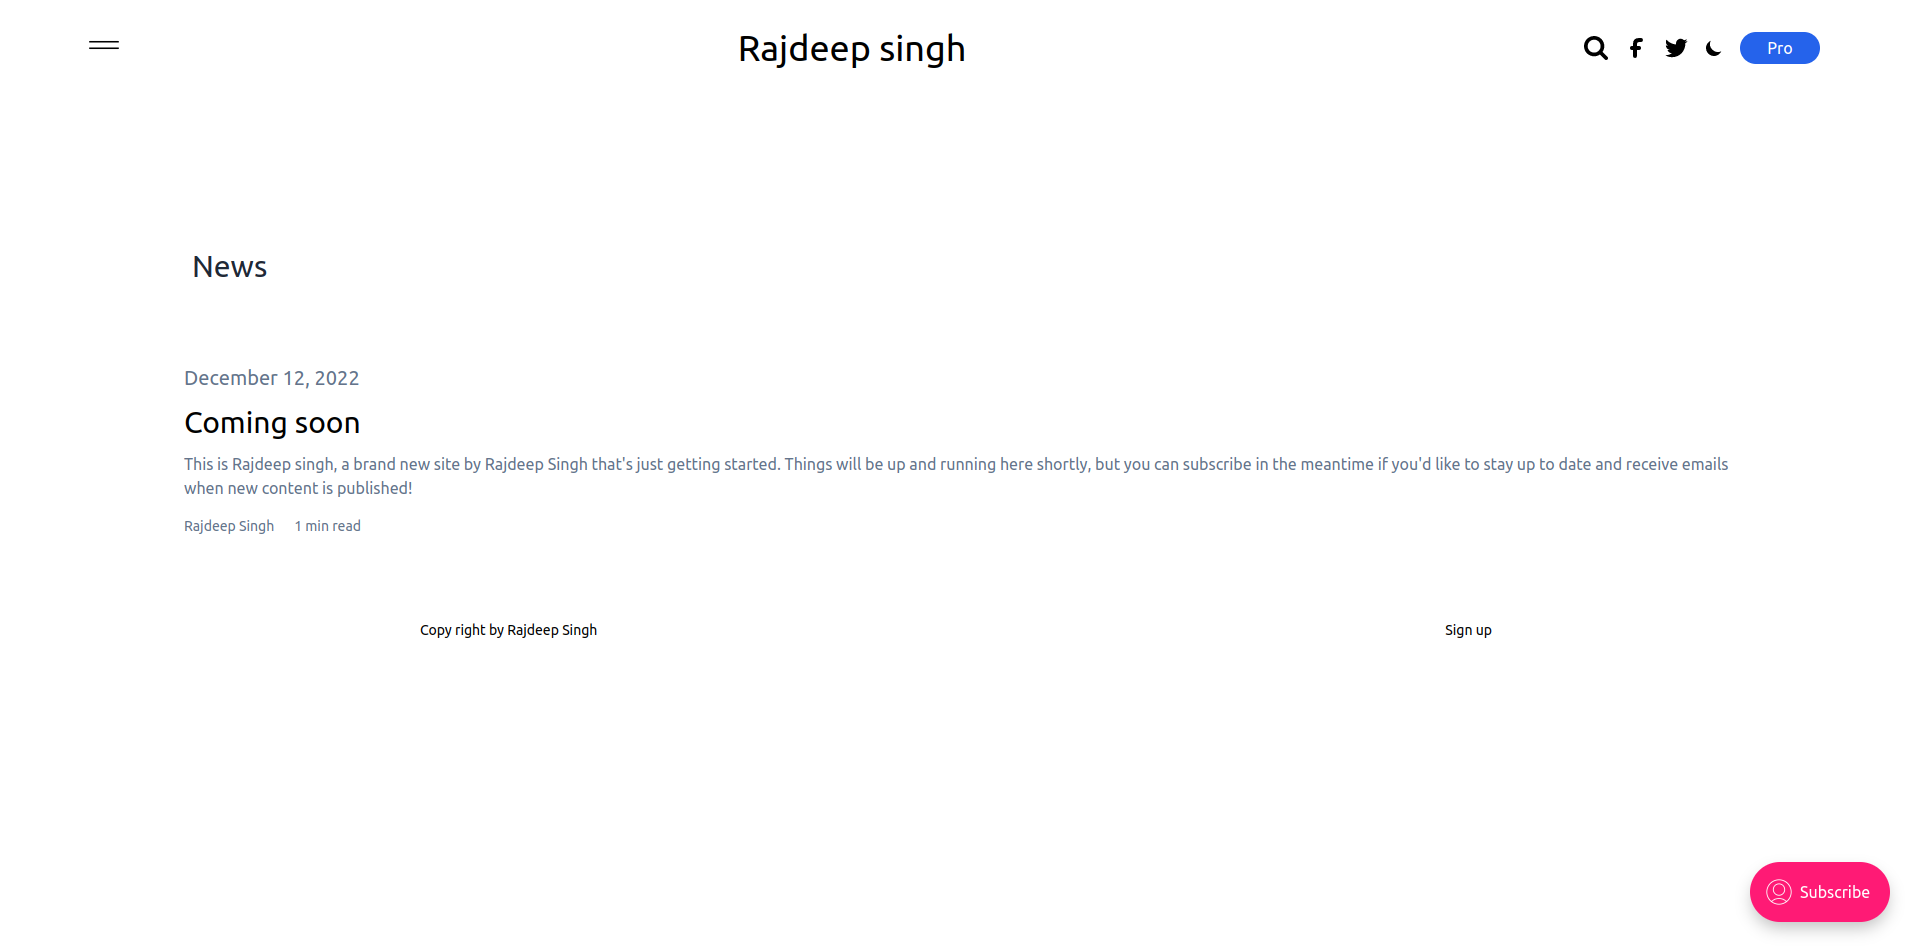
How to Create an Index Page
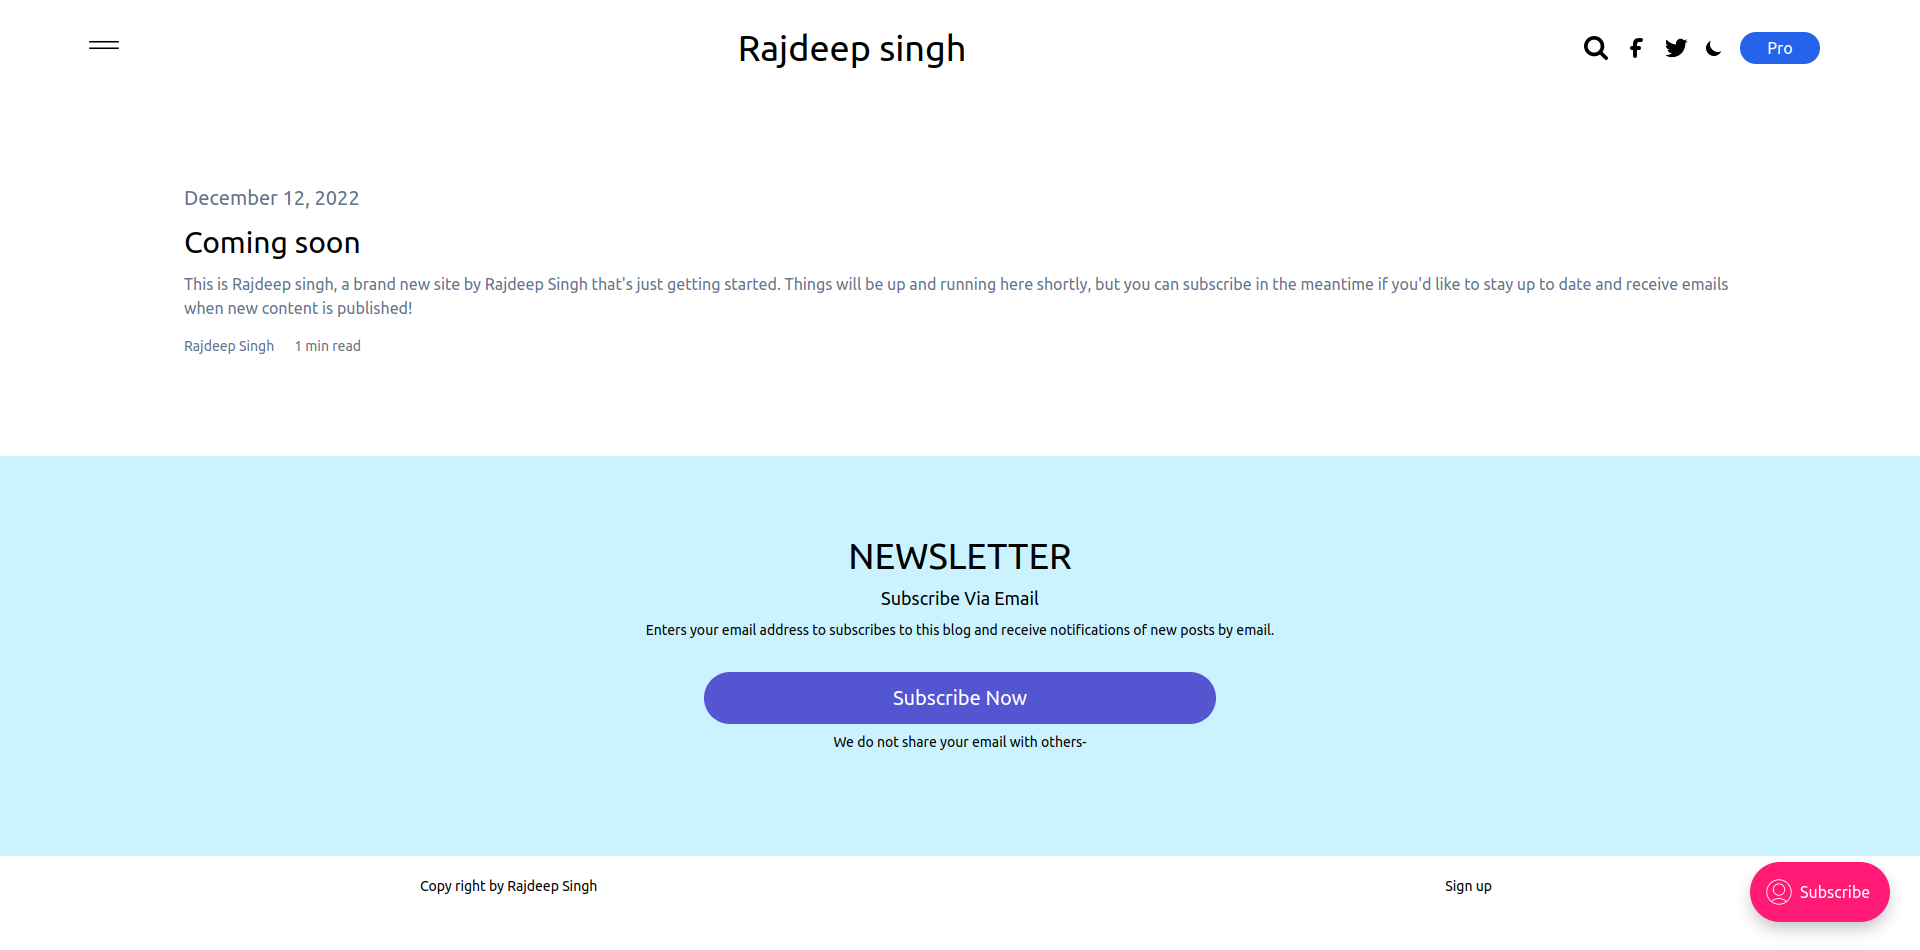 Create
 index.hbs in the Ghost theme
The index page is the main page of the website. You can create a similar index page with the following code:
{{!--  Add default.hbs layout file --}}
{{!< default}}

{{!-- loop all the posts and show on home page --}}

{{#foreach posts}}

{{!--  check condition defined in config section in package.json and add adsense code after every third post --}}
    {{#has number="nth:3" }}
        {{#match @custom.adsense_enable "Enable" }}
            {{> ads}}
        {{/match}}
    {{/has}}

    {{!-- partials/postCard.hbs --}}
    {{> postCard }}

    {{/foreach}}

    {{!-- Add pagination --}}
    {{pagination}}

{{!--  check condition defined in config section in package.json and add adsense --}}
    {{#match @custom.adsense_enable "Enable"}}
        {{> ads}}
    {{/match}}

{{!-- newsletter partials --}}
    {{> newsletter}}
You can access all posts with a for each loop and pass them to the partials with the {{> postCard}} template. The @custom.adsense_enable is a custom config written in the package.json file and used in the theme to check that the website owner has enabled AdSense on-site or not. The custom config enables you to go to Ghost > Settings > Design > and to click on Site-wide and enable Adsense.
How to Create a Posts Page
 Create
 post.hbs in the Ghost theme
The posts page is where readers will read your articles on your site. You can create a posts page with the following code.
{{!< default}}

{{#post}}


{{!-- Pass reading_time time to authors partials with block , learn more about about block https://ghost.org/docs/themes/helpers/block/ --}}
{{#contentFor "fastestReadingTime"}}

 <p class="text-slate-600 dark:text-slate-400 text-xs xs:text-xs sm:text-xs md:text-sm lg:text-sm xl:text-sm 2xl:text-sm ">
    {{reading_time}}
 </p>

{{/contentFor}}

{{#match @custom.adsense_enable "Enable"}}

    {{> ads}}

{{/match}}

<article class="{{post_class}} w-6/6 p-2">

    <!-- Heading section -->

    <div class="m-auto mb-4 w-6/6 xs:w-5/6 sm:w-5/6 md:w-5/6 lg:w-5/6 xl:w-5/6 2xl:w-5/6">
        <h1 class="mt-8 text-3xl xs:text-4xl sm:text-5xl md:text-5xl xl:text-5xl 2xl:text-5xl">
             {{title}}
        </h1>
        <p class="text-slate-600 dark:text-slate-500 mt-2 text-1xl">
            {{excerpt}}
        </p>
    </div>

    <!--  Author card partials/authors -->
    {{> authors}}


    <!-- article thumbnail with partials/authors -->
    {{> featureImage}}


    <!-- article body -->
    <div class="prose-lg prose-neutral m-auto p-2 my-10 w-10/12">
        {{content}}
    </div>


</article>


    {{!-- partials/comment --}}
    {{> comment}}


{{!-- Add adsense  --}}
{{#match @custom.adsense_enable "Enable"}}

    {{> ads}}

{{/match}}

{{!-- Show related posts --}}
{{#get "posts" filter="authors:{{primary_author.slug}}+id:-{{id}}" limit="3" include="authors"}}

{{!-- if post is available then show it --}}
{{#if posts}}

<h2 class="mt-10 m-auto text-left w-5/6 text-xl xs:text-1xl sm:text-3xl md:text-4xl xl:text-5xl 2xl:text-6xl">
    Read more
</h2>

{{!-- loop all post --}}
{{#foreach posts}}
    {{> postCard }}
{{/foreach}}

{{/if}}

{{/get}}

{{!-- Add adsense  --}}
{{#match @custom.adsense_enable "Enable"}}

    {{> ads}}

{{/match}}

{{/post}}

{{!-- newsletter partials --}}
{{> newsletter}}
The fastestReadingTime block is to pass the reading time to the author partials. The @custom.adsense_enable is a custom config written in the package.json file and used in the theme to check that the website owner has enabled AdSense on-site or not. The custom config enables you to go to Ghost > Settings > Design > and to click to Site-wide and enable Adsense.
How to Create Informational Pages
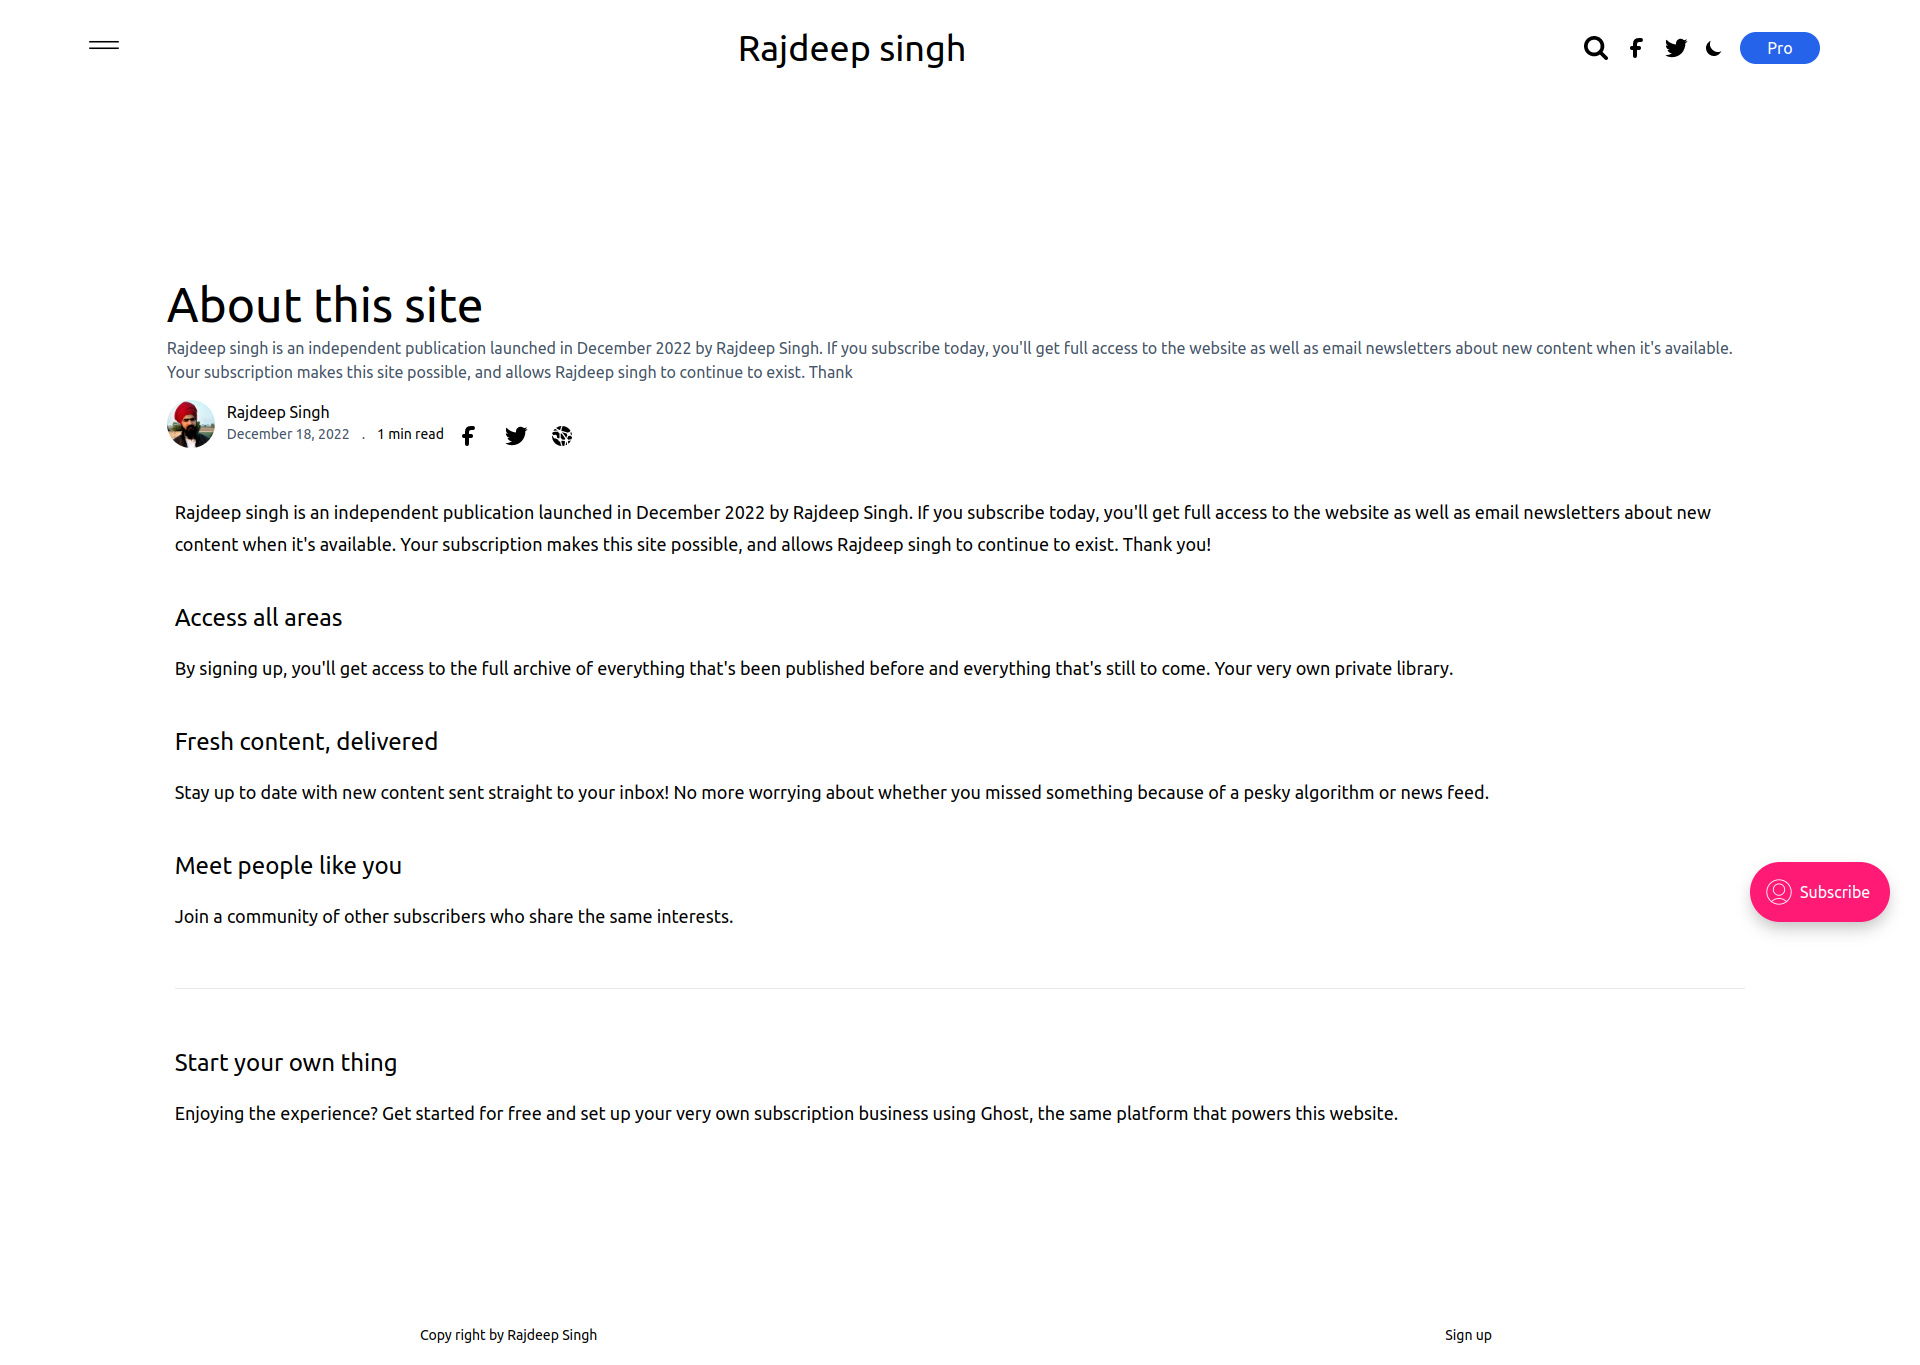 Create
 page.hbs in the ghost theme
The page.hbs file helps you create informational pages for your website. For example, you can create an about, contact, privacy policy, or disclaimer page on your site.
{{!< default}}

{{#post}}

    {{!--Pass reading_time time to authors partials with block , learn more about about block https://ghost.org/docs/themes/helpers/block/     --}}
    {{#contentFor "fastestReadingTime"}}

    <p class="text-grey-600 text-xs xs:text-xs sm:text-xs md:text-sm lg:text-sm xl:text-sm 2xl:text-sm ">
        {{reading_time}}
    </p>
    {{/contentFor}}

{{!-- Add adsense base of if enable on theme  --}}
    {{#match @custom.adsense_enable "Disable"}}

        {{> ads}}

    {{/match}}

    <article class="{{post_class}}  w-6/6 p-2">

        <!-- Heading section -->
        <div class=" m-auto mb-16 w-6/6 xs:w-5/6 sm:w-5/6 md:w-5/6 lg:w-5/6 xl:w-5/6 2xl:w-5/6">
            <h1 class="text-gray-800 mt-8 text-3xl xs:text-4xl sm:text-4xl md:text-5xl xl:text-6xl 2xl:text-8xl">
                {{title}}
            </h1>
            <p class="text-gray-600 text-xl xs:text-xl sm:text-xl md:text-1xl xl:text-2xl 2xl:text-2xl">
                {{excerpt}}
            </p>
        </div>

        <!--  partials/authors -->
        {{> authors}}


        {{!--  partials/featureImage  --}}
        {{> featureImage}}


        <!-- article body -->
        <div class=" prose-xl prose-neutral m-auto p-2 my-10 w-10/12">
            {{content}}
        </div>


    </article>


    {{!-- Add adsense  --}}
    {{#match @custom.adsense_enable "Disable"}}

        {{> ads}}

    {{/match}}

    {{/post}}
The fastestReadingTime block is to pass the reading time to the author partials. The @custom.adsense_enable is a custom config written in the package.json file and used in the theme to check that the website owner has enabled AdSense on-site or not. The custom config enables you to go to Ghost > Settings > Design > and to click to Site-wide and enable Adsense.
How to Create an Author Page
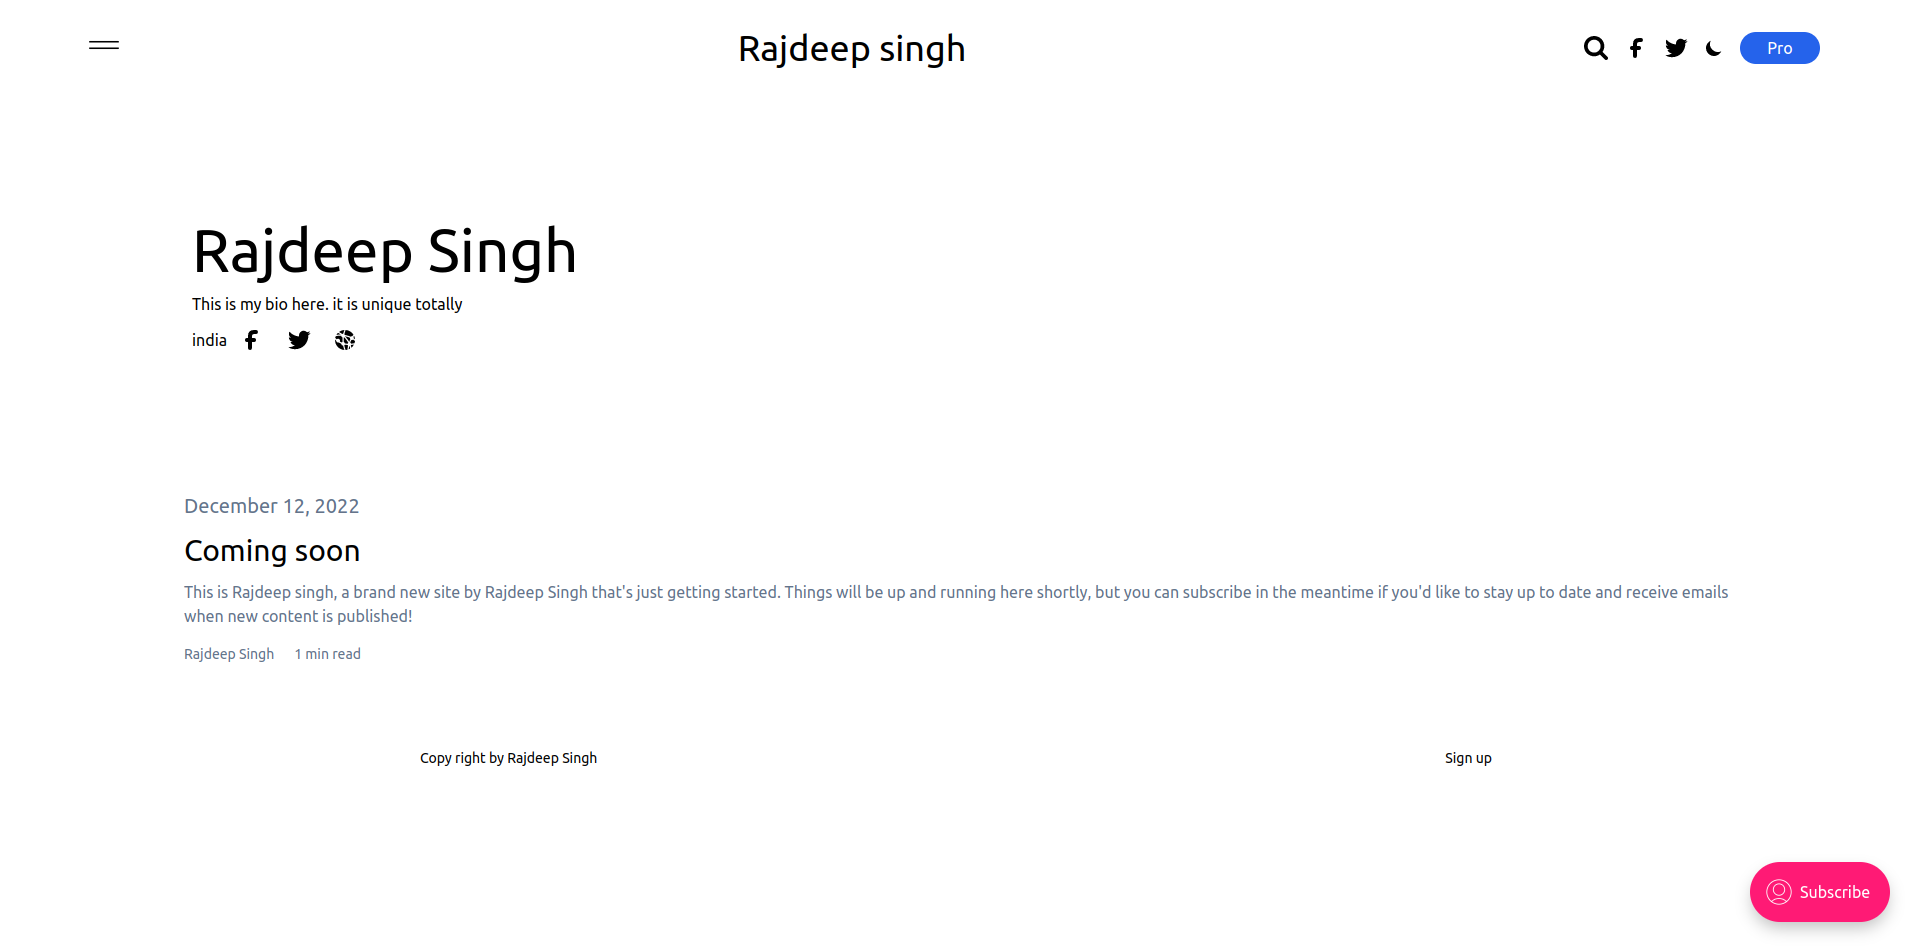 Create
 author.hbs in the ghost theme
Author pages let you describe the author. You can show the author's name, bio, and related articles.
{{!< default}}

{{#author}}

{{!--  Author Section pass with block learn more about about block https://ghost.org/docs/themes/helpers/block/ --}}
   {{#contentFor "authorName"}}
      {{name}}
    {{/contentFor}}

<div class="container mt-20 mb-16 flex flex-col justify-between mx-auto">

    <div class="flex flex-col mt-6 w-6/6 xs:w-5/6 sm:w-5/6  md:w-3/6 lg:w-3/6 xl:w-3/6 2xl:w-3/6 xs:mt-6 sm:mt-6 md:mt-6 lg:mt-0 xl:mt-0 2xl:mt-0 ">

        <h1 class="text-3xl mt-5 xs:text-3xl sm:text-3xl md:text-4xl xl:text-5xl 2xl:text-6xl"> {{name}} </h1>

        {{#if bio}}
            <p class="mt-0 xs:mt-0 sm:mt-0 md:mt-1 lg:mt-3 xl:mt-3 2xl:mt-3 text-md">
                {{bio}}
            </p>
        {{/if}}

        <ul class="flex flex-row my-3">

            <li class="text-md">{{location}}</li>

               {{#if facebook}}

                    <li class="mx-3 text-sm flex items-center">
                        <a target="_blank" href="https://facebook.com/{{facebook}}" >

                        {{!-- Pass partials/Icons/facebook --}}
                            {{> Icons/facebook}}

                        </a>
                    </li>

                {{/if}}
                {{#if twitter}}
                    <li class="mx-3 text-sm flex items-center">
                        <a target="_blank" href="https://twitter.com/{{twitter}}" >

                        {{!-- Pass partials/Icons/twitter --}}
                            {{> Icons/twitter}}

                        </a>
                    </li>
                {{/if}}
                {{#if website}}
                    <li class="mx-3 text-sm flex items-center">
                        <a target="_blank" href="{{website}}" >

                            {{!-- Pass partials/Icons/website --}}
                            {{> Icons/website}}

                        </a>
                    </li>
                {{/if}}
        </ul>
    </div>
</div>


{{!--  get posts related to author base on author Id --}}
    {{#get "posts" limit="all" filter="authors:{{slug}}+id:-{{id}}" order="published_at desc"   }}

        {{#if posts}}
                {{#foreach posts}}
                    {{> authorCard}}
                {{/foreach}}
        {{/if}}

    {{/get}}

{{/author}}
How to Create a Tags Page
 Create tag.hbs in the ghost theme
You can use the tag.hbs file to show articles related to the tag used.
{{!< default}}


{{#tag}}

<div class="container m-auto mt-32  mb-16  w-5/6 xs:w-5/6 sm:w-5/6 md:w-5/6 lg:w-5/6 xl:w-5/6 2xl:w-5/6">

    <h1 class=" text-gray-800 text-4xl xs:text-5xl sm:text-6xl md:text-7xl xl:text-8xl 2xl:text-9xl">{{name}}</h1>

    {{#if description}}
        <p class=" text-gray-600 text-xl xs:text-xl sm:text-xl md:text-1xl xl:text-2xl 2xl:text-2xl">
            {{description}}
        </p>
    {{/if}}


</div>

{{!--  get posts related to tag base on  tag slug --}}

    {{#get "posts" include="authors,tags" limit="3" filter="tag:{{slug}}" as |related|}}

   {{!-- loop posts base on article --}}
        {{#foreach related}}

    {{!--  check condition define in config section in package.json and add adsense code after every third post --}}
            {{#has number="nth:3"  }}
                {{#match @custom.adsense_enable "Enable"}}
                    {{> ads}}
                {{/match}}
            {{/has}}

        {{!-- partials/postCard.hbs --}}
            {{> postCard }}

        {{/foreach}}

    {{/get}}

{{/tag}}
How to Create an Error Page
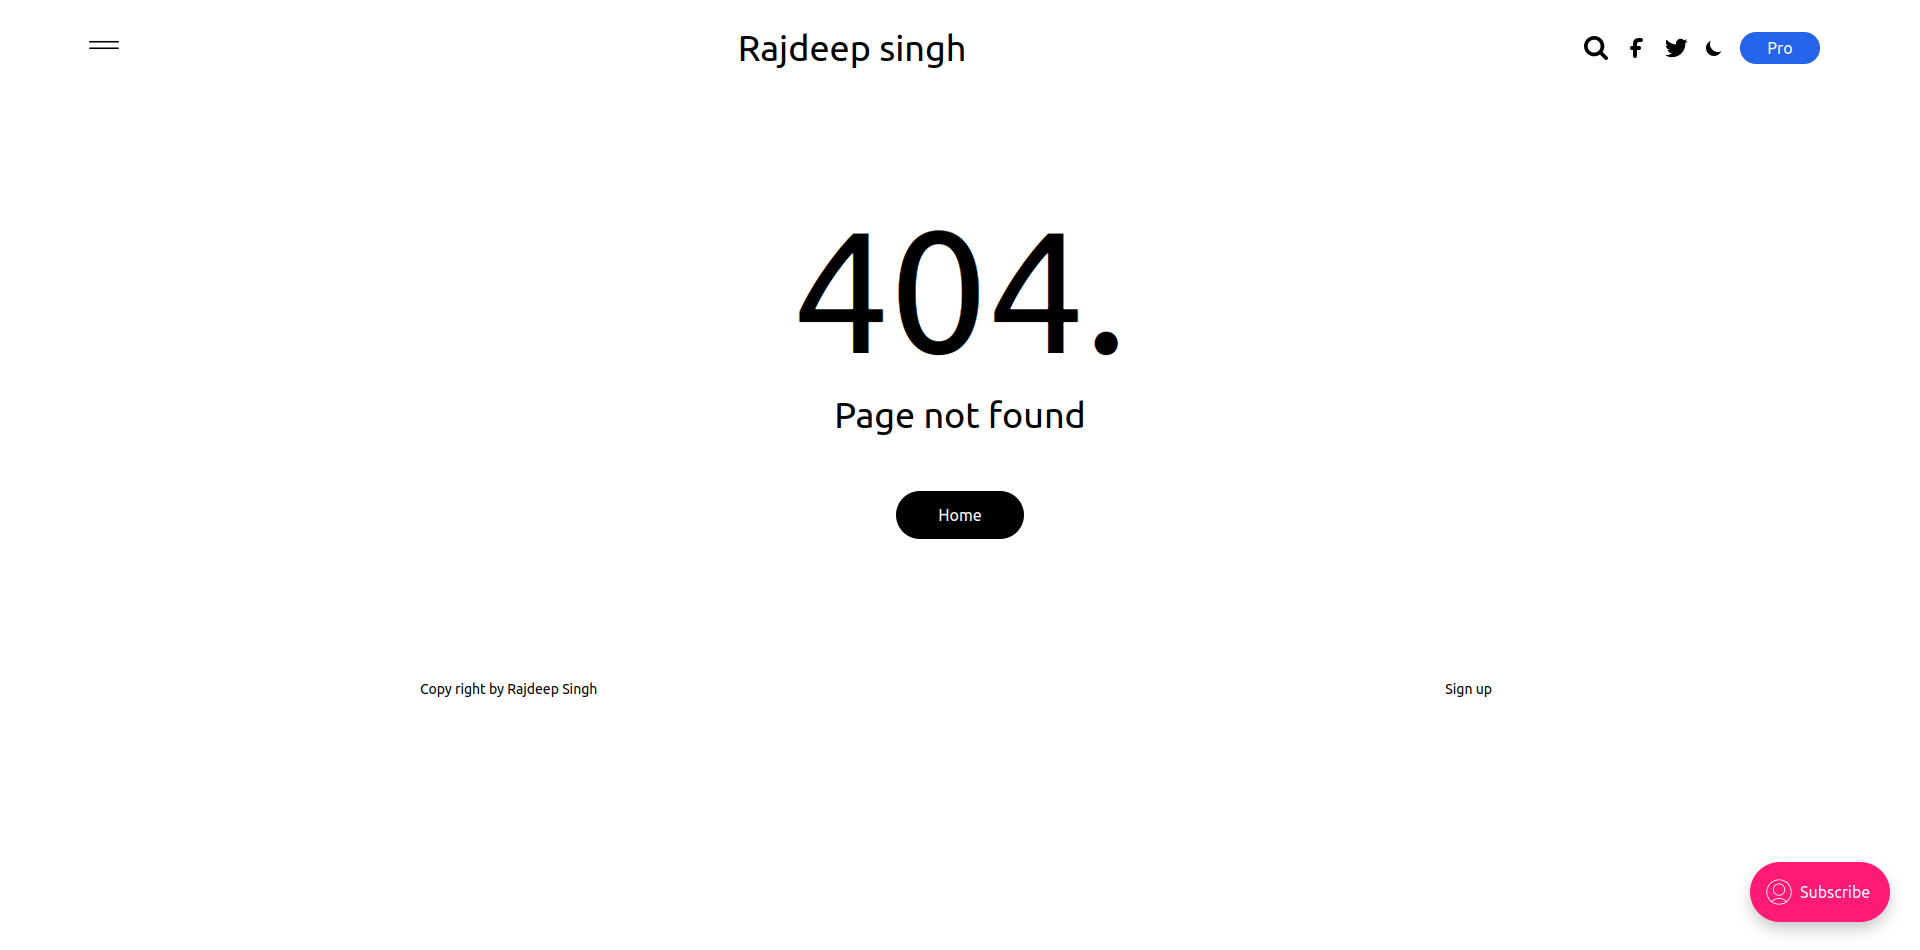 Create
 error.hbs in the ghost theme
You use the error.hbs file to show when any errors occur on the website. Error pages help your website not break in production. The most common error is a 404 (not found) error.
{{!< default}}
<div class="flex flex-col m-auto p-10 w-5/6 xs:w-5/6 sm:w-5/6 md:w-5/6 lg:w-5/6 xl:w-5/6 2xl:w-5/6">
    <h1 style="font-size: 10.8rem;" class="text-black text-center">
        {{statusCode}}
    </h1>

    <p class="text-4xl -m-6 text-center">
        {{message}}
    </p>

    <a href="/" class="text-center w-32 m-auto my-20 p-3 bg-black text-white items-center rounded-full">
        Home
    </a>
</div>
How to Enable Comments
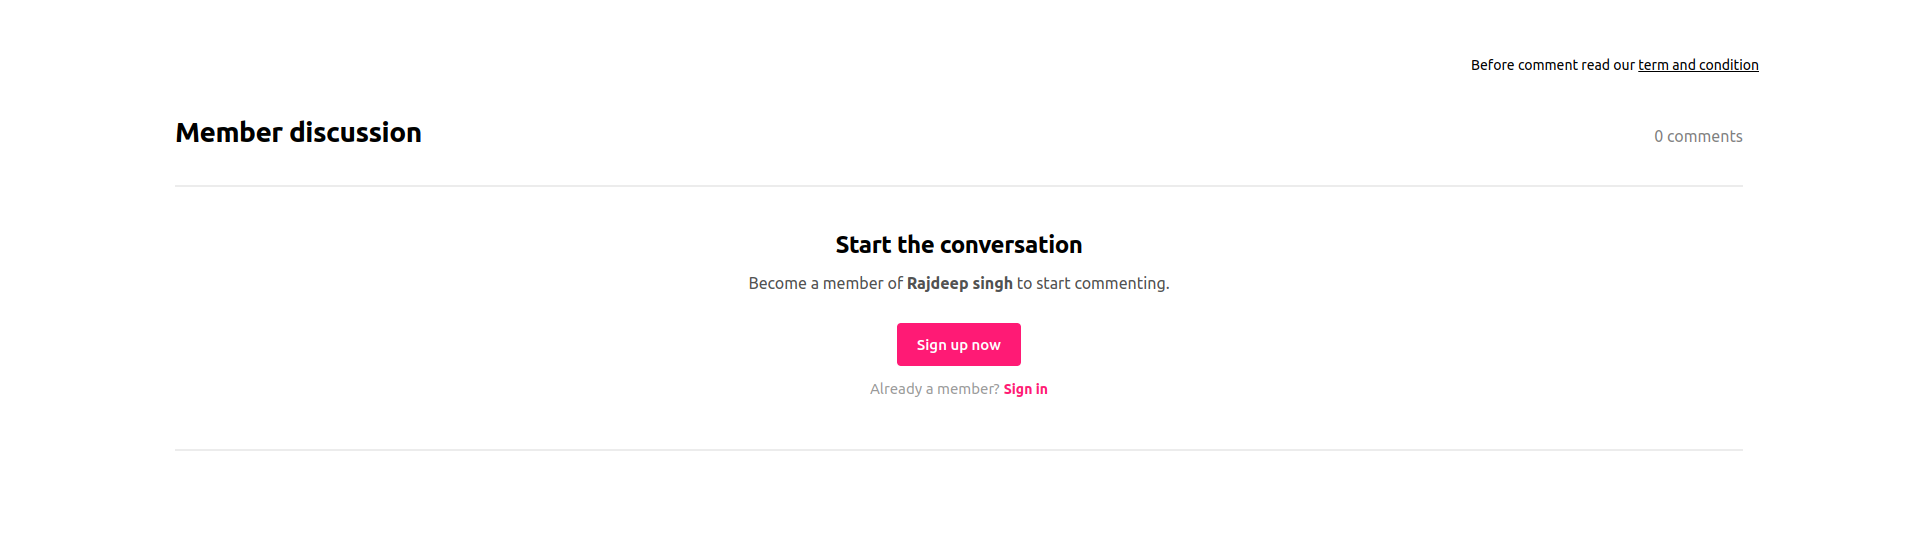 enable comments in the ghost theme
Ghost 5 officially supports the commenting system (it's built-in) and you can just enable comments on the theme by copying and pasting the code – you never need any configuration. Ghost itself handles all the configurations. Here's the code:
<div class="m-auto my-8 w-10/12">
    <p class="text-right text-xs xs:text-xs sm:text-xs md:text-sm lg:text-sm xl:text-sm 2xl:text-sm ">
        Before comment read our <a style='text-decoration: underline' href="https://officialrajdeepsingh.dev/terms-and-conditions/">term and condition </a>
    </p>
    <div class="mt-5 mb-5 p-4">

   {{!--  Enable comment on theme --}}
       {{comments}}
    </div>
</div>
How to Set Up Search
 enable the search bar in the ghost theme
Ghost 5 comes with the official support of search functionality. You do not need any other configuration. Just paste the following code into your theme and the search functionally will start working on your site.
{{!-- partials/Icons/search --}}
<button class="gh-search" data-ghost-search>{{> Icons/search}}</button>
Conclusion
Building a theme with Ghost is a relatively straightforward process compared to WordPress. The Ghost team has created well-defined documentation that you can easily follow as a beginner with examples.
They also provide many ready-made components, like search functionality, amp page, comments, and so on.
You can create your Ghost theme by copy-pasting the code. For beginner developers, it might seem a bit complicated, but you'll get the hang of it with some time and work.
The Ghost team has created a well-defined folder structure for theme development. It is the easiest way to manage the theme development process. You can also use npm packages to enhance the development process and add more functionality to the theme. In my theme, I use tailwind CSS and the Gulp package to speed up the development process.