
By Dan Englishby
Hello, freeCodeCamp readers. I hope I can bring you some great coding content for inspiration, education and of course, fun!
In this tutorial, we will learn about keyword density and how to build a tool that can calculate keyword density with Laravel.
The web tool will allow us to paste in a full page of HTML. Then, magic will be executed to give us a precise keyword density score.
In a quick summary, here are some basic skills we will touch upon whilst building the tool.
- Laravel routes, controllers, and views
- Laravel layouts
- HTML & forms
- JQuery & Ajax
- Some native PHP
- A bit of SEO!
What is keyword density?
If you have your own website or blog, you possibly already know what keyword density is. For those who don't know what it means I will give a short and sweet explanation below.
Keyword density is a calculation of word or keyword occurrences usually in a large piece of text. The density is reported in a percentage which is simply calculated with the following formula.
KeywordDensity = (Keyword Count / Word Count) * 100
Why is this important?
Keyword density is a key factor in the Google search engine algorithm. It is widely thought that a good keyword density for optimising web pages for Google rankings is around 3.5%. If the percentage is higher, for example 20%, then this could be seen as 'keyword stuffing' and therefore could badly affect your Google search rankings.
So, that is a minuscule lesson on SEO and to give you a bit of context of what we are trying to build.
Building a Keyword Density Tool with Laravel
This tutorial will presume we are all starting with a fresh Laravel build enabling anyone to follow on from any particular point. (Apologies if the beginning sections are telling you to suck eggs!)
Also, just for further context, I'm building this on MacOS with XAMPP locally.
Prerequisites
- A PHP environment installed and access to the root directory
- Composer installed
- Your favourite code editor that interprets PHP, HTML, CSS & JS.
With all of these prerequisites checked off, we can now get our hands dirty.
Creating Our Laravel App
First of all we need to download and install a fresh Laravel build. Follow the steps below to achieve this.
- Open your command line interface at the root directory of your web server, for example XAMPP/xamppfiles/htdocs/
- Run the following command and let composer do it's magic
composer create-project --prefer-dist laravel/laravel KeywordDensityApp
Top Tip: If you are working on MacOS, then check out the following steps to enable permissions on the Laravel storage folder.
- Navigate to your CLI to the project folder ('KeywordDensityApp')
- Run the following command
sudo chmod -R 777 storage/*
Adding a controller and view
Now that we have the basics out of the way, we can start to build our controller and web page that will allow a user to paste in and analyse some HTML.
We can create a new controller in two ways: via the PHP artisan command line helper or simply by creating with your code editor. Feel free to use any of the below methods, just make sure the controller matches
Create controller with PHP artisan
php artisan make:controller ToolController
Create controller with code editor
- Locate the following - ProjectFolder/App/Http/Controllers
- Create a new .php file named ToolController
Make sure this newly created file has the following contents:
<?php

namespace App\Http\Controllers;

use Illuminate\Http\Request;

class ToolController extends Controller
{
    //
}
Now let's create the view.
Create view with code editor
- Locate view folder under ProjectFolder/resources/views
- Create a new folder named tool
- Create a new view PHP file named index.blade.php
Now let's create a layout file
With most Laravel applications, you will want to build a layouts file so that you don't have to repeat lots of HTML over and over to get the same design across the board.
This layout is pretty basic, using a simple Bootstrap template and has a @yield call to the 'content' area which we will utilise in our views. In addition, there's a @yield call to 'scripts' which we will utilise later.
- Locate view folder under ProjectFolder/resources/views
- Create a new folder here named layouts
- Create a new file named master.blade.php
- Add the following code to the file
<!DOCTYPE html>
<html lang="{{ str_replace('_', '-', app()->getLocale()) }}">
<head>
    <meta charset="utf-8">
    <meta name="viewport" content="width=device-width, initial-scale=1">

    <title>Keyword Density Tool</title>
    <link rel="stylesheet" href="https://stackpath.bootstrapcdn.com/bootstrap/4.4.1/css/bootstrap.min.css"
          integrity="sha384-Vkoo8x4CGsO3+Hhxv8T/Q5PaXtkKtu6ug5TOeNV6gBiFeWPGFN9MuhOf23Q9Ifjh" crossorigin="anonymous">
    <!-- Fonts -->
    <link href="https://fonts.googleapis.com/css?family=Nunito:200,600" rel="stylesheet">
    <meta name="csrf-token" content="{{ csrf_token() }}">
<style>
    body {padding-top: 5em;}
</style>
</head>
<body>

<nav class="navbar navbar-expand-md navbar-dark bg-dark fixed-top">
    <a class="navbar-brand" href="#">Keyword Density App</a>
    <button class="navbar-toggler" type="button" data-toggle="collapse" data-target="#navbarsExampleDefault" aria-controls="navbarsExampleDefault" aria-expanded="false" aria-label="Toggle navigation">
        <span class="navbar-toggler-icon"></span>
    </button>

    <div class="collapse navbar-collapse" id="navbarsExampleDefault">
        <ul class="navbar-nav mr-auto">
            <li class="nav-item">
                <a class="nav-link" href="/">Home <span class="sr-only">(current)</span></a>
            </li>
            <li class="nav-item active">
                <a class="nav-link" href="{{route('KDTool')}}">Tool</a>
            </li>
        </ul>

    </div>
</nav>

<main role="main" class="container mt-3">

    @yield('content')

</main><!-- /.container -->

<script src="https://code.jquery.com/jquery-3.2.1.min.js"></script>
<script src="https://cdn.jsdelivr.net/npm/popper.js@1.16.0/dist/umd/popper.min.js"></script>
<script src="https://stackpath.bootstrapcdn.com/bootstrap/4.4.1/js/bootstrap.min.js"></script>
@yield('scripts')
</body>
</html>
Extend our views to use the layout file
Let us now use the newly created layouts file in both our welcome view and tool index view. Follow these steps to extend to the layout.
- Add the following code to both ProjectFolder/resources/views/welcome.blade.php and ProjectFolder/resources/views/tool/index.blade.php
@extends('layouts.master')

@section('content')


@endsection
Try rendering the index page of the tool directory, for example localhost/tool. It should look something like below.
 Basic view layout
Linking up the Controller, Route, & View
Now that we have a controller and view we need to first define a route and second add a return view method to the controller.
Define the route
- Locate web routes file under ProjectFolder/routes/web.php
- Add the following code to the bottom of the file:
Route::get('/tool', 'ToolController@index')->name('KDTool');
Create the new controller method
Now, go back to your ToolController and add the following function:
public function index()
{
   return view('tool.index');
}
Feel free to change the view names, route URLs, or controller functions to your personal liking. Just make sure they all match up and the page renders.
Building up our tool view
Now, with our earlier set up of views and layout files, we can start to add the content in the form of HTML that we are going to need. It will consist of nothing more than some text, textarea input form, and a submit button.
Add the following HTML to the content section of the ProjectFolder/resources/views/tool/index.blade.php file.
    <form id="keywordDensityInputForm">
        <div class="form-group">
            <label for="keywordDensityInput">HTML or Text</label>
            <textarea class="form-control" id="keywordDensityInput" rows="12"></textarea>
        </div>
        <button type="submit" class="btn btn-primary mb-2">Get Keyword Densities</button>
    </form>
The view should now render like this:
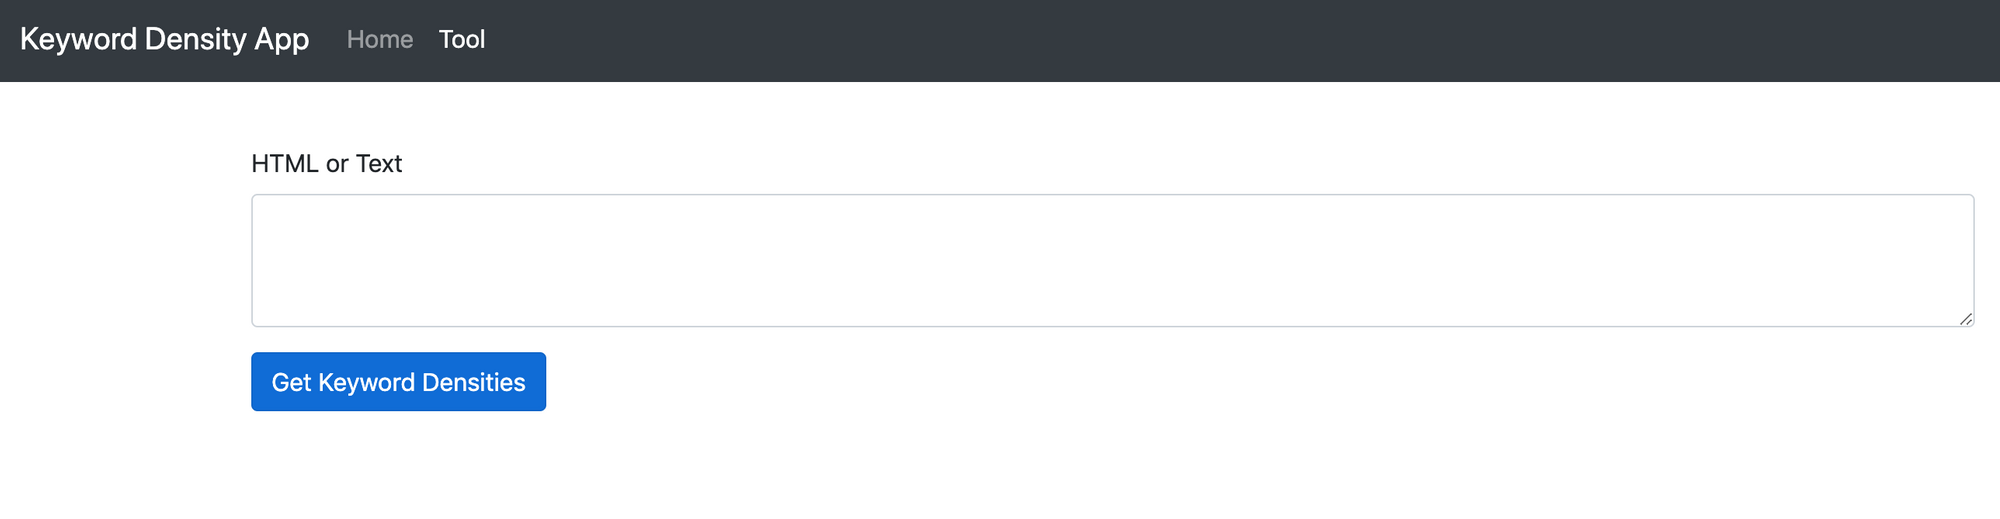 Keyword Density Tool View with Text Area input
Creating the bridge between the front end and the back end
Now, we pretty much have everything we need on the front end: a simple input text area where users can paste in their plain text or HTML. What's missing is the logic for when the button is pressed 'Get Keyword Densities'.
This bridging logic will essentially do the following.
- Listen for clicks on the Get Keyword Density Button
- Grab the contents of the non-empty text area input
- Use JQuery Ajax to send the data to the backend to be processed and await a response.
- When the response is passed back, handle the data and create a HTML table with the human-readable statistics (keyword density).
Front end
To do this we will use an in-page script which we can inject using the @section tag.
Add the following to the tool/index.blade.php view, after the content section.
@section ('scripts')
    <script>
        $('#keywordDensityInputForm').on('submit', function (e) { // Listen for submit button click and form submission.
            e.preventDefault(); // Prevent the form from submitting
            let kdInput = $('#keywordDensityInput').val(); // Get the input
            if (kdInput !== "") { // If input is not empty.
            // Set CSRF token up with ajax.
                $.ajaxSetup({
                    headers: {
                        'X-CSRF-TOKEN': $('meta[name="csrf-token"]').attr('content')
                    }
                });

                $.ajax({ // Pass data to backend
                    type: "POST",
                    url: "/tool/calculate-and-get-density",
                    data: {'keywordInput': kdInput},
                    success: function (response) {
                        // On Success, build a data table with keyword and densities
                        if (response.length > 0) {
                            let html = "<table class='table'><tbody><thead>";
                            html += "<th>Keyword</th>";
                            html += "<th>Count</th>";
                            html += "<th>Density</th>";
                            html += "</thead><tbody>";

                            for (let i = 0; i < response.length; i++) {
                                html += "<tr><td>"+response[i].keyword+"</td>";
                                html += "<td>"+response[i].count+"</td>";
                                html += "<td>"+response[i].density+"%</td></tr>";
                            }

                            html += "</tbody></table>";

                            $('#keywordDensityInputForm').after(html); // Append the html table after the form.
                        }
                    },
                });
            }
        })
    </script>
@endsection
This entire script that we inject will handle all of the numbered list items above.
What is left to do is handle the data coming in on the back end side of things.
Back end
Firstly, before we go any further with coding, we need to handle the fact that both plain text and HTML can be submitted. For this we can use a nifty tool to help us out.
html2text is the perfect PHP library for this use case, so it's time we install it. html2text does exactly what it says on the tin, converts HTML markup to plain text.
Luckily, this package has a composer install command, so enter the following command into the CLI on the projects root directory.
composer require html2text/html2text
Now, our backend controller is going to receive either HTML or plain text in requests firing from the HTML form we created in our view. We now need to make the route to handle this call and to route the call to the specific controller that will work the magic.
Add the following PHP to the web.php routes file:
Route::post('/tool/calculate-and-get-density', 'ToolController@CalculateAndGetDensity');
Secondly, add the following to ToolController.php file:
    public function CalculateAndGetDensity(Request $request) {
        if ($request->isMethod('GET')) {


        }
    }
OK, so the stage is set. Let's code in the magic that will calculate the keyword density and return the data.
Firstly, add use statement is required for the newly installed html2text package. Add the following to the top of the ToolController.php, just below other use statements:
use Html2Text\Html2Text;
Then we need to handle the get parameter that is to be passed in, making sure it's not set and then converting the parameter of content to plain text. Refactor the CalculateAndGetDensity function to look like below:
public function CalculateAndGetDensity(Request $request) {
        if ($request->isMethod('GET')) {

            if (isset($request->keywordInput)) { // Test the parameter is set.
                $html = new Html2Text($request->keywordInput); // Setup the html2text obj.
                $text = $html->getText(); // Execute the getText() function.


            }

        }
    }
Now that we have a variable to hold all of the text stripped for the keywordInput parameter, we can go ahead and start to calculate density.
We need to handle the following:
- Determine the total count of words
- Analyse the textual string and convert it to a key value array (the key being the keyword, the value being the occurrence of the word)
- Sort into order by descending with the biggest occurrence first in the array
- Loop over the key and value array, pushing the values to a new array with an additional field of 'density' which utilises the keyword density formula we looked at earlier in the article. This formula will use the value (occurrence) and the total word count.
- Finally, to return the data
Refactor the function to look like the following, taking note of the comments:
public function CalculateAndGetDensity(Request $request) {
        if ($request->isMethod('GET')) {

            if (isset($request->keywordInput)) { // Test the parameter is set.
                $html = new Html2Text($request->keywordInput); // Setup the html2text obj.
                $text = strtolower($html->getText()); // Execute the getText() function and convert all text to lower case to prevent work duplication
                $totalWordCount = str_word_count($text); // Get the total count of words in the text string
                $wordsAndOccurrence  = array_count_values(str_word_count($text, 1)); // Get each word and the occurrence count as key value array
                arsort($wordsAndOccurrence); // Sort into descending order of the array value (occurrence)

                $keywordDensityArray = [];
                // Build the array
                foreach ($wordsAndOccurrence as $key => $value) {
                    $keywordDensityArray[] = ["keyword" => $key, // keyword
                        "count" => $value, // word occurrences
                        "density" => round(($value / $totalWordCount) * 100,2)]; // Round density to two decimal places.
                }

                return $keywordDensityArray;
            }
        }
    }
Note: The beauty of html2text is that it doesn't really care if it's converting HTML or plain text in the first place, so we don't need to worry if a user submits either. It will still churn out plain text.
Putting it to the test
Finally, we are ready to test the tool, wahoo! Go ahead and render the tool index view (localhost/tool).
- Now, you can go to any website of your choice on the web, load a page from that site, right click and click view source.
- Copy the entire contents and come back to the tool.
- Paste the contents into the text area and click the Get Keyword Densities button.
- Await the response and check out the table of keyword densities!
- Check out my example below which uses the HTML of this page.
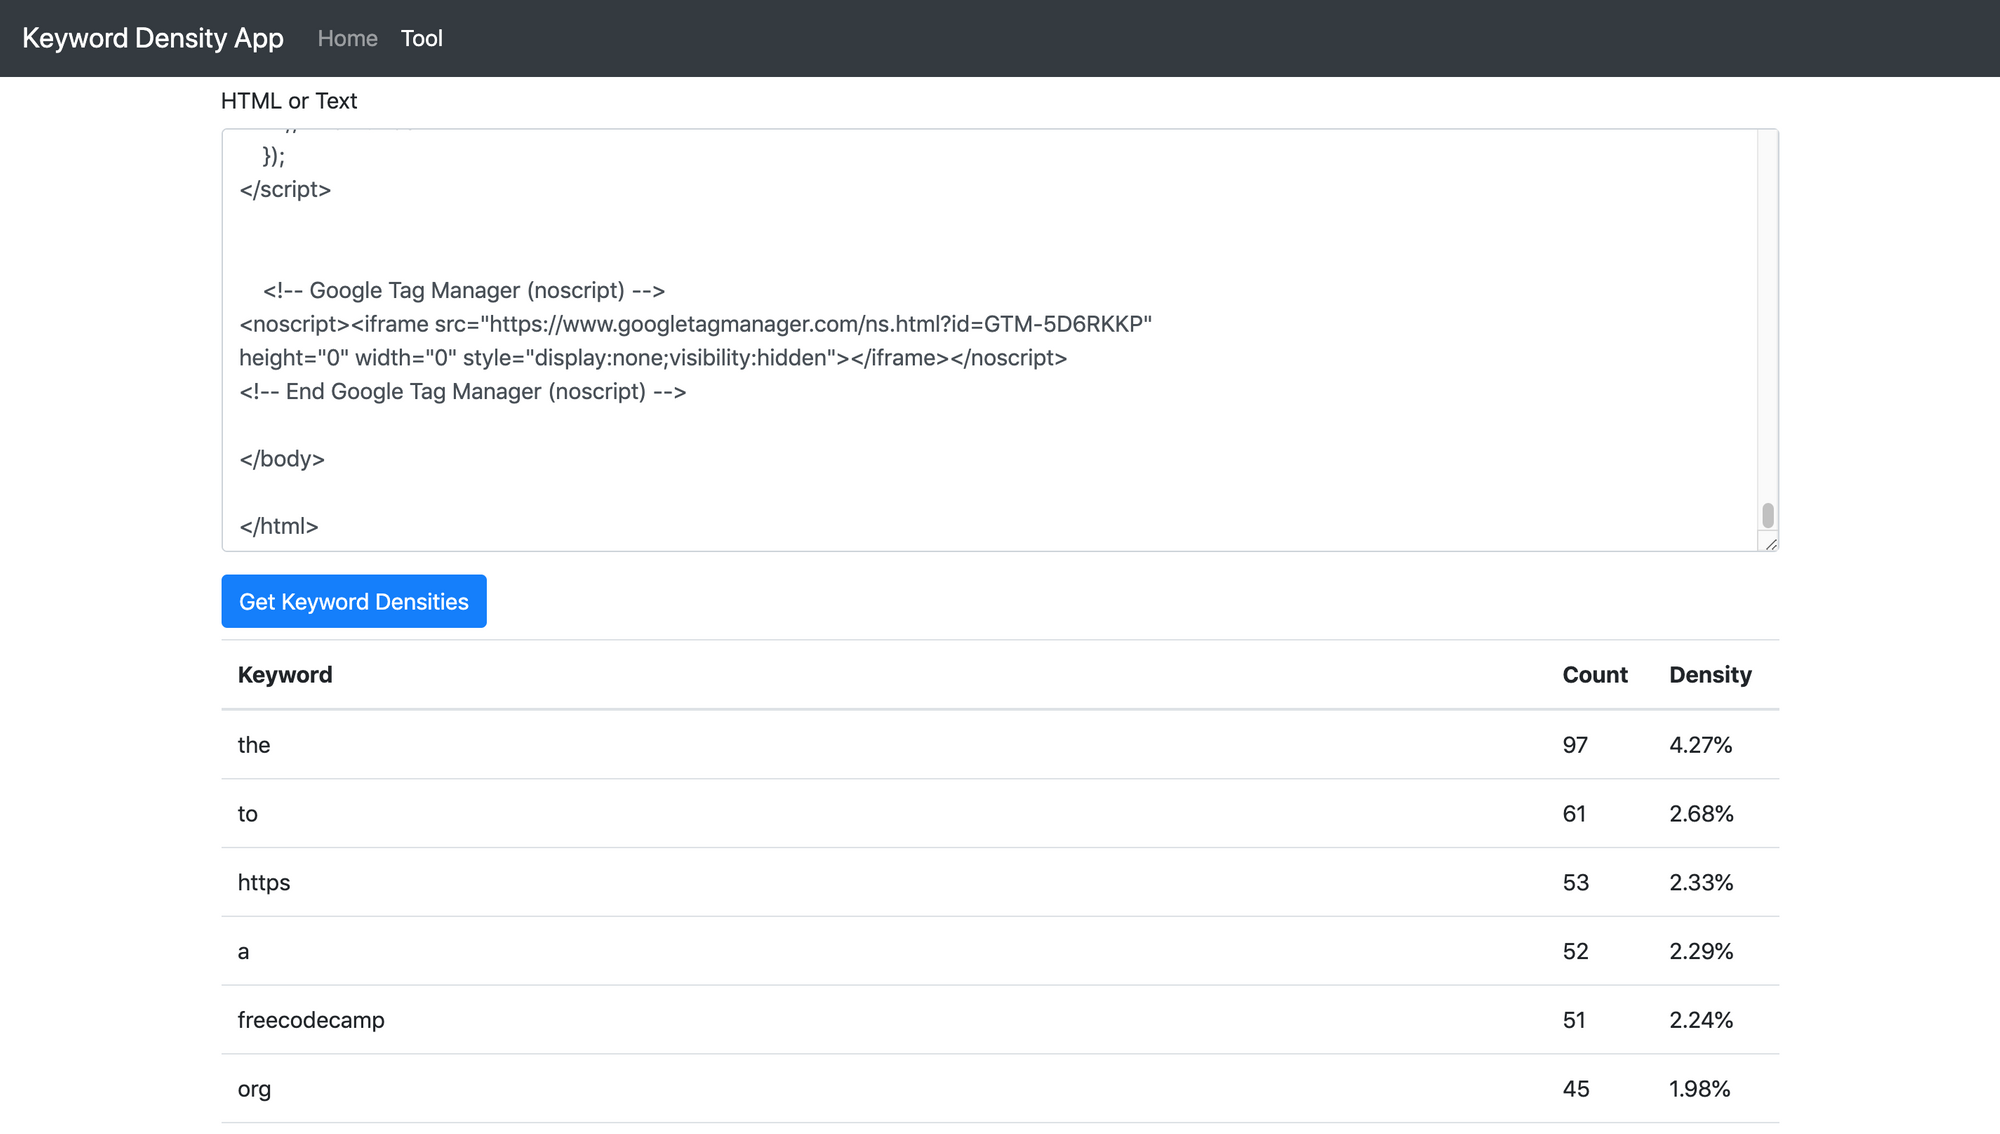 Keyword Density Tool & Table of keywords
And that is it!
Summary
In this article we learned how to build a Laravel application from scratch. It touched on some of the different parts of the full stack in development such as JQuery, PHP, HTML etc. Hopefully, with the understanding of this application, the same methodology can be used to build something else, perhaps bigger and better.
Possible further developments
The keyword density tool currently takes 'stop' words into account. Stop words are known to be ignored by Googles crawlers. Words such as it, the, as, and a. Looking at the tool screenshot above, you can see that they are used a lot!
Further development could be carried out to filter the stop words and only calculate density on the non-stop words which is potentially a better view for SEO scoring.
I hope you enjoyed this article! If you did, feel free to check out my blog, https://www.codewall.co.uk/
Until next time!