
Hello, everyone! Welcome to this hands-on tutorial. Before we begin you should be familiar with the basics of ReactJS, NextJS, and Firebase. If you're not, I would recommend that you go through their documentation.
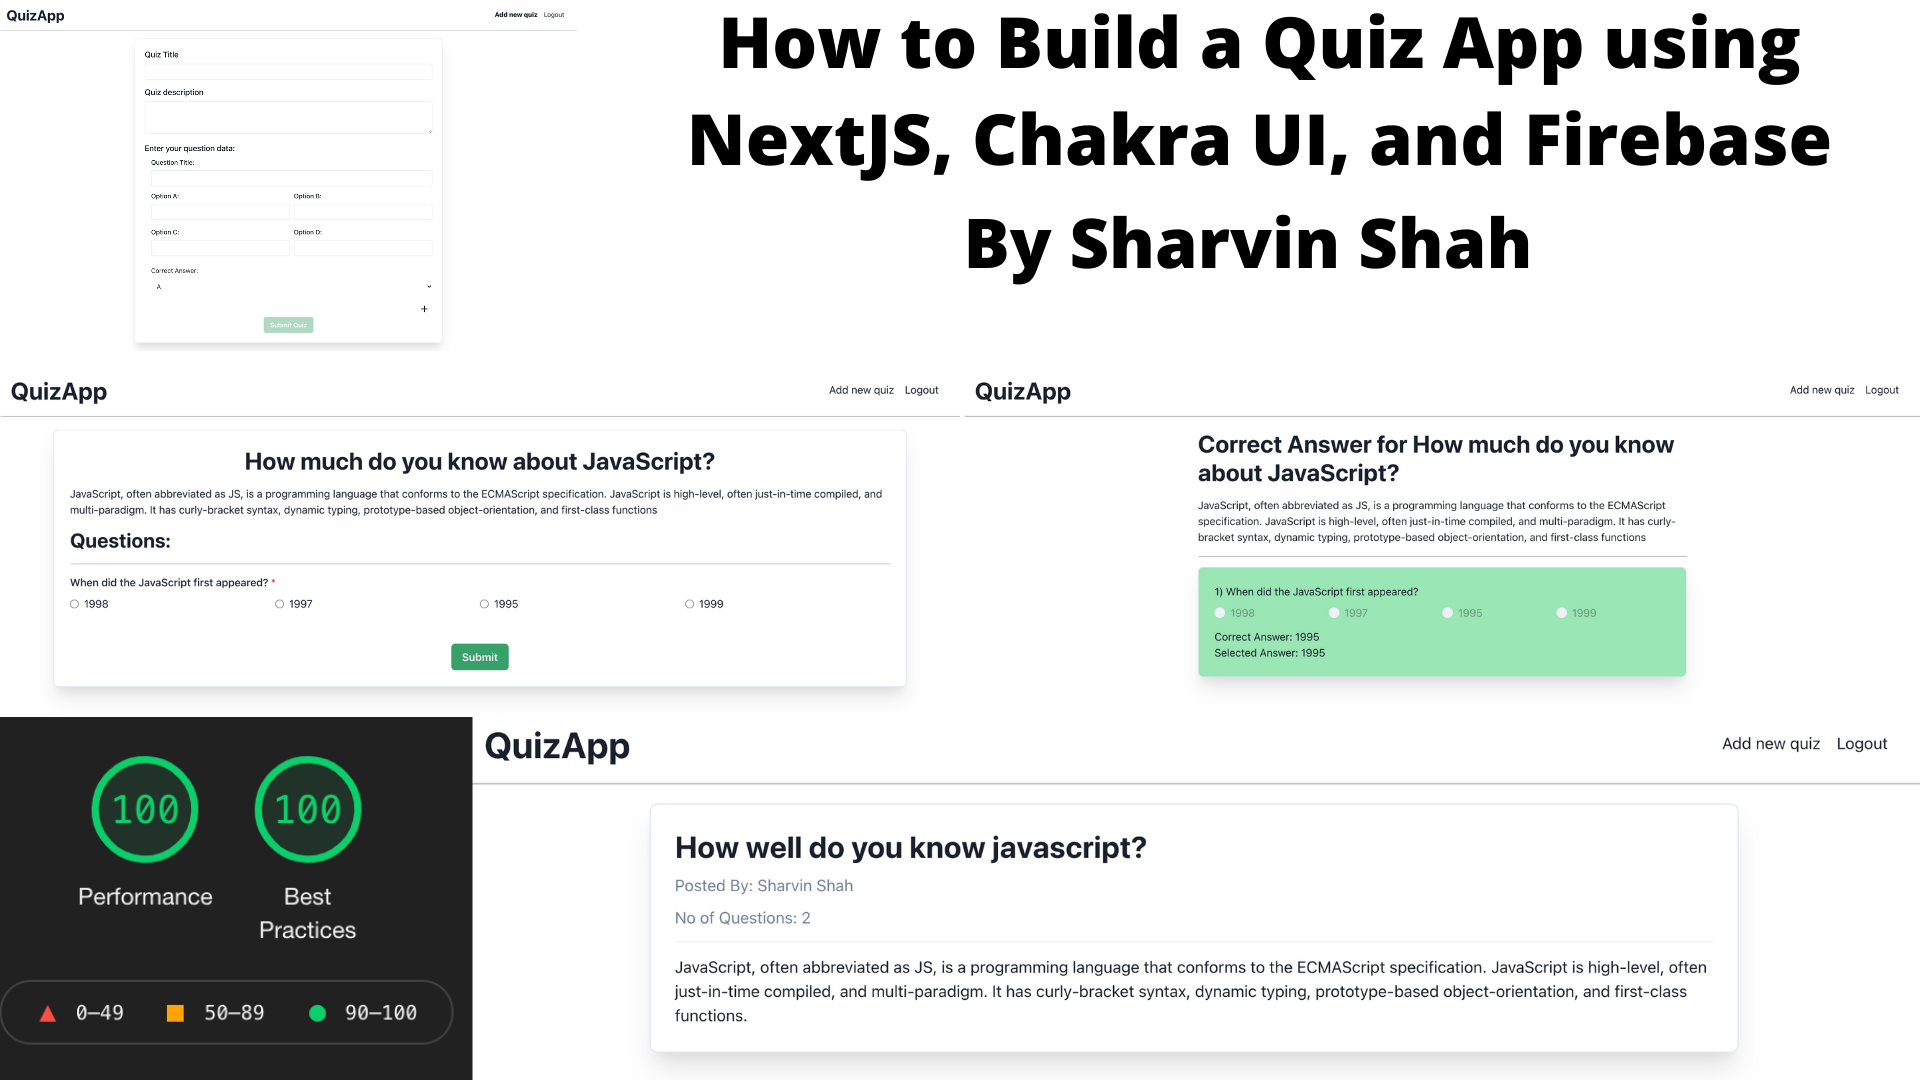
Here's what we're going to build:

And here's the tech we'll use:
TypeScript: provides type-safe code which helps us find bugs during build time.
NextJS: a React-based framework that lets us render data on the server-side. This helps Google crawl the application and which results in SEO benefits.
Chakra UI: a simple, modular, and accessible component library that will give us the building blocks that we need to build the application.
Firebase: provides Firestore and authentication that we are going to use in our application. We will use Firestore to save a quiz, the user-info, and answers. We'll use authentication to provide the Google SignIn feature to the user.
Vercel: will host our application. It scales well, all without any configuration, and deployment is instant.
Formik: provides us various components to build forms. It is hard to develop forms without formik.
Yup: A form always needs to be validated. Yup is a library which we will be using for this purpose. Yup and Formik work together very well, and not much configuration is required.
I am going to divide this tutorial into four separate sections. At the start of every section, you will find a Git commit that has the code developed in that section. Also, If you want to see the complete code it is available in this repository.
Contents
How to Show a Single Quiz, How to Answer a Quiz and How to Validate the Answer.
How to Deploy the App to Vercel and Firebase Authentication Configuration.
Let's get started.
How to Set Up Auth and User Collection
In this section following we'll implement the following functionality:
How to configure NextJS and Chakra UI in our quiz app.
How to configure Firebase Authentication and Firestore.
How to set up Navbar, Signup and Sign-out mechanisms.
You can find the quiz app code implemented in this section at this commit.
How to configure NextJS and Chakra UI in our quiz app:
To create a NextJS application you need to use the following command:
npx create-next-app quizapp
You'll get the following directory structure:
+-- node_modules
+-- pages
+-- public
+-- styles
+-- .gitignore
+-- package-lock.json
+-- package.json
+-- README.md
Note: I am using NextJS version 10.1.3 and React version 17.0.2. You can confirm the version in your package.json.
Now let's convert our codebase into TypeScript-compatible code.
In the root directory of the project, create a file named tsconfig.json using the following command:
touch tsconfig.json
After that, install the TypeScript dependencies inside the project using the following command:
npm install --save-dev typescript @types/react @types/node
After that, convert the following files like this:
pages/_app.js => pages/_app.tsx
pages/index.js => pages/index.tsx
Remove the pages/api directory. Now go to the pages/_app.tsx and replace the full code as follows:
import { AppProps } from 'next/app'

function App({ Component, pageProps }: AppProps) {
  return <Component {...pageProps} />
}

export default App
Go to pages/index.tsx and replace it with the following code:
import Head from 'next/head';

export default function Home() {
  return (
    <div>
      <Head>
        <title>QuizApp</title>
        <link rel="icon" href="/favicon.ico" />
      </Head>
      <main></main>
      <footer></footer>
    </div>
  );
}
Now start the development server using the following command:
npm run dev
The first time when you start the development server, Next will:
Populate the
tsconfig.jsonfile for you.Create the
next-env.d.tsfile, which ensures that Next types are picked up by the TypeScript compiler. You should not touch this file.
Delete the styles directory from the root directory.
After following the above steps you'll have the following directory structure:
+-- node_modules
+-- pages
|   +-- _app.tsx
|   +-- index.tsx
+-- public
+-- .gitignore
+-- package-lock.json
+-- package.json
+-- README.md
+-- tsconfig.json
Now go to http://localhost:3000 and you'll find an empty screen.
Let's install Chakra UI using the following command:
npm i @chakra-ui/react @emotion/react@^11 @emotion/styled@^11 framer-motion@^4
Note: If you use zsh you'll need to add the escape character () after @ as follows:
npm i @chakra-ui/react @emotion/react@\^11 @emotion/styled@\^11 framer-motion@\^4
As per chakra documentation, we need to wrap <Component /> with ChakraProvider in the pages/_app.tsx as follows:
import { ChakraProvider } from '@chakra-ui/react';
import { AppProps } from 'next/app';

function App({ Component, pageProps }: AppProps) {
  return (
    <ChakraProvider>
      <Component {...pageProps} />
    </ChakraProvider>
  );
}

export default App;
Basically, this will perform CSSReset and pass the chakra theme to the component.
Now we will create our Navbar component.
To create this component first we need to create a directory named src in the root directory and cut/paste the pages directory inside the src directory.
After that create a directory named common under the src directory.
Under the common directory create a file named Navbar.tsx. Copy/paste the following code inside that file:
import React from 'react';
import { Box, Divider, Flex, Heading, Link } from '@chakra-ui/react';
import { useRouter } from 'next/router';

const Navbar: React.FC<{}> = () => {
  const router = useRouter();

  return (
    <>
      <Flex justify="space-between" m={4}>
        <Heading onClick={() => router.push('/')} as="button">
          QuizApp
        </Heading>
        <Box>
          <Box p={2}>
            <Link
              p={2}
              onClick={() => router.push('/signin')}
              fontWeight={
                router.pathname === '/signin' ? 'extrabold' : 'normal'
              }
            >
              Sign In
            </Link>
          </Box>
        </Box>
      </Flex>
      <Divider
        css={{
          boxShadow: '1px 1px #888888',
        }}
      />
    </>
  );
};

export default Navbar;
After that go to pages/index.tsx and add the following line between the <main></main> tag.
<Navbar />
You'll also need to import the Navbar using the following syntax:
import Navbar from '../common/Navbar';
Go to your web browser and open http://localhost:3000 and you'll see the following output:

How to Configure Firebase Authentication and Firestore:
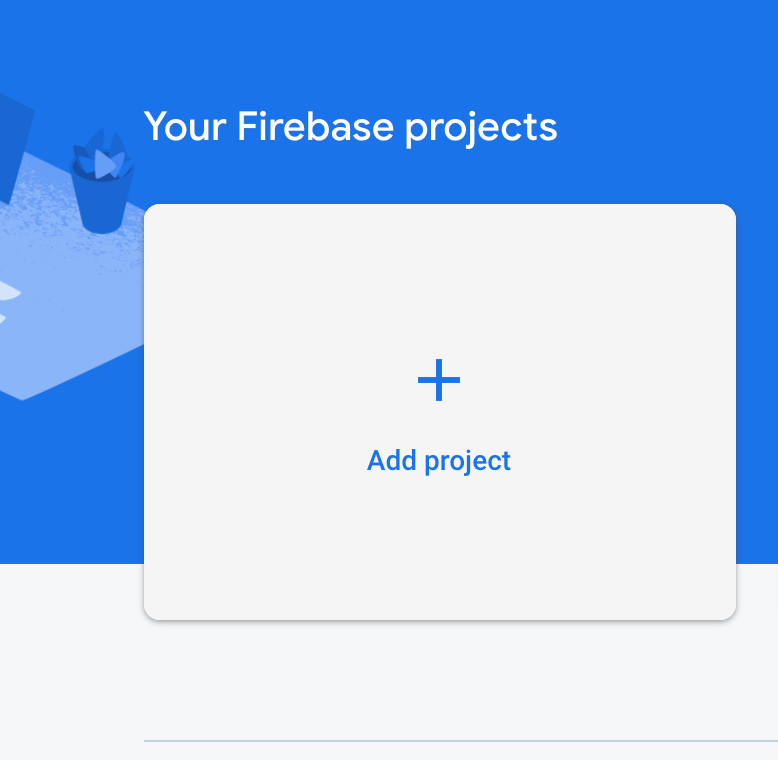
Now let's configure Firebase. Go to the firebase console. Click on Add project:
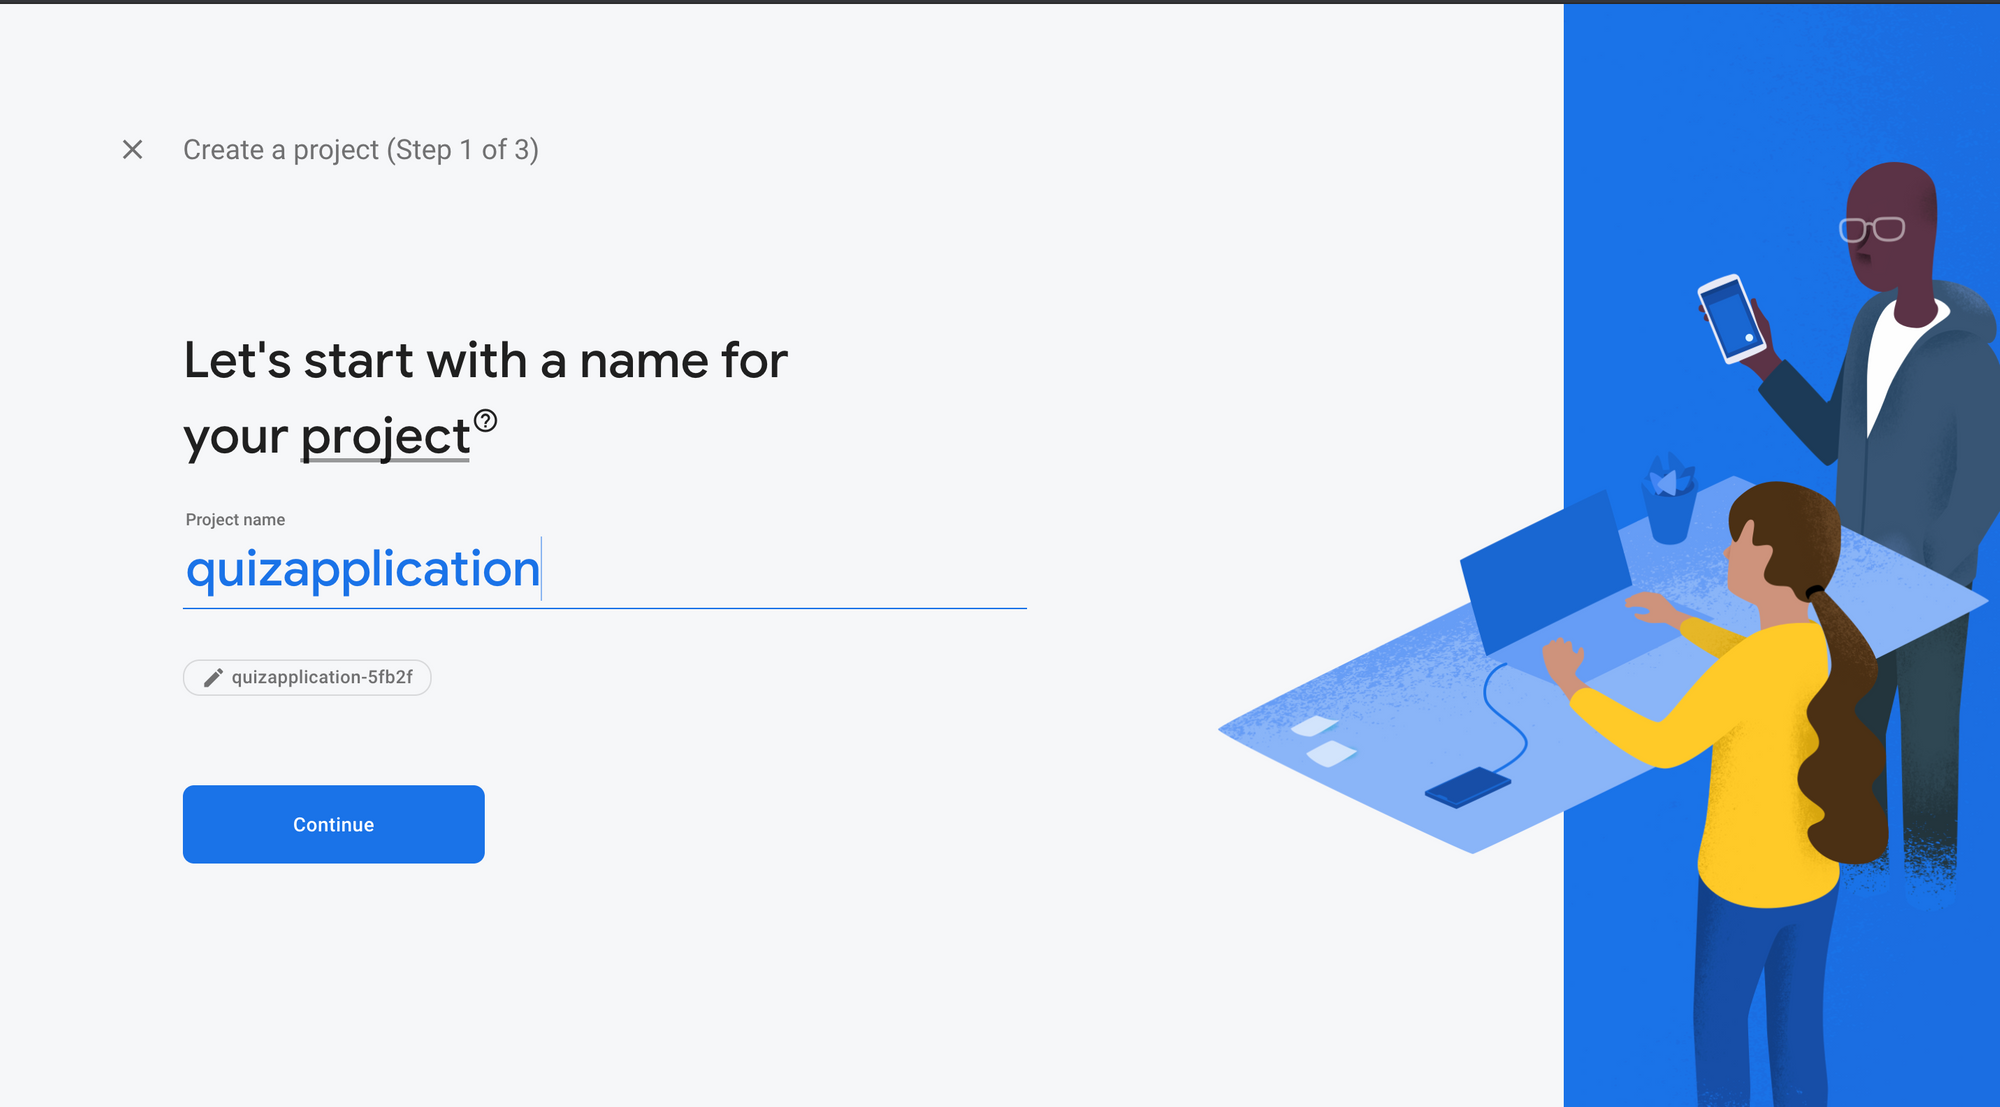
After that add your project name as follows:
Next, it will ask if you want to enable Google Analytics or not. I prefer to disable it, but you can switch it on if you want.
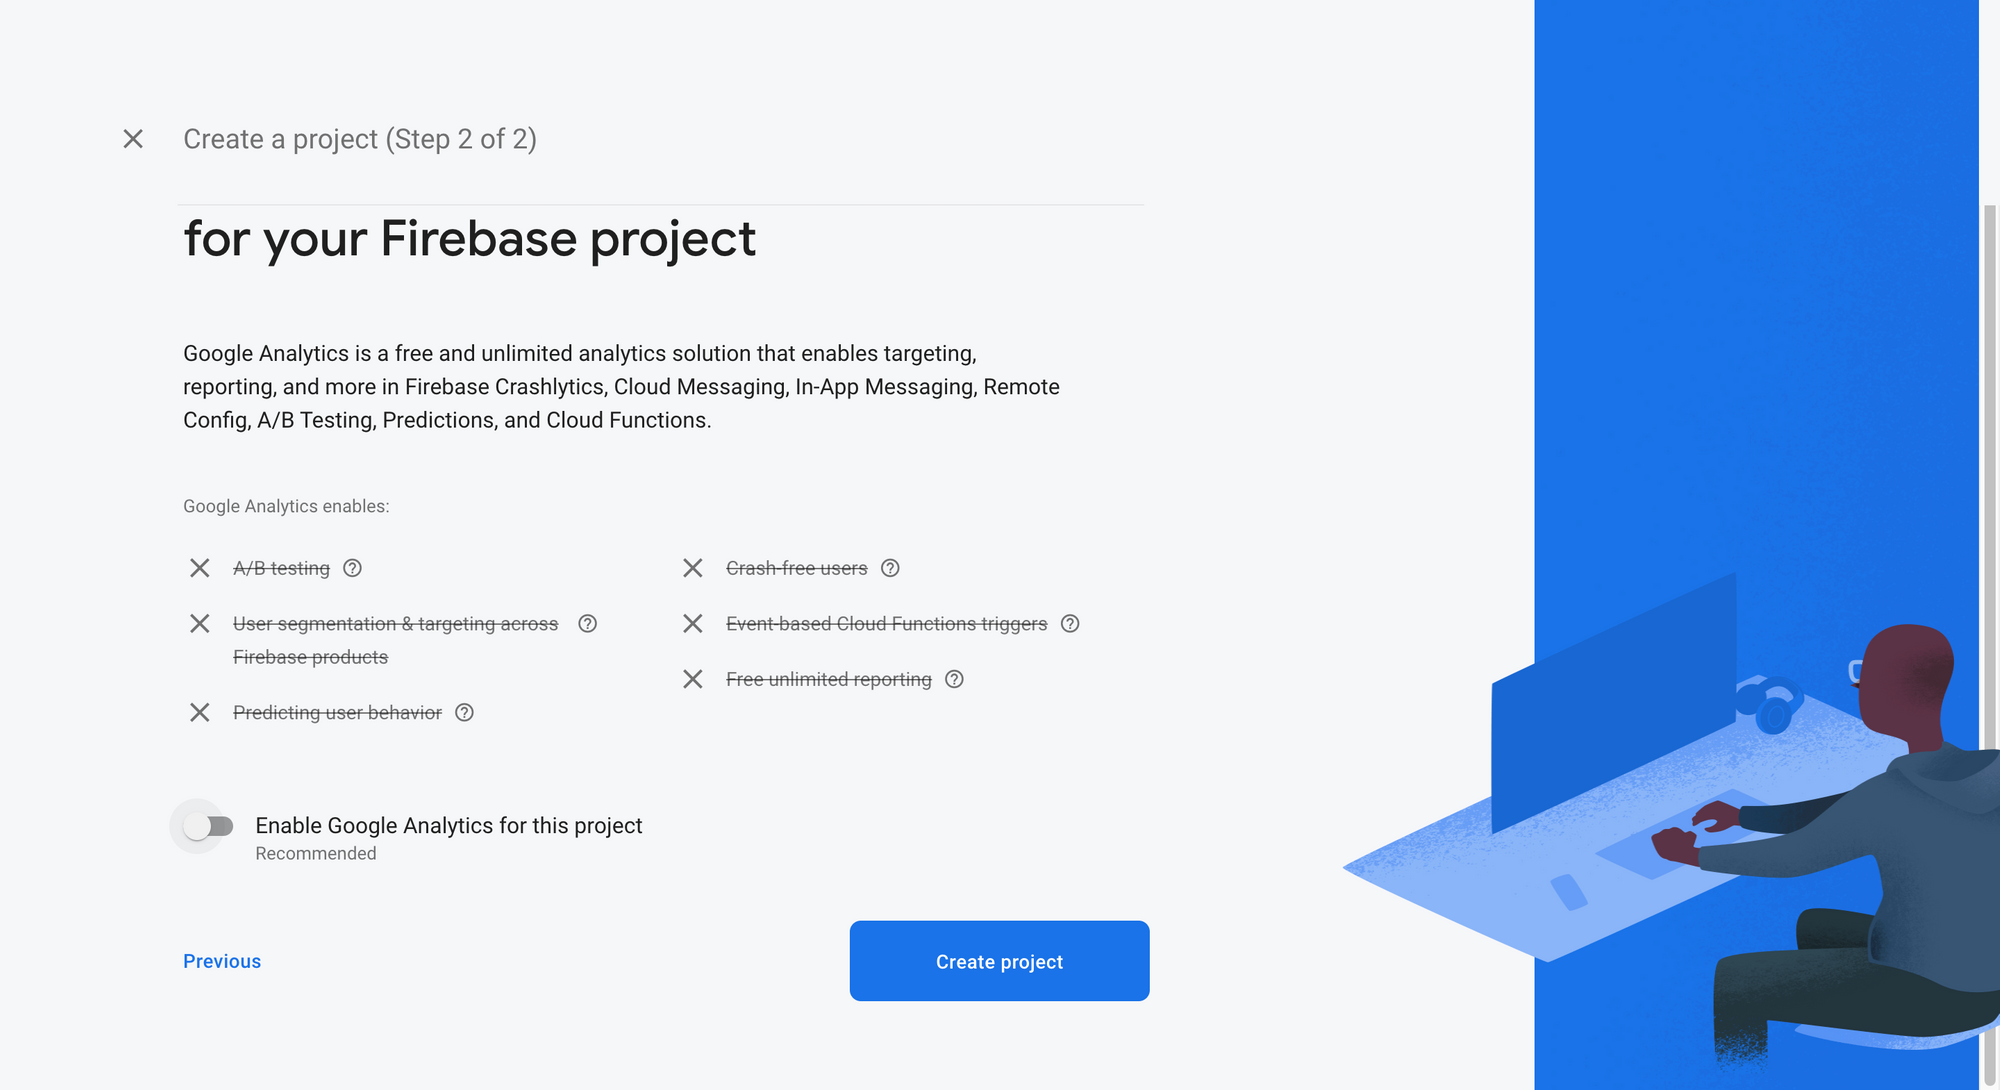
Now click on Create project. It will take some time to create the project.
Once the project is created you'll see the following screen:

After clicking on continue you'll see a dashboard that looks like this:
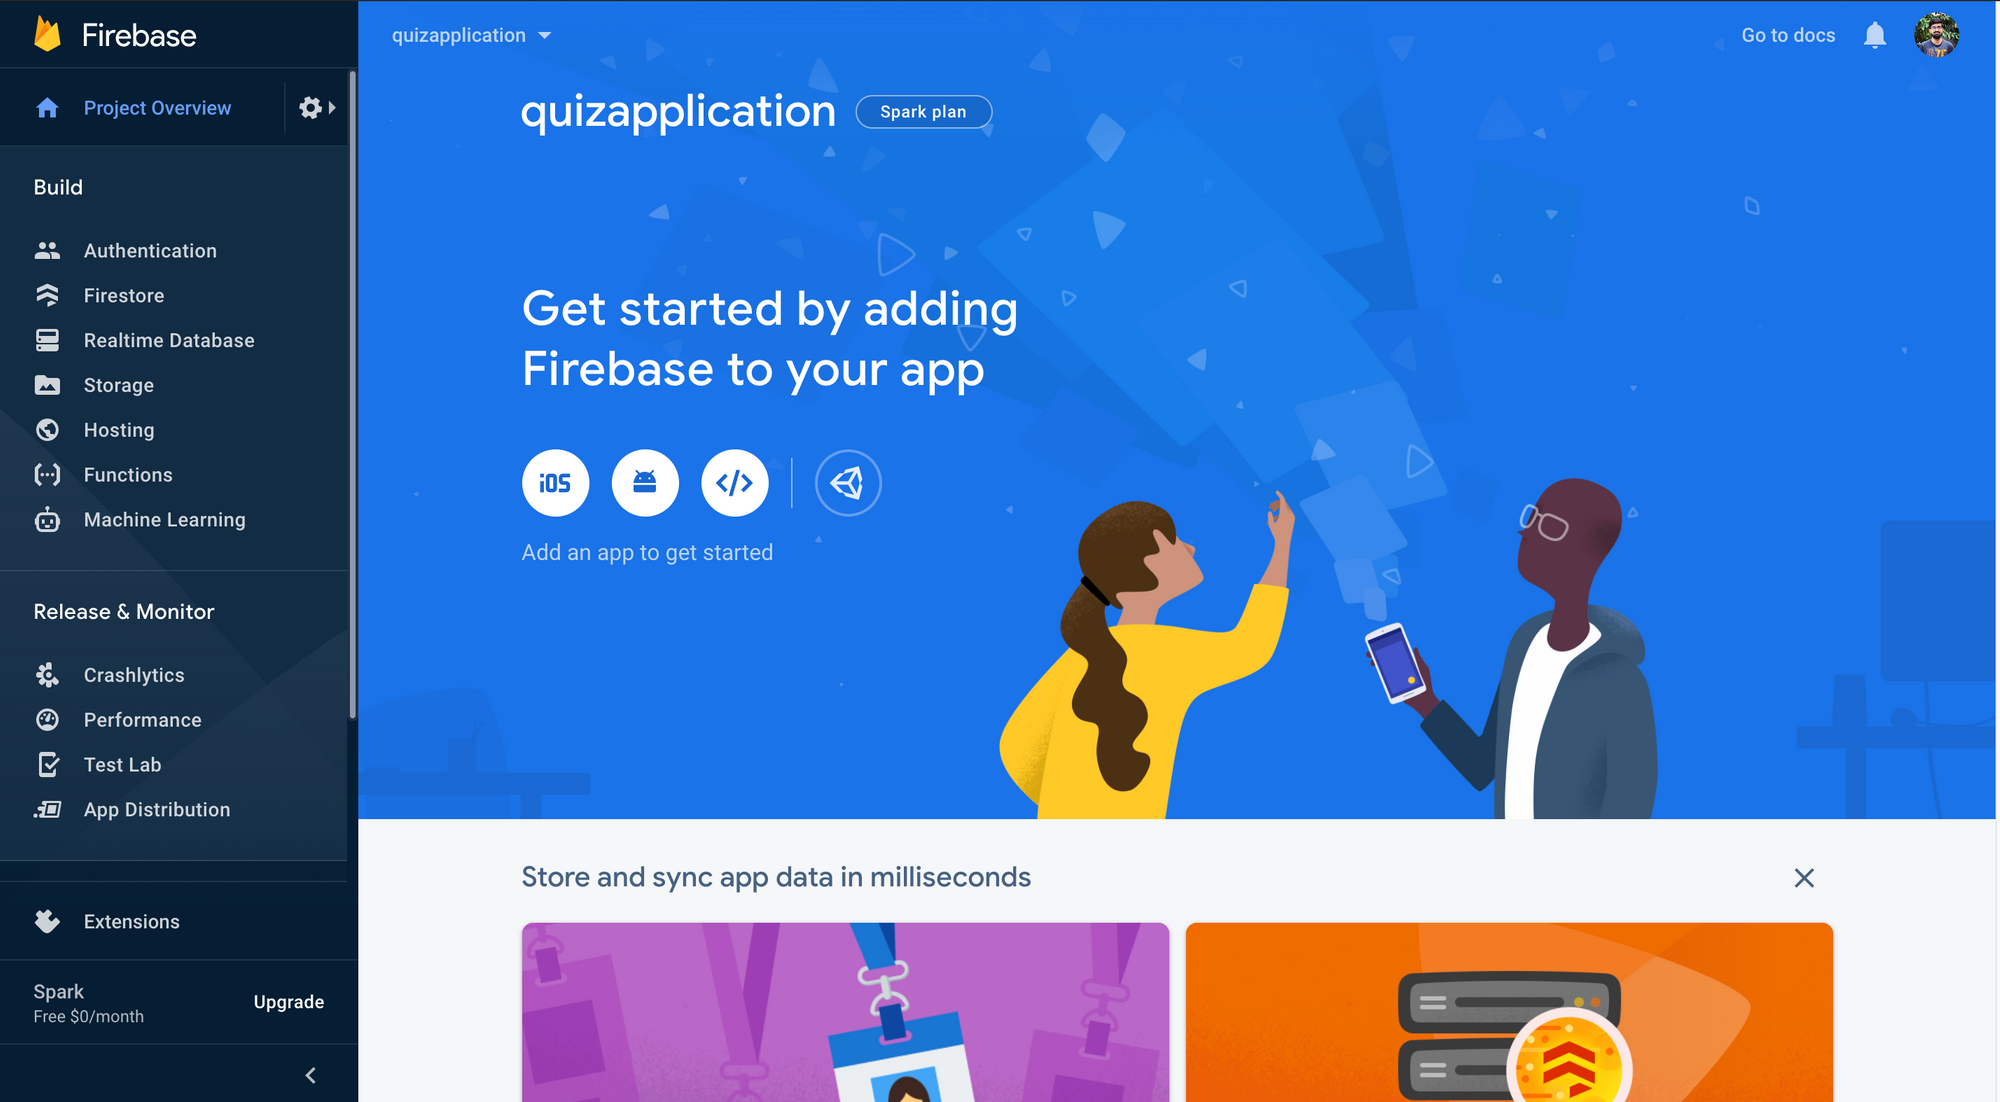
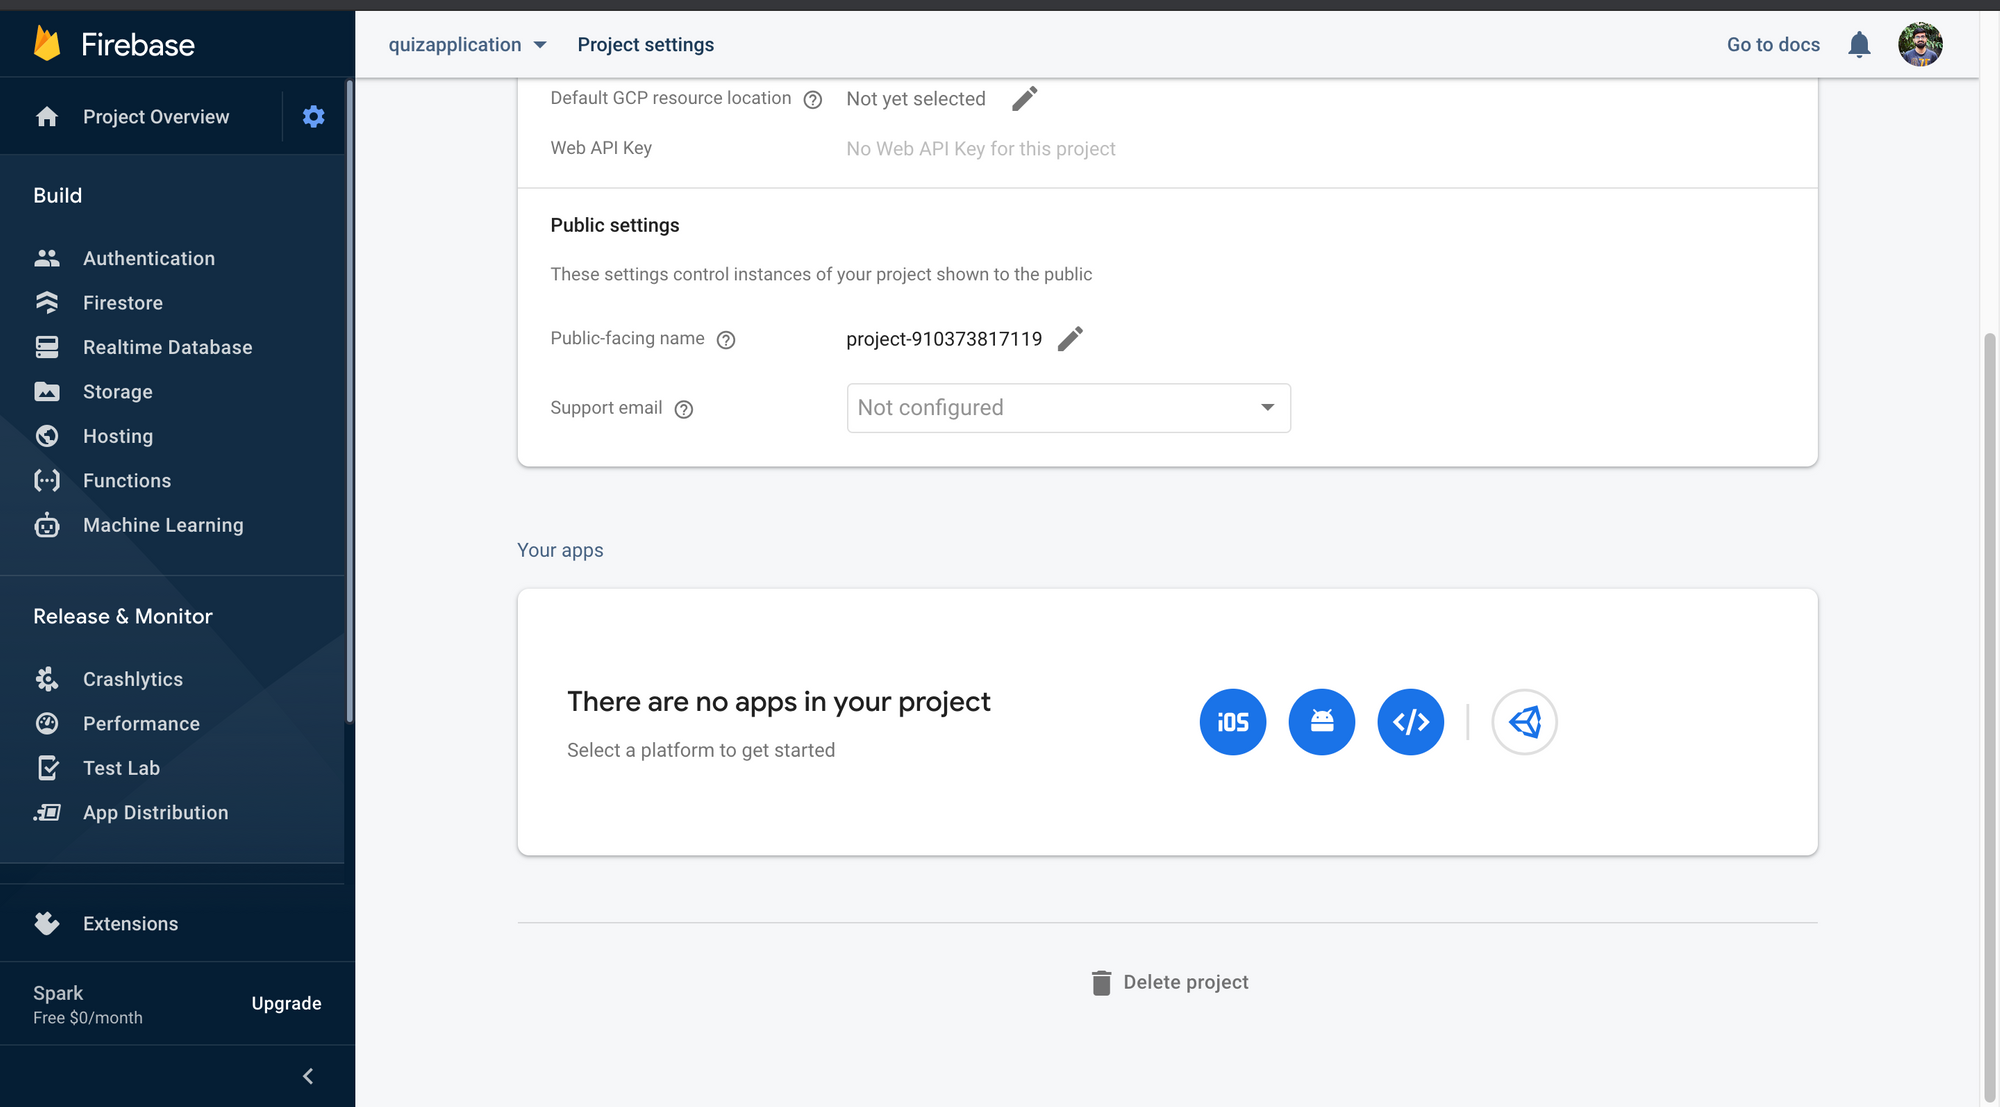
Click on the Settings > Project Settings > General. Inside the General tab scroll down and in the Your apps card, select the third option (after the Android icon).
It will ask for some details to register the app. Add your app's nickname as follows:

After you've clicked on register app, Firebase will give you a snippet. Copy-paste these details into a file and then you can click on continue to console.
Now go to the service accounts tab in project settings and click on the button Generate new private key. It will download some configurations that we will need for firebase-admin.
Now go back and click on the Authentication tab:
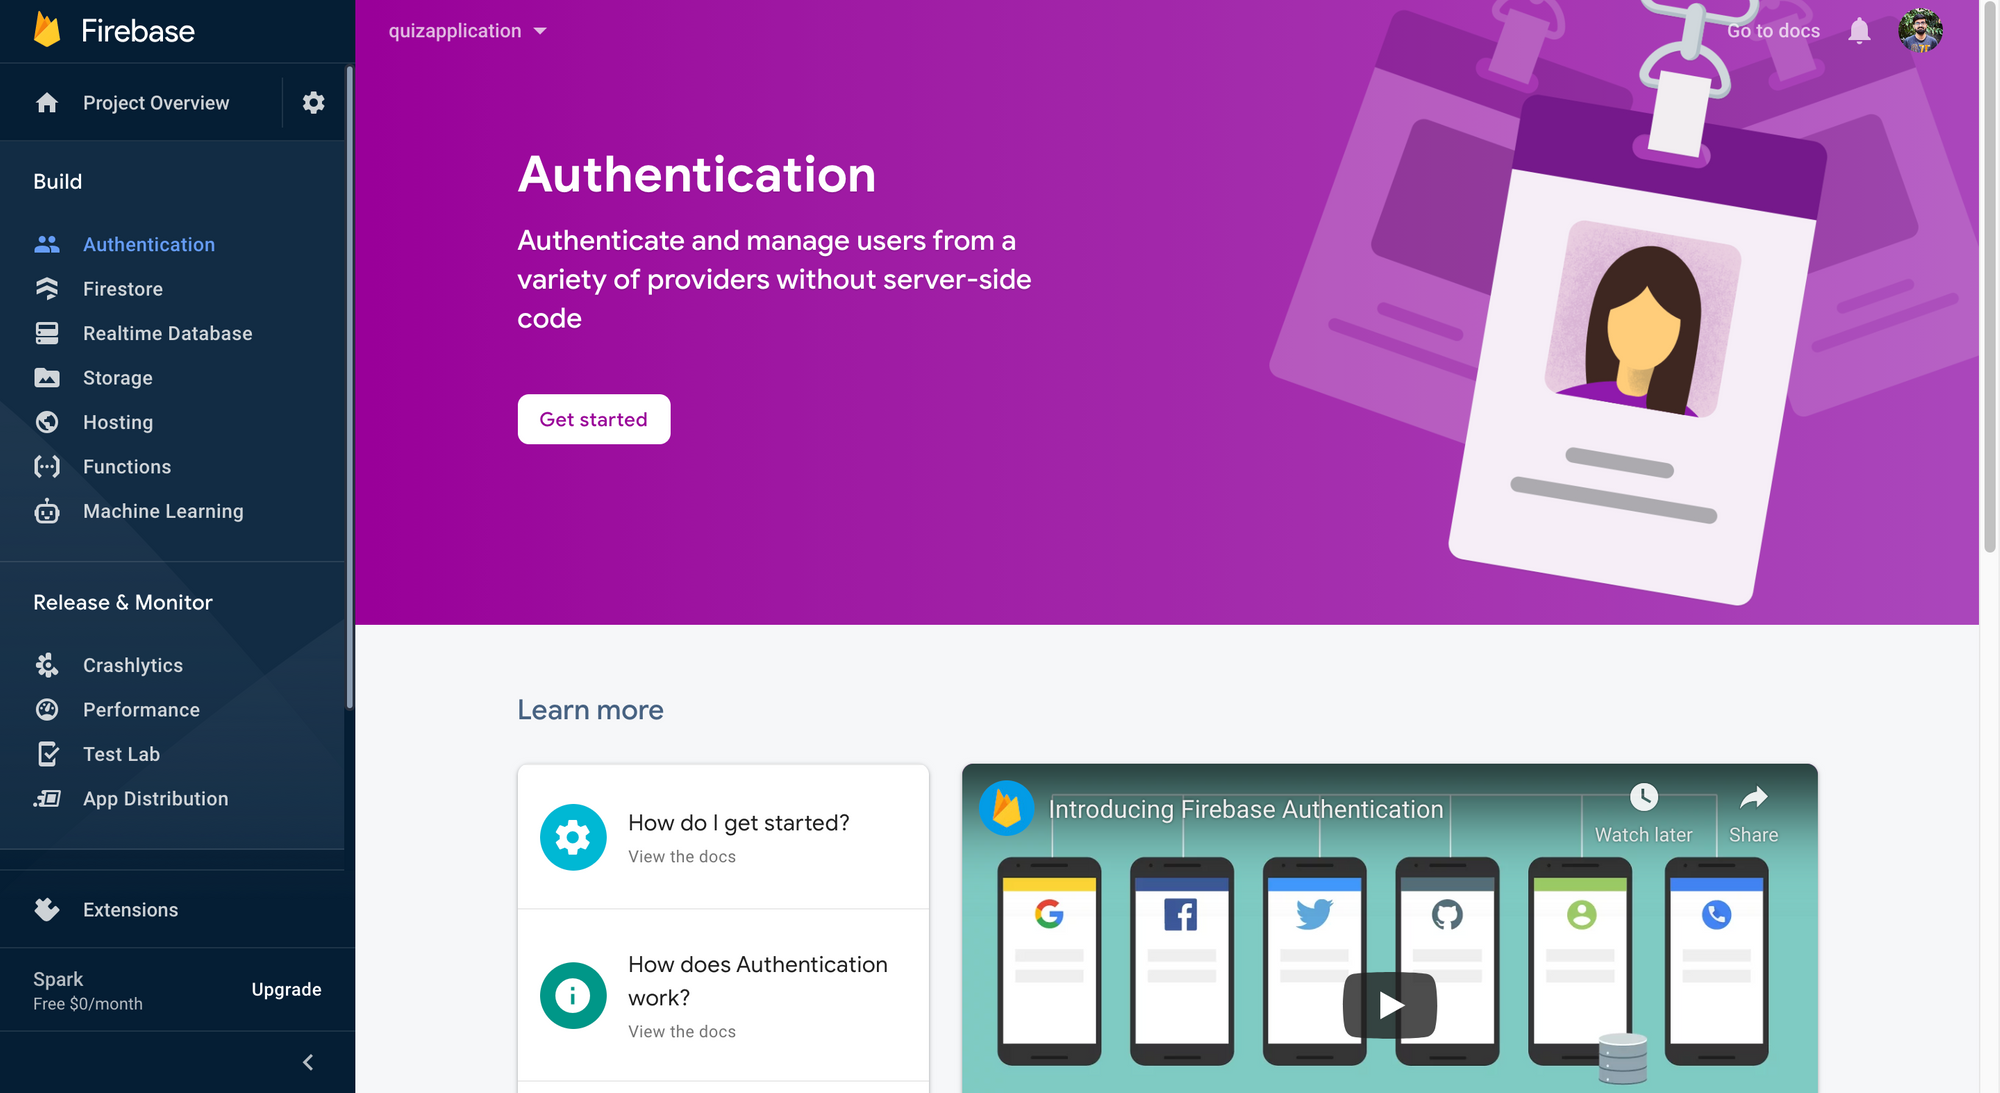
After that click on the Get started button and you'll get the following screen:
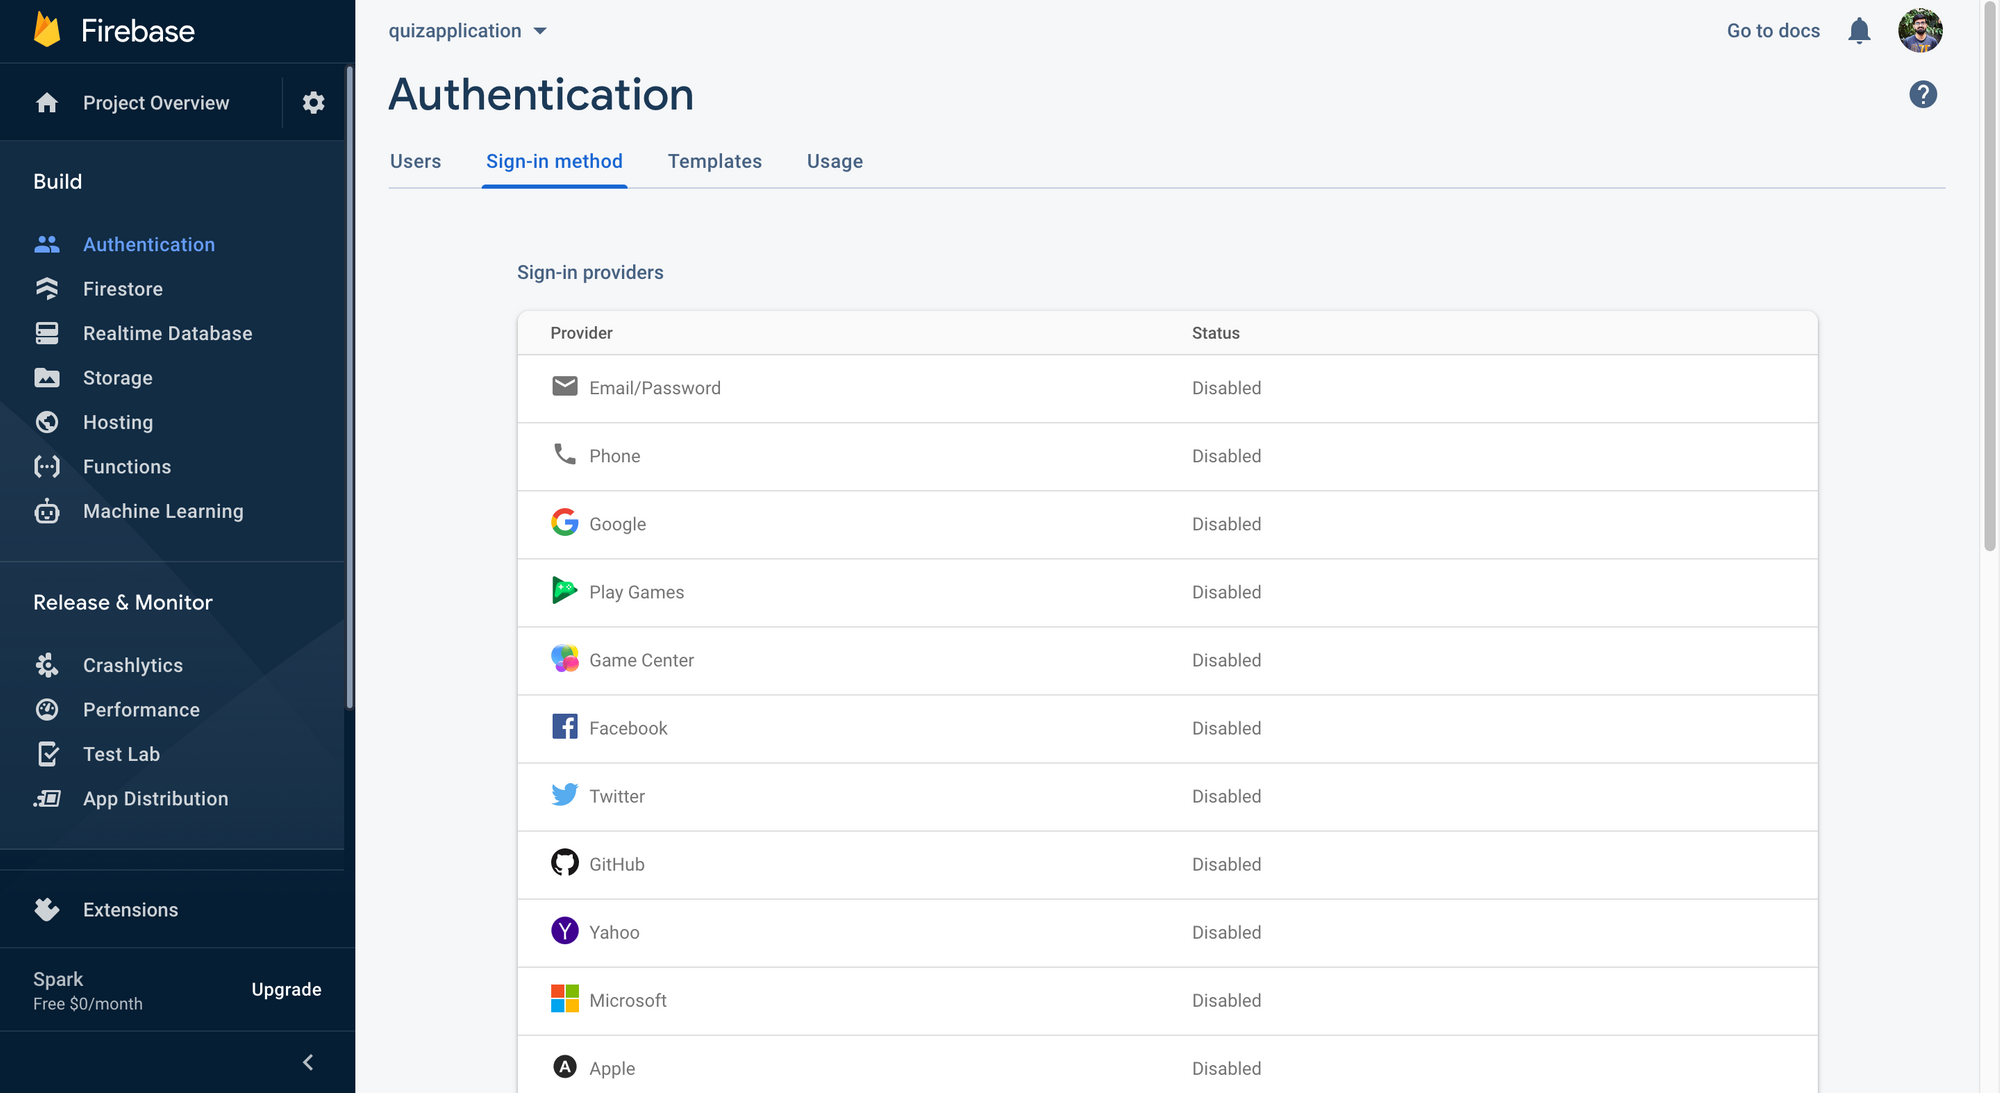
Now click on Google text and click the Enable button:
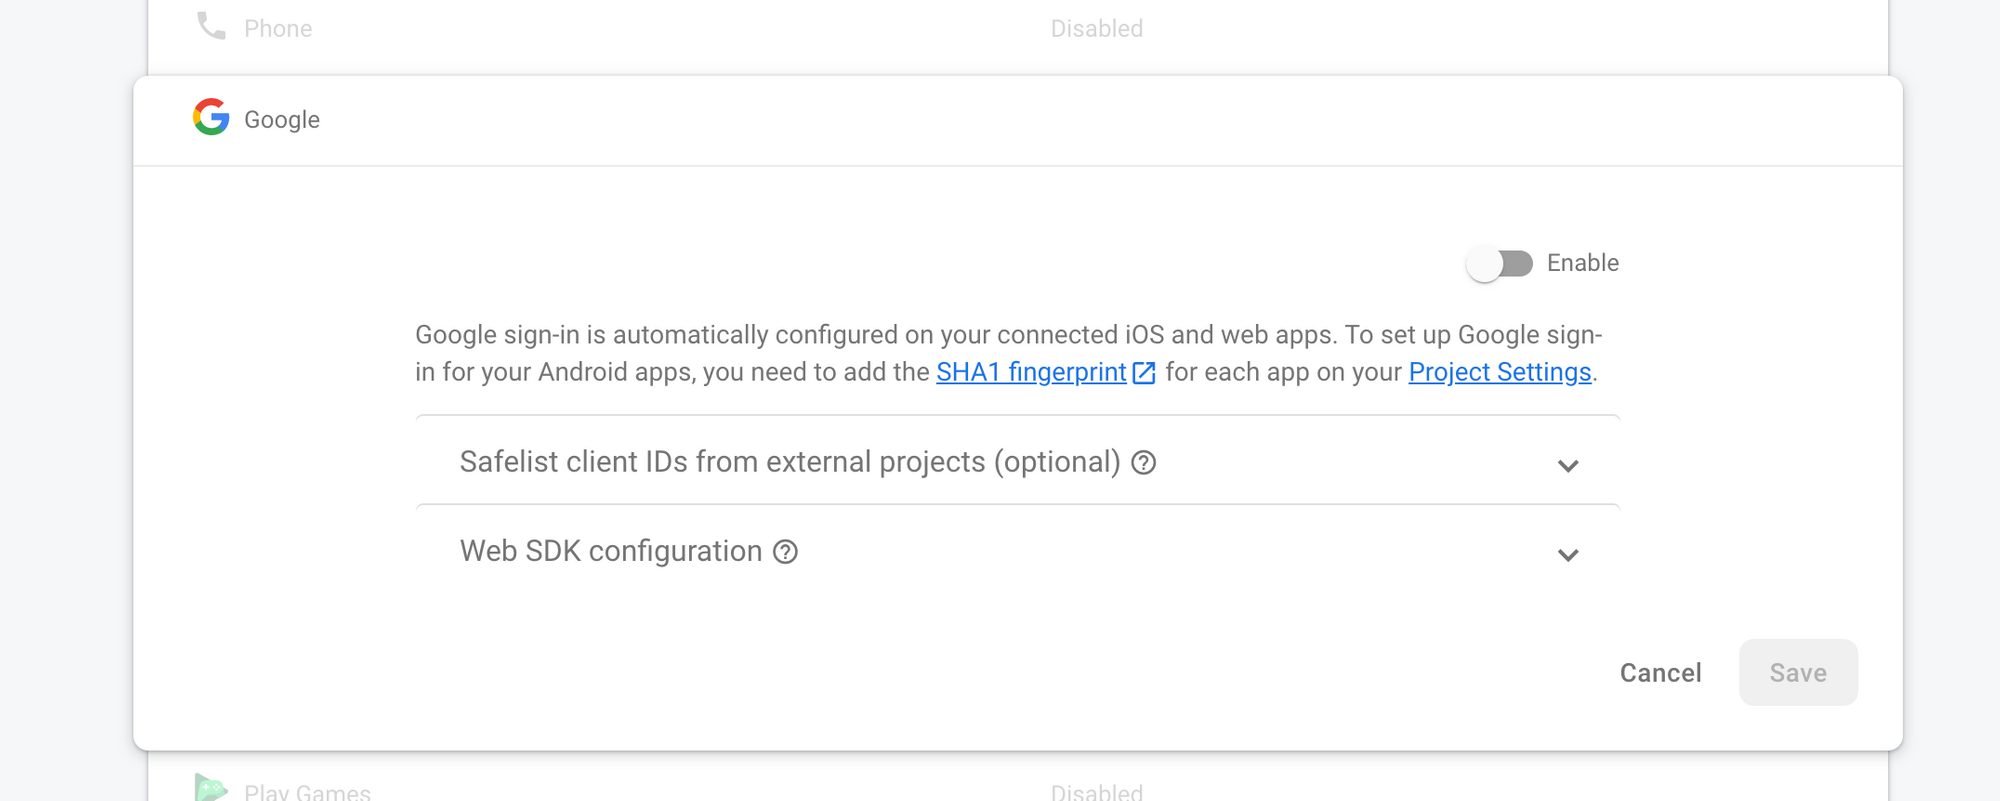
Select the project configured email as your email id.
Click on the Firestore tab and click on Create database button.

Once you've clicked on Create database it will ask for the mode. Select test mode for developing the application.
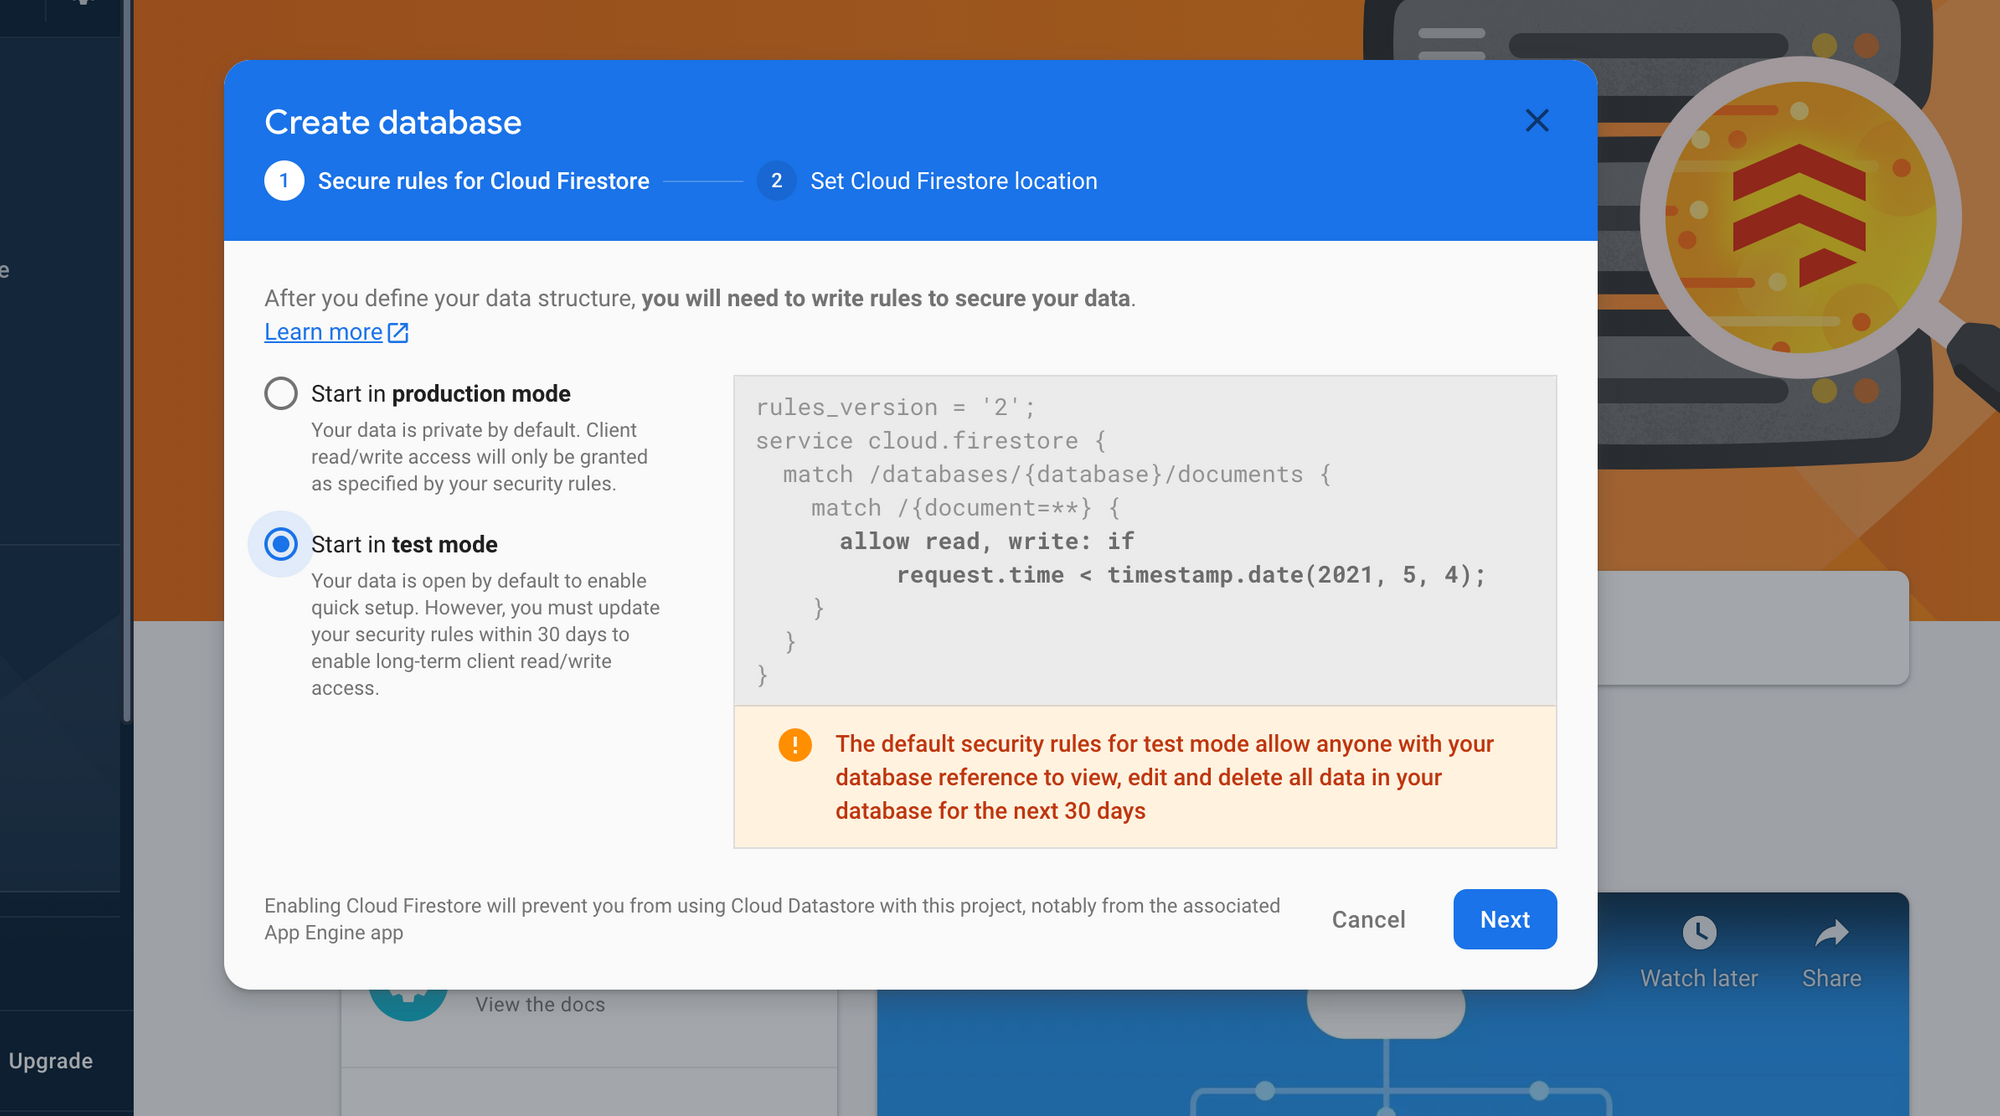
Click on Next. It will ask for the location. Select the appropriate option and then click the Enable button.
How to set up the Navbar, Signup, and Sign-out mechanisms:
Now back to our project. Install the following dependencies using this npm command:
npm i firebase firebase-admin
Create a directory named lib inside the src directory.
In the lib directory create two files named firebase.ts and firebase-admin.ts.
Copy the following code inside firebase.ts:
import firebase from 'firebase/app';
import 'firebase/firestore';
import 'firebase/auth';

const firebaseConfig = {
  apiKey: process.env.NEXT_PUBLIC_FIREBASE_API_KEY,
  authDomain: process.env.NEXT_PUBLIC_FIREBASE_AUTH_DOMAIN,
  projectId: process.env.NEXT_PUBLIC_FIREBASE_PROJECT_ID,
};

try {
  firebase.initializeApp(firebaseConfig);
} catch (err) {
  if (!/already exists/.test(err.message)) {
    console.error('Firebase initialization error', err.stack);
  }
}

export default firebase;
Here we initialize the Firebase library using apikey, authdomain and projectId.
Paste the following code inside firebase-admin.ts:
import admin from 'firebase-admin';

if (!admin.apps.length) {
  admin.initializeApp({
    credential: admin.credential.cert({
      projectId: process.env.NEXT_PUBLIC_FIREBASE_PROJECT_ID,
      privateKey: process.env.FIREBASE_PRIVATE_KEY,
      clientEmail: process.env.FIREBASE_CLIENT_EMAIL,
    }),
    databaseURL: process.env.FIREBASE_DATABASE_URL,
  });
}

const db = admin.firestore();
const auth = admin.auth();

export { db, auth };
Here we initialize the firebase-admin library using projectId, privateKey, clientEmail, and databaseURL.
Now in the root directory create a file named .env.local and paste in the following code:
NEXT_PUBLIC_FIREBASE_API_KEY=
NEXT_PUBLIC_FIREBASE_AUTH_DOMAIN=
NEXT_PUBLIC_FIREBASE_PROJECT_ID=

FIREBASE_PRIVATE_KEY=
FIREBASE_CLIENT_EMAIL=
FIREBASE_DATABASE_URL=
You'll find NEXT_PUBLIC_FIREBASE_API_KEY, NEXT_PUBLIC_FIREBASE_AUTH_DOMAIN, NEXT_PUBLIC_FIREBASE_PROJECT_ID inside the Firebase Console > Settings > Project Settings > General > Your Apps Card.
You'll find FIREBASE_PRIVATE_KEY, FIREBASE_CLIENT_EMAIL under the service account tab. We can generate a new private key using the Generate new private key button. That file contains both sets of data.
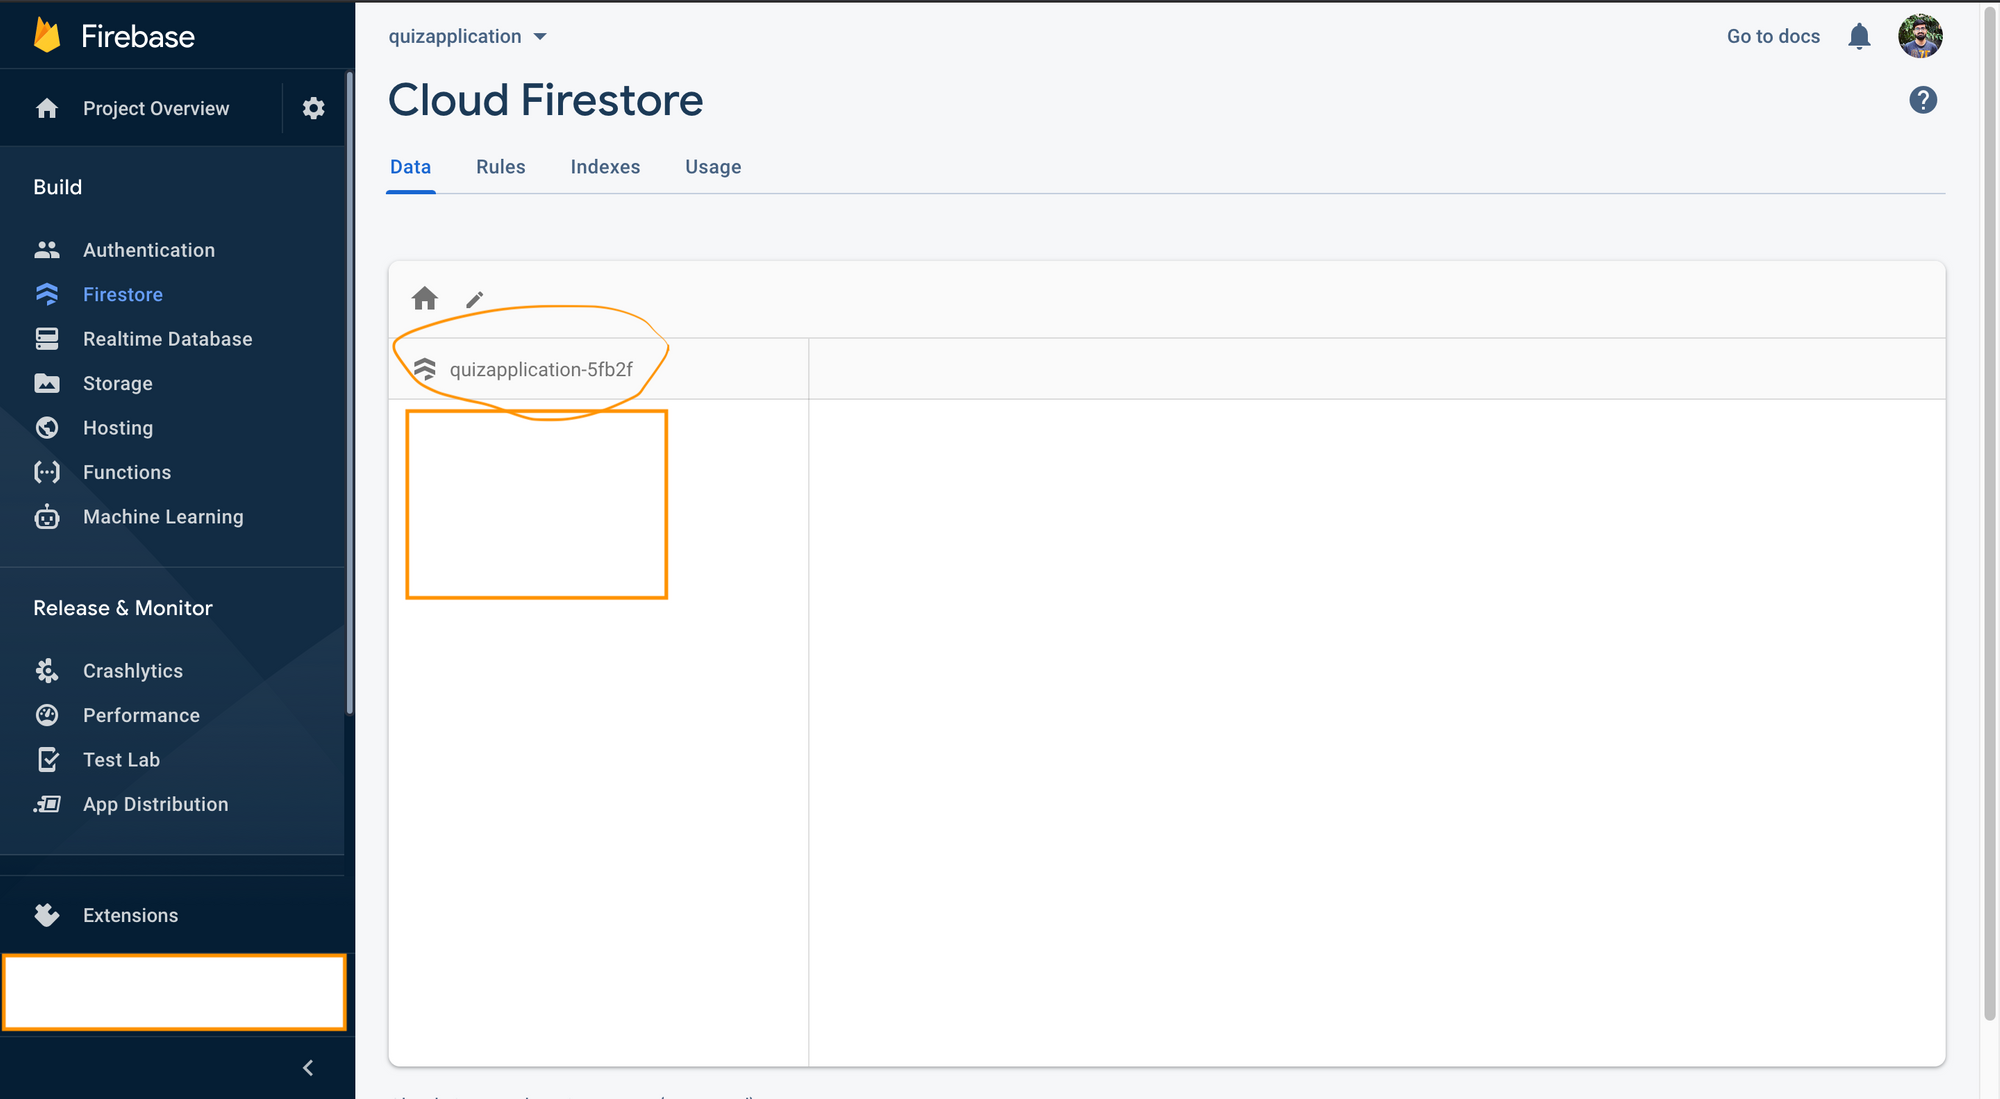
For the FIREBASE_DATABASE_URL add https://<database-name>.firebaseio.com. Replace database-name with your database name.
Note: You can find the database-name under firebase console > firestore in the data tab (refer to the screen shot below).
Now in the lib directory create a third file named auth.tsx. This is going to contain our Authorization mechanism and state. Paste the following code in this file:
import { Context, createContext, useContext, useEffect, useState } from 'react';
import { addUser } from '../utils/db';
import firebase from './firebase';

interface Auth {
  uid: string;
  email: string | null;
  name: string | null;
  photoUrl: string | null;
  token: string | null;
}

interface AuthContext {
  auth: Auth | null;
  loading: boolean;
  siginWithGoogle: () => Promise<void>;
  signOut: () => Promise<void>;
}

const authContext: Context<AuthContext> = createContext<AuthContext>({
  auth: null,
  loading: true,
  siginWithGoogle: async () => {},
  signOut: async () => {},
});

const formatAuthState = (user: firebase.User): Auth => ({
  uid: user.uid,
  email: user.email,
  name: user.displayName,
  photoUrl: user.photoURL,
  token: null,
});

function useProvideAuth() {
  const [auth, setAuth] = useState<Auth | null>(null);
  const [loading, setLoading] = useState<boolean>(true);

  const handleAuthChange = async (authState: firebase.User | null) => {
    if (!authState) {
      setLoading(false);
      return;
    }
    const formattedAuth = formatAuthState(authState);
    formattedAuth.token = await authState.getIdToken();
    setAuth(formattedAuth);
    setLoading(false);
  };

  const signedIn = async (
    response: firebase.auth.UserCredential,
    provider: String = 'google'
  ) => {
    if (!response.user) {
      throw new Error('No User');
    }
    const authUser = formatAuthState(response.user);
    await addUser({ ...authUser, provider });
  };

  const clear = () => {
    setAuth(null);
    setLoading(true);
  };

  const siginWithGoogle = async () => {
    setLoading(true);
    return firebase
      .auth()
      .signInWithPopup(new firebase.auth.GoogleAuthProvider())
      .then(signedIn);
  };
  const signOut = async () => {
    return firebase.auth().signOut().then(clear);
  };

  useEffect(() => {
    const unsubscribe = firebase.auth().onAuthStateChanged(handleAuthChange);
    return () => unsubscribe();
  }, []);

  return {
    auth,
    loading,
    siginWithGoogle,
    signOut,
  };
}

export function AuthProvider({ children }: any) {
  const auth = useProvideAuth();
  return <authContext.Provider value={auth}>{children}</authContext.Provider>;
}

export const useAuth = () => useContext(authContext);
In the src directory create a folder named utils and under that folder create a file named db.ts. Add the following code inside that file:
import firebase from '../lib/firebase';

export const addUser = async (authUser: any) => {
  const resp = await firebase
    .firestore()
    .collection('users')
    .doc(authUser.uid as string)
    .set({ ...authUser }, { merge: true });
  return resp;
};
Go to the Navbar.tsx under component directory and update the previous code with the following code:
import { Box, Divider, Flex, Heading, Link } from '@chakra-ui/react';
import { useRouter } from 'next/router';
import React from 'react';
import { useAuth } from '../lib/auth';

const Navbar: React.FC<{}> = () => {
  const { auth, signOut } = useAuth();
  const router = useRouter();

  return (
    <>
      <Flex justify="space-between" m={4}>
        <Heading onClick={() => router.push('/')} as="button">
          QuizApp
        </Heading>
        <Box>
          {auth ? (
            <Box p={2}>
              <Link
                p={2}
                fontWeight={
                  router.pathname === '/quiz/new' ? 'extrabold' : 'normal'
                }
                onClick={() => router.push('/quiz/new')}
              >
                Add new quiz
              </Link>
              <Link p={2} onClick={() => signOut()}>
                Logout
              </Link>
            </Box>
          ) : (
            <Box p={2}>
              <Link
                p={2}
                onClick={() => router.push('/signin')}
                fontWeight={
                  router.pathname === '/signin' ? 'extrabold' : 'normal'
                }
              >
                Sign In
              </Link>
            </Box>
          )}
        </Box>
      </Flex>
      <Divider
        css={{
          boxShadow: '1px 1px #888888',
        }}
      />
    </>
  );
};

export default Navbar;
Replace the _app.tsx with the following code:
import { ChakraProvider } from '@chakra-ui/react';
import { AppProps } from 'next/app';
import { AuthProvider } from '../lib/auth';

function App({ Component, pageProps }: AppProps) {
  return (
    <ChakraProvider>
      <AuthProvider>
        <Component {...pageProps} />
      </AuthProvider>
    </ChakraProvider>
  );
}

export default App;
Create a new file named signin.tsx under the pages directory and add the following code:
import { Button, Center, Container, Heading, VStack } from '@chakra-ui/react';
import { useRouter } from 'next/router';
import React from 'react';
import { FcGoogle } from 'react-icons/fc';
import Navbar from '../common/Navbar';
import { useAuth } from '../lib/auth';

const signin = () => {
  const { auth, siginWithGoogle } = useAuth();
  const router = useRouter();

  if (auth) {
    router.push((router.query.next as string) || '/');
  }

  return (
    <>
      <Navbar />
      <Container>
        <Center mt={10}>
          <VStack spacing="4">
            <Heading fontSize="3xl" mb={2}>
              Hello, Welcome to the Quiz App!!
            </Heading>
            <Button leftIcon={<FcGoogle />} onClick={() => siginWithGoogle()}>
              Sign In with Google
            </Button>
          </VStack>
        </Center>
      </Container>
    </>
  );
};

export default signin;
You'll need to install react-icons. To install react-icons use the following command:
npm i react-icons
Now restart the development server and go to the http://localhost:3000. Click on the Sign In link and you'll get the following screen.
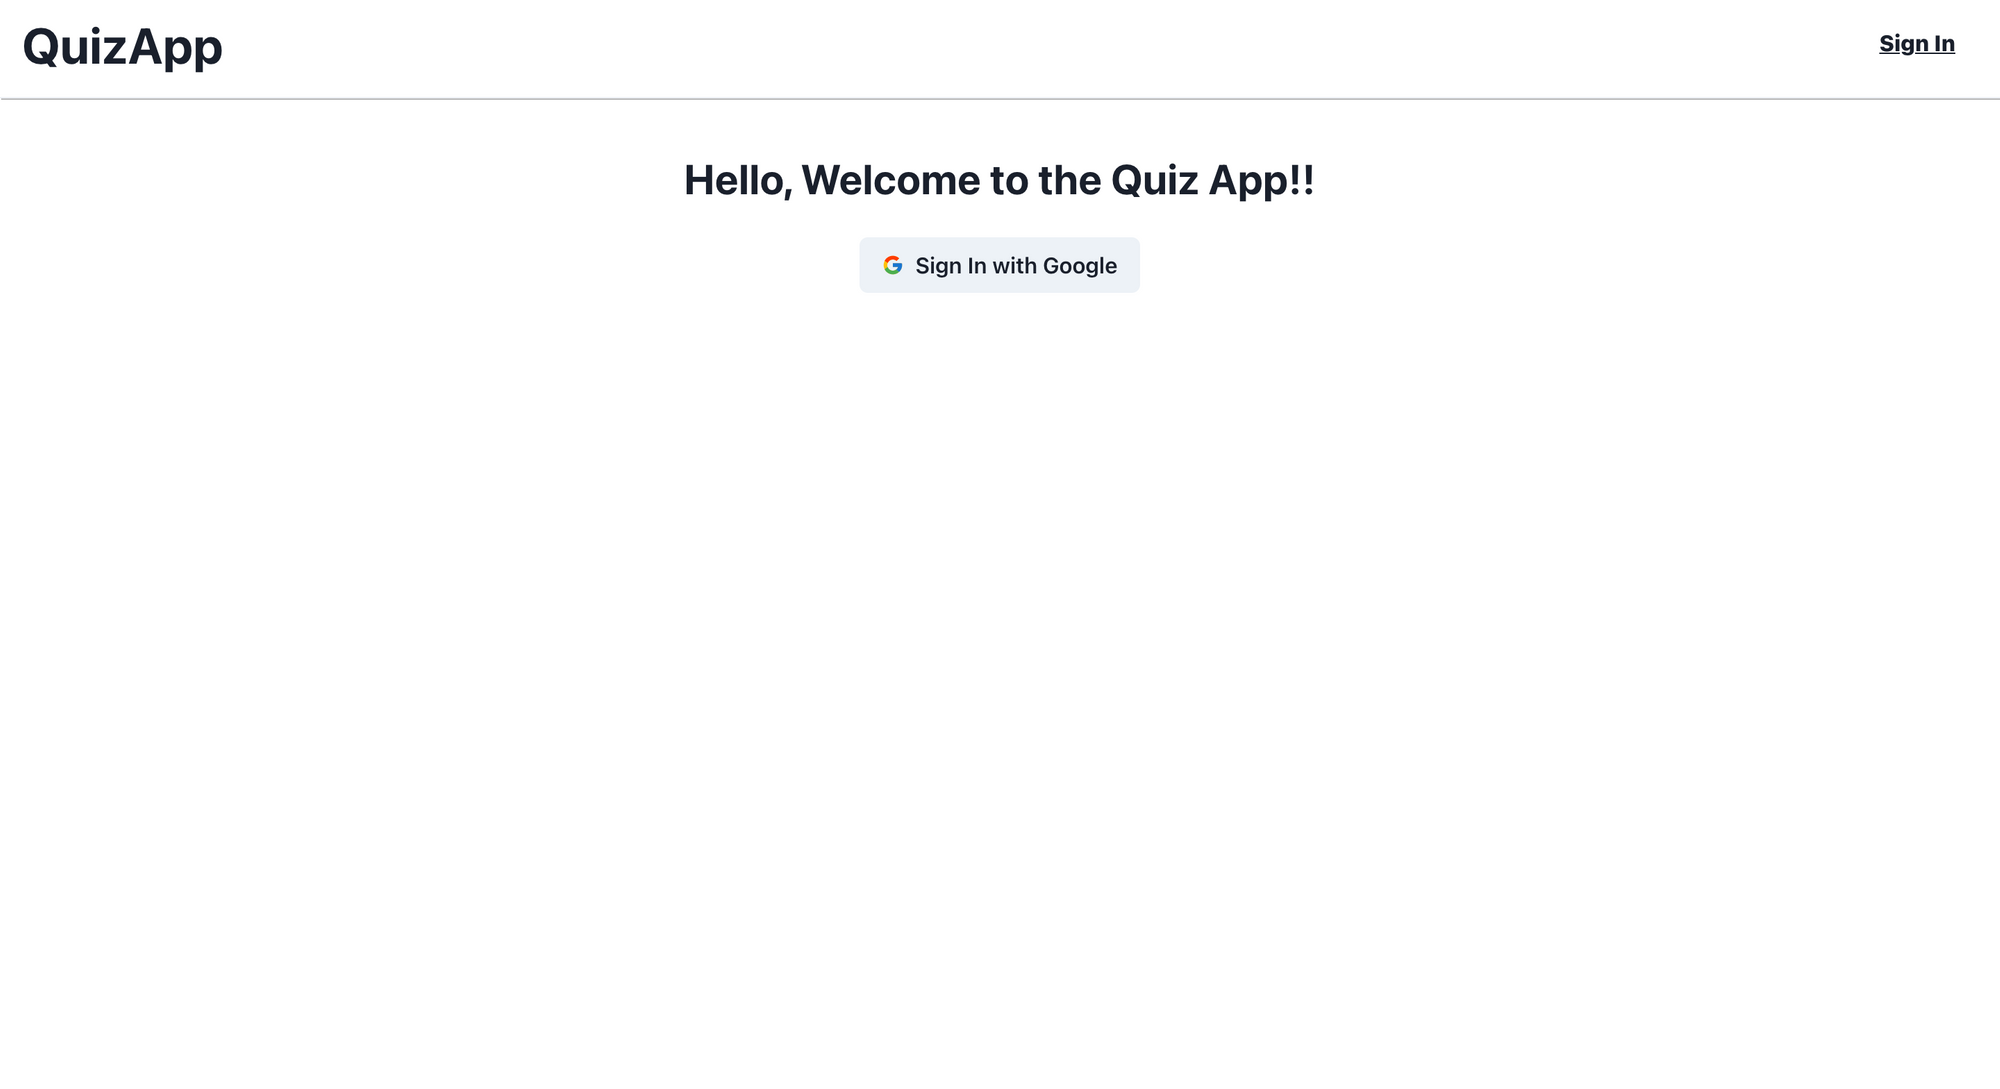
Now click the Sign in with Google Button. After a successful sign-in, you will be redirected to the Home page.
How to Add a Quiz and Display Multiple Quizzes
In this section we'll implement the following functionality:
How to set up the Add a Quiz mechanism.
How to set up the Display Multiple Quizzes mechanism.
You can find the quiz app code in this section at this commit.
How to set up the Add a Quiz mechanism:
Now we will focus on adding the quiz. To add a new quiz we will use Formik. It will help us configure the dynamic form and Yup will help us with the validation of those forms.
Let's install both the libraries using the following command.
npm i formik yup
We will also use a package named uuid to give a unique identifier to our questions and options. To install the package use the following command:
npm i uuid
We will also need chakra icons so install them using the following command:
npm i @chakra-ui/icons
We will need Axios to make an API call to our Next serverless environment. Use the following command to install it:
npm i axios
Inside the src > pages directory create a new directory named quiz and under that directory create a new directory named new.
Inside the new directory create a file named index.tsx and paste the following code into it:
import { AddIcon, MinusIcon } from '@chakra-ui/icons';
import {
Box,
Button,
Center,
Container,
Divider,
Flex,
FormControl,
FormErrorMessage,
FormLabel,
IconButton,
Input,
SimpleGrid,
Text,
Textarea,
} from '@chakra-ui/react';
import { Field, FieldArray, Form, Formik, getIn } from 'formik';
import { useRouter } from 'next/router';
import React, { useEffect } from 'react';
import { v4 as uuidv4 } from 'uuid';
import * as yup from 'yup';
import Navbar from '../../../common/Navbar';
import { useAuth } from '../../../lib/auth';
import { addQuizApi } from '../../../utils/service';
const optionData = [
{
label: 'Option A:',
},
{
label: 'Option B:',
},
{
label: 'Option C:',
},
{
label: 'Option D:',
},
];
const answerOption = [
{
label: 'A',
answer: 0,
},
{
label: 'B',
answer: 1,
},
{
label: 'C',
answer: 2,
},
{
label: 'D',
answer: 3,
},
];
const Index = () => {
const { auth, loading } = useAuth();
const router = useRouter();
useEffect(() => {
if (!auth && !loading) {
router.push('/signin?next=/quiz/new');
}
}, [auth, loading]);
const questionsData = {
title: '',
options: [{ title: '' }, { title: '' }, { title: '' }, { title: '' }],
answer: '0',
};
const initialValues = {
title: '',
description: '',
questions: [questionsData],
};
const validationSchema = yup.object().shape({
title: yup.string().required('Required'),
description: yup.string().required('Required'),
questions: yup
.array()
.of(
yup.object().shape({
title: yup.string().required('Required!'),
options: yup.array().of(
yup.object().shape({
title: yup.string().required('Required!'),
})
),
})
)
.required('Must add a question'),
});
const submitHandler = async (values, actions) => {
try {
values = {
...values,
createdAt: new Date(),
updatedAt: new Date(),
questions: values.questions.map((question) => {
return {
...question,
options: question.options.map((option) => {
return { ...option, optionId: uuidv4() };
}),
questionId: uuidv4(),
};
}),
};
await addQuizApi(auth, values);
router.push('/');
} catch (error) {
console.log('error', error);
} finally {
actions.setSubmitting(false);
}
};
return (
<>
<Navbar />
<Container
maxW="3xl"
mt={5}
mb={5}
borderWidth="1px"
borderRadius="lg"
p={6}
boxShadow="xl"
>
<Formik
initialValues={initialValues}
onSubmit={submitHandler}
validationSchema={validationSchema}
>
{(props) => (
<Form>
<Field name="title">
{({ field, form }) => (
<FormControl
isInvalid={form.errors.title && form.touched.title}
>
<FormLabel htmlFor="title" fontSize="xl">
Quiz Title
</FormLabel>
<Input {...field} id="title" />
<FormErrorMessage>{form.errors.title}</FormErrorMessage>
</FormControl>
)}
</Field>
<Field name="description">
{({ field, form }) => (
<FormControl
isInvalid={
form.errors.description && form.touched.description
}
>
<FormLabel htmlFor="description" fontSize="xl" mt={4}>
Quiz description
</FormLabel>
<Textarea {...field} id="description" />
<FormErrorMessage>
{form.errors.description}
</FormErrorMessage>
</FormControl>
)}
</Field>
<Field name="questions">
{({ field }) => (
<FormControl>
<FormLabel htmlFor="questions" fontSize="xl" mt={4}>
Enter your question data:
</FormLabel>
<Box ml={4}>
<FieldArray {...field} name="questions" id="questions">
{(fieldArrayProps) => {
const { push, remove, form } = fieldArrayProps;
const { values, errors, touched } = form;
const { questions } = values;
const errorHandler = (name) => {
const error = getIn(errors, name);
const touch = getIn(touched, name);
return touch && error ? error : null;
};
return (
<div>
{questions.map((_question, index) => {
return (
<Flex key={index} direction="column">
<FormControl
isInvalid={errorHandler(
`questions[${index}][title]`
)}
>
<FormLabel
htmlFor={`questions[${index}][title]`}
>
Question Title:
</FormLabel>
<Input
name={`questions[${index}][title]`}
as={Field}
mb={
!errorHandler(
`questions[${index}][title]`
) && 3
}
/>
<FormErrorMessage>
{errorHandler(
`questions[${index}][title]`
)}
</FormErrorMessage>
</FormControl>
<SimpleGrid
minChildWidth="300px"
spacing="10px"
mb={{ base: 4 }}
>
{optionData.map((option, subIndex) => (
<FormControl
mb={2}
key={subIndex}
isInvalid={errorHandler(
`questions[${index}][options][${subIndex}].title`
)}
>
<FormLabel
htmlFor={`questions[${index}][options][${subIndex}].title`}
>
{option.label}
</FormLabel>
<Input
name={`questions[${index}][options][${subIndex}].title`}
as={Field}
/>
<FormErrorMessage>
{errorHandler(
`questions[${index}][options][${subIndex}].title`
)}
</FormErrorMessage>
</FormControl>
))}
</SimpleGrid>
<Box>
<Text mb="8px">Correct Answer:</Text>
<Field
component="select"
name={`questions[${index}][answer]`}
style={{
width: '100%',
padding: '10px',
}}
>
{answerOption.map((value, key) => (
<option
value={value.answer}
key={key}
>
{value.label}
</option>
))}
</Field>
</Box>
<Flex
direction="row"
justify="flex-end"
mt={4}
>
{index > 0 && (
<IconButton
onClick={() => remove(index)}
aria-label="Remove Question"
icon={<MinusIcon />}
variant="ghost"
>
-
</IconButton>
)}
{index === questions.length - 1 && (
<IconButton
onClick={() => push(questionsData)}
aria-label="Add Question"
icon={<AddIcon />}
variant="ghost"
>
+
</IconButton>
)}
</Flex>
{index !== questions.length - 1 && (
<Divider
mt={2}
mb={4}
css={{
boxShadow: '1px 1px #888888',
}}
/>
)}
</Flex>
);
})}
</div>
);
}}
</FieldArray>
</Box>
</FormControl>
)}
</Field>
<Center>
<Button
colorScheme="green"
isLoading={props.isSubmitting}
type="submit"
disabled={!(props.isValid && props.dirty)}
>
Submit Quiz
</Button>
</Center>
</Form>
)}
</Formik>
</Container>
</>
);
};
export default Index;
Let's understand the code above.
Note: Don't copy/paste the individual code snippets below. I took pieces from the big code block above and broke them into smaller chunks so we can understand what's going on.
const questionsData = {
  title: '',
  options: [{ title: '' }, { title: '' }, { title: '' }, { title: '' }],
  answer: '0',
};

const initialValues = {
  title: '',
  description: '',
  questions: [questionsData],
};

<Formik
   initialValues={initialValues}
   onSubmit={submitHandler}
   validationSchema={validationSchema}
>
    {(props) => (
       <Form>
         #Input field and button
       </Form>
    )}
</Formik>
<Formik> is a wrapper that takes 3 props. The initialValues that are defined above and passed here as props are then passed down to the Input fields defined in between.
<FieldArray {...field} name="questions" id="questions">
  {(fieldArrayProps) => {
    const { push, remove, form } = fieldArrayProps;
    const { values, errors, touched } = form;
    const { questions } = values;
    const errorHandler = (name) => {
      const error = getIn(errors, name);
      const touch = getIn(touched, name);
      return touch && error ? error : null;
    };
    return (<div>
      // Input fields
    </div>)
  };
</FieldArray>
Inside this form, you'll find that the FieldArray component is defined. This component is provided by Formik itself. When we want dynamic input fields, we can use this component.
The fieldArrayProps consists of two important elements named push and remove which helps us add a new input field and remove it.
We are using the getIn utility from Formik to validate our fields and check if there are any errors.
const validationSchema = yup.object().shape({
  title: yup.string().required('Required'),
  description: yup.string().required('Required'),
  questions: yup
    .array()
    .of(
      yup.object().shape({
        title: yup.string().required('Required!'),
        options: yup.array().of(
          yup.object().shape({
            title: yup.string().required('Required!'),
          })
        ),
      })
    )
    .required('Must add a question'),
});
Above is the Yup syntax which defines the object shape. For further information please refer to yup's documentation.
We combine the validation schema with Yup and pass it to Formik. Formik internally maps them with the name defined in the input field.
const submitHandler = async (values, actions) => {
  try {
    values = {
      ...values,
      createdAt: new Date(),
      updatedAt: new Date(),
      questions: values.questions.map((question) => {
        return {
          ...question,
          options: question.options.map((option) => {
            return { ...option, optionId: uuidv4() };
          }),
          questionId: uuidv4(),
        };
      }),
    };
    await addQuizApi(auth, values);
    router.push('/');
  } catch (error) {
    console.log('error', error);
  } finally {
    actions.setSubmitting(false);
  }
};
The onSubmit is invoked when a user clicks enter on the keyboard or presses the submit button on the website. We have to pass submitHandler as a reference to it.
Inside that function, we set a unique id for our questions and options and make an API call to store it on our Firestore collection.
Now inside the src > utils directory, create a new file named service.ts and add the following code:
import axios from 'axios';

export const addQuizApi = async (auth, values) => {
  try {
    const header = {
      'Content-Type': 'application/json',
      token: auth.token,
    };
    const resp = await axios.post('/api/quiz', values, { headers: header });
    return resp;
  } catch (error) {
    throw error;
  }
};
Inside the src > pages directory create a new directory named api. All the files under this directory will run as the serverless environment by default.
Inside the api directory create a directory named quiz. Here create a new file named index.ts and paste in the following code:
import { NextApiRequest, NextApiResponse } from 'next';
import { auth } from '../../../lib/firebase-admin';
import { addQuiz as addQuizFb } from '../../../utils/db';

export default async (req: NextApiRequest, res: NextApiResponse) => {
  switch (req.method) {
    case 'POST':
      await addQuiz(req, res);
      break;
    default:
      res.status(405).json({ status: false, message: 'Method Not found' });
      break;
  }
};

const addQuiz = async (req: NextApiRequest, res: NextApiResponse) => {
  try {
    const user = await auth.verifyIdToken(req.headers.token as string);
    const quizData = { ...req.body, userId: user.uid };
    await addQuizFb(quizData);
    return res
      .status(200)
      .json({ status: true, message: 'Quiz added successfully...' });
  } catch (error) {
    return res
      .status(500)
      .json({ status: false, message: 'Something went wrong' });
  }
};
Now go to the src > utils > db.ts directory and add the following code after the addUser function:
export const addQuiz = async (quizData) => {
  let response = await firebase.firestore().collection('quiz').add(quizData);
  return response;
};
Now, let's run our development server and try to add a new quiz.
npm run dev
Go to http://localhost:3000 and click on the Add new quiz link in the navbar. You'll get the following output:
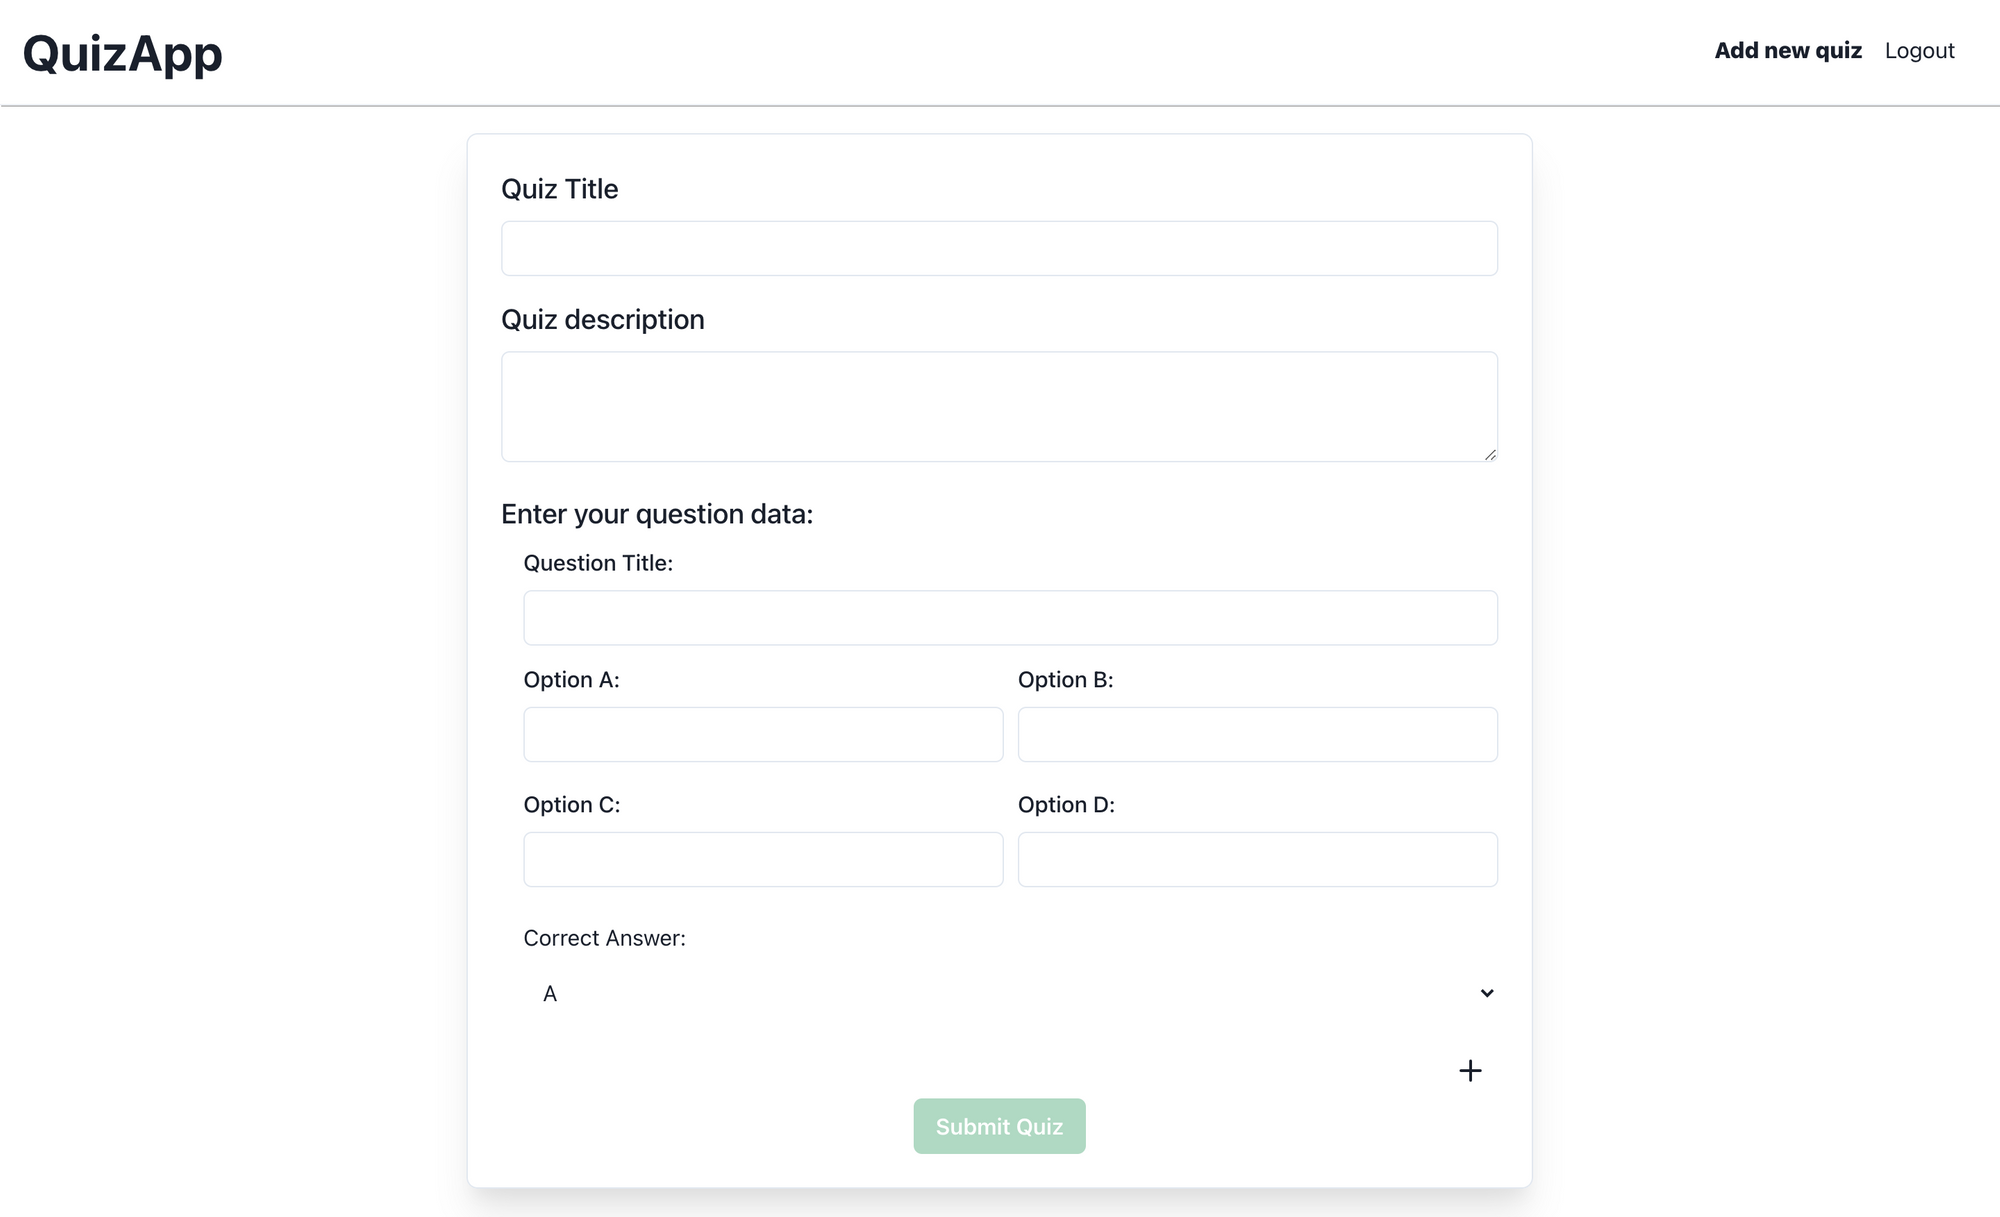
Now fill in the form and click on Submit Quiz button. Go to the Firebase console and you'll see that a new collection named quiz has been created.
Note: For the FIREBASE_PRIVATE_KEY in .env.local, remember to add string quotation marks around it or you'll get the following error:
FirebaseAppError: Failed to parse private key: Error: Invalid PEM formatted message.
How to set up the Display Multiple Quizzes mechanism:
Now let's show our quiz list on the / route. Go to the pages > index.js and update the existing code with the following code:
import { Box, Container, Divider, Flex, Heading, SimpleGrid, Text } from '@chakra-ui/react';
import Head from 'next/head';
import { useRouter } from 'next/router';
import React from 'react';
import Navbar from '../common/Navbar';
import { getAllQuiz, getAllUsers } from '../utils/db';

const Home = (props) => {
  const quiz = JSON.parse(props.quiz);
  const router = useRouter();

  const generateQuizCard = (singleQuiz) => {
    return (
      <Box m={3} borderWidth="1px" borderRadius="lg" p={6} boxShadow="xl">
        <Heading as="h3" size="lg">
          {singleQuiz.title}
        </Heading>

          <Text color="gray.500" mt={2}>
            Posted By: {singleQuiz.user.name}
          </Text>
          <Text color="gray.500" mt={2}>
            No of Questions: {singleQuiz.questions.length}
          </Text>

        <Divider mt={3} mb={3} />
        <Text noOfLines={[1, 2, 3]}>{singleQuiz.description}</Text>
      </Box>
    );
  };

  return (
    <Box>
      <Head>
        <title>QuizApp</title>
        <link rel="icon" href="/favicon.ico" />
      </Head>
      <main>
        <header>
          <Navbar />
          <Container maxW="6xl">
            {quiz.length > 0 && (
              <SimpleGrid minChildWidth="400px">
                {quiz.map((singleQuiz) => (
                  <Box
                    key={singleQuiz.id}
                    onClick={() => router.push(`/quiz/${singleQuiz.id}`)}
                    as="button"
                    textAlign="start"
                    m={2}
                  >
                    {generateQuizCard(singleQuiz)}
                  </Box>
                ))}
              </SimpleGrid>
            )}
          </Container>
        </header>
      </main>
      <footer></footer>
    </Box>
  );
};

export async function getServerSideProps(_context) {
  const quiz = await getAllQuiz();
  const users = await getAllUsers();
  const data = quiz.map((singleQuiz: any) => {
    return { ...singleQuiz, user: users.find((user) => user.id === singleQuiz.userId)};
  });
  return { props: { quiz: JSON.stringify(data) } };
}

export default Home;
Now go to the src > utils > db.ts and add the following after addQuiz function:
export const getAllQuiz = async () => {
  const snapshot = await firebase.firestore().collection('quiz').get();
  const quiz = snapshot.docs.map((doc) => ({ id: doc.id, ...doc.data() }));
  return quiz;
};

export const getAllUsers = async () => {
  const snapshot = await firebase.firestore().collection('users').get();
  const users = snapshot.docs.map((doc) => ({ id: doc.id, ...doc.data() }));
  return users;
}
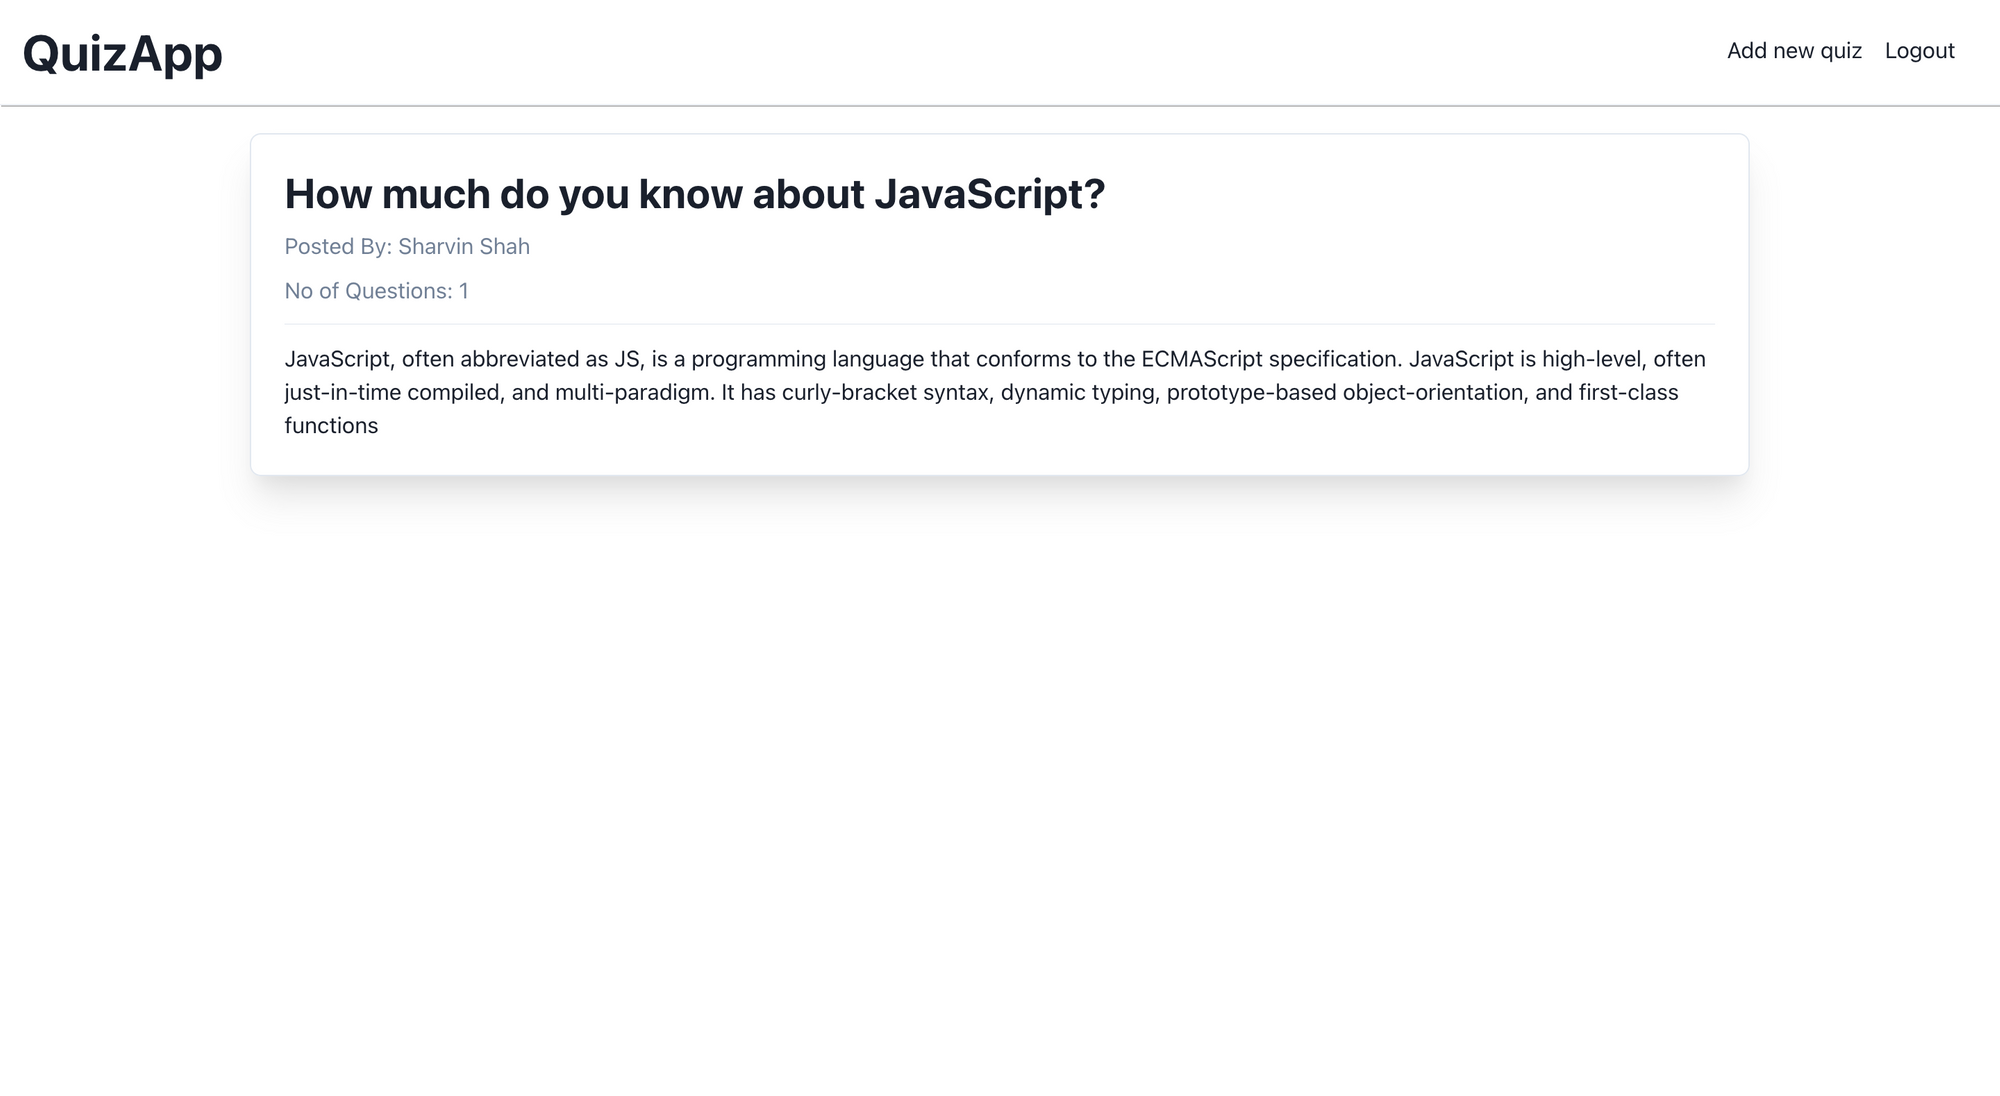
Go to http://localhost:3000 and refresh the page. You'll get the following output:
How to Show a Single Quiz, How to Answer a Quiz and How to Validate the Answer
In this section following will be implemented:
How to sett up the Show a Single Quiz and Answer Quiz mechanisms.
How to set up the Validate Answer mechanism.
You can find the quiz app code implemented in this section at this commit.
How to set up the Show a Single Quiz and Answer Quiz mechanisms:
Create a new directory named [id] under src > pages > quiz. Inside this directory create a file named index.tsx and paste in the following code:
import {
  Button,
  Center,
  Container,
  Divider,
  FormControl,
  FormLabel,
  Heading,
  HStack,
  RadioGroup,
  SimpleGrid,
  Text,
} from '@chakra-ui/react';
import { Field, Form, Formik } from 'formik';
import { NextPageContext } from 'next';
import { useRouter } from 'next/router';
import React, { useEffect } from 'react';
import Navbar from '../../../common/Navbar';
import { useAuth } from '../../../lib/auth';
import { getSingleQuiz } from '../../../utils/db';
import { addAnswerApi } from '../../../utils/service';

const ShowQuiz = (quiz, onSubmit) => {
  return (
    <Container
      maxW="7xl"
      mt={5}
      mb={5}
      borderWidth="1px"
      borderRadius="lg"
      p={6}
      boxShadow="xl"
    >
      <Center flexDirection="column">
        <Heading>{quiz.title}</Heading>
      </Center>
      <Text mt={4}>{quiz.description}</Text>
      <Heading mt={4} size="lg">
        Questions:
      </Heading>
      <Divider
        mt={4}
        mb={4}
        css={{
          boxShadow: '1px 1px #888888',
        }}
      />
      <Formik initialValues={{}} onSubmit={onSubmit}>
        {(props) => (
          <Form>
            {quiz.questions.map((singleQuiz, key) => (
              <Field name={singleQuiz.questionId} key={key}>
                {({ field, _form }) => (
                  <FormControl
                    as="fieldset"
                    isRequired={true}
                    mb={{ base: 4, md: 0 }}
                  >
                    <FormLabel as="legend">{singleQuiz.title}</FormLabel>
                    <RadioGroup>
                      <SimpleGrid minChildWidth="120px" mb={2}>
                        {singleQuiz.options.map((option, subkey) => (
                          <HStack key={subkey}>
                            <Field
                              {...field}
                              type="radio"
                              name={singleQuiz.questionId}
                              value={option.optionId}
                            />
                            <Text>{option.title}</Text>
                          </HStack>
                        ))}
                      </SimpleGrid>
                    </RadioGroup>
                  </FormControl>
                )}
              </Field>
            ))}
            <Center mt={10}>
              <Button
                type="submit"
                isLoading={props.isSubmitting}
                colorScheme="green"
              >
                Submit
              </Button>
            </Center>
          </Form>
        )}
      </Formik>
    </Container>
  );
};

const SingleQuiz = (props) => {
  const { auth, loading } = useAuth();

  const router = useRouter();

  useEffect(() => {
    if (!auth && !loading) {
      router.push(`/signin?next=/quiz/${props.quizId}`);
    }
  }, [auth, loading]);

  const quiz = JSON.parse(props.quiz);

  const onSubmit = async (values, actions) => {
    try {
      const resp = await addAnswerApi(auth, props.quizId, values);
      const answerId = resp.data.data.answerId;
      router.push(`/quiz/${props.quizId}/answer/${answerId}`);
    } catch (error) {
      console.log('error', error);
    } finally {
      actions.setSubmitting(false);
    }
  };

  return (
    <>
      <Navbar />
      {quiz && ShowQuiz(quiz, onSubmit)}
    </>
  );
};

export async function getServerSideProps(context: NextPageContext) {
  const quizId = context.query.id;
  const quizData = await getSingleQuiz(quizId);
  return { props: { quiz: quizData, quizId } };
}

export default SingleQuiz;
Inside src > utils > db.ts add the following code below the getAllUsers function:
export const getSingleQuiz = async (quizId) => {
  const snapshot = await firebase
    .firestore()
    .collection('quiz')
    .doc(String(quizId))
    .get();
  const quizData = snapshot.exists ? JSON.stringify(snapshot.data()) : null;
  return quizData;
};
Inside src > utils > service.ts add the following code below the addQuizApi function:
export const addAnswerApi = async (auth, quizId, values) => {
  try {
    const header = {
      'Content-Type': 'application/json',
      token: auth.token,
    };
    const resp = await axios.post(
      `/api/quiz/${quizId}/answer`,
      {
        questions: values,
        createdAt: new Date(),
        updatedAt: new Date(),
      },
      { headers: header }
    );
    return resp;
  } catch (error) {
    throw error;
  }
};
Inside src > pages > api > quiz directory, create a new directory named [id].
How to set up the Validate Answer mechanism:
Inside this directory create a file named answer.ts and paste in the following code:
import { NextApiRequest, NextApiResponse } from 'next';
import { auth } from '../../../../lib/firebase-admin';
import { addAnswer as addAnswerFb } from '../../../../utils/db';

export default async (req: NextApiRequest, res: NextApiResponse) => {
  switch (req.method) {
    case 'POST':
      await addAnswer(req, res);
      break;
    default:
      res.status(405).json({ status: false, message: 'Method Not found' });
      break;
  }
};

const addAnswer = async (req: NextApiRequest, res: NextApiResponse) => {
  try {
    const user = await auth.verifyIdToken(req.headers.token as string);
    const data = {
      ...req.body,
      quizId: req.query.id,
      userId: user.uid,
    };
    const response = await addAnswerFb(data);
    return res
      .status(200)
      .json({ status: true, data: { answerId: response.id } });
  } catch (error) {
    return res
      .status(500)
      .json({ status: false, message: 'Something went wrong' });
  }
};
Inside src > utils > db.ts add the following code below the getSingleQuiz function:
export const addAnswer = async (data) => {
  const response = await firebase.firestore().collection('answer').add(data);
  return response;
};
Go to http://localhost:3000, refresh the page, and click on the quiz. You'll get the following output:
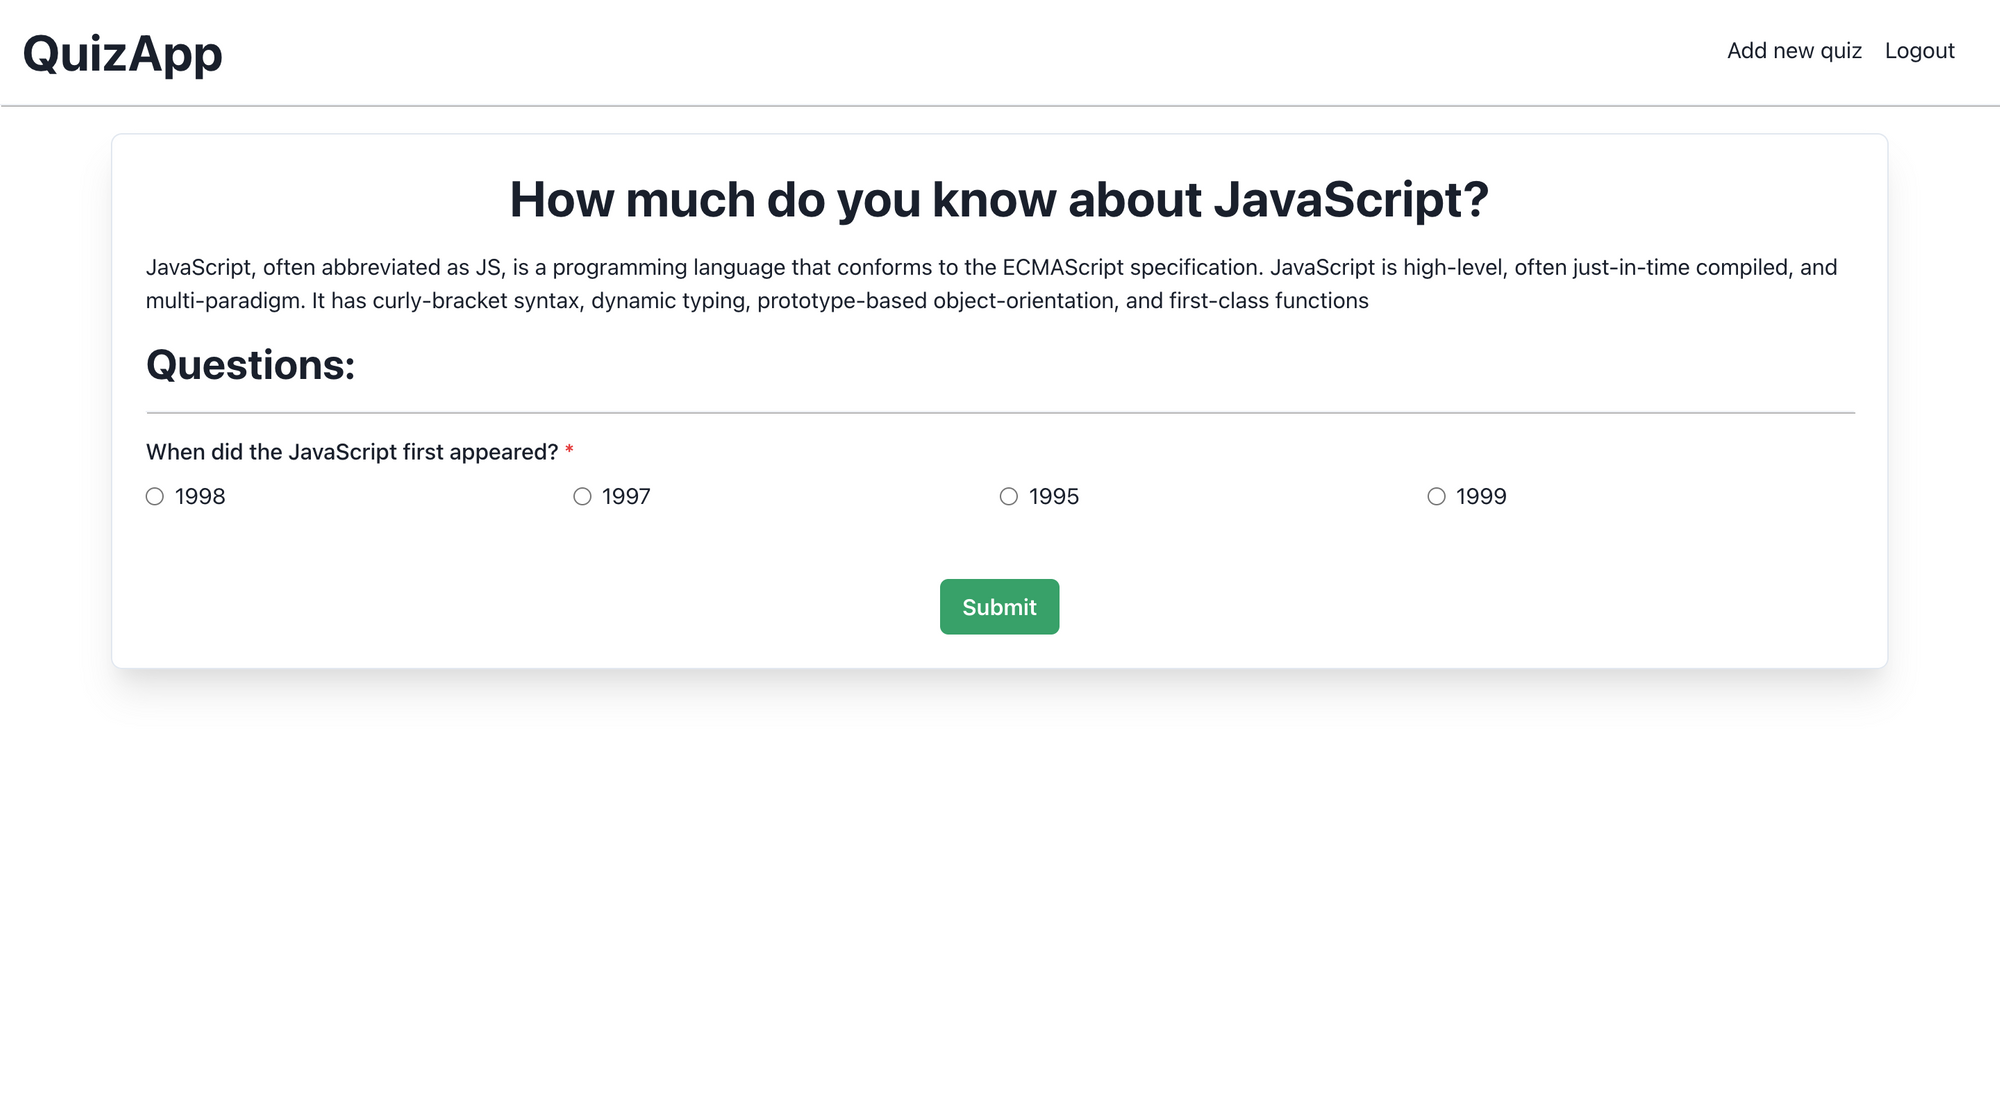
Now you can answer the question and press submit. Right now it will go to a 404 page. We will need to create a page where we can show the correct answer.
Inside the src > pages > quiz > [id] directory, create a new directory called answer. Inside that directory create a new file called [answerId].tsx and paste in the following code:
import {
  Box,
  Center,
  Container,
  Divider,
  Heading,
  Radio,
  RadioGroup,
  SimpleGrid,
  Text,
} from '@chakra-ui/react';
import { NextPageContext } from 'next';
import React from 'react';
import Navbar from '../../../../common/Navbar';
import { getAnswer, getSingleQuiz } from '../../../../utils/db';

const answer = (props) => {
  const quiz = JSON.parse(props.quiz);
  const answer = JSON.parse(props.answer);

  return (
    <>
      <Navbar />
      {quiz && answer && (
        <Container maxW="3xl" mt={5}>
          <Center flexDirection="column">
            <Heading>Correct Answer for {quiz.title}</Heading>
            <Text mt={4}>{quiz.description}</Text>
          </Center>
          <Divider
            mt={4}
            mb={4}
            css={{
              boxShadow: '1px 1px #888888',
            }}
          />
          {quiz.questions.map((singleQuiz, index) => {
            return (
              <Box
                mt={index !== 0 && 4}
                key={index}
                borderWidth="1px"
                borderRadius="lg"
                p={6}
                boxShadow="xl"
                backgroundColor={
                  answer.questions[singleQuiz.questionId] &&
                  singleQuiz.options[singleQuiz.answer].optionId ===
                    answer.questions[singleQuiz.questionId]
                    ? 'green.200'
                    : 'red.200'
                }
              >
                <Text>
                  {index + 1}) {singleQuiz.title}
                </Text>
                <RadioGroup>
                  <SimpleGrid minChildWidth="120px" mt={2}>
                    {singleQuiz.options.map((option, index) => (
                      <Radio value={option.title} isDisabled key={index}>
                        {option.title}
                      </Radio>
                    ))}
                  </SimpleGrid>
                </RadioGroup>
                <Text mt={3}>
                  Correct Answer: {singleQuiz.options[singleQuiz.answer].title}
                </Text>
                {answer.questions[singleQuiz.questionId] ? (
                  <Text>
                    Selected Answer:{' '}
                    {
                      singleQuiz.options.find(
                        (option) =>
                          option.optionId ===
                          answer.questions[singleQuiz.questionId]
                      ).title
                    }
                  </Text>
                ) : (
                  <Text>Not Answered</Text>
                )}
              </Box>
            );
          })}
        </Container>
      )}
    </>
  );
};

export async function getServerSideProps(context: NextPageContext) {
  const quizId = context.query.id;
  const answerId = context.query.answerId;
  const quizData = await getSingleQuiz(quizId);
  const answerData = await getAnswer(answerId);
  return { props: { answer: answerData, quiz: quizData } };
}

export default answer;
Inside src > utils > db.ts add the following code below the addAnswer function:
export const getAnswer = async (answerId) => {
  const answerSnapshot = await firebase
    .firestore()
    .collection('answer')
    .doc(String(answerId))
    .get();
  let answerData = answerSnapshot.exists
    ? JSON.stringify(answerSnapshot.data())
    : null;
  return answerData;
};
Go to http://localhost:3000, refresh the page, click on the quiz and answer the question. You'll get the following output:
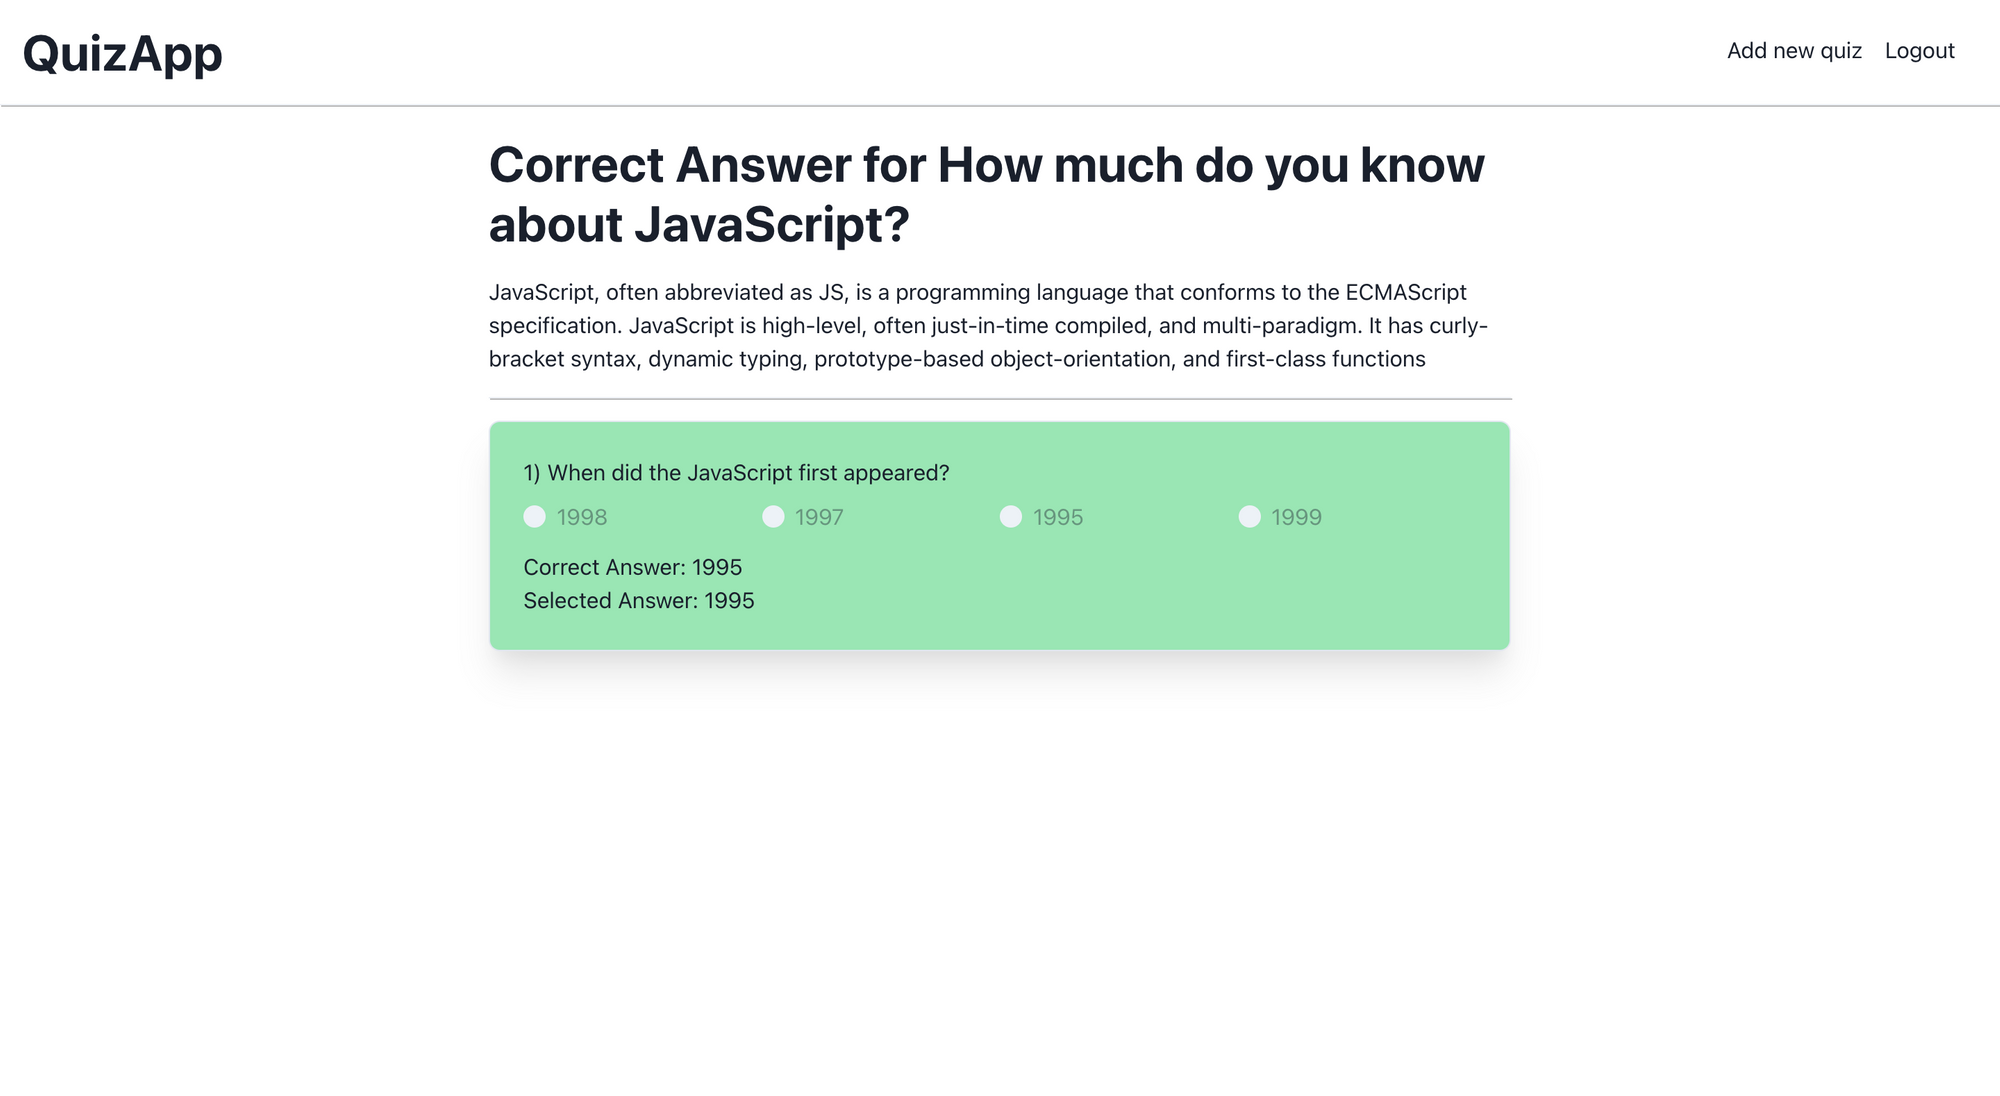
With this, we have completed our application and it's ready to be deployed on Vercel. In the next section, we will configure the deployment mechanism.
How to Deploy the App to Vercel and Firebase Authentication Configuration
There are two ways to configure an application on Vercel:
Using the Vercel npm library and pushing the code locally to a Vercel server
Connecting the Vercel bot to the GitHub repository.
I am going to use the second method.
You need to create a repository on GitHub and push the code over there.
If you haven't created an account on Vercel then you can go to https://vercel.com/ and click on the sign up button.
Once you've created your account you'll be directed to a dashboard that looks like this:
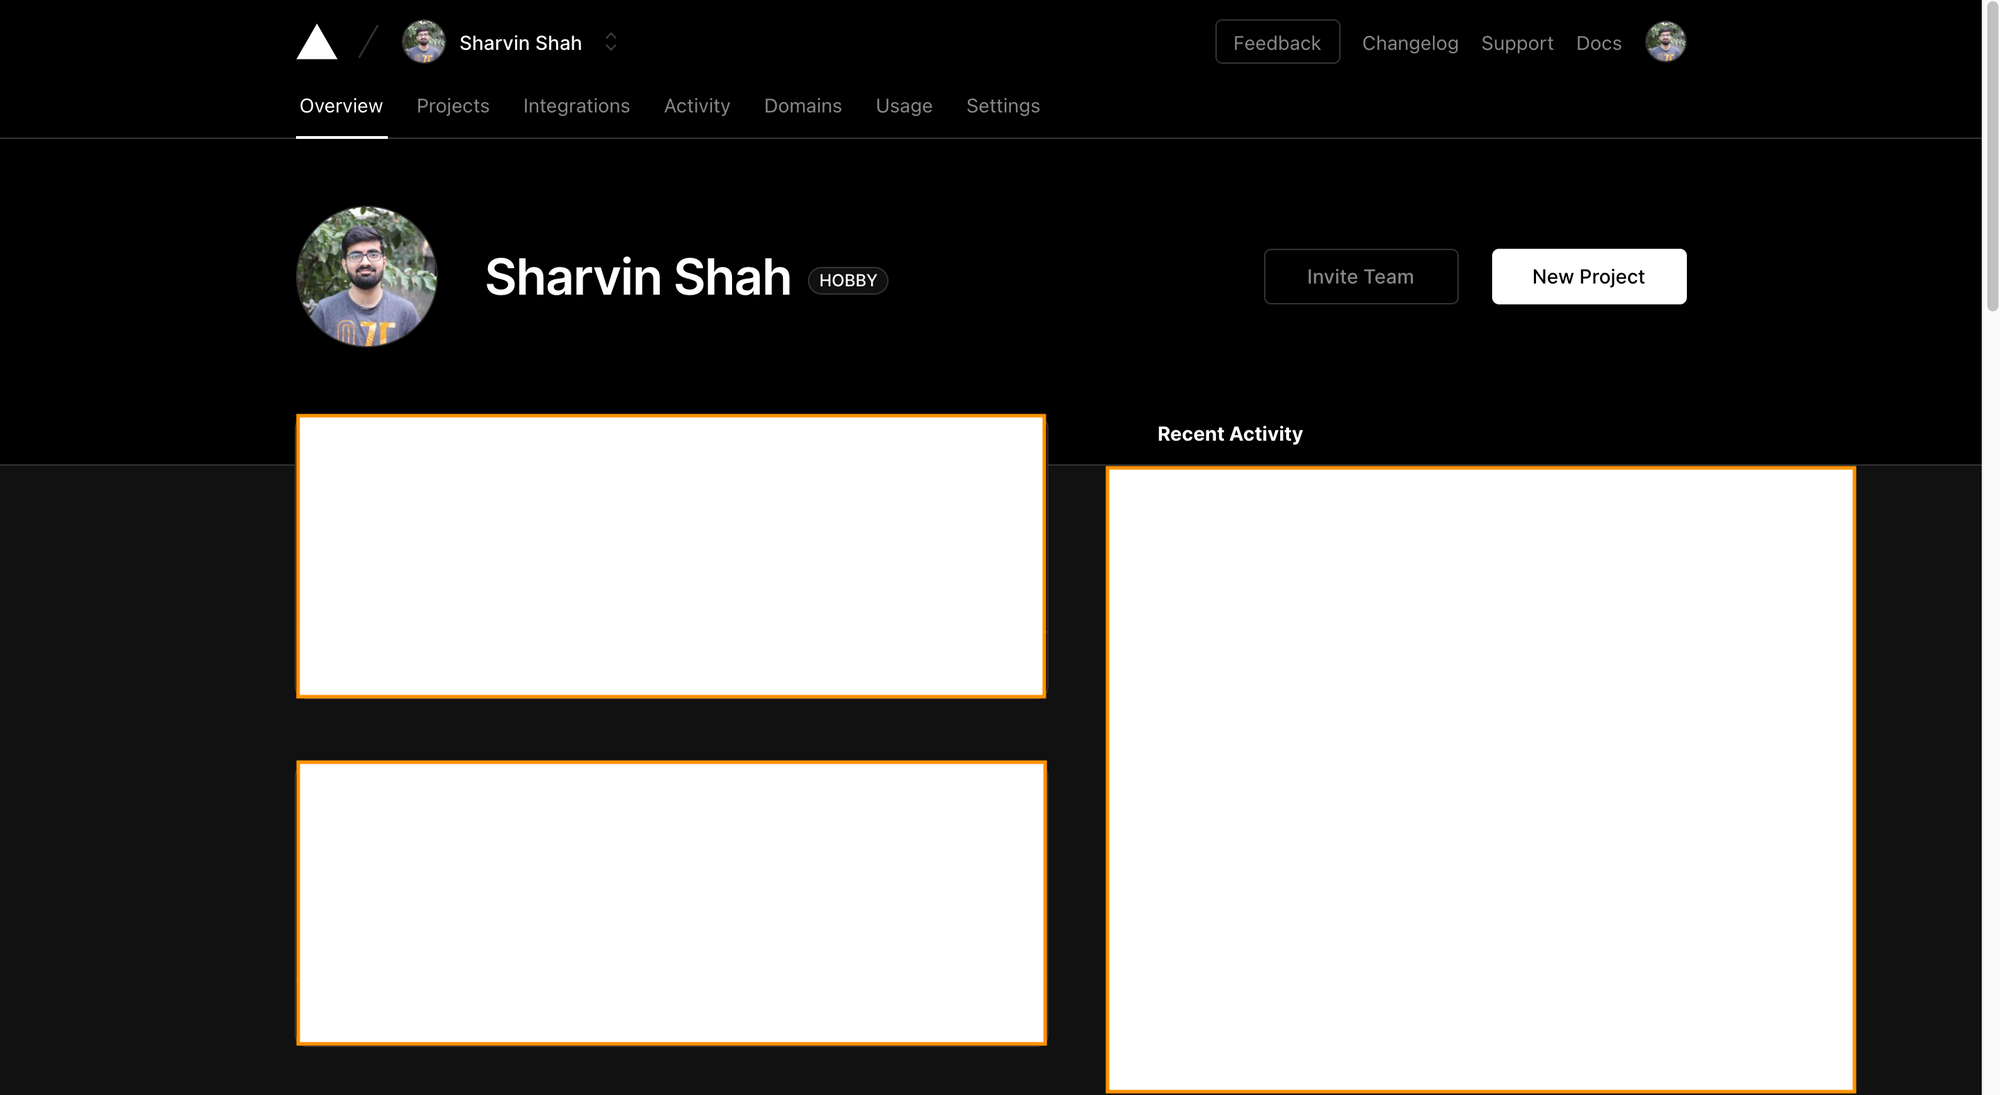
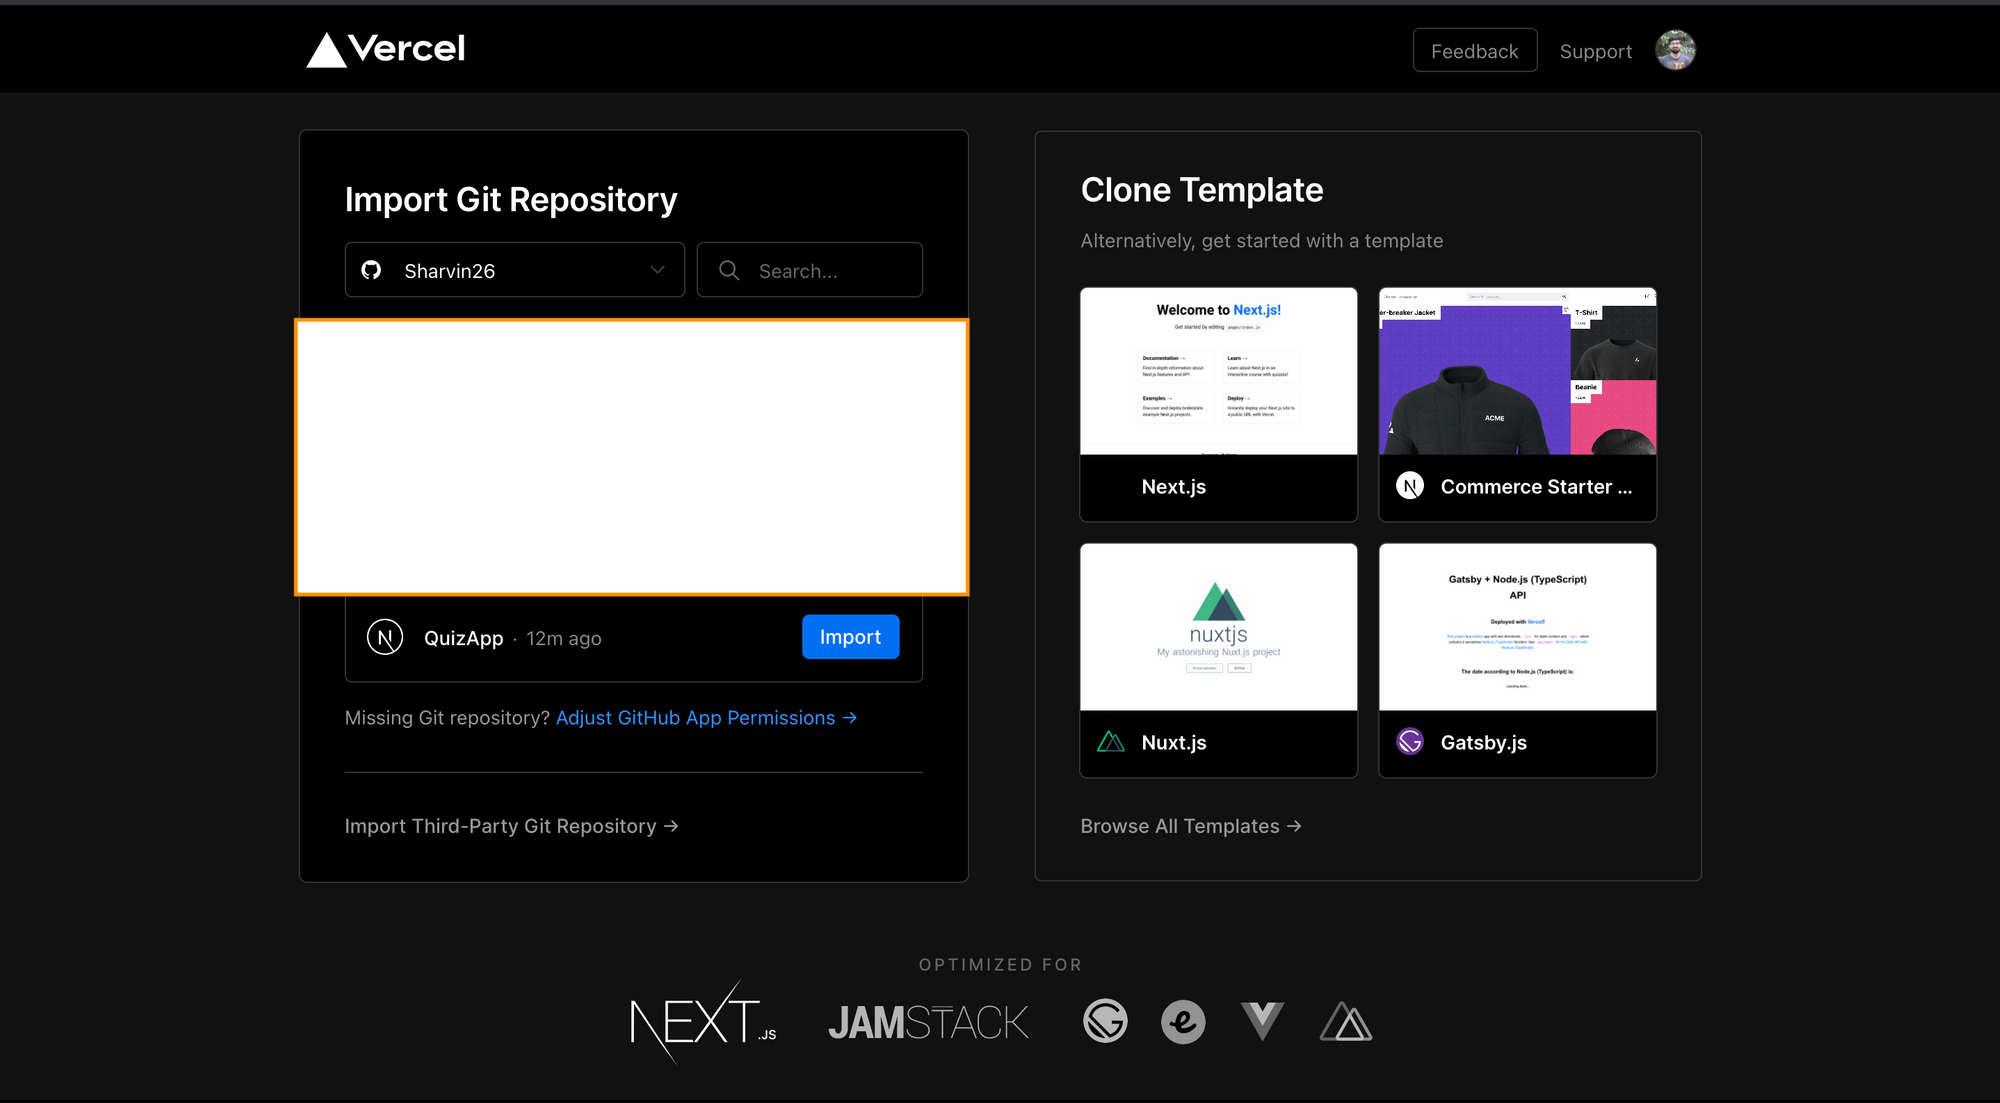
Click on the New Project button. It will ask you to install the Vercel bot and permissions.
Note: You can allow the Vercel bot to read all repositories from your GitHub account or give permission for the currently created repository.
Click the Import button on the GitHub repository created above:
Now you'll need to add environment variables. Add them from .env.local.
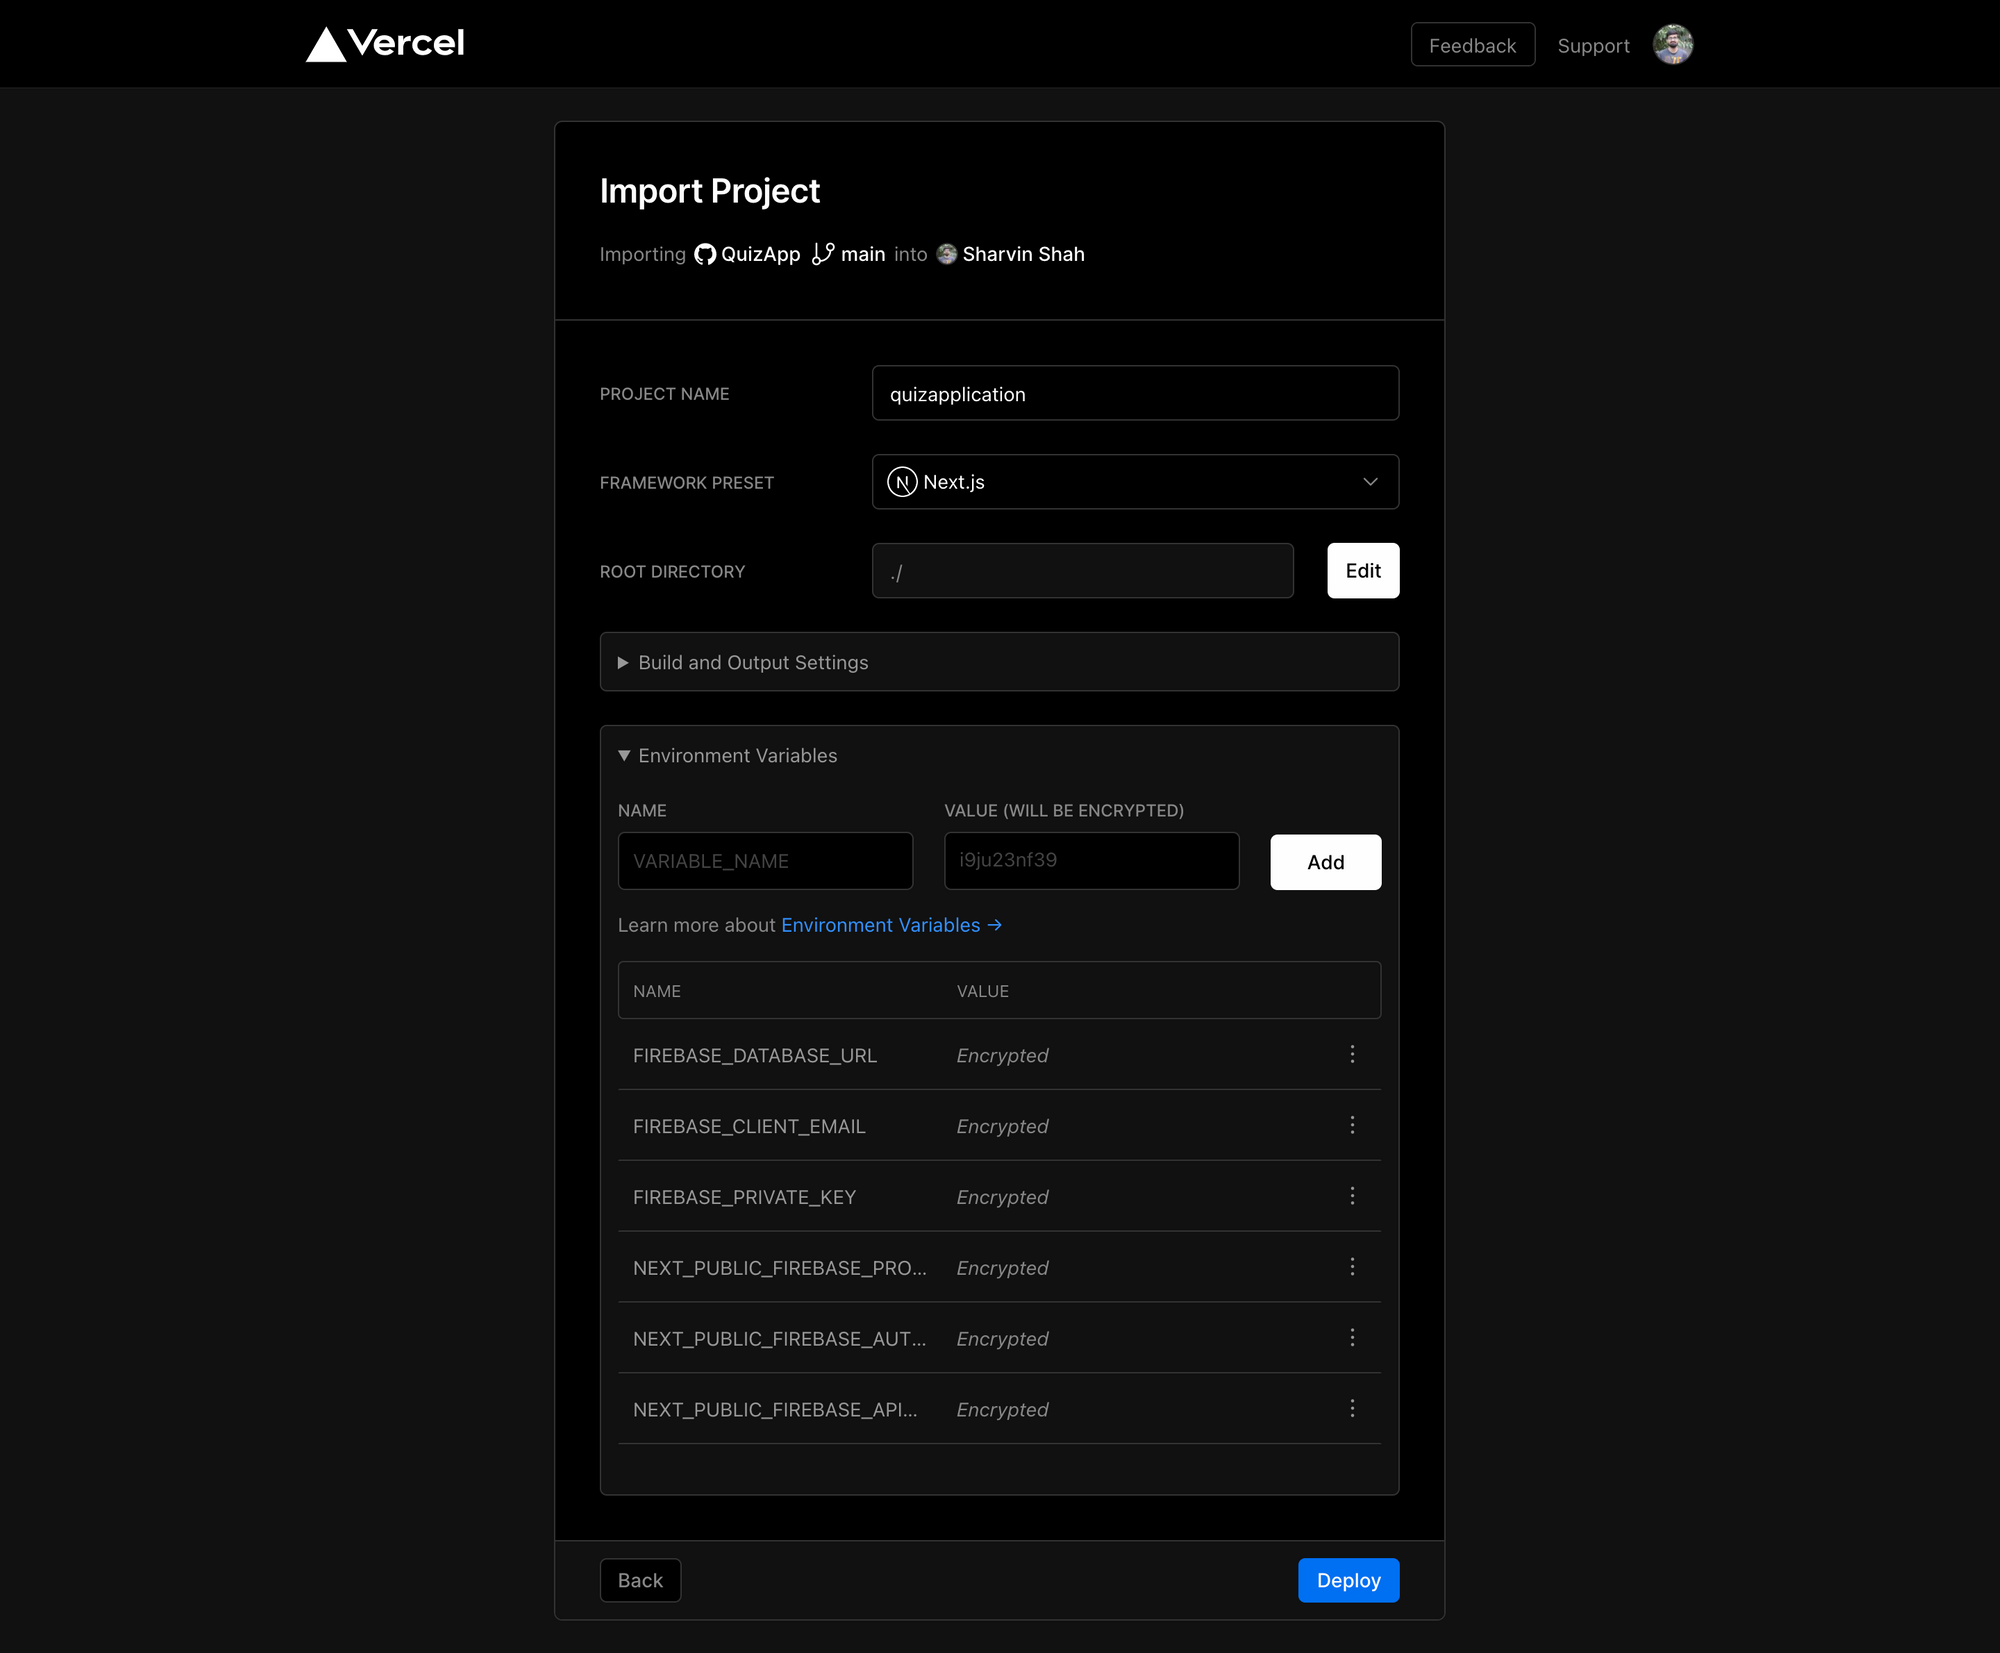
Once they are added click on the Deploy button. After the deployment is successful you'll get the following screen.
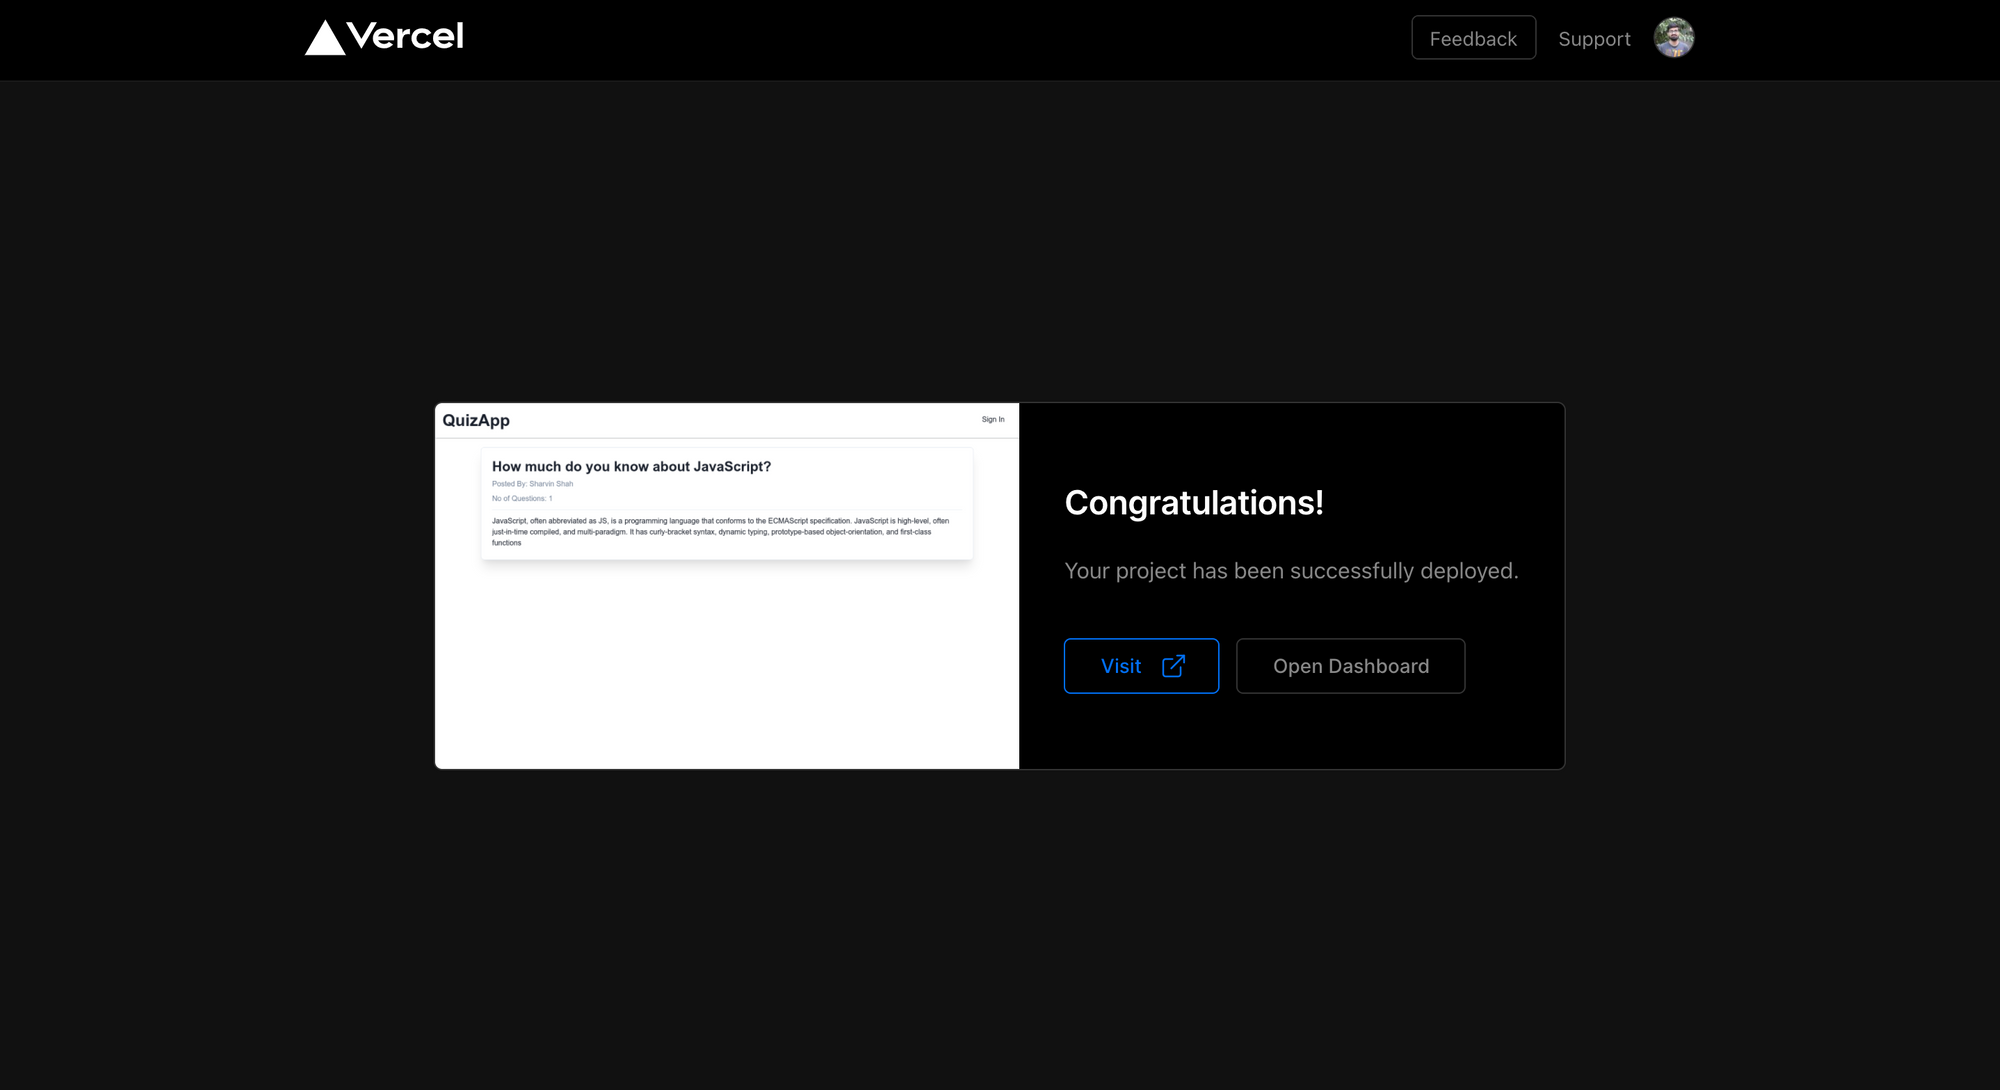
Note: the URL may be in this format -<username-or_something_random>.vercel.app.
Our Sign In won't work now. We have to add our new URL to the allowed URLs in the Firebase console.
Go to the Firebase console > Authentication and click on Sign-in-methods and scroll down. You'll see the Authorized domains table.
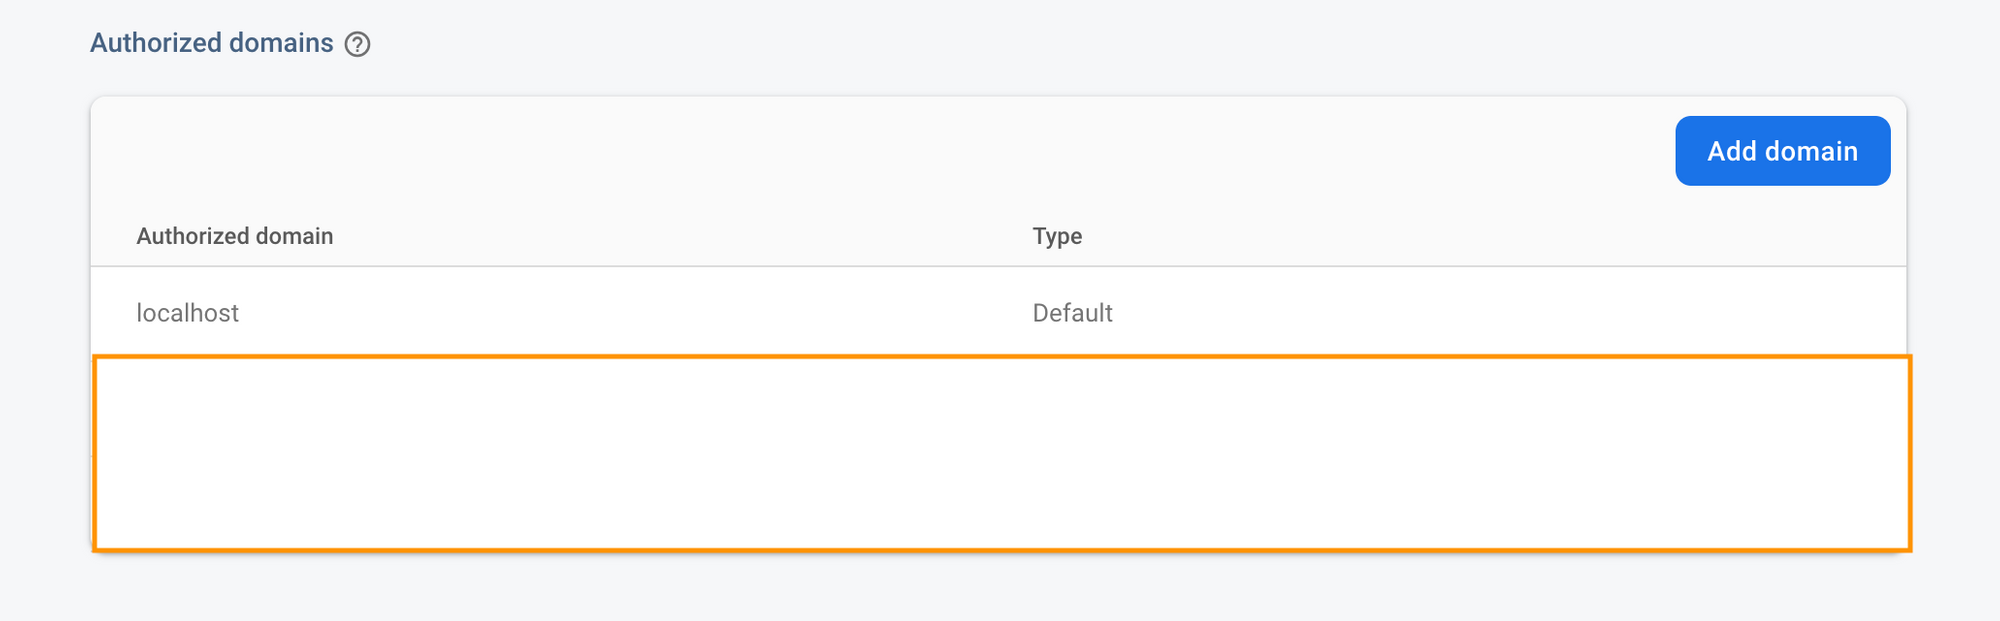
Click on the Add domain button, copy the newly generated URL, and click on add. Now open the deployed quiz application and test it.
Note: If you receive an error while adding a new quiz or answering the quiz, go to Vercel dashboard > Select the project > Select the settings tab > Select Environment Variables and update your FIREBASE_PRIVATE_KEY once again.
With this, we have created our production-ready quiz application. If you have built the app along with the tutorial, then a very big congratulations to you on this achievement.
Next Steps:
If you want to build more features into this app, here are few next steps you can consider:
Dashboard for users. (Show Profile Information, Update, and Delete. Show Quiz Added, Update and Delete. Show Quiz Answer.)
Firestore security rules modification.
Rich text markdown for Quiz questions and options.
Thank you for reading!
Feel free to connect with me on Twitter and Github.
If you want any project to be developed or want to consult with me, you can DM me on my Twitter (@sharvin26).