
By Abel Lifaefi Mbula
If you’re just at the beginning of your journey in PHP development, chances are that you use complete file names in the URL to navigate your application, like server/contact.php. No worries, we all started that way, and it’s how we learn.
Today, I want to help you improve how you navigate files in your application. We’ll be talking about routing, as it’s crucial in any modern application. It'll help you take a step forward in your professional PHP development.
A routing system simply maps an HTTP request to a request handler (function or method). In other words, it defines how we navigate or access different parts of an app without the need to type the file name. You can do this by creating or setting routes (or paths). For example, the route server/contact lets us access the contact.php file.
Prerequisites
To get the most out of this tutorial, you'll need the following:
- A basic understanding of PHP.
- A basic understanding of HTTP and networking.
- An Apache or NGINX server, and a basic understanding of how to configure those.
And with that, let's jump in.
How Routing Works
First thing first, let me recall you what a routing is. Routing allows us to structure our app in a better way and get rid of messy URLs. These are two main features offered by any good routing system:
- Defines which action to run for each incoming request.
- Generates SEO-friendly URLs (e.g.
/views/usersinstead ofviews/user.php?all).
To do a routing system, we need a router, which is no more than the entry file to our app. By default, this entry file is named as index.php. Inside the file, we define the routing system thanks to [switch](https://www.php.net/manual/en/control-structures.switch.php) or [match](https://www.php.net/manual/en/control-structures.match.php) statements.
Last but not least, we must redirect all requests to the router. This is done in the configuration file of the PHP server.
Project Setup
Before moving forward, let’s see what the project will look like:
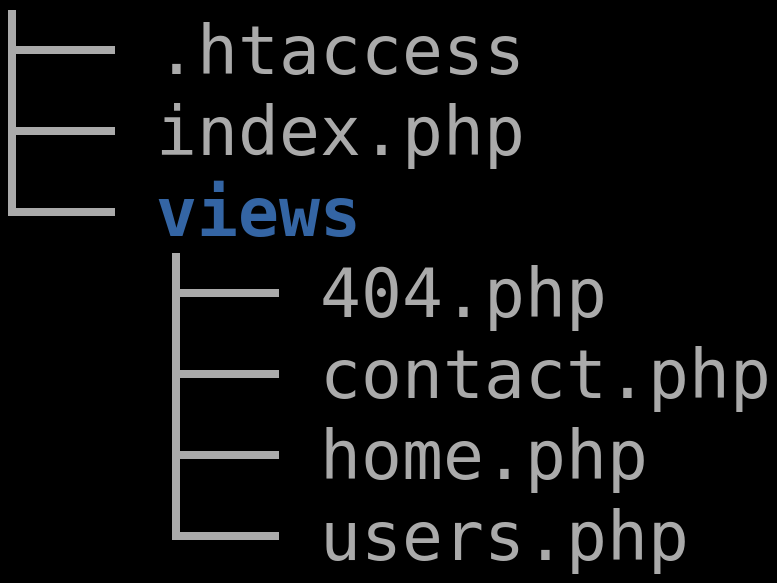 File structure
Use the shell commands below to initiate the project:
mkdir php-routing & cd php-routing
touch index.php .htaccess
.htaccess: A directory-level Apache configuration file. You don’t need it if you use an NGINX server.index.php: This is the router and entry file of the project. All incoming requests will be redirected here.views: This folder holds all the UIs for the project.
How to Redirect All HTTP Requests to the Router
We've said earlier that the redirection is done in the PHP server config file. So you'll need to make some tweaks depending on whether you use an Apache or NGINX server.
Redirect Using Apache
Here, we can easily use the .htaccess file that we have already created in the root of the project. Add the directives below:
RewriteEngine On
RewriteCond %{REQUEST_FILENAME} !-f
RewriteRule ^(.*)$ index.php
- line 1: We activate the Apache server’s runtime rewriting engine.
- line 2: We limit access to physical files.
- line 3: We redirect all the upcoming requests to the
index.php.
Note: If the site or app is note at the root of the server (or if we don’t have a virtual host), here's what the .htaccess should look like:
RewriteEngine On
RewriteBase /folder/
RewriteRule ^index\\.php$ - [L]
RewriteCond %{REQUEST_FILENAME} !-f
RewriteCond %{REQUEST_FILENAME} !-d
RewriteRule . /folder/index.php [L]
In the code above, replace /folder/ with the name of the folder containing your site.
Redirect Using NGINX
The default configuration file is name nginx.conf. This file can be found in etc/nginx, usr/local/nginx/conf, or /usr/local/etc/nginx.
To redirect to index.php use the command below:
location / {
        try_files $uri $uri/ /index.php
}
The location / block specifies that this is a match for all locations unless explicitly specified location /<name>.
The try_files directive tells the server that for any request to the URI that matches the block in the location, try the $uri (or $uri/) first, and if the file is present, serve the file. Otherwise, the fallback option (index.php) is used. And this last behavior is what we want.
Reload the server after the modification.
How to Create the Routing System
We now know how routing works, and we are even sending all requests to the router. Now is the time to write the code for the router in index.php.
First, create a variable to hold the HTTP request string:
$request = $_SERVER['REQUEST_URI'];
This variable will help us to compare with many routes (paths) and call the appropriate view interface.
switch ($request) {
     case '/views/users':
        require __DIR__ . '/views/users.php';

     case '/views/department':
        require __DIR__ . '/views/dep.php';
}
What's happening here? The switch statement is similar to a series of if statements on the same expression (variable). It executes a code only when a case statement is found whose expression evaluates to a value that matches the value of the switch expression. Let me illustrate this so that you can get it well.
Let's consider that our variable holds the value /views/users/. When the piece of the code above will be run, PHP will check if the value /views/users equals to the value of case statement, which in our case is /views/users. So, this condition will evaluate to true, PHP will call the file /views/users.php. If the condition evaluates to false, PHP will check for the next case statement until the end of the switch block.
Note: Every time the case statement evaluates to true PHP will continue to execute the code in the following case statements without necessary evaluating those case statements. In our case, PHP also requires views/dep.php. To avoid this "bad behavior", you must add break statement after each case statement.
Let now put everything together into our index.php file:
<?php

$request = $_SERVER['REQUEST_URI'];
$viewDir = '/views/';

switch ($request) {
    case '':
    case '/':
        require __DIR__ . $viewDir . 'home.php';
        break;

    case '/views/users':
        require __DIR__ . $viewDir . 'users.php';
        break;

    case '/contact':
        require __DIR__ . $viewDir . 'contact.php';
        break;

    default:
        http_response_code(404);
        require __DIR__ . $viewDir . '404.php';
}
As you already know, we start off by storing a user request in the $request variable, then we use it in the switch statement. For the sake of clean code, I have created a variable to hold the view directory name.
You'll also notice two other things:
- Both
''and'/'are used to matchsite.comas well assite.com/for when users are in the root of the app or website. - There's a special
casestatement,default, to match anything that wasn't matched by the other cases, i.e. when the route is unknown.
Let's now add some dummy data in our views.
Add Dummy Data in the Views Files
We have already created all files in the views directory. Let's just move to this directory and add some content in each file.
Just put some content in each file:
<h1>Home</h1>
<p>Welcome in my app.</p>
<h1>Users</h1>
<p>List of our users.</p>
<h1>Conct us</h1>
<p>Getting in touch is easy. Just email us</p>
<h1>404</h1>
<p>You've reached the end of Internet.</p>
As you can see, each file just contains a title and a paragraph. Feel free to add whatever content you like and test the router.
Final thoughts
In this tutorial, you learned how to create a basic routing system from scratch, including:
- How to create a file named
index.phpat the root of the project. This is the router for your app. - How to redirect all incoming requests to the router. You do this in the configuration file of your server.
- How to create the routing system with a
switchstatement in the router.
Happy coding!