
By Jacob Isah
Web security is an important aspect of the web application development process. Especially as more data is stored, managed, and shared.
As a web developer, it's essential to prioritize security measures to protect your company’s users and data from potential threats.
In this article, I will demonstrate web security best practices by building a secure web application using Django, a powerful Python web framework. I'll cover password hashing, secure session management, authentication, authorization, and other key security considerations with accompanying code examples.
Before continuing with this article, keep in mind that this isn't intended for absolute beginners. You should have a good understanding of Python to get the most out of this guide.
If you need to brush up on your basic programming skills in Python and Django before continuing, here are a couple resources to help you out:
- Python for Everybody from Dr. Chuck
- Django for Everybody, also from Dr. Chuck
You will get access to the code at the end of the article.
Set Up Your File Structure
Let's say that we want to store our project on the desktop. The first thing do is to set up our file structure. Let's start by creating a root directory for our project on the desktop (WebSec in this case).
mkdir WebSec
cd WebSec
Create a Virtual Environment and Activate It
On Linux (Ubuntu):
python3 -m venv my_env

Source my_env/bin/activate
And on Windows:
python -m venv my_env

my_env\Scripts\activate.bat
How to Create the Django Project
First, if you don't already have it, you'll need to install Django using the following command:
python -m pip install Django
Then you can use this command to create the project:
django-admin startproject web_sec_project .
And finally, use this command to create the app:
django-admin startapp web_sec_app
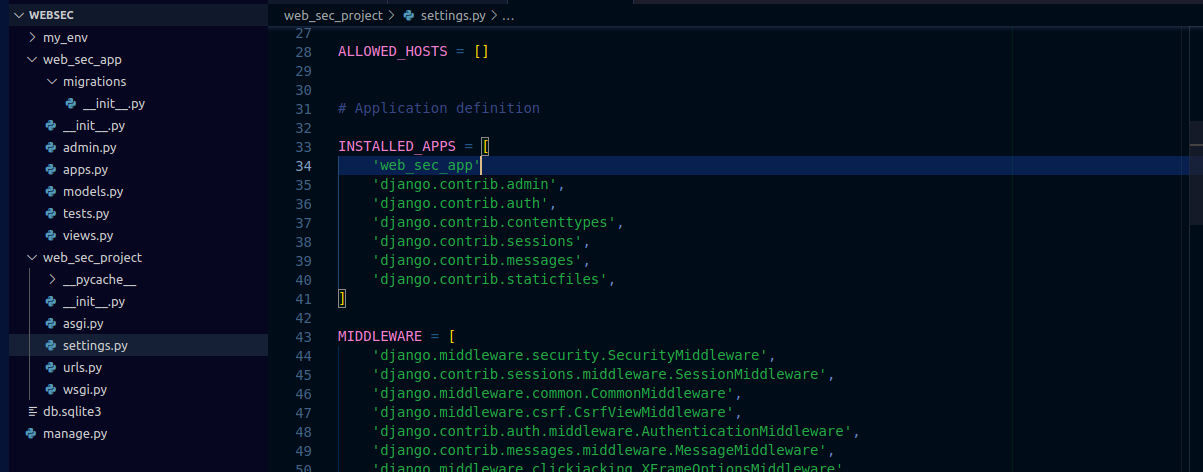
Your file structure should look like this at the end:
WebSec
    my_env/
    web_sec_app/
        __pycache__/
        migrations/
        templates/
        admin.py
        apps.py
        forms.py
        models.py
        tests.py
        urls.py
        views.py
    web_sec_project/
        __pycache__/
        __init__.py
        asgi.py
        settings.py
        urls.py
        wsgi.py
    db.sqlite3
    manage.py
Run Your Server
On your IDE terminal run the following command and test if your project is working. If so, you are good to go.
python manage.py runserver
Ensure that you add your app to your project:
Now let’s start building and implementing web security.
Password Hashing
The first line of defense when implementing web security is ensuring that user passwords are properly protected. And instead of storing passwords in plaintext, it's a good idea to hash them. We'll use cryptographic hashing to safeguard sensitive user information.
Cryptographic hashing, also known as hash functions or hash algorithms, is a fundamental concept in cryptography and computer security. It involves taking an input (or "message") and transforming it into a fixed-size string of characters, which is typically a sequence of numbers and letters. This output is called the "hash value" or "hash code."
Django provides a secure password hashing mechanism by default, using the PBKDF2 algorithm with a SHA-256 hash.
Django uses a robust and secure password hashing mechanism to protect user passwords. This mechanism helps ensure that even if the database is compromised, attackers cannot easily retrieve users' plaintext passwords. Django's password hashing mechanism consists of PBKDF2.
PBKDF2 is a simple cryptographic key derivation function that is resistant to dictionary attacks and rainbow table attacks. It is based on iteratively deriving HMAC many times with some padding. This ensures that even if the database is compromised, the passwords remain unreadable.
To demonstrate this, we are going to create a new user with a hashed password and save the user with their hashed password in the database.
First, we import the User from the User model. Then, we import make_password. Here's the code to do that:
#web_sec_app/views.py

from django.contrib.auth.hashers import make_password
from django.contrib.auth.models import User

# Create User views here.
def UserView(request):
    users = User.objects.all()
    password = 'password'
    hashed_password = make_password(password)
    return render(request, 'create_user.html',
                {'users': users, 'hashed_password': hashed_password})
Secure Session Management
Session management is key to maintaining user state across multiple requests. Django comes with a built-in session management system that stores session data on the server-side. We'll ensure that the session data is encrypted and the session ID is secure to prevent session hijacking attacks.
To achieve secure session management, we will make sure we have a secure session cookie, which will require HTTPS. We are also going to prevent JavaScript access to the session cookie. The session expires when the browser is closed.
SESSION_COOKIE_SECURE = True
This setting tells Django to only send the session cookie over HTTPS connections. When set to True, the session cookie will not be sent over unencrypted HTTP connections. This is important for protecting sensitive session data, such as user authentication tokens, from being intercepted by malicious actors on insecure networks.
SESSION_COOKIE_HTTPONLY = True
Setting SESSION_COOKIE_HTTPONLY to True adds an extra layer of security. When this is enabled, the session cookie cannot be accessed by JavaScript code running on the client's browser. This helps mitigate certain types of cross-site scripting (XSS) attacks, where an attacker tries to steal session data using malicious scripts.
SESSION_EXPIRE_AT_BROWSER_CLOSE = True
When SESSION_EXPIRE_AT_BROWSER_CLOSE is set to True, the session will expire and be deleted once the user closes their web browser. This provides a mechanism for creating short-lived sessions that automatically end when the user finishes their browsing session. It's useful for scenarios where you want to ensure that users are logged out when they close their browser, enhancing security for shared or public computers.
Your settings.py file should contain the following:
SESSION_COOKIE_SECURE = True
SESSION_COOKIE_HTTPONLY = True
SESSION_EXPIRE_AT_BROWSER_CLOSE = True
Authentication and Authorization
Proper authentication and authorization procedures are important for limiting access to certain parts of the web application.
In this section, I'll demonstrate how to implement user login and authentication using Django's authentication framework. I'll also define access control based on user roles to ensure that only authorized users can access certain views and features.
@user_passes_test(lambda u: u.is_superuser)
def admin(request):
    return render(request, 'admin.html', {'username': request.user.username})
The code above is used to restrict access to the admin view based on whether the user is a superuser (admin) or not.
If the user is a superuser, they are allowed to access the view, and the template admin.html is rendered with their username displayed. If the user is not a superuser, they will be redirected to a default unauthorized view, unless additional handling is implemented.
This ensures that only authorized users with admin privileges can access the 'admin.html' page.
Cross-Site Scripting (XSS) Protection
Cross-Site Scripting (XSS) is a common vulnerability that allows hackers to inject malicious scripts into web pages viewed by other users.
In this section, we'll explore how to implement Content Security Policy (CSP) headers to prevent unauthorized script execution and protect our application against XSS attacks.
CSP headers work by creating a set of rules that define which content sources are allowed and which are blocked. This significantly reduces the attack surface for XSS vulnerabilities, making it much harder for attackers to execute unauthorized scripts on your application.
It's important to carefully configure CSP policies to strike a balance between security and functionality, as overly restrictive policies could potentially break legitimate functionality in your application.
CSP_DEFAULT_SRC = ("'self'",)
Cross-Site Request Forgery (CSRF) Protection
CSRF attacks occur when malicious websites trick users into taking unauthorized actions on other sites where they are authenticated. Django offers built-in protection against CSRF attacks using CSRF tokens.
It is one of the most common methods used for preventing CSRF attacks using CSRF tokens.
When a user loads a web page that requires user interaction, the server generates a unique token and includes it in the form or the request data. This token is typically associated with the user's session. When the user submits the form or initiates an action, the server checks if the submitted token matches the one associated with the user's session. If they don't match, the request is rejected, as it might be an attempt to perform a CSRF attack.
I'll show you how to include these tokens in forms to prevent unauthorized requests.
<h4>Create Account</h4>
<form action="{% url 'create_user' %}" method="post">
   {% csrf_token %}
   <input
      type="text"
      id="userName"
      name="username"
      class="form-control input-sm chat-input"
      placeholder="username"
    />
</form>
SQL Injection Prevention
SQL injection is a serious vulnerability that occurs when attackers manipulate user inputs to execute malicious SQL queries on the database. I'll demonstrate how Django's ORM (Object-Relational Mapping) automatically sanitizes user inputs and protects against SQL injection attacks.
It is important to note that even though Django's ORM offers robust defense against the majority of SQL injection attacks, developers must still adhere to best security practices, such as input validation and authorization checks, to guarantee the overall security of their web applications.
It's also a good idea to update Django and its dependencies frequently to take advantage of any security updates or other improvements that may be released in the future.
def search(request):
    query = request.GET.get('q')
    if query is not None:
        results = Search.objects.filter(Q(name__icontains=query) | Q(description__icontains=query))
    else:
        results = []
    return render(request, 'search.html', {'results': results})
The code above defines a Django view function that handles search functionality by extracting a query from the request's GET parameters, using that query to perform a search in the Search model using the Django ORM's filter method, and then rendering a template with the search results.
The search is performed based on the 'name' and 'description' fields of the model, and the results are case-insensitive partial matches.
By relying on Django's ORM and its built-in features, you're leveraging a higher level of abstraction that inherently helps prevent common SQL injection vulnerabilities.
This code's structure and usage patterns align with best practices for writing secure queries in Django, making it less susceptible to SQL injection attacks. But it's still important to ensure that the rest of your codebase follows security best practices and that you keep your Django version and dependencies up to date to benefit from the latest security patches.
File Upload Security
Handling file uploads requires special attention to prevent attackers from uploading malicious files. We'll see how to validate and restrict file uploads to ensure the security of our web application.
def upload_file(request):
    if request.method == 'POST':
        uploaded_file = request.FILES.get('file')
        if uploaded_file:
            if uploaded_file.content_type in ALLOWED_FILE_EXTENSIONS:
                try:
                    with open('uploads/' + uploaded_file.name, 'wb+') as destination:
                        for chunk in uploaded_file.chunks():
                            destination.write(chunk)
                    return render(request, 'success.html')
                except ValidationError as e:
                    error_message = str(e)
                    return render(request, 'fileUpload.html', {'error_message': error_message})
            else:
                error_message = "Invalid file type."
                return render(request, 'fileUpload.html', {'error_message': error_message})
        else:
            error_message = "No file selected."
            return render(request, 'fileUpload.html', {'error_message': error_message})
    else:
        return render(request, 'fileUpload.html')
The code snippet above defines a function called upload_file This function takes a request object as its argument and handles file uploads.
The function first checks if the request method is POST. If it is, then the function gets the file uploaded by the user using the request.FILES.get('file') method.
If the file is not empty, then the function checks if the file extension is in the ALLOWED_FILE_EXTENSIONS list. This list contains the file types that are allowed to be uploaded. If the file extension is not in the list, then the function displays an error message.
If the file extension is in the list, then the function tries to save the file to a directory called uploads. function uses the with open() statement to open the file in binary write mode. The file is then saved in chunks using the for chunk in file.chunks() loop.
If the file is saved successfully, then the function redirects the user to a success page. Otherwise, an error message is displayed.
The ALLOWED_FILE_EXTENSIONS list is a security measure that prevents users from uploading malicious files, such as executables or scripts. The maximum file size limit is another security measure that prevents users from uploading large files that could cause a denial-of-service attack. Storing the uploaded file in a separate directory isolates the file from the rest of the application and makes it more difficult for attackers to access it.
Wrapping-up
Building a secure web application is a continuous process that requires vigilance and implementing best practices.
In this article, I demonstrated various web security measures with code examples while building a web application using Django.
By implementing password hashing, secure session management, authentication, authorization, and protection against common web vulnerabilities like XSS and CSRF, I've taken important steps towards creating a robust and secure web application.
But web security is a vast and ever-evolving field, and it's crucial to stay updated with the latest security trends and practices to ensure your web application remains safe from potential threats. Always perform thorough security testing and regularly update your application and libraries to maintain a strong defense against potential attacks.
With the right security measures in place, you can confidently provide your users with a safe and secure web experience.
You can have access to the code here. Thanks for reading!