By Siben Nayak
In my previous article, I talked about how AWS Chalice helps you quickly build a Python-based serverless application and deploy it on AWS within a few minutes.
While it was a quick and fun prototype, Python may not be the language of choice for many when it comes to running large scale production applications.
Many organisations use Java as their primary development language, and a lot of developers are also moving towards newer languages like Go.
In this article, I will walk you through the steps required to build and deploy the same serverless application that gets the latest news from Google News. But this time, we will use the AWS Serverless Application Model (SAM) and Java for our development.
Like Chalice, the AWS SAM CLI offers a rich set of tools that enable developers to build serverless applications quickly.
Prerequisites
This tutorial requires an AWS account. If you don’t have one already, go ahead and create one. Our application is going to use only the free-tier resources, so cost shouldn’t be an issue.
You also need to configure security and create users and roles for your access.
How to Configure AWS Credentials
SAM uses the AWS Command Line Interface (CLI) behind the scenes to deploy the project. If you haven’t used AWS’s CLI before to work with AWS resources, you can install it by following the guidelines here.
Once installed, you need to configure your AWS CLI to use the credentials from your AWS account.

How to Install SAM
Next, you need to install SAM. We will be using Java in this tutorial, but you can use any language runtime supported by AWS Lambda.
Verify Java Installation
$ java --version

openjdk 11.0.8 2020-07-14
OpenJDK Runtime Environment AdoptOpenJDK (build 11.0.8+10)
OpenJDK 64-Bit Server VM AdoptOpenJDK (build 11.0.8+10, mixed mode)
Install SAM CLI
Depending on your OS, the installation instructions for the SAM CLI will vary. This article covers the instructions for installing it on MacOS.
The recommended approach for installing the SAM CLI on macOS is to use the Homebrew package manager.
Verify that you have Homebrew installed, like this:
$ brew --version

Homebrew/homebrew-core (git revision fe68a; last commit 2020-10-15)
Homebrew/homebrew-cask (git revision 4a2c25; last commit 2020-10-15)
If not, you can install Homebrew using the following command:
$ /bin/bash -c "$(curl -fsSL https://raw.githubusercontent.com/Homebrew/install/master/install.sh)"
Next, install SAM using the following command:
brew tap aws/tap
brew install aws-sam-cli
Verify SAM Installation
$ sam --version

SAM CLI, version 1.6.2
How to Create a Project
Next, run the sam-init command to create a new project.
sam init -r java11 -d maven --app-template hello-world -n daily-news-java
By default, SAM creates a Python project. Since we want to create a Java project, we will need to pass some additional parameters.
Parameters:
-r java11: use the Java 11 runtime-d maven: use maven as the dependency manager--app-template hello-world: use the HelloWorld quick start template-n daily-news-java: the name of our project
This will create a daily-news-java folder in your current directory. You can see that SAM has created several files in this folder.

Let’s take a look at the App.java file.
The sam-init command created a simple Lambda function that returns the JSON body {"message": "hello world"} and the machine’s IP address when called. We can now change this template and add more code to read news from Google.
Now let’s take a look at the template.yml file.
This contains the CloudFormation template that creates our Amazon API Gateway and AWS Lambda resources.
The Lambda configuration specifies that we have a HelloWorldFunction lambda that runs on Java 11 and 512 MB memory.
The API gateway configuration defines a single GET method with a /hello path that we will use to invoke the API.
We will be using Java’s internal HTTP and XML parsing libraries, so we don’t need to add any dependencies to our pom.xml file.
Note that the default pom.xml provided as part of the boilerplate code comes with compiler source set to 1.8. We will need to update that to 11 so that we can use the new HTTP library that is part of Java 11.
Since Java is object-oriented, let’s also create a NewsItem class that contains the title and publication date of a news item.
Note that we have overridden the toString method. This creates a JSON representation of the object and avoids using any JSON parsing libraries.
Next, you need to add a method to fetch the RSS feed from Google, parse it to extract the news title and publication date, and create a list of news items. To do this, add the following code to your App.java:
Now let’s update the handleRequest method in App.java to invoke this method and return the list of news items as result.
Don’t forget to update the unit tests as well. They were written to test the presence of “hello world” in the response and will start failing after our change.
How to Start the Build
From the daily-news-java folder, run the sam build command.

This compiles your source code and builds any dependencies that you have in the application. It then moves all the files into the .aws-sam/build folder so that they are ready to be packaged and deployed. It also updates the template.yml file accordingly.
How to Test Your Application Locally
Now here’s the beautiful part about SAM. You can deploy and test your application locally! This is really helpful during the development stage when you want to test your code without having to deploy it to AWS.
The SAM CLI provides the sam local command to run your application locally. This internally uses Docker to simulate the execution environment of Lambda. If you don’t have Docker installed, you can get it from here.
We can locally test our application in two ways:
- Hosting the API locally
- Directly invoking the Lambda function
Let’s take a look at both of these options.
Local Hosting
Use the following command to start the API locally:
sam local start-api
This internally creates a local server and exposes a local endpoint that replicates your REST API.

Once the Docker container is loaded, you can access the API on localhost, like this:
curl http://127.0.0.1:3000/hello
Direct Invocation
Use the following command to invoke the Lambda function:
sam local invoke "HelloWorldFunction" -e events/event.json
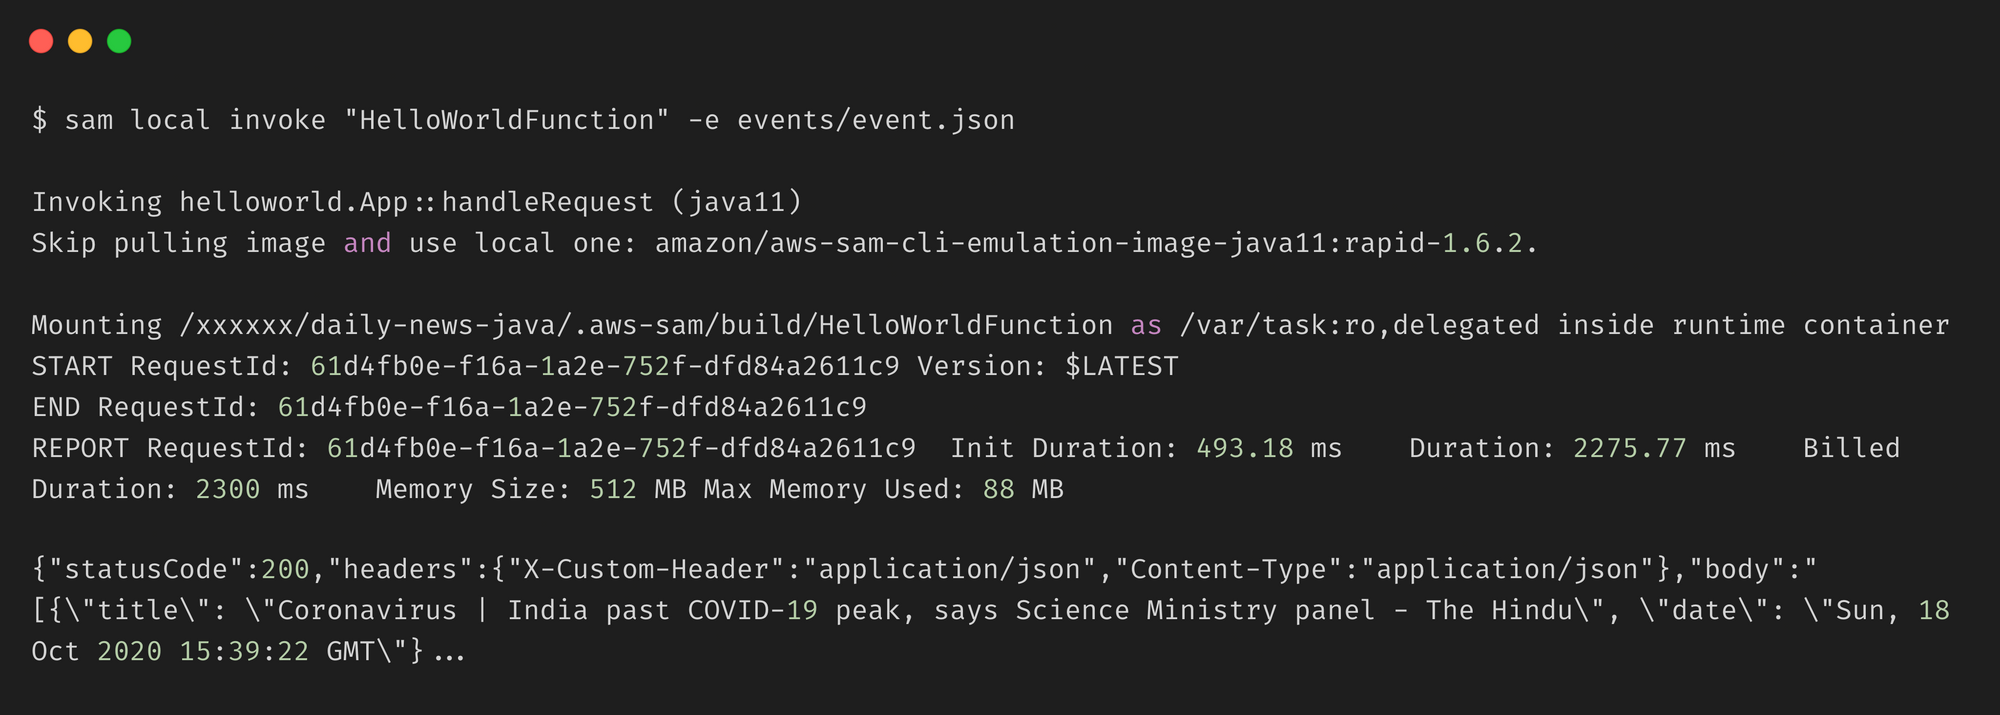
This directly invokes the Lambda function (just like we would call the main method) and passes the event.json file as payload.
How to Deploy the Project
Let’s deploy the application. From the daily-news-java folder, run the sam deploy --guided command. Follow the prompts and provide the required inputs (or just press Enter to accept the defaults).
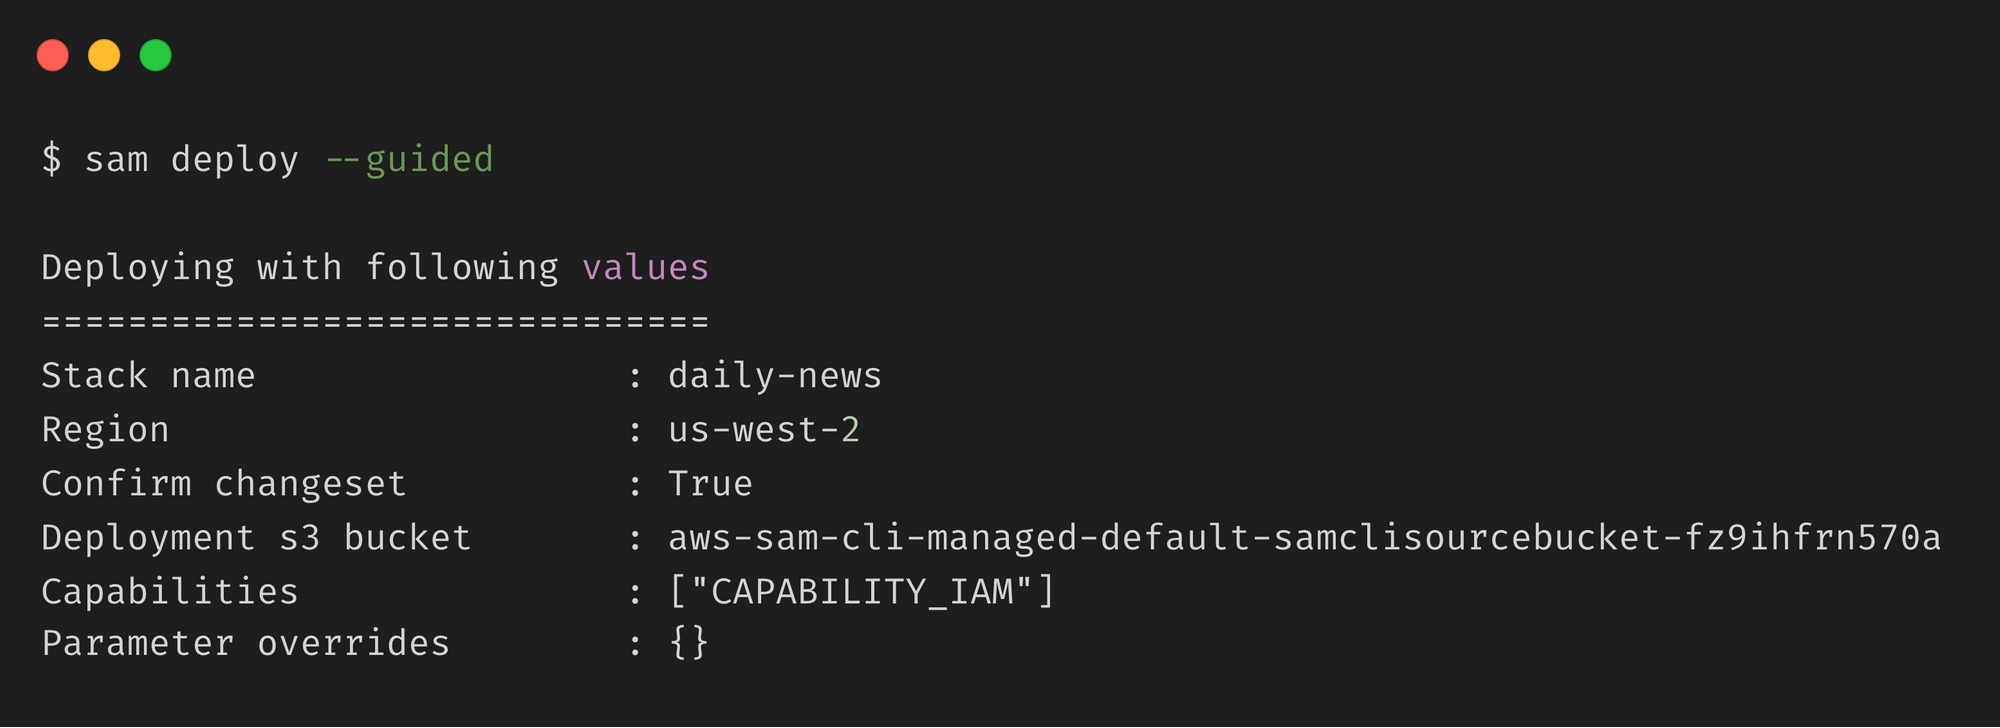
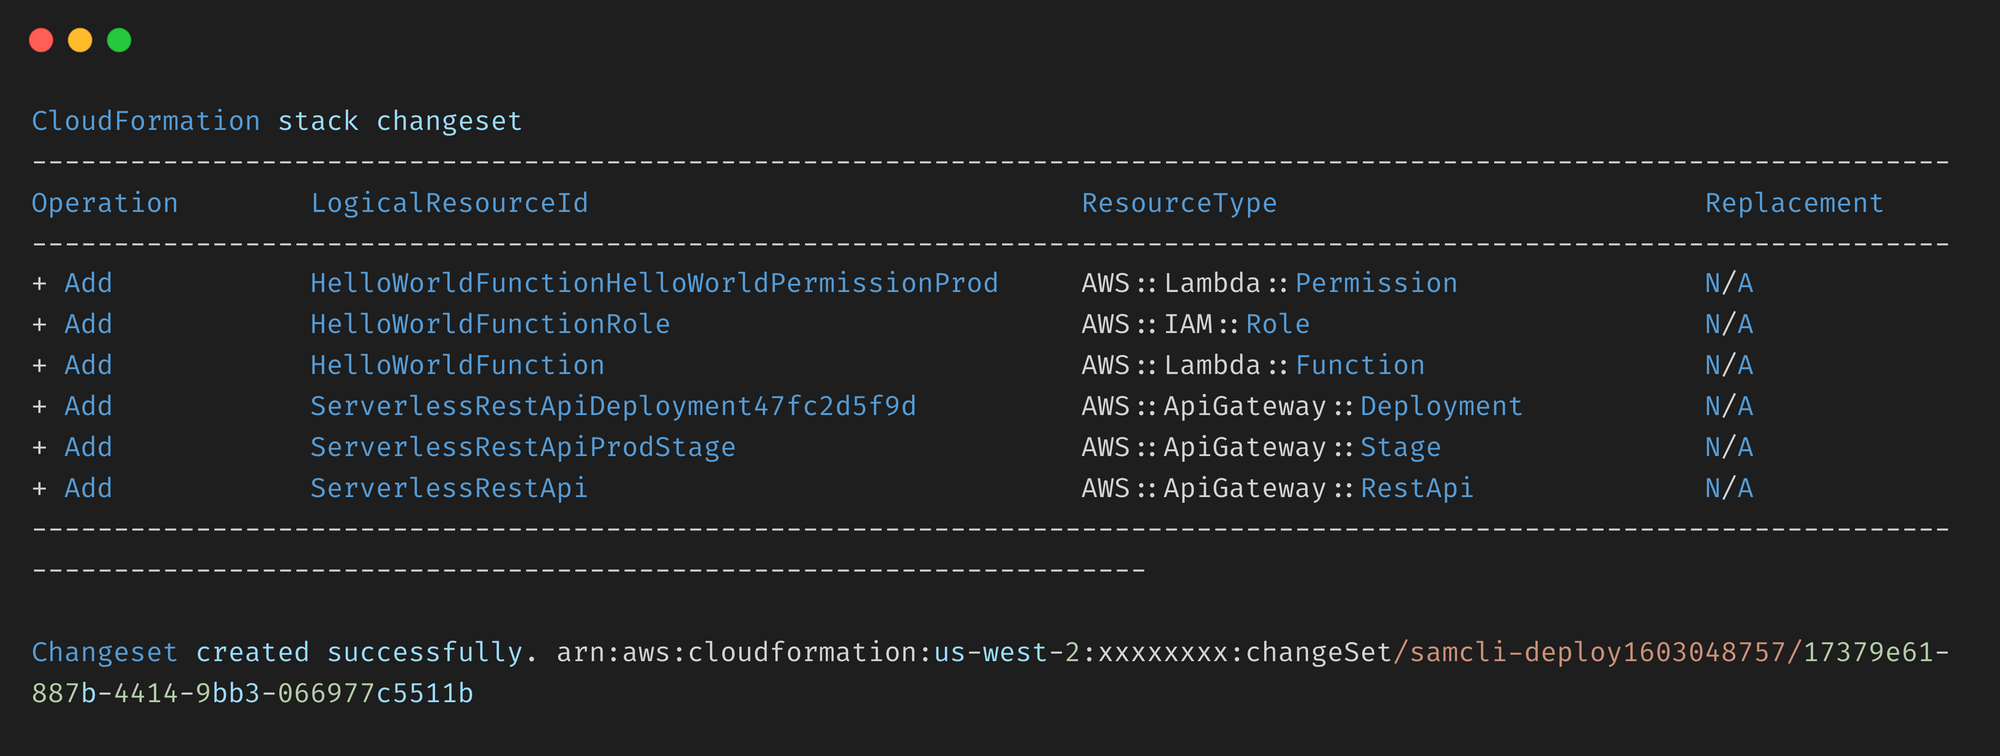
This deploys our application on AWS using Amazon API Gateway and AWS Lambda. It takes the deployment artifacts that we built with the sam build command, packages and uploads them to an Amazon S3 bucket created by the AWS SAM CLI, and deploys the application using AWS CloudFormation.
 daily-news API in API Gateway
 daily-news Lambda Function
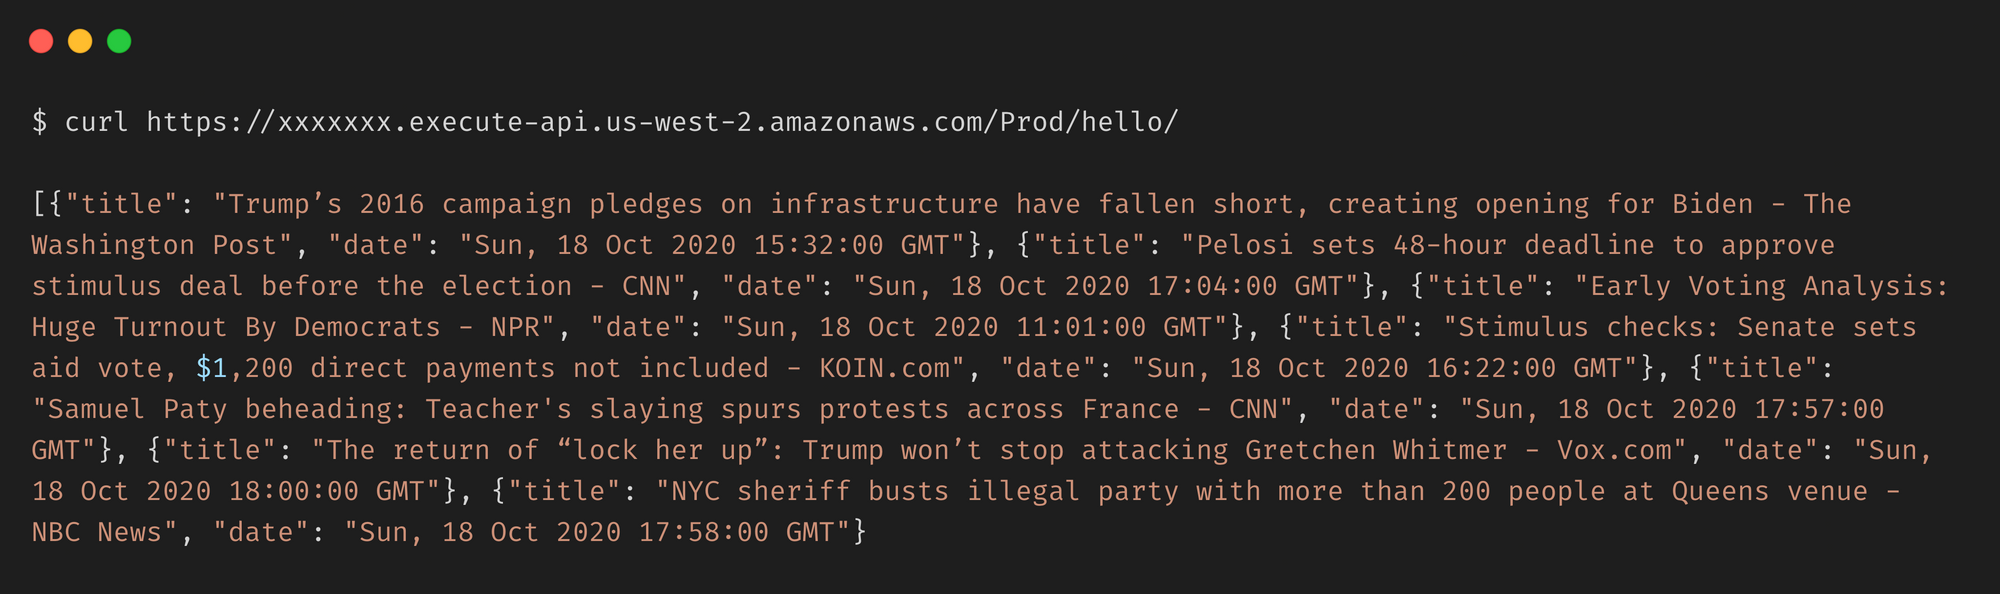
We can now try accessing the API using the endpoint URL provided above.
How to Clean Up Resources
We can use the aws cloudformation delete-stack command to delete the AWS CloudFormation stack along with all the resources it created when we ran the sam deploy command.

Conclusion
Congratulations! You just deployed a serverless application on AWS using AWS SAM. It did involve a bit more work than earlier, but it wasn’t too hard either.
You can now go ahead and make any modifications to your App.java file and rerun sam deploy to redeploy your changes.
The full source code for this tutorial can be found here.
Thank you for staying with me so far. Hope you liked the article. You can connect with me on LinkedIn where I regularly discuss technology and life. Also take a look at some of my other articles on Medium.
Happy reading ?