By Fakorede Damilola
In this article I am going to show you how to build a snake game with JavaScript.
A snake game is a simple game where a snake moves around a box trying to eat an apple. Once it successfully eats the apple, the length of the snake increases and the movement becomes faster.
Then the game is over when the snake runs into itself or any of the four walls of the box.
Alright, let's start with the HTML and CSS (the skeleton for our game).
HTML
<h1>Nokia 3310 snake</h1>
<div class="scoreDisplay"></div>
<div class="grid"></div>
<div class="button">
  <button class="top">top</button>
  <button class="bottom">bottom</button>
  <button class="left">left</button>
  <button class="right">right</button>
</div>
<div class="popup">
  <button class="playAgain">play Again</button>
</div>
The HTML above is pretty basic.
- We have a div of class
scoreDisplaythat will display our scores. - There's a div of class
gridthat will house the game (this is going to be a 10 by 10 grid) - The class
buttonbasically contains a button for users playing the game on a phone (we will automate it with the keyboard for desktop user). - And the
popupclass will hold our replay button.
Now let's add some styling with CSS.
CSS
body {
  background: rgb(212, 211, 211);
}

.grid {
  width: 200px;
  height: 200px;
  border: 1px solid red;
  margin: 0 auto;
  display: flex;
  flex-wrap: wrap;
}

.grid div {
  width: 20px;
  height: 20px;
  /*border:1px black solid;
box-sizing:border-box*/
}

.snake {
  background: blue;
}

.apple {
  background: yellow;
  border-radius: 20px;
}

.popup {
  background: rgb(32, 31, 31);
  width: 100px;
  height: 100px;
  position: fixed;
  top: 100px;
  left: 100px;
  display: flex;
  justify-content: center;
  align-items: center;
}
In the CSS, the grid which is the gameboard has a set dimension and a display of flex. This allows the contents (div) of this grid to line up in a horizontal manner as if they were inline elements instead of the normal block display which they possess.
The flex wrap property simply moves the divs to the next line, preventing them from going past the set dimension of their parent element (grid).
We will be dynamically creating the game board contents from JS but we can give a width and height here (with the .grid div). I included the comments here to help you actually see the divs, so as time goes on we will uncomment the code.
The snake and Apple classes are to show us where the snake and bonus is on the game, while the popup class is a fixed div that houses the replay div.
At this point, you should have something like this:
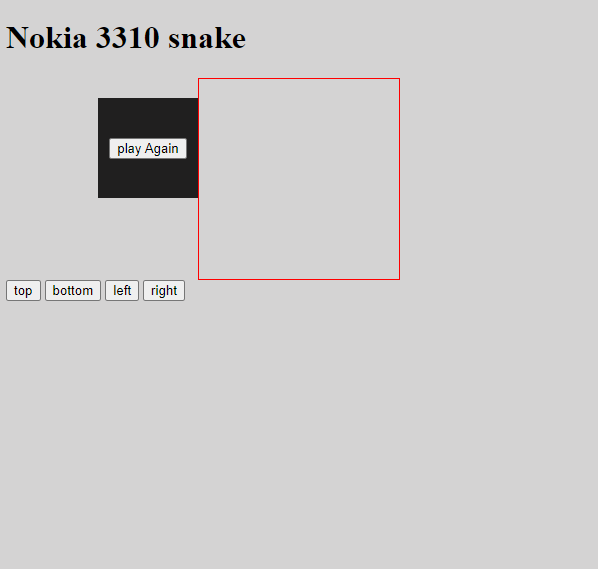 Structure with HTML and CSS
Now we're ready for the JavaScript.
JavaScript
The first thing we need to do is define our variables:
let grid = document.querySelector(".grid");
let popup = document.querySelector(".popup");
let playAgain = document.querySelector(".playAgain");
let scoreDisplay = document.querySelector(".scoreDisplay");
let left = document.querySelector(".left");
let bottom = document.querySelector(".bottom");
let right = document.querySelector(".right");
let up = document.querySelector(".top");
let width = 10;
let currentIndex = 0;
let appleIndex = 0;
let currentSnake = [2, 1, 0];
let direction = 1;
let score = 0;
let speed = 0.8;
let intervalTime = 0;
let interval = 0;
The variable width is exactly what it is (the width of the grid, that is 10). Other variables will make more sense as we go on – but believe it or not our snake is actually an array called currentSnake.
Now let's start with the functions:
document.addEventListener("DOMContentLoaded", function () {
  document.addEventListener("keyup", control);
  createBoard();
  startGame();
  playAgain.addEventListener("click", replay);
});
There is an eventListener on the document object called DomContentLoaded and this event is fired off immediately once the HTML content is loaded on our screen.
Once this happens, we set an eventListener on the document to watch for clicks on the keyboard (more on this later). After that, we want to create the gameBoard, start the game, and watch out for clicks on our replay button.
The createBoard function
function createBoard() {
  popup.style.display = "none";
  for (let i = 0; i < 100; i++) {
    let div = document.createElement("div");
    grid.appendChild(div);
  }
}
Like I said earlier, this is a 10 by 10 grid, meaning we are going to need 100 divs. So from above, we close the div popup and we loop to 100 every time we create a new div and append it to the grid (gameboard).
This will immediately add some of the styling we created from above (the .grid div). You can uncomment the CSS styles and you will see the divs created (uncomment them back).
The startGame function
function startGame() {
  let squares = document.querySelectorAll(".grid div");
  randomApple(squares);
  //random apple
  direction = 1;
  scoreDisplay.innerHTML = score;
  intervalTime = 1000;
  currentSnake = [2, 1, 0];
  currentIndex = 0;
  currentSnake.forEach((index) => squares[index].classList.add("snake"));
  interval = setInterval(moveOutcome, intervalTime);
}
The startGame function first gets all the divs (since we are creating the divs at runtime, we can not get them at the top of the code).
Next we select a spot for our apple. We will do that below in the randomApple function. The direction refers to where the snake is headed – 1 for right, -1 for left, and so on.
intervalTime sets the time it takes for the snake to move around, while currentSnake defines where exactly on the grid the snake will be (note that the snake is basically a couple of divs given a particular type of color).
To display our snake on the screen, we will loop over currentSnake with forEach. With each value we get, we will use it with squares. Remember that we accessed the grid divs with querySelectorAll, and we can then access them like an array, that is using numbers. In our case, these are the values of currentSnake.
After this, we simply append a setInterval call (with function move Outcome and a time of intervalTime, which we set above) to the variable interval. This is so that we can easily call clearInterval on that variable.
The moveOutcome runs every 1000ms (1s) and basically defines what happens when you move the snake.
The moveOutcome function
function moveOutcome() {
  let squares = document.querySelectorAll(".grid div");
  if (checkForHits(squares)) {
    alert("you hit something");
    popup.style.display = "flex";
    return clearInterval(interval);
  } else {
    moveSnake(squares);
  }
}
So like the startGame function above, we first get all the grid divs, and then we check if the checkForHits function returns true.
If it does, this means we have hit something and then it displays the replay button and it clears the interval. If it returns false, this means we did not hit anything and we move the snake with the moveSnake function.
So basically, every 1sec the game either comes to an end if checkForHits is true or we move the snake a step forward if checkForHits is false. I will talk about the moveSnake function first.
The moveSnake function
function moveSnake(squares) {
  let tail = currentSnake.pop();
  squares[tail].classList.remove("snake");
  currentSnake.unshift(currentSnake[0] + direction);
  // movement ends here
  eatApple(squares, tail);
  squares[currentSnake[0]].classList.add("snake");
}
The moveSnake function receives an argument called squares so that we don't have to get the .grid div again in this function.
The first thing we need to do is remove the last element of the currentSnake array via pop (this is the tail and the first element is always the head). Basically the snake moves a step forward leaving the previous position it was in. After this we simply add a new value to the beginning of the array with unShift.
Let's assume that our snake just started moving and is facing to the right (that is, direction = 1). That direction will be added to the currentSnake's head and the sum will be pushed as the new snakeHead.
For example, if the snake was in position [2,1,0], we remove the last element leaving it at position [2,1]. Then we take the head which is 2 and add the direction which is 1 and make this value the new value [3,2,1] which moves our snake a step forward to the right after one second.
If we want to move the snake downwards, the direction will be set to the width (which is 10) and added to the first element (that is 12 and pushed) [12,2,1].
After that we simply check if the snake has eaten an apple and display the new snakehead on the DOM.
The checkForHits function
function checkForHits(squares) {
  if (
    (currentSnake[0] + width >= width * width && direction === width) ||
    (currentSnake[0] % width === width - 1 && direction === 1) ||
    (currentSnake[0] % width === 0 && direction === -1) ||
    (currentSnake[0] - width <= 0 && direction === -width) ||
    squares[currentSnake[0] + direction].classList.contains("snake")
  ) {
    return true;
  } else {
    return false;
  }
}
The checkForHits function has an if statement. Depending on the condition defined, it could either return true (meaning we hit something) or false.
The first condition is if currentSnake [0] (the head of the snake) + width (10) is equal to the total area of the width (that is, width*width = 100) and the direction is equal to the width.
So basically let's assume that the snake's head is at position 97 which is the last layer of our grid. If you were to add 10 to 97 (= 107), that is greater than the whole grid which is 100. If the direction of the snake is still headed downwards, then the snake has hit the bottom border.
If the snake was at 97 , 97+10 =107, but the player was able to change the direction to, say, 1 (like, they pressed the left key), then it would not hit anything.
Or (||) if the remainder when the head of the snake divided by the width = width-1 (for example, 9) and the direction is 1. Every last div on the right hand side has a value of 9, 19, 29 and so on. So basically it will always remain 9 when you divide by 10.
If the head of our snake is at position 39 and the direction is still 1 (that is, the snake is still moving to the wall), then it has hit something (the right wall).
Every other condition is pretty much the exact opposite of the two above. The final condition allows that if the snake head is headed to a place that already contains a class snake, that simply means the snake is biting itself.
So...if any of the conditions above are true, the snake has hit something and true will be returned (else false). And if that's the case, the game is over. But if it is false, move the snake a step forward with moveSnake.
The eatApple function
function eatApple(squares, tail) {
  if (squares[currentSnake[0]].classList.contains("apple")) {
    squares[currentSnake[0]].classList.remove("apple");
    squares[tail].classList.add("snake");
    currentSnake.push(tail);
    randomApple(squares);
    score++;
    scoreDisplay.textContent = score;
    clearInterval(interval);
    intervalTime = intervalTime * speed;
    interval = setInterval(moveOutcome, intervalTime);
  }
}
The eatApple function is called from the moveSnake function every time the snake moves a step.
It receives two argument squares, .grid div and tail (basically the value that was popped up from the snake in moveOutcome). It then checks if the next position our snake moves to contains an apple.
If it does, it simply adds that tail we popped up back to the array. This is because every time our snake eats an apple we want to increase the length of the snake by one value – and what better way than to add the tail that was popped off when it moved?
Then we simply select a new position for our apple with randomApple (see below). After that we add a value of one to our score and display it to the user, clear the timeInterval (so that we can increase the speed of the snake, that is the time each movement happens) and then we simply set the interval back.
The randomApple function
function randomApple(squares) {
  do {
    appleIndex = Math.floor(Math.random() * squares.length);
  } while (squares[appleIndex].classList.contains("snake"));
  squares[appleIndex].classList.add("apple");
}
randomApple simply picks a spot to place our apple by using a do while loop. First it picks a random position with Math.random() in the do loop and checks if the spot it picked already contains a snake class.
This means that the condition in the do statement will keep on running until it finds a spot that does not contain a snake (keep doing this while this is true). Once it finds a spot it simply gives that spot a class of apple.
Set up controls
Now we need to set up our controls. We will start with keyboard users.
function control(e) {
  if (e.keycode === 39) {
    direction = 1; // right
  } else if (e.keycode === 38) {
    direction = -width; //if we press the up arrow, the snake will go ten divs up
  } else if (e.keycode === 37) {
    direction = -1; // left, the snake will go left one div
  } else if (e.keycode === 40) {
    direction = +width; // down the snake head will instantly appear 10 divs below from the current div
  }
}
Remember from above we set an eventListener for **keyup**. This function fires off immediately after your hand presses and. leaves a key on a keyboard.
Now each button on the keyboard has a value called keycode (numbers) which we have access to and let us know which number was clicked. Basically we will be watching for the arrow keys with their respective keycodes. With that we make changes to the direction, for example -1, 10 and so on.
Alright, I hope you understand how we are able to move the snake now.
Next, this set of buttons is for mobile devices and we are basically doing the same thing:
up.addEventListener("click", () => (direction = -width));
bottom.addEventListener("click", () => (direction = +width));
left.addEventListener("click", () => (direction = -1));
right.addEventListener("click", () => (direction = 1));
The final thing we need to do is create the replay div which will popup when the snake hits something. The button helps us reset the game.
The replay function
function replay() {
  grid.innerHTML = "";
  createBoard();
  startGame();
  popup.style.display = "none";
}
From above, we basically clear the grid (gameboard) and run the previous functions.
Congrats - you made it to the end! Here's the final result:
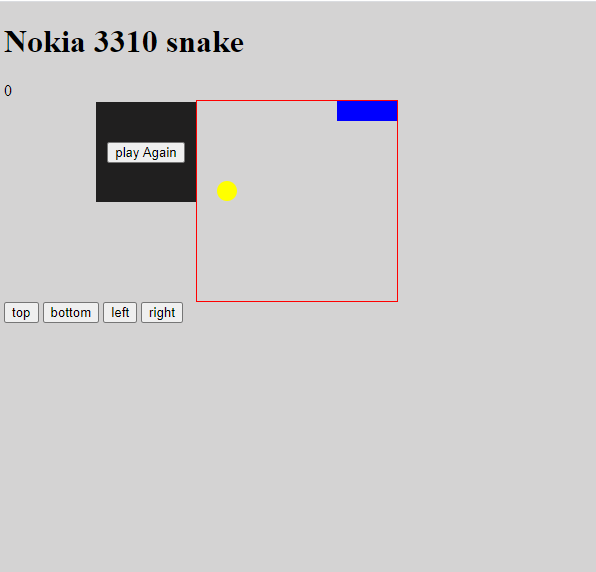 Final game
I hope you were able to code along and you enjoyed it.
In this tutorial, we learned how to create our own snake game with JavaScript. Some other important concepts we covered include push, pop, setInterval, clearInterval and eventListener.
You can check out the final game here: https://codepen.io/Fako29/pen/dyppXZG.
Thank you for reading. Follow me on Twitter here: https://twitter.com/fakoredeDami