
Sometimes you want to check what a word means while chatting with someone in WhatsApp. But you don't want to exit or minimize the app.
Well, how about building a WhatsApp bot that can give you the meaning of words you want to know?
In this tutorial, you will learn how to build a chatbot that can serve as your dictionary. It'll be easily accessible on WhatsApp using the Twilio MessagingX WhatsApp API to send and receive messages. We'll use Fast API to create the web server and interact with the database, and MongoDB to store the words and their meanings into a database.
By the end of this tutorial, you will have developed a functional chatbot that can define words in real-time while you're conversing on WhatsApp.
Prerequisites
Python 3.9+ installed on your machine.
MongoDB free account – if you don’t have one, you can set it up here.
Twilio free account – you can set up one here.
Merriam-Webster Developer’s account – you can set up one here.
An IDE or text editor, such as VS code.
Set Up Your Development Environment
Before you start, you need to set up your development environment by creating the required directory and files. Here's the commands for that:
mkdir whatsappDictionary
cd whatsappDictionary
touch requirements.txt models.py utils.py main.py .env
requirements.txtcontains the required libraries to get the chatbot up and running.model.pycontains the code connecting your chatbot to the MongoDB serverutils.pyincludes the code to connect to Twilio MessagingX WhatsApp APImain.pycontains the code to build the Fast API server and connect to the Merriam-Webster API.whatsappDictionaryis the directory for all the files.
Next, you'll create and activate a virtual environment and update the Python package manager pip to the most recent version using the following command:
python -m venv venv; ./venv/Scripts/Activate; pip --upgrade pip
If you are on a Linux machine, use this command:
pyton -m venv venv; venv\\Scripts\\activate.bat; pip --upgrade pip
To learn more about virtual environments and their benefits, you can read this tutorial.
Next you'll need to populate the requirements.txt file with the following dependencies:
fastapi
uvicorn
twilio
pymongo
pyngrok
requests
dotenv
fastapiis a Python framework for building APIs quickly and easilyuvicornis a lightning-fast server implementation for Pythontwilioallows you to interact with the Twilio MessagingX WhatsApp APIpymongois the driver you will use to connect to the MongoDB serverpyngrokenables you to tunnel a local server to a public URLrequestsallow you to send HTTP requests using Pythondotenvloads the environment variables from the .env file.
Install these dependencies by running the following command on your terminal:
pip install -r requirements.txt
Configure the Database
You now want to set up a database to store words and their definitions. You are going to use MongoDB, which is a NoSQL language and is easy to set up.
You will need to create a free account on the MongoDB website (if you don't have one already). Once you have an account, log in to create a new Shared cluster and database.
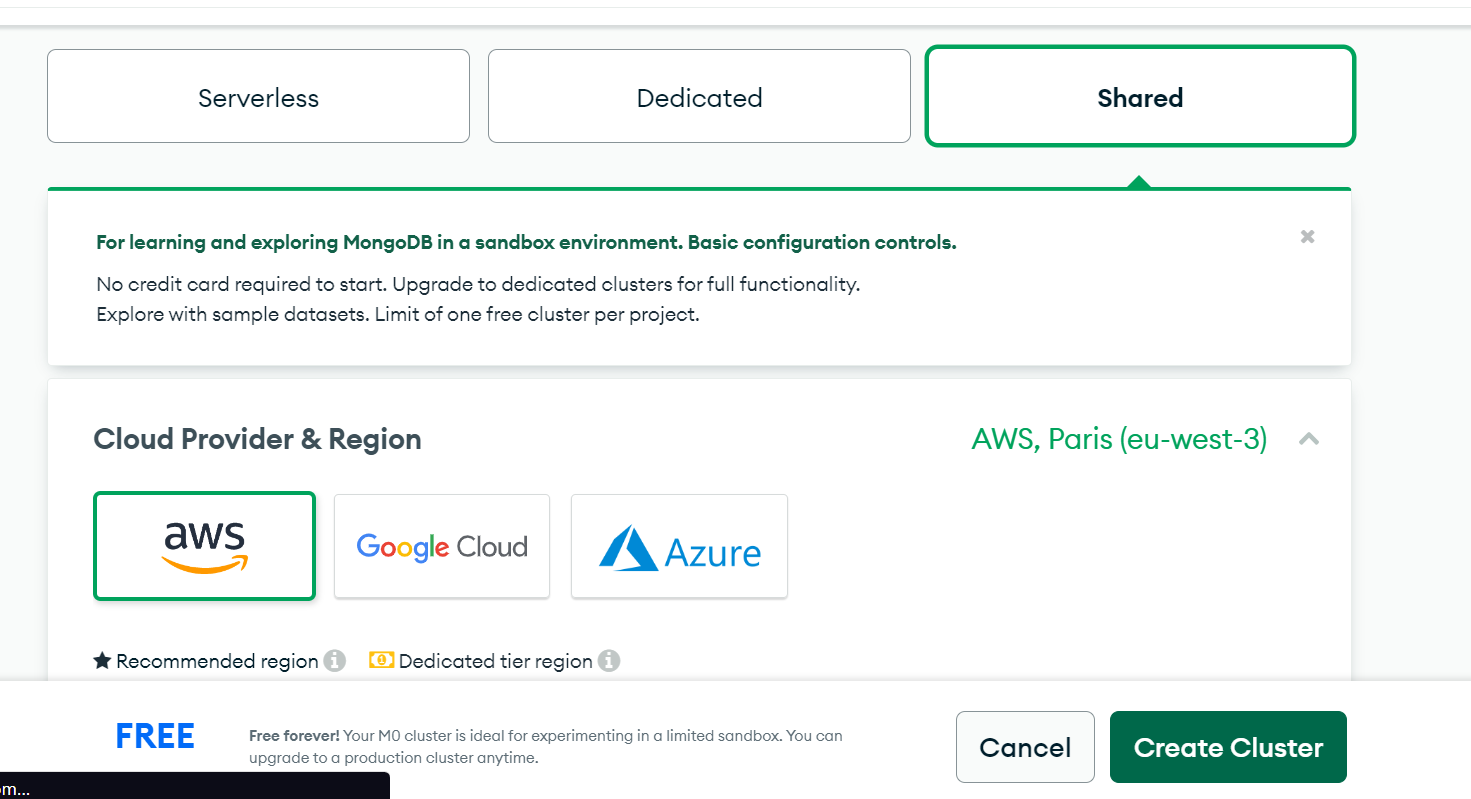
Image showing how to create a shared cluster on Mongo DB
Afterwards, go to Security_,_ then ADD NEW DATABASE USER to add a new user with read/write access to the database.

This image shows the tab where you can add a new database
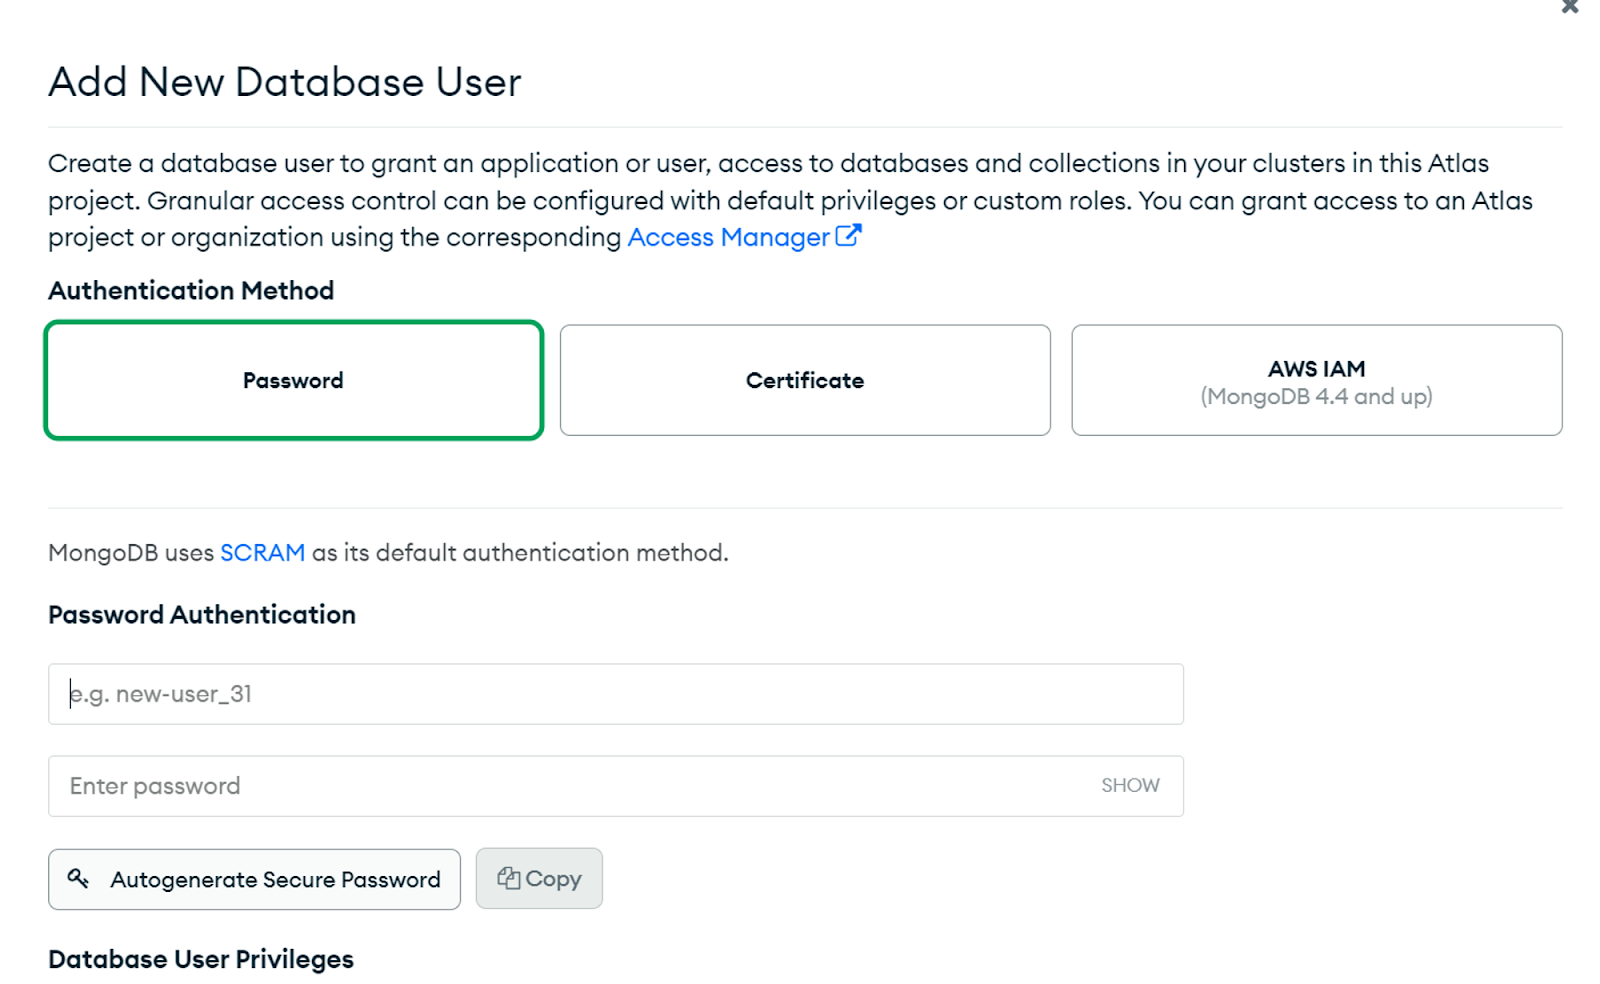
This image shows the window of adding a new database user
Go back to the cluster dashboard, click on Connect and then on Drivers.
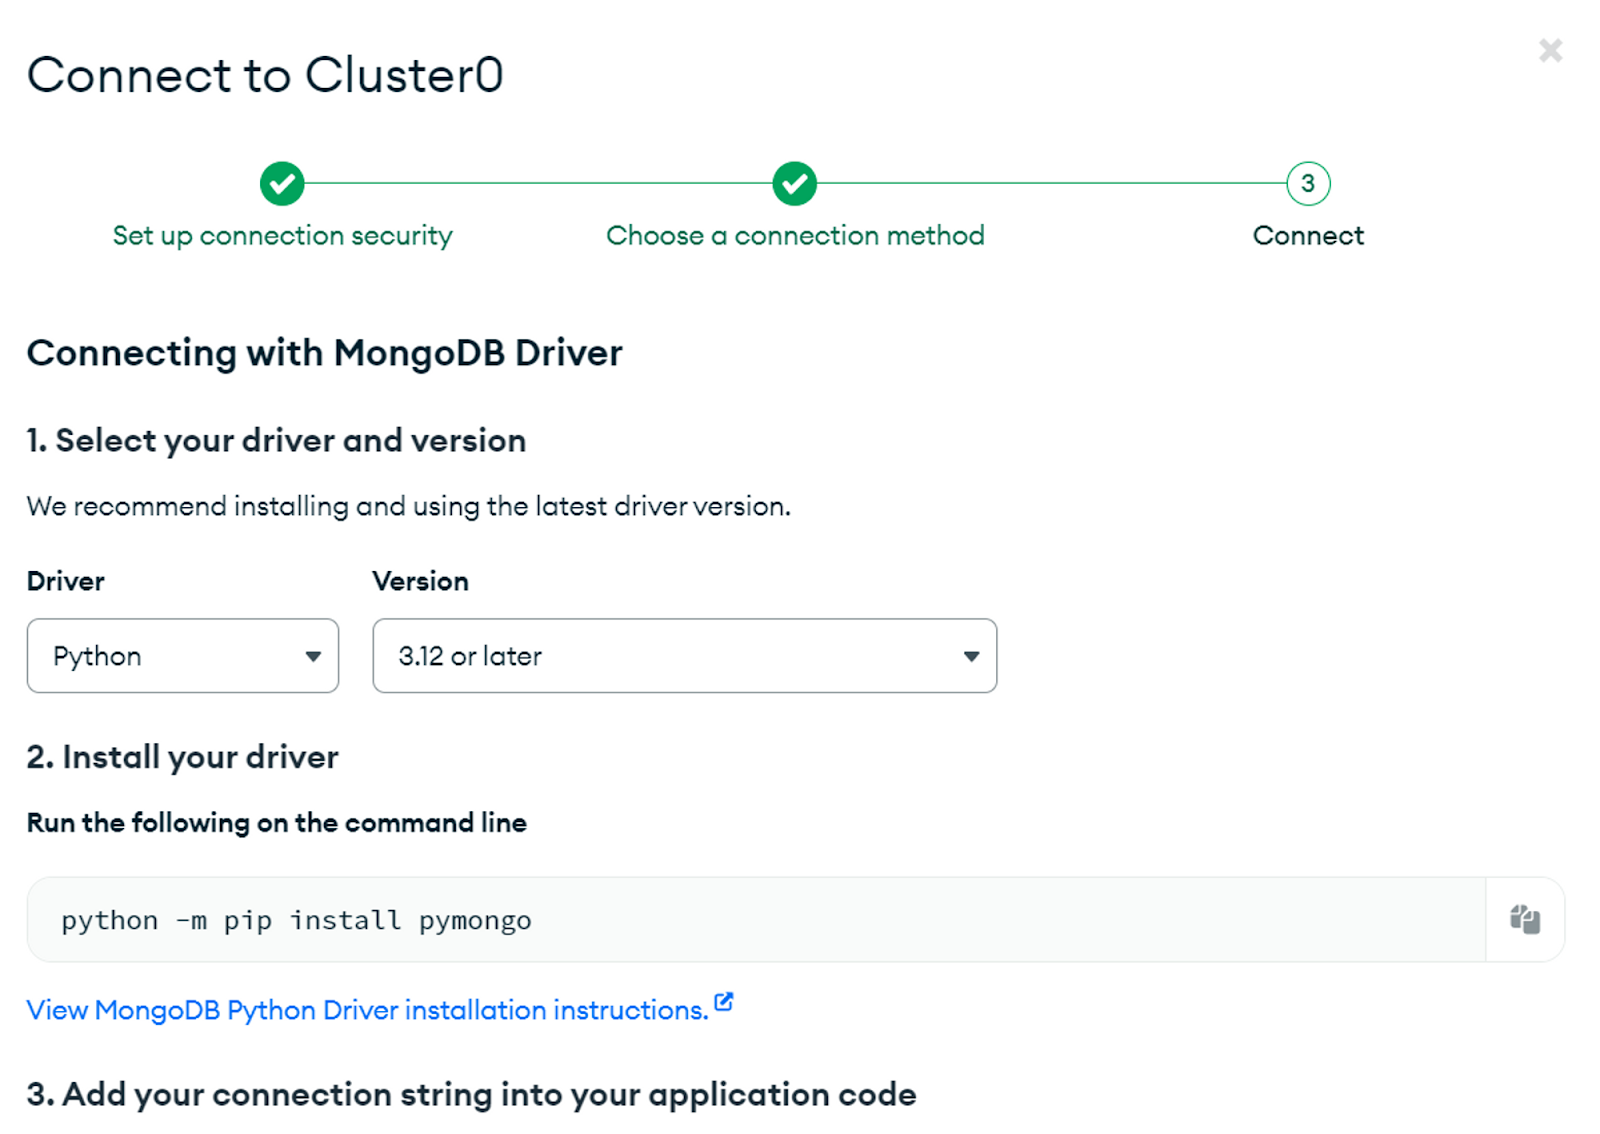
This image shows you the final process while trying to connect to the cluster
Copy the code shown to you into model.py:
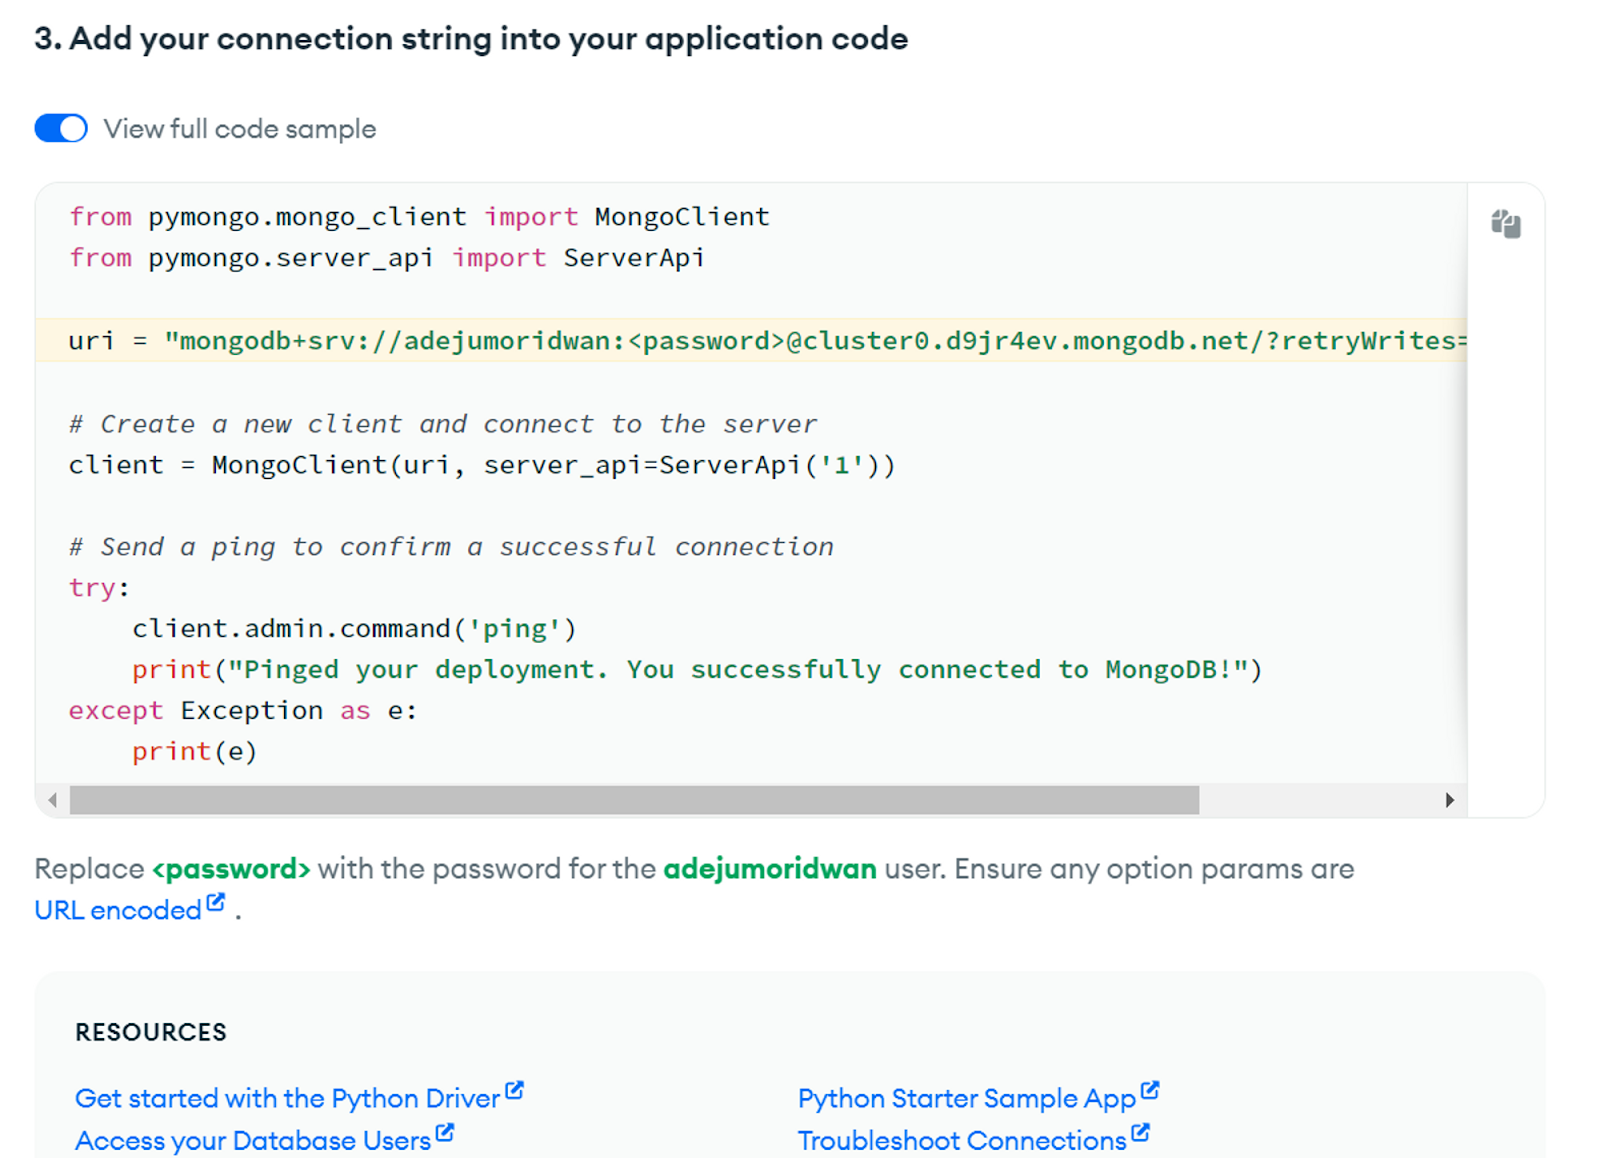
This image shows the code on how to connect to the MongoDB server using the pymongo driver.
from pymongo.mongo_client import MongoClient
from pymongo.server_api import ServerApi

uri = f"mongodb+srv://adejumoridwan:<password>@cluster0.d9jr4ev.mongodb.net/?retryWrites=true&w=majority"

# Send a ping to confirm a successful connection
try:
    client.admin.command('ping')
    print("Pinged your deployment. You successfully connected to MongoDB!")
except Exception as e:
    print(e)
Give your password to run the code and connect to the MongoDB server. You don’t want anyone to see this. Go to the .env file you created and store your password there.
MONGO_SECRET=<password>
Next, update model.py to access the .env file.
from pymongo.mongo_client import MongoClient
from pymongo.server_api import ServerApi
from dotenv import load_dotenv
import os

load_dotenv()
password = os.environ.get('MONGO_SECRET')

uri = f"mongodb+srv://adejumoridwan:{password}@cluster0.d9jr4ev.mongodb.net/?retryWrites=true&w=majority"

# Send a ping to confirm a successful connection
try:
    client.admin.command('ping')
    print("Pinged your deployment. You successfully connected to MongoDB!")
except Exception as e:
    print(e)
load_dotenv()loads the variables in .envos.environ.get('MONGO_SECRET')receives the password from .env, which stores the variable password
Run the script to connect to the MongoDB server. You can create a collection by clicking on your Cluster name and going to Collections. Collections are NoSQL versions of SQL tables.
Click on Create Database to create your database:
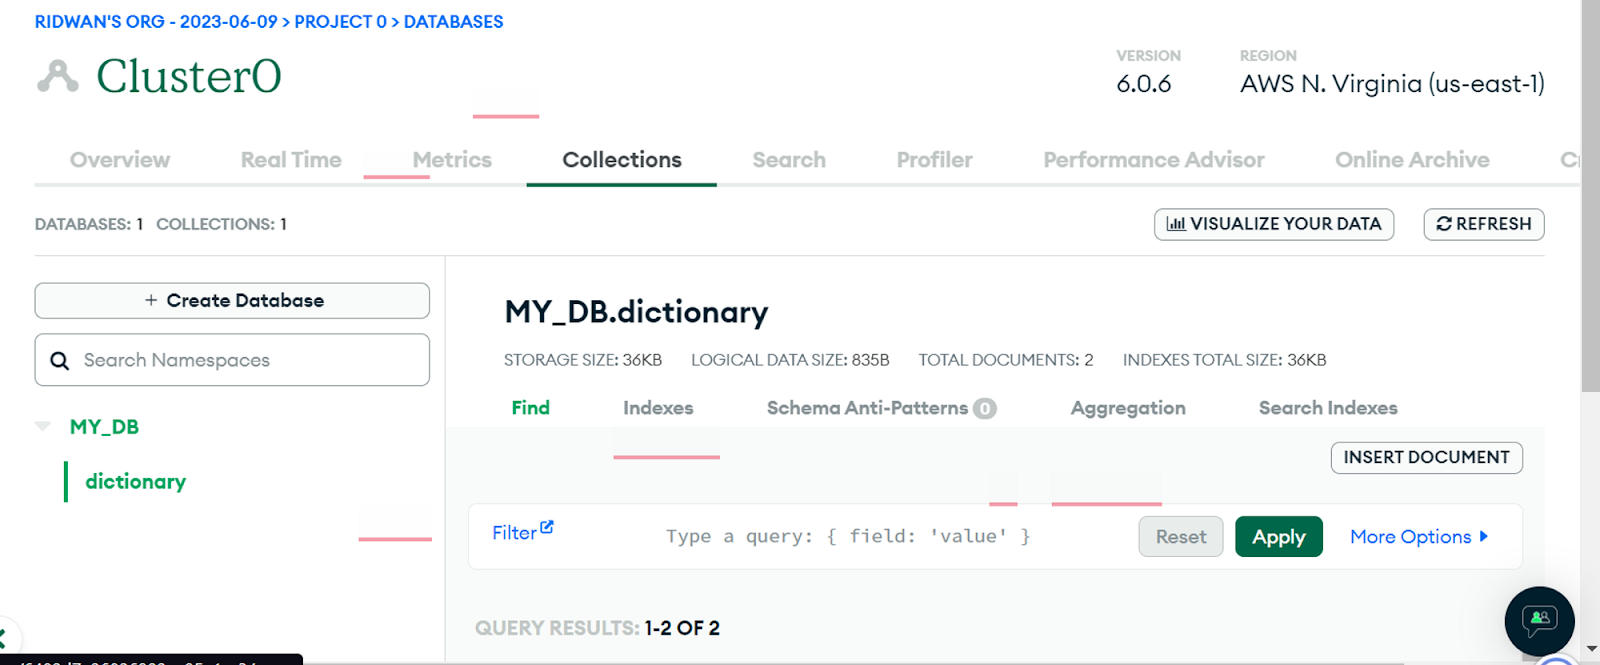
This shows information and tabs regarding the created clusters such as Overview, Collections and so on
Give the database and collection names. The database and collection names for this tutorial are MY_DB and dictionary, respectively.

The window shows you the option to fill in when you want to create a database, such as a database name, collection name, and additional preferences.
Go to models.py and update the code to create a new client and connect to the server.
from pymongo.mongo_client import MongoClient
from pymongo.server_api import ServerApi
from dotenv import load_dotenv
import os

load_dotenv()
password = os.environ.get('MONGO_SECRET')

uri = f"mongodb+srv://adejumoridwan:{password}@cluster0.d9jr4ev.mongodb.net/?retryWrites=true&w=majority"

# Create a new client and connect to the server
client = MongoClient(uri, server_api=ServerApi('1'))

dictionary_collection = client["MY_DB"]["dictionary"]

# Send a ping to confirm a successful connection
try:
    client.admin.command('ping')
    print("Pinged your deployment. You successfully connected to MongoDB!")
except Exception as e:
    print(e)
dictionary_collection is what you will use to update entries into the server later.
How to Configure Twilio Sandbox for WhatsApp
To configure the Twilio sandbox for WhatsApp, go to Twilio Console. Under Develop, click on Messaging, then Try it out. Under Try it out, click on Send a WhatsApp Message.
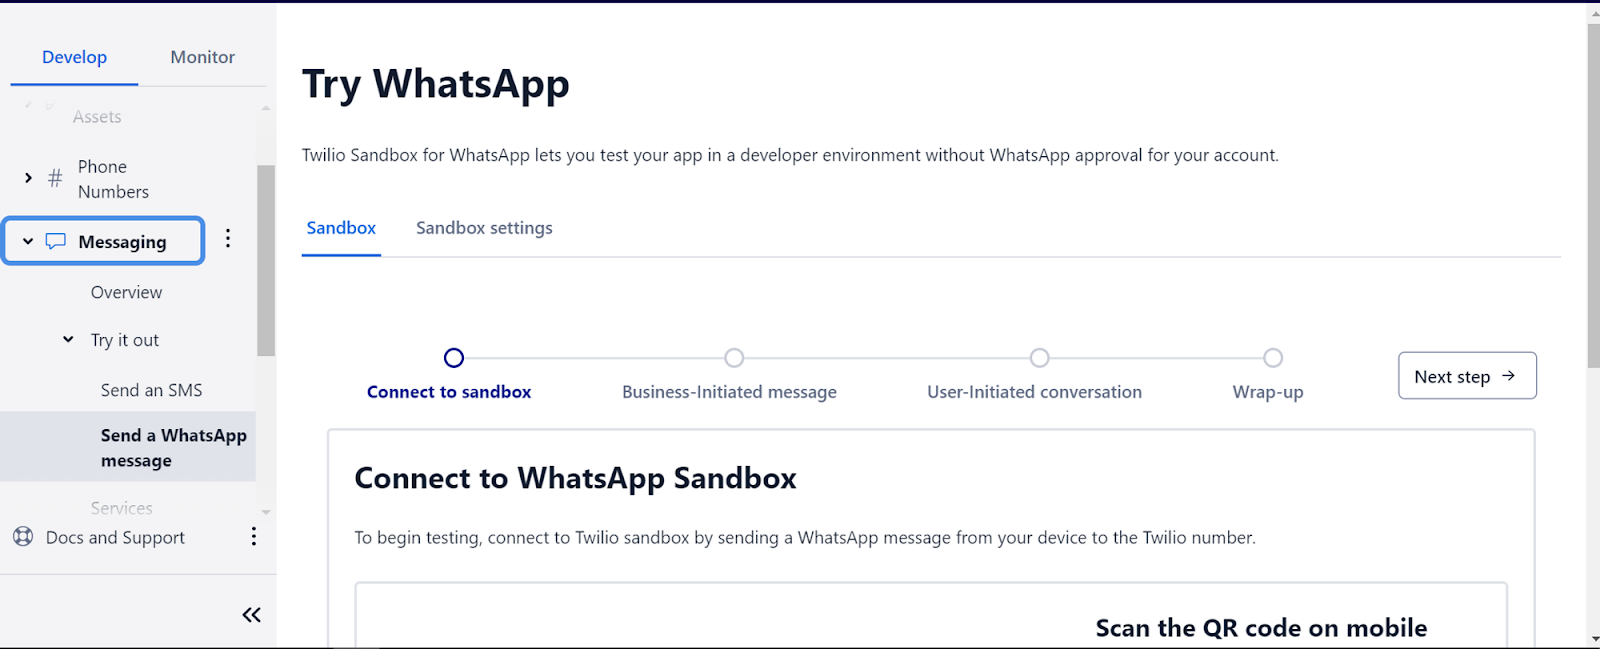
This sandbox allows you to send WhatsApp messages to your number
To connect to the WhatsApp Sandbox, save the number provided on the sandbox on your device and send the message join manner-free to the number, or you can scan the QR code on your device.
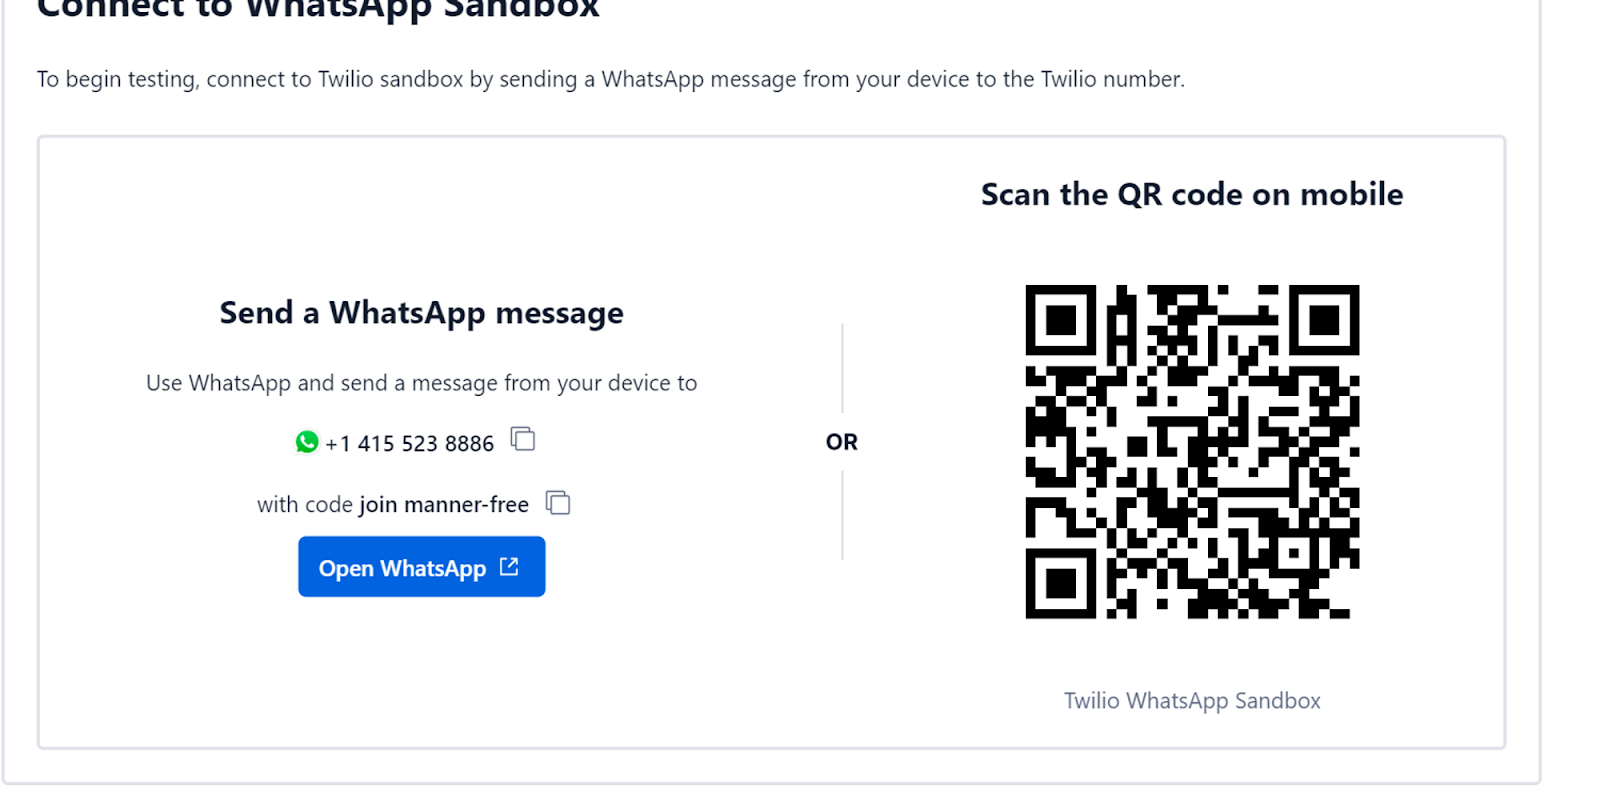
Here you see the sandbox to connect to whatsapp sandbox to your number
Once the connection is successful, copy the code and paste it into the file utils.py:
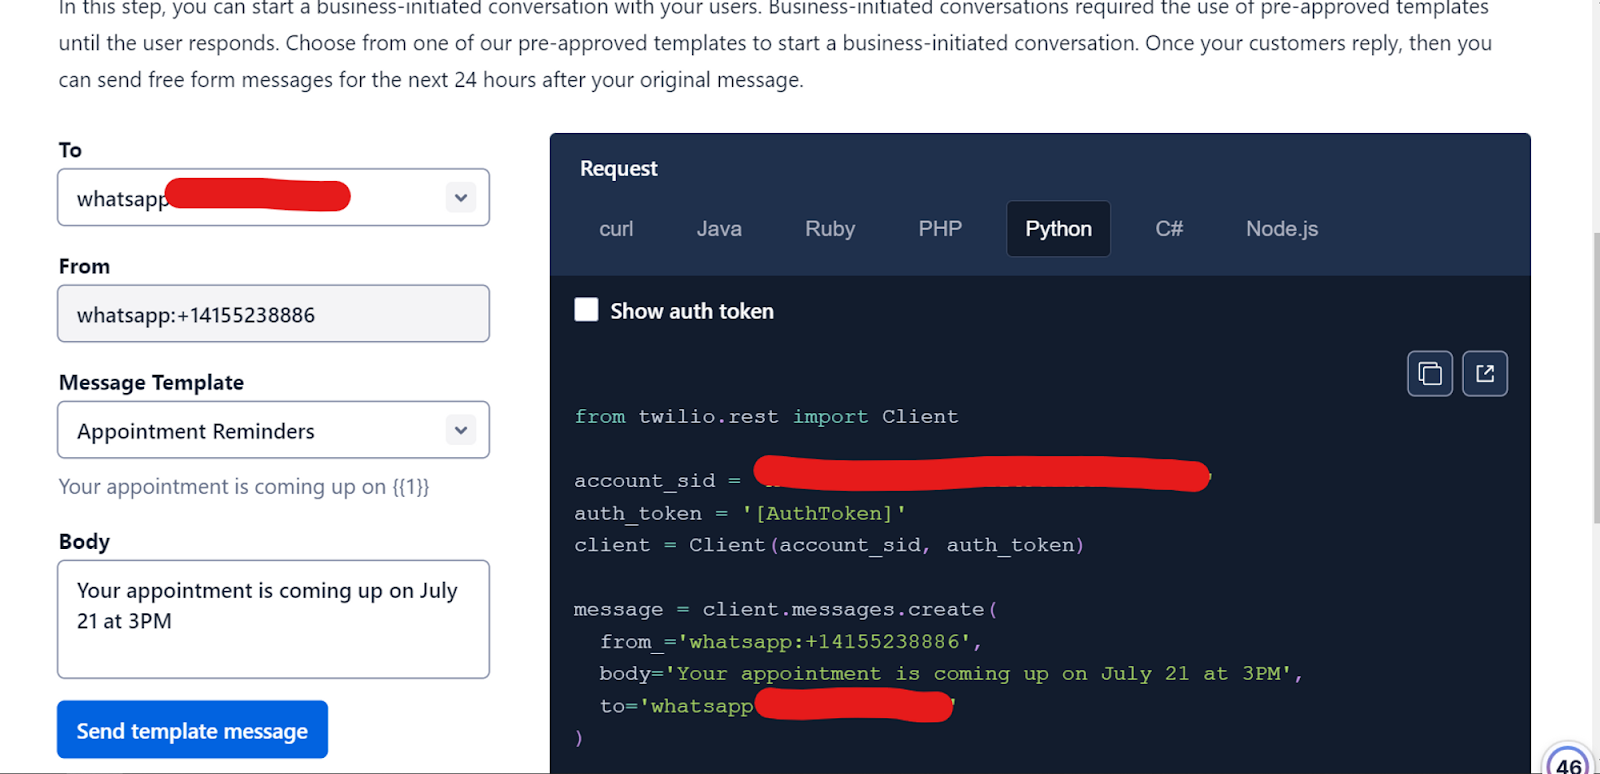
Here you can see how to connect to WhatsApp API in various languages. Currently, the image is showing how to connect to WhatsApp API so that you can send messages from Twilio.
from twilio.rest import Client

account_sid = '<account_sid>'
auth_token = '[AuthToken]'
client = Client(account_sid, auth_token)

message = client.messages.create(
  from_='whatsapp:+14155238886',
  body='Your appointment is coming up on July 21 at 3PM',
  to='whatsapp:<to_number>
)

print(message.sid)
The client.messages.create() function allows you to send messages to your WhatsApp from the WhatsApp sandbox. It takes three parameters:
from_is where the message is coming from, that is, from the WhatsApp Sandboxbodytakes in the body of your messagetois the WhatsApp number you are sending to
How to Connect to the Twilio API
Go to the .env file to store your Twilio authentication token, account SID, Twilio sandbox number, and WhatsApp number.
MONGO_SECRET="<password>"
TWILIO_ACCOUNT_SID="<account_sid>"
TWILIO_AUTH_TOKEN="<auth_token>"
TWILIO_NUMBER="<twilio_number>"
TO_NUMBER="<to_number>"
Update the utils.py file to access these variables:
from twilio.rest import Client
from dotenv import load_dotenv
import os

load_dotenv()

account_sid = os.getenv("TWILIO_ACCOUNT_SID")
auth_token = os.getenv("TWILIO_AUTH_TOKEN")
client = Client(account_sid, auth_token)
twilio_number = os.getenv('TWILIO_NUMBER')
to_number = os.getenv(“TO_NUMBER”)

message = client.messages.create(
  from_=f'whatsapp:{twilio_number}',
  body='Your appointment is coming up on July 21 at 3PM',
  to=f'whatsapp:{to_number}
)
load_dotenv() loads the environment variables, and os.getenv gets these variables from the environment.
Next is to define a send_message function. This function is going to have two arguments: to_number and text. The function will send a message defined in text to to_number.
from twilio.rest import Client
from dotenv import load_dotenv
import os

load_dotenv()

account_sid = os.getenv("TWILIO_ACCOUNT_SID")
auth_token = os.getenv("TWILIO_AUTH_TOKEN")
client = Client(account_sid, auth_token)
twilio_number = os.getenv('TWILIO_NUMBER')

def send_message(to_number, text):
      message = client.messages.create(
          from_=f"whatsapp:{twilio_number}",
          body=text,
          to=f"whatsapp:{to_number}"
          )
Update the send_message function to configure logging in case errors are encountered when sending messages.
import logging
from dotenv import load_dotenv
import os
from twilio.rest import Client

load_dotenv()

account_sid = os.getenv("TWILIO_ACCOUNT_SID")
auth_token = os.getenv("TWILIO_AUTH_TOKEN")
client = Client(account_sid, auth_token)
twilio_number = os.getenv('TWILIO_NUMBER')

# Set up logging
logging.basicConfig(level=logging.INFO)
logger = logging.getLogger(__name__)

# Sending message logic through Twilio Messaging API
def send_message(to_number, text):
    try:
        message = client.messages.create(
            from_=f"whatsapp:{twilio_number}",
            body=text,
            to=f"whatsapp:{to_number}"
            )
        logger.info(f"Message sent to {to_number}: {message.body}")
    except Exception as e:
        logger.error(f"Error sending message to {to_number}: {e}")
How to Build the FastAPI Backend
Inside the main.py, set up a basic FastAPI application.
from fastapi import FastAPI

app = FastAPI()

@app.get("/")
async def index():
    return {"message": "I love FreeCodeCamp"}
The code below sets up a basic FastAPI backend, creating a new instance of the FastAPI class and assigning it to the app variable.
The @app.get decorator creates a new endpoint that you can access with an HTTP GET request. The endpoint is at the root URL / and returns a JSON response with a single key-value pair: "message": "I love FreeCodeCamp".
To run the app, run the following command in your terminal:
uvicorn main:app --reload
On your browser, open the host http://127.0.0.1:8000. You will see a JSON response of {"message": "I love FreeCodeCamp"}. You can also access an interactive API doc provided by swagger on the host http://127.0.0.1:8000/doc which allows you to interact with your API and see if you have any errors.

This interactive documentation provided by swagger shows how to interact with your API to check for errors.
How to Set Up ngrok
To receive Twilio messages on the backend, you will use ngrok to host the local host on a public server. Read this post to learn how to set up ngrok on your machine.
On ngrok administrator, run the command ngrok http 8000. This makes your host public, and you can receive messages on your backend.

Here you can see ngrok up and running on your local machine
Go to your WhatsApp Sandbox, under Sandbox settings, and paste the forwarding URL https://b5a6-105-112-120-51.ngrok-free.app appending it with /message under When a message comes in and click Save.
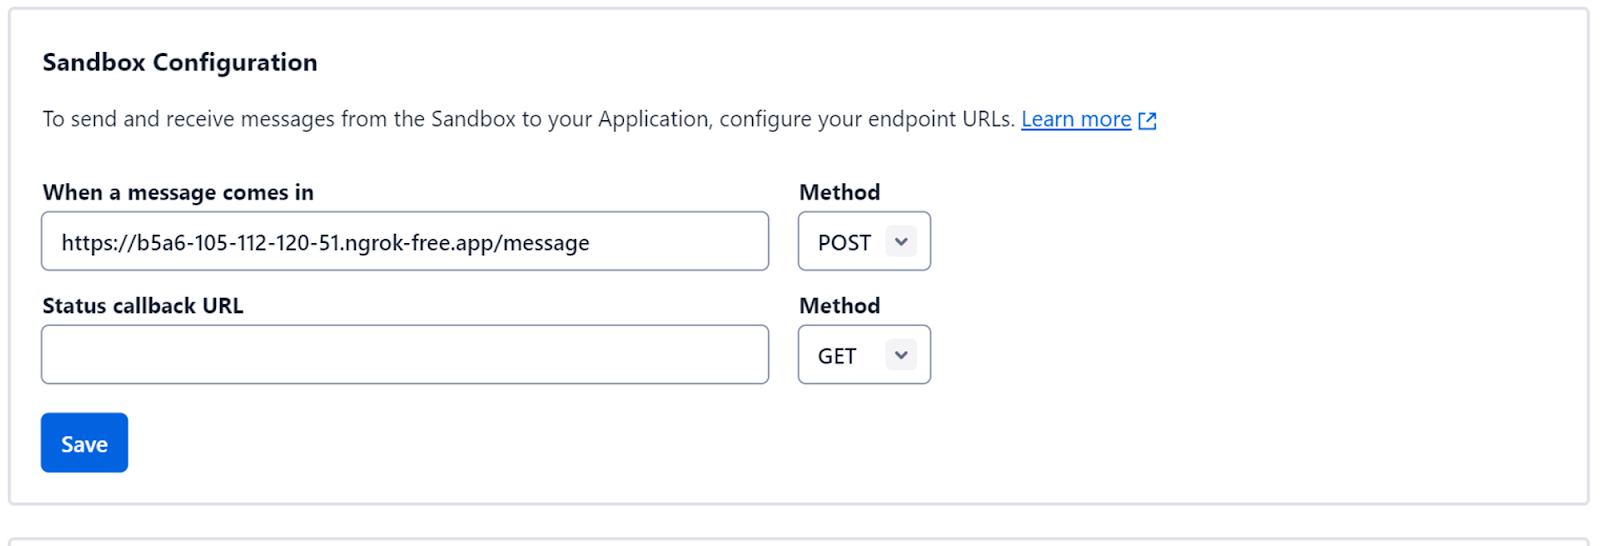
This image shows how to configure your sandbox and link to the ngrok url
How to Connect to the Merriam-Webster API
To set up a Merriam-Webster dictionary account, go here and fill out your credentials:
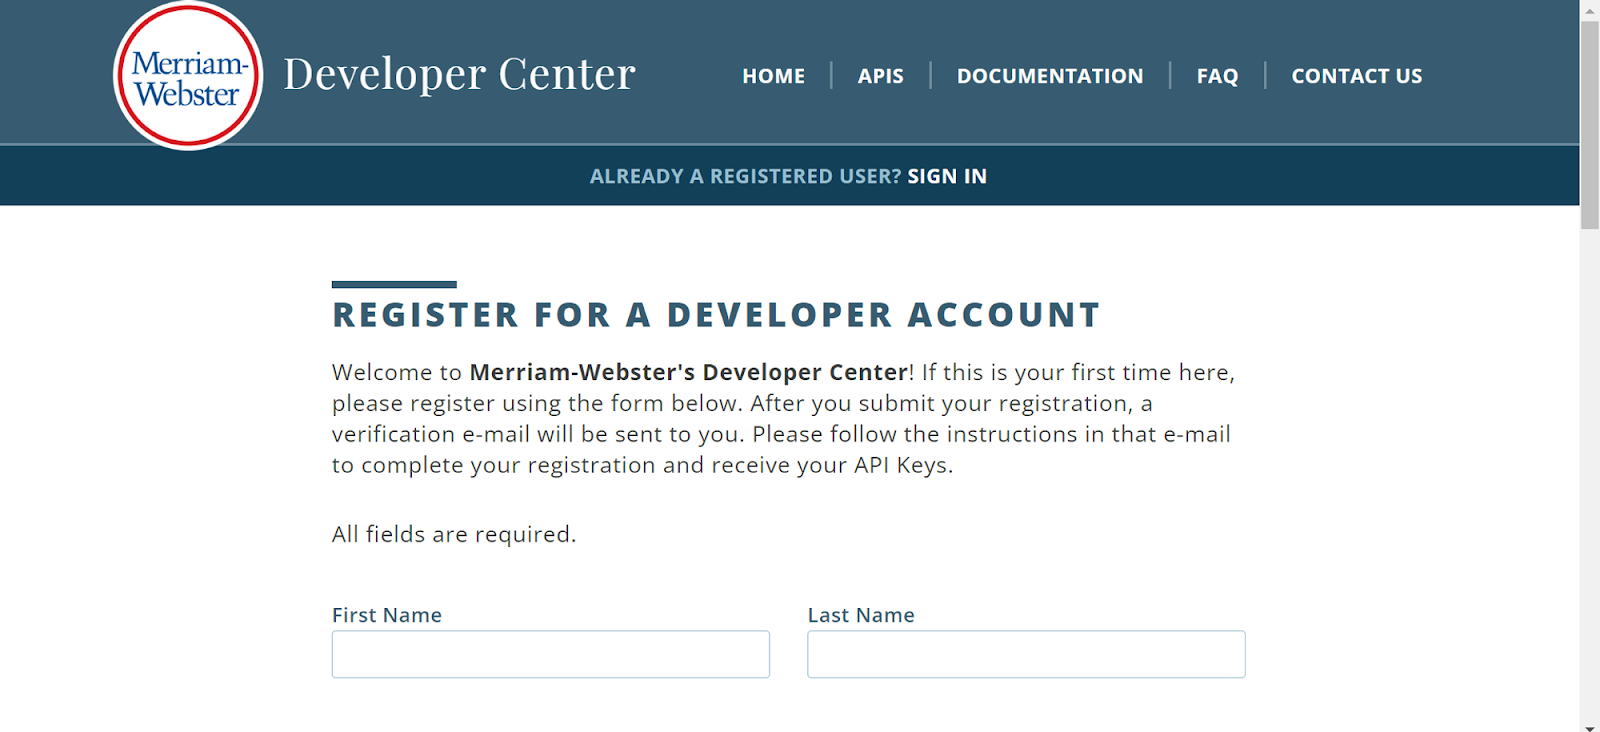
Image showing page to register for Merriam Webster Developer Center
You can register for two keys: Collegiate Dictionary and Collegiate Thesaurus, though this tutorial uses only Collegiate Dictionary.
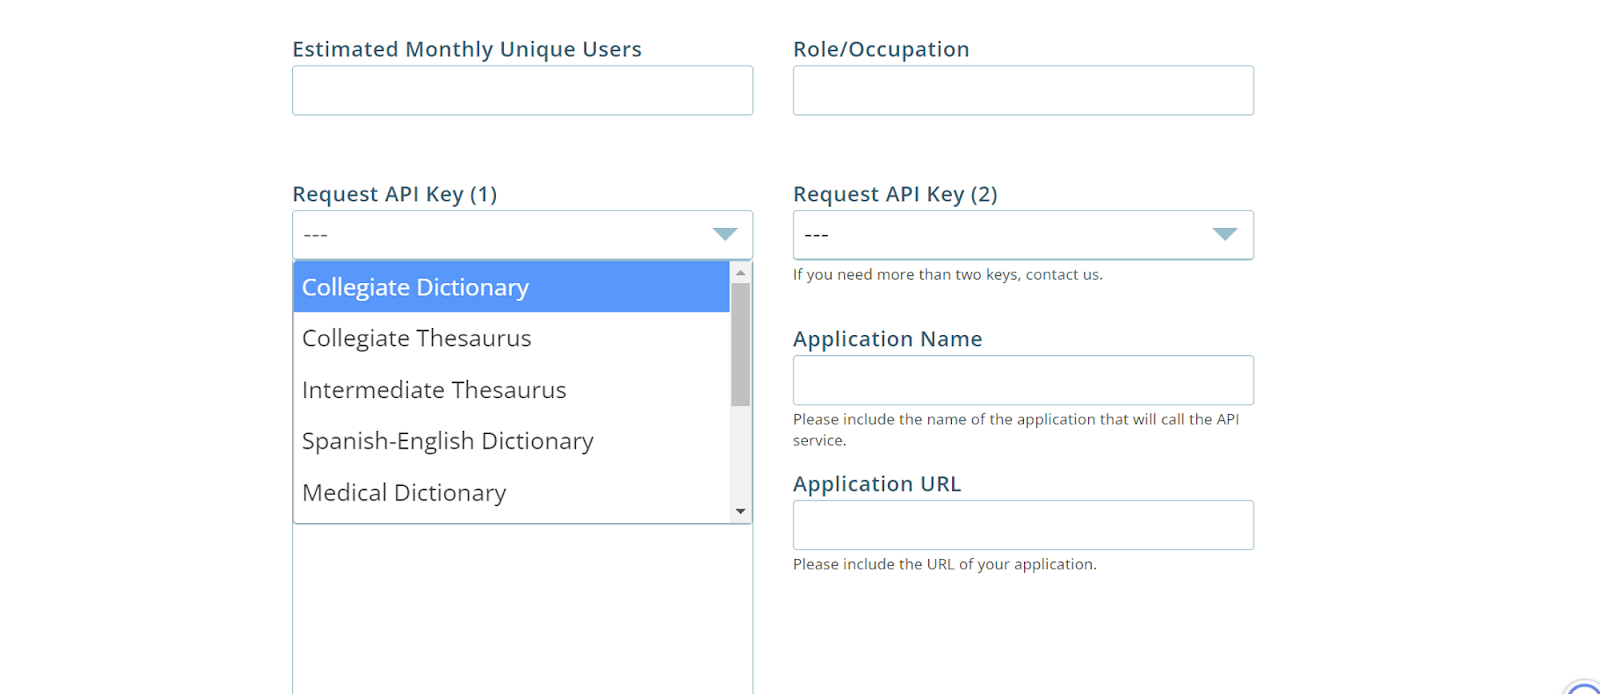
This shows the various keys one can apply for on Merriam-Webster
After filling in all your details, click on Register and Login.
In the home tab, go to Keys to get your API keys.
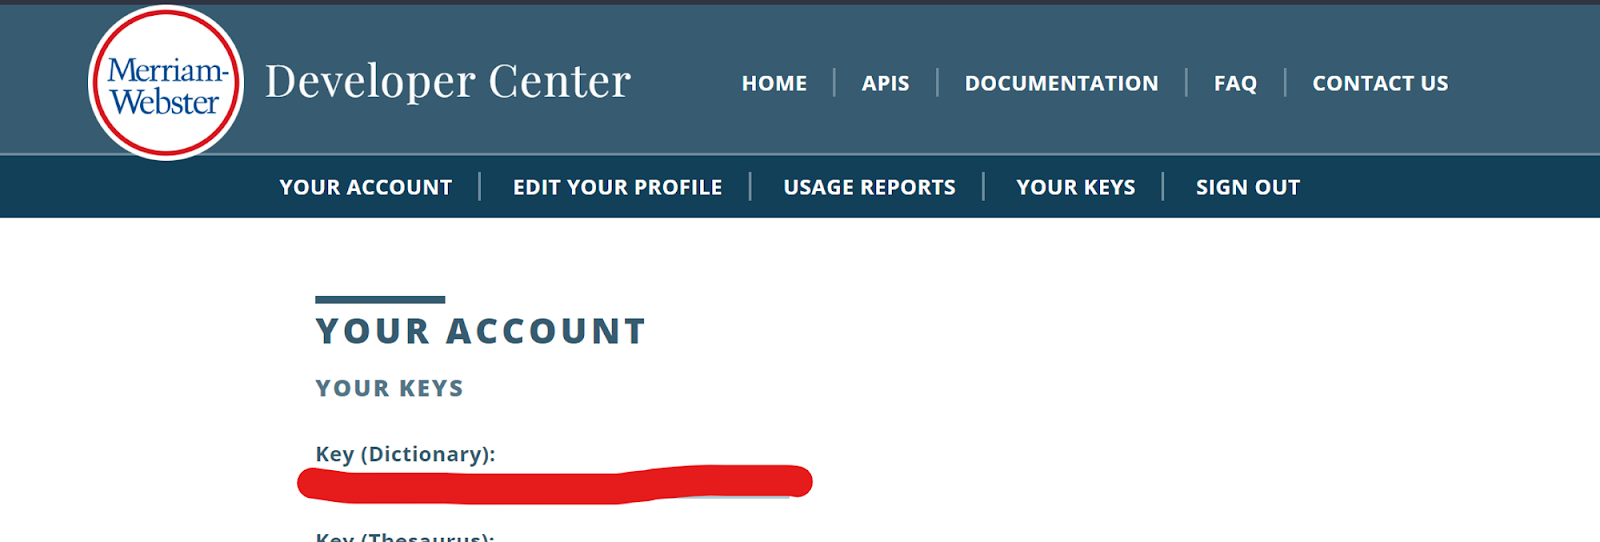
This key tab shows the keys you have registered for
Update the .env file, saving the key as DICTIONARY_KEY.
MONGO_SECRET="<password>"
TWILIO_ACCOUNT_SID="<account_sid>"
TWILIO_AUTH_TOKEN="<auth_token>"
TWILIO_NUMBER="<twilio_number>"
TO_NUMBER="<to_number>"
DICTIONARY_API_KEY="<dictionary_key>"
Update the main.py as follows:
from fastapi import FastAPI, Form
import requests
from utils import send_message
from dotenv import load_dotenv
import os
from typing import List

load_dotenv()

app = FastAPI()
whatsapp_number = os.getenv("TO_NUMBER")
api_key = os.getenv("DICTIONARY_API_KEY")

@app.post("/message")
async def reply(Body: str = Form()):
    url = f"<https://www.dictionaryapi.com/api/v3/references/collegiate/json/{Body}?key={api_key}>"
    response = requests.get(url)
    # Extract the JSON data from the response
    data = response.json()

    definition = data[0]["shortdef"][0]

    send_message(whatsapp_number, definition)
@app.post("/message") is a decorator in the fastAPI framework that defines a POST request route to the URL /message. The reply function defined above is called when a POST request is sent to this URL.
The reply function takes in a Body parameter in the request body, which is the message sent to the chatbot (the word you want to get the definition of). It then sends an HTTP request to the Merriam-Webster API to retrieve the word's meaning.
The url variable stores the link to Merriam-Webster API, which takes the Body and the api_key to get details regarding the provided word.
You can make requests from url using requests from the request library and storing request.get(url) into the response variable.
You then extract the JSON data from the response using response.json() and store it in variable data.
data[0]["shortdef"][0] allows you to access the short definition of a word stored in the variable definition.
send_message() takes the definition and sends it to whatsapp_number.
Next, you'll need to handle situations where someone sends a sentence instead of a word, or a word containing punctuations or characters. So update main.py as follows:
from fastapi import FastAPI, Form
import requests
from utils import send_message
from dotenv import load_dotenv
import os
from typing import List
from models import dictionary_collection

load_dotenv()

app = FastAPI()
whatsapp_number = os.getenv("TO_NUMBER")
api_key = os.getenv("DICTIONARY_API_KEY")

@app.post("/message")
async def reply(Body: str = Form()):
    url = f"<https://www.dictionaryapi.com/api/v3/references/collegiate/json/{Body}?key={api_key}>"
    flag="Please give a valid word"

    if Body.isalpha():
        response = requests.get(url)
        # Extract the JSON data from the response
        data = response.json()

        definition = data[0]["shortdef"][0]

        send_message(whatsapp_number, definition)
    else:
        return send_message(whatsapp_number, flag)

    return ""
flag is a variable storing the message to give if you provide a sentence or a word with characters.
The if condition checks if a message is a word through Body.isaplha(), if true it gets the definition from Merriam-Webster API if false it returns the function send_message() telling the user to Please give a valid word.
To store the words and their meanings to the MongoDB database, update main.py as follows:
from fastapi import FastAPI, Form
import requests
from utils import send_message
from dotenv import load_dotenv
import os
from typing import List
from models import dictionary_collection

load_dotenv()

app = FastAPI()
whatsapp_number = os.getenv("TO_NUMBER")
api_key = os.getenv("DICTIONARY_API_KEY")

@app.post("/message")
async def reply(Body: str = Form()):
    url = f"<https://www.dictionaryapi.com/api/v3/references/collegiate/json/{Body}?key={api_key}>"
    flag="Please give a valid word"

    if Body.isalpha():
        response = requests.get(url)
        # Extract the JSON data from the response
        data = response.json()

        definition = data[0]["shortdef"][0]

        send_message(whatsapp_number, definition)

        dictionary_db = {"word":Body, "definition":definition}
        dictionary_collection.insert_one(dictionary_db)

    else:
        return send_message(whatsapp_number, flag)

    return ""
dictionary_db = {"word": Body, "definition": definition} creates a dictionary with two keys, word and definition, and values Body and definition, respectively.
dictionary_collection.insert_one(dictionary_db) inserts the dictionary into the MongoDB collection, named dictionary_collection.
You can go to your dashboard and view the items added to the collection.
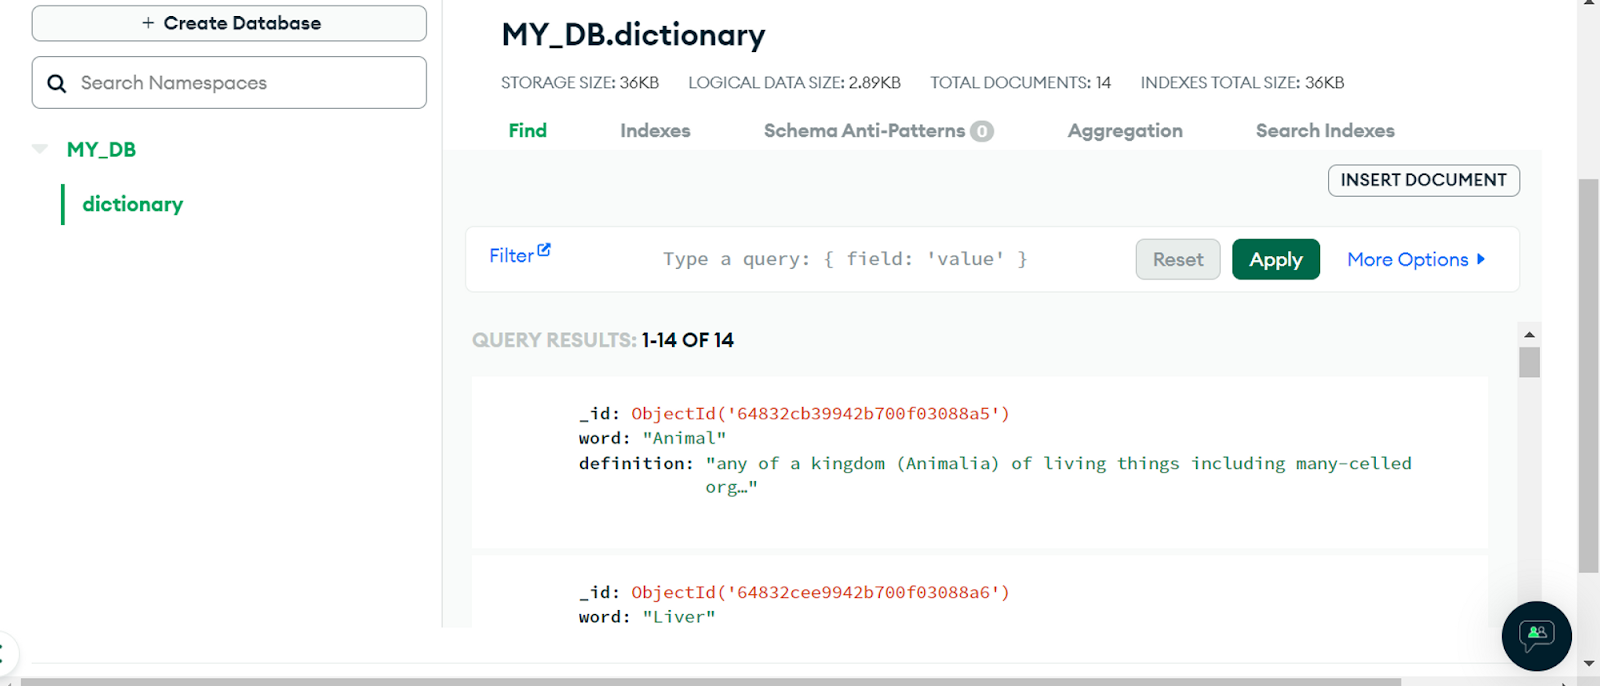
This contains the items that have been sent and received on your application
Test the ChatBot
Now you can chat with the chatbot and ask for definitions of words:
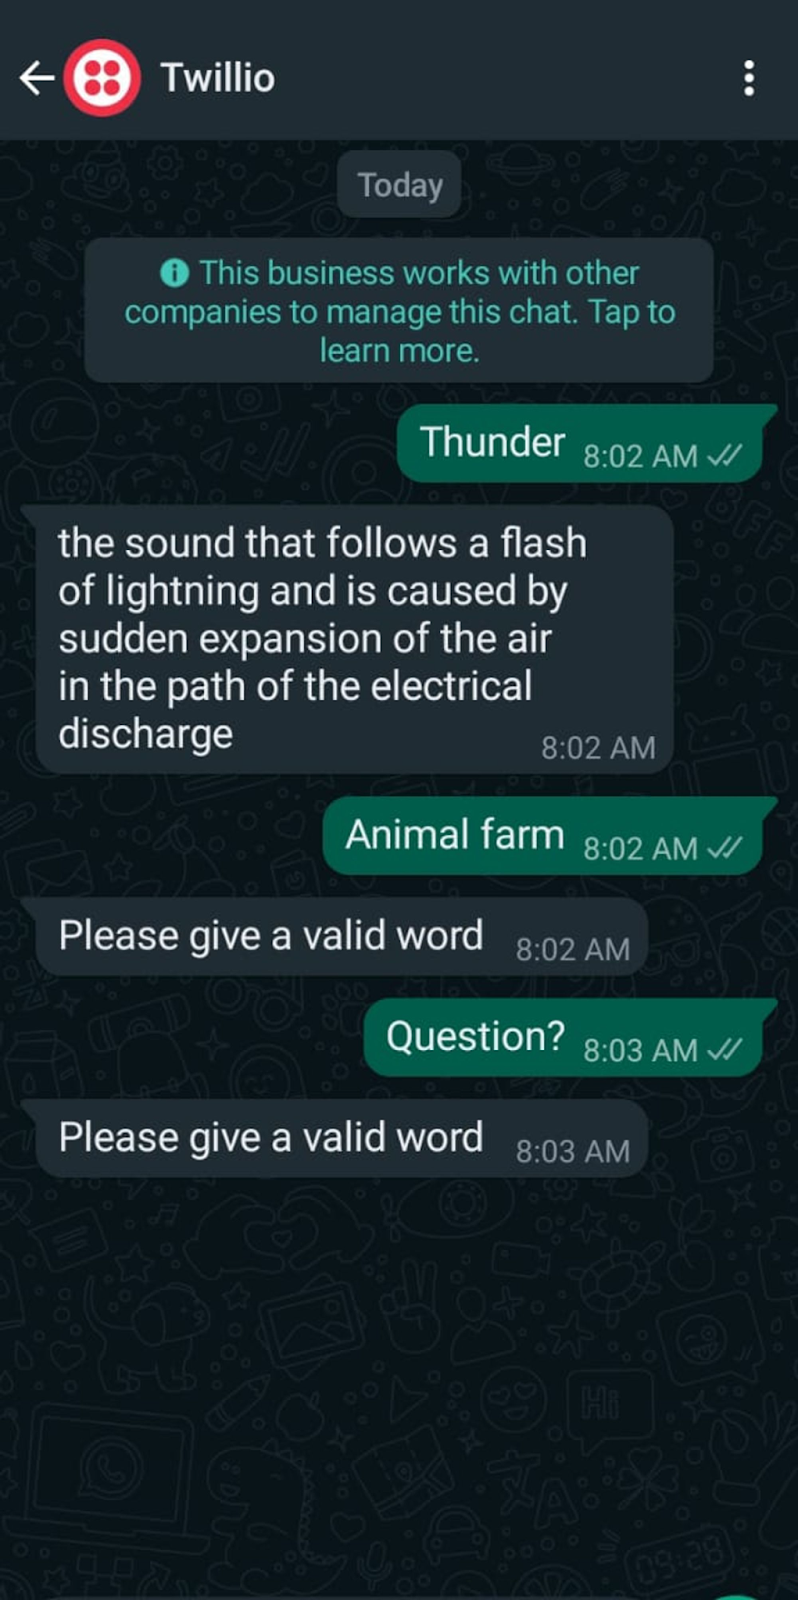
Image showing a chat with the dictionary chatbot
Conclusion
In this tutorial, you learned how to create a WhatsApp dictionary chatbot. You learned how to use FastAPI to power the backend of your application, how to interact with Twilio MessagingX WhatsApp API, and how to use NoSQL database like MongoDB to store your data.
You can extend the chatbot to get synonyms and definitions of words with more than one explanation by accessing more metadata from the Merriam-Webster API.
You can check out the Merriam-Webster API documentation for the various responses you can get. Ensure you read the Twilio WhatsApp API docs for more advanced functionalities like getting media replies and word pronunciation.