

A common issue on development teams is that an application might work on one developer’s computer but not on the others.
Luckily, there's Docker, a popular containerization technology. It works by packing up all the components needed to run the application and then executing the application in an isolated environment. This helps tackle the problem of "it works on my machine but not yours."
You just have to save the application in the Docker registry so that it can be downloaded and used by other developers. In this article, you will learn how to build a web application Docker image and push it to an Azure private registry.
Table of Contents
- How to Get Started
- How to Build a Docker image
- How to Run and Test a New Container Locally from the Image
- How to Push the Image to Azure Registry
- Clean Up
- Summary
How to Get Started
Before attempting to follow along with this tutorial, you should have the following:
- Docker installed – You can install Docker from the Docker website.
- An Azure Subscription – You can sign up for a free Azure account if you don’t already have one.
- Azure CLI – This tutorial requires the Azure command-line interface (CLI) to interact with the Azure container registry.
- Basic understanding of Docker commands and containers.
How to Build a Docker Image
A Docker image is a fundamental component and consists of a text file called a Dockerfile. This contains the application files and binaries that you wish to containerize.
In this guide, you will examine an example that lets you create a Docker image that has an Apache web server and a web application in order to learn how to create a Docker image.
How to Create a Docker image from a Dockerfile
You will first develop an HTML page that serves as your web application before writing a Dockerfile. As a result, you will create a new directory called appdocker and within it, create a new file called “index.html”. Add the following code to index.html:
<html>
    <body>
        <h1>Welcome to my web app</h1>
        <p>This page demo how to create, build and push a dockerized application to azure container registrar, (ACR) </p>

    </body>
</html>
You should now create a Dockerfile (without an extension) in the same directory with the content listed below to build your web image, which we will cover in more detail next.
FROM httpd:latest
LABEL Owner 'Destiny Erhabor'
COPY index.html /usr/local/apache2/htdocs/
- Every Docker image is created from another Docker image. The
FROM httpd:latestat the start of the Dockerfile is necessary and indicates the Apache base image you will use for your own. - The
LABEL Owner 'Destiny Erhabor'gives you an option to specify the image owner. In this case you should use your name. - The image creation procedure is then carried out using the
COPY index.html /etc/nginx/nginx.confinstruction. The local index.html page that you created is copied by Docker into the image's /usr/local/apache2/htdocs/ directory.
Now, to build the Docker image, open a terminal to where the Dockerfile is located in the folder “appdocker”, and then run the docker build command:
docker build -t mywebapp:v1 .
docker build
You can also check list of the images created by executing the command:
docker images
docker images
The three steps of the Docker image builder are as follows, which you can see in the execution above:
- The base image is downloaded by Docker in step one.
- Docker copies the image's index.html file.
- The image is created and tagged by Docker.
How to Run and Test a New Container Locally from the Image.
You will use the docker run command in your terminal to create a new container using your Docker image as follows:
docker run -d --name mywebapp -p 8080:80 mywebapp:v1
- The name of the container you desire is specified in the
--nameparameter. - You define the desired port translation with the
-pargument. In your example, this would entail that our local machine's port 8080 would be translated from port 80 of the container. - The name of the image and its tag make up the command's final parameter.
You can test your container on your local system on the port translation that we previously performed. To achieve this, launch a browser and type http://localhost:8080.
testing image locally
How to Push the Image to Azure Registry
The primary repository for shared Docker images is called the Docker Registry. This registry can either be public, such as Docker Hub or private, such as Azure Container Registry.
Private Docker container images and other relevant artifacts can be stored and managed on the Microsoft-owned Azure Container Registry (ACR). These images can then be downloaded and used for local or hosting platform container-based deployments.
You'll need to go through the following steps to push your image into ACR:
First, you will launch the azure CLI command below in your terminal to connect to your Azure account:
az login
Next, you’ll use the Azure CLI to create a resource group, a container that manages multiple Azure resources using az group create and the azure container registry using the az acr commands:
az group create --name RG-ACR --location eastus
The --name tag specifies the resource group name as RG-ACR and --location gives the region where it is located as eastus.
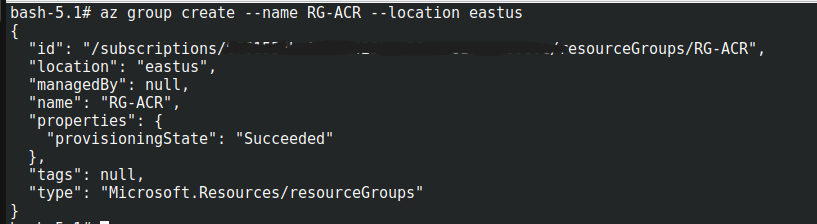 Resource group
az acr create --resource-group RG-ACR --name mywebappacrdemo --sku Basic
The resource group you created earlier is required to manage the acr resource – hence the --resource-group tag. The --name specifies the name of the registry (the name must be globally unique) and the --sku provides the several service tiers.
These tiers offer a range of options for the capacity and use of your private Docker registry together with predictable pricing. Here you are using Basic tiers.
 ACR resources creation
Now that you are logged in, use the command to establish a connection to the ACR resource you created above by passing the --name parameter as the name of that resource:
az acr login --name mywebappacrdemo
When the command is successful, a Login Succeeded message is returned.
Finally, run a few instructions to push the mywebapp Docker image into your ACR resource.
The initial action is to tag the image with the fully qualified name of the login server for the registry. The format of the fully qualified name is . azurecr.io, as show below:
docker tag mywebapp:v1 mywebappacrdemo.azurecr.io/mywebapp:v1
Now push the image into the ACR resource.
docker push mywebappacrdemo.azurecr.io/mywebapp:v1
ACR resource in azure portal
Clean Up
To avoid paying for the underlying Azure cost, you should clean up your resources if they're not being used.
To clean up your Azure resources, in the Azure portal go to or search for resources group, find the one you just created, and delete it. This will delete all resources in the resource group.
Summary
In this tutorial, we looked at the primary tasks that go into building and running a Docker image for a web application.
You also learned how to push a Docker image to the Azure container registry using the Azure CLI.
As always, I hope you enjoyed the article and learned something new. If you want, you can follow me on LinkedIn or Twitter.