
Content loaders, skeleton screens, ghost elements, and content placeholders. These are the names given to the effect we'll be exploring today.
Many companies, such as Linkedin, Facebook, Youtube and Slack, use this effect in their apps and websites, as you may have noticed.
As much as we developers want our websites to load as quickly as possible, there are times when a lot of data needs to be rendered on the page, so Skeleton screens are a great option.
In this article, we'll cover:
Prerequisites
This article assumes that you have:
Knowledge of HTML and CSS (SASS)
Knowledge of JavaScript (ES6)
We will use HTML and SASS for this project. If you would like to get started with SASS, check out this Beginner's Guide.
What is a Skeleton Screen?
A skeleton screen is an animated placeholder that simulates the layout of a website while data is being loaded.
They let the user know that some content is loading and, more importantly, provide an indication of what is loading, whether it's an image, text, card, and so on.
This gives the user the impression that the website is faster because they already know what type of content is loading before it appears. This is referred to as perceived performance.
Here are some examples of skeleton screens from Facebook and LinkedIn:

LinkedIn home feed loading state
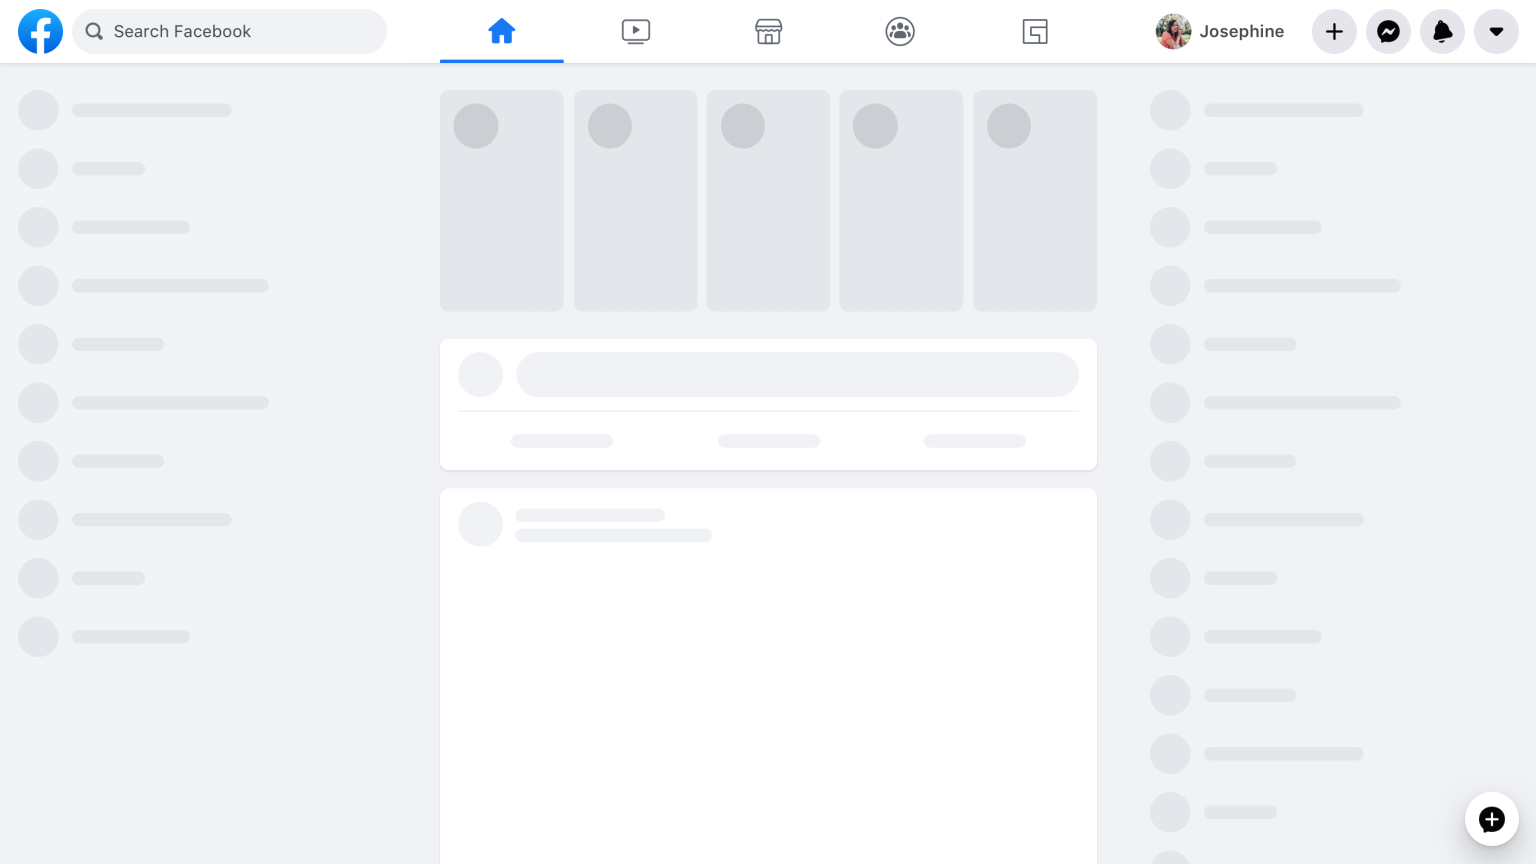
Facebook home feed loading state
Different types of Skeleton Screens
There are 2 main types of skeleton screens:
Content Placeholders
Color Placeholders
Content Placeholders are typically light grey boxes and circles that simulate the appearance of the page, as shown in the images above for Facebook and LinkedIn.
Color Placeholders are more difficult to create because they simulate not only the UI layout but also the dominant color. It is most commonly found on image-focused websites such as Pinterest and Unsplash.
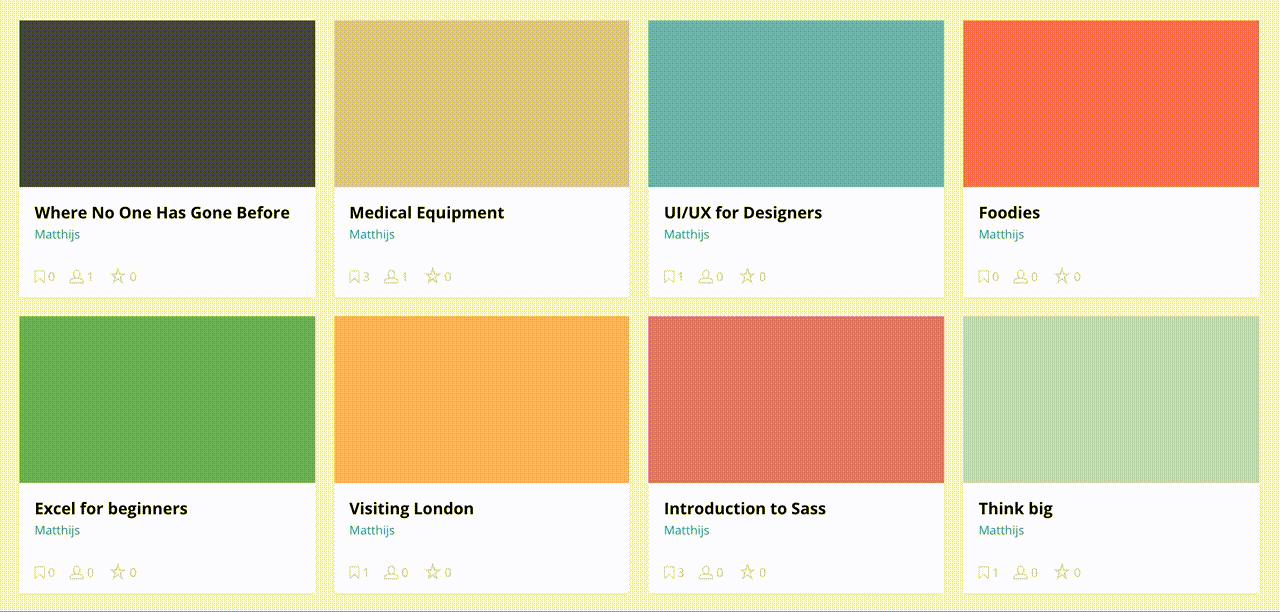
Color Placeholder example from Pinterest
Why Use Skeleton Screens?
They appear to be faster and are more user friendly. Improved perceived performance provides both good UX and helps in increasing conversion rate.
The issue with spinners/loaders is that we have no idea what is loading or how long it will take.
The use of spinners/loaders creates a period of uncertainty for the user since the load time is unknown.
Skeleton screens draw the user's attention to progress rather than waiting time.
It creates an illusion of speed and short load time
When to use them
Use to notify the user that something is loading when more than one element is loading at the same time.
Use when loading data takes more than 3 seconds.
Use on websites with a lot of traffic.
Use for a background or long-running process.
Things to keep in mind
While implementing skeleton screens, we should keep in mind the goal we are trying achieve with the website or app, and prioritize loading the content.
Use of skeleton loading screens is no excuse to skip actual performance optimization, and if you can cache meaningful content and display that, that'll be good.
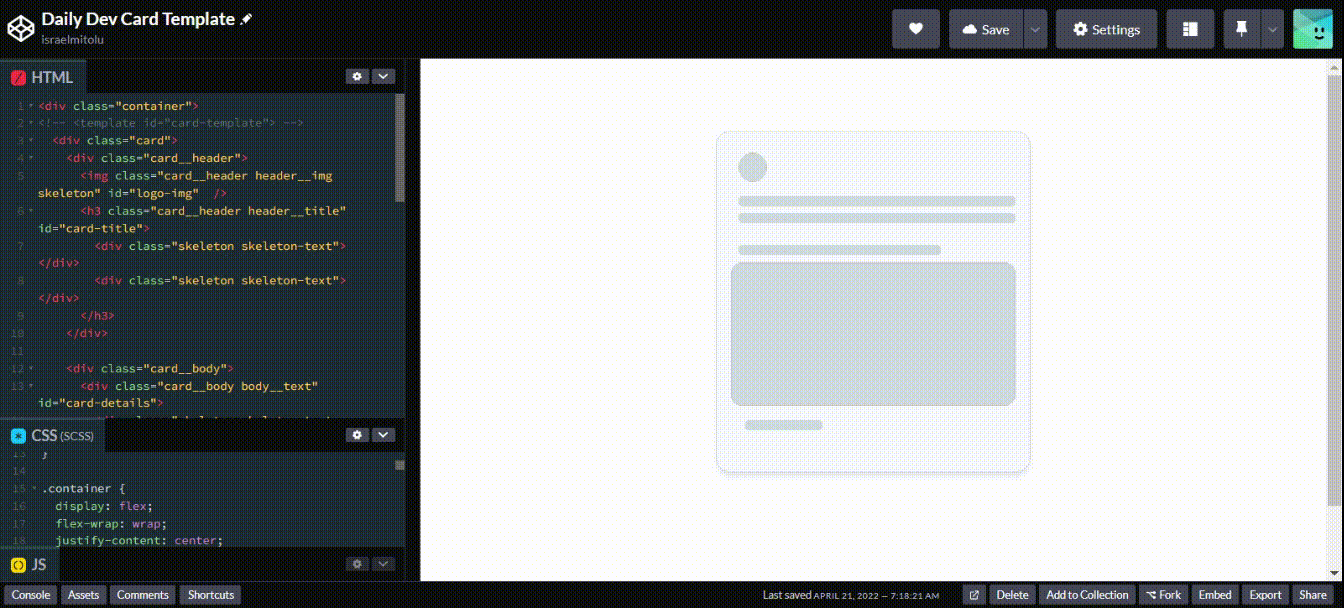
Building A Daily Dev Skeleton Loading UI
In this section, we will dive into the implementation of the skeleton loading screen following a step-by-step process so it's easier to understand.
We'll build one like daily.dev's feed section.
Step 1: Set up the project
First, to code along with me, clone or download the starter code for the layout here. You can download the files by using DownGit.
The code contains the card layout, so we will continue from here in the next steps.
To begin, start the development server in the IDE and open up your browser.
Starter Card Layout
Step 2: Design the Skeleton elements
There are 5 elements that we want to build for the skeleton loading: the logo image, title, details, cover image and footer section.
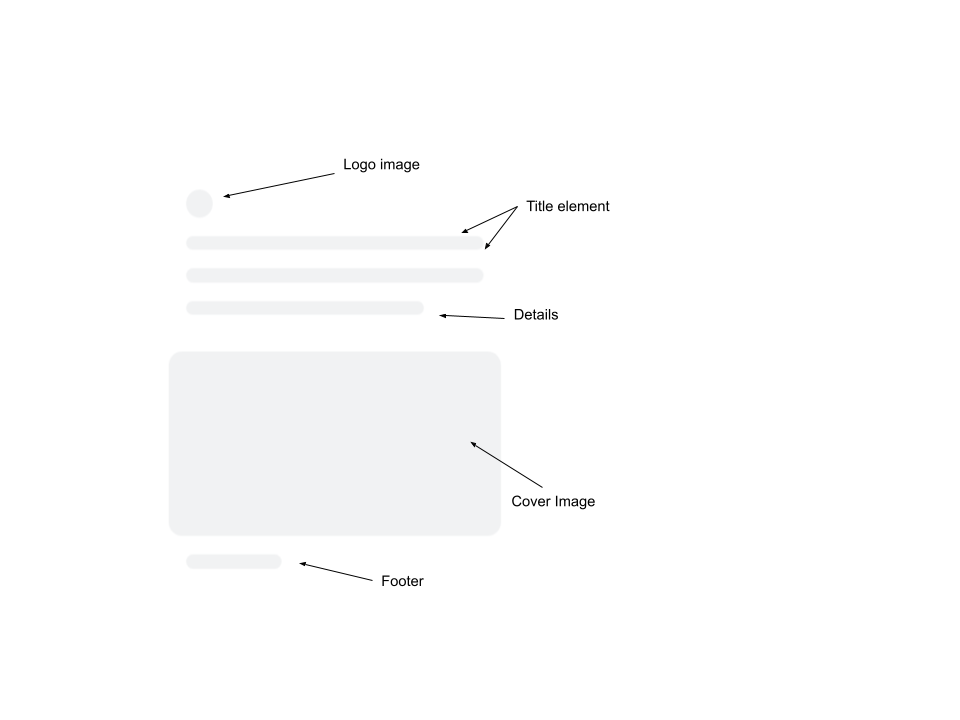
Daily Dev's Skeleton Elements
Now, we will add skeleton classes to the locations of the above elements.
For the logo,
<img class="card__header header__img skeleton" />
For the title, there will be 2 divs to represent the two lines that we have in the picture above.
<div class="skeleton skeleton-text"></div>
<div class="skeleton skeleton-text"></div>
For the details, add the following code inside the div of class body__text:
<div class="skeleton skeleton-text skeleton-text__body"></div>
Inside the body__img div, add the following code:
<img class="skeleton" alt="" id="cover-img" />
For the footer, add this code:
<div class="skeleton skeleton-text skeleton-footer"></div>
Now, the complete HTML code for the card:
<a class="card" id="card-link" target="_blank">
  <div class="card__header">
    <div>
      <img class="card__header header__img skeleton" id="logo-img" alt="" />
    </div>
    <h3 class="card__header header__title" id="card-title">
      <div class="skeleton skeleton-text"></div>
      <div class="skeleton skeleton-text"></div>
    </h3>
  </div>

  <div class="card__body">
    <div class="card__body body__text" id="card-details">
      <div class="skeleton skeleton-text skeleton-text__body"></div>
    </div>

    <div class="card__body body__img">
      <img class="skeleton" alt="" id="cover-img" />
    </div>
  </div>

  <div class="card__footer" id="card-footer">
    <div class="skeleton skeleton-text skeleton-footer"></div>
  </div>
</a>
Now, let's add some styling to make the skeleton components:
.skeleton {
  animation: skeleton-loading 1s linear infinite alternate;
}

@keyframes skeleton-loading {
  0% {
    background-color: hsl(200, 20%, 80%);
  }
  100% {
    background-color: hsl(200, 20%, 95%);
  }
}

.skeleton-text {
  width: 100%;
  height: 0.7rem;
  margin-bottom: 0.5rem;
  border-radius: 0.25rem;
}

.skeleton-text__body {
  width: 75%;
}

.skeleton-footer {
  width: 30%;
}
This is the resulting layout:
Card component loading
Step 3: Clone the card template
Insert a template tag between the container and the card element in the index.html file.
In the image above there's a template tag that I commented out, and yes, its a valid HTML element ;). It is used to declare fragments of HTML that can be cloned and inserted in the document by script.
<template id="card-template">
As a result, make sure to add the closing tag </template> after the closing tag of the card div.
Now let's look at the JavasScript code that we'll use to clone the card template.
Create a script tag just before the end of the body tag, and add the following code:
const container = document.querySelector(".container");
const cardTemplate = document.getElementById("card-template");
for (let i = 0; i < 10; i++) {
  container.append(cardTemplate.content.cloneNode(true));
}
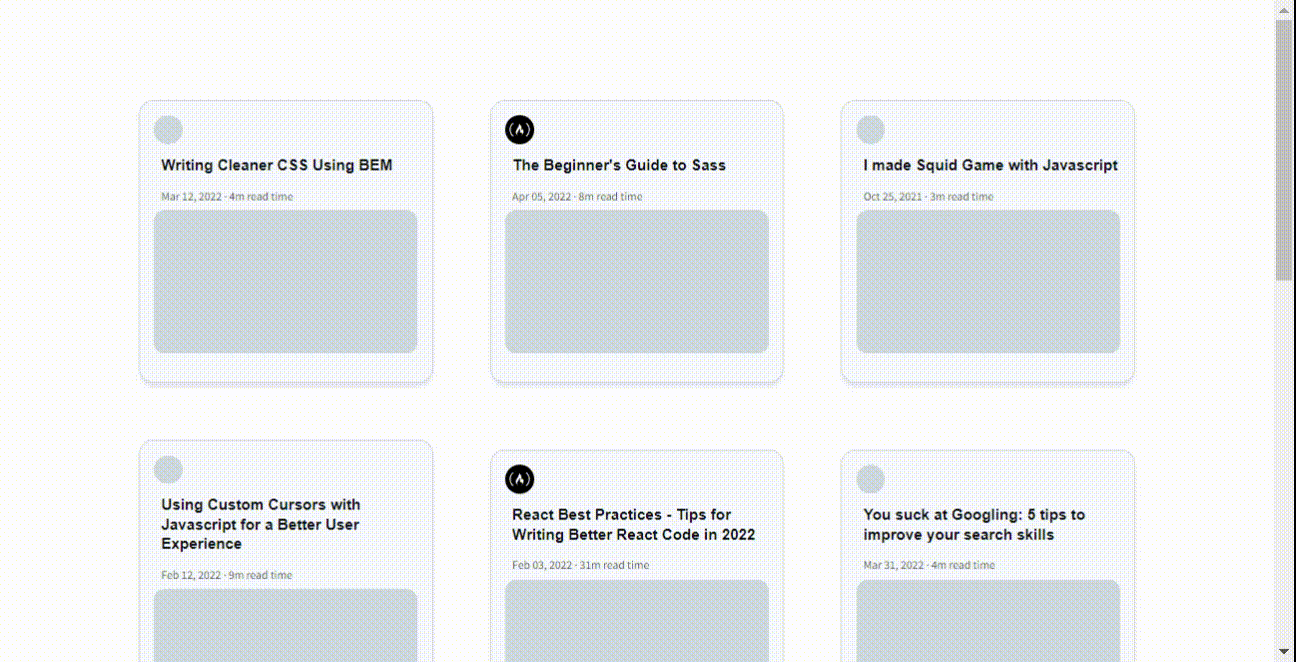
The code above grabs the page container and the card template, and then creates 9 clones/copies of the card (making 10 in total). Then it appends/inserts the cards into the container.

Cloned card skeleton UI
Step 4: Create JSON file
We need some data before we can add content to the page. Normally, you would need to get data with an external website, but we'll be using one that I've set up specifically for this project.
To begin, create a file called data.json in the project folder.
Add the following code to the JSON file.
[
  {
    "id": 1,
    "logoImage": "https://res.cloudinary.com/daily-now/image/upload/t_logo,f_auto/v1/logos/4a287b2e7cb5499bae863f8e7137cdb4",
    "title": "Writing Cleaner CSS Using BEM ",
    "details": "Mar 12, 2022 · 4m read time",
    "coverImage": "https://res.cloudinary.com/daily-now/image/upload/f_auto,q_auto/v1/posts/dd19e7a56475f39ab1c38167c02c7b58",
    "link": "https://israelmitolu.hashnode.dev/writing-cleaner-css-using-bem-methodology"
  },
  {
    "id": 2,
    "logoImage": "https://daily-now-res.cloudinary.com/image/upload/t_logo,f_auto/v1628412854/logos/freecodecamp",
    "title": "The Beginner's Guide to Sass",
    "details": "Apr 05, 2022 · 8m read time",
    "coverImage": "https://res.cloudinary.com/daily-now/image/upload/f_auto,q_auto/v1/posts/bec6719be210973098293a32dc732d1e",
    "link": "https://www.freecodecamp.org/news/the-beginners-guide-to-sass/"
  },
  {
    "id": 3,
    "logoImage": "https://res.cloudinary.com/daily-now/image/upload/t_logo,f_auto/v1/logos/devto",
    "title": "I made Squid Game with Javascript",
    "details": "Oct 25, 2021 · 3m read time",
    "coverImage": "https://res.cloudinary.com/daily-now/image/upload/f_auto,q_auto/v1/posts/1f947033365381cbe322ddf294ad7169",
    "link": "https://dev.to/0shuvo0/i-made-squid-game-with-javascript-10j9"
  },
  {
    "id": 4,
    "logoImage": "https://res.cloudinary.com/daily-now/image/upload/t_logo,f_auto/v1/logos/4a287b2e7cb5499bae863f8e7137cdb4",
    "title": "Using Custom Cursors with Javascript for a Better User Experience",
    "details": "Feb 12, 2022 · 9m read time",
    "coverImage": "https://res.cloudinary.com/daily-now/image/upload/f_auto,q_auto/v1/posts/3d056b99c95b37cd35ae5cfc6a8b38be",
    "link": "https://israelmitolu.hashnode.dev/using-custom-cursors-with-javascript-for-a-better-user-experience"
  },
  {
    "id": 5,
    "logoImage": "https://daily-now-res.cloudinary.com/image/upload/t_logo,f_auto/v1628412854/logos/freecodecamp",
    "title": "React Best Practices - Tips for Writing Better React Code in 2022",
    "details": "Feb 03, 2022 · 31m read time",
    "coverImage": "https://res.cloudinary.com/daily-now/image/upload/f_auto,q_auto/v1/posts/5a629fff5583f9ab5f0931d14736b299",
    "link": "https://www.freecodecamp.org/news/best-practices-for-react/"
  },
  {
    "id": 6,
    "logoImage": "https://res.cloudinary.com/daily-now/image/upload/t_logo,f_auto/v1/logos/tnw",
    "title": "You suck at Googling: 5 tips to improve your search skills",
    "details": "Mar 31, 2022 · 4m read time",
    "coverImage": "https://res.cloudinary.com/daily-now/image/upload/f_auto,q_auto/v1/posts/e318150ae67c2083ff3585a96f366f7b",
    "link": "https://thenextweb.com/news/5-tips-to-improve-your-google-search-skills"
  },
  {
    "id": 7,
    "logoImage": "https://res.cloudinary.com/daily-now/image/upload/t_logo,f_auto/v1/logos/logrocket",
    "title": "A better way of solving prop drilling in React apps",
    "details": "Jan 14, 2022 · 13m read time",
    "coverImage": "https://res.cloudinary.com/daily-now/image/upload/f_auto,q_auto/v1/posts/6fe4c4060bca638b419d8b2c63d8eaf7",
    "link": "https://blog.logrocket.com/solving-prop-drilling-react-apps/"
  },
  {
    "id": 8,
    "logoImage": "https://res.cloudinary.com/daily-now/image/upload/t_logo,f_auto/v1/logos/dz",
    "title": "Golang and Event-Driven Architecture",
    "details": "Apr 18, 2022 · 6m read time",
    "coverImage": "https://res.cloudinary.com/daily-now/image/upload/f_auto,q_auto/v1/posts/d06eddd82c62288df6e2600bcda61579",
    "link": "https://dzone.com/articles/golang-and-event-driven-architecture"
  },
  {
    "id": 9,
    "logoImage": "https://res.cloudinary.com/daily-now/image/upload/t_logo,f_auto/v1/logos/4a287b2e7cb5499bae863f8e7137cdb4",
    "title": "Introduction to Git In 16 Minutes",
    "details": "Mar 18, 2021 · 8m read time",
    "coverImage": "https://res.cloudinary.com/daily-now/image/upload/f_auto,q_auto/v1/posts/3c02111a8f242f607551500432e17a78",
    "link": "https://vickyikechukwu.hashnode.dev/introduction-to-git-in-16-minutes"
  },
  {
    "id": 10,
    "logoImage": "https://res.cloudinary.com/daily-now/image/upload/t_logo,f_auto/v1/logos/4a287b2e7cb5499bae863f8e7137cdb4",
    "title": "How to Create a Sleek Preloader Animation Using GSAP Timeline",
    "details": "Jan 25, 2022 · 7m read time",
    "coverImage": "https://res.cloudinary.com/daily-now/image/upload/f_auto,q_auto/v1/posts/e238c35cb9d41dd9a5475602aef00119",
    "link": "https://israelmitolu.hashnode.dev/how-to-create-a-sleek-preloader-animation-using-gsap-timeline"
  }
]
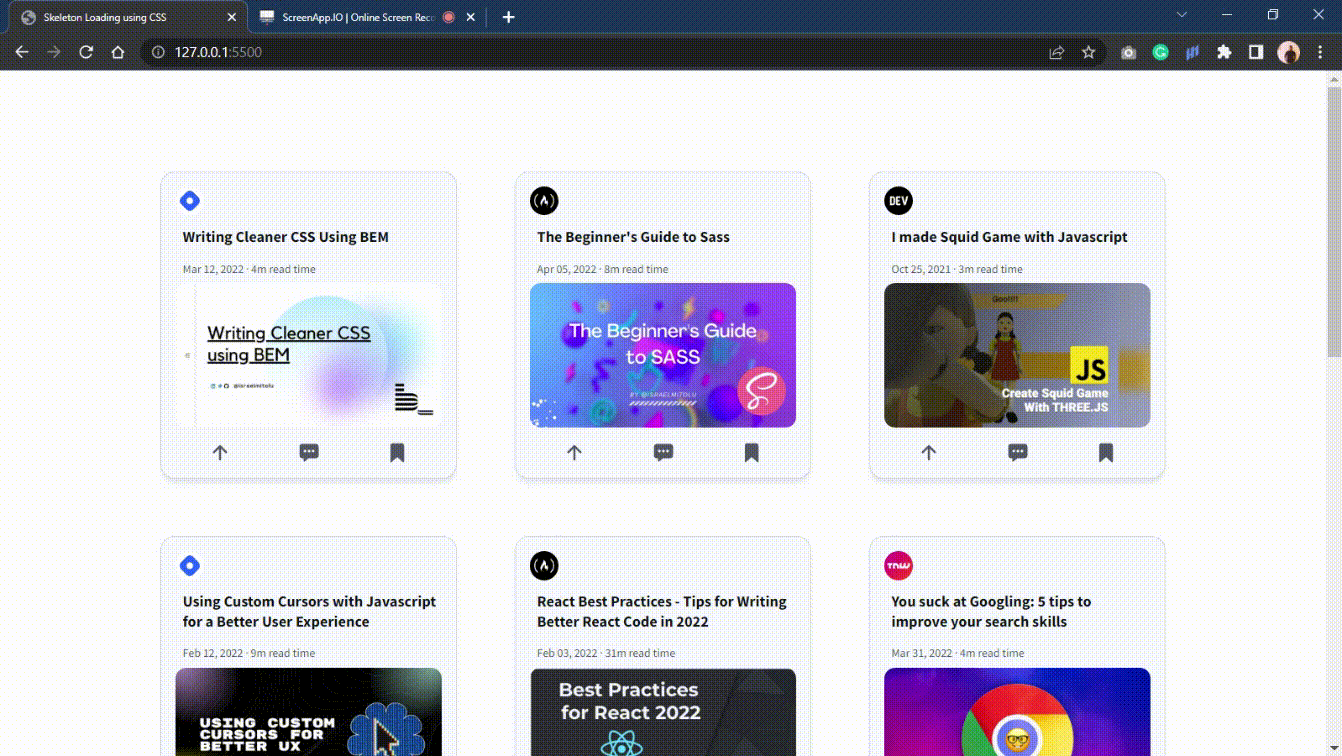
To replicate Daily Dev's feed section, we have created some data that has an array of objects with properties such as id, logo image, title, details and cover image.
Step 5: Populate HTML Elements with appropriate content
Add the following code to the script tag that houses your JavaScript:
fetch("data.json")
  .then((response) => response.json())
  .then((posts) => {
    container.innerHTML = "";
    posts.forEach((post) => {
      const div = cardTemplate.content.cloneNode(true);
      div.getElementById("card-link").href = post.link;
      div.getElementById("logo-img").src = post.logoImage;
      div.getElementById("card-title").textContent = post.title;
      div.getElementById("card-details").textContent = post.details;
      div.getElementById("cover-img").src = post.coverImage;
      div.getElementById(
        "card-footer"
      ).innerHTML = ` <ion-icon name="arrow-up"></ion-icon>
          <ion-icon name="chatbox-ellipses"></ion-icon>
          <ion-icon name="bookmark"></ion-icon>`;
      container.append(div);
    });
  });
The code above is what we will use to add content to the cards once they are done loading.
Now, let me explain the code bit by bit:
fetch("data.json")
  .then((response) => response.json())
Here, we have a basic fetch request, where we set the path to the resource. In this case, the data.json file. If it were an external API, you would use the endpoint URL as the argument:
The fetch() method does not directly return the JSON response body but instead returns a promise that resolves with a Response object.
To learn more, check out the MDN docs.
.then((posts) => {
    container.innerHTML = "";
    posts.forEach((post) => {
      const div = cardTemplate.content.cloneNode(true);
      div.getElementById("logo-img").src = post.logoImage;
      div.getElementById("card-title").textContent = post.title;
      div.getElementById("card-details").textContent = post.details;
      div.getElementById("cover-img").src = post.coverImage;
      div.getElementById(
        "card-footer"
      ).innerHTML = `<ion-icon name="arrow-up"></ion-icon>
          <ion-icon name="chatbox-ellipses"></ion-icon>
          <ion-icon name="bookmark"></ion-icon>`;
      container.append(div);
    });
  });
Here, we define what should happen after fetching the data.
The code first clears the page, and then runs a forEach() method which extracts the properties from the JSON file, and then inputs it into the card elements (logo image, card title,...) using .textContent property.
Finally, for the footer, we used .innerHTML to insert the icons as HTML content.
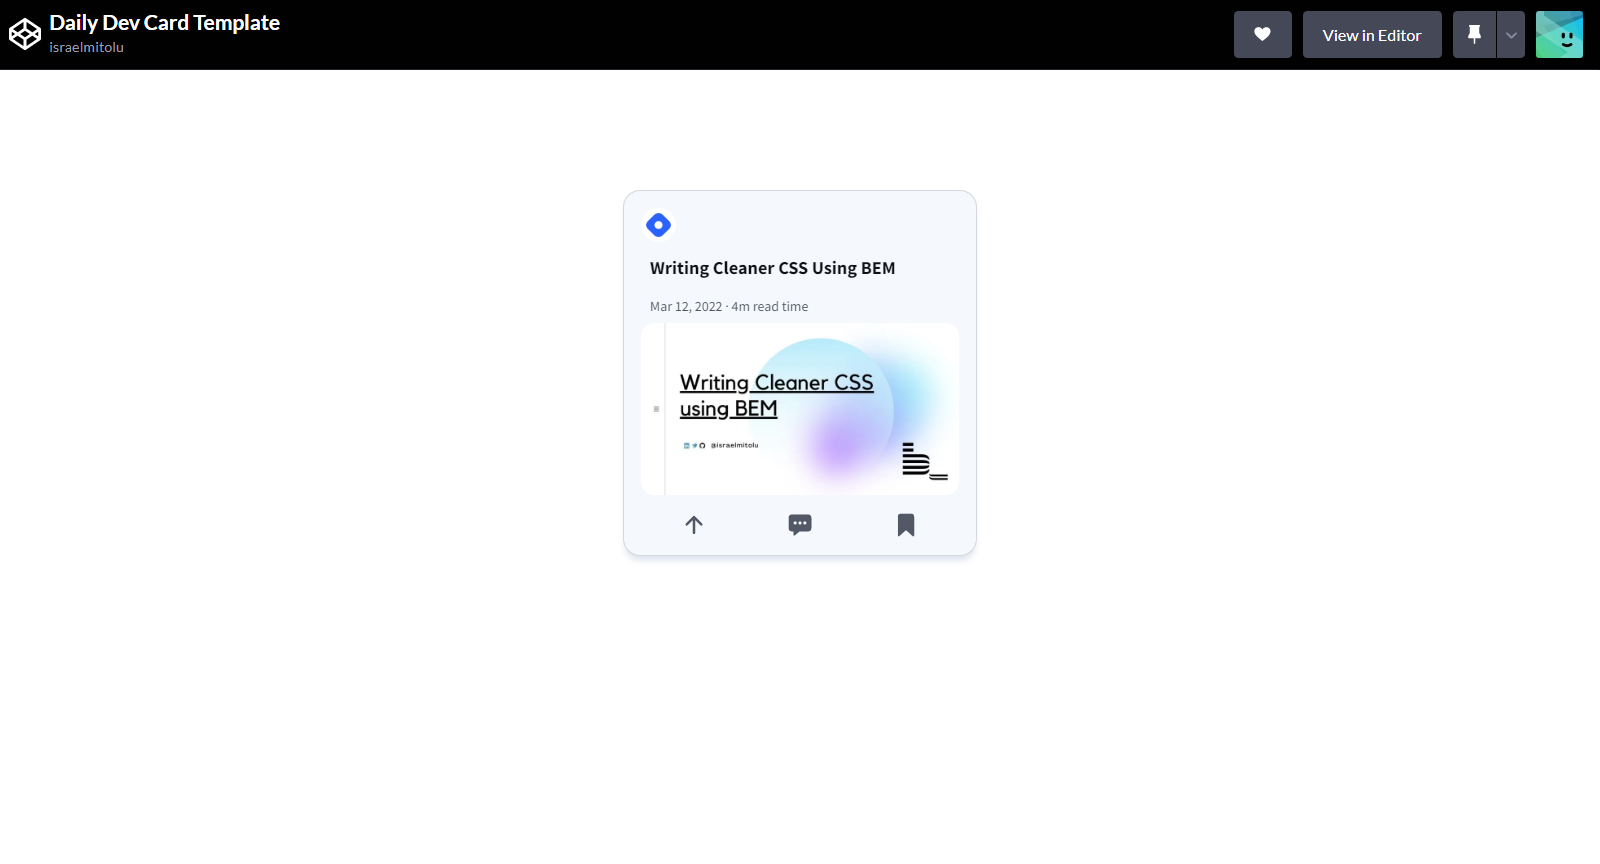
If you added everything correctly, there shouldn't be any errors, and this is our fully functional skeleton loading UI.
Our finished Daily Dev skeleton UI
Check out the live demo and the source code repository on Github.
Network Throttling in Chrome DevTools
It's important to note that we didn't set a timeout because this skeleton screen is dependent on the user's network speed.
If you want to simulate it at different network speeds, go into the network tab in your browser Devtools.
Here's how to do it in Chrome v100:
Throttle Network in Chrome DevTools
Open DevTools (Ctrl+Shift+i).
Navigate to the "Network" tab.
Select the type of connection you want
Reload the page to see assets downloading at the specified connection speed.
If the default options don't suit you, you can create a custom Network Throttling Profile by selecting the option at the very top of the dropdown menu.
Conclusion
You made it all the way to the end! You've learned about skeleton loading, and how it contributes to user experience by creating the illusion of speed when loading data, and you've implemented your own.
I hope you found this tutorial useful and that it serves as a good starting point for creating various skeleton loading screens.
If you found this article insightful, do share it with your friends and network. Also, feel free to connect with me on Twitter and my blog where I share resources and articles to make you a better dev.
Thanks for reading, and happy coding!
Before you go, here are some skeleton loading packages for React, Angular and Vue.