By Shane Duggan
Pong is a classic video game that has stood the test of time. It's a crowd favorite that many among you might recognise.
For the programmers out there, coding Pong in Python is a fun and challenging way to learn the language and basic concepts of game development.
But it may be daunting to think about how all of the components come together to form a cohesive and user-interactive game, especially for beginner programmers.
Well, fret not, because that's where this step-by-step tutorial comes in.
Using the Turtle module, I will walk you through the process of coding Pong in Python, from setting up your development environment to implementing the game mechanics. It will be a great mention in your portfolio of projects, and a great way to test your skills in Python, regardless of your programming experience thus far.
The best part is, you'll be able to play the game against your friends or family as we will be implementing it as a player-vs-player game.
So grab your computer or laptop and let's get coding!
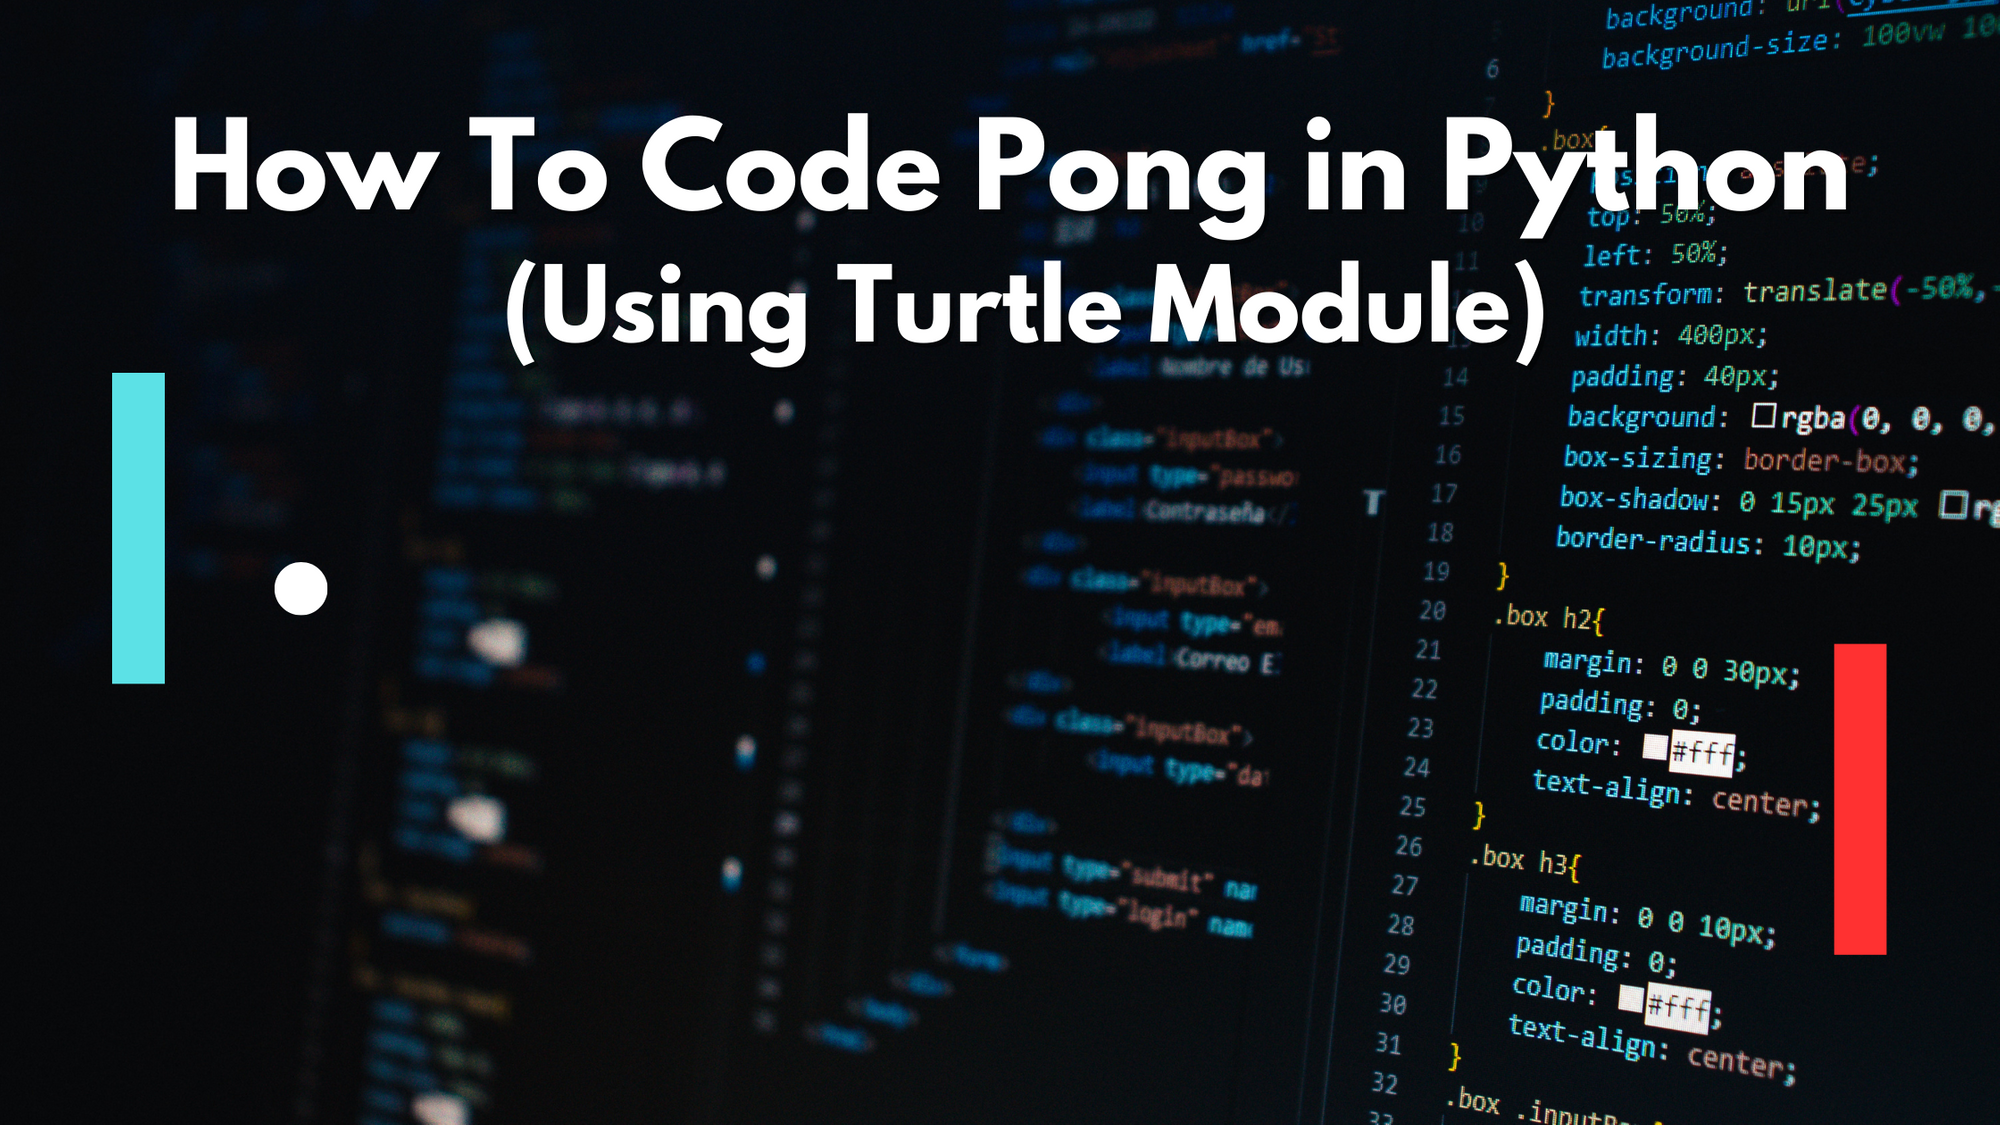
 What we'll be programming today
What Do I Need to Code Pong in Python?
Before we dive into the tutorial, let's make sure you have everything you need to get started. First and foremost, you will need a computer with Python installed. I recommend using Python 3, as it is the most up-to-date version of the language.
You will also need a text editor or integrated development environment (IDE) to write and edit your code. Some popular options for Python include PyCharm, IDLE, and Visual Studio Code.
Personally, I use Visual Studio Code as I find it has many useful integrations and features. I will be completing this tutorial with it.
Additionally, you will need the Turtle module, which is a built-in library in Python that allows you to create graphics and draw shapes on the screen.
If you have prior knowledge of Game Theory, that is great and will definitely help you and apply well in this guide. But don't worry if you don't have any prior knowledge – this tutorial will walk you through everything you need to know to get your first game up and running.
And if you are unfamiliar with these tools or concepts, I've got you covered. I will go through the installation and setup process in more detail in the next section as well.
What Is The Turtle Module?
The Turtle module is a built-in library in Python that allows you to create graphics and draw shapes on the screen. It is named after the turtle graphics system developed by Seymour Papert in the 1960s, which was designed to teach young children the basics of programming.
The Turtle module provides a simple interface for drawing lines and shapes using a cursor, or "turtle," that can be moved around the screen using commands like forward, backward, left, and right. You can also customize the turtle with different colors, pens, and shapes, and you can use loops and conditionals to create more complex designs.
One of the main benefits of the Turtle module is that it is easy to learn and use, making it a great tool for beginners who are new to programming. It allows you to quickly create visual outputs and see the results of your code, which can be a fun and engaging way to learn programming concepts.
Additionally, you can use the Turtle module to create a wide range of graphics and animations, from simple shapes and patterns to complex games and simulations.
Due to its ease of use, we will be using it in this guide to get you up and running with your Pong game in Python as soon as possible.
What Are the Steps for Coding Pong?
Now that you have a basic understanding of the Turtle module and what you need to get started, it's time to begin coding Pong in Python.
Below, I have outlined the steps you will need to follow in order to create your own version of Pong. These steps are designed to be easy to follow and will guide you through the process of setting up your development environment, designing the game, and implementing the game mechanics. Let's get started!
- Step 1: Set up your development environment
- Step 2: Design your game
- Step 3: Implement the game mechanics
- Step 4: Add additional features and customization
- Step 5: Test and debug your code
How to Set Up Your Development Environment
The first step in coding Pong in Python is to set up your development environment. This includes installing Python, installing a text editor or integrated development environment (IDE), and installing the Turtle module.
If you are using Visual Studio Code (VS Code) as your IDE, here is what you need to do:
- Install Python: If you don't already have Python installed on your computer, you will need to download and install it. I recommend using Python 3, as it is the most up-to-date version of the language. You can download Python from the official website or through the VS Code marketplace.
- Install VS Code (Or whichever text editor/IDE you are comfortable with): Once you have Python installed, you will need to download and install VS Code. You can download VS Code from the official website or through the Python website.
- Install the Turtle module: The Turtle module is a built-in library in Python that allows you to create graphics and draw shapes on the screen. To install the Turtle module, you will need to open a terminal window in VS Code and enter the following command to install the turtle module:
pip install turtle
Once you have completed these steps, you are ready to begin coding Pong in Python using the Turtle module and VS Code. In the next step, we will discuss how to design your game and create a game plan.
How to Design Your Game
Now that you have set up your development environment, it's time to start designing your game of Pong. This step is all about creating a game plan and determining the basic mechanics of your game.
To begin, you should decide on the size and layout of your game screen. The Turtle module allows you to create a screen with a specific width and height, and you can use the "setup" function to set these values.
You will need to decide on the game elements that you want to include in your game. In a basic Pong game, you will need at least two paddles (one for each player) and a ball.
You can create these elements using the Turtle module's "Turtle" function, which allows you to create a new turtle object with a specific shape and color.
To create the ball for your game, you can use the Turtle module's "Turtle" function and set the shape to "circle" and the color to "white.
You can easily create these elements with the Turtle module as shown below:
# Creating the Ball
ball = turtle.Turtle()
ball.shape("circle")
ball.color("white")
Other elements include a scoreboard, background color, and game styling. We also have to create a set of rules to govern the playing of the game.
I have included a table below for you to see what the basic setup of a Pong game might look like:
import turtle

# Set up game screen
turtle.setup(400, 300)
# Set game screen background color
turtle.bgcolor("black")
paddle1 = turtle.Turtle()
paddle1.shape("square")
paddle1.color("red")
paddle1.shapesize(stretch_wid=5, stretch_len=1)  # make the paddle wider
paddle1.penup()
paddle1.goto(-350, 0)
paddle1.dy = 0
paddle2 = turtle.Turtle()
paddle2.shape("square")
paddle2.color("blue")
paddle2.shapesize(stretch_wid=5, stretch_len=1)
paddle2.penup()
paddle2.goto(350, 0)
paddle2.dy = 0
ball = turtle.Turtle()
ball.shape("circle")
ball.color("white")
ball.penup()
ball.goto(0, 0)
game_over = False
winner = None
points = {
    "player1": 0,
    "player2": 0
}
game_rules = {
    "max_points": 3,
    "ball_speed": 3
}
score_display = turtle.Turtle()
score_display.color("white")
score_display.penup()
score_display.hideturtle()
score_display.goto(0, 260)
score_display.write("Player 1: 0  Player 2: 0", align="center", font=("Arial", 24, "normal"))
With this, you should have all of the elements of the game set up and ready to move onto the next step of implementing the actual game mechanics.
How to Implement the Game Mechanics
The next step in creating our game of Pong is to set up the mechanics of the game. This includes defining the movement of the ball, the collision of the ball with the paddles and screen edges, and the scoring system.
To define the movement of the ball, we will need to update the x and y coordinates of the ball turtle object in the main game loop. We can do this using the setx and sety functions, and we can adjust the speed of the ball by multiplying the dx and dy values by a constant factor.
To implement the collision mechanics of the game, we will need to check for the ball's position in relation to the paddles and screen edges.
If the ball collides with a paddle, we will need to reverse the direction of the ball by multiplying the dx value by -1. If the ball goes off the screen, we will need to reset the ball to the center of the screen and update the score.
To create the scoring system, we will need to keep track of the points for each player. We can do this by creating a dictionary with keys for each player and updating the values of these keys every time a player scores. We can then display the current score on the screen using the write function of the score display turtle object.
In summary, the coding logic looks like so:
paddle1.sety(paddle1.ycor() + paddle1.dy)
paddle2.sety(paddle2.ycor() + paddle2.dy)
ball.setx(ball.xcor() + ball.dx)
ball.sety(ball.ycor() + ball.dy)

# Check for game over conditions
if points["player1"] == game_rules["max_points"]:
    game_over = True
    winner = "player1"
elif points["player2"] == game_rules["max_points"]:
    game_over = True
    winner = "player2"

# Check for ball collision with paddles
if (ball.xcor() > 340 and ball.xcor() < 350) and (ball.ycor() < paddle2.ycor() + 50 and ball.ycor() > paddle2.ycor() - 50):
    ball.setx(340)
    ball.dx *= -1
elif (ball.xcor() < -340 and ball.xcor() > -350) and (ball.ycor() < paddle1.ycor() + 50 and ball.ycor() > paddle1.ycor() - 50):
    ball.setx(-340)
    ball.dx *= -1

# Check for ball going off screen
if ball.xcor() > 390:
    ball.goto(0, 0)
    ball.dx *= -1
    points["player1"] += 1
elif ball.xcor() < -390:
    ball.goto(0, 0)
    ball.dx *= -1
    points["player2"] += 1

# Check for ball colliding with top or bottom of screen
if ball.ycor() > 290:
    ball.sety(290)
    ball.dy *= -1
elif ball.ycor() < -290:
    ball.sety(-290)
    ball.dy *= -1

# Update score display
score_display.clear()
score_display.write("Player 1: {}  Player 2: {}".format(points["player1"], points["player2"]), align="center", font=("Arial", 24, "normal"))
How to Add Additional Features and Customization
Now that we have the basic mechanics of the game in place, it's time to add some additional features and customization to make our game of Pong even more fun and engaging.
One simple feature we can add is the ability for the players to control their paddles using the keyboard.
To do this, we will need to define functions to move the paddles up and down, and bind these functions to specific keys using the onkeypress function of the turtle module.
We can also add some customization options to make the game more challenging or personalized. For example, we can allow the players to choose the maximum number of points required to win the game, or adjust the ball speed to make the game more or less challenging.
We can also allow the players to choose the colors of their paddles and the ball, or even add different background images to the game screen (I'd recommend testing different colors, game images, and aesthetics to see which suits your style best).
For this tutorial, I have created key bindings and a game over screen for the game:
# Function to move paddle1 up
def paddle1_up():
    paddle1.dy = 10

# Function to move paddle1 down
def paddle1_down():
    paddle1.dy = -10

# Function to move paddle2 up
def paddle2_up():
    paddle2.dy = 10

# Function to move paddle2 down
def paddle2_down():
    paddle2.dy = -10
# Set up keyboard bindings
turtle.listen()
turtle.onkeypress(paddle1_up, "w")
turtle.onkeypress(paddle1_down, "s")
turtle.onkeypress(paddle2_up, "Up")
turtle.onkeypress(paddle2_down, "Down")
# Game over screen
game_over_display = turtle.Turtle()
game_over_display.color("white")
game_over_display.penup()
game_over_display.hideturtle()
game_over_display.goto(0, 0)
game_over_display.write("Game Over! {} wins!".format(winner), align="center", font=("Arial", 36, "normal"))
By adding these additional features and customization options, we can make our game of Pong even more exciting and unique.
How to Test and Debug Your Code
Now that we have all of the pieces of our game of Pong in place, it's time to test and debug our code to make sure everything is working as expected.
This is an important step in the development process, as it allows us to catch any errors or bugs that may have crept into our code.
To test our game, we can simply run the code and play through a few rounds to see if everything is functioning properly. As we play, we should pay attention to the movement of the ball and paddles, the collision mechanics, and the scoring system to ensure they are all working correctly.
If we encounter any errors or issues during testing, we will need to debug our code to find the source of the problem. This can involve adding print statements to help us understand what is happening at each step of the game loop, or using the inbuilt debugging features of VS Code to inspect the variables and flow of our code.
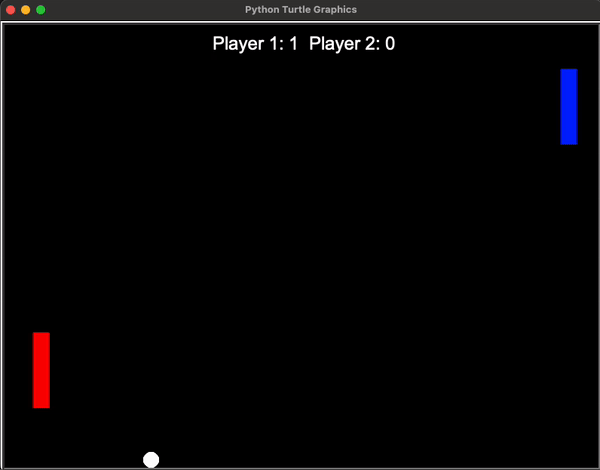
 A simple game of Pong, play the game itself to debug!
How Do You Take Your Game to the Next Level?
Now that you have a basic version of the game up and running, you may be wondering how to take it to the next level. There are a few ways you can do this, depending on your goals and interests.
One option is to add more advanced features and mechanics to the game. For example, you could implement power-ups or special abilities that allow the players to change the ball's speed or trajectory, or add more complex collision mechanics to make the game more challenging.
You could also incorporate multiplayer functionality, allowing players to compete against each other online or over a network.
Another option is to focus on the aesthetic and user experience of the game. You could add more visually appealing graphics and animations with upscaled videos, or create a more immersive and engaging soundscape.
 Ideas for improved Pong’s graphics (If you fancy)
You could also work on the user interface, making it more intuitive and user-friendly for players.
It is possible to host your game on a website. Since this article is for beginners, the simplest way you can get your game up and ready to be played online is simply to host it through a WordPress website and through managing code snippets.
Simply put, you use a front-end embed on WordPress to which you can run your backend to your python script.
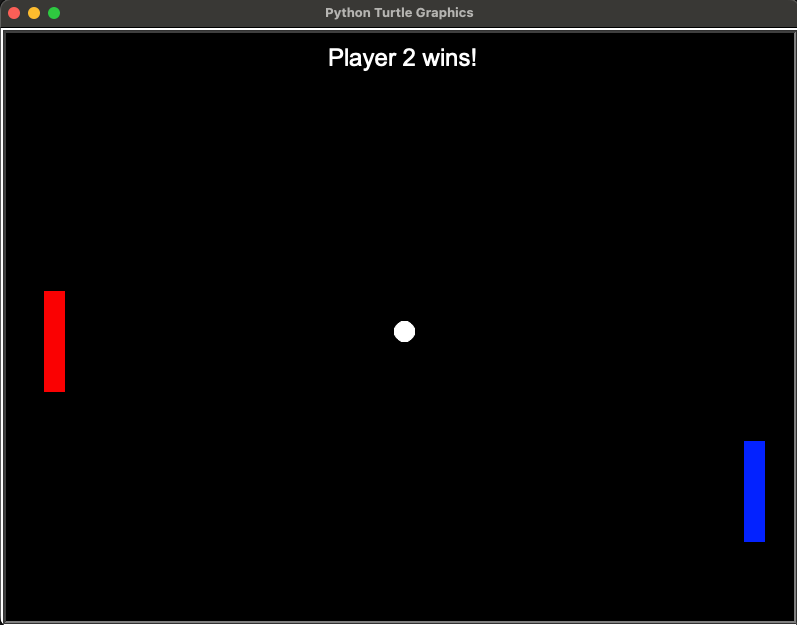 Make your game over page more exciting than this with some graphics!
With all of these additions, you can create a more exciting and engaging experience for players.
Whether you're looking to add more advanced mechanics or focus on the aesthetics of the game, there are many ways you can take your game development skills to the next level!
Wrapping Up and Conclusion
In this tutorial, we have covered all of the steps needed to create a fully functional game of Pong in Python using the Turtle module.
You have learned how to set up the game screen, create the game elements (paddles and balls), define the mechanics of the game, and add additional features and customization options. We have also covered how to test and debug your code to ensure everything is working as expected.
Following these steps, you should now have a solid foundation in game development with Python and the Turtle module. Use these skills to create unique and exciting games or take your game development skills up a notch by adding more advanced features and mechanics.
Coding a game of Pong in Python with the Turtle module is a great way to learn the language and game development in a fun and practical way. Hope you enjoyed this tutorial and wish you the best of luck in your game development journey!