
In this article, I'll show you two ways to create a lightbox effect in a spreadsheet. The first will trigger the image to be displayed in a large area in the sheet. The second will be an actual HTML popup on top of the sheet.
If you want to follow along with the sheet I used, you can access it here. The link will prompt you to create a copy of the spreadsheet and accompanying Apps Script file.
What is an Image Lightbox?
 image thumbnails in a spreadsheet
An image lightbox is what we call it when we hover over or click on an image and it pops up into a bigger version on-screen.
It’s something we’re used to seeing on websites, and it gives things a nice, professional touch when done well.
What about in a spreadsheet, though? 🤔
Well, we’ve got two versions of a solution:
- Using built-in functions to display a larger version in a larger cell.
- Using Apps Script to actually create a popup box on top of our spreadsheet.
As a bonus to the first solution, we’ll also include optional Apps Script to make things a little smoother. More on that below 😉.
As usual, here's a walkthrough video where I go through the whole process:
Image Popup With Built-In Functions
First, we need images in cells. From the top menu, Insert - Image - Insert image in cell will do the trick for this.
 inserting image in spreadsheet cell
Next, we need to merge some cells together so that there’s a larger container that will hold our larger picture after the next step.
You can use one cell and change the width and height of it, but in my example sheet, the “lightbox” area is sharing rows with the rest of the data so I didn’t want to do that.
 a large range of merged cells
In the column next to my image thumbnails, I’ve put checkboxes by selecting Data - Data validation - Criteria: Checkboxes from the top menu.
This will let us select which image to popup in our lightbox area.
 data validation in google sheets
I’ve named the range A2:A11 as pics and the range B2:B11 as checkboxes to allow for easier readability in the function we’ll write next.
 named ranges in google sheets
Now all that remains is one XLOOKUP() function to put inside our lightbox range.
=XLOOKUP(TRUE,checkboxes,pics,"") is the function that searches for a check and then displays the corresponding image. By putting this in a big cell or range of merged cells, we can display whichever small image we select in the bigger area.
 xlookup function in google sheets
Remember, all a checkbox is doing is storing either a TRUE (checked) or a FALSE (unchecked) value.
 checkboxes and image thumbnails in google sheets
⚠️WARNING⚠️
This does have one issue, though. Do you know what it is?
XLOOKUP() is going to return whichever checkboxes it comes to first with a TRUE value. So if you have multiple images checked, it’s only going to display the first one it gets to, not the most recently clicked one.
To get around this, let’s write some code.
Apps Script Improvement
Open up Apps Script by selecting Extensions - Apps Script from the top menu.
 opening apps script in google sheets
Delete the built-in function in the code editor that opens. We'll start from scratch with an onEdit function:
function onEdit(e) {
We need to grab the range that we are currently editing.
var range = e.range
Then the checkboxes range.
var checkboxes = SpreadsheetApp.getActive().getRangeByName("checkboxes")
Then we need to check whether what we just edited is in that checkbox range.
if (range.getColumn() == 2 && range.getRow() >= 2 && range.getRow() <= 10)
If it was a checkbox, then we want to uncheck all the checkboxes and re-check the one we just checked.
// Uncheck all other checkboxes in the range
checkboxes.uncheck();
// Check the edited cell
range.check();
Now, there is a slight delay when you run the code. After clicking a checkbox, all of them are cleared right before the one you checked gets checked again.
Here’s what the full code looks like:
function onEdit(e) {
  var range = e.range;
  var checkboxes = SpreadsheetApp.getActive().getRangeByName("checkboxes")

  // Check if the edited cell is a checkbox in the desired range
  if (range.getColumn() == 2 && range.getRow() >= 2 && range.getRow() <= 10) {
    // Uncheck all other checkboxes in the range
    checkboxes.uncheck();
    // Check the edited cell
    range.check();
  }
}
A Real Popup Box with HTML
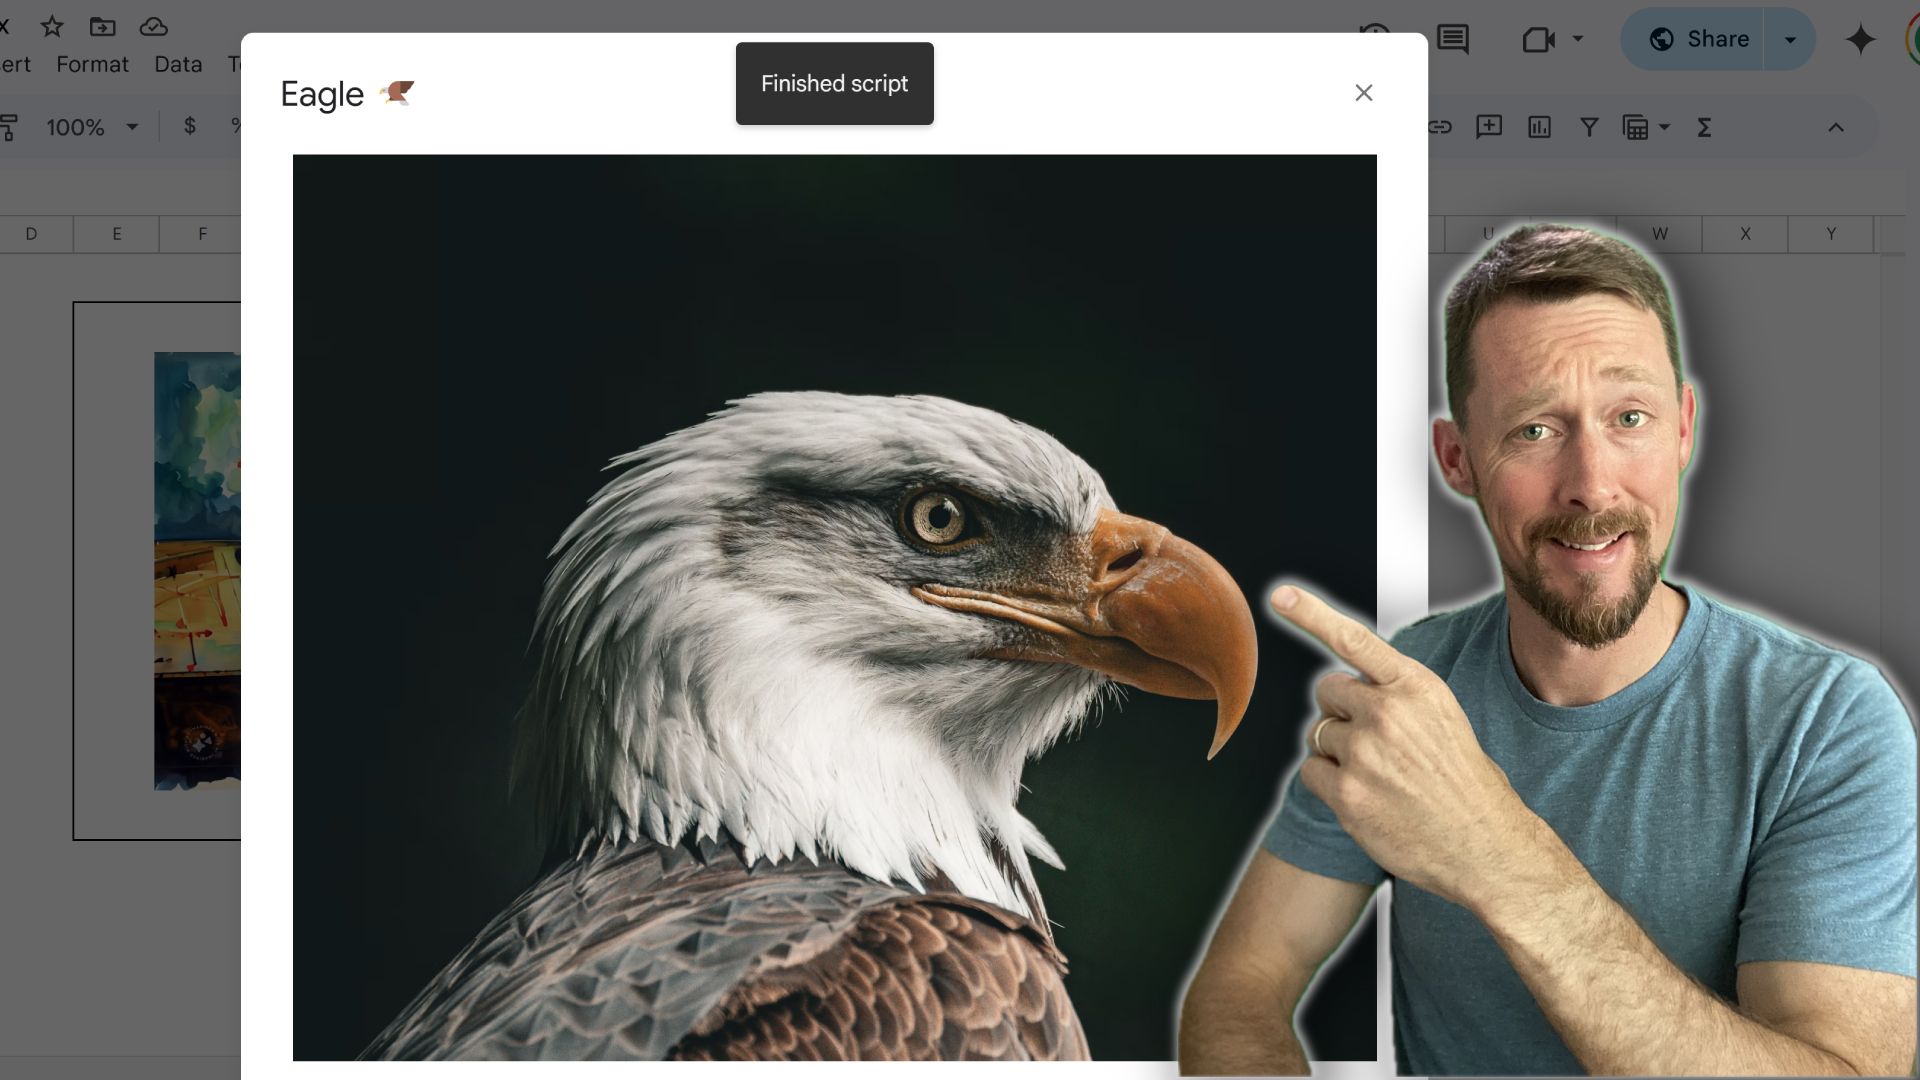
 modal dialog box in google sheets
Okay, that’s all fine and dandy. What about the real thing, though?
This takes more Apps Script, but it’s doable thanks to the built-in howModalDialog method.
This is basically a popup window that can hold HTML. And since the internet is built with HTML, all we need to do is use a little bit to plug in an image.
This method requires an image live on the internet somewhere. So, we cannot reference the image that we've embedded in our sheet and use it in the HTML we're going to write.
Weird, I know.
Let’s find an image URL we can use. I’ve grabbed an eagle off of unsplash.
We’ll hold this in a variable.
var imageURL = "https://images.unsplash.com/photo-1715002383611-63488b956401?q=80&w=1887&auto=format&fit=crop&ixlib=rb-4.0.3&ixid=M3wxMjA3fDB8MHxwaG90by1wYWdlfHx8fGVufDB8fHx8fA%3D%3D"
Then we need to build our HTML. In our case, all we want is one element, so we won’t worry ourself with constructing a full, semantically correct page (although we certainly could 😉)
Another variable will hold this img element:
var html = '<img src="' + imageURL + '" style="max-width: 100%; max-height: 100%;">';
We have access to Class Ui in Apps Script where we can “…add features like menus, dialogs, and sidebars.”
var ui = SpreadsheetApp.getUi();
And finally, by calling the showModalDialog() method, we can generate HTML from our html variable using the Class HtmlService.
ui.showModalDialog(HtmlService.createHtmlOutput(html).setWidth(700).setHeight(1000), 'Eagle 🦅');
A final touch is to add a thumbnail version of our eagle image into our spreadsheet so that it is inserted on top of our cells (this next bit won’t work if it’s embedded in a cell itself).
Once it’s in our sheet, we can click the three black dots in the top right corner and assign a script directly to the image.
 assigning a script to image in google sheets
We named our script displayImagePopup, so this is what we enter. Make sure to leave off the parentheses when typing it into the image's script form.
 assigning script
Now, anytime we click the small image of the eagle, a popup box opens with the full image.
Here’s what the full code looks like:
function displayImagePopup() {
  // Get the active sheet
  var sheet = SpreadsheetApp.getActiveSheet();
  var imageURL = "https://images.unsplash.com/photo-1715002383611-63488b956401?q=80&w=1887&auto=format&fit=crop&ixlib=rb-4.0.3&ixid=M3wxMjA3fDB8MHxwaG90by1wYWdlfHx8fGVufDB8fHx8fA%3D%3D"
  // Create an HTML string for the popup
  var html = '<img src="' + imageURL + '" style="max-width: 100%; max-height: 100%;">';

  // Show the dialog
  var ui = SpreadsheetApp.getUi();
  ui.showModalDialog(HtmlService.createHtmlOutput(html).setWidth(700).setHeight(1000), 'Eagle 🦅');
}
Thank you so much!
I hope this was helpful for you.
Check out my YouTube channel and free newsletter to get good at spreadsheets!