
NPM is the largest software registry on the internet. There are over a million packages in the NPM Library.
Developers publish packages on NPM to share their code with others. And organisations also use NPM to share code internally.
In this article, you will learn how to create a package. And you will also learn how to publish your package on NPM so others can download and use it.
Let's get started!
How to Choose a Name For Your NPM Package
The first thing you need to do before creating your package is to choose a name. This is important because your package needs to have a unique name. You should choose a name that has not been used already.
When you decide on a name, go to the NPM registry and run a search. Be sure there's no exact match to the name you chose (or a match that is too similar).
For example, if there's a package called hellonpmpackage and you decide to call yours hello-npm-package, NPM will throw an error when you attempt to publish it.
If there's already a package in the NPM registry with the same you want to use, then you have two options.
You can choose a different name.
You can publish your package as a scoped package (see the section "Publishing scoped packages" below).
How to Create a NPM Package
Follow the steps below to create your package.
1. Install Node
If you do not already have Node installed, you should go ahead and install it. You can visit the official website to download and install Node.js. NPM comes pre-installed with Node.
2. Initialize a Git Repository
Create a new project folder for your package and navigate into the folder. Then, run the following command in your terminal:
git init
This will help you track the changes you make to your package. Also, make sure you have a remote version of your repository on GitHub (or your preferred hosting service).
3. Initialize NPM in Your Project
To do this, navigate to the root directory of your project and run the following command:
npm init
This command will create a package.json file. You will get prompts to provide the following information:
package-name: As you learned earlier in this tutorial, the name of your package must be unique. Also it must be lowercase. It may include hyphens.version: The initial value is 1.0.0. You update the number when you update your package using semantic versioning.description: You can provide a description of your package here. Indicate what your package does and how to use it.entry point: The entry file for your code. The default value isindex.js.test command: Here, you can add the command you want to run when a user runsnpm run test.git repository: The link to your remote repository on GitHub.keywords: Add relevant keywords that will help others find your package on the NPM registry.author: Add your name.license: You can add a license or use the default license (Internet Systems Consortium (ISC) License).
See the screenshot below for an example of how to answer the prompt questions:
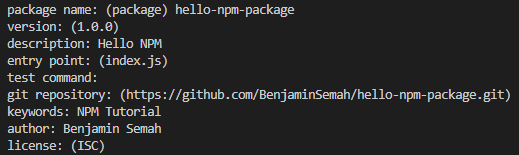
Creating a package.json file
Note: I left the test command blank because there is no test command for the package in this tutorial.
4. Add Your Code
Now, you can go ahead and add the code for your package.
First, you need to create the file that will be loaded when your module is required by another application. For this tutorial, that will be the index.js file.
Inside the index.js file, add the code for your package.
For this tutorial, I will be creating a simple package called first-hello-npm. This package returns the string "Hello NPM!".
//index.js

function helloNpm() {
  return "hello NPM"
}

module.exports = helloNpm
After creating your function, you should export it like in the example above. That way, anyone who downloads your package can load and use it in their code.
If you have been following along, you should now have your package created. But before you publish, you need to test your package. Testing your package reduces the chances of publishing bugs to the NPM registry.
How to Test Your NPM Package
Testing ensures that your NPM package works as expected. There are many ways to test your package. In this tutorial, you will learn one of the simplest ways of testing.
First, navigate to the root of your package project. Then, run the following command:
npm link
This will make your package available globally. And you can require the package in a different project to test it out.
Create a test folder. And inside that test folder, add a script.js file.
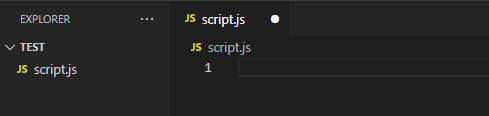
Example of a test folder with a script.js file
In the example above, the test folder contains only the script.js file. It does not yet contain the package. To add the package you created to your test folder, run the command below:
npm link <name-of-package>
In the case of the test folder for this tutorial, I will run the following command:
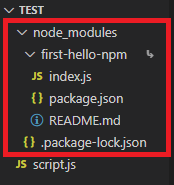
npm link first-hello-npm
This will create a node-modules folder. And it'll add all the files and folders from your package – see the screenshot below:
In the script.js file, you can now require your package and use it for the test.
// test/script.js

const helloNpm = require('first-hello-npm')

console.log(helloNpm())
The first-hello-npm package is expected to return the string "hello NPM!". As you can see from the screenshot below, the package works as expected when I run the script.

Test result for first-hello-npm package
After testing your package and ensuring it works as expected, you can now publish it on the NPM registry.
How to Publish Your NPM Package
To publish your package on the NPM registry, you need to have an account. If you don't have an account, visit the NPM sign up page to create one.
After creating the account, open your terminal and run the following command in the root of your package:
npm login
You will get a prompt to enter your username and password. If login is successful, you should see a message like this:
Logged in as <your-username> on https://registry.npmjs.org/.
You can now run the following command to publish your package on the NPM registry:
npm publish
If all goes well, you should get results similar to the screenshot below:
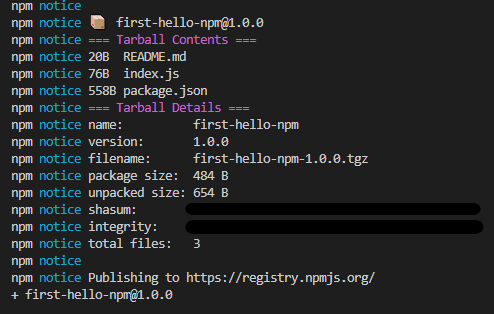
Notice indicating that the package is published successfully.
If you have been following along, then congratulations! You just published your first NPM package.
You can visit the NPM website and run a search for your package. You should see your package show up in the search results.
For example, from the screenshot below, you can see the first-hello-npm package is now available on NPM.
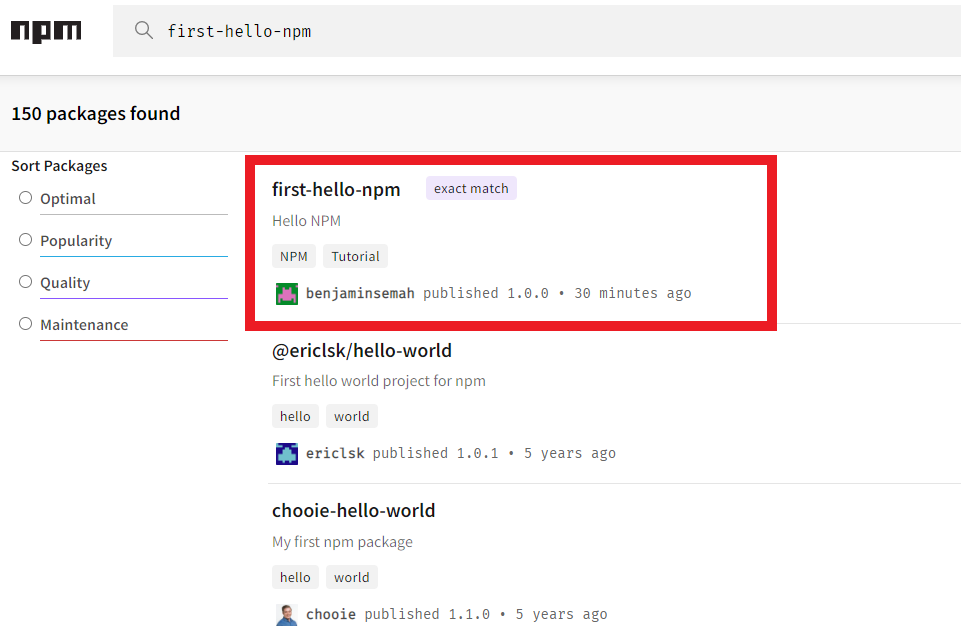
The first-hello-npm package is now available on NPM
How to Publish Scoped NPM Packages
If an existing package has the same name you would like to use, the workaround is to publish a scoped package.
When you publish a scoped package, you have the option to make it public or private. If it's private, you can choose who you want to share the package with.
How to Create a Scoped NPM Package
To create a scoped package, first navigate to the root of your package directory.
Then, run the npm init command and pass your username as the value to the scope flag:
npm init --scope=@your-username
Respond to the prompts to create a package.json file. For your package name, the format should be @your-username/package-name.
For example @benjaminsemah/first-hello-npm.
You can now add the code for your package and test it. The process is the same as already explained above.
Then, to publish your scoped package, run the following command in your terminal.
npm publish --access public
You can change from public to private if you don't want to make the package available for public use.
You should see a response similar to this.

Scoped package published successfully.
Congratulations if you followed along. You've published your scoped package. You should see your scoped package on NPM if you search for it. For example in the screenshot below, you can see the scoped package I created in this tutorial.
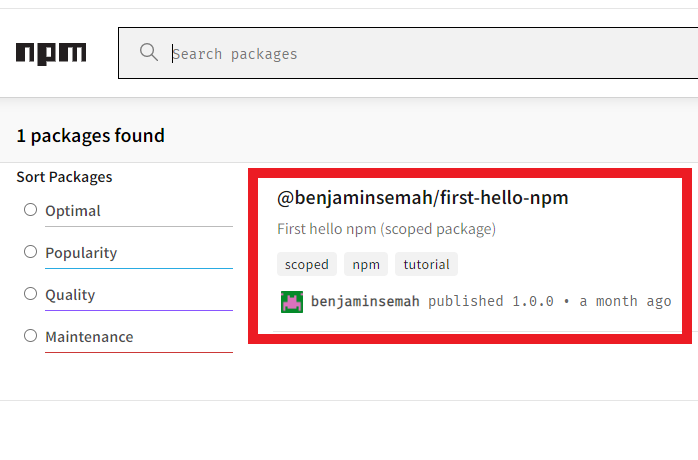
Scoped package is now available on NPM
Conclusion
Packages helps developers work faster. And they also improve collaboration. When you figure out a smarter way of doing things, one way you can share with the community is to create and publish your solution as a package.
In this article, you learned what packages are and why they are useful. You also learned how to create and publish packages on the NPM registry. The developer community awaits all the beautiful packages you will create and share.
Thanks for reading. And happy coding!