
By Juliet Ofoegbu
As a front-end developer, you may have used a free hosting platform like Vercel, Netlify, or GitHub pages to deploy your front-end projects.
Personally, I typically use Vercel and Netlify. But I also like trying out different web technologies, and I've used Firebase's authentication and storage features on different projects before. So I decided to use Firebase to deploy a React-TypeScript project of mine, and it went really well.
What is Firebase?
Firebase is a Backend-as-a-Service (BaaS) platform owned by Google that you can use to perform backend operations like authentication, real-time database functionality, and so on.
Firebase gives frontend developers the ability to work with backend features without needing to actually go deep into backend development.
You can also use Firebase to host and deploy projects. It provides a hosting URL after deployment that you can share with others to view your app on their own device just like other hosting and deployment platforms.
Follow these step-by-step procedures to successfully deploy your React projects using Firebase.
Create your React Project
Depending on the method you prefer to use in creating React projects, go ahead and create one. For example, you can do so using CRA: npx create-react-app app-name or using Vite: npm create vite@latest (recommended).
Use cd app-name to navigate to the project directory. Then npm start or npm run dev to start up your development server. Build your desired project, create a GitHub repo, and push the project to GitHub.
Now we're done with part one of the procedure. On to the next part.
How to Configure and Install Firebase
If you don't have an account on Firebase, go to this site to create an account on Firebase or log in if you already have one. If you have a Google account, it will be easy to create an account on Firebase.
After you've successfully logged in, you'll need to create a project on Firebase. Here's how to do that:
Step 1: Firebase Console Dashboard.
Go to your Firebase console dashboard, where you should see the text "Go to console" at the top right-hand side of your page after logging in.
The page that opens up will have a "Create a project" button. Click on that button and it will take you to the page where you'll input your project details (Step 2).
If you've previously used Firebase, that means you already have projects on Firebase. In that case, it will bring up a page like the one below displaying a list of your projects and a box to add a new project.
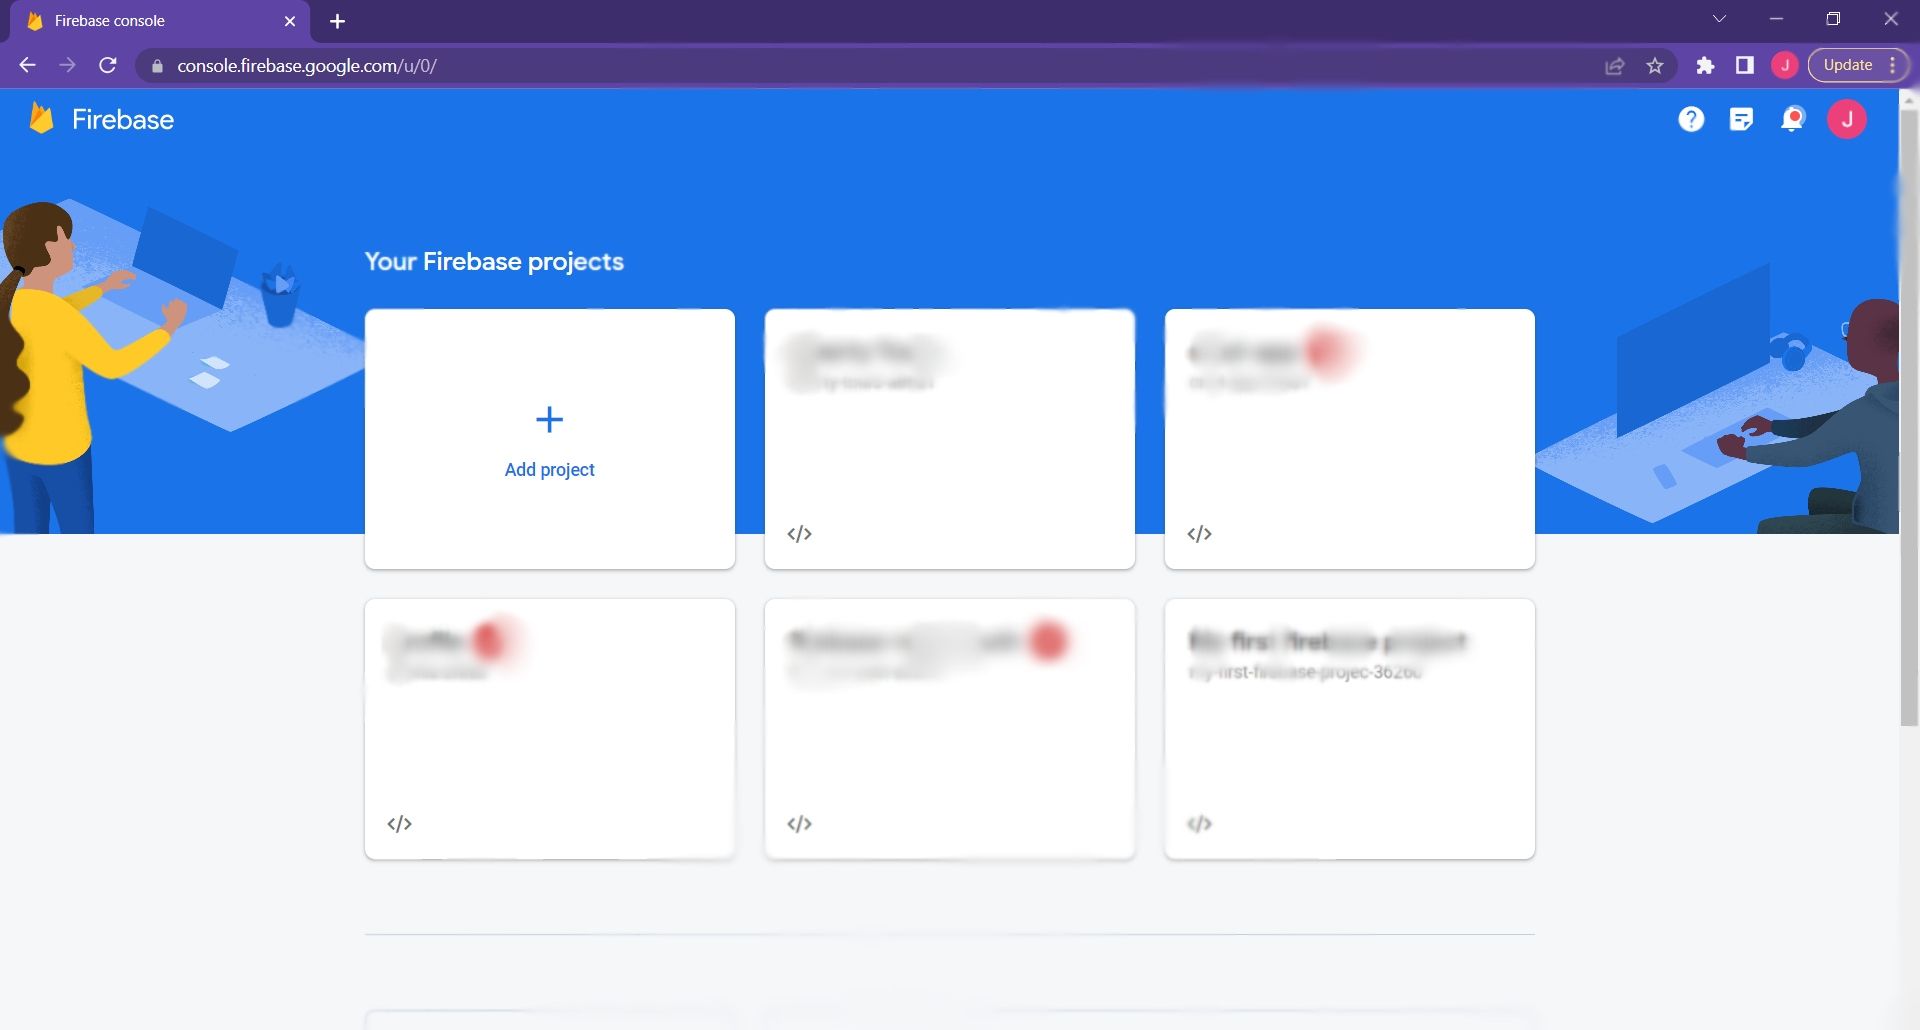 Firebase console
Step 2: Create a New Project
Click the "Add project" card. A page prompting you to give your project a name will open up.
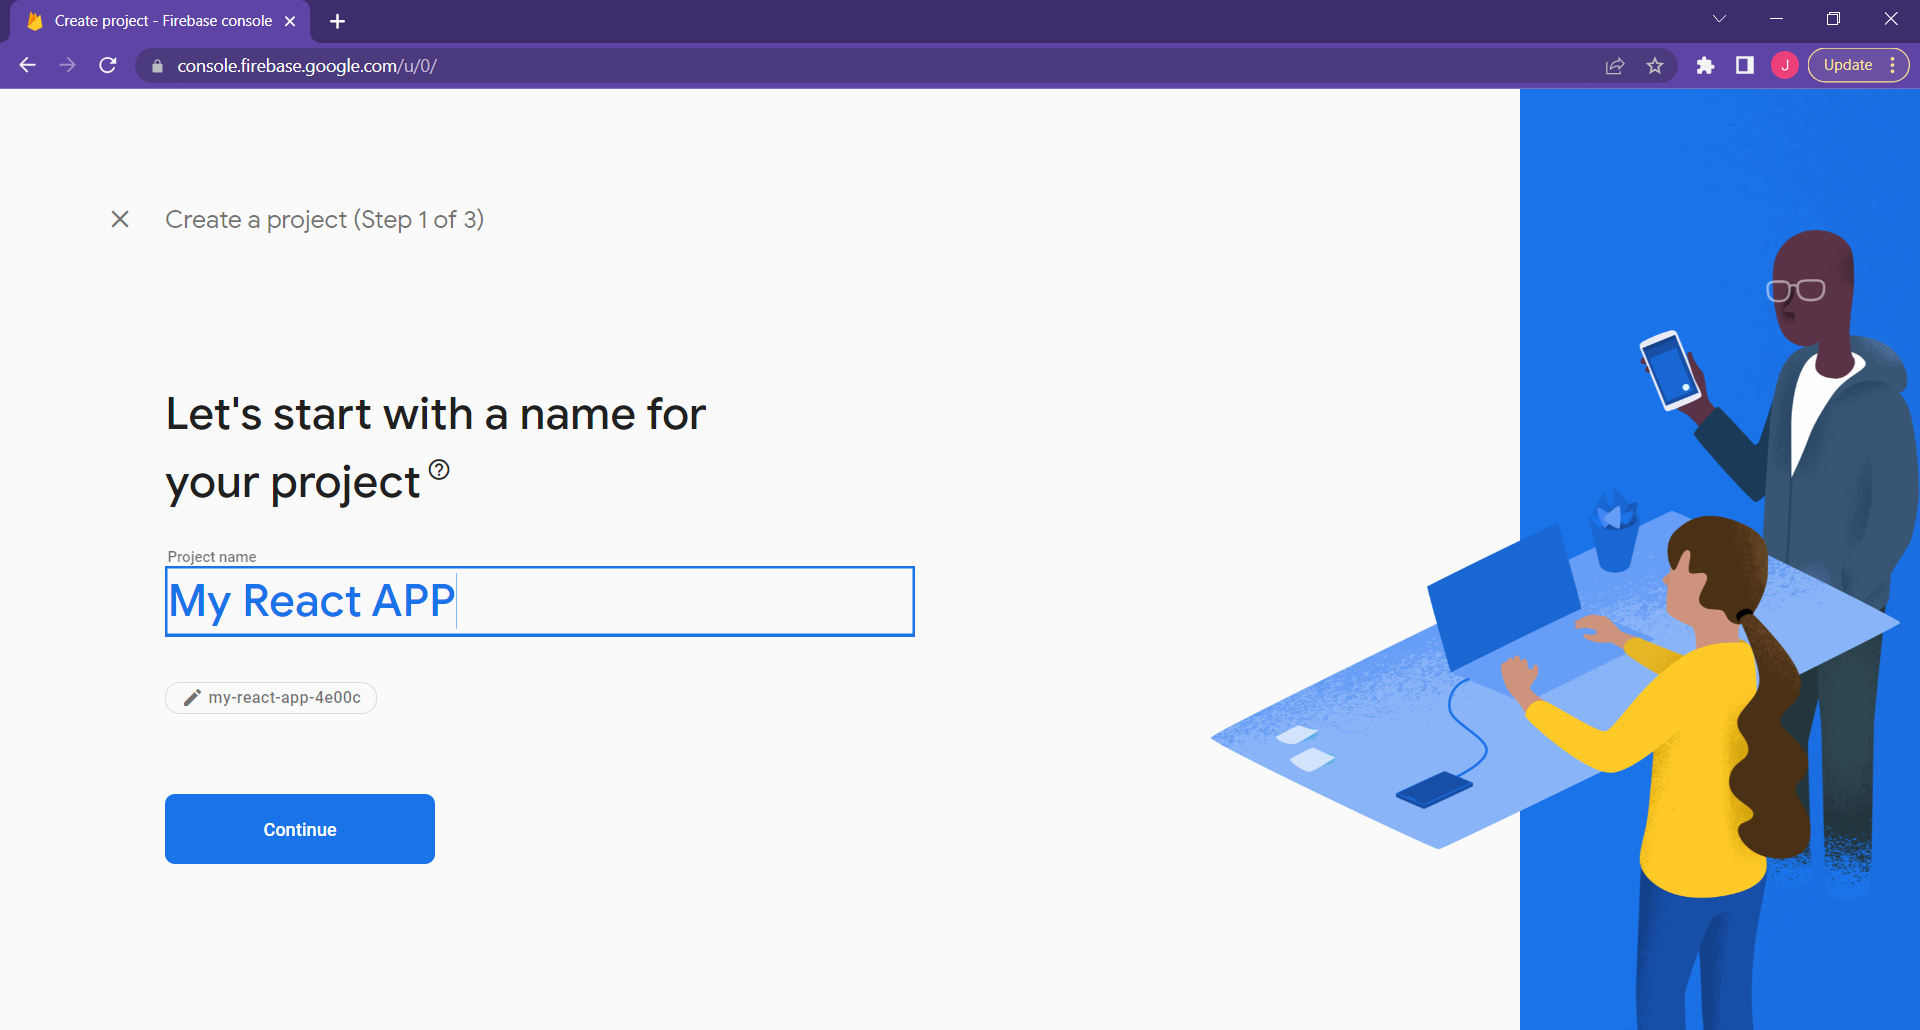 Creating a project
Step 3: Fill in Project Details
In this example, I named the project "My React APP".
If you're new to Firebase, you'll need to tick the "Accept Firebase terms" checkbox and the second checkbox.
Click the "continue" button. The next page that comes up has a toggle to enable or disable Google Analytics for the project. Disable this toggle as we don't need Google Analytics for this demo.
Click the "Create Project" button and it should start creating your Firebase project.
If this isn't your first time using Firebase, click on the "Continue" button on the page above, disable Google Analytics, and create a new project.
Step 4: Install Firebase and Firebase Tools
The next step is to go to your project terminal on VS code, your Command Line Interface, or any code editor you're using. Ensure you're in the main folder of the project you want to deploy and then install Firebase into the project using this command: npm install firebase.
Next, install the Firebase tools we'll be using for hosting and deployment using this command: npm install -g firebase-tools.
Step 5: Log in to Firebase Using the Terminal
After configuring the Firebase project and installing the necessary dependencies, you'll have to log in to Firebase on the terminal using this command: firebase login.
A prompt requiring you to select Yes or No to a question on whether you should "Allow Firebase to collect CLI and Emulator Suite usage and error reporting information" will appear. Select the "Yes" option.
Step 6: Select Account
A window will open up on the default browser that will require you to select your Firebase account for login.
After successful authentication, a success message will appear on the terminal.
 Firebase CLI login
Step 7: Run Project Build
Use the npm run build command to build the project scripts. This command automatically generates a production-ready build of your application by bundling all the necessary JavaScript, CSS, and other assets into a single folder "build" folder in the project directory.
This process is important as it optimizes the code and assets for performance. This reduces the overall size of the application and makes it efficient for deployment.
After the successful completion of part two, we've come to the next integral part of this whole deployment process.
How to Initialize Firebase
Now we need to initialize Firebase, so we'll walk through the steps to do that.
Step 1: Initialize Firebase
Initialize Firebase for this project by using this command on the terminal: firebase init. It will let you know that you're about to initialize a Firebase project in the directory.
Some prompts that will come up after this command are: "Are you ready to proceed?", to which you will type "Y" for "Yes".
The next prompt is: "Which Firebase features do you want to set up for this directory?". Use the arrow down key on your keyboard to point to the "Hosting:Configure files for Firebase Hosting and (optionally) set up GitHub Action deploys" option. Press the space bar and then hit enter.
Step 2: Project Setup
This step connects your project directory with the Firebase project. When prompted to select a project, choose the "Use an existing project" option.
Then when prompted to "select a default Firebase project for the directory", select the particular Firebase project you created in part 1 of this process.
You might see some other project options if you have more than one Firebase project on your Firebase console.
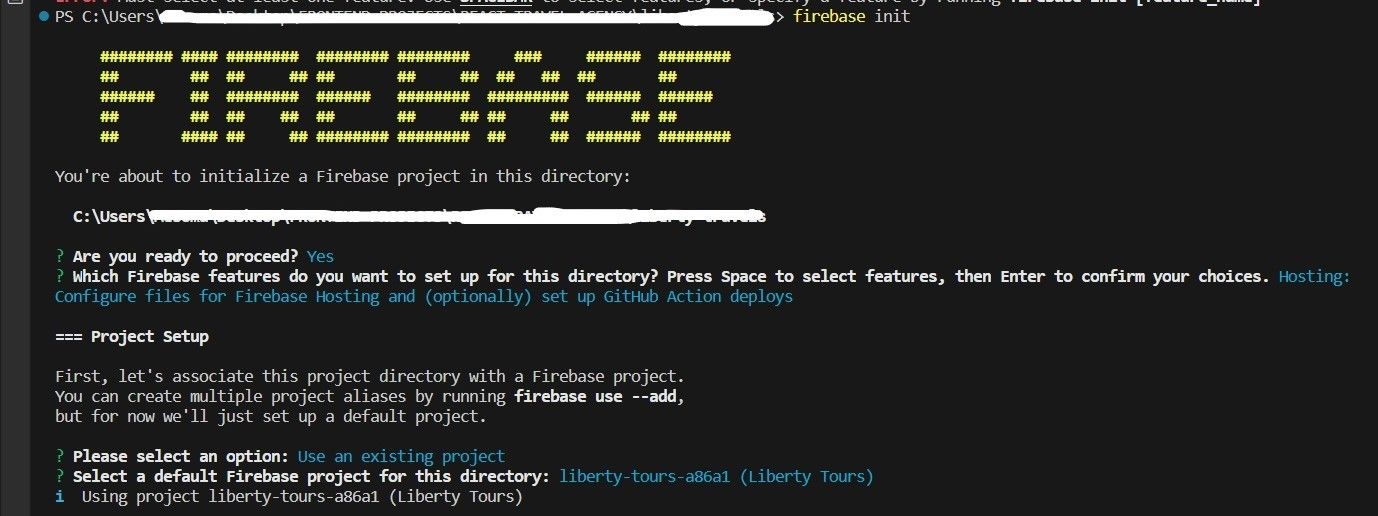 Connecting project to Firebase.
Step 3: Setup Hosting
This process will bring up some prompts you'll have to answer.
The first one is: "What do you want to use as your public directory?", to which you'll choose or type in "build".
Next, when asked if you want to "Configure as a single-page app (rewrite all urls to /index.html)", select the "Y" or "Yes" option.
When asked to "Set up automatic builds and deploys with GitHub?", choose the "Yes" option. Also, when prompted with the "File build/index.html already exists. Overwrite?" question, choose "No".
Step 4: Authorize Firebase with GitHub
You will have to authorize Firebase with your GitHub account. A window will open up on your browser that will require you to authorize Firebase into your GitHub, and input your GitHub password. After a successful authentication, you'll get a success message on your terminal with your GitHub username.
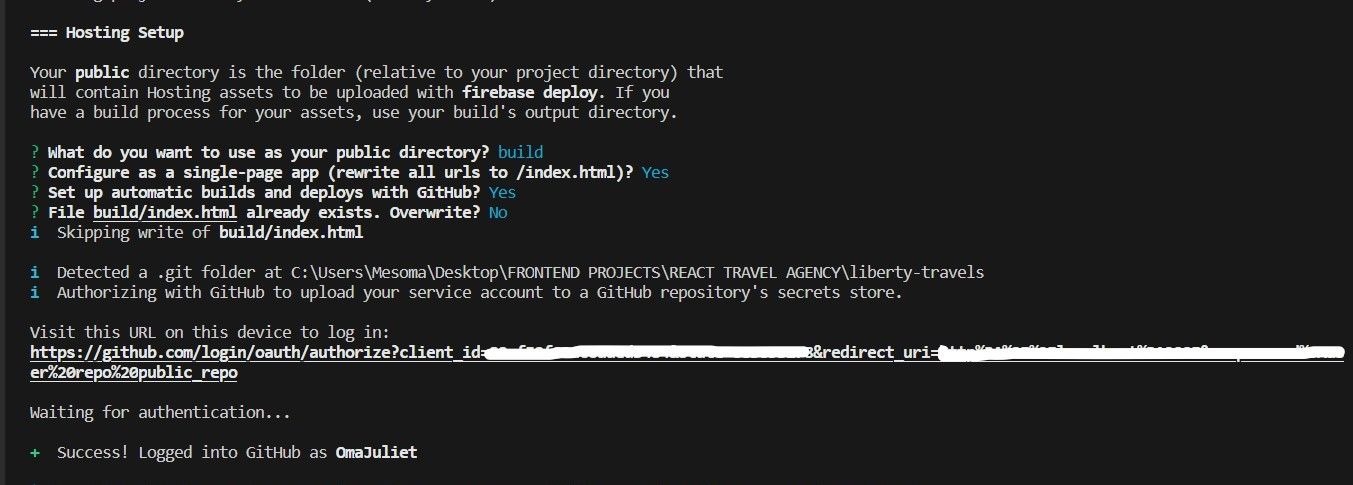 Firebase Hosting setup
If you've been following along successfully and gotten to this stage, you've done well so far. Now we're halfway to deploying our project.
How to Choose a GitHub Repository and Set Up GitHub Workflow
Step 1: Select GitHub Repo
First, you'll need to type in the GitHub repository you'd like to use to set up a GitHub workflow for Firebase deployments.
The format to do this is "username/repository". Remember in part 1 of this process, you built a project and pushed it to GitHub. That GitHub repo is what you'll use.
For example, let's say your GitHub username is "CoderDev" and the repository of the project is "Firebase-Deployment". You'll type "CoderDev/Firebase-Deployment" into the terminal. It should look like this:

Step 2: GitHub secret token
After setting up a GitHub workflow, it will create a service account with Firebase Hosting admin permissions and will upload the service account JSON to GitHub as a secret token.
You can also view this secret token on GitHub. To do this, go to the repository of the project and switch to the "Settings" tab. On the left-hand panel of the settings page, click on the "Secrets and variables" dropdown and select the "Actions" option. It will display your secret token like this:
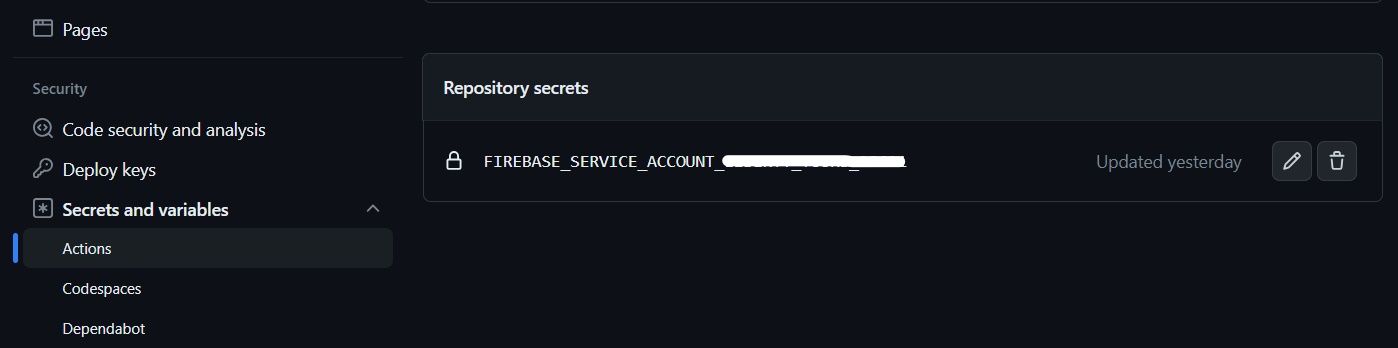 Secret token
Step 3: Set up Workflow
You'll be prompted with the question "Set up the workflow to run a build script before every deploy?". Choose "Yes" for this.
You'd also be asked, "What script should be run before every deploy? (npm ci && npm run build) npm run build". Type this into the terminal: npm ci && npm run build. This will create a workflow file in the project directory.
You'll now see the "firebase-hosting-pull-request.yml" file inside a ".github/workflows" folder in your project folder structure.
 First GitHub Workflow File
Step 4: Automatic deployment
Next, you'll be asked if you want to "Set up automatic deployment to your site's live channel when a PR is merged". Select "Yes".
When asked to enter the name of the GitHub branch associated with your site's live channel, type or select "main". This will create another workflow file "firebase-hosting-merge.yml" inside the ".github/workflows" folder.
 Second GitHub Workflow File
Step 5: Generate Folders
The two operations performed above will generate two folders in your project directory. One named "firebase.json" is where the configuration information will be written in, and the other named ".firebaserc" is where the project information will be written in.
 Creating Folders
That's all you have to do to initialize Firebase in your project.
These processes are a bit lengthy, but the good news is that all that's left to do is deploy to Firebase.
How to Deploy to Firebase
Run the Deployment Command
Run the deployment command firebase deploy. Wait for it to deploy. After it is done, a success message will be displayed on your terminal with a hosting URL. That is the project's live link with a "web.app" domain extension.
 Firebase Deployment
That's it! We're done deploying our React project with Firebase.
Now anytime you add, commit, and push new changes to that GitHub repo, it will automatically build the app and redeploy it to Firebase so that changes will be reflected in the live site.
This automatic build and redeploy is possible because earlier, in the Firebase initialization process, we selected the 'yes' option to set up automatic builds and deploy with GitHub.
We also selected the "Yes" option to set up the workflow to run build script before every deploy and specified the scripts that should be run before every deploy.
To view how this deployment is carried out after every push to the repo, go to that project's GitHub repo. Switch to the "Actions" tab to see how the app is being built and deployed.
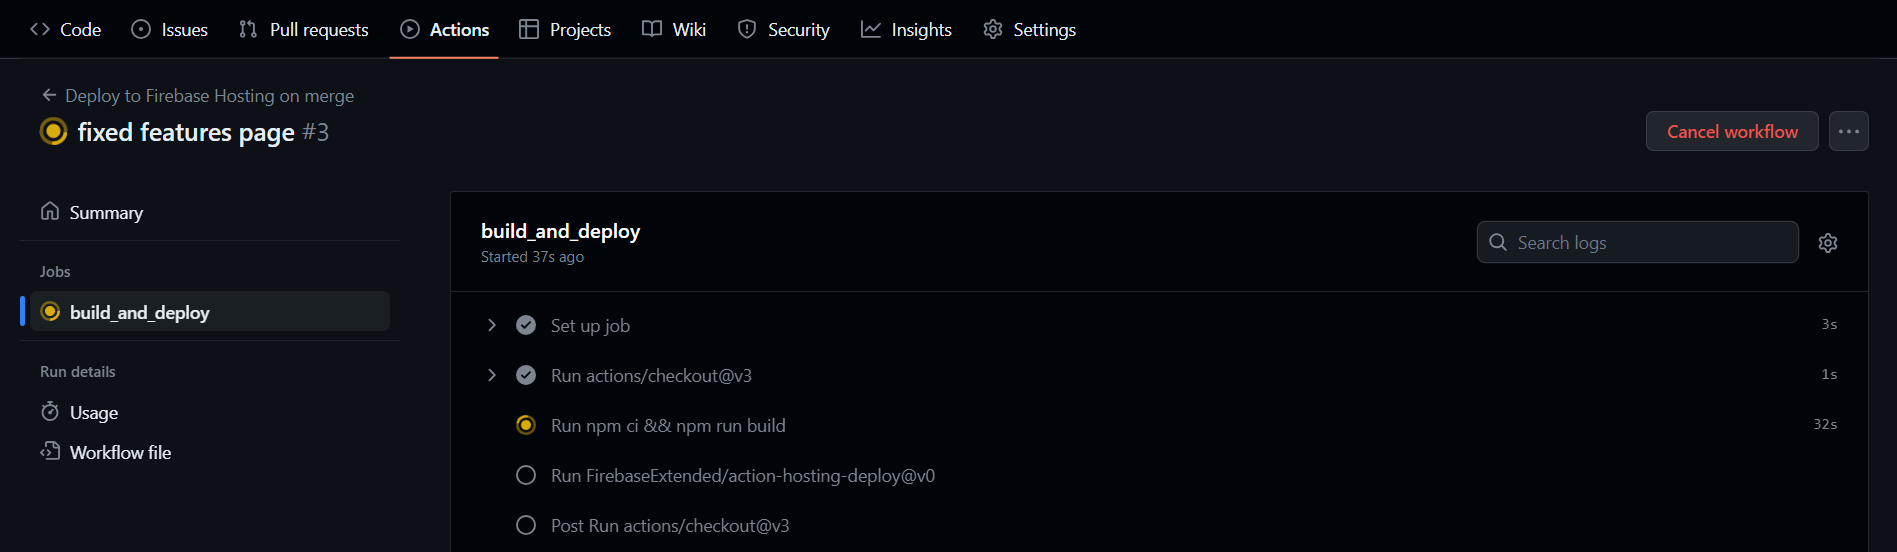 Build and deployment action from GitHub.
You might encounter some errors while deploying. The good thing is that right there on that GitHub actions page, you can trace to see where the error is coming from in the app.
Let's say you're working with TypeScript in the project, and you declared a function and didn't use it, or you called a hook and didn't use it. Your app may function as it should on the browser.
But while deploying, this might be an issue or cause a warning and you'll need to fix it, commit, and push again to the repo to fix the error. Once you've done this and the deployment is successful, the action page should look like this.
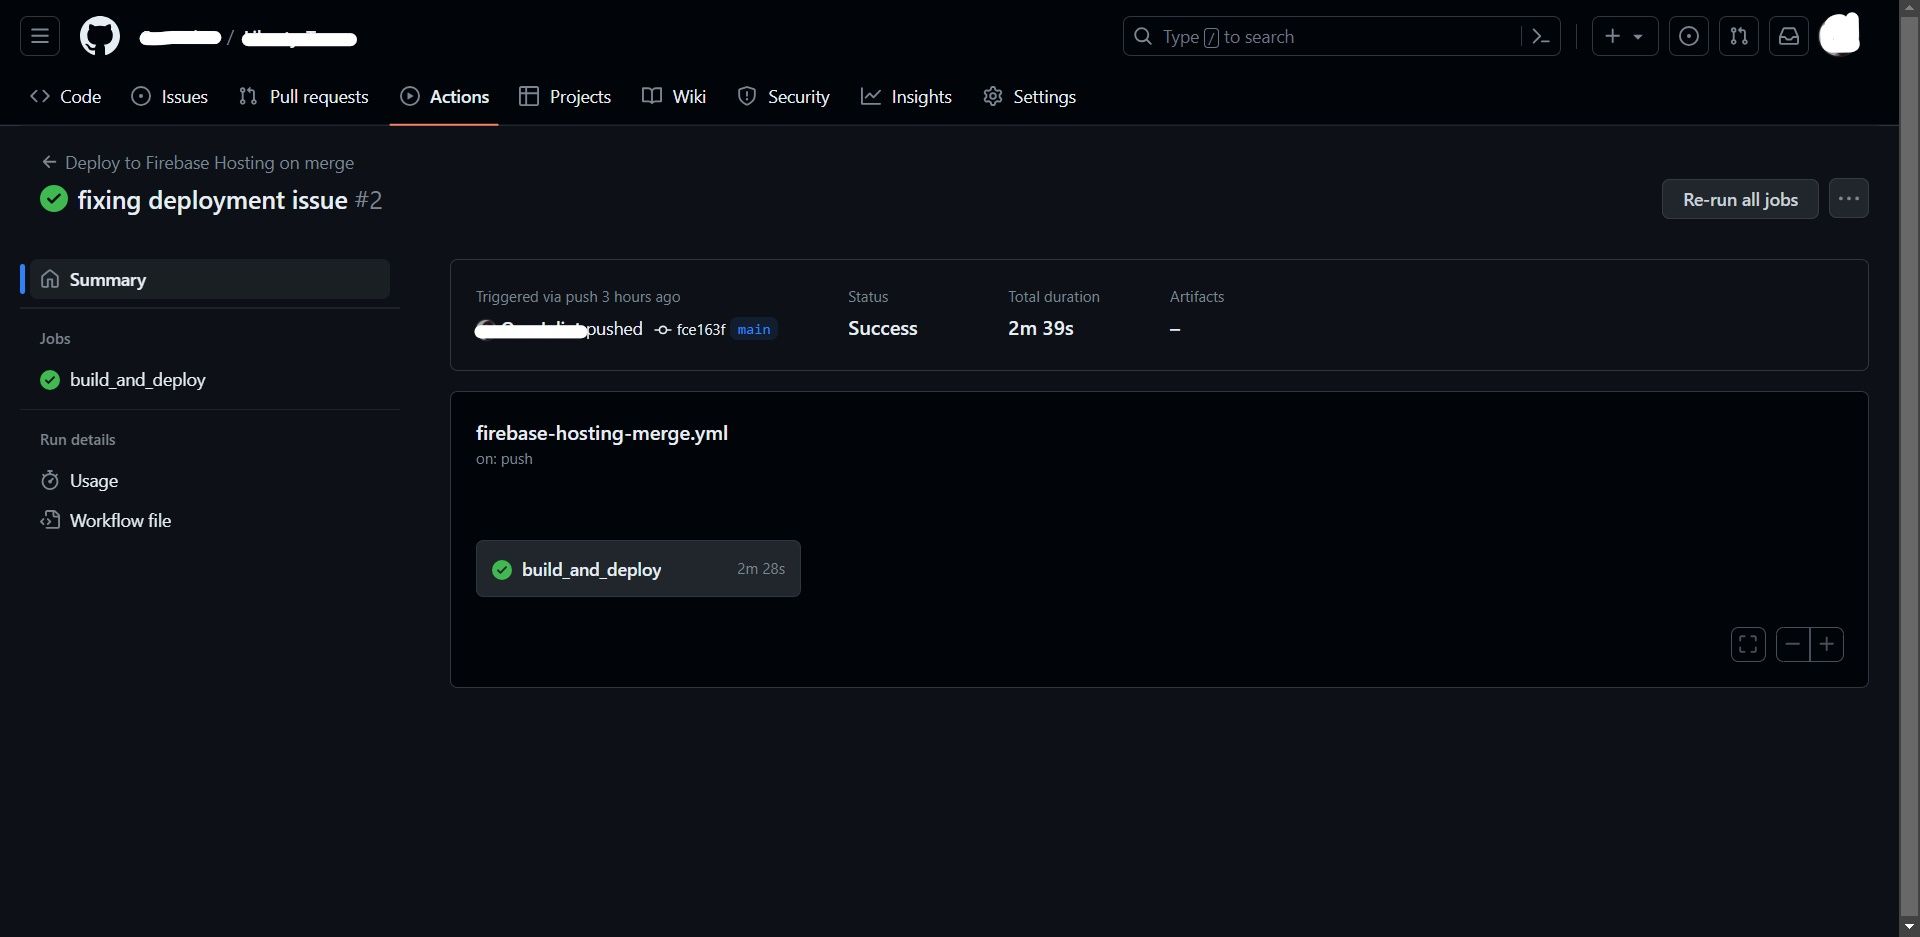 Fixing deployment issue
Conclusion
Deploying your project using Firebase might at first seem like a long process. But if you follow the steps in this article, you should be good to go.
You can easily deploy your application to Firebase Hosting and take advantage of its powerful capabilities such as automatic processes, simplified deployment process, and continuous integration with GitHub by following the easy steps in this article.
If you wish to learn more about all the features Firebase has to offer to developers, go to the Firebase Official Documentation and explore.