
Recently, I've been working on a marketing strategy for a new app based on the Flutter framework. An entire development team has been teaching me the ins and outs of Flutter as a cross-platform technology.
And from what I've learned, I believe that the framework is accessible to almost anyone, even those with few technical skills.
In this tutorial, you will learn how to build your first Flutter app, from developing the concept to publishing on the App Store.
I'll teach you how to properly set up your development environment and code with the main Flutter code language – Dart. Some key concepts like state management, UI construction, and widgets will prepare you to create and launch a polished app. I'll even guide you through publishing your app to the App Store
So find a comfortable seat and get ready, as we're about to dive in.
Prerequisites
First of all, you have to decide on an environment. I advise you to choose either Visual Studio Code or Android Studio. The first one is lightweight and is a nice option that works well across different kinds of operating systems. Android Studio is just as powerful, if you plan on building Android apps.
If you're a beginner, take a look at VS Code with the Flutter extension, as it offers a user-friendly experience and it's a really good starting point. Just make sure your PC meets the minimum system requirements for Flutter development, as mentioned in the official Flutter documentation.
Table of Contents
- Mobile App Development with Flutter
- 11 Simple Steps to Create Your First Flutter App
- Step 1: Start with an Idea or Vision for Your Future App
- Step 2: Install the Flutter SDK on Your Computer
- Step 3: Install Libraries and Plugins to Make Coding Easier
- Step 4: Time to Code!
- Step 5: Organize your Project
- Step 6: Code the UI Elements and Interactions (Widgets)
- Step 7: Do Splash Screenwriting
- Step 8: Demonstrating Changes
- Step 9: Test Your App
- Step 10: Code Styles
- Step 11: Publish Your App
- Conclusion
Mobile App Development with Flutter
Let's kick off with some useful information about our framework. Basically, Flutter is an open-source kit developed by Google that allows you to build mobile apps, as well as network and integrated apps.
The key thing to remember about Flutter is that once you write code, you can upload your app to Android, iOS, and the web. Then, you can install it on multiple systems, including a PC. This really saves you a lot of time and effort compared to building separate apps for each platform.
Before we get started, let's learn why Flutter is extremely useful for mobile development.
Advantages of Flutter
As I already mentioned, Flutter works with multiple systems and platforms at once, covering Android and iOS as well as Windows, Linux, and MacOS. Imagine – it's a single code base that rules them all!
Another advantage is that Flutter has a low entry barrier because of its simple syntax. For example, if you want to display some text, you easily create a widget called "Text", assign a style and color, add some text – and there you have it. It sounds simple – and it is.
Limitations of Flutter
Before you decide to use Flutter, you should understand the whole picture. There are native technologies like Kotlin and Swift that have their unique advantages.
The first is that they provide the lowest possible delay and the smoothest possible user experience. They're perfect for applications that require low response times, like financial trading apps.
The second benefit is excellent performance and optimization. You have no redundancy in these specific situations. But only in these situations. So if your application requires extensive use of the device's hardware, such as real-time 3D graphics or sensor integration, you should consider going native.
Back-end Development with Flutter
But, if you've decided to go the Flutter way, there's an important thing to consider: Flutter is a front-end framework, and it requires a back-end framework for complex applications. In short, if your app has state that needs to be stored, you need additional back-end technology.
I prefer Node.js because it can be launched anywhere, but you may use any other viable service. For a startup, a good example is free Firebase Cloud Functions. And as I've already mentioned, Dart is the main code language of Flutter, so you can also write a back-end with its help.
But choosing a decent back-end for your Flutter app is a whole other topic. I recommend you read the article “Decoding the Art of Choosing the Perfect Flutter Backend: A Guide for Developers”.
Otherwise, feel free to join me in this tutorial – let's begin!
11 Simple Steps to Create Your First Flutter App
Step 1: Start with an Idea or Vision for Your Future App
Many tools can help you at this stage, but the one you choose will depend on your design skills.
You can find visual inspiration on Dribbble, Pinterest, and many other websites. But when it comes to creating a design, there are three ways to go:
If you have no design skills, consider using Canva for app design and MockFlow for wireframes.
If you have some skills, then jump into Figma and you'll enjoy its many functionalities. Create your wireframes, and only after careful consideration develop the full-blown design.
Note that you can also use plugins like Figma2Flutter and FigmaToFlutter to turn your design into working Flutter code. So, the first step can easily be the last in creating your first Flutter app.
But I encourage you to read on and get an idea of the whole process. The code auto-created by one of the plugins may have bugs, and you'll need to be able to fix them.
And finally, if you're stuck, find a designer. It can be a professional freelancer, a design agency, or just a friend with design skills. Either way, you'll still have the option of transforming your design using the Figma2Flutter or FigmaToFlutter plugins.
Step 2: Install the Flutter SDK on Your Computer
This step is very easy. Follow the link to the Flutter download page. Choose your operating system and platform. Don't forget to check the software requirements.
Here, you might need to get some better hardware or install some extra packages, but I think you can do it using the tutorial on the Flutter website.
The Flutter tutorial provides different options for a text editor or an integrated development environment (IDE). So, install the one you prefer, such as Android Studio, and install the Flutter SDK. When you're done with the tutorial, come back here, and we'll continue.
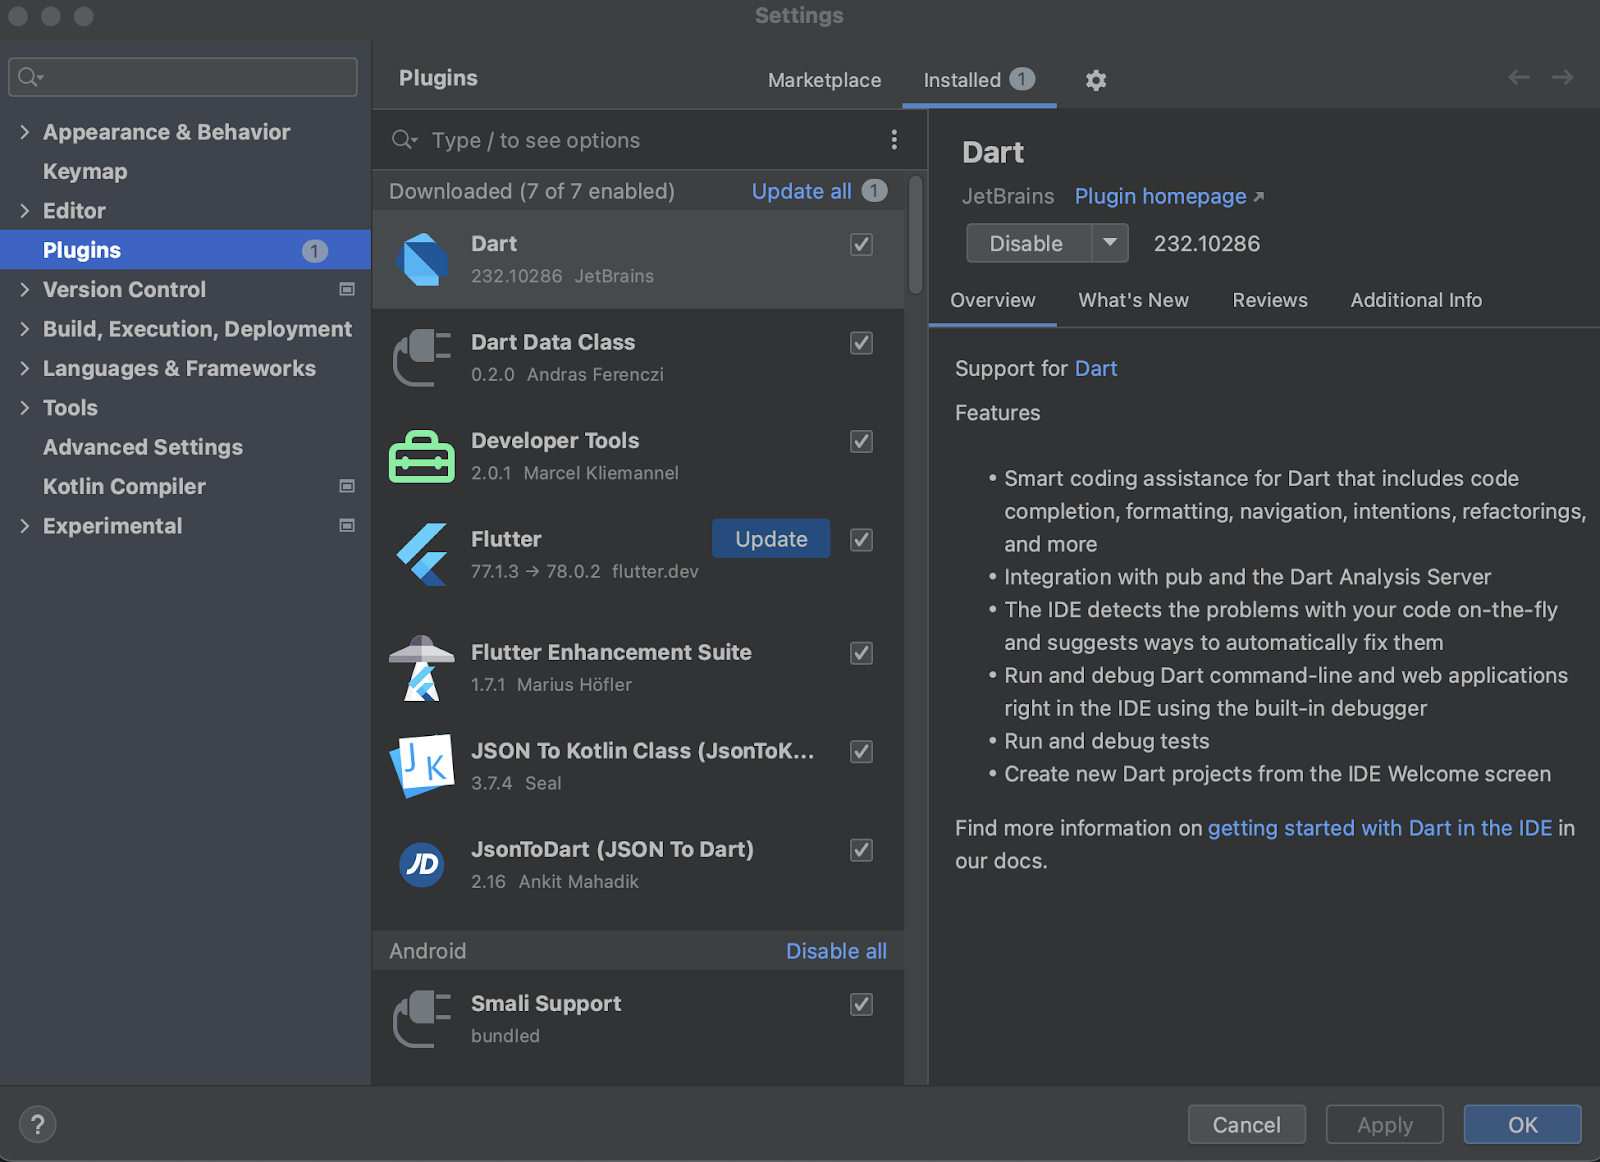
Step 3: Install Libraries and Plugins to Make Coding Easier
Flutter libraries are like toolkits that come with pre-built parts to help you create code faster and easier. They come packed with all sorts of useful things like buttons, forms, animations and more. You can use them for everything from designing user interfaces to managing data and handling interactions.
Now, let's talk about plugins in Flutter. They are like special tools that help your application do more.
These plugins connect your Flutter code to the native features of your device, such as the camera or GPS. You can also easily add extra functionality to your app without having to write all the code on your own. Just write some initial code, hit enter and you'll get several lines of code from the example.
You can also find practical ideas for your app on Flutter Awesome and pub.dev with official libraries and community support. These sites host third-party developers who build their libraries on GitHub and share them here. They’ve been tested on real projects and include a wide range of features such as connecting to servers, using Bluetooth, and adding visual effects.
Also, libraries are rated according to their popularity and quality. A high rating increases the chances that the library you choose will have as few bugs as possible.
If you run into trouble, don't worry! You can turn to Flutter Awesome and pub.dev for help. Since Flutter is open source, you'll be able to find the latest updates and get help from other Flutter developers. And if there's a new problem, it's likely to be fixed in the next Flutter update. Easy peasy!
Step 4: Time to Code!
Flutter is built and translated into machine code using the Dart programming language. Host devices understand this code, ensuring fast and effective performance. It’s an open, object-oriented programming language developed by Google.
Here are some of the key features of Dart:
- Object-oriented with classes, inheritance, and mixins
- Statically typed for early error detection
- Supports both just-in-time (JIT) and ahead-of-time (AOT) compilation
- Automatic memory management with garbage collection
- Built-in asynchronous programming resource
- Consistent and simple syntax
Dart is a programming language that allows you to describe any logic in a mobile application in an easy-to-understand way. Its features, such as the reactive programming version and asynchronous features, make it suitable for building high-performance, responsive apps that can run on iOS and Android.
Though not as widely adopted as some other languages, Dart's tight integration with Flutter has made it increasingly popular for mobile app improvement.
Now, let’s get back to the code! Just create your project on a standard blank page with the ability to launch and test your app.
Here’s our simple Flutter app, which displays a "Hello, Flutter!" message. It demonstrates the basic form of a Flutter app, along with the main access aspect, defining a static widget, and building a MaterialApp with a Scaffold, AppBar, and a targeted Text widget:
import 'package:flutter/material.dart';

void main() {
  runApp(MyApp());
}

class MyApp extends StatelessWidget {
  @override
  Widget build(BuildContext context) {
    return MaterialApp(
      home: Scaffold(
        appBar: AppBar(
          title: Text('My First Flutter App'),
        ),
        body: Center(
          child: Text(
            'Hello, Flutter!',
            style: TextStyle(fontSize: 24),
          ),
        ),
      ),
    );
  }
}
I strongly advise you to break your code into logical parts:
- UI
- server communication
- business logic
- images
- translation and more
The plan allows you to organize your code and structure it easily.
The next step is no less important than the coding itself. Choosing the right state management is like the basics of Flutter app development. There, you’ll get to know different insights like factors, Model-View-ViewModel architecture, and the difference between two popular Flutter management patterns.
So, what are we waiting for, let’s get right to it.
Step 5: Organize your Project
Choose the right state management solution
State management controls the state of user interface elements such as text fields, buttons, and checkboxes in a graphical user interface (UI). It ensures that the state of other UI controls affect the state of a particular UI control. This technique is critical to ensure a smooth user experience in your app
To choose the right state management, consider factors such as the complexity of your project, your familiarity with different state management solutions, and the specific needs of your project. Google recommends starting with something basic like Vanilla, which is simple and easy to use.
Now let's look at the Model-View-ViewModel (MVVM) architecture, which is an important part of state management. And you have to choose between Provider and BloC. The whole difference between these two popular Flutter state management patterns is the following:
- For smaller projects and short deadlines, you can use Provider MVVM. But beware: the tradeoff is slightly slower performance and lower scalability.
- For mid-size and large projects, Google suggests using BLoC. Such an approach allows you to manage the flexibility and the scale of your code.
If you haven’t decided what to use for your project yet, here are some pages with descriptions and examples from the official library documentation:
- https://pub.dev/packages/flutter_bloc
- https://pub.dev/packages/provider
- https://docs.flutter.dev/data-and-backend/state-mgmt
So, choose a state management option that fits your app.
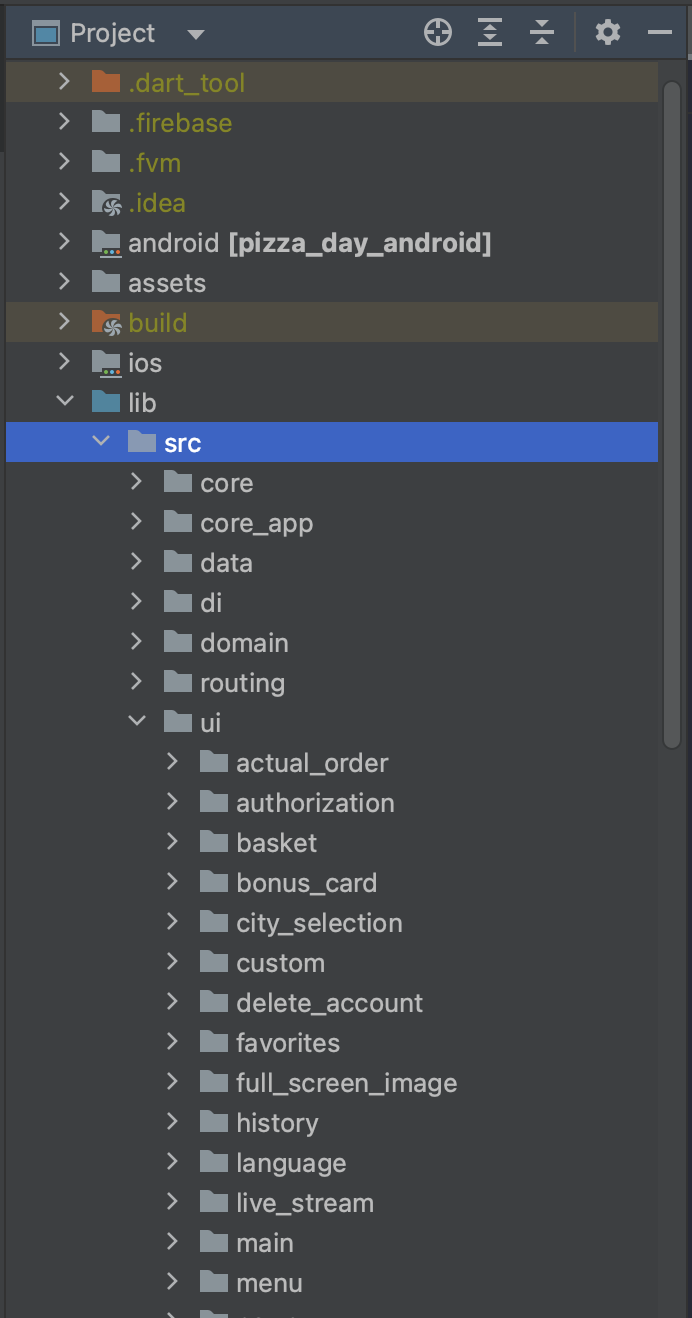
Separate folders for screens
You should keep your code clean. To do this, it's a good idea to create separate folders for each screen, where the code files are stored.
For example, you'd have one folder for the splash screen and another for the login screen. Also, keep the user interface code separate from the business logic code, in separate files.
Your prepared Directory Structure should look something like this:
Highly decomposed system
When you start working with a screen, you should carefully break it down into small parts. For example, on the main screen, there is a list of goods. This element should be in a separate file and even a single element of a list should be in a different file.
The more your system is decomposed, the easier it will be for you in the future to change a piece of code, as well as support and scale your product.
Here are some tips on how can you break down a system into smaller components effectively:
- Start by defining the goals, features, potential users, and limitations of your system to set clear boundaries.
- Divide the system into smaller, independent pieces for easier management.
- Assign specific functionality and interfaces to each component and how they interact.
- To achieve the system goals, test all components and their interactions.
- To optimize performance, refine components based on feedback.
Colors and styles
When you have the screens' structure, you can code the basic transition between them and the styles of an app. Flutter makes it easy to manage all your styles in one place, like button colors, fonts, and icons, so you can customize them easily. You code them in one chosen style—a bright or dark style scheme.
The next step is to code simple transitions and patterns that will make your app fit your style choices. As you'll see in the code example below, Flutter makes it very easy to control styles. This allows you to test and customize the look and feel of your app as much as you want.
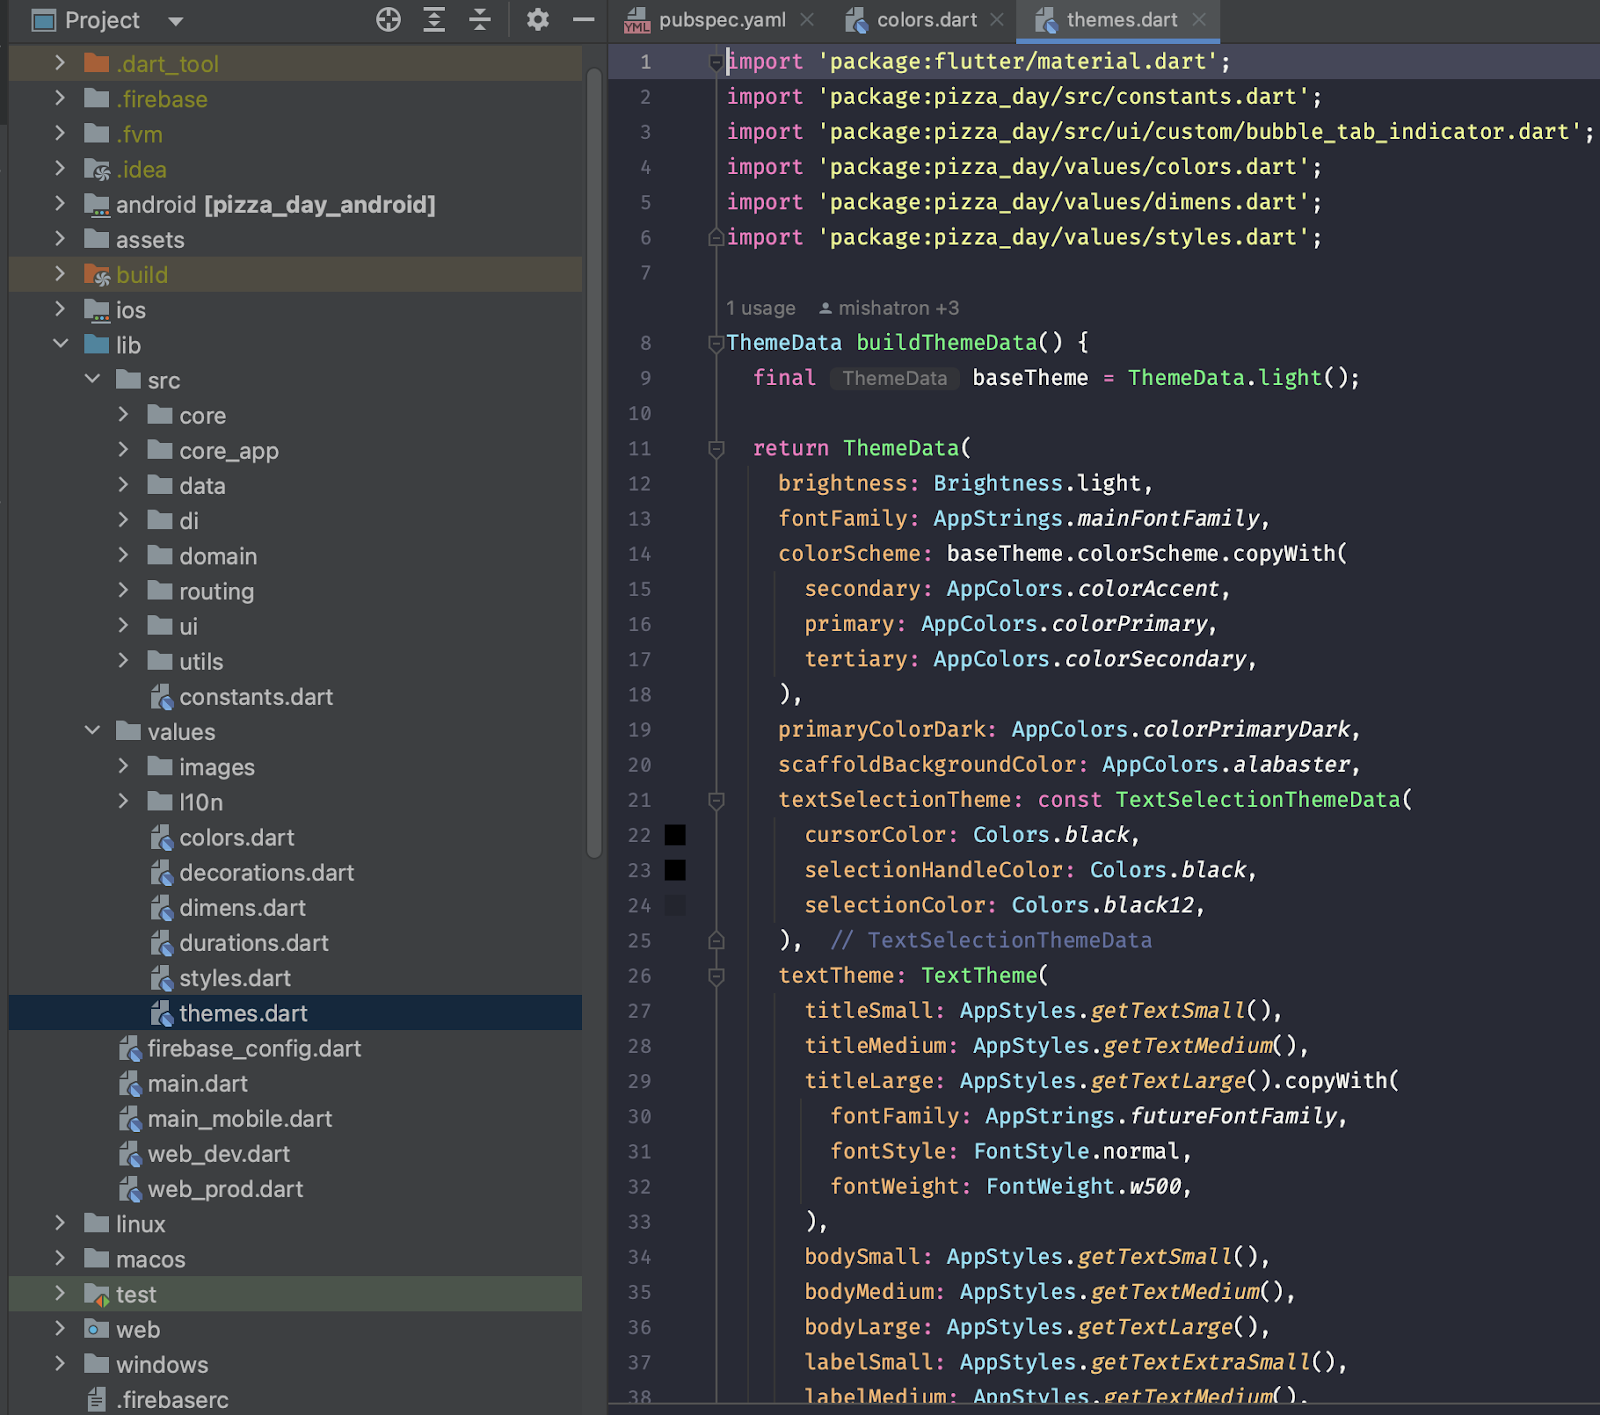
And here’s some useful code as an example, so you can experiment and try your own ideas to your heart's content.
@override
Widget build(BuildContext context) {
 return TextField(
   controller: controller,
   focusNode: focusNode,
   style: AppStyles.getCitySearchTextStyle(),
   decoration: InputDecoration(
     hintText: context.tr().searchHint,
     hintStyle: AppStyles.getSearchHintStyle(),
     contentPadding: AppPaddings.horizontalPaddingM,
     isDense: true,
     border: InputBorder.none,
     focusedBorder: InputBorder.none,
     enabledBorder: InputBorder.none,
     errorBorder: InputBorder.none,
     disabledBorder: InputBorder.none,
   ),
 );
}
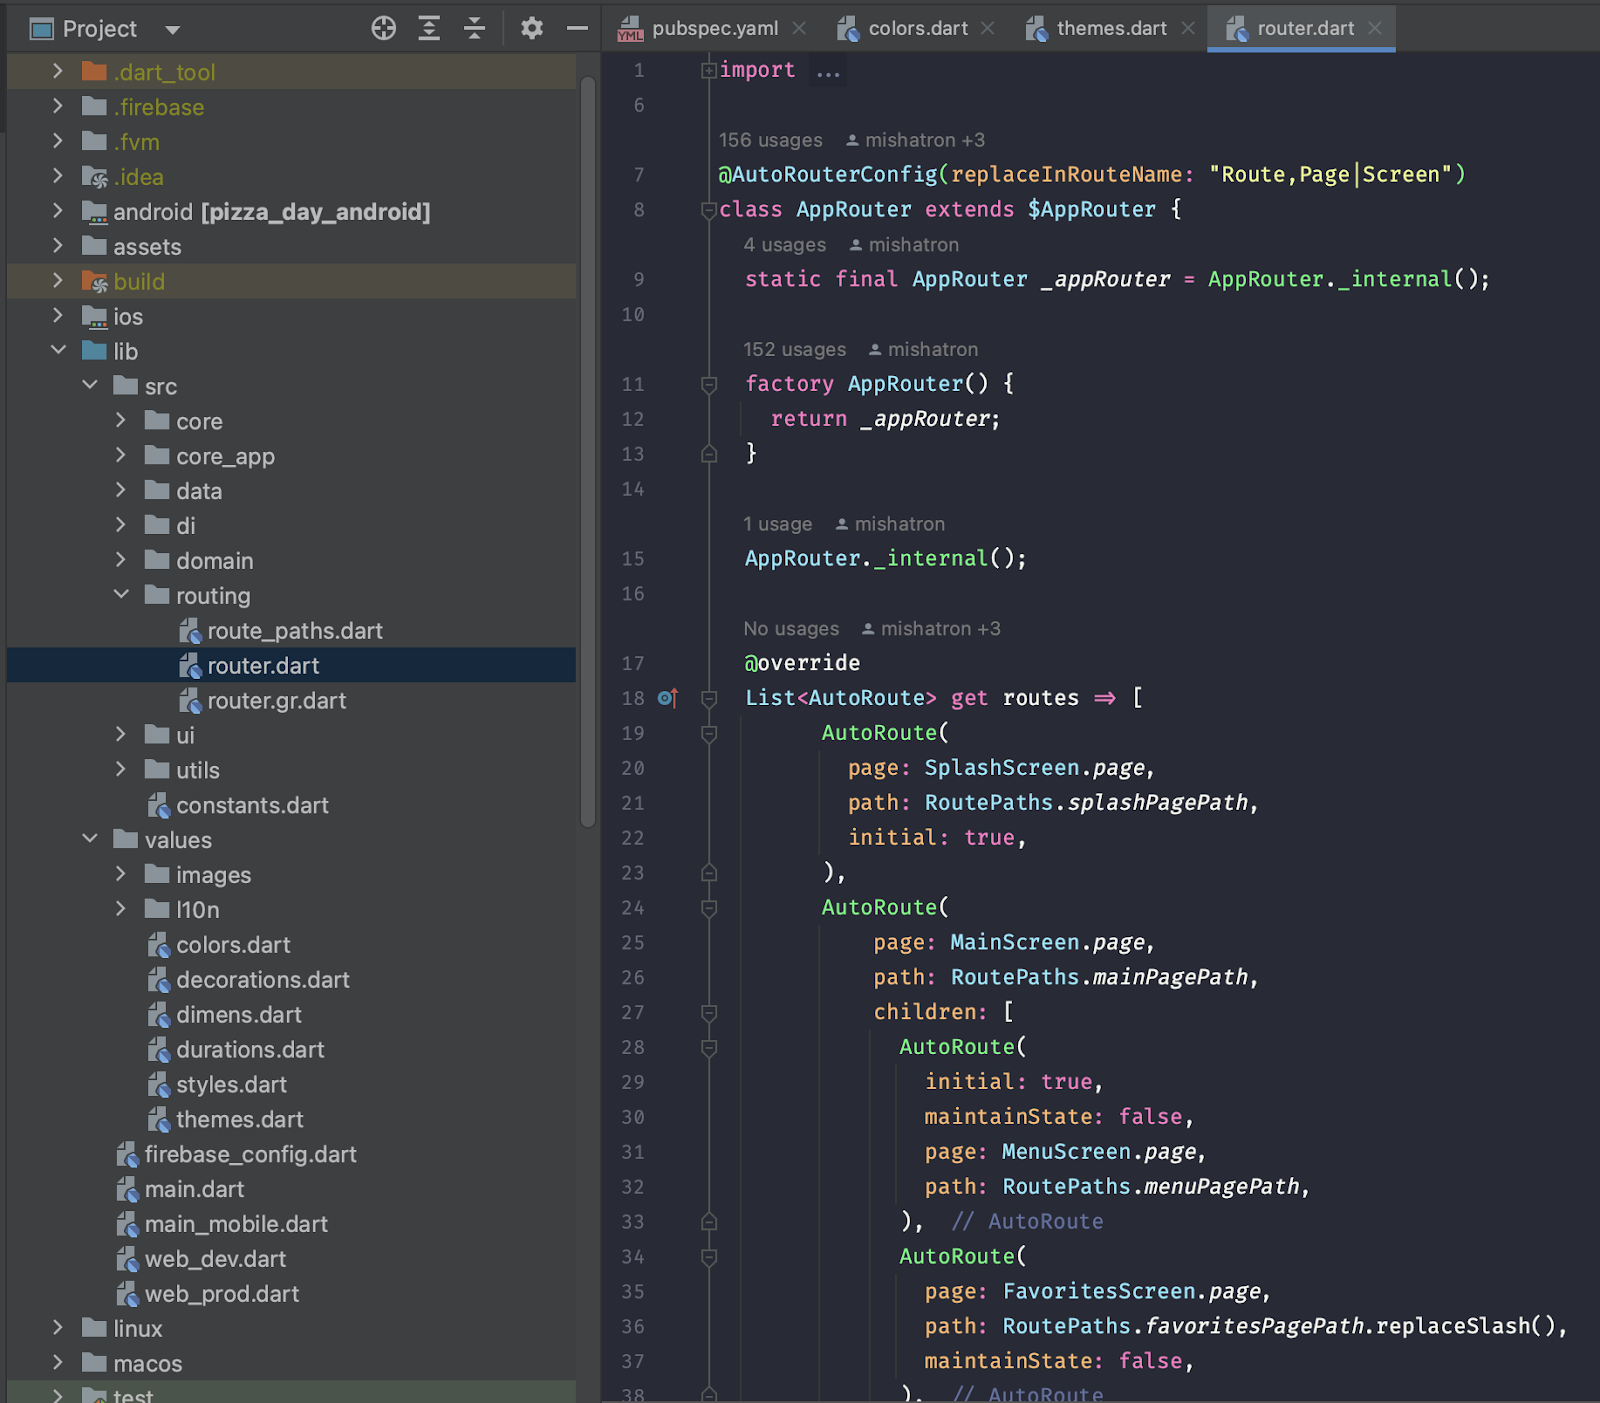
Setting up the router
There is a robust navigation tool for managing transitions between specific monitors within the application. There are two main navigation techniques you can use in Flutter:
- Navigator: this is a navigation widget that is built into Flutter. It allows you to slide and lift the screen from the stack, providing a simple forward and backward navigation experience. You can use named and anonymous routes to understand the application's video display units.
- Routing Library: you can use a library like go_router or auto_router if you need more complex navigation. This package provides features such as deep link analysis and fine-grained control of navigation stacks.
Here’s also the Flutter navigation documentation, in case you need something.
Now you should set up the router as shown in the example on the screen and let me know if everything worked well for you:
Simple navigation between screens
Using the Navigator.Push approach and MaterialPageRoute, this example shows a way to navigate between screens (or routes) in a Flutter app.
Navigator.push(
  context,
  MaterialPageRoute(builder: (context) => SecondScreen())
So, now you can start setting up languages for your app because it’s as important as having the right UI elements in the project.
Languages
You'll want to localize your app, so that users can select different languages or have it automatically localized.
Google provides recommendations on the approach that best suits your needs and technical requirements which you can read more about here.
Start by creating a file of translations for one language. If needed, you can add more languages later.

return Center(
 child: Text(Localization.from(context).continueText),
)
Once you finish this part, you will have the basic elements of an app – styles, localization, screen structures, and transitions. And then, you can start programming each screen.
Step 6: Code the UI Elements and Interactions (Widgets)
At this stage, you'll code the basic elements of a screen's UI and the logic that will control the UI. For example, you might develop a logic for browsing a list of products from a remote server by selecting an item from a goods list. Then you write code that converts a particular data model into an item.
Flutter uses ready-made widgets. In fact, Flutter is all about widgets. One of the innovative things about them is that they're reusable UI components that you can integrate directly into the app instead of building them from scratch. Compare this to different strategies that use exclusive objects (layouts, perspectives, controllers), where Flutter has a single, unique object model.
Every object in Flutter is a widget – from buttons to pads to text, and existing building blocks to the lowest levels of customization. You'll be using the same tools that the Flutter team uses to build theirs.
Widgets in Flutter are available for rendering but they can also cause a problem with the overall structure. You'll need to plan the form because large apps can require up to ten layers of code to create a primary element. For an excellent article with lots of ready-made widgets, check out this guide.
Otherwise, here's a short but useful list of must-have code elements for your basic app:
Element 1: Create lists
This part of the code demonstrates a way to create a list of items using ListView.Builder. It takes a list of items and generates ListTile widgets for each item, allowing you to address faucet events on the gadgets:
  final List<String> items =
      List<String>.generate(10, (int index) => "Item with number $index");

  @override
  Widget build(BuildContext context) {
    return Scaffold(
      body: ListView.builder(
        itemCount: items.length,
        itemBuilder: (BuildContext context, int index) {
          return ListTile(
            title: Text(items[index]),
            onTap: () {
              ScaffoldMessenger.of(context)
                  .showSnackBar(SnackBar(content: Text('Item $index tapped!')));
            },
          );
        },
      ),
    );
  }
Here is how your list should look after coding:
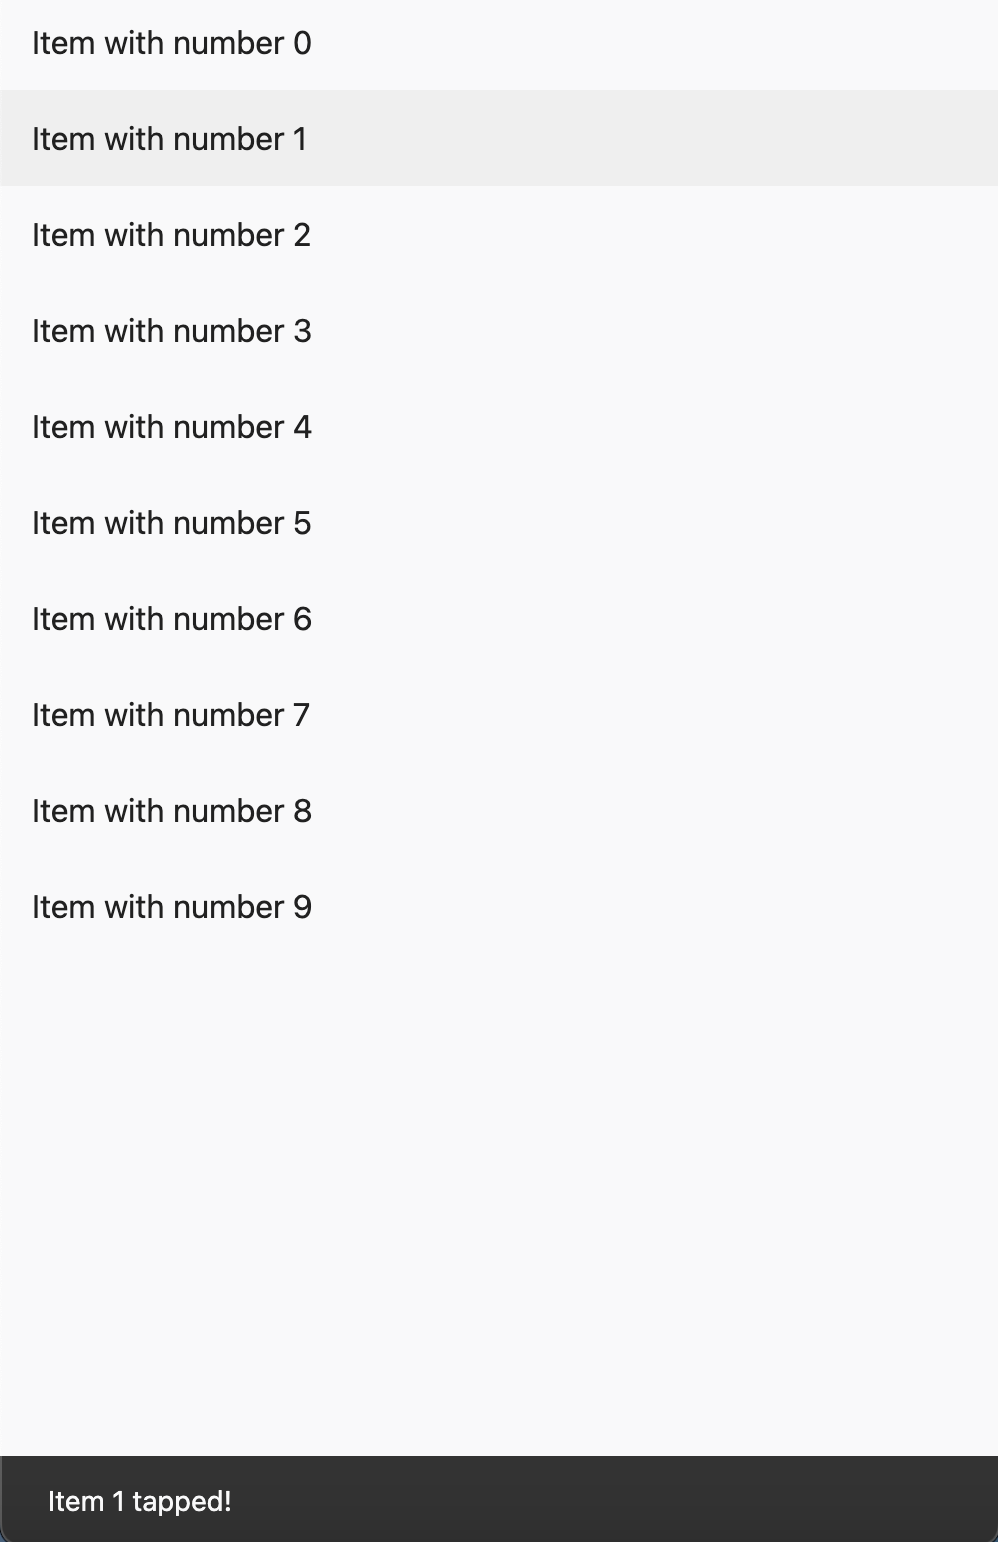 View of the list
Element 2: API request
This code shows how to get data from an API using the HTTP bundle. It makes a GET request to the desired URL and handles the response, processing any fetched records or managing errors:
Future<void> fetchData() async {
  final response = await http.get(Uri.parse('https://api.example.com/data'));
  if (response.statusCode == 200) {
    final data = json.decode(response.body);
    // Process fetched data here
    print(data);
  } else {
    // Handle error
    print('Failed to fetch data: ${response.statusCode}');
  }
}
Element 3: Styling text
Here, you can see a demonstration of how to display two texts in column and style textual content in Flutter the usage of the TextStyle magnificence, which allows you to customize styles like coloring, font size, font weight and font style:
  @override
  Widget build(BuildContext context) {
    return const Scaffold(
      body: Center(
        child: Column(
          mainAxisAlignment: MainAxisAlignment.center,
          children: <Widget>[
            Text(
              'Hello!',
              style: TextStyle(
                color: Colors.red,
                fontSize: 36,
                fontWeight: FontWeight.bold,
                fontStyle: FontStyle.italic,
              ),
            ),
            Text(
              'Flutter',
              style: TextStyle(
                color: Colors.blue,
                fontSize: 18,
                fontWeight: FontWeight.bold,
                fontStyle: FontStyle.italic,
              ),
            ),
          ],
        ),
      ),
    );
  }
The result looks great, doesn't it?
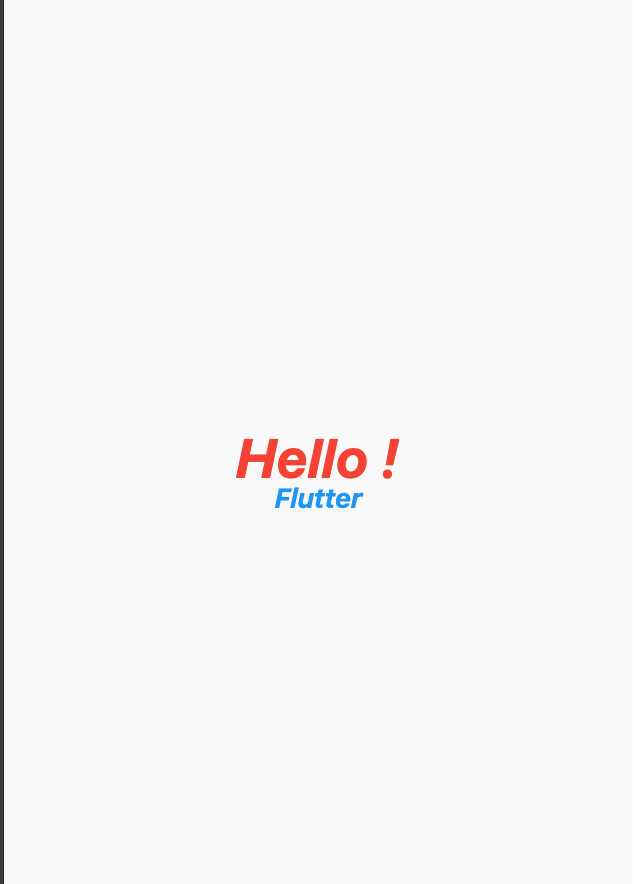 View of the styled text
Element 4: Custom-styled buttons
This one shows a way to create a custom-styled button using the MaterialButton widget. It allows you to personalize properties such as height, top, shape, color and a widget (in this situation, a text widget with custom styling):
  @override
  Widget build(BuildContext context) {
    return Scaffold(
      body: Center(
        child: MaterialButton(
          elevation: 0,
          height: 50,
          shape: RoundedRectangleBorder(
            borderRadius: BorderRadius.circular(20),
          ),
          color: Colors.blue,
          onPressed: () {
            ScaffoldMessenger.of(context)
                .showSnackBar(const SnackBar(content: Text("Button tapped!")));
          },
          child: const Padding(
            padding: EdgeInsets.all(16),
            child: Text(
              "Hello button",
              textAlign: TextAlign.center,
              style: TextStyle(
                color: Colors.white,
                fontSize: 12,
                fontWeight: FontWeight.bold,
              ),
            ),
          ),
        ),
      ),
    );
  }
Hello-button is ready!
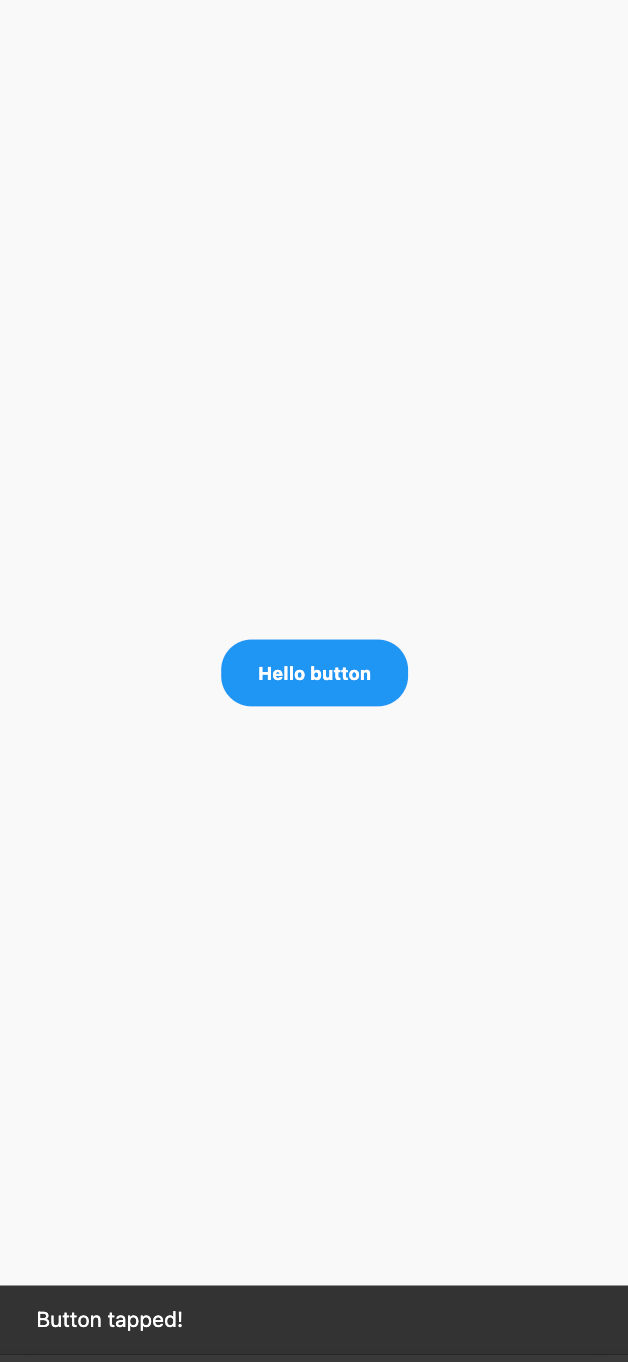 View of the custom styled button
Element 5: Icons
This one suggests a way to display an icon (in this situation, a celebrity icon) in your Flutter app, allowing you to customize its color and length:
Icon(
  Icons.star,
  color: Colors.yellow,
  size: 24,
)
Element 6: Displaying images from the network
By specifying the photo URL, width, top and health, this code demonstrates how to display a photo from a network URL using the Image.Network widget:
Image.network(
  'https://example.com/image.jpg',
  width: 200,
  height: 200,
  fit: BoxFit.cover,
)
Element 7: Simple animated container
This code creates an active container that changes its size (width and top) when a true set (_isExpanded) is changed, with a smooth animation described using the required period and curve:
AnimatedContainer(
  width: _isExpanded ? 200 : 100,
  height: _isExpanded ? 200 : 100,
  color: Colors.blue,
  duration: Duration(milliseconds: 500),
  curve: Curves.easeInOut,
)
Element 8: Handling text input
This code demonstrates how to take care of textual content input using the TextField widget, providing a callback property to handle text changes and such decorations (like label) to the data entry process:
  @override
  Widget build(BuildContext context) {
    return const Scaffold(
      body: Padding(
        padding: EdgeInsets.all(16.0),
        child: TextField(
          decoration: InputDecoration(
            focusedBorder: OutlineInputBorder(
              borderSide: BorderSide(color: Colors.greenAccent, width: 5.0),
            ),
            enabledBorder: OutlineInputBorder(
              borderSide: BorderSide(color: Colors.red, width: 5.0),
            ),
            hintText: 'Enter your name',
          ),
        ),
      ),
    );
  }
 View of the text handling
Step 7: Do Splash Screenwriting
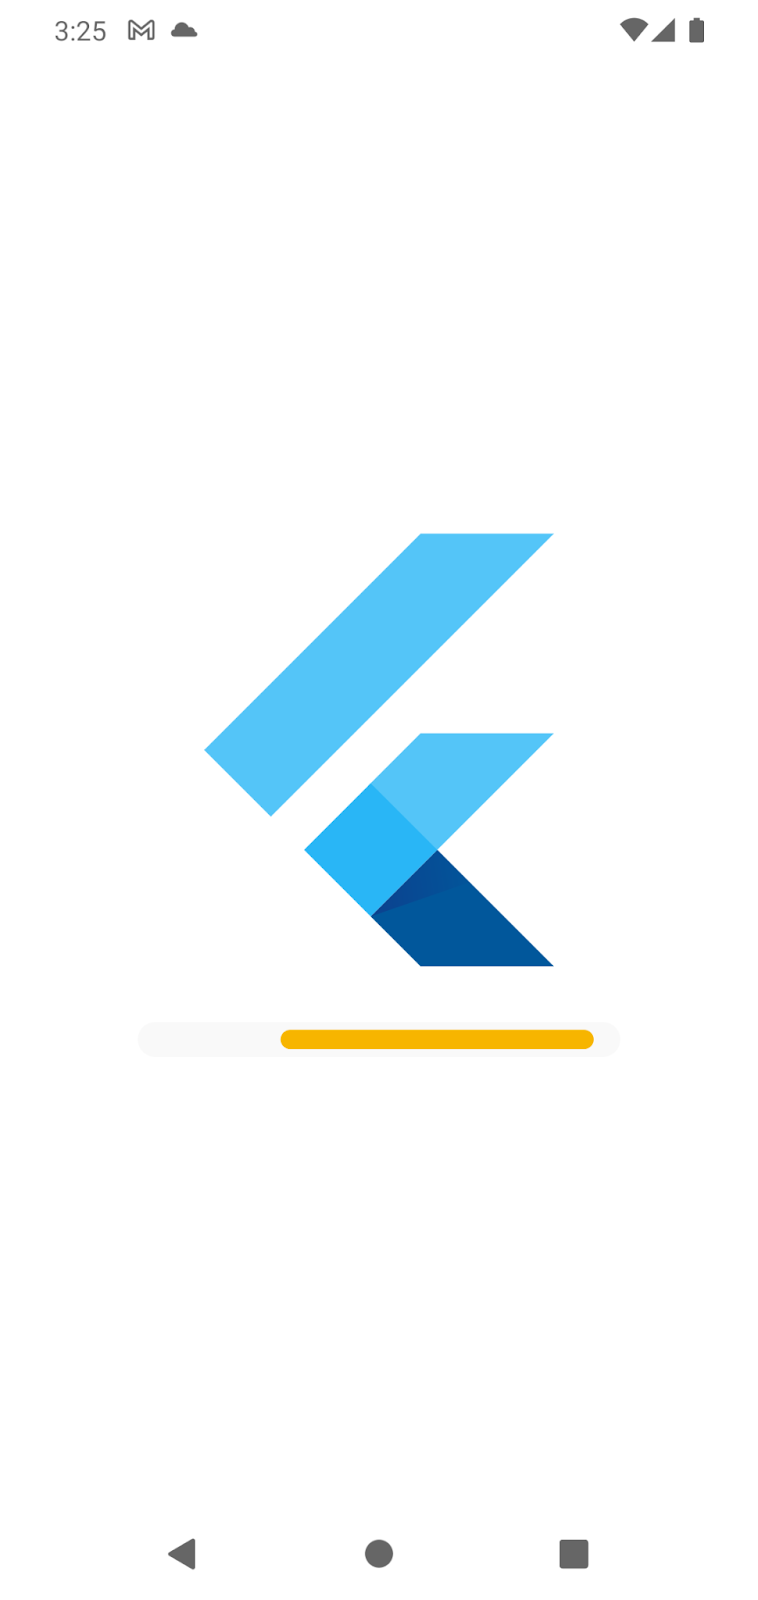
Each application starts with a splash screen that displays a logo or a loading indicator while the app is getting ready. After that, the app loads the necessary data and the splash screen appears.
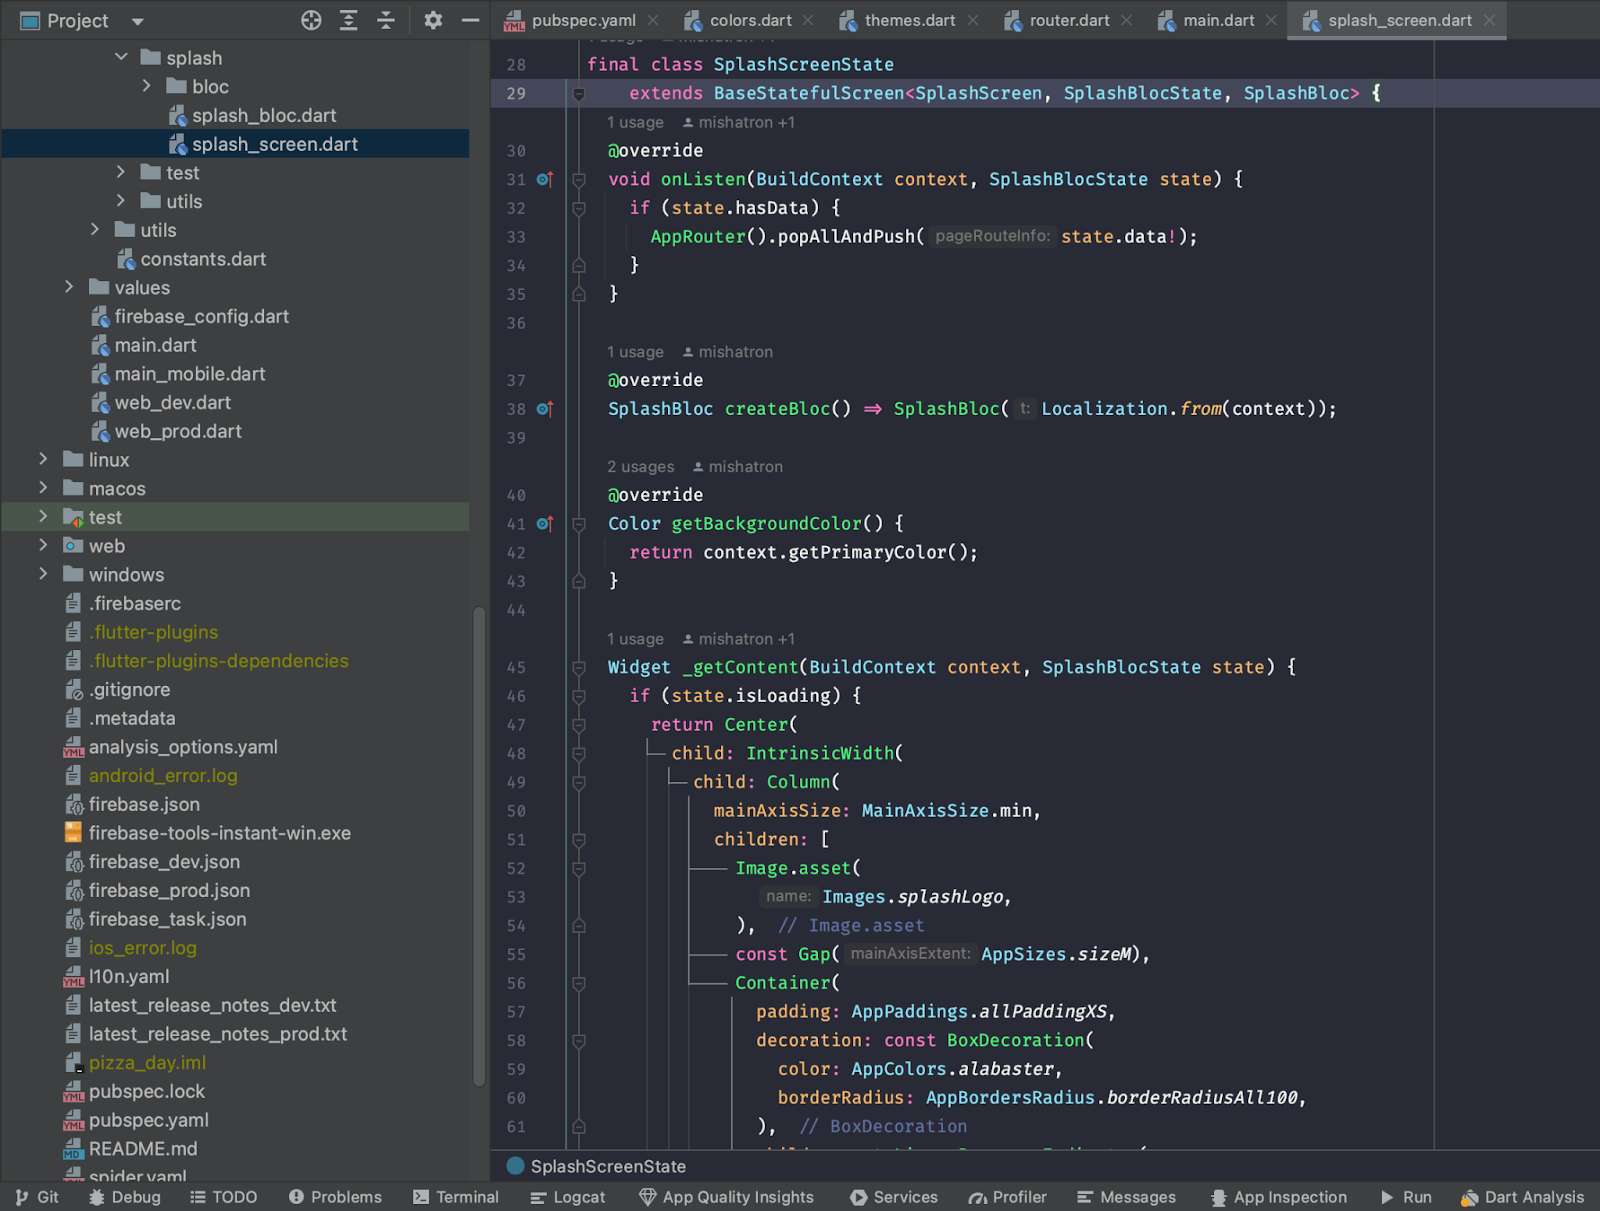
So, let's create our first screen and things will get a lot easier from there. You already have a lot of widgets in your arsenal, but you can copy and paste some of the code below. You can see more of my code on the screen, but I'll leave the rest for you to improve.
Below, you can see my images for writing a splash screen:
IntrinsicWidth(
 child: Column(
   mainAxisSize: MainAxisSize.min,
   children: [
     const FlutterLogo(
       size: 250,
     ),
     const Gap(AppSizes.sizeM),
     Container(
       padding: AppPaddings.allPaddingXS,
       decoration: const BoxDecoration(
         color: AppColors.alabaster,
         borderRadius: AppBordersRadius.borderRadiusAll100,
       ),
       child: const LinearProgressIndicator(
         backgroundColor: AppColors.alabaster,
         borderRadius: AppBordersRadius.borderRadiusAll100,
         minHeight: AppSizes.sizeSSM,
       ),
     )
   ],
 ),
)
Step 8: Demonstrating Changes
Once you finish a section of your code, press a button in Android Studio to quickly see the changes on your screen.
This is one of Flutter's key features. You don't have to restart your project or rebuild the entire application every time you make a change. With Flutter, you can use hot reload or hot restart. Press a button and your changes will appear on your phone or website in a second.
Here’s how your changes may look on your screen:
 Demonstrating changes
At the moment, your app is almost ready, but here are a few important steps left. One of them is testing. That’s the only way you can check that everything is working fine. And if it doesn’t – you can easily see the mistake and fix it.
Step 9: Test Your App
To make sure your app works and everything is built correctly, you need to test it. For example, you might have programmed one feature and accidentally broken the other. Also, if you have any platform-dependent elements, such as Bluetooth or NFC, you’ll need to check how they work in your application.
But testing can have positive and negative test cases. Positive cases should always be tested. For example, an app should work with a correct login and password. Negative cases are when a QA engineer tries to "break" a product by entering the wrong types of data (instead of email, we enter "11111111"). Negative cases are needed to minimize user errors and to write understandable check prompts ("Please, enter your email here").
As you can see, this underscores the importance of thorough testing. By simulating user errors, we can ensure our apps are working fine and deliver a smooth UX.
In the example below with a login, you can see the proper testing functionality:
  @override
  Widget build(BuildContext context) {
    return const Scaffold(
      body: Padding(
        padding: const EdgeInsets.all(16.0),
        child: Column(
          children: [
           TextField(
            controller: textEditingController,
            decoration: const InputDecoration(
             focusedBorder: OutlineInputBorder(
              borderSide: BorderSide(color: Colors.greenAccent, width: 5.0),
            ),
            enabledBorder: OutlineInputBorder(
              borderSide: BorderSide(color: Colors.red, width: 5.0),
                borderSide: BorderSide(color: Colors.red, width: 5.0),
            ),
            hintText: 'Enter your name',
          ),
        ),
        const SizedBox(
         height: 16,
        ),
        MaterialButton(
         elevation: 0,
         height:50,
         shape: RoundedRectangleBorder(
          borderRadius: BorderRadius.circular(20),
         ),
         color: Colors.blue,
         onPressed:(){
          if (textEditingController.text.trim().isEmpty){
           ScaffoldMessenger.of(context).showSnackBar(
            const SnackBar(
             content: Text("You should enter your name"),
            ),
           );
          }else{
         ScaffoldMessenger.of(context).showSnackBar(
         SnackBar(
         content:Text(
         "Your name is ${textEditingController.text.trim()}",
        ),
       ),
      );
     }
    },
    child: const Padding(
     padding: EdgeInsets.all(16),
     child: Text(
      "Display my name",
      textAlign: TextAlign.center,
      style: TextStyle(
       color: Colors.white,
       fontSize: 12
       fontWeight: FontWeight.bold,
      ),
     ),
    ),
   ),
  ],
 ),
),
);
}
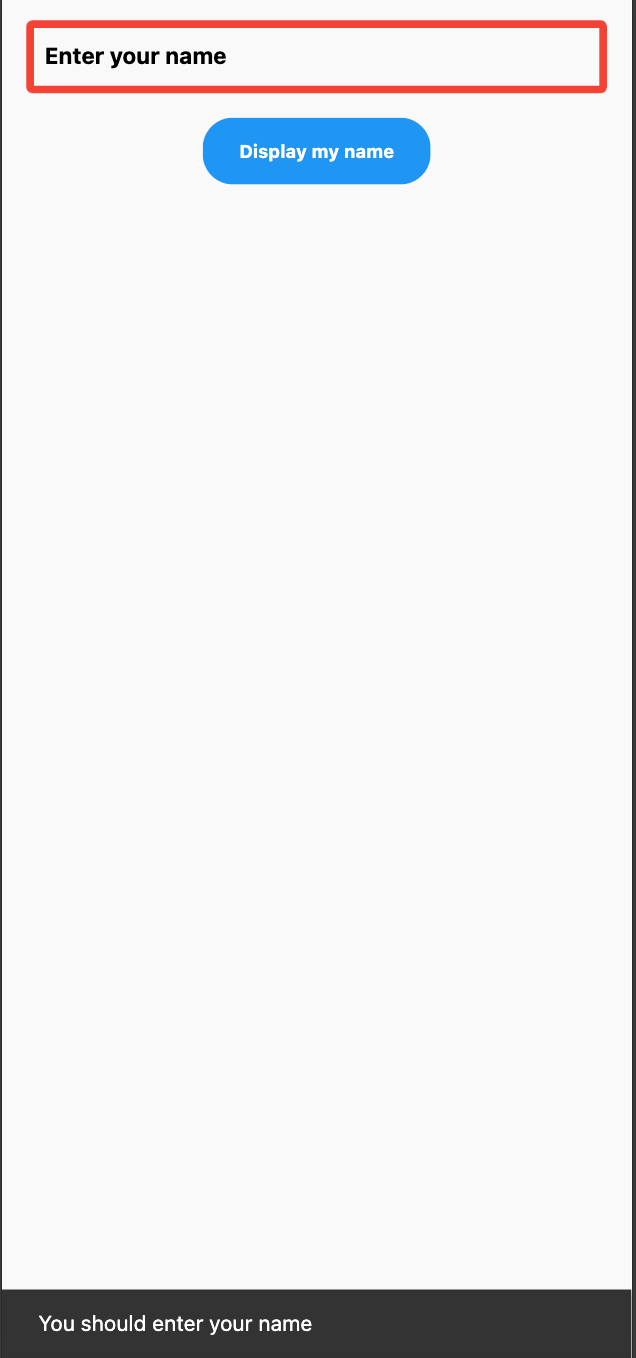 the testing view
Step 10: Code Styles
To maintain a consistent style, it's important to follow certain standards when coding. Google recommends a certain code style – a way of calling variables or methods and dimensions. Libraries and plugins (analyzers) for Android Studio mark up code and suggest changes as you write your code.
Here are a few of them I can recommend:
- Dio for network requests
- Flutter bloc + bloc + bloc concurrency to use BLoC state management
- Provider to use Provider state management
- Auto_route + Auto Route Generator for routing
There are a lot more you can find, from plugins to cache any network image to native splash generations. Code styles are required to ensure code quality and future code support for the largest projects.
You can read more in the Flutter docs here.
Step 11: Publish Your App
When you’re done coding and testing your app, you should test its performance on the platforms where you plan to have it – iOS, Android, and Web.
The first step is to publish a developer account creation on each system. After that, you'll need to pay a certain amount of money (once a year in Apple's case) and then download the apps. Then, Google and Apple employees review the apps for compliance with requirements, standards and laws. If all goes well, the application will be released.
After overcoming any challenges, remember that a successful launch is just the beginning. Take a look at the images below and make sure your app is ready to be discovered by users:
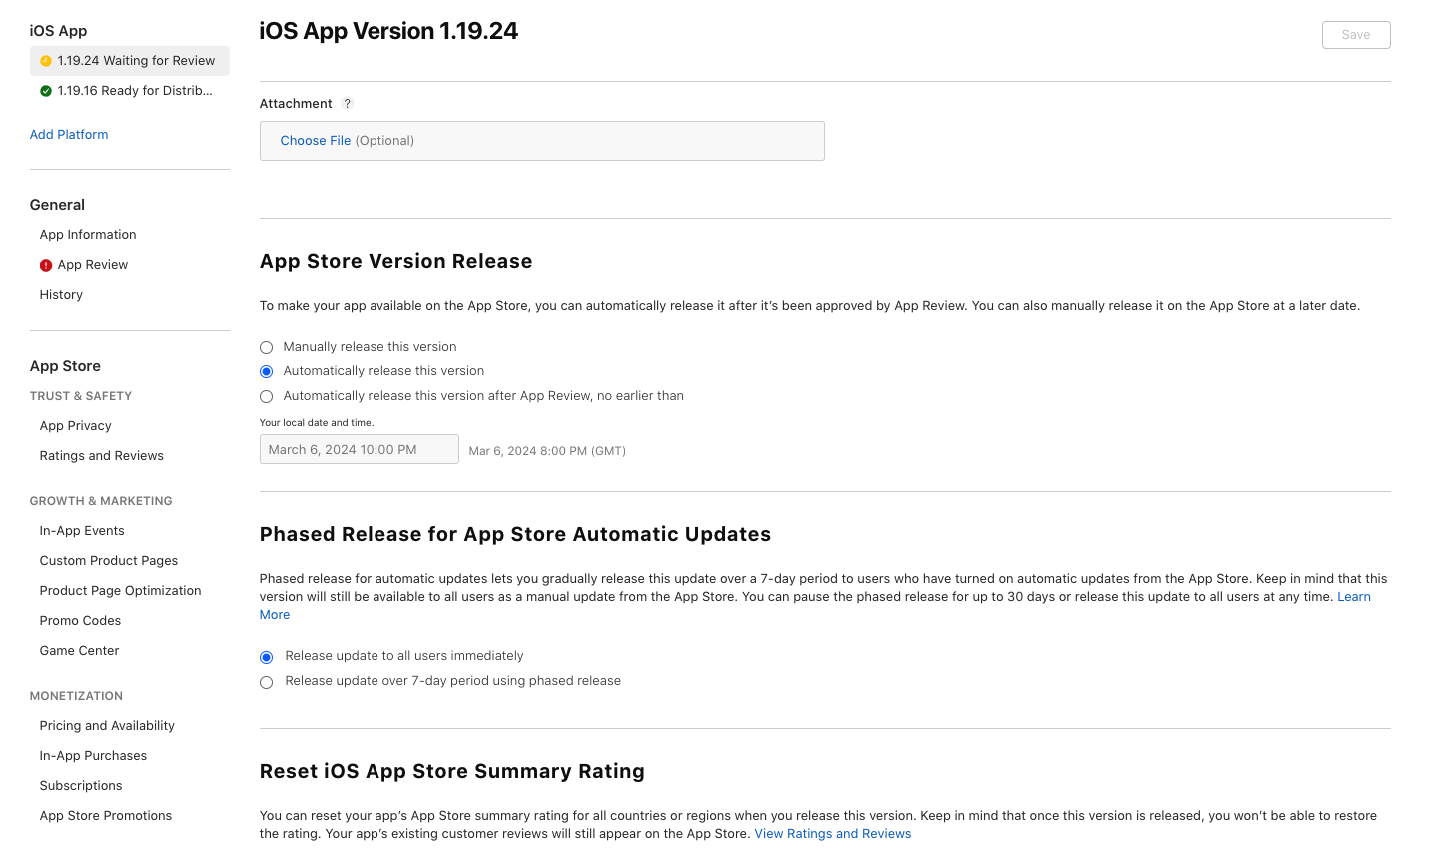
To publish your Flutter app to the App Store, you have to complete a few steps.
First of all, register for the Apple Developer Program and upload certificates to sign your app. After that, create an App Store Connect account to manage your app. Now, using Xcode, upload your app for App Store distribution. When everything is done, your last step is to enter details such as screenshots, description, and pricing for your app.
Sounds pretty easy, doesn't it? If you are looking for more information, just visit the Apple developer page to learn more.
Almost the same goes for the Google Play Store. Sign up for a Google Play Developer account and link it to a Google Wallet Merchant Account for in-app purchases (if necessary). Then, just make sure that your app meets their technical requirements and guidelines. This includes things like app signing, privacy policy, and content rating.
During the third step, you have to fill in details about your app that users will see in the Play Store. Now, upload your app bundle or just an APK file and configure pricing and distribution settings. You may have to wait a little, as Google will take some time to review your app to ensure it fits their policies.
Once your app is approved, you can finally publish it to the Google Play Store and make it available for users! This was just an overview – so to learn more about the process, visit the official page and get as much information as you need.
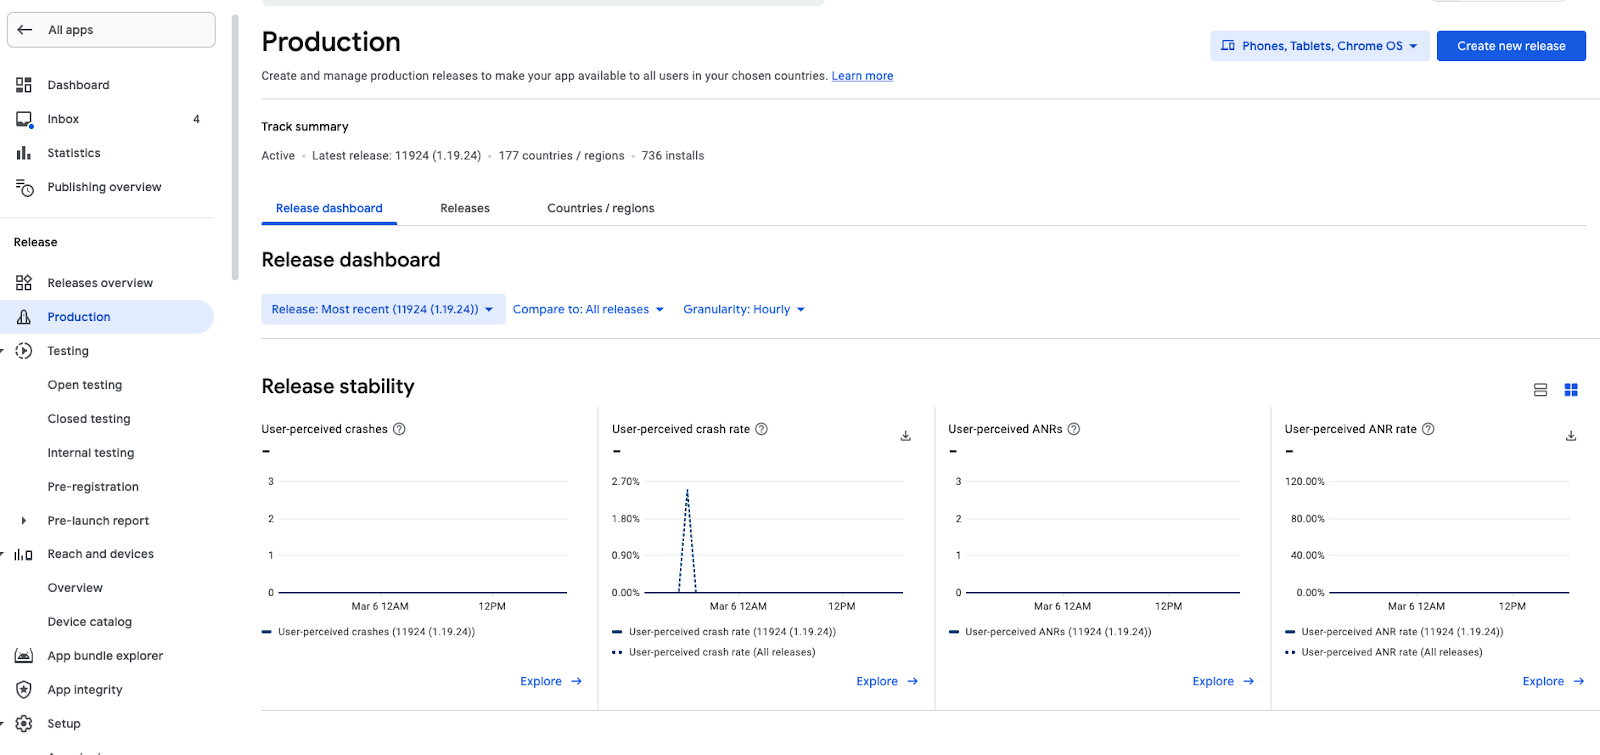
Now, you're ready to take the world. Just make sure you carefully check all the settings before publishing your app. You can set a clear date and time for publishing your Flutter app, manage production releases, and more. To be honest with you, there are way more features than you can imagine, so I'll let you do it by yourself.
Conclusion
All right, now your app is ready. In this tutorial, I've given you the fundamentals of building a basic Flutter mobile app. Don't be afraid to take your unique idea and to run with it.
As I’ve already told you, the Flutter community is a treasure of information, so, feel free to jump in and explore it!
By the way, here's another golden piece of advice from me to keep in your developer toolbox: start simple, keep your code clean and organized, and test as you build. With these basics and a bit of effort, you'll quickly build a great Flutter app!
I would also like to thank my development partner in crime Mikhailo, who was helping me all the time creating this guide for you. Without his technical expertise, I wouldn't even know how to properly tell you about all these instructions, thanks again!
Do you have an idea for a Flutter project?
My company Covent IT is an early adopter of the Flutter framework and a well-established mobile app development company in general. In case you have a promising project in mind, feel free to request a consultation for a Flutter project.