
By Ondiek Elijah Ochieng
These days, developers need to develop, ship, and run applications quicker than ever. And fortunately, there's a tool that helps you do that – Docker.
With Docker, you can now easily ship, test, and deploy your code quickly while maintaining full control over your infrastructure. It significantly reduces how long it takes to get from writing code to running it in production.
This article will show you how to make a basic Docker image and run it as a container. For the demonstration, we'll use Flask as our web framework and Docker for image creation and containerization. You'll also learn a few Docker commands that are commonly used.
What is Flask?
Flask is a popular Python micro web framework that helps you develop lightweight web applications and APIs quickly and easily.
As a web framework, it provides greater flexibility, customization, and scalability for simple web applications while remaining highly compatible with cutting-edge technologies.
What is Docker?
Docker is a tool that makes it easier to create, deploy, and run applications using containers.
A docker container is a collection of dependencies and code organized as software that enables applications to run quickly and efficiently in a range of computing environments.
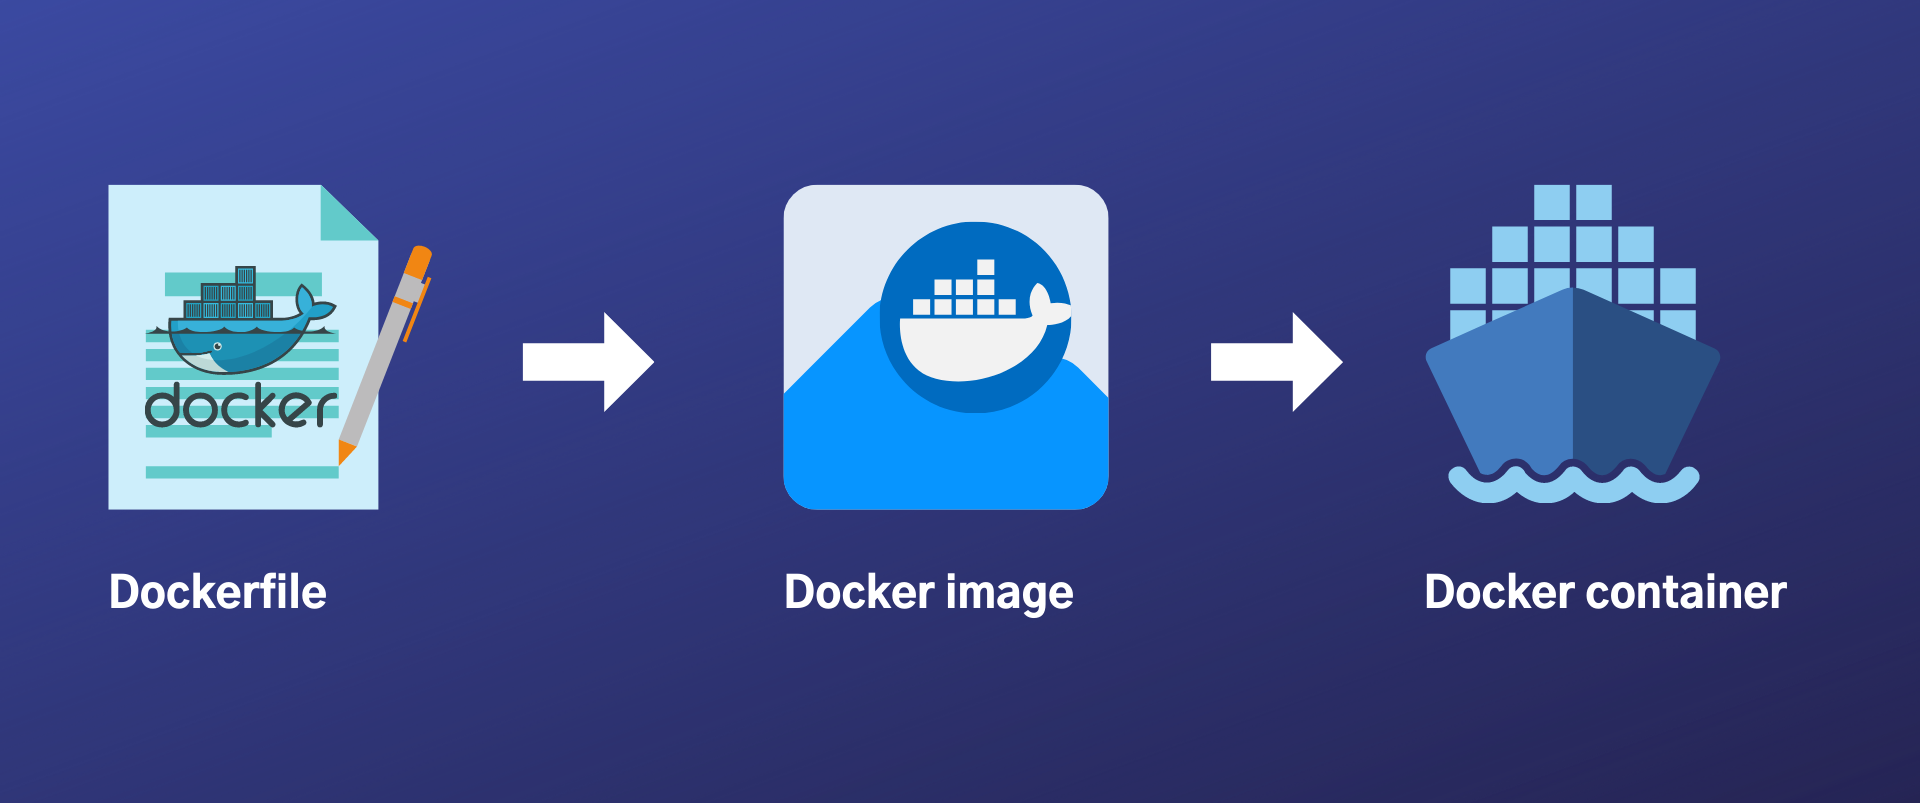
A docker image, on the other hand, is a blueprint that specifies how to run an application. In order for Docker to build images automatically, a set of instructions must be stored in a special file known as a Dockerfile.
The instructions in this file are executed by the user on the command line interface in order to create an image. (Source: docker.com)
How to Set Up the Project
Basic directory structure
After completing the following steps, our application directory structure will look like this:
flask-docker
├── app.py
├── Dockerfile
├── requirements.txt
└── venv
In this section, we'll go over how to create an application with a structure similar to the one shown above. You can find a detailed guide on how to create or install this project here.
Assuming you followed the installation instructions correctly and have an active virtual environment with Flask installed, we will now modify the two files created in the GitHub readme as follows.
How to modify app.py
Let's add the following lines of code to our app.py:
from flask import Flask
app = Flask(__name__)

@app.route('/')
def hello_geek():
    return '<h1>Hello from Flask & Docker</h2>'


if __name__ == "__main__":
    app.run(debug=True)
Now, if we run python app.py on the command line to test our Flask app, we should get results similar to the ones shown below:
 * Serving Flask app 'app' (lazy loading)
 * Environment: production
   WARNING: This is a development server. Do not use it in a production deployment.
   Use a production WSGI server instead.
 * Debug mode: on
 * Running on http://127.0.0.1:5000/ (Press CTRL+C to quit)
 * Restarting with stat
 * Debugger is active!
 * Debugger PIN: 316-584-348
How to modify the Dockerfile
# syntax=docker/dockerfile:1

FROM python:3.8-slim-buster

WORKDIR /python-docker

COPY requirements.txt requirements.txt
RUN pip3 install -r requirements.txt

COPY . .

CMD [ "python3", "-m" , "flask", "run", "--host=0.0.0.0"]
Before we build an image for the application we just created, let's first understand what the lines of code in the Docker file above mean and what role they play.
The below code should be the first line of every Dockerfile – it tells the Docker builder what syntax to use while parsing the Dockerfile and the location of the Docker syntax file. (Source)
# syntax=docker/dockerfile:1
While it is possible to create our own base images, there is no need to go that far because Docker allows us to inherit existing images. The following line tells Docker which base image to use — in this case, a Python image.
FROM python:3.8-slim-buster
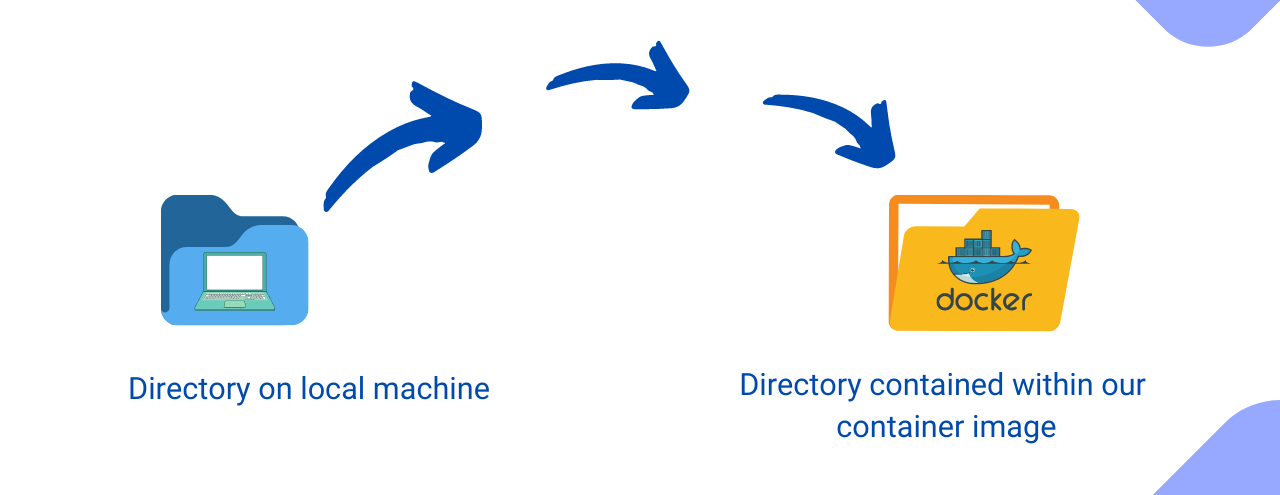
To keep things organized, we also tell Docker which folder to use for the rest of the operations, so we use a relative path as shown below.
In this case, we're telling Docker to use the same directory and name for the rest of its operations — it's a directory contained within our container image.
WORKDIR /python-docker
In the fourth and fifth lines, we tell Docker to copy the contents of our requirements.txt file into the container image's requirements.txt file. Then run pip install to install all the dependencies in the same file to be used by the image.
COPY requirements.txt requirements.txt
RUN pip3 install -r requirements.txt
Continuing with the copying, we now copy the remainder of the files in our local working directory to the directory in the docker image.
COPY . .
Our image so far has all of the files that are similar to those in our local working directory. Our next task is to assist Docker in understanding how to run this image inside a container.
This line specifically instructs Docker to run our Flask app as a module, as indicated by the "-m" tag. Then it instructs Docker to make the container available externally, such as from our browser, rather than just from within the container. We pass the host port:
CMD [ "python3", "-m" , "flask", "run", "--host=0.0.0.0"]
Since we had,
if __name__ == "__main__":
    app.run(debug=True)
Because we had the "if" statement in our application file, this will be true if we run this module as a standalone program. As a result, it can function as a module imported by another program or as a standalone program, but it will only execute the code in the if statement if run as a program. (Source)
How to Build a Docker Image
After that, all that remains is to build our image. Using docker build, we can now enlist Docker's help in building the image. You can combine the build command with other tags, such as the "--tag" flag, to specify the image name.
docker build --tag python-docker .
How to run an image as a container
Running an image inside a container is as simple as building one. But before we do so, we'd like to see what other images are available in our environment. To view images from the command line, execute the following:
docker images
If the above command finds any images, the output should look something like this:
REPOSITORY      TAG       IMAGE ID       CREATED             SIZE
python-docker   latest    cd52b70b361a   About an hour ago   912MB
headless-cms    latest    e8b253e230ee   43 hours ago        937MB
scrappy         latest    3e7ac0d44890   7 weeks ago         904MB
python          3.9.2     587b1bc803b3   7 months ago        885MB
Now we can choose which image to run. Using the docker run command, we can run an image by passing the image's name as a parameter.
docker run
While running the above command, you'll notice that on the command line it indicates that the application is running. But when you enter http://localhost:5000/ on the browser, the greeting will be:
This site can’t be reached localhost refused to connect.
Regardless of whether the container is running, it is doing so in isolation mode and cannot connect to localhost:5000.
The best solution is to run the image in detached mode. Because we need to view this application in the browser rather than the container, we'll modify our docker run and add two additional tags: "-d" to run it in detached mode and "-p" to specify the port to be exposed.
The docker run command will now be formatted as follows:
docker run -d -p 5000:5000 python-docker
This time, we'll see the following output if we run it in detached mode and visit localhost at port 5000:

We can use the following command to see which containers are currently running:
docker ps
The output is as follows:
CONTAINER ID   IMAGE           COMMAND                  CREATED         STATUS         PORTS                    NAMES
a173935297cd   python-docker   "python3 -m flask ru…"   5 minutes ago   Up 5 minutes   0.0.0.0:5000->5000/tcp   happy_wescoff
To stop the currently running container, we execute this command:
docker stop <container-name>
Another useful command to have when working with Docker is this one:
docker container prune
It removes unused resources, freeing up space and keeping your system clean.
And that's it!
Thank you for taking the time to read this article. Please share, thank me in a tweet, and don't forget to follow me on Twitter @dev_elie.
You can find more information on Docker and Python in the official documentation. I'll see you next time.