
By Xing Liu
I've been using Vim since the first year I started coding. For all the IDEs/editors that I have used, the Vim plugin is always the very first plugin that I install.
I know that Vim can be challenging to work in for people who are not familiar with it. In this article, we'll cover some fundamental topics like how to exit Vim, rather than quitting Vim.
I will also include the command that you can use to reveal the corresponding help documentation. To do that, first we need to press ESC a few times, and run the command provided, for example, :h vim-modes, and press Enter.
TL;DR – How to Exit Vim
- Press ESC once (sometimes twice)
- Make sure you are using the English input method
- The next step depends on the current status and your expectations:
- If you didn't make any changes, type
:qand press Enter/return - If you made some changes and would like to keep them, type
:wqand press Enter/return - If you made some changes and would rather discard them, type
:q!and press Enter/return
- If you didn't make any changes, type
If you want to understand in more detail how this works, let's dive in.
What are Modes in Vim?
There are seven BASIC modes in Vim and seven additional modes that are considered variants of the BASIC modes. You may run :h vim-modes inside Vim to read the documentation if you would like to know more.
Fortunately, we don't have to know all of them in order to get started. But there are three modes that we need to be aware of: Normal Mode, Insert Mode, and Command-line Mode.
What is normal mode in Vim?
Normal Mode is crucial since it's only in Normal Mode that we can run commands (there are exceptions but those are beyond the scope of this article).
Say, if we want to read the documentation of vim-modes, then we have to first make sure we are in Normal Mode before typing in :h vim-modes. And the most canonical way of entering Normal Mode is by pressing ESC. Even if you are already in Normal Mode, pressing ESC will keep you in Normal Mode, so no worries.
Find it in the Documentation: :h Normal, :h mode-switching.
What is insert mode in Vim?
You use Insert Mode to edit the current file (in Vim, this is normally referred to as buffer). By default, we are in the Normal Mode right after we open a file. If we need to make changes to the current file, first we need to switch to Insert Mode.
The most common way to make this switch is by pressing i in Normal mode after navigating the cursor to the place that we are going to edit.
There are actually many other ways to enter Insert Mode as well, like o, O, a, A, I, and so on.
Find it in the Documentation: :h Insert, :h i_<Esc>, :h o, :h O, :h a, :h A, :h I.
What is command-line mode in Vim?
Command-line Mode is normally a "short-lived" mode, which you use to run "Ex commands" (not to be confused with the "commands" in Normal Mode).
Fun fact: Vim is actually a contraction of Vi Improved and it is based on another text editor named [vi](https://en.wikipedia.org/wiki/Vi). And vi is based on a line editor named [ex](https://en.wikipedia.org/wiki/Ex_(text_editor)). Both vi and ex were developed by Bill Joy.
Another fun fact for macOS users: there is only Vim on macOS and the command vi is symlinked to vim. Also note that the "Ex command" in Command-line Mode is different from the "command" in Normal Mode.
You can enter Command-line Mode by typing : in Normal Mode. For example, if you run the commands above to see the documentation, you are actually using the Command-line Mode as soon as you type in :.
Similarly, press ESC if you'd like to switch back to Normal Mode.
Find it in the Documentation: :h Command-line, :h cmdline-lines.
How to Exit Vim
 documentation of
 :h quit
If you take a look at the documentation of :h quit, note that the quit is prefixed with :. This means that quit is used within Command-line Mode.
In order to enter Command-line Mode, first we need to make sure we are in Normal Mode, then simply type in :. Now that we are in Command-line Mode, just type in quit and press Enter or return.
You may also notice the :q there, which is actually the shorthand version of the :quit command. That being said, we can also quit Vim by executing :q .
It does mention, though, that this command will fail "when changes have been made and Vim refuses to abandon the current buffer" (if you still remember, buffer is just opened file(s), nothing fancy).
In this case, we'd need to use :wq, which means "write and quit". You can find this in the Documentation under :h :wq.
:x is another command that works almost the same as :wq. According to :h :x, it is "like :wq, but write only when changes have been made".
The difference here is that :wq will save the file no matter if you made changes to it or not. :x won't save the file if you didn't make any changes. What matters here is the modification time of a file, since :wq will update the modification time but :x will not.
There are some times that we'd rather not keep the changes that we've made. At this point, we need the :q! command. The ! is normally referred to as "bang", which makes q! something like "force quit".
Do note that if you use this way, you WILL lose all changes that you have made to this file and there is almost no way that you can recover them.
How to Troubleshoot Exiting Vim
What if I don't want to enter Command-line Mode?
Not a problem. In Normal Mode, you can also press ZZ or ZQ to quit Vim. Where ZZ is the same as :x and ZQ is the same as :q!.
Here, ZZ and ZQ are considered commands of Normal Mode while :x and :q! are Ex commands.
What if :wq failed?
This is legit since :wq could fail when the file is read-only or the file name is missing.
Note that when a file is read-only, Vim won't stop you from opening and editing the file. You may also find that :wq! won't work either at that moment. You might end up discarding all changes with :q! and open the same file prefixed with sudo and do the same changes one more time.
One thing you could do is to save this file in another directory that you have write permission to, like ~ or even /tmp. Then move it back to the directory where you don't have write permission.
In order to achieve this, you can run :w ~/my-backup-file which will save this file under ~. Next you can use the mv command to move this file around. Also note that this is what you need to do when Vim complains that the file name is missing.
There is another solution right inside Vim. You could run this command: :w !sudo tee %. Here !sudo means to run the sudo command in your shell environment.
For example, :ls will list all buffers in Vim but :!ls will run the ls command from the shell and display the result. tee copies from standard input (a.k.a. stdin) to standard output (a.k.a. stdout). % refers to the current filename.
This means that we use the sudo command from the shell environment, copy the content of the current file (note: modified version) from Vim, and redirect the modified content to the file (which is referred to by using the filename).
 Warning of file content change
You will notice the warning above. This warning happens because the file content was updated within the shell environment without Vim's attention. So Vim considers this to be an external change and lets you know what happened.
You can just press Enter at this time since you made the external change on purpose.
You may also notice that the modified file content also shows up above the warning message. This is as expected since it comes from the stdout. If you don't want to see it, you may do :w !sudo tee% >/dev/null, which will discard the stdout from tee.
What if I am lost and have to force-quit?

Well if we try exiting by pressing control + c, Vim will show us the above info. But you may still get around this by Ctrl + Alt + Delete on Windows or Force Quit... on macOS.
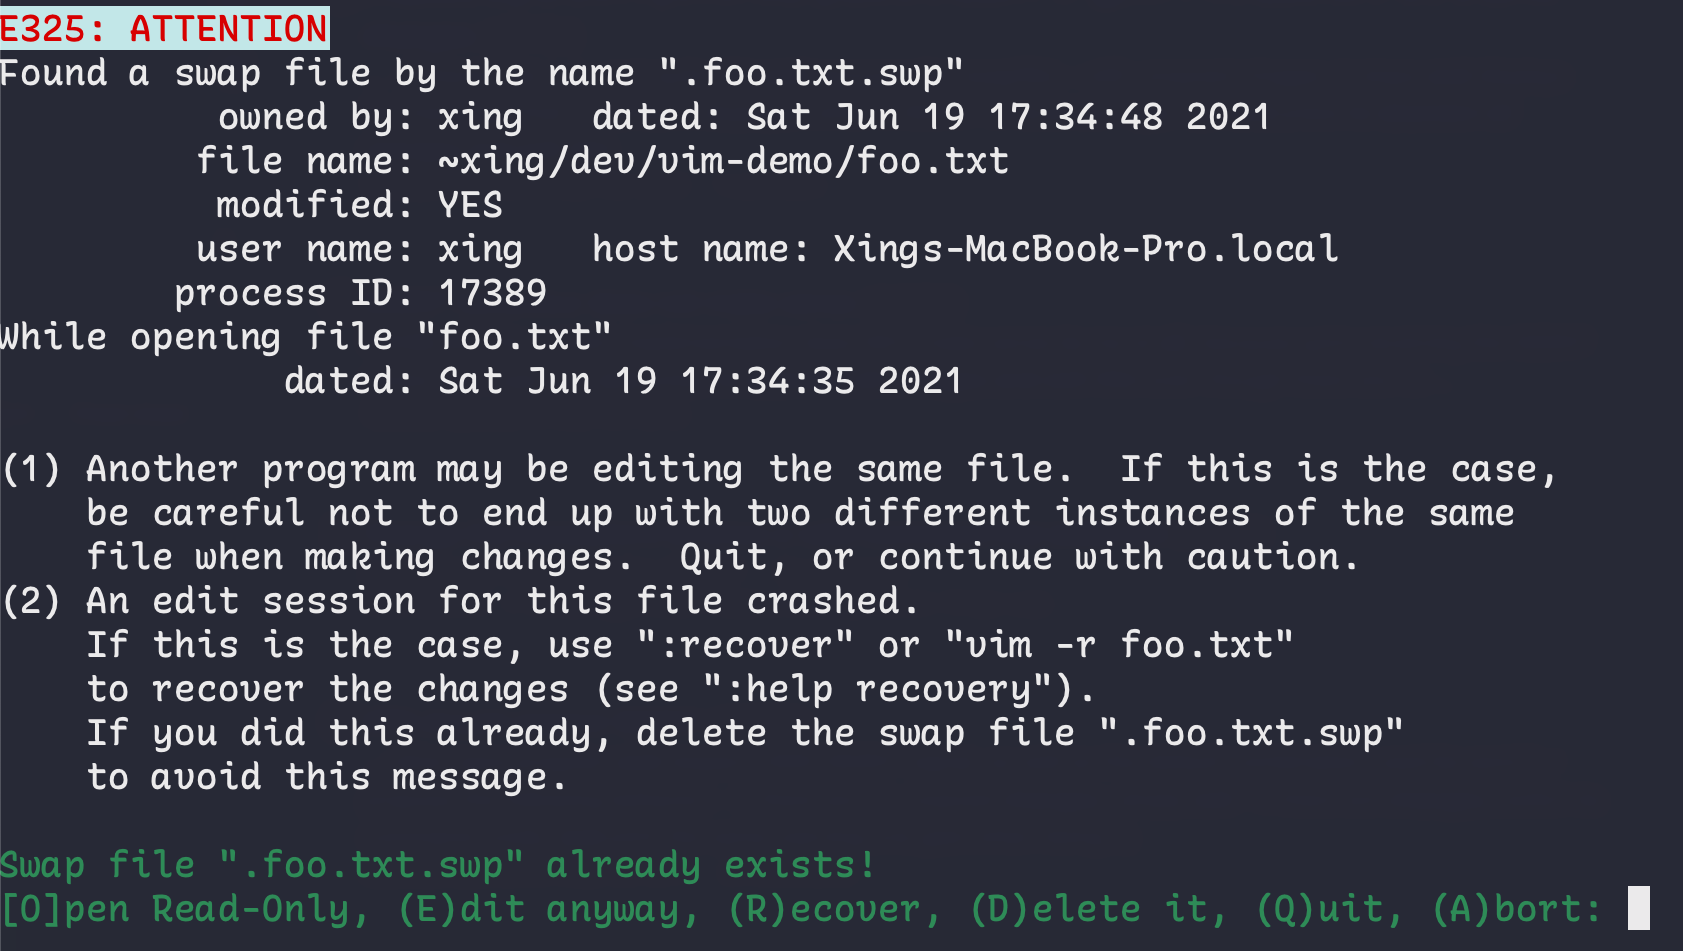
Next time when you try to open the same file again, you should see this (here I am using a file named foo.txt as an example):
 swap file
Don't panic – this is as expected, since Vim is trying to help you recover your valuable changes that you might have lost.
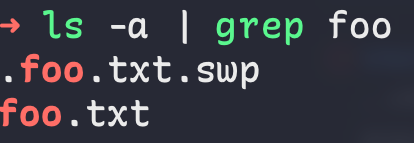
By checking the directory, you will find a file with the extension of .swp. This is a swap file (documentation: :h swap-file):
 swap file .swp
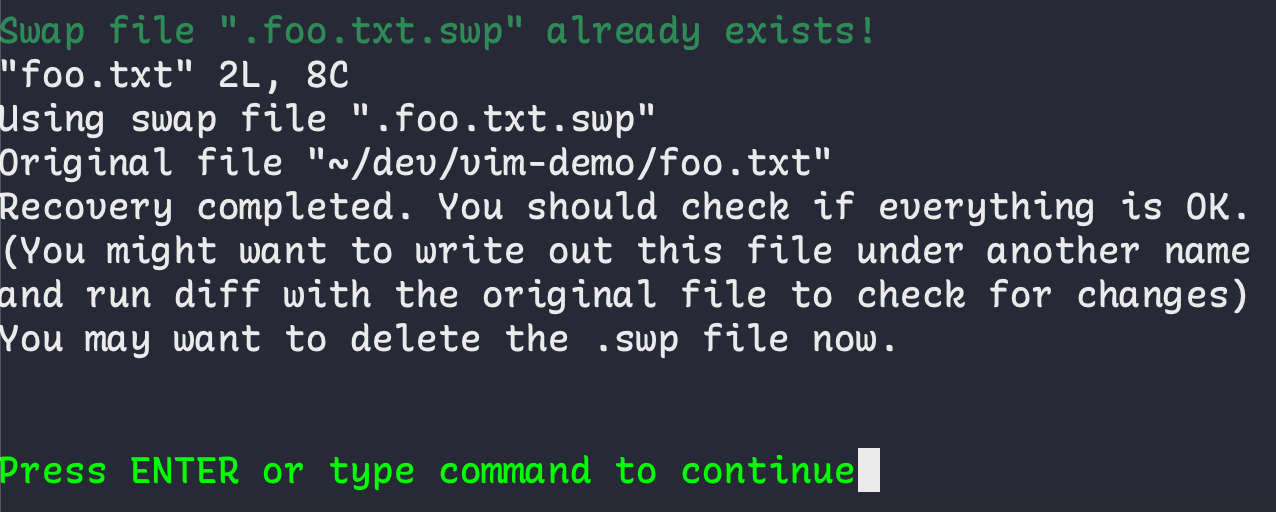
We will see the following if we press R to recover:
 .swp recover
After pressing Enter, now you'll notice that the changes you made earlier are back. And after you are done with the recover process, you can simply remove the .swp file so that you won't see the error above anymore.
Conclusion
In this article, we covered some fundamentals about Vim's modes and how to exit Vim. We also learned how to solve common issues when it comes to exiting Vim.
Thanks for reading. There is lot more to learn when it comes to Vim. But feel free to explore the Vim help documentation if you would like to learn more.