

Next.js has been steadily growing as a must-have tool for developers creating React apps. Part of what makes it great is its data fetching APIs that request data for each page. But how can we use that API to make GraphQL queries for our app?
- What is GraphQL?
- What is Apollo GraphQL?
- Fetching data in Next.js
- What are we going to build?
- Step 0: Creating a new Next.js app
- Step 1: Adding Apollo GraphQL to a Next.js app
- Step 2: Adding data to a Next.js page with getStaticProps
- Step 3: Fetch data with a GraphQL query in Next.js using Apollo Client
- Step 4: Adding SpaceX launch data to the page
What is GraphQL?
GraphQL is a query language and runtime that provides a different way of interacting with an API than what you would expect with a traditional REST API.
When fetching data, instead of making a GET request to a URL to grab that data, GraphQL endpoints take a “query”. That query consists of what data you want to grab, whether it’s an entire dataset or a limited portion of it.
If your data looks something like this:
Movie {
  "title": "Sunshine",
  "releaseYear": "2007",
  "actors": [...],
  "writers": [...]
}
And you only want to grab the title and the year it was released, you could send in a query like this:
Movie {
  title
  releaseYear
}
Grabbing only the data you need.
The cool thing is, you can also provide complex relationships between the data. With a single query, you could additionally request that data from different parts of the database that would traditionally take multiple requests with a REST API.
What is Apollo GraphQL?
Apollo GraphQL at its core is a GraphQL implementation that helps people bring together their data as a graph.
Apollo also provides and maintains a GraphQL client, which is what we’re going to use, that allows people to programmatically interact with a GraphQL API.
Using Apollo’s GraphQL client, we’ll be able to make requests to a GraphQL API similar to what we would expect with a REST-based request client.
Fetching data in Next.js
When fetching data with Next.js, you have a few options for how you want to fetch that data.
First, you could go the client side route and make the request once the page loads. The issue with this is that you’re then putting the burden on the client to take the time to make those requests.
The Next.js APIs like getStaticProps and getServerSideProps allow you to collect data at different parts of the lifecycle, giving us the opportunity to make a completely static app or one that’s server-side rendered. That will serve the data already rendered to the page straight to the browser.
By using one of those methods, we can request data along with our pages and inject that data as props right into our app.
What are we going to build?
We’re going to create a Next.js app that shows the latest launches from SpaceX.

We’ll use the API maintained by SpaceX Land to make a GraphQL query that grabs the last 10 flights. Using getStaticProps, we’ll make that request at build time, meaning our page will be rendered statically with our data.
Step 0: Creating a new Next.js app
Using Create Next App, we can quickly spin up a new Next.js app that we can use to immediately start diving into the code.
Inside your terminal, run the command:
npx create-next-app my-spacex-launches
Note: you don’t have to use my-spacex-app, feel free to replace that with whatever name you want to give the project.
After running that script, Next.js will set up a new project and install the dependencies.
Once finished, you can start up your development server:
cd my-spacex-launches
npm run dev
This will start a new server at http://localhost:3000 where you can now visit your new app!
Step 1: Adding Apollo GraphQL to a Next.js app
To get started with making a GraphQL query, we’ll need a GraphQL client. We’ll use the Apollo GraphQL Client to make our queries to the SpaceX GraphQL server.
Back inside of the terminal, run the following command to install our new dependencies:
npm install @apollo/client graphql
This will add the Apollo Client as well as GraphQL, which we’ll need to to form the GraphQL query.
And once installation completes, we’ll be ready to get started Using Apollo Client.
Step 2: Adding data to a Next.js page with getStaticProps
Before we fetch any data with Apollo, we’re going to set up our page to be able to request data then pass that data as a prop to our page at build time.
Let’s define a new function at the bottom of the page below our Home component called getStaticProps:
export async function getStaticProps() {
  // Code will go here
}
When Next.js builds our app, it knows to look for this function. So when we export it, we’re letting Next.js know we want to run code in that function.
Inside our getStaticProps function, we’re going to be ultimately returning our props to the page. To test this out, let’s add the following to our function:
export async function getStaticProps() {
  return {
    props: {
      launches: []
    }
  }
}
Here, we’re passing a new prop of launches and setting it to an empty array.
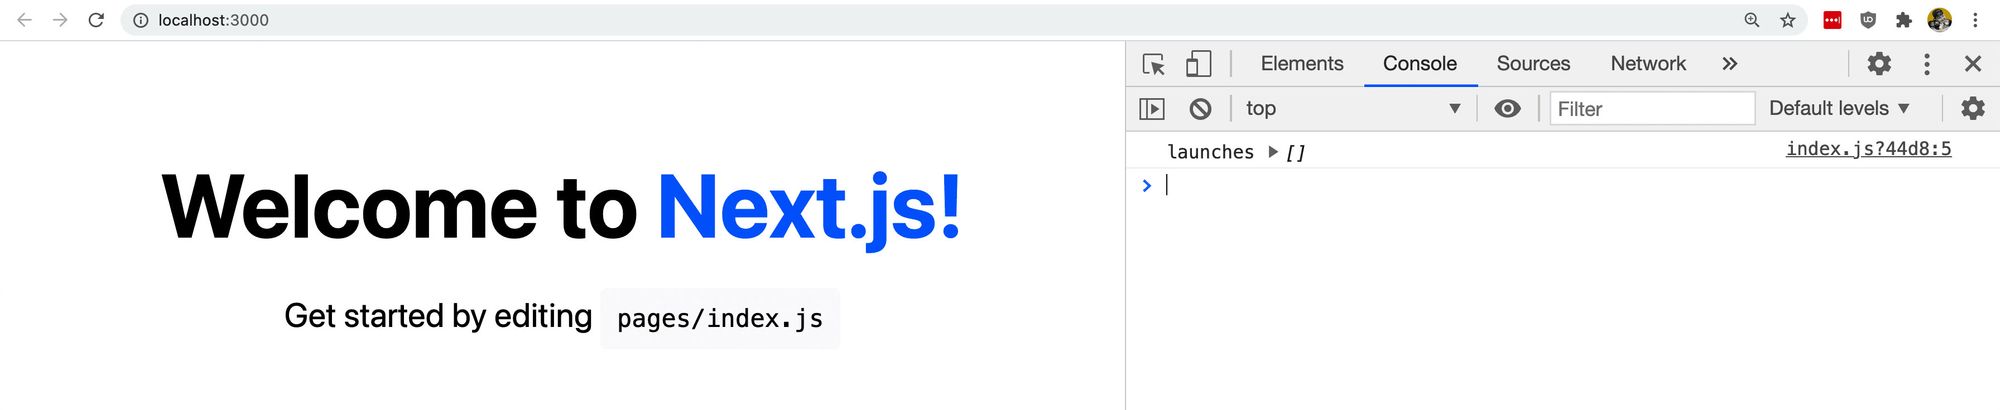
Now, back inside of our Home component, let’s add a new destructured argument that will serve as our prop along with a console.log statement to test our new prop:
export default function Home({ launches }) {
  console.log('launches', launches);
If we reload the page, we can see that we’re now logging out our new prop launches which includes an empty array just like we defined.
The great thing about this is that given that the getStaticProps function we’re creating is asynchronous, we can make any request we’d like (including a GraphQL query) and return it as props to our page, which is what we’ll do next.
Step 3: Fetch data with a GraphQL query in Next.js using Apollo Client
Now that our application is prepared to add props to the page and we have Apollo installed, we can finally make a request to grab our SpaceX data.
Here, we’re going to use the Apollo Client, which will allow us to interface with the SpaceX GraphQL server. We’ll make our request to the API using the Next.js getStaticProps method, allowing us to dynamically create props for our page when it builds.
First, let’s import our Apollo dependencies into the project. At the top of the page add:
import { ApolloClient, InMemoryCache, gql } from '@apollo/client';
This is going to include the Apollo Client itself, InMemoryCache which allows Apollo to optimize by reading from cache, and gql which we’ll use to form our GraphQL query.
Next, to use the Apollo Client, we need to set up a new instance of it.
Inside the top of the getStaticProps function, add:
const client = new ApolloClient({
  uri: 'https://api.spacex.land/graphql/',
  cache: new InMemoryCache()
});
This creates a new Apollo Client instance using the SpaceX API endpoint that we’ll use to query against.
With our client, we can finally make a query. Add the following code below the client:
const { data } = await client.query({
  query: gql`
    query GetLaunches {
      launchesPast(limit: 10) {
        id
        mission_name
        launch_date_local
        launch_site {
          site_name_long
        }
        links {
          article_link
          video_link
          mission_patch
        }
        rocket {
          rocket_name
        }
      }
    }
  `
});
This does a few things:
- Creates a new GraphQL query inside of the
gqltag - Creates a new query request using
client.query - It uses
awaitto make sure it finishes the request before continuing - And finally destructures
datafrom the results, which is where the information we need is stored
Inside of the GraphQL query, we’re telling the SpaceX API that we want to get launchesPast, which are the previous launches from SpaceX, and we want to get the last 10 of them (limit). Inside that, we define the data we’d like to query.
If we take a second to add a new console log statement after that, we can see what data looks like.
Once you refresh the page though, you’ll notice that you’re not seeing anything inside of the browser’s console.
getStaticProps runs during the build process, meaning, it runs in node. Because of that, we can look inside of our terminal and we can see our logs there:
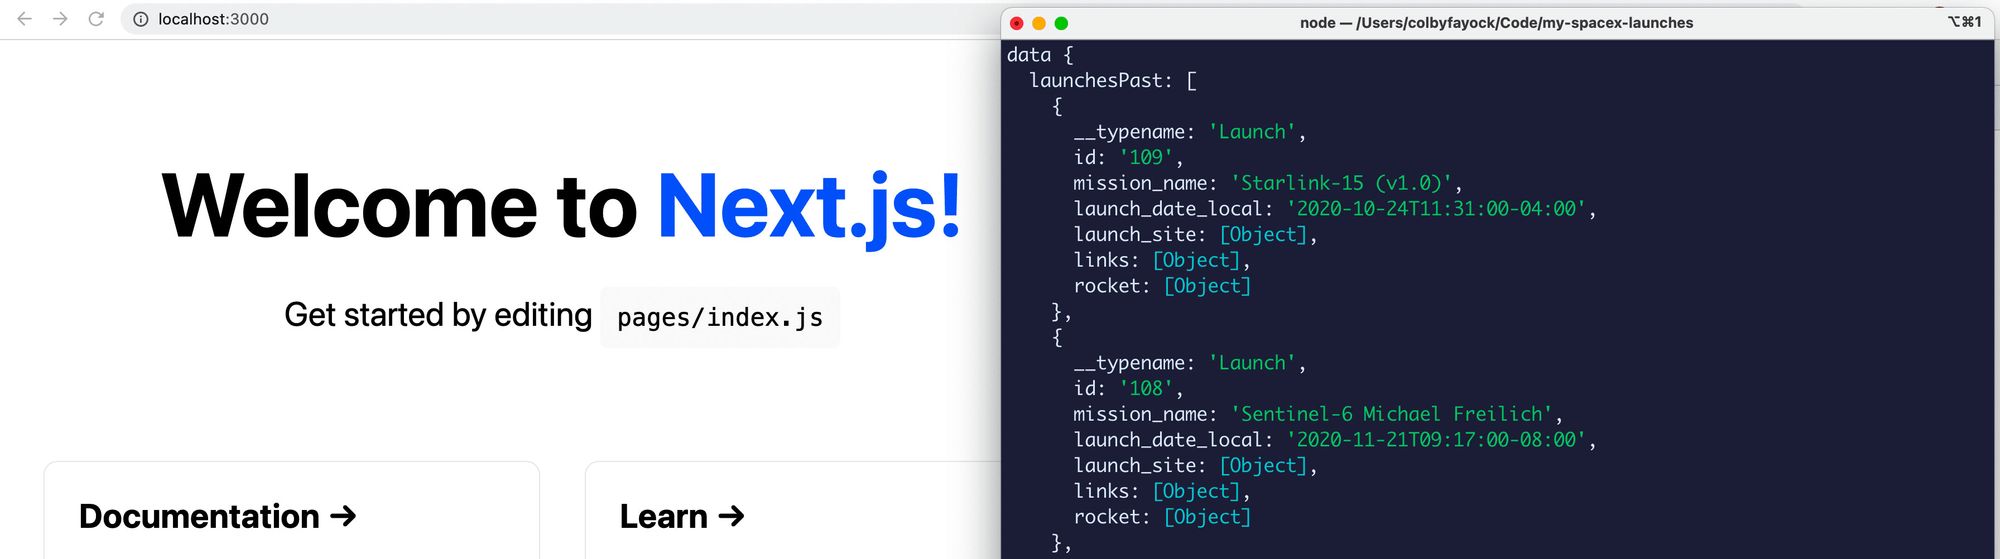
After seeing that, we know that inside of the data object, we have a property called launchesPast, which includes an array of launch details.
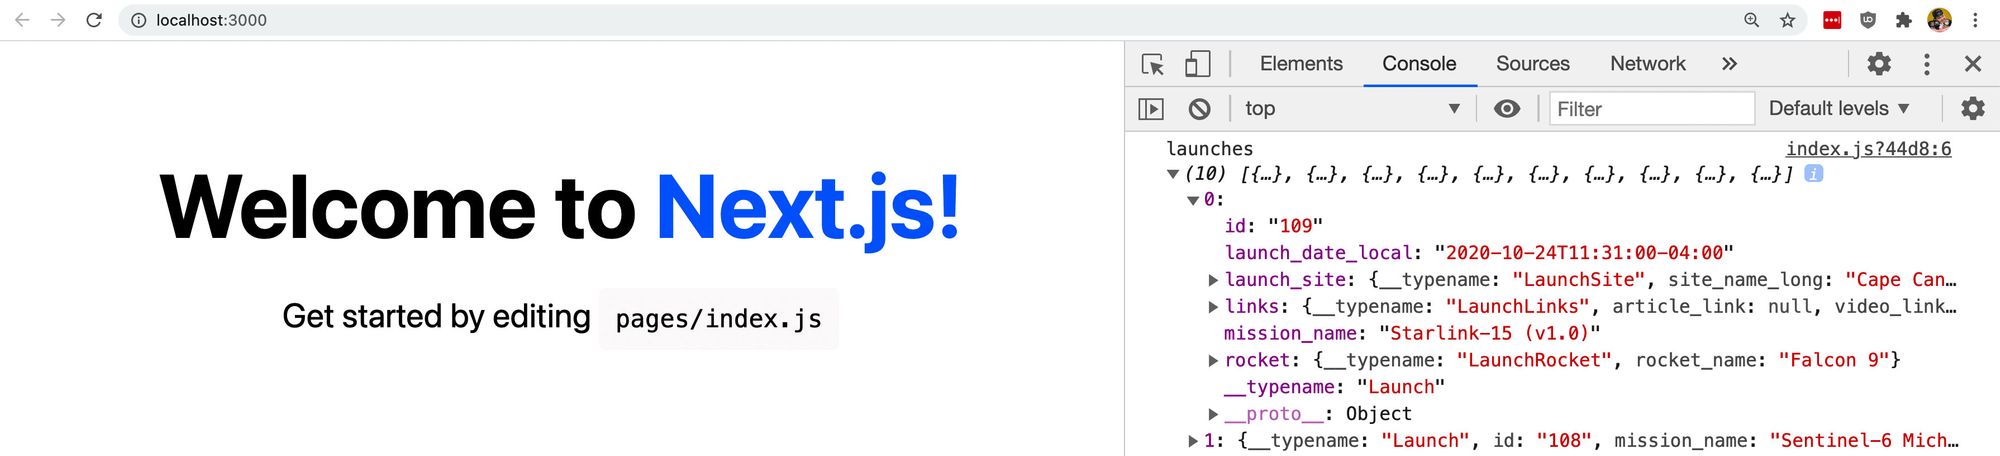
Now, we can update our return statement to use launchesPast:
return {
  props: {
    launches: data.launchesPast
  }
}
And if we add our console.log statement back to the top of the page to see what our launches prop looks like, we can see our launch data is now available as a prop to our page:
Step 4: Adding SpaceX launch data to the page
Now for the exciting part!
We have our launch data that we were able to use Apollo Client to request from the SpaceX GraphQL server. We made that request in getStaticProps so that we could make our data available as the launches prop that contains our launch data.
Digging into the page, we’re going to take advantage of what already exists. For instance, we can start by updating the h1 tag and the paragraph below it to something that describes our page a little bit better.
Next, we can use the already existing link cards to include all of our launch information.
To do this, let’s first add a map statement inside of the page’s grid, where the component we return is one of the cards, with launch details filled in:
<div className={styles.grid}>
  {launches.map(launch => {
    return (
      <a key={launch.id} href={launch.links.video_link} className={styles.card}>
        <h3>{ launch.mission_name }</h3>
        <p><strong>Launch Date:</strong> { new Date(launch.launch_date_local).toLocaleDateString("en-US") }</p>
      </a>
    );
  })}
We can also get rid of the rest of the default Next.js cards including Documentation and Learn.
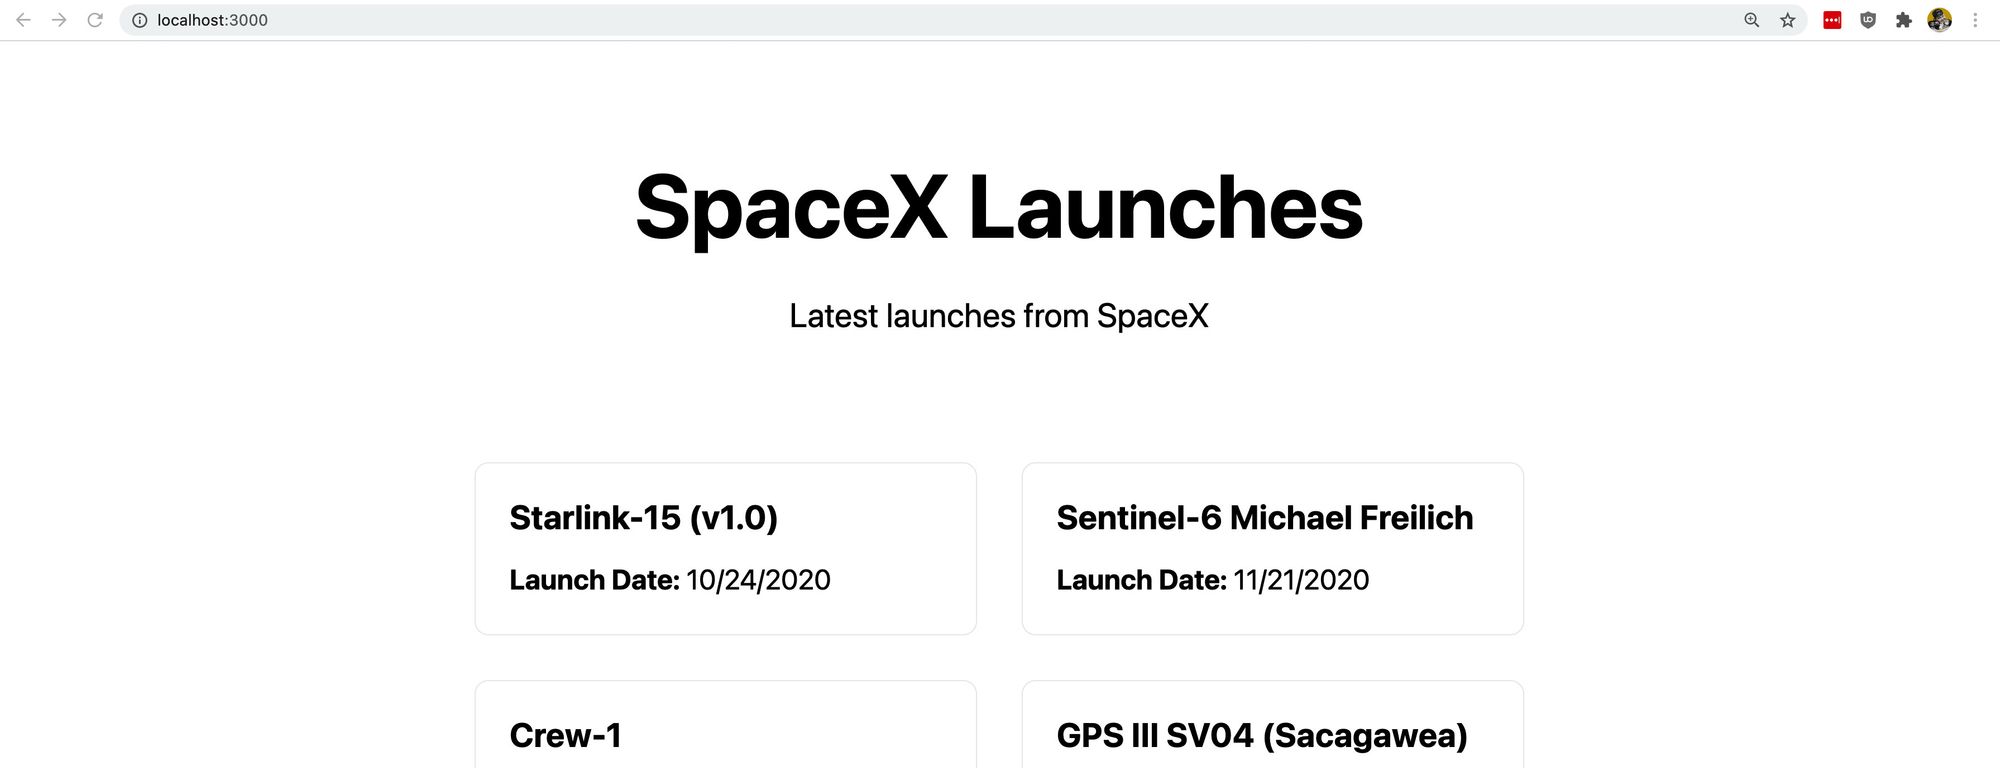
Our page now includes the last 10 launches from SpaceX along with the date of the launch!
We can even click any of those cards, and because we linked to the video link, we can now see the launch video.
What’s next?
From here, we can include any additional data from inside of our launches array on our page. The API even includes mission patch images, which we can use to show nice graphics for each launch.
You can even add additional data to the GraphQL query. Each launch has a lot of information available including the launch crew and more details about the rocket.
https://api.spacex.land/graphql/

