

Deleting or formatting a disk or storage device is a common task for most computer users.
If you use the Windows operating system, you would normally do that using the GUI Disk Management application which comes built-in with any Windows operating system.
 Disk Management (GUI)
Sometimes, you might have difficulties in deleting a disk using the GUI application, so you'll need to do it using the CLI (Command Prompt) instead.
In this article, I will introduce you to the process of deleting a disk of any kind of storage device using the GUI method and the CLI method directly from the Windows operating system itself. I will be using a 32GB Pendrive of mine as a guinea pig.
Important note: make sure first that you have copied all of your data to another drive/storage before deleting a disk or storage device.
 My guinea pig
How to Format or Delete a Disk Using the GUI (Graphical User Interface) Method
First, open Disk Management. You can do that in multiple ways, but I am going to show you two ways here.
Click on the search icon in the taskbar and type Disk Management. Click on Create and format hard disk partitions.
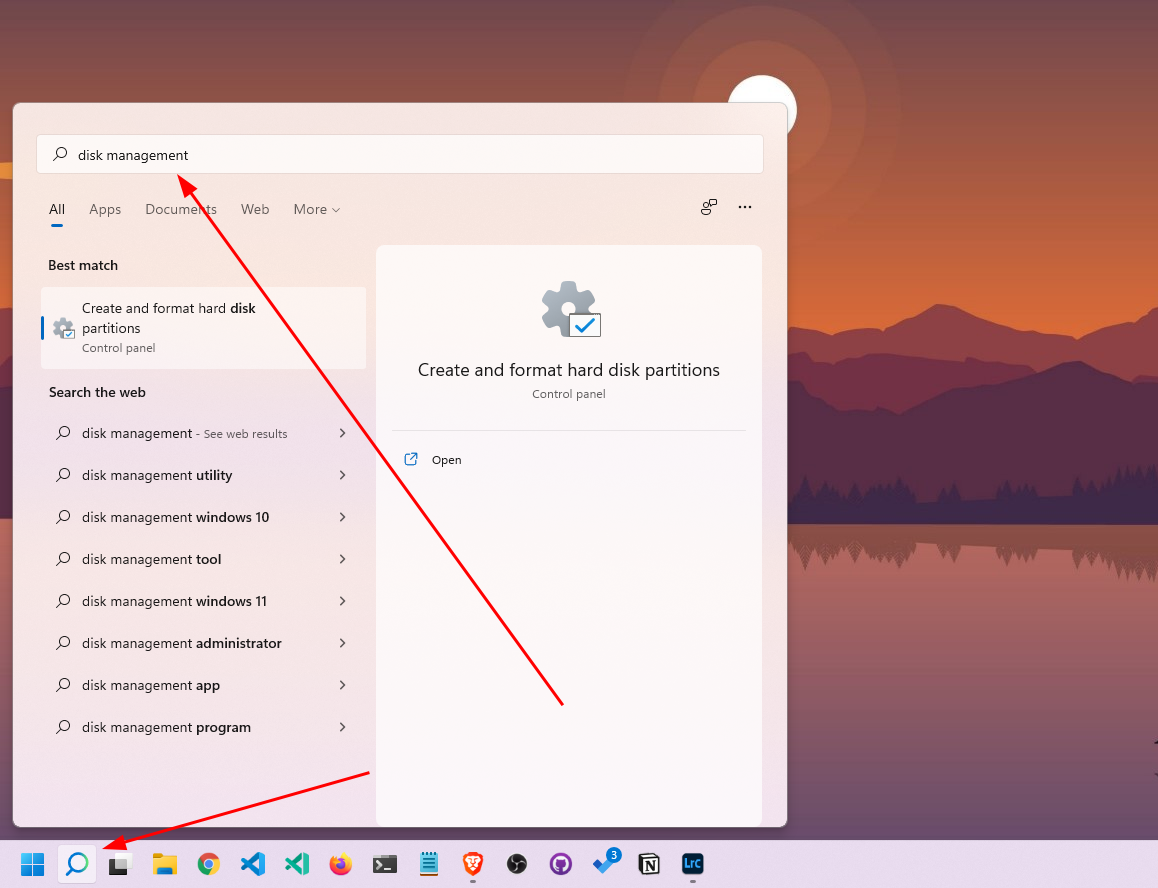 Search result for Disk Management
Alternatively, you can open the control panel and search for Disk Management. You will get Create and format hard disk partitions under the Windows Tools. Click on that.
 Search result for Disk Management in the Control Panel
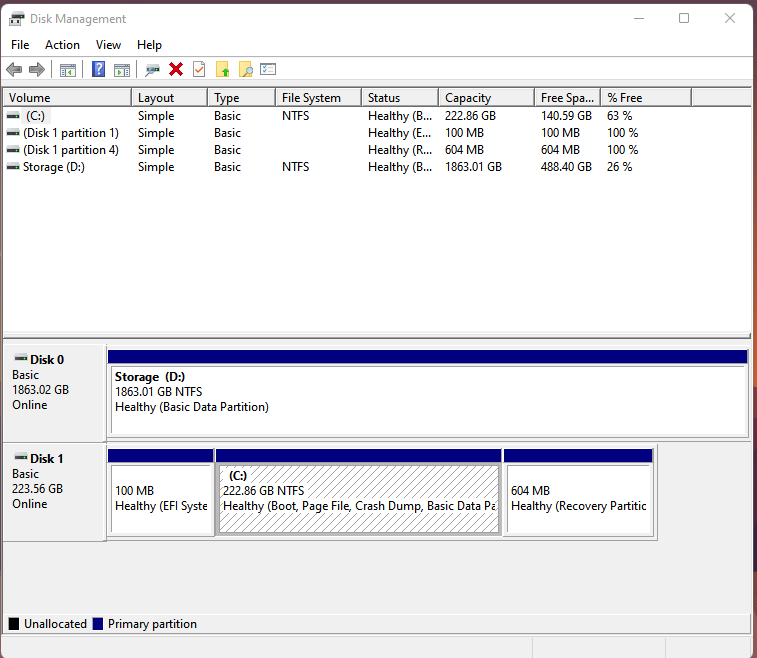
The Disk Management tool will open and show all of the storage devices along with their partitions. Here the 3rd option – Disk 2 – is our guinea pig (32GB Pendrive).
 Our guinea pig in the Disk Management
Suppose you want to delete the first partition of Disk 2. Then you need to follow these steps:
First, right click on the partition you want to delete. Then click on Delete Volume....
 Click on Delete Volume...
Make sure that you have copied everything from the entire disk/storage earlier. Then if you have done that already, simply click on Yes.
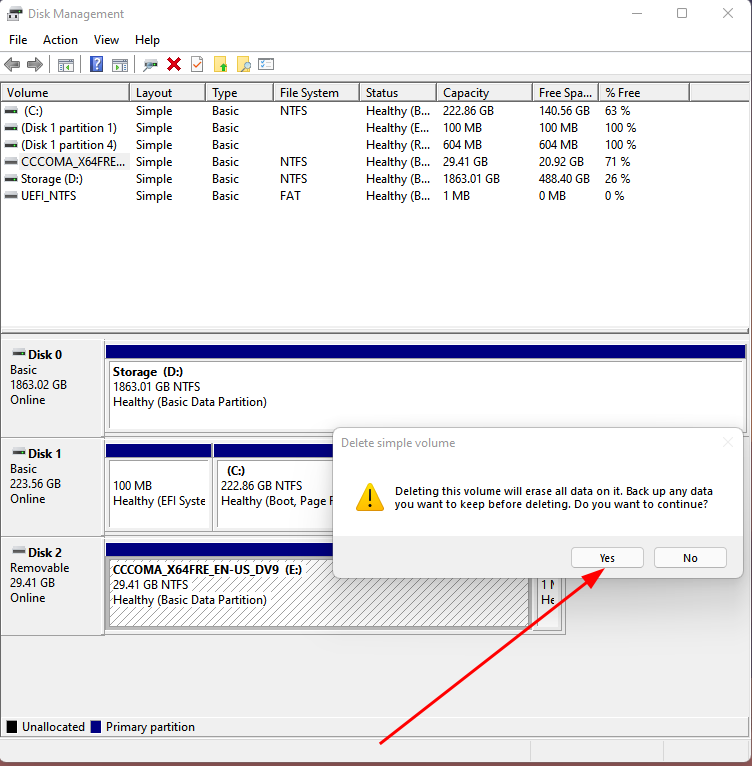 Prompt windows before deleting a partition or storage
Another prompt window might appear saying that it is currently in use. Make sure that no other tasks or applications are using the drive/partition. Then simply click on Yes.
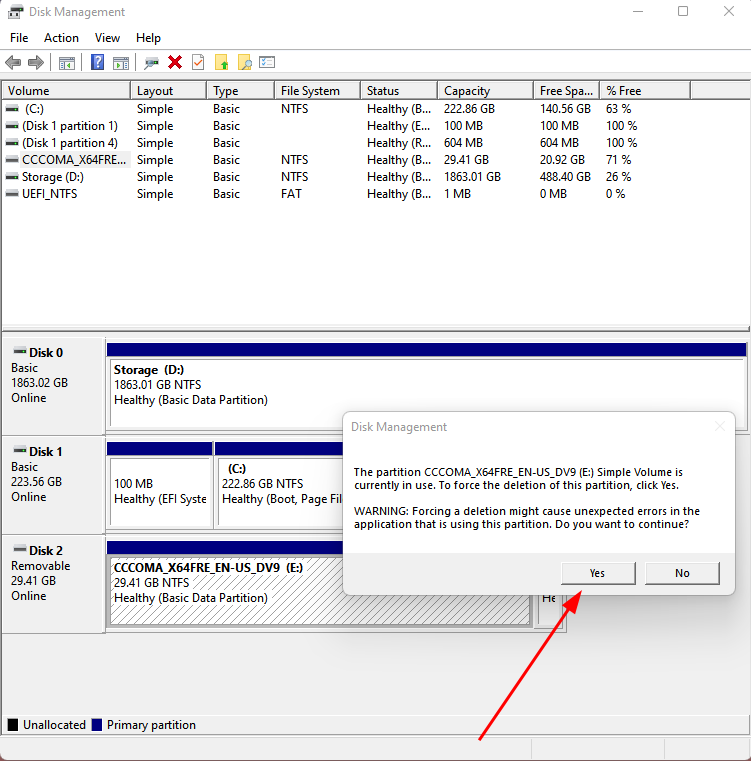 Another prompt
Now you'll se that the partition has become unallocated.
 After deleting a partition of Disk 2
In this way, you can delete any partition. Later you can create a new partition from it or extend the partition with other existing partitions.
To delete a storage/disk completely, you have to delete all of the partitions it has manually, like this:
 After deleting all of the partitions of Disk 2
After that, you will see that the entire storage/disk has become unallocated. Then if you want to create a new partition, simply right click on the Unallocated box and click on New Simple Volume....
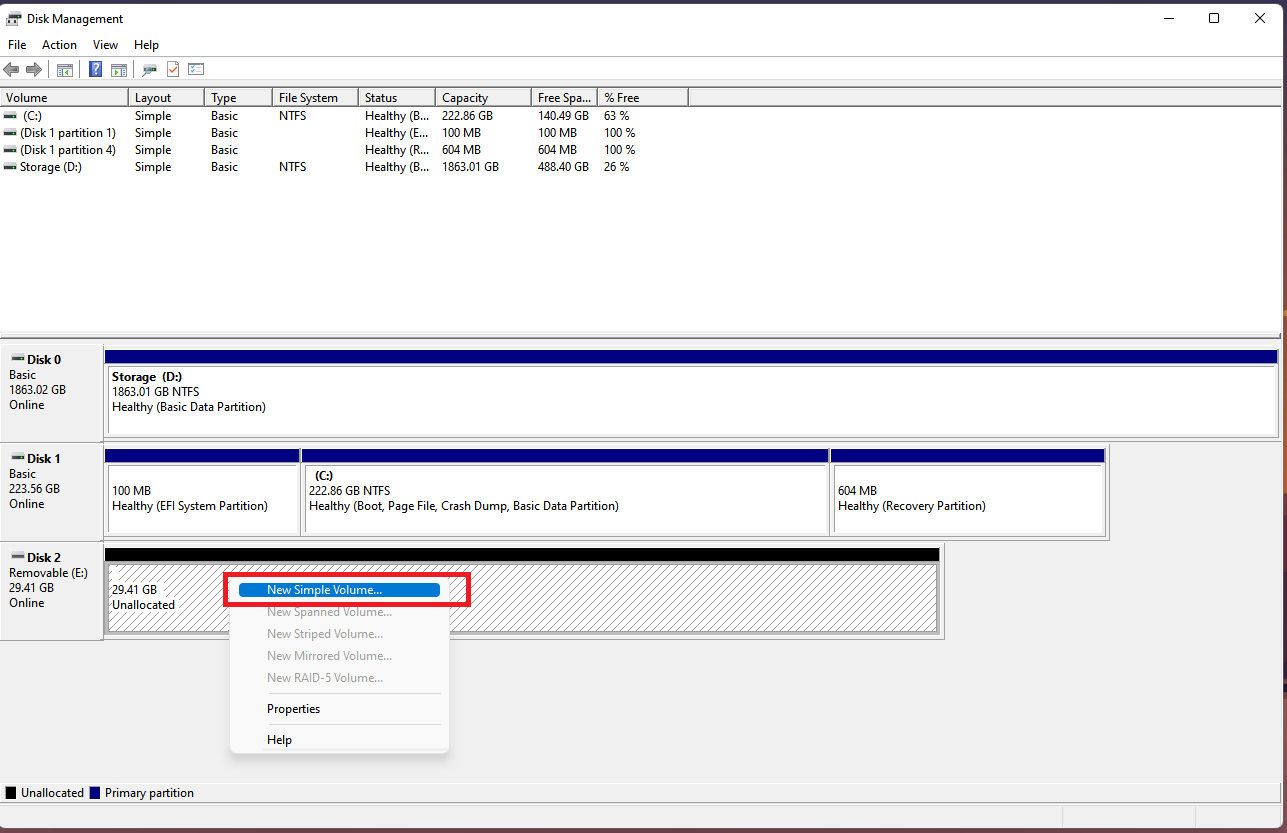 Creating a new volume
Click Next on the wizard.

Select the size of the volume you want and click on Next. If you want the whole volume size, then simply keep the box as it was.
 Volume size
Select the drive letter you want and again click on the Next button.
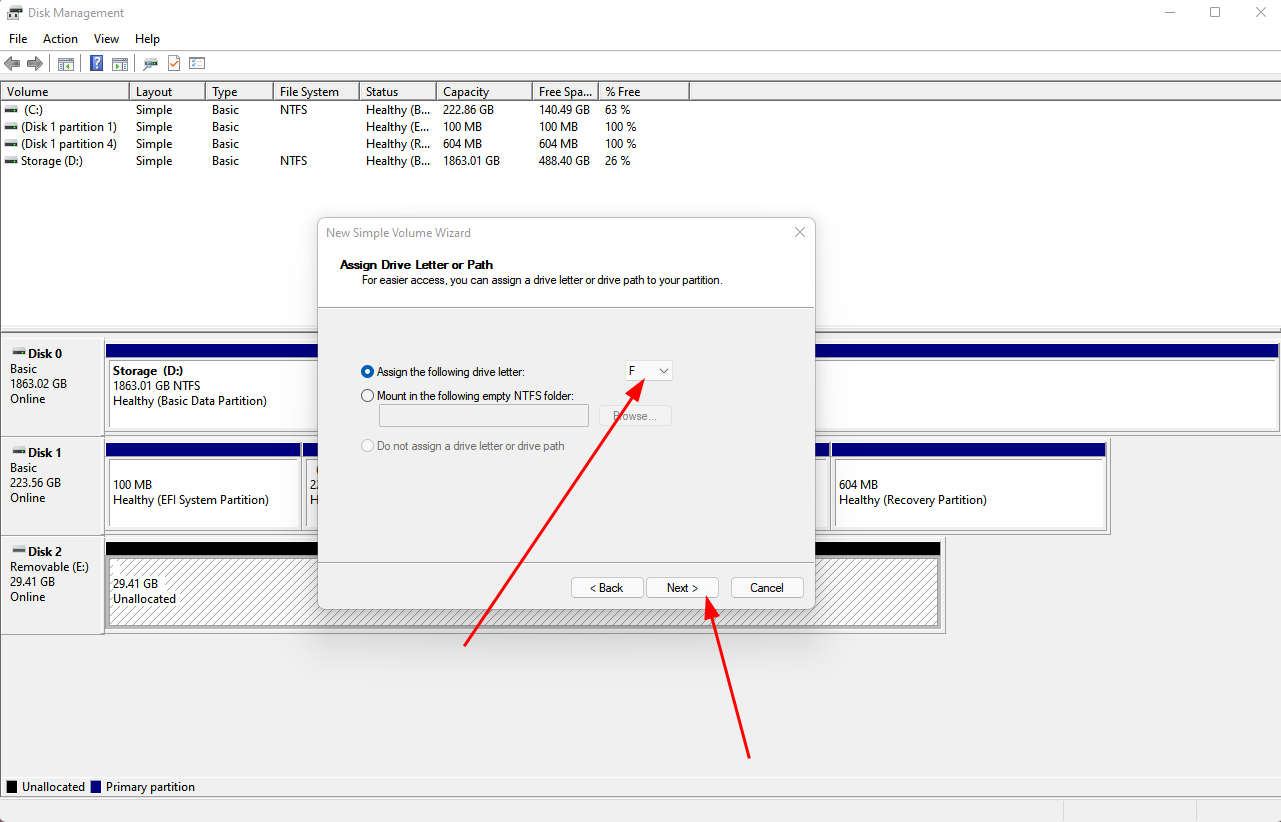 Selecting the Drive Letter
Select the file system and volume label. If you do not want to mess up anything here, keep the allocation unit size as Default. Also, if you want a quick format then keep the box beside Perform a quick format checked. Click on the Next button.
Some additional information regarding the File System: If you want to work on Windows, Linux, and Mac simultaneously, then select FAT32. Just keep in mind that FAT32 does not support more than 4GB in a single file.
To work on Windows and Linux simultaneously while avoiding the 4GB per file limit, NTFS is a good choice.

Click on Finish and it is done.
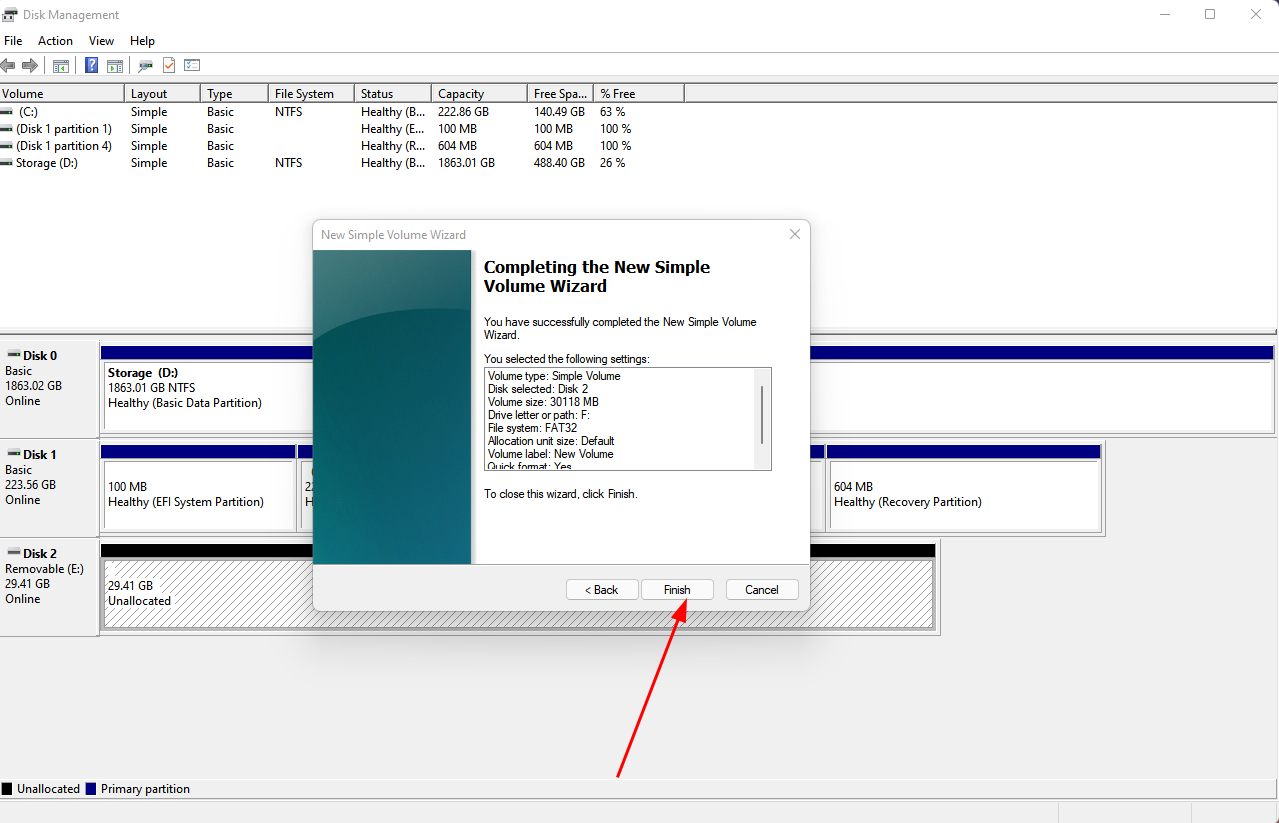 Finishing the task
Now you've seen how to delete disk/storage via the GUI. Now I will discuss the most exciting part – the CLI way!
How to Delete a Disk/Storage Using the CLI (Command Line Interface) Method
First, open the Command Prompt or the CMD. You can do that by searching the name like in the image below. Make sure to click on Run as administrator.
 Opening the CMD
Alternatively you can open the CMD using the Run window. Simply press the Win + R keys. Type cmd and press the Enter key.
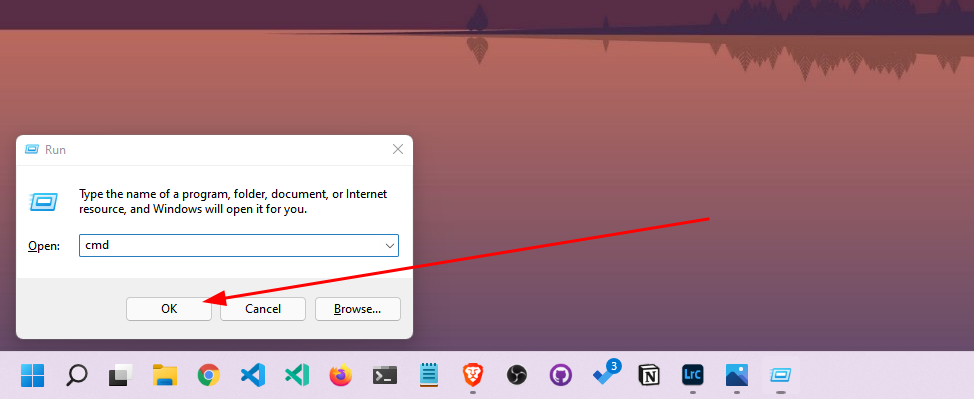 Open the CMD using Run
After opening the CMD, we need to open the DiskPart. According to Google, here's a definition of the Diskpart:
The diskpart command interpreter helps you manage your computer's drives (disks, partitions, volumes, or virtual hard disks).
To open DiskPart, type the command diskpart and hit Enter on your keyboard.
 Open the DiskPart
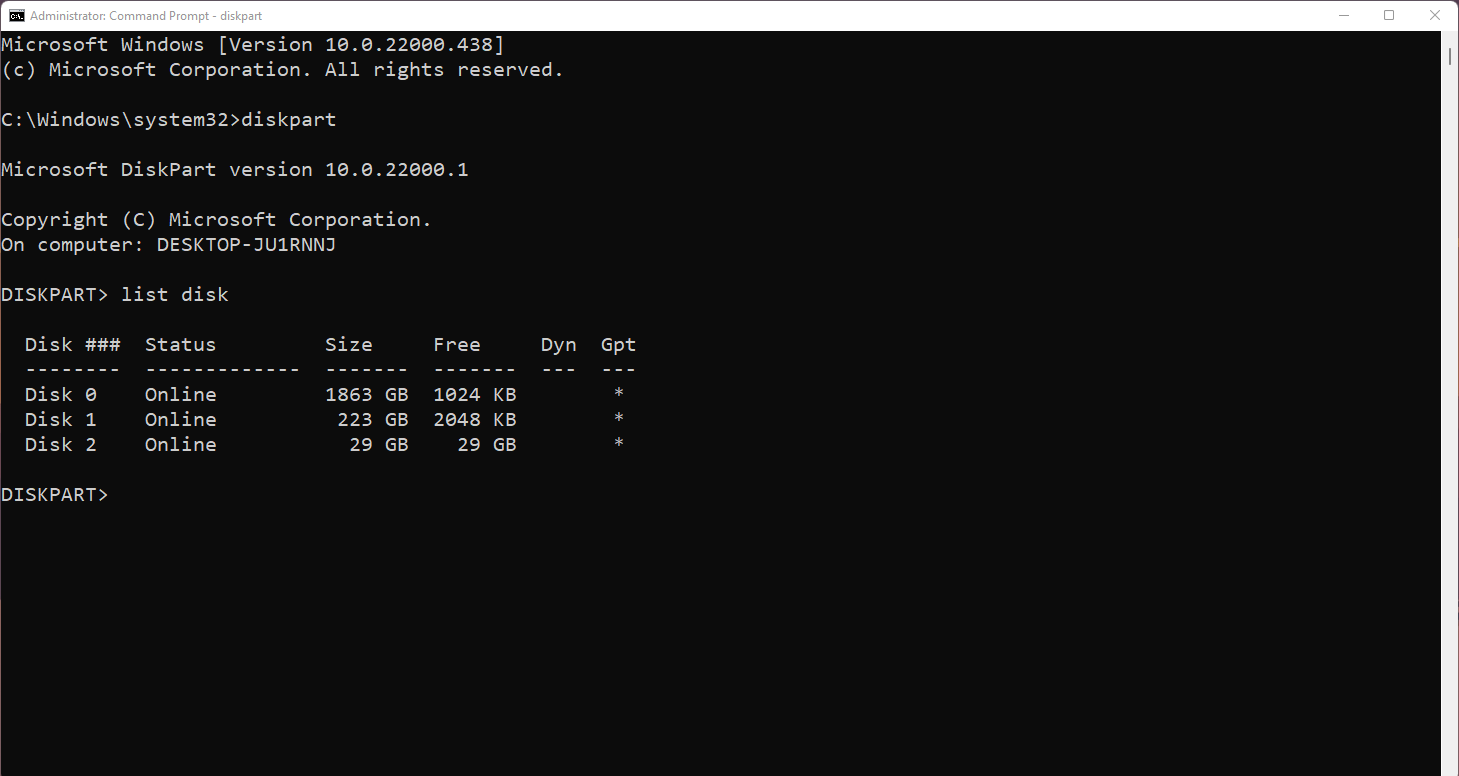
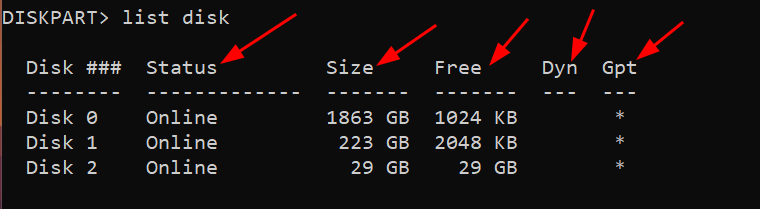
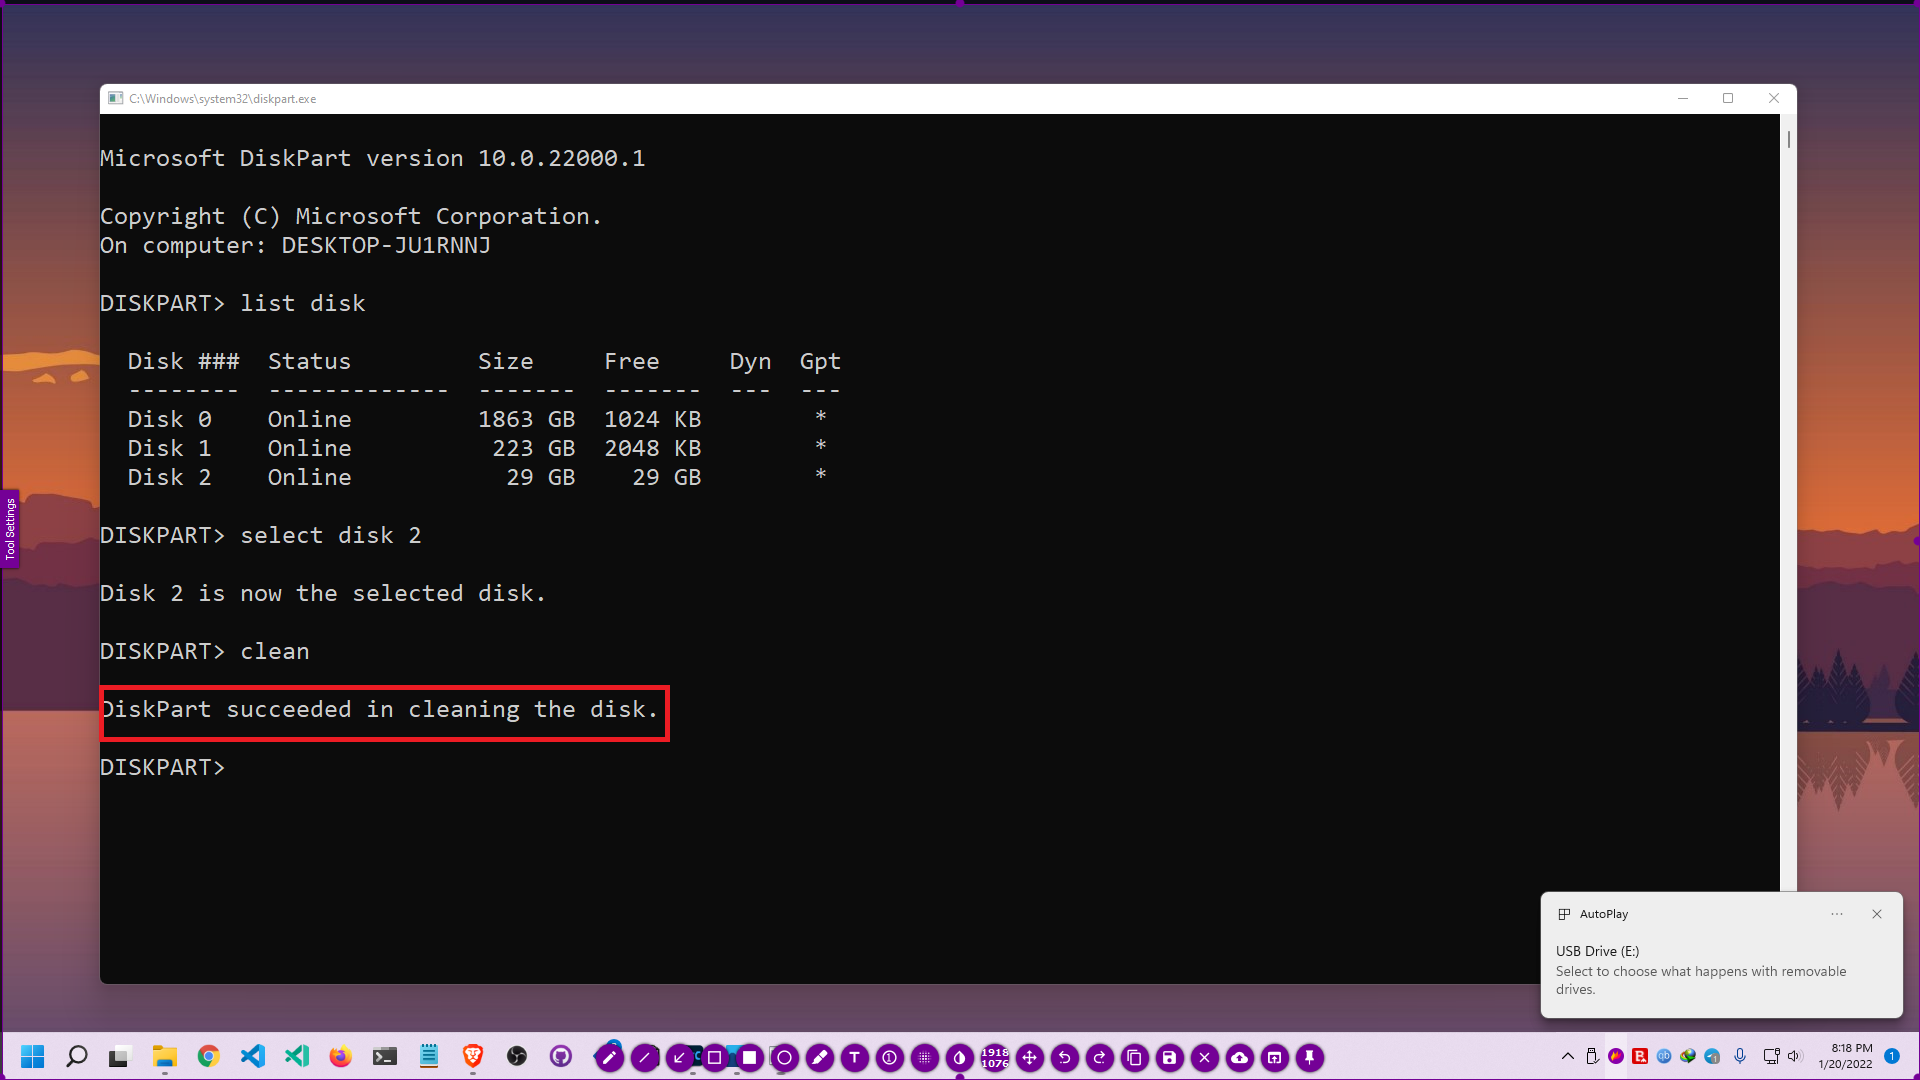
Now, we need to check the available disks. For that, type the command list disk. It will show all of the drives we have in our computer.
 list disk
You can see that I have 3 disks or storage devices in my workstation right now. Those are classified as Disk 0, Disk 1 and Disk 2.
 Disk Status
You can also see the other stats like the Status of the disks, the Size of the disks, how much free space they have, whether the disk has become Dynamic or not, and the partition table (for my case, it is GPT or GUID Partition Table, stated as Gpt ) also.
Keep in mind that if your disk is on MBR, then you won't face any problems in the following process. If your disk is on GPT like me, then you'll get an error – but fear not! I'll show how you can solve the error and complete the rest of the task as well.
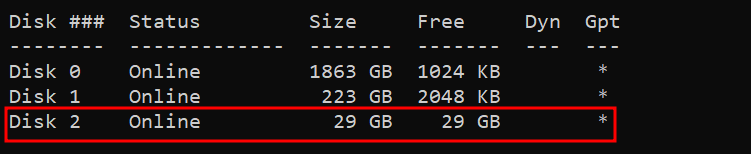
Here, as I am still working with my 32GB Pendrive as my guinea pig, Disk 2 is my target Disk.
 Target Disk
So I will simply select the target disk (The disk which I want to delete).
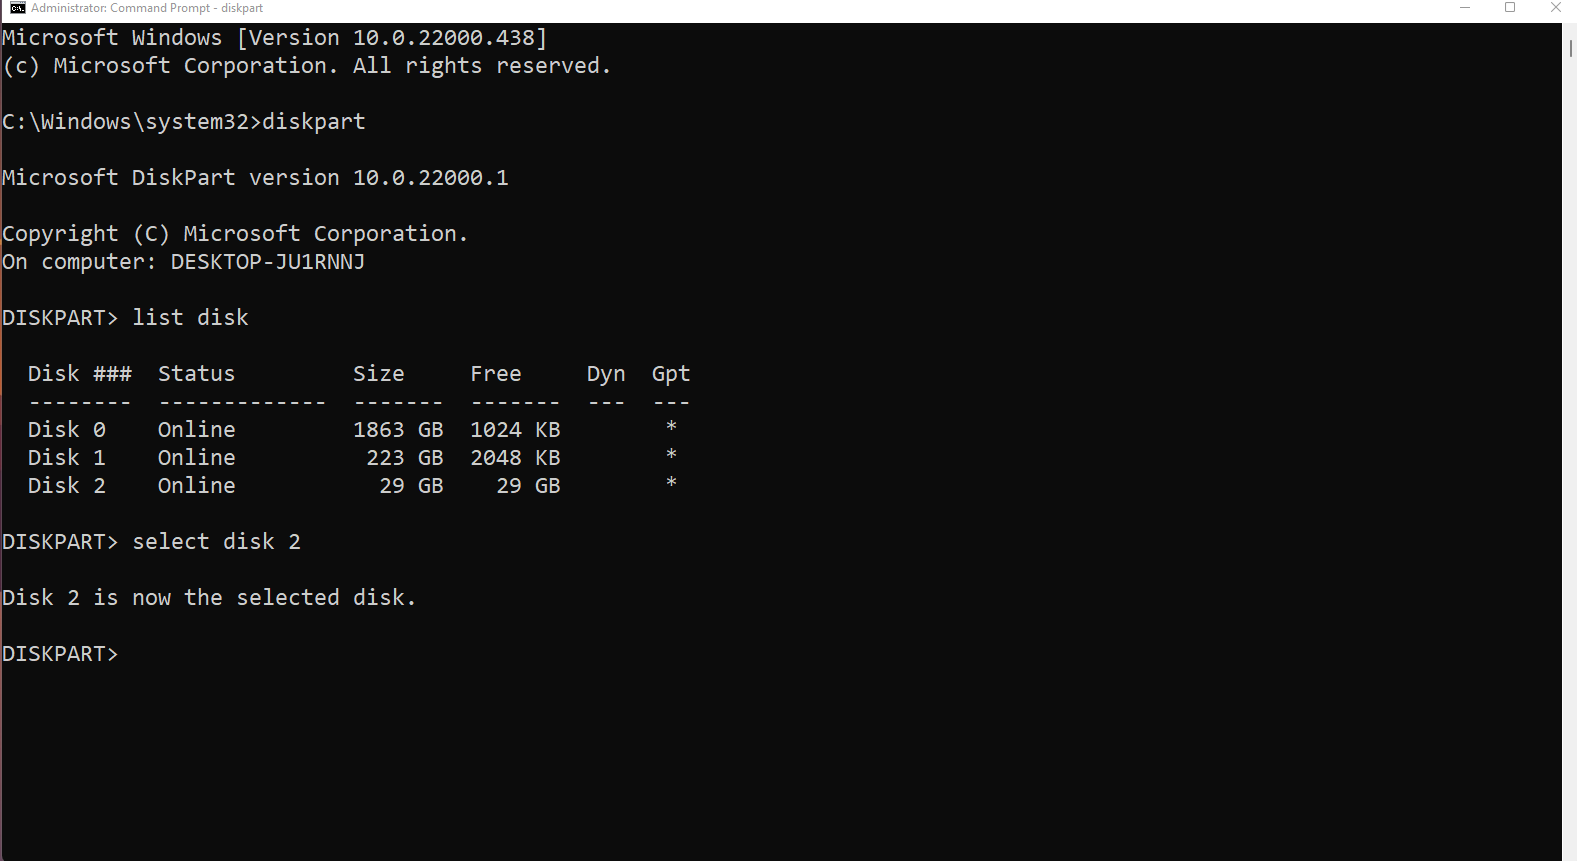
To select the disk, you need to type the command select disk 2. Then simply hit the Enter key.
Here you need to type the disk number that you want to delete. Like, if your target disk is 3, then you need to use the command select disk 3.
 Selecting the target disk
The target disk has been selected!
Now, you need to delete the entire disk. For that, simply type the command clean. This will delete all the partitions the target disk has.
 Cleaning the disk
You will get the confirmation that DiskPart has successfully cleaned the target disk.
Remember that we can't use the drive yet.
To create a primary partition, type the command create partition primary and hit Enter.
 Creating primary partition
We will get a confirmation that it has succeeded in creating the specified partition.
Now we need to make the partition active. First, we need to select the partition. As we have created only one partition, then we have only Partition 1. So I will select the 1st Partition using the command select partition 1 and hit Enter.
 Selecting the partition
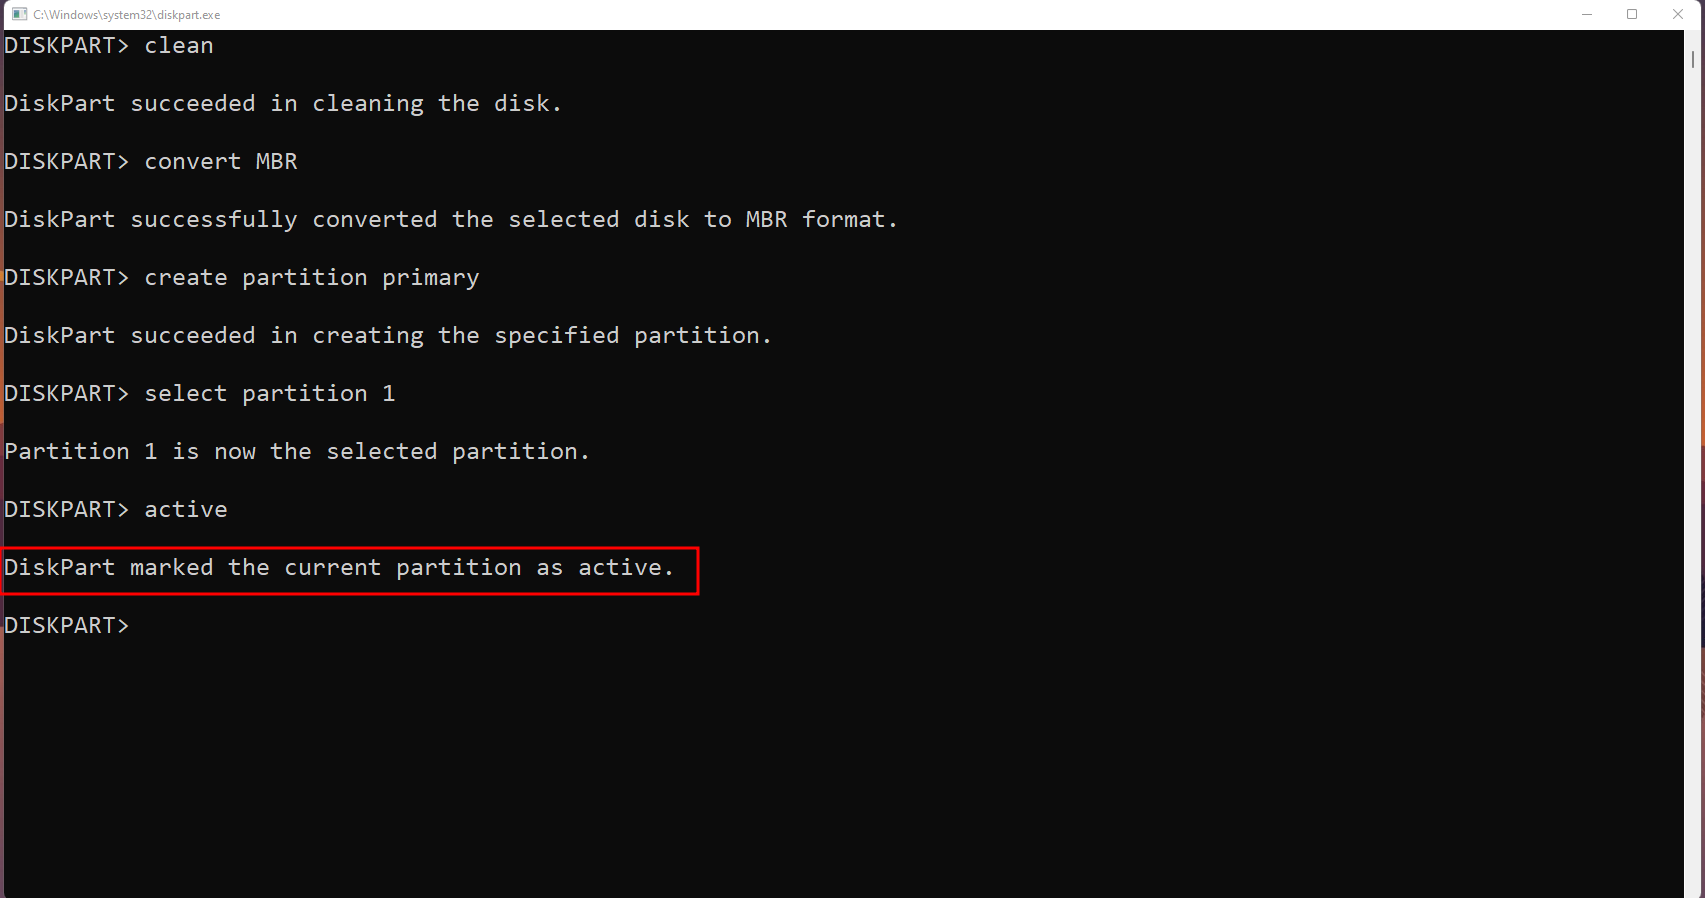
Now we need to make the partition active. For that, type the command active and press Enter. You will receive the marked error only if your disk is also on a GPT partition table like me.

This happens because the active command is not applicable for GPT disks. We can simply convert the entire disk to MBR, and later apply the active command.
If your disk is on MBR, then you won't get the error message. You can skip the next few steps if you do not get the error message in this step.
To convert the disk to MBR, first of all we need to clean (delete all the partitions) the disk first. So type clean and press Enter.
 Clean command
Now, to convert the partition table from the MBR to the GPT, type convert MBR and press Enter.
 Converting to MBR
To create a primary partition, enter the command and hit Enter create partition primary.
 Creating primary partition
Now select the partition by entering the command select partition 1 and press Enter.
 Selecting the partition
Now you need to make the partition active. Simply type active and press Enter.
 Making the partition active
Alright this is where you'll pick back up if you didn't get the error.
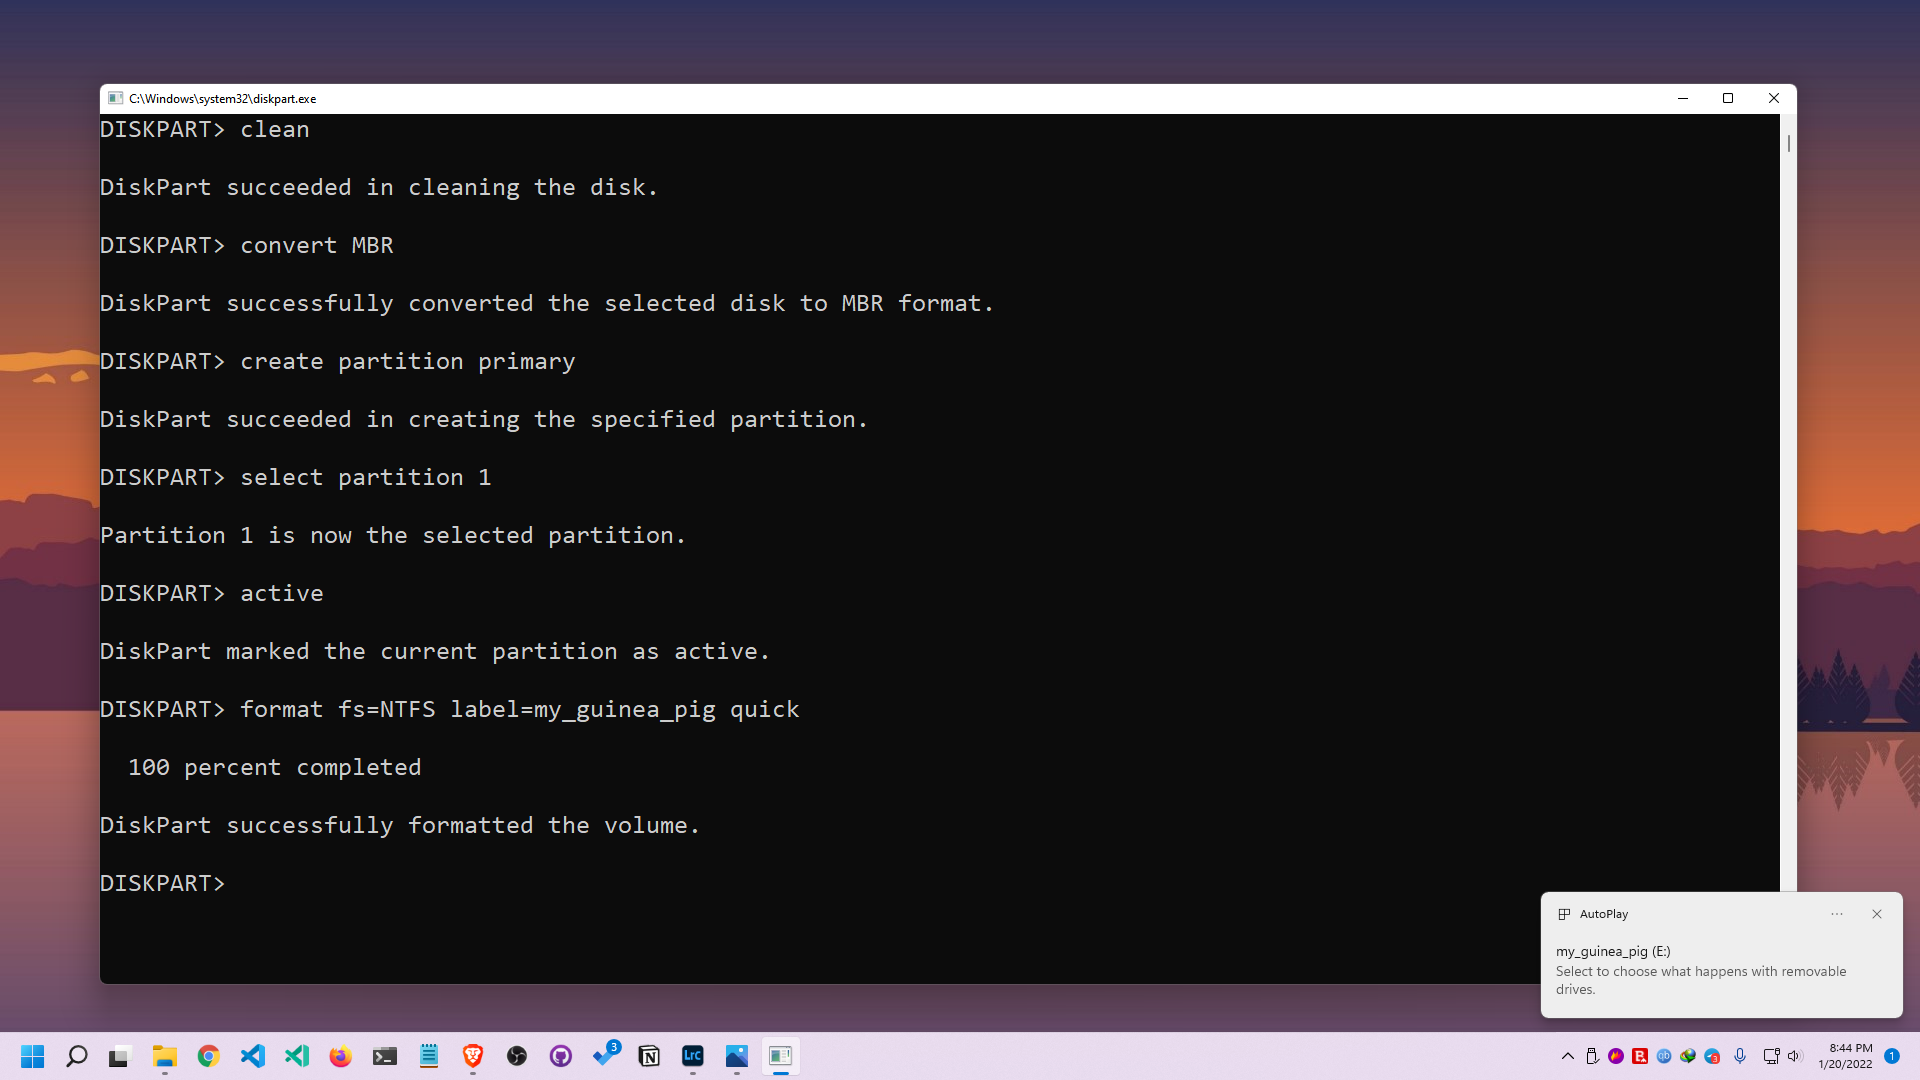
Now we need to format the partition. Suppose I want the NTFS file system in formatting the disk. I can also add a label here.
Type the command format fs=NTFS label=my_guinea_pig quick and hit Enter . Here the fs indicates the file system, and quick indicates that I want the quick formatting here.
You can add any label you want, but make sure not to leave any space between multiple words in the label name (you can use the underscore if you want).
 Quick formatting the disk
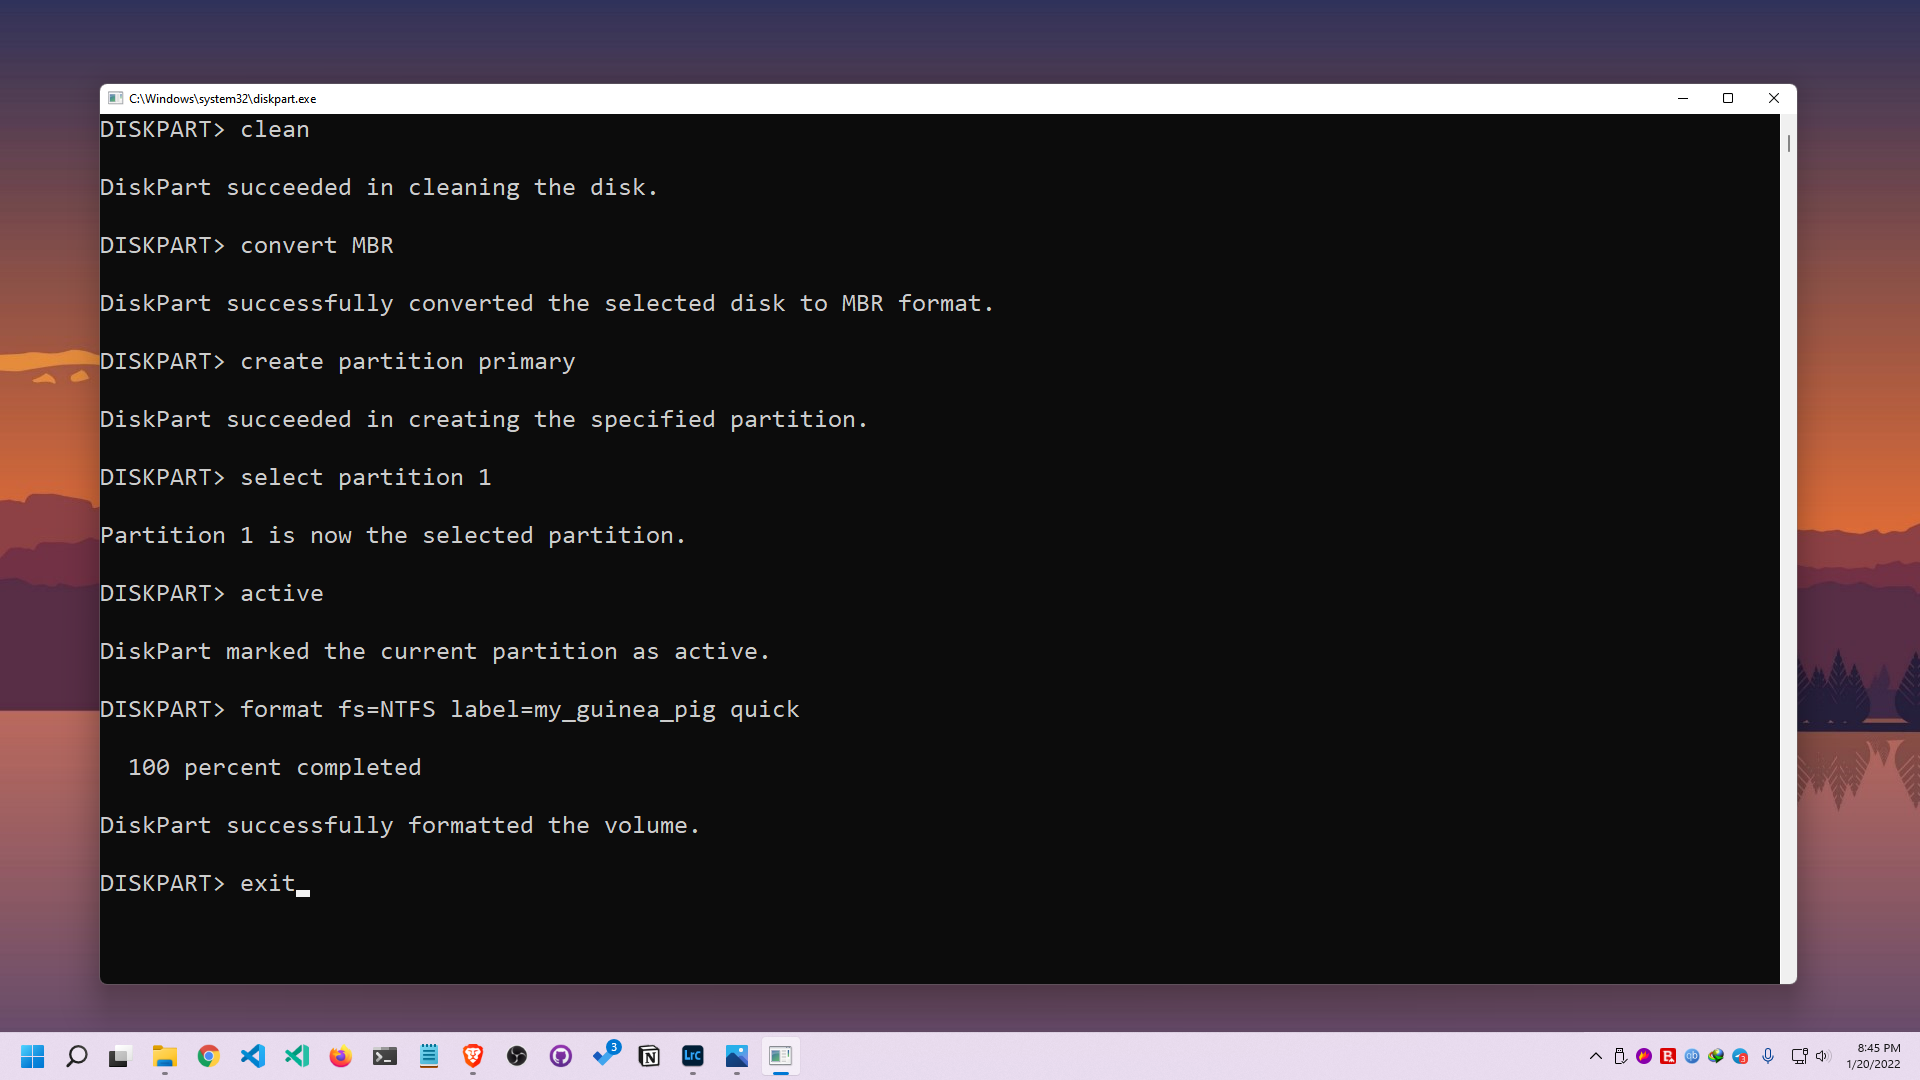
Now we're done, and we can close the CMD as well. Simply type exit and hit enter.
 Exiting the CMD
Now, if I check the USB drive using my file explorer, I will see that my drive is formatted exactly the way I wanted.
 Task has been finished
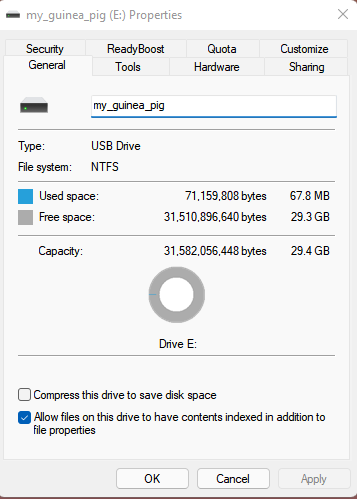 Disk Properties
Now you know how to delete and reformat disk/storage via the CLI.
Conclusion
Thanks for reading the entire article. If it helps you then you can also check out other articles of mine at freeCodeCamp.
If you want to get in touch with me, then you can do so using Twitter, LinkedIn, and GitHub.
You can also SUBSCRIBE to my YouTube channel (Code With FahimFBA) if you want to learn various kinds of programming languages with a lot of practical examples regularly.
If you want to check out my highlights, then you can do so at my Polywork timeline.
You can also visit my website to learn more about me and what I'm working on.
Thanks a bunch!