

The modern age of Web Development is incredible. We have a plethora of frameworks and libraries to help us work more efficiently, tons of quality resources to learn from, and numerous projects to inspire us.
My decade-long journey as a web developer may not be very different from many of your journeys. But lately, I have been more focused on getting things done quickly with quality. It is not only about what and how we code. It is also about how we test, debug, and finally ship/deploy the application.
In this article, you will learn a few web development workflows that can help you develop, test, build, and deploy faster.
Browser Console – A Web Dev's Best Friend
In my early days of development, the browser's console used to be my best friend (and it still is today).
You can try out all your JavaScript logic, code snippets, and code ideas directly in the console. It works like a charm when you want to try out proofs-of-concept of your logic in the console before putting the code in the app.
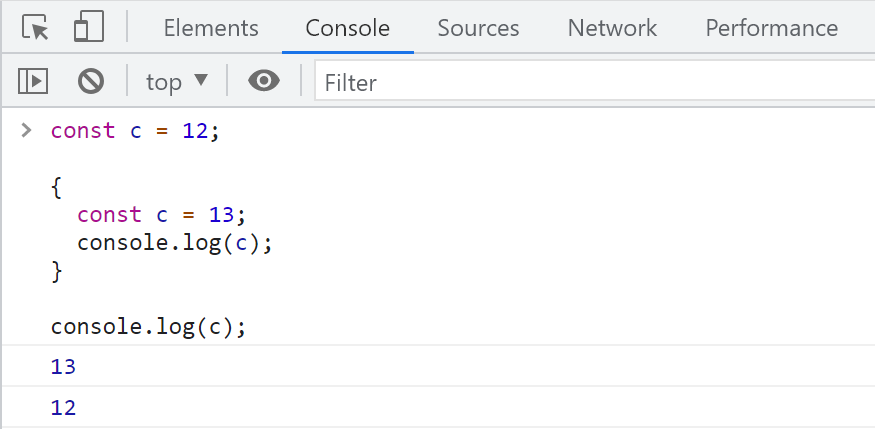 JavaScript Program in the Browser's Console
You can launch the DevTools (for Chrome, and available in other browsers, too) using the F12 key from your favorite browser. Next, you can navigate to the console tab to start writing and experimenting with the code.
That's for JavaScript logic, though...
The browser's console is a great way to try out the logic part, but it is not sufficient to build and test a web application on the go.
If you are getting started with any popular framework or library like Angular, React, Vue, or Svelte, they've got you covered. You will have a complete infrastructure to develop, test, run, and see the changes almost in realtime.
However, suppose you are doing a project with plain JavaScript, HTML5, and CSS (I'm in love with this combo). In that case, you may not need any particular infrastructure.
Here are a couple of options to get you started.
VS Code + Live Server or Anything Equivalent
Suppose you are using Visual Studio Code as your preferred editor/IDE for web development. In that case, you can install an extension called Live Server. It launches a local development Server with a live reload feature for static and dynamic pages.
Once installed, you can right-click on the entry point HTML file (usually an index.html file) of the app and open it with Live Server.
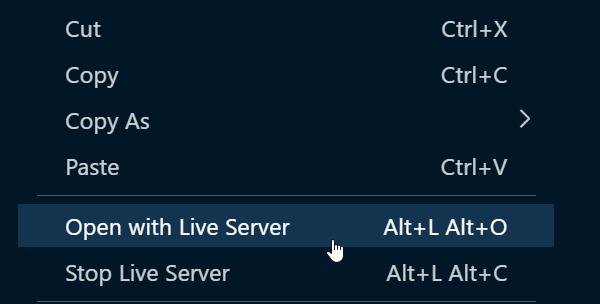 Launch the App using the Live Server
Alternatively, you can try the Go Live option from VS Code's status bar.
 Alternate way to Go Live
This workflow works really well to develop and test your web app incrementally. It provides hot reloading, so you do not need to refresh the browser to see the latest changes. It happens automatically.
In case you are not using VS Code, there might be other alternatives for your favorite IDE.
With the npx serve Command
The npx stands for Node Package Execute. It comes with npm to execute any package you want from the npm registry without installing it locally. serve is a utility to help you serve a static site, single-page app locally.
To use it, open a command prompt at the root of the project folder and type this:
npx serve
You will get a URL to access the app locally.
 Using npx serve
Both of these methodologies are very helpful to run and test the app locally. But you may need a bit more sophisticated workflow to build and deploy the app to test the production version simultaneously.
A More Sophisticated Workflow
The last thing you want is for your application to not behave the same way in the production as it does locally. It could be a nightmare if you discover it close to deadline.
A better approach would be to develop functionality, test it locally, and then deploy and preview it on a production-like infrastructure. If all goes well, then you can launch it to production. You can do all that in a fully automated way within a few minutes.
I have started following a workflow that helps me to achieve these tasks:
Some fantastic cloud-based hosting services are available that help you remove many complexities with building, deploying, and hosting your web apps. Here are a few you can check out (my favorites are Vercel and Netlify):
It is standard practice to manage and track your source code changes using a Version Control System like Git and an app like GitHub. If you do not have an account on GitHub, you can create one now.
If you are looking for a GitHub repo guide to increase engagement on your public repositories, you can read this article I wrote:
Alright, coming back to our topic. The hosting services mentioned above have integrations with GitHub. It means you can connect a particular repository in GitHub to build the source code from it and deploy it to a CDN by the hosting services.
The best part is, all these happen automatically every time you push your commits to a repository branch. For each pull request, you get a preview URL to test your changes in a production-like infrastructure. Isn't that cool?
Once you're satisfied with testing, you just merge the pull request to the master (or main) branch to build and deploy your app/site from there.
So, what does the workflow look like at a high level? Take a look at the image below:
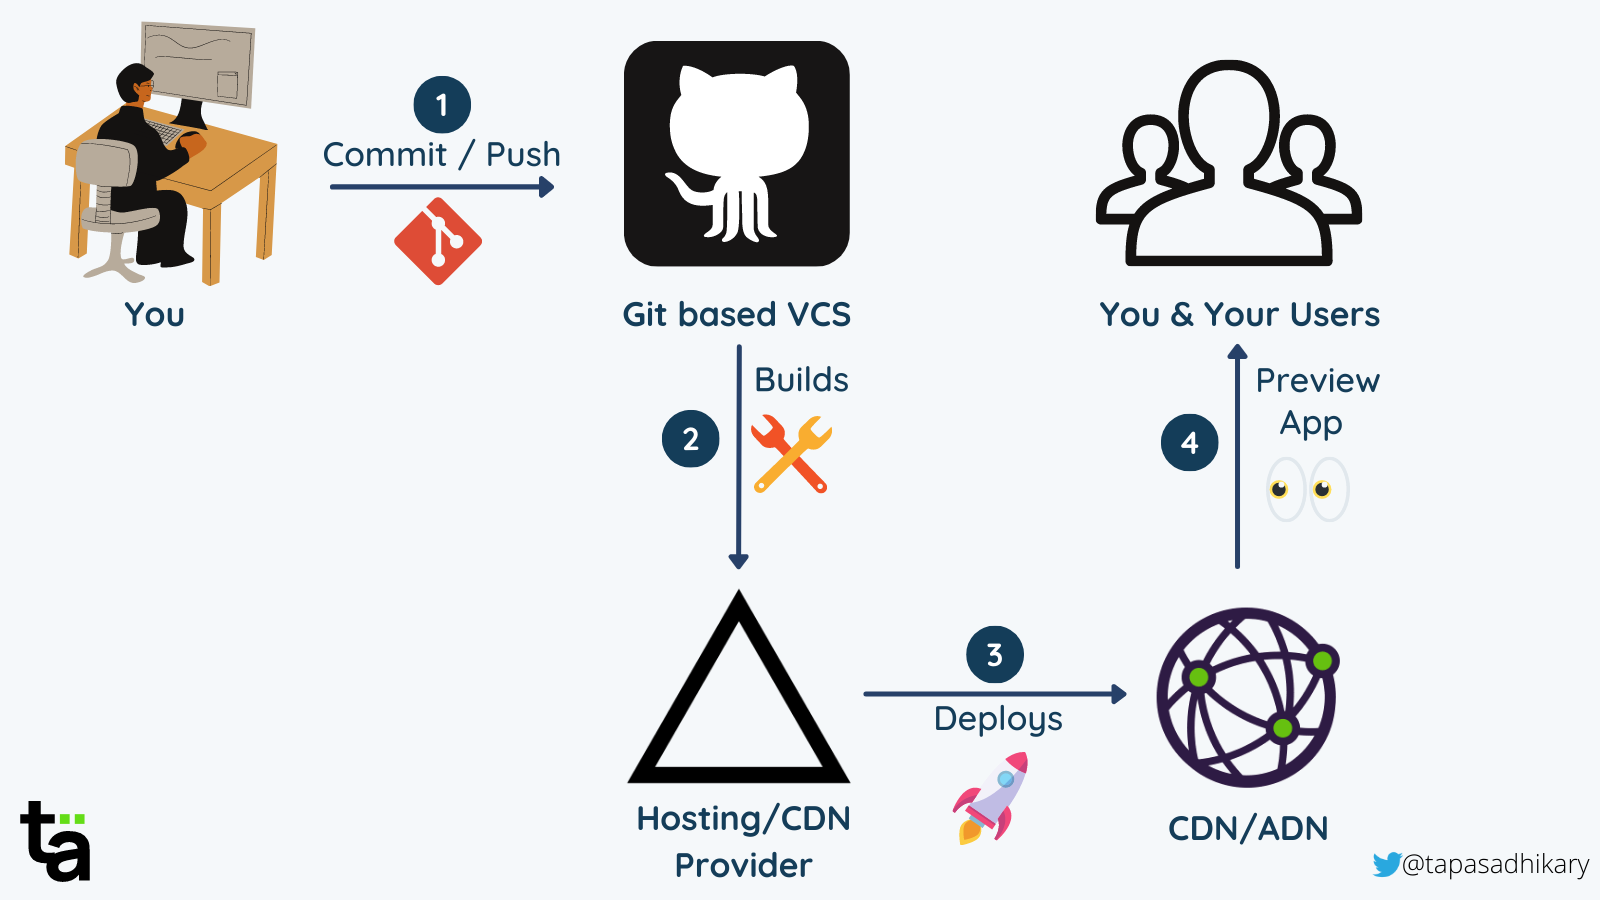 An Automated Workflow
- We, as developers, create a GitHub repository for our source code and commit, push the initial code to it.
- We perform a few easy steps with the hosting provider (like Vercel, Netlify) to integrate the GitHub repository.
- Next, we create branches in the repository to implement features or fix bugs. Netlify, Vercel, or other services will create a deployable build, deploy it on a CDN, and provide us a preview URL for each branch.
- We then use this URL to test the feature. We can also share this URL publicly with our stakeholders.
- Once we're done, we merge the PR, and the changes in the master or main branch are also built and deployed automatically.
This workflow helps me the most with my web development. I just focus on delivering my code changes to GitHub, and the rest all happens automatically.
Let's now go through the quick steps of deploying a simple web app on Vercel. It's pretty similar to other platforms which I'll leave for you to explore.
How to Deploy a Web App on Vercel
- Sign up with Vercel and login. Then click on the
New Projectbutton:
 Select a New Project
- Next, configure and import a GitHub repository:
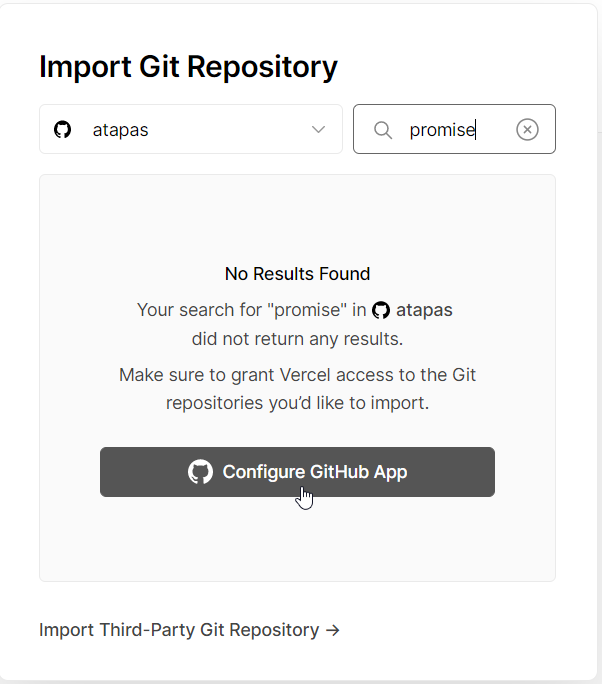 Configure GitHub Repo
- Now install Vercel on your GitHub organization where this repo exists.
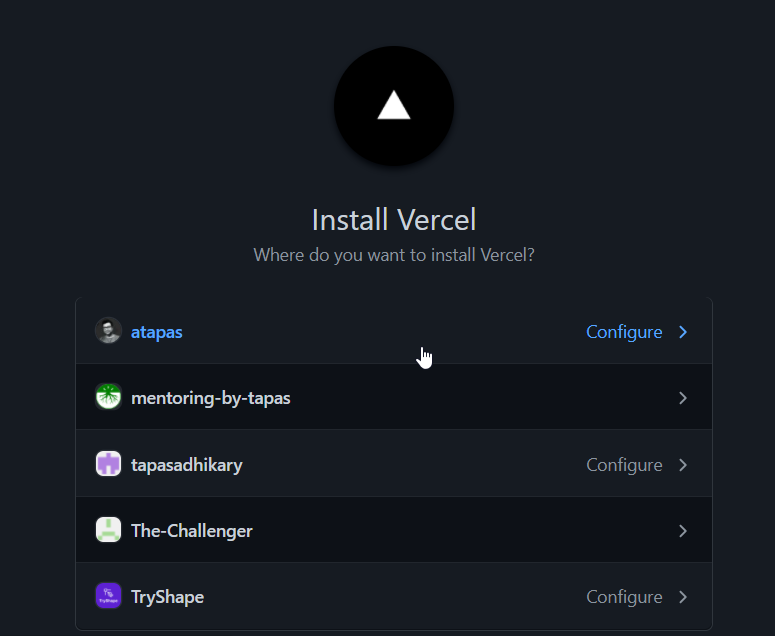 Install Vercel on GitHub
- You'll need to provide access to all the repositories or select the ones you want Vercel to manage. Then save the changes.
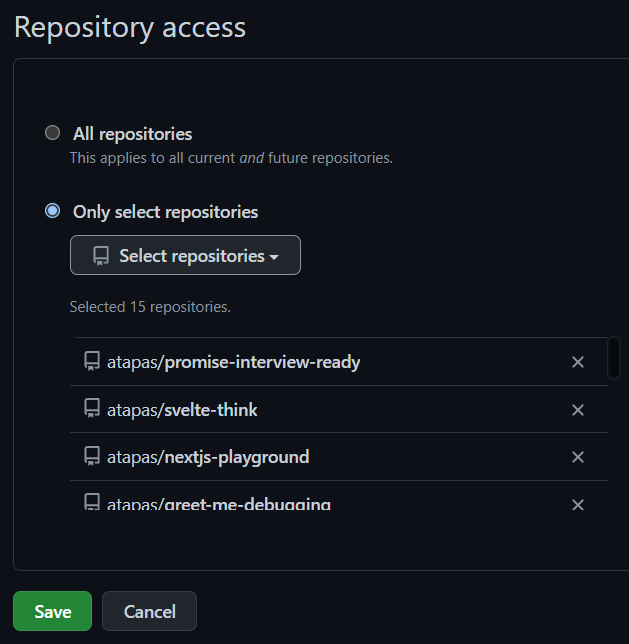 Select Repository
- Now control comes back to the Vercel interface and you can import the repository from there.
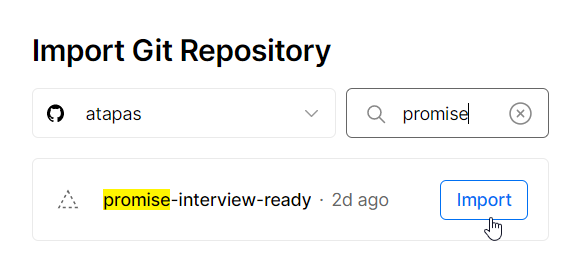 Import the Selected Repo to Deploy
- You can select the entry point of the project root directory and deploy.
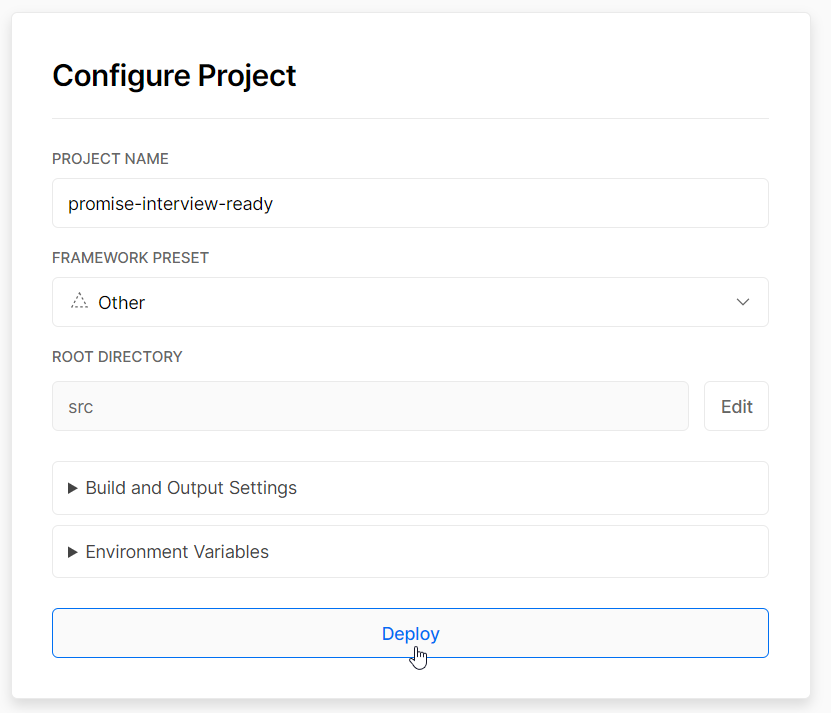 A Basic Configuration
- The deployment may take a while depending on the type of your web project. Once it's done, you will get a screen like the below confirming it.
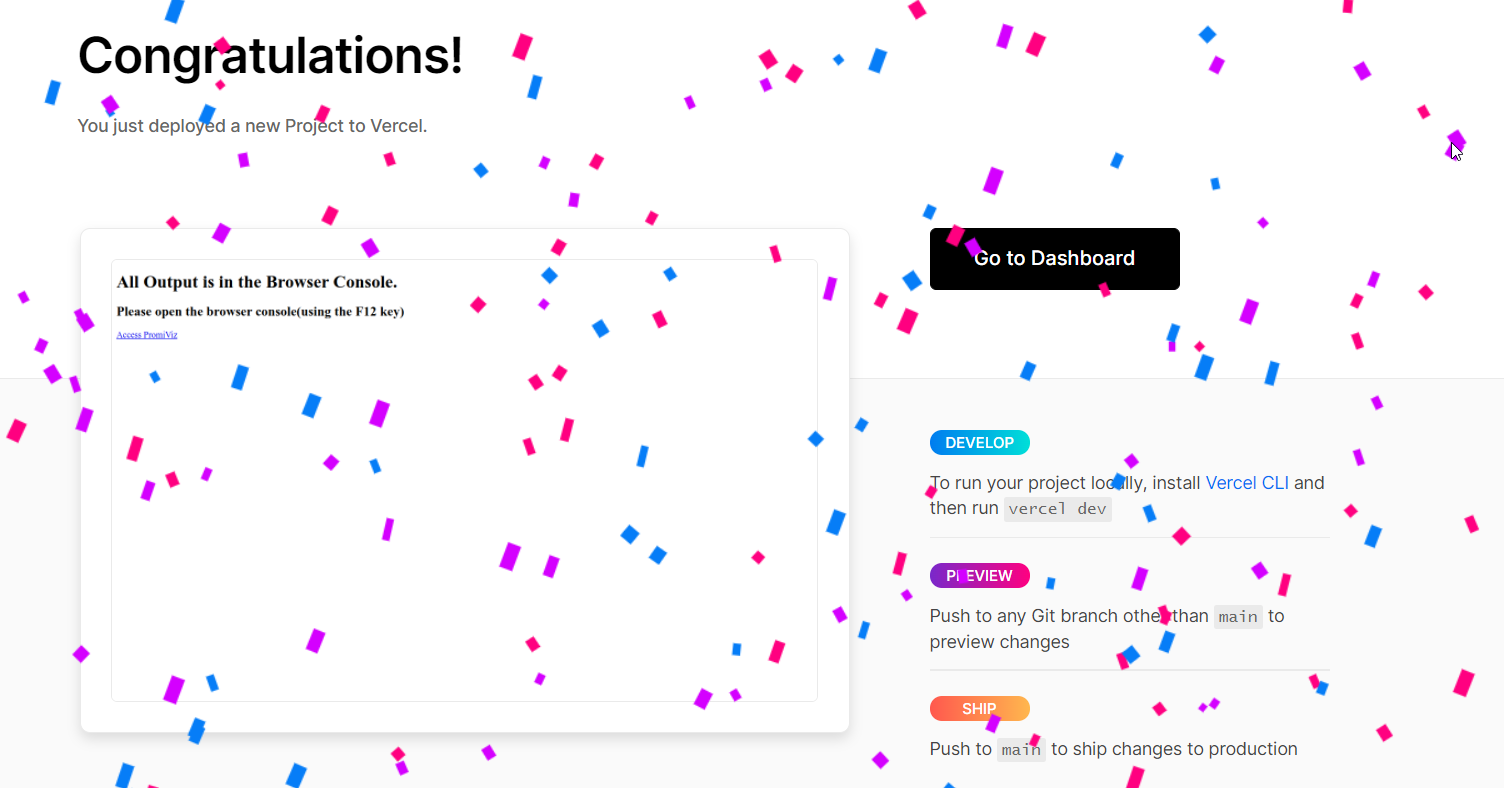 Done!
Done!
Great, I hope that was easy. Please explore it further, and I'm sure you will love it.
Before We End...
I hope you found the article insightful and informative. My DMs are open on Twitter if you want to discuss further.
Let's connect. I share my learnings on JavaScript, Web Development, and Blogging on these platforms as well: