

There are times when you'll want to check items off a list or mark them as complete on a form. Fortunately, it's not too difficult to add checkboxes to your Microsoft Word documents.
There are two main types of checkboxes: interactive (that let a user check the box while in the Word document on their computers), and not interactive (that you'd use if you were printing something for people to fill out). We'll look at both options here.
With just a few adjustments and clicks, you can insert checkboxes right into Word – so let's see how you can do it.
Just a quick note: this is a tutorial for Mac using Office 2019. If you use a Windows machine or have a different version of Word, some of this might differ a bit.
How to Add Checkboxes to a Word Document – the Interactive Way
In order to add interactive checkboxes directly into your Word document (like, that users can check off on their computers/electronically), you'll need to enable some special tools.
Step 1: Enable the "Developer" ribbon
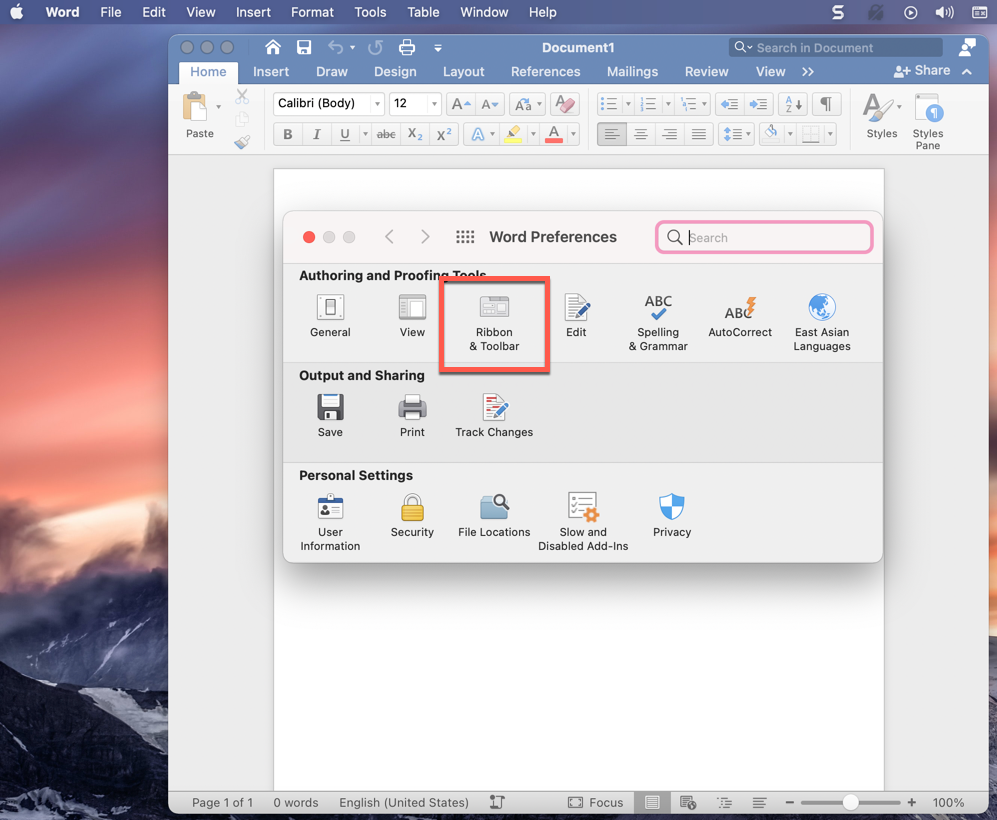
Go to the Word tab in your main Word menu (up at the top of your screen) and select "Preferences" from the dropdown.
 Select the "Preferences" option under the Word menu.
This will bring up the following menu, where you'll see an option for "Ribbon & Toolbar", like this:
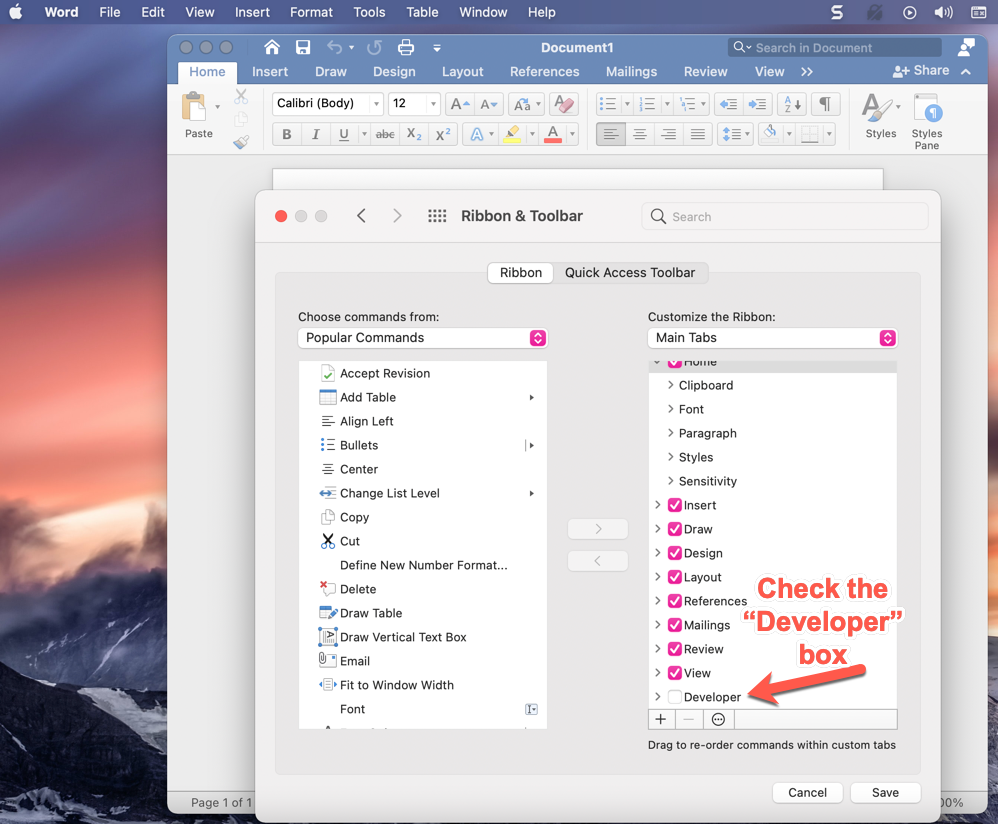
Just click on the Ribbon & Toolbar button and you'll see the Ribbon & Toolbar menu. There are a lot of choices there, but just look on the right side under the "Main Tabs" drop down and scroll to the bottom of that long list (many things will likely already be checked).
When you get to the bottom, you'll see the "Developer" checkbox (like in the image below), and it will likely be unchecked. Just check that box and hit "Save" and then go back to your word document.
 Turn on your "Developer" setting.
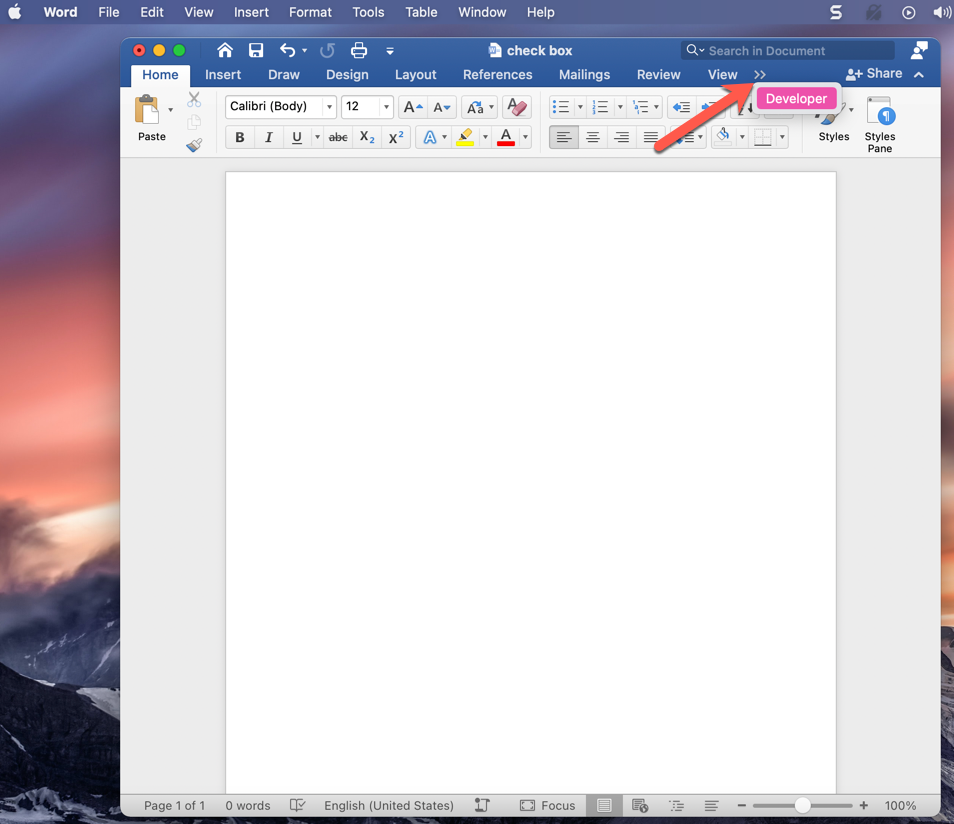
Now, when you go back to your word document, you'll see that more options have been added to your ribbon (that's the menu at the top of your document, with the options "Home", "Insert", "Draw", "Design", Layout", and so on).
Step 2: Go to the Developer Tab
You'll see two little arrows at the end of that menu, and if you click on them you'll see a "Developer" option – click the "Developer" button.
This will bring up a whole new Ribbon that looks like this:

Step 3: Add your Checkboxes
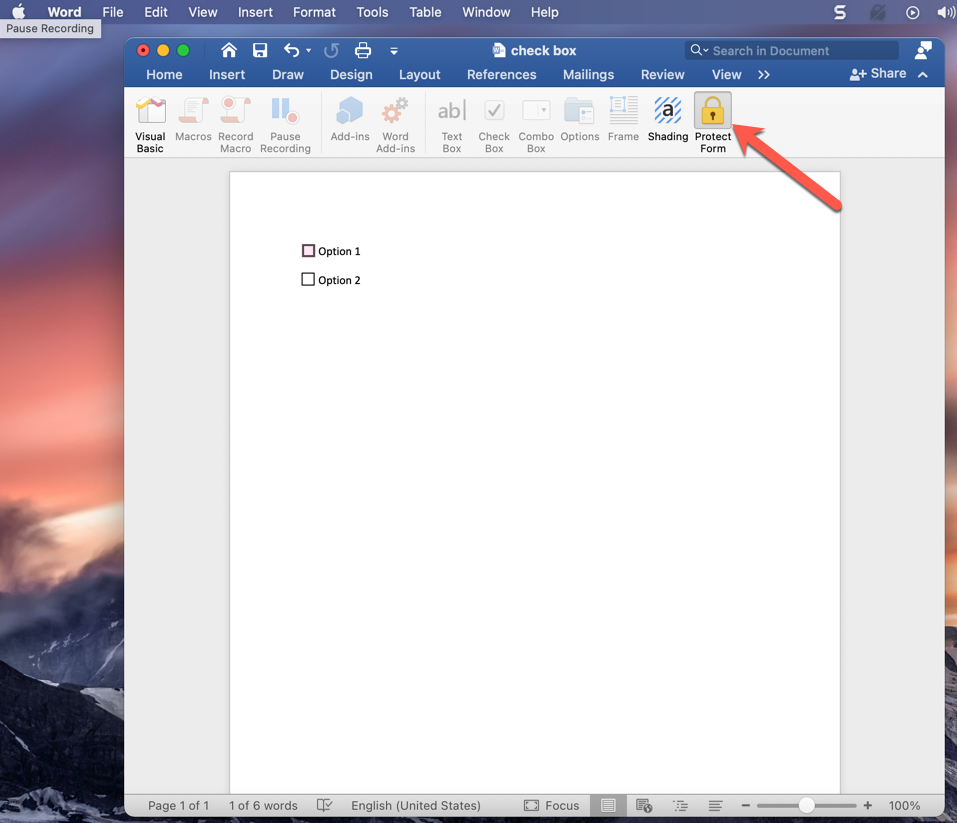
You'll see the "Check box" option on that Developer ribbon, around the middle. If you click on it, a checkbox will be added to your Word document wherever your cursor is. So just make sure your cursor is located where you want the checkbox to be.

Once you've added all the checkboxes you want, and you're ready to make your form interactive, there's one step that remains.
Step 4: Protect your form
Word is smart, and it won't let you actually check the checkboxes if you're still editing and working on the form. If it did, anyone could come in when they went to fill it out and change the text, make edits, and so on.
So, you need to protect your form. This makes it so the only thing people can do is check those boxes (or uncheck them).
Simply click the lock symbol that says "Protect form" next to it at the right side of your Developer ribbon:
 How to protect your form so users can check the checkboxes
Once you've done that, you can now test out your fancy new checkboxes. If you click in the box, an X will appear, showing that it's been checked. If you made a mistake and don't want that check, just click the box again and the X will go away.
Do keep in mind that once you click "Protect form" you won't be able to make any formatting or other changes (all your Ribbons will be "greyed out" and inaccessible). If you need to make edits, just click the Protect form button again and you'll be able to make those changes.
Now you can add checkboxes to your forms and share them electronically.
But what if you just want to print out a list with checkboxes that people will fill out manually, on paper? Let's look at how to do that next.
How to Add Checkboxes in Word for a Printed Document
If you just want to add boxes to a document that you're going to print and have people check off by hand, it's a bit easier to do. You'll just use bullet points to create your checklist.
Before you can do that, though, you'll need to make some updates to your bullet options.
Step 1: Customize your bullet point options
If you want bullets that look like empty checkboxes, you'll just have to make a few updates to your bullet point options.
First, make sure your cursor is where you want the checkbox to be in your Word document. After following the below steps, that's where Word will insert the box.
In Word, in the Home menu (on your document), you'll find the bullet tab – it looks like three vertical dots, with a small arrow button next to it:
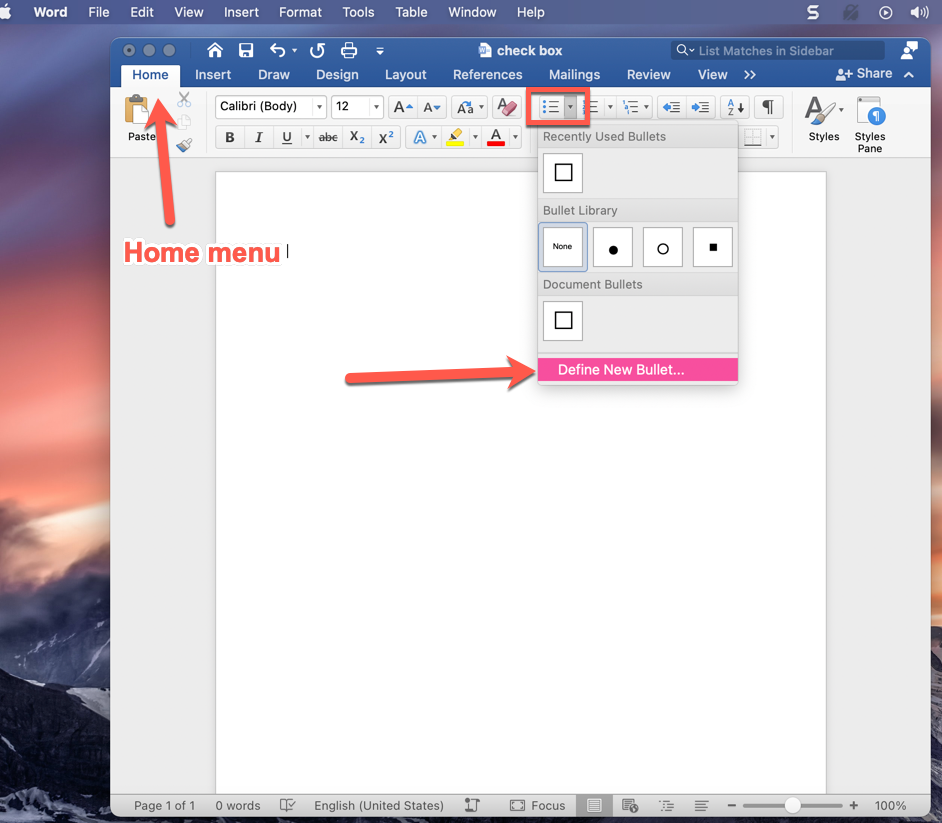
Click that small button with the arrow, and you'll see the above dropdown with the option to "Define New Bullet" at the bottom.
Just click that option, and you'll be taken to a new screen that looks like this:
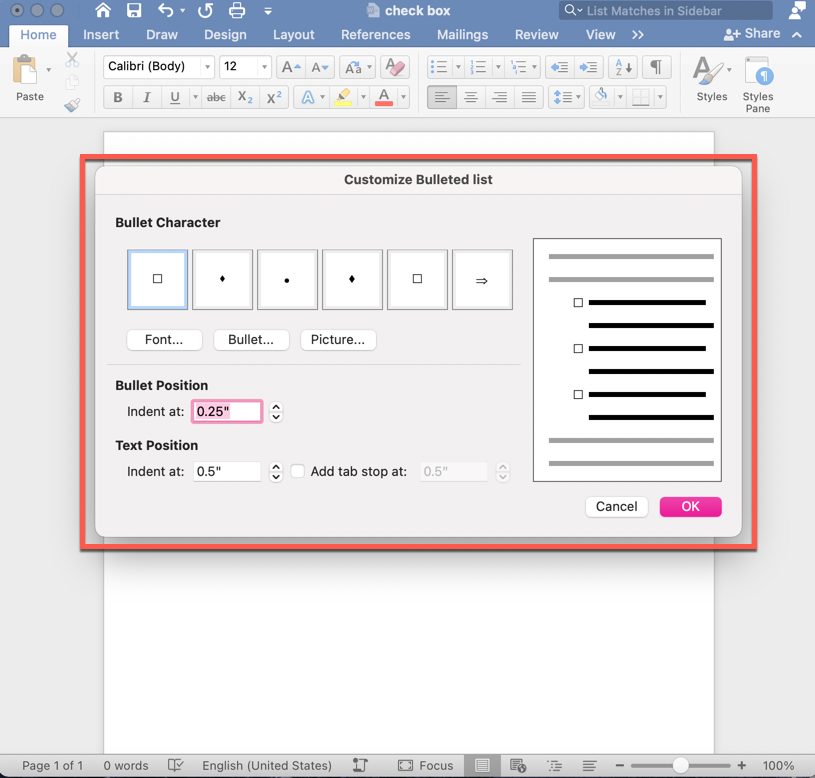
First, you'll need to select the font that has a checkbox-like symbol in it. So click on the "Font" button (below the examples of bullet characters) and select "Windings 2" (you'll likely need to scroll down just a bit).
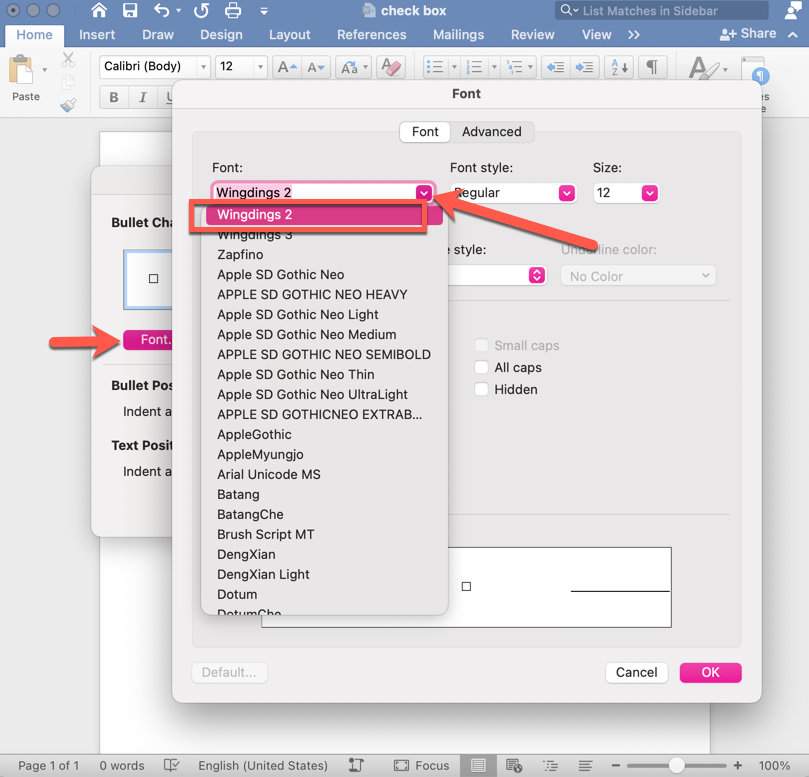
Then click "Ok" and you'll be taken back to the customized bullet list screen. Now that your font is "Wingdings 2", you can customize your bullets.
Step 2: Choose the symbols for your customized bullets
To choose the checkbox symbol, simply click on one of the bullets that appears in the "Bullet Character" examples list (that selects it, so you'll be changing that bullet). Then click on the "Bullets" button, and a list of symbols will appear:
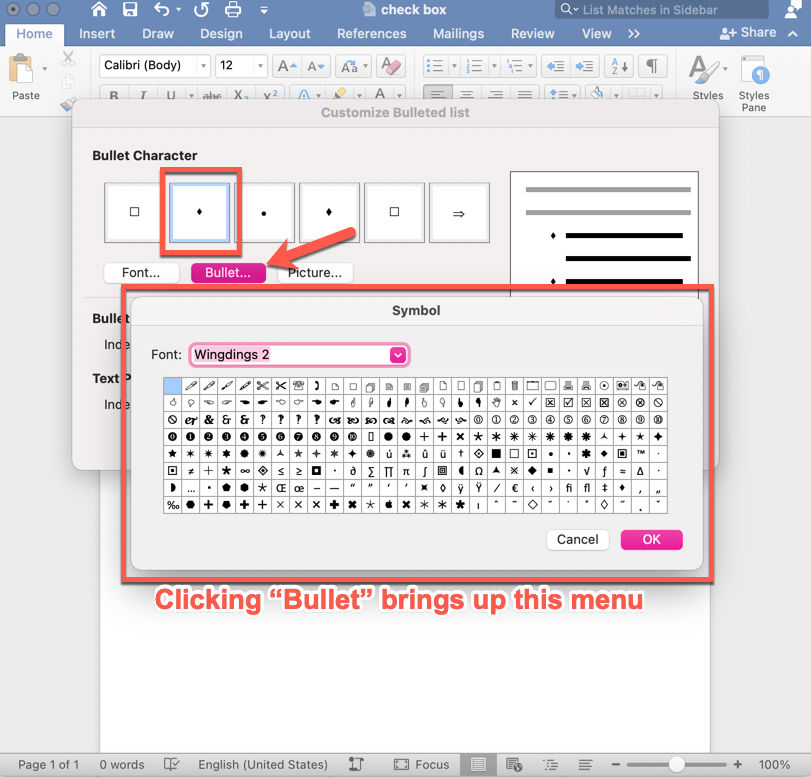
You can see that there are a lot of options, but towards the middle/right there's an empty checkbox. Just click on that and click "Ok" and you'll see that whatever bullet was there before has been replaced by the checkbox option.
Step 3: Enter your checkbox in your Word document
Now hit "Ok" again, and you'll be taken back to your word document – where you'll now see a checkbox!
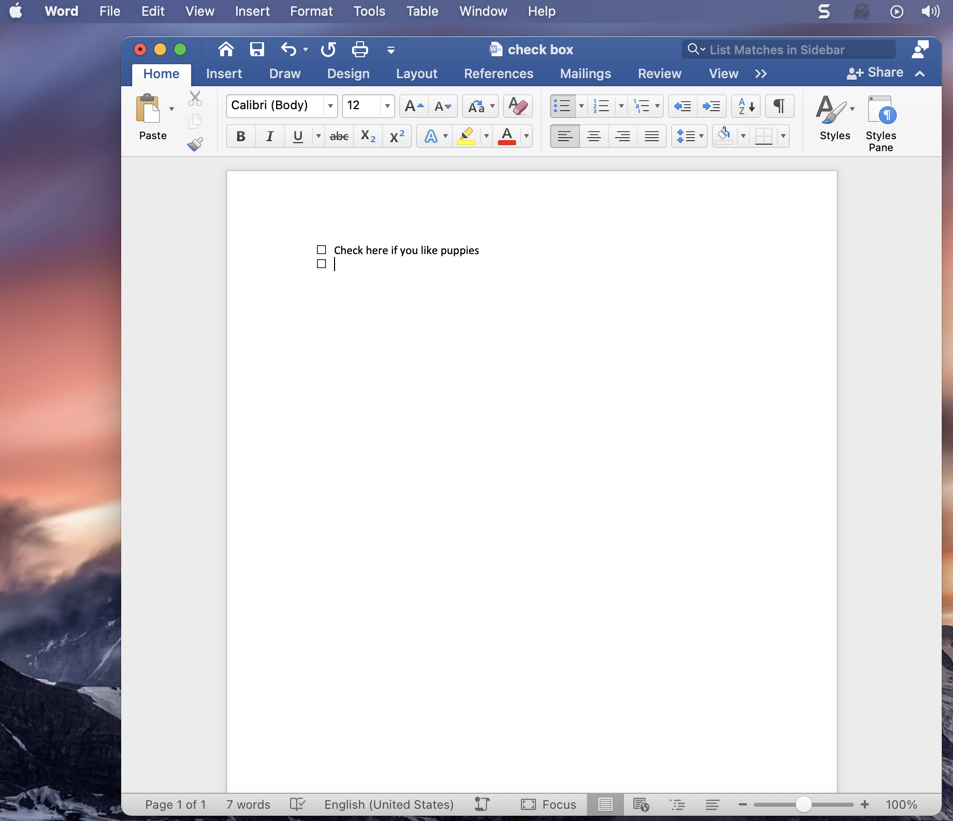
Fun tip: if you add some text (like "Check here if you like puppies" above) and then hit the Enter key, a new checkbox will appear below. So your checkboxes will automatically continue in list form until you're done with your list.
When you're finished with your list, just hit enter again and the cursor will go back to the beginning of a new line without a checkbox.
Do keep in mind that if you insert a checkbox, don't type anything next to it, and then hit enter, the checkbox will just disappear and your cursor will go to a new line.
Here's another fun tip: if you want to change the alignment of your checkbox list, you can just click and hold on one of the boxes and then drag it back and forth to indent it more or less.
That's it!
Now you know how to insert both interactive and non-interactive checkboxes in Word documents. Enjoy!