By Nandhini Saravanan
A simple guide to Anaconda and its installation on Ubuntu 16.04 (64-bit).
 [Anaconda Logo](https://en.wikipedia.org/wiki/Anaconda(Python_distribution)" rel="noopener" target="blank" title=")
Hey everyone. I wrote this post to guide you through how Anaconda is installed in Ubuntu versions. Additionally, it covers various details about Anaconda and the area in which it is utilized.
For starters, what is Anaconda all about?
Before probing into what Anaconda really means and what it is about, we will first learn about Conda.
Quoting Conda’s official blog:
Conda is an open source package management system and environment management system that runs on Windows, macOS and Linux.
Conda quickly installs, runs and updates packages and their dependencies. Conda easily creates, saves, loads and switches between environments on your local computer.
It was created for Python programs, but it can package and distribute software for any language.
The next question on the table is: why Conda, all of a sudden? We all know that is a package management system used to install and manage software packages written in Python.
That has its limitation too. It can only be used for Python packages.
pip is focused around Python, neglecting non-Python library dependencies, such as HDF5, MKL, LLVM which do not have a setup file in their source code.
To put it in simple words:
pip is a package manager that facilitates installation, upgrade, and uninstallation of python packages. It works with virtual python environments.
Conda is a package manager for any software (installation, upgrade and uninstallation). It works with virtual system environments.
Conda is a packaging tool and installer that aims to do more than what pip does: handle library dependencies outside of the Python packages as well as the Python packages themselves.
Conda also creates a virtual environment.
How does Anaconda come into the picture?
Conda is written entirely in Python which makes it easier to use in Python virtual environments. Furthermore, we can use Conda for C libraries, R packages, Java packages and so on.
It installs binaries. The conda build tool builds packages from source and conda install installs things from built conda packages.
Conda is the package manager of Anaconda, the Python distribution provided by Continuum Analytics. A skimpy line to describe Anaconda is this:
Anaconda is a python and R distribution. It aims to provide everything you need (python wise) for data science tasks.
Anaconda is a set of binaries that includes Scipy, Numpy, Pandas along with all their dependencies.
Scipy is a statistical analysis package.
Numpy is a numerical computing package .
Pandas is a data abstraction layer that exposes a way to merge and transform data.
Anaconda helps us by getting all of these together in one single shot.
The Anaconda binary is an installer that builds all of these packages and their dependencies in your system.
For more information on Anaconda, visit its official blog: https://anaconda.org/
Installing the easier way
Installing files can be a big major mess sometimes, but Anaconda is a lot more user friendly than you might think. I prefer Ubuntu, as installation just requires a couple of strong commands and a good network connection. It feels a lot easier. Here are the subsequent steps on installation of Anaconda.
(This whole installation process works on 64-bit computers alone).
Step 1: Download the Anaconda bash script
Download the latest version of the Anaconda installer bash script from their official website. It can be downloaded by running a curl command. If you don’t have curl installed in your system, install it by running the following command.
sudo apt-get updatesudo apt-get install curl
Go to the /tmp folder.
cd /tmp
After you have installed curl, run the following command using it:
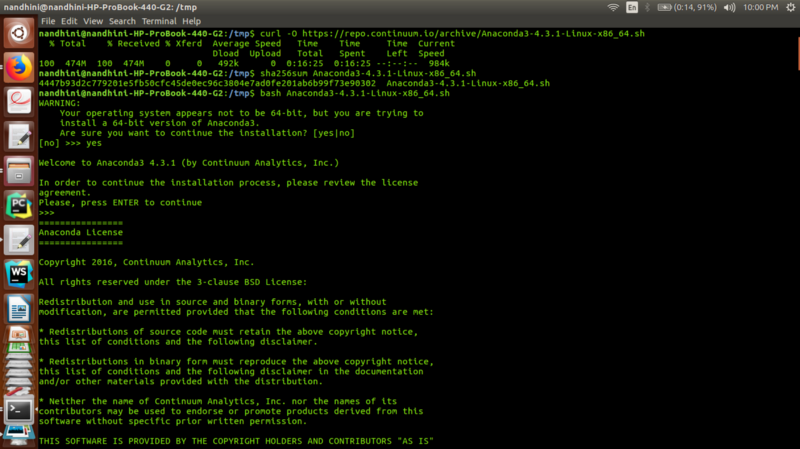
curl -O https://repo.continuum.io/archive/Anaconda3-4.3.1-Linux-x86_64.sh
The setup usually consumes a few minutes as its size is approximately 500 MB. Please wait until the whole download process completes.
 Anaconda install process
The screen shot attached was taken after the script has been downloaded. Make sure you have a strong connection or else download errors might occur.
Step 2: Verify the Integrity
To verify the data integrity of the installer, we use a cryptographic hash algorithm called SHA-2 (Secure Hash Algorithm).
sha256sum Anaconda3-4.3.1-Linux-x86_64.sh
A checksum will be generated in the next line after the command is executed.
 Verifying data integrity using checksum
Step 3: Run the bash script
We are almost there. The package is downloaded and we just have to run the script by typing this command.
bash Anaconda3-4.3.1-Linux-x86_64.sh
A normal verification step asks whether you want to install Anaconda. Type yes so that the installation continues.
 After running the bash script
Step 4: Installing the Cryptographic Libraries
This is a part of the prior process. The installer asks the user whether they want to install all the cryptographic libraries. Type in yes and you are good to go. Refer to the screen shot below. You’ll get details similar to it.
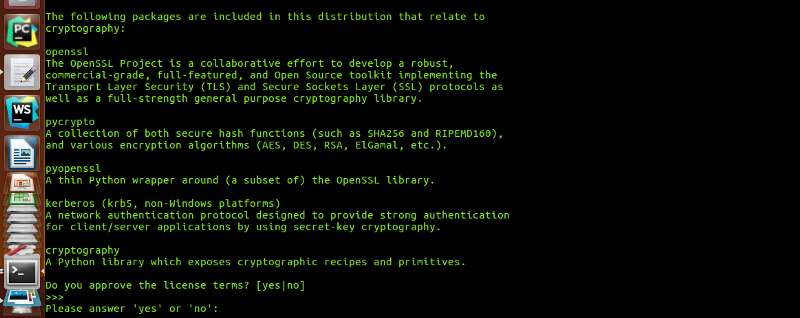 Cryptographic Libraries
Step 5: Confirm the Location
The last and final step is confirm the path to where you want to place all the Anaconda packages. After you have specified the path, press Enter and you are done! Anaconda will start working out its magic by installing all the essentials you’ll need!
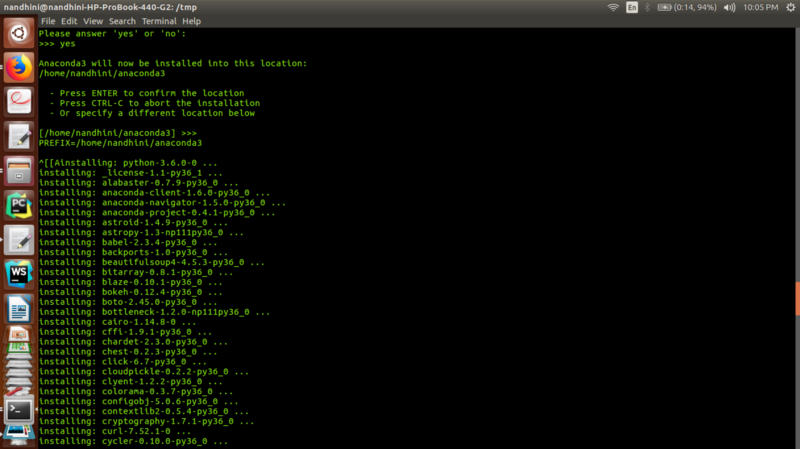 Anaconda Path Set up
Step 6: Activate and Verify
In order to activate the installation, we should source the ~/.bashrc file by typing in the following command:
source ~/.bashrc
Verify your installation by using the conda command.
conda list
The output of all the packages available through the Anaconda installation is displayed.